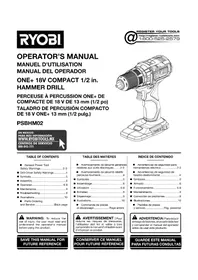
CDI-1803 - Drill RYOBI - Free user manual and instructions
Find the device manual for free CDI-1803 RYOBI in PDF.


User questions about CDI-1803 RYOBI
0 question about this device. Answer the ones you know or ask your own.
Ask a new question about this device
Download the instructions for your Drill in PDF format for free! Find your manual CDI-1803 - RYOBI and take your electronic device back in hand. On this page are published all the documents necessary for the use of your device. CDI-1803 by RYOBI.
USER MANUAL CDI-1803 RYOBI
Read all instructions. Failure to follow all instructions listed below may result in electric shock, fire and/or serious injury. The term "power tool" in all of the warnings listed below refers to your mains operated (corded) power tool or battery operated (cordless) power tool.
SAVE THESE INSTRUCTIONS.
1) WORK AREA
a) Keep work area clean and well lit. Cluttered and dark areas invite accidents.
b) Do not operate power tools in explosive atmospheres, such as in the presence of flammable liquids, gases, or dust. Power tools create sparks which may ignite the dust or fumes.
c) Keep children and bystanders away while operating a power tool. Distractions can cause you to lose control.
2) ELECTRICAL SAFETY
a) Power tool plugs must match the outlet. Never modify the plug in any way. Do not use any adapter plugs with earthed(grounded) power tools. Unmodified plugs and matching outlets will reduce risk of electric shock.
b) Avoid body contact with earthed or grounded surfaces such as pipes, radiators, ranges and refrigerators. There is an increased risk of electric shock if your body is earthed or grounded.
c) Do not expose power tools to rain or wet conditions. Water entering a power tool will increase the risk of electric shock.
d) Do not abuse the cord. Never use the cord for carrying, pulling or unplugging the power tool. Keep cord away from heat, oil, sharp edges or moving parts. Damaged or entangled cords increase the risk of electric shock.
e) When operating a power tool outdoors, use an extension cord suitable for outdoor use. Use of a cord suitable for outdoor use reduces the risk of electric shock.
3) PERSONAL SAFETY
a) Stay alert, watch what you are doing and use common sense when operating a power tool. Do not use a power tool while you are tired or under the influence of drugs, alcohol or medication. A moment
of inattention while operating power tools may result in serious personal injury.
b) Use safety equipment. Always wear eye protection. Safety equipment such as dust mask, non-skid safety shoes, hard hat, or hearing protection used for appropriate conditions will reduce personal injuries.
c) Avoid accidental starting. Ensure the switch is in the off position before plugging in. Carrying power tools with your finger on the switch or plugging in power tools that have the switch on invites accidents.
d) Remove any adjusting key or wrench before turning the power tool on. A wrench or a key left attached to a rotating part of the power tool may result in personal injury.
e) Do not overreach. Keep proper footing and balance at all times. This enables better control of the power tool in unexpected situations.
f) Dress properly. Do not wear loose clothing or jewellery. Keep your hair, clothing and gloves away from moving parts. Loose clothes, jewellery or long hair can be caught in moving parts.
g) If devices are provided for the connection of dust extraction and collection facilities, ensure these are connected and properly used. Use of these devices can reduce dust related hazards.
4) POWER TOOL USE AND CARE
a) Do not force the power tool. Use the correct power tool for your application. The correct power tool will do the job better and safer at the rate for which it was designed.
b) Do not use the power tool if the switch does not turn it on and off. Any power tool that can not be controlled with the switch is dangerous and must be repaired.
c) Disconnect the plug from the power source before making any adjustments, changing accessories, or storing power tools. Such preventive safety measures reduce the risk of starting the power tool accidentally.
d) Store idle power tools out of the reach of children and do not allow persons unfamiliar with the power tool or these instructions to operate the power tool. Power tools are dangerous in the hands of untrained users.
e) Maintain power tools. Check for misalignment or binding of moving parts, breakage of parts and any other condition that may affect the power tools operation. If damaged, have the power tool repaired before use. Many accidents are caused by poorly maintained power tools.
English
GENERAL SAFETY RULES
f) Keep cutting tools sharp and clean. Properly maintained cutting tools with sharp cutting edges are less likely to bind and are easier to control.
g) Use the power tool, accessories and tool bits etc., in accordance with these instructions and in the manner intended for the particular type of power tool, taking into account the working conditions and the work to be performed. Use of the power tool for operations different from intended could result in a hazardous situation.
5) BATTERY TOOL USE AND CARE
a) Ensure the switch is in the off position before inserting battery pack. Inserting the battery pack into power tools that have the switch on invites accidents.
b) Recharge only with the charger specified by the manufacturer. A charger that is suitable for one type of battery pack may create a risk of fire when used with another battery pack.
c) Use power tools only with specifically designated battery packs. Use of any other battery packs may create a risk of injury and fire.
d) When battery pack is not in use, keep it away from other metal objects like paper clips, coins, keys, nails, screws, or other small metal objects that can make a connection from one terminal to another. Shorting the battery terminals together may cause burns or a fire.
e) Under abusive conditions, liquid may be ejected from the battery; avoid contact. If contact accidentally occurs, flush with water. If liquid contacts eyes, additionally seek medical help. Liquid ejected from the battery may cause irritation or burns.
6) SERVICE
a) Have your power tool serviced by a qualified repair person using only identical replacement parts. This will ensure that the safety of the power tool is maintained.
7) SPECIAL RULES
a) Wear ear protectors with impact drills. Exposure to noise can cause hearing loss.
b) Use auxiliary handle supplied with the tool. Loss of control can cause personal injury.
CHARGER SAFETY
To reduce risk of injury, charge only nickel-cadmium type rechargeable batteries. Other types of batteries may burst, causing personal injury and damage.
- Do not expose charger to wet or damp conditions.
Use of an attachment not recommended or sold by the battery charger manufacturer may result in a risk of fire, electric shock, or injuries to person.
To reduce risk of damage to charger body and cord, pull by charger plug rather than cord when disconnecting charger.
Make sure cord is located so that it will not be stepped on, tripped over, or otherwise subjected to damage and stress.
An extension cord should not be used unless absolutely necessary. Use of improper extension cord could result in a risk of fire and electric shock. If extension cord must be used, make sure:
a. That pins on plug of extension cord are the same number, size and shape as those of plug on charger.
b. That extension cord is properly wired and in good electrical condition.
- Do not operate charger with a damaged cord or plug. If damaged, have it replaced immediately by a qualified serviceman.
Do not operate charger if it has received a sharp blow, been dropped, or otherwise damaged in any way; take it to a qualified serviceman. - Do not disassemble charger; take it to a qualified serviceman when service or repair is required. Incorrect reassembly may result in a risk of electric shock or fire.
To reduce risk of electric shock, unplug the charger from outlet before attempting any maintenance or cleaning. Turning off controls will not reduce this risk. - Disconnect charger from power supply when not in use.
- Risk of electric shock. Do not touch uninsulated portion of output connector or uninsulated battery terminal.
- Save these instructions. Refer to them frequently and use them to instruct others who may use this unit. If you loan someone this unit, loan them these instructions also.
English
SPECIFICATIONS
| Model | CDI-1443 | CDI-1803 |
| Voltage | 14.4 V | 18 V |
| Chuck (mm) | 13 | 13 |
| Switch | Variable speed | Variable speed |
| No load speed (drill mode): | ||
| - Lo speed (min-1) | 0 - 350 | 0 - 370 |
| - Hi speed (min-1) | 0 - 700 | 0 - 750 |
| - Super-Hi speed (min-1) | 0 - 2000 | 0 - 2200 |
| No load speed (impact mode): | ||
| - Lo speed (min-1) | 0 - 5600 | 0 - 5920 |
| - Hi speed (min-1) | 0 - 11200 | 0 - 12000 |
| - Super-Hi speed (min-1) | 0 - 32000 | 0 - 35200 |
| Max. Torque (Nm) | 50 | 55 |
| Weight - incl. battery pack (kg) | 2.8 | 3 |
| Battery pack: | BPP-1417/ | BPP-1817/ |
| BPP-1420 | BPP-1820 | |
| Charger | BC-1440/ | BC-1800/ |
| BC-1415-S | BC-1815-S |
DESCRIPTION
See Figure 1-9
- Keyless chuck
- Switch trigger
- Direction of rotation selector (Forward/Reverse)
- Screwdriver bits
- Battery pack
- Depth gauge Rod
- Auxiliary handle
- Latches
- Depress latches to release battery pack
- To Tighten
- To Loosen
- Drill bit
- Drilling Depth
- To Decrease torque
- To Increase torque
- Torque adjusting Ring
- Drill mode
- Impact mode
- Reverse
- Forward
- Chuck jaws
- Unlock (release)
- Lock (tighten)
- Battery Charger
- Green Light
- Red Light
OPERATION
LED FUNCTION OF CHARGER
See Figure 9.
LED WILL BE ON TO INDICATE STATUS OF CHARGER AND BATTERY PACK:
Red LED on = Fast charging mode.
Green LED on = Fully charged battery pack.
No LED on = Defective charge or battery pack.
The battery pack for your tool has been shipped in a low charge condition to prevent possible problems. Therefore, you should charge it prior to use.
Note: Batteries will not reach full charge the first time they are charged. Allow several cycles for them to fully charge.
TO CHARGE
Charge battery pack only with the charger provided.
Make sure power supply is normal house voltage, 230 volts, 50Hz AC only.
Connect charger to power supply.
- Place battery pack in charger. Align raised rib on battery pack with groove in charger.
English
OPERATION
Press down on battery pack to be sure contacts on battery pack engage properly with contacts in charger. When properly connected, red light will turn on.
- When your battery pack becomes fully charged, the red light will turn off and the green light will turn on.
After normal usage, 1 hour of charge time is required to be fully charged. A minimum charge time of 1 to 1-1/2 hours is required to recharge a completely discharged tool.
DO NOT place charger in an area of extreme heat or cold. It will work best at temperatures above 10^ and below 38^ .
IMPORTANT INFORMATION FOR RECHARGING HOT BATTERIES
When using your tool continuously, the batteries in your battery pack will become hot. You should let a hot battery pack cool down for approximately 30 minutes before attempting to recharge.
TO INSTALL BATTERY PACK
- Lock switch trigger on your drill by placing the direction of rotation selector in center position. See Figure 6.
- Place battery pack in your drill. Align raised rib on battery pack with groove inside drill. See Figure 2.
Make sure the latches on battery pack snap in place and battery pack is secured in drill before beginning operation.
TO REMOVE BATTERY PACK
- Lock switch trigger on your drill by placing the direction of rotation selector in center position. See Figure 6.
- Locate latches of battery pack and depress to release battery pack from your drill. See Figure 2.
Remove battery pack from your drill.
ADJUSTING THE AUXILIARY HANDLE
See Figure 3.
Follow these steps to adjust the auxiliary handle.
- Loosen the auxiliary handle by turning the knob counterclockwise.
- Rotate the auxiliary handle to the desired location.
- Tighten the auxiliary handle securely by turning the knob clockwise.
ADJUSTING THE DEPTH GAUGE ROD
See Figure 4.
Follow these steps to adjust the depth gauge rod.
Lock the trigger switch by placing the rotation selector in the center position.
Loosen the auxiliary handle by turning the knob counterclockwise.
- Adjust the depth gauge rod so that the drill bit extends beyond the end of the rod to the required drilling depth.
- Tighten the auxiliary handle by turning the knob clockwise.
The tool is equipped with an adjustable torque clutch for driving different types of screws into different materials. Adjust the torque as necessary.
We recommend that you use carbide-tipped bits and select impact mode when drilling in hard material such as brick, tile, concrete, etc.

CAUTION
The impact drill is not designed for reverse hammering. Failure to obey this caution may result in property damage.
SWITCH
See Figure 6.
To turn your drill ON, depress the switch trigger.
To turn it OFF, release the switch trigger.
VARIABLE SPEED
This tool has a variable speed switch that delivers higher speed and torque with increased trigger pressure. Speed is controlled by the amount of switch trigger depression.
SWITCH LOCK
See Figure 6.
The switch trigger can be locked in the OFF position. This feature can be used to prevent the possibility of accidental starting when not in use. To lock switch trigger, place the direction of rotation selector (Forward/Reverse Selector) in center position.
Note: When selector is in center position, switch trigger is locked.
English
OPERATION
REVERSIBLE
See Figure 6.
This tool has the feature of being reversible. The direction of rotation is controlled by a selector located above the switch trigger. With the drill held in normal operating position, the direction of rotation selector should be positioned to the left of the switch for drilling. The drilling direction is reversed when the selector is to the right of the switch. When the selector is in center position, the switch trigger is locked. To stop, release switch trigger and allow the chuck to come to a complete stop.
ELECTRIC BRAKE
This drill has an electric brake. When the trigger switch is released, the chuck stops turning. When the brake is functioning properly, sparks will be visible through the vent slots on the housing. This is normal and is the action of the brake.
ADJUSTING THE SPEED
See Figure 8.
Follow these steps to adjust the speed.
For super high speed: Slide the three-speed gear train switch to "3".
For high speed: Slide the three-speed gear train switch to "2".
For low speed: Slide the three-speed gear train switch to "1".
Note: If you have difficulty changing from one gear range to the other, turn the chuck by hand until the gears engage.

CAUTION
To prevent gear damage, always allow chuck to come to a complete stop before changing the speed or the direction of rotation.
KEYLESS CHUCK
See Figure 7.
Your drill has a keyless chuck. As the name implies, you can hand tighten or release drill bits in the chuck jaws. Rotate the chuck with your hand.
The arrows on the chuck indicate which direction to rotate the chuck body in order to LOCK (tighten) or UNLOCK (release) the drill bit.

WARNING
Do not hold chuck body with one hand and use power of the drill to tighten chuck jaws on drill bit. Chuck body could slip in your hand or your hand could slip and come in contact with rotating drill bit. This could cause an accident resulting in serious personal injury.
MAINTENANCE

WARNING
When servicing, use only identical replacement parts. Use of any other part may create a hazard or cause product damage.
Avoid using solvents when cleaning plastic parts. Most plastics are susceptible to damage from various types of commercial solvents and may be damaged by their use. Use clean cloths to remove dirt, dust, oil, grease, etc.

WARNING
Do not at any time let brake fluids, gasoline, petroleum-based products, penetrating oils, etc. come in contact with plastic parts. They contain chemicals that can damage, weaken or destroy plastic.
Do not abuse power tools. Abusive practices can damage tool as well as workpiece.

WARNING
Do not attempt to modify this tool or create accessories not recommended for use with this tool. Any such alteration or modification is misuse and could result in a hazardous condition leading to possible serious personal injury.
ENVIRONMENTAL PROTECTION

Recycle raw materials instead of disposing as waste. The machine, accessories and packaging should be sorted for environmental-friendly recycling.

Deutsch
HULPHANDGREEP INSTALLEREN
Zie afbeelding 3.
OBECNÉ BEZPESNOSTNI POKNY

UPOZORNENI
OBECNÉ BEZPESNOSTNI POKNY
7) OCOBbIe HHCTPyKcIIH
a)IpnpaobeteCyapnoIpeBbOBCerdaNoIb3yntecb cpeCTBaMn 3aunTuclya.CHbHbI IyM MoKcET Bbl3BaT bChHKeHNc OCTpToIcJYxa.
b) IIob3yItebc BCNOMOrateJbHO pykoftKoH, NOCTABJIeHHO B KOMJIeKeTc C HhctpymeHTOM. IOTepfl KOHTPOJfH NaI HnCTpyMeHTOM BeJE T fIkeJBIM TpaBMAM.
Pysckn
TEXHNUECKHEXAPAKTEPHCTIKI
ФУHKПИ CBETOBbIX DATUHKOВ 3APДHOrO YCTPOIcTBA
CM.Puc.9.
CBETOBBIE IATUHKI IOKA3bIBAIOT 3TANI B3APIKN AKKUMJITOPA:
KpacHbI DaTUnK =peXHM 6bICTpO 3apAKn.
3eIeHbI IaTtHK = aKcMyJrTop IIOJIHOCTbIO 3apJxHe.
EclH H OINH DaTnHK He ropHT = JeΦeKT aKKMyIaTopa HIN HENPaBnIbHa 3apJaKa.
3APRAKAKKUMYJYTOPA
Bo I36kaeHHe HnepnTHoCTe, AkkyMJIaTOp IOcTaJIeH B KOMIIJIeKte He JIOHocTbO 3apJKeHHbIM. IpeI NaHaJIOM paOToI er OHaIO 3apAHTb.
IpnepeHHe:Pi npEbn0 3apJikke AkkymyTOp IOJIHOCTbHO He 3apeJITcY. TIOsb6 akKymyTOp IOJIHOCTbHO 3apJIDJIcR, NE6xoJoIMHO HeNcoJbKO IIIOJIOB (pa6Ota -3apJIKa).
3APRAJKA AKKYMUYIHTOPA:
IIOJIb3yIteCb TOJIbKO 3apIaHbIM ycTPOIcTBOM, IOCTaBJIeHHbIM B KOMIIJIeKTe cAKKyMJIYTOPOM.
Пюовьт,Чтоби Нашижени B ceTHблIO 230 B, 50 Гп петершого Тка (obiyhoe Домашенье нашижени).
BkIIOHHTe 3apAHOe yCTPOHCTBO B pO3eTKy.
BCTaBtBe aKKymJITOP B3apJHoe yCTPOIcTBO.ДЯТOrTO CoMBeTHe TbIcTyI aKKymJITOPa COTBepCTHem 3ApJHORo YCTPOIcTBa.
HaKMMte Ha aKKyMylTOp, YTObIe ERO KJIeMMbl 3aIIeJIKNHJInCb Ha KJIeMMax 3apJHOrO yCTPOIcTBa. EChN aKKyMylTOp IpBaHNbHO BcTaJIeB H 3apJHnOe yCTPOIcTB0, 3aKHaIaeTcKpaCHbIJaTUnK.
KordaakkymyTOpIIOHOCbTO3apJxHe,KpachBn JatYHKrachet,a3eJeHbJdATYHK3aRopaetc.
Iocne 06bHoro HcnoB3ObaHHa HnCtpyMeHTa, YTO6b3apJITb akKymyTApOT, HAO OKIo Yaca 3apJKN. EChnakKymyTApOT NIOHocTbIO pa3pJKeH, TO JIN3 apJKnNortpeOyETe HIOITopa Yaca.
HE yctaHabIHHaBte 3aparHnoe yctpOcTBo B MeCTax c 3KCTpeMaJIbHbIMn TMIEpaTypaMn. Pa60ta 3aparHoro ycTpoCtBa 6yET nHaepoJee IpnOH3BOInTeJIbHOH npH temepatype O 10^ lo 38^
BAXHbIe HNCTPYKUIN JJIa 3APJIKI TOPQHXAKKYMJTOPOB
OTIPOJIOJIKHTeJIbHOHpa6OtBJAkkymyIITOPHarpeBaetc. EClH AkkymyIITOp Harpelci,JaIte EMYocTb13MmHYT nepeI3ap4KOJ.
YCTAHOBKA AKKYMUYIJTOPA
3a6I0Kpyte KypoK IpeJIu-7wpyNIOBepTa, yCTaHOBB nepeKJouateJIb HapraJIeHnB RApuENH B CEHTpaJIbHOM IOIOJOeHH.CM.PUC.6.
BCTABTe aKKyMJIaTOp B INCHTPyMeHT. JIJIa 3TOrO COBmCTHTe BbCTYHa KkMyJIAToPA C OTBepCTHE M OCHOBAHIN HcTpyMeHTa.CM.Puc.2.
IpeJnHaayIOM pa6oTbI npOBepbTe, YTObIaKKyMnyTOp IpaBnJIbHO 3aceRHyIcra HaJePJIH-IIIpyNIOBepte.
CHRTHE AKKUMJITOPA
3a6I0Kpyte KypoK IpeJIu-7wpyNIOBepTa, yCTaHOBB nepeKJouateJIb HapraJIeHnB RApuENH B CEHTpaJIbHOM IOIOJOeHH.CM.PUC.6.
TTO6bI CHrTB aKKyMjTOp c HnCTpyMeHTa,HaKMHTe Ha 3aCTeKKN.C.M.Puc.2.
CHHMMTe aKKMyJIArTop.
Pysckn
PABOTA
YCTAHOBKA BCIIHOMOTATEJIbHOI PYKOKTNI
C.M. Puc. 3.
UcTaHOBKa BcNOMoRaTeJIbHoI pyKoRTK:
OITnyctHTe KOJIbIIO KpeJIJIeHnB CIIOMoRaTeJbHOI pyKoRTKN, IIOBOPaHHBa pyKy BJIeBO.
YcTaHOBHTe pyKoTky B HyXHoe IOJIOKeHHe.
KpeIko 3aTAAHHTe KOJIbIO KpeIIJeHHB CBIOMoTaTeJIbHOI pyKOJTKN, IIOBOPaHHBa pyKy BIIpABO.
PERYJINPOBKA ORPAHNUHTEJI TJYBHNbI
CM.Puc.4.
PeryIINPOBkaIOLOXKeHnO rOpAHuHTeJI rIy6HbI:
3a6JIOKHyTe KypOK,ycTaHOBNB IpeKeJIIOUaTeJIb HApBaJIeHnB BpaIeHnB BIEHTpaJIbHOM IOLOJKeHHN.
OITnycHTHe KOJIbIcIO KpeJIJIeHnB CIIOMoRaTeJIbHOI pyKoRTKn, IIOBOpaYHBa pyKy BJIeBO.
YcTaHOBHTeOrpaHHHTeJIbIgHyBHBtAq,TrOb6CBepIO BbICTyNaJIO3aHEoBnpeHaNyKHyHOIgHyCBepIeHNH.
KpeIko 3aTaNHTe BcHOMoTaTeIbHyIO pyKOaTKy, IOBOPaHHBa pyKy BnpaBO.
PEGYJINPOBKA BPAIIAIOIIEFO MOMEHTA
CM.PHC.5.
HnctpymeHT ochaiehen cienIeHHem, NO3BOJIyIOuHM perIINPOBaTb BpaiaIoIIH MmEHTB 3aBHcHMOCTH OT MaTePHaJIa 3aOTOBKn. HAcTpoTe BpaiaIoIIH MmEHT IOJIxHBIM O6bA3OM.
GARANTIE - CONDITIONS
All Ryobi products are guaranteed against manufacturing defects and defective parts for a period of twenty four (24) months from the date stated on the original invoice drawn up by the retailer and given to the end user. Deterioration caused by normal wear and tear, unauthorised or improper use or maintenance, or overload are excluded from this guarantee as are accessories such as battery packs, light bulbs, blades, fittings, bags, etc. In the event of malfunction during the warranty period, please take the NON-DISMANTLED product, along with the proof of purchase, to your retailer or nearest Authorised Ryobi Service Centre.
This warranty in no way affects your legal rights concerning defective products.
D
DECLARATION OF CONFORMITY
We declare under our sole responsibility that this product is in conformity with the following standards or standardized documents. 98/37/EC, 89/336/EEC, EN60745, EN61000, EN55014

Name of company: Address:
RYOBI TECHNOLOGIES S.A.S.
Name of company: Address:
RYOBI TECHNOLOGIES (UK) LTD
MEDINA HOUSE, FIELD HOUSE LANE
MARLOW, BUCKS, SL7 1TB
UNITED KINGDOM
Tel: +44-1628-894400 Fax: +44-1628-894401
Name/Title:
Mark Pearson
Managing Director
Signature:
Name of company: Address:
RYOBI TECHNOLOGIES GMBH Itterpark 4
D-40724 Hilden
GERMANY
Tel: +49-2103-29580 Fax: +49-2103-2958544
Name/Title:
Walter Martin Eichinger General Manager
Signature: