USER MANUAL YOUNG PROFI PLUS RECARO
Assembly and Usage Instructions
Group 0+ (-13 kg)
D
GB
F
NL
1
Only suitable for use in vehicles fitted with approved 3-point safety belts that conform with ECE Regulation No. 16 or comparable standards.
This is a seat in the Weight Class 0+ for babies up to the age of 18 months weighing up to 13kg
These Assembly and Usage Instructions must be given to the client. Subject to printing errors, mistakes and technical changes.
Infant carrier from birth until a maximum weight of 13kg for installation in a vehicle either with a three-point belt or on the matching Isofix base. The Isofix system corresponds with Isofix Size Class E. If you intend using the Isofix system then please check beforehand in your vehicle manual whether this size class is approved for your vehicle.
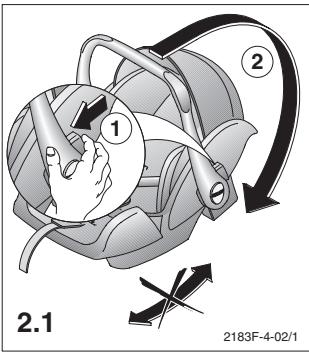
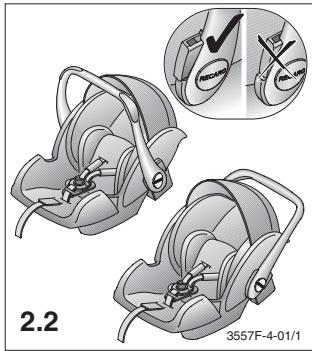
2. Rocking-seat function:
3. Installing with Isofix
3.1 Insert the guides through the upholstery slot between the back rest and seat and on to the Isofix bracket. This is not necessary when such guides have already been installed, e.g. BMW. Ensure that the open side area faces upwards. In some vehicles, the isofix brackets are located behind the seat fabric and are not visible; in this situation please contact your vehicle manufacturer or dealer.
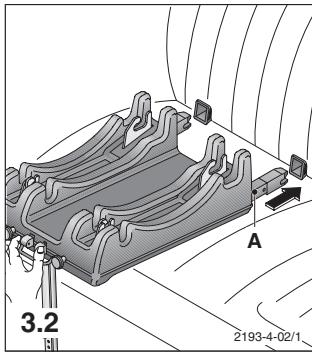
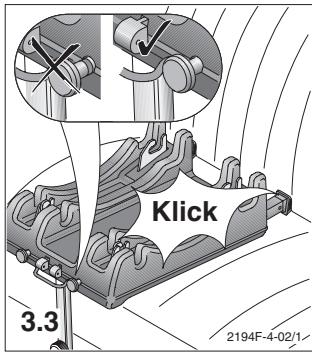
3.2 Isofix:
Before installing the Isofix Base, press the green buttons to FULLY extend the connecting arms to the locked position (see diagram 3.2). This is necessary before installation in any vehicle.
Insert the Isofix:
Insert the Isofix connectors (A) of the platform into the guides.
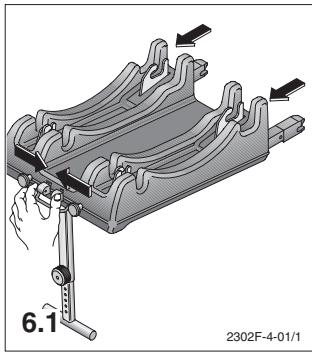
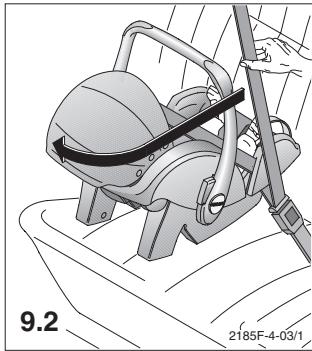
Press down the locking lever (A) to release the front locks and lift off the infant carrier. Push the infant carrier slightly towards the rear of the vehicle and lift out. If this proves to be difficult on account of collision with the vehicle's rear seat, then readjust the Isofix base slightly forwards (see fig. 6.1).
6. Ausbau Isofix:
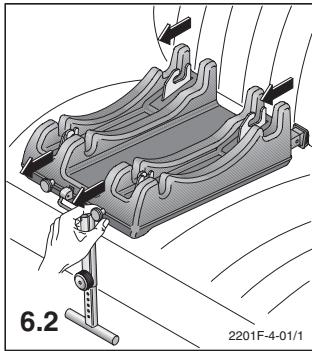
6. Releasing Isofix:
6.1 The Isofix base can be extended on its connectors by pressing the green buttons together and moving the Isofix base towards the front of the vehicle. This is necessary before any renewed installation in another vehicle.
7.1 Lengthen the belts by pressing the central adjuster, keep depressed and pull the shoulder belts.
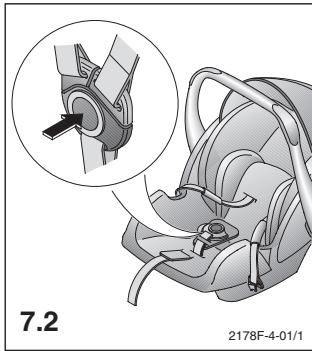
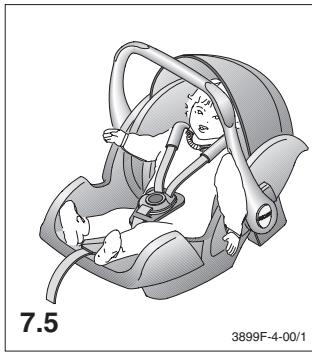
7.3 Place the child in the seat, position the upper belts over the child's shoulders, locate the buckle tabs into each other (see diagram 7.3) and secure into the locking buckle with an audible click.
7.4 Straffen Sie die Gurte durchziehen am Mittelgurt. Die Gurte müssen straffenlagen.
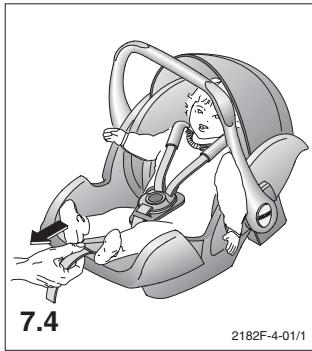
7.4 Pull the crotch-strap upwards and tighten the belts by pulling the forward section of the belt as shown in diagram 7.4. The belts should be pulled tight, so that one finger can just be inserted between the belt and child's body.
9. Installing with the vehicle belt:
9.1 Insert the lap section of the seatbelt in the guides on both sides and close the belt locking buckle with an audible click.
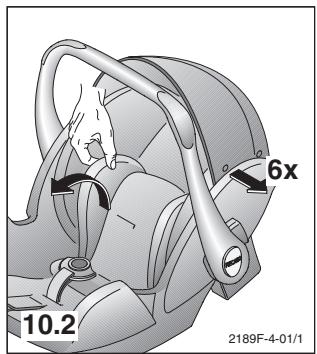
10. Removing the cover:
10.1 Pull the shoulder pads and belt locking buckle pad off the belts.
10.4 Unhook the rubber loops from the inside of the shell and remove the cover.
Fasten the cover in the reverse sequence (see diagrams 10.4 - 10.1).
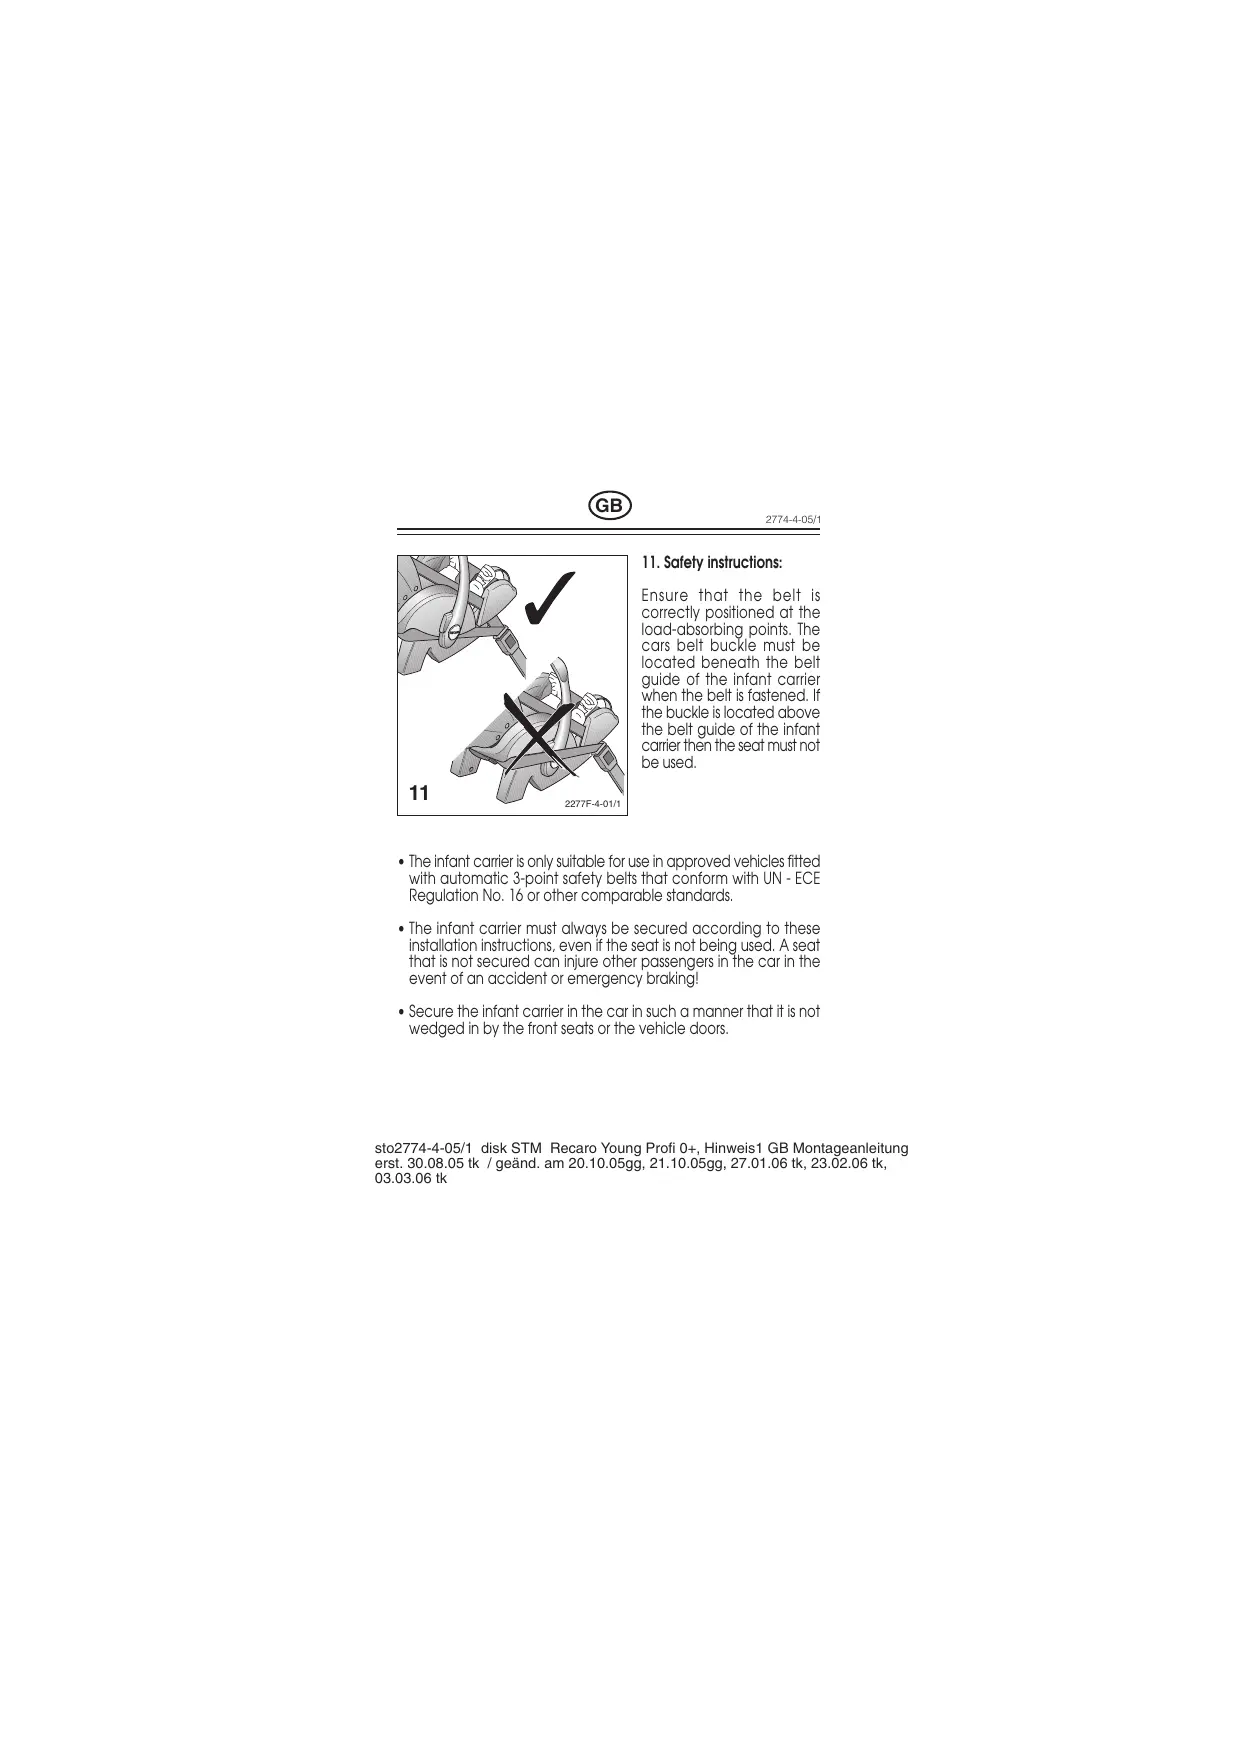
11. Safety instructions:
Ensure that the belt is correctly positioned at the load-absorbing points. The cars belt buckle must be located beneath the belt guide of the infant carrier when the belt is fastened. If the buckle is located above the belt guide of the infant carrier then the seat must not be used.
- The infant carrier is only suitable for use in approved vehicles fitted with automatic 3-point safety belts that conform with UN - ECE Regulation No. 16 or other comparable standards.
- The infant carrier must always be secured according to these installation instructions, even if the seat is not being used. A seat that is not secured can injure other passengers in the car in the event of an accident or emergency braking!
-
Secure the infant carrier in the car in such a manner that it is not wedged in by the front seats or the vehicle doors.
-
The child seat must not be changed and the assembly and usage instructions must be carefully observed because, otherwise, the child could be endangered while travelling.
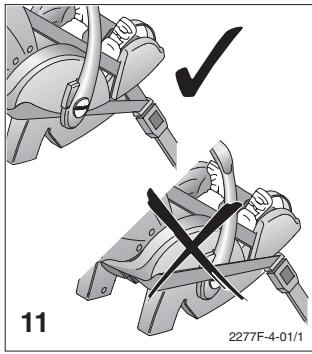
- The belts must not be twisted, jammed or squeezed, and they must be taut.
- After an accident the child seat should be replaced.
- Ensure that luggage and other objects are adequately secured, particularly when they are on the rear window shelf, otherwise they could cause injuries in the event of a crash. Set a good example and strap yourself in. An adult that is not strapped in can be a danger to the child.
- Never leave your child unsupervised.
Always buckle in your child.
- Protect the child seat from direct exposure to the sun so that the child cannot be burnt by a hot cover, and to prevent the cover from fading.
- Never use the child seat without the cover! Never exchange the seat cover for one that has not been recommended by the manufacturer. This is because the cover forms an integral part of the system's safety function!
12. General instructions
- The Usage Instructions are in a pocket under the cover. They should always be returned to this pocket after use.
- Weight Class 0+ to 13 kg. Only to be fitted rearward facing.
- The seat and belts can be cleaned with lukewarm water and soap. The cover can be washed according to the care label.
- The belt locking buckle can be flushed out with water.
13. Warranty:
- 2-year warranty, as of the date of purchase, for fabrication and material faults. Claims can only be made against proof of purchase date. The warranty is limited to child seats that have been correctly treated and are returned in a clean and orderly state.
- The warranty does not cover natural wear and damage caused by excessive, unsuitable or improper usage.
14. Warranty claim or not?
-
Warning: We stress that child car seats can cause pressure points in vehicle seats on account of their safety conditioned technical design to ensure their secure installation. Consequently, please take appropriate measures, especially with leather upholstery, to protect vehicle seats. RECARO, or their dealers, are not liable for any damage that may be caused to the upholstery of vehicle seats.
-
Fabric: All our fabrics fulfil high demands regarding colour fastness. However, fabrics are bleached by UV radiation. This is not a material fault, merely normal wear for which no guarantee is given.
- Locking buckle: Functional faults of the belt locking buckle are usually attributable to dirt for which no guarantee is given.
- Please call us if you have any questions. Telephone: +49 (0) 9255 77 0
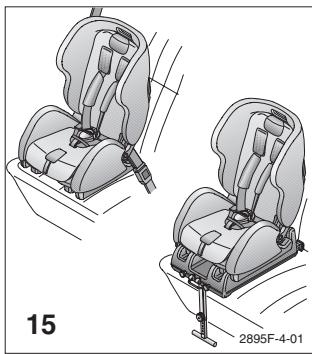
15. Young Expert plus - the Expert for Group I
The Young Expert plus Isofix is the optimum addition for your Young Profi plus. It is designed for weight category 1 (10 - 20 lb / 9 - 18 kg) and can be safely installed in the vehicle with the same Isofix base.
Ask your dealer.
RECARO
Young Profi plus