
929-082 - Wall mount Marquant - Free user manual and instructions
Find the device manual for free 929-082 Marquant in PDF.


| Type of Product | Wall-mounted shelf bracket for glass shelves |
| Brand | Marquant |
| Model | 929-082 |
| Maximum Load | 8 kg (total) |
| Number of Glass Shelves | 2 |
| Shelf Material | Glass |
| Wall Plate Material | Metal (steel) |
| Included Hardware | Screws, concrete anchors, plastic bushings, decor pieces, hex key |
| Installation Surfaces | Wooden studs or concrete/brick walls |
| Adjustability | Shelf supports can be repositioned at different heights |
| Recommended Use | Indoor only |
| Maintenance | Check all screw connections every 2 months; tighten if needed |
| Cleaning | Wipe with a dry cloth; avoid abrasive cleaners |
| Safety Warnings | Do not exceed max load; install by qualified personnel; use on sturdy walls |
| Tools Required | Phillips screwdriver, drill, masonry bit (8 mm for concrete), marker, hammer |
| Country of Origin | Not specified (likely China or Europe) |
| Warranty | Contact dealer for warranty information |
Frequently Asked Questions - 929-082 Marquant
User questions about 929-082 Marquant
0 question about this device. Answer the ones you know or ask your own.
Ask a new question about this device
Download the instructions for your Wall mount in PDF format for free! Find your manual 929-082 - Marquant and take your electronic device back in hand. On this page are published all the documents necessary for the use of your device. 929-082 by Marquant.
USER MANUAL 929-082 Marquant
Installation Instructions for Wall Bracket
929-082

natural_image
Exterior view of a modern office building (no signage)SV Bruksanvisning i original
NO Bruksanvisning i original
EN Operating instructions in original
SVENSKA 4
SÄKERHETSANVISNINGAR....40
BESKRIVNING 4
Installation on wooden stud in wall 27
Installation on concrete or brick wall 28
Assembling the shelf supports....29
Fitting the shelf supports.... 29
Fitting the glass shelves 30
Leads and cables....31
MAINTENANCE 31
SÄKERHETSANVISNINGAR
natural_image
Line drawing of a two-tiered vertical shelf with a central vertical panel and side-mounted base (no text or symbols)Delar
Sladdar och kablar
natural_image
Line drawing of a two-tiered vertical shelf with a curved top and side supports (no text or symbols)Deler
natural_image
Diagram of a vertical brick wall with a diagonal metal rod inserted, showing bolt holes and a scale bar (no text or symbols)
Ledninger og kabler
natural_image
Line drawing of a two-tiered vertical shelf with a central vertical mount and side-mounted base (no text or symbols)Części
natural_image
Pure diagram of a vertical panel with circular indentations, no text or symbols presentnatural_image
Simple line drawing of a rectangular object with a small dot on top (no text or symbols)natural_image
Technical line drawing of a mechanical bracket or support structure (no text or symbols)natural_image
Diagram of a vertical structural column mounted on a brick wall, with a diagonal rod inserted (no text or symbols)
Przewody i kable
Read the Installation Instructions carefully before use.
Contact your dealer if you have any questions.
WARNING: Do not exceed the permitted maximum load (max. 8 kg) – risk of serious personal injury and/or material damage.
WARNING:
- Read all the instructions and safety instructions carefully before installation. Contact your dealer if you have any questions.
- The product must only be installed by qualified personnel.
- Check that the wall can support the weight of the bracket and the appliance it is to hold.
- Screw the screws into the middle of any studs.
- Ask another person to help, or use a mechanical lifting device to lift and position the equipment.
- Tighten the screws firmly, but not too hard – risk of material damage.
- The product is only intended for indoor use. Using it outdoors can cause personal injury and/or material damage.
DESCRIPTION
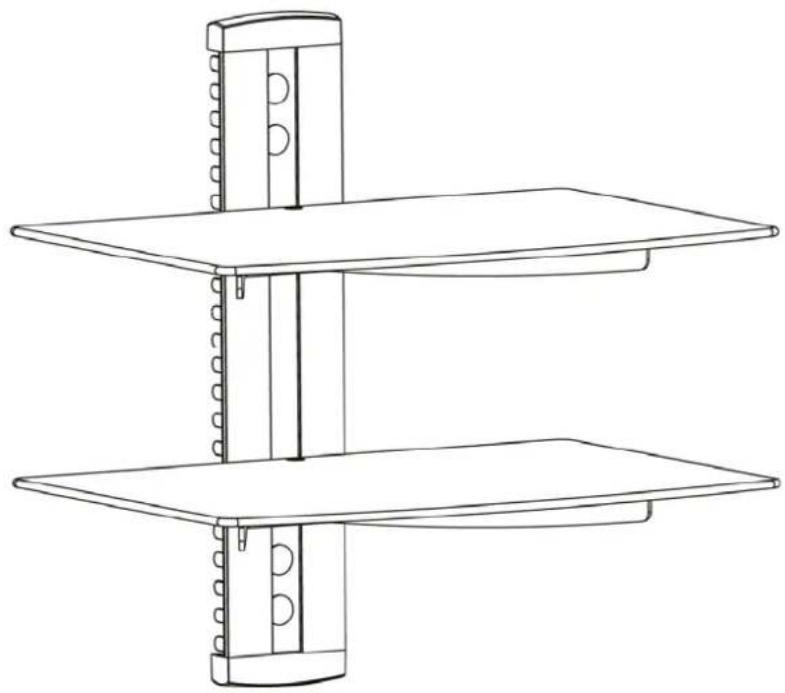
natural_image
Line drawing of a two-tiered vertical shelf with a curved top and side supports (no text or symbols)Parts
IMPORTANT: Check that you have all the parts in the list. Contact your dealer if any parts are missing or damaged.
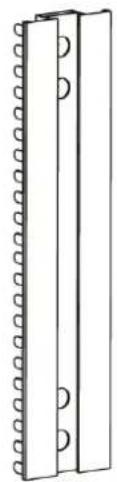
natural_image
Pure diagram of a vertical panel with circular indentations, no text or symbols presentWall plate (1) C

natural_image
Simple line drawing of a rectangular object with a small dot on top (no text or symbols)Glass shelf (2) A

natural_image
Technical line drawing of a mechanical bracket or support structure (no text or symbols)Shelf support (2) B

Fastener (2) D

Decor piece (2)
E
Package

ST5.5 x 50
(4)
P-A

Concrete anchor
(4)
P-B

M5 x 10
(6)
P-C

Plastic bushing
(2)
P-D

Plastic cap (4) P-E

Hex key 3 mm (1) P-F
Tools
• Phillips screwdriver
• Drill with 8 mm masonry drill bit (for installation in concrete wall)
- Marker pen
- Hammer
INSTALLATION
Installation on wooden stud in wall
WARNING:
- Check that the wall can support the weight of the bracket and the appliance it is to hold.
- Tighten the screws firmly, but not too hard – risk of material damage.
- Fasten the screws in the middle of the studs.
-
The supplied installation parts are intended for mounting on wooden studs behind standard chipboard/plasterboard, or the like. Make sure to use suitable parts for the installation.
-
Locate the edges of the studs with a stud detector. Draw a vertical line at the middle of each stud.
- Put the wall plate against the wall and mark the centre of the four holes on the centre line markings for the studs.
- Drill 4 holes with a diameter of 3 mm and depth of 30 mm, and insert 4 screws (P-A). Check that the plate is horizontal.


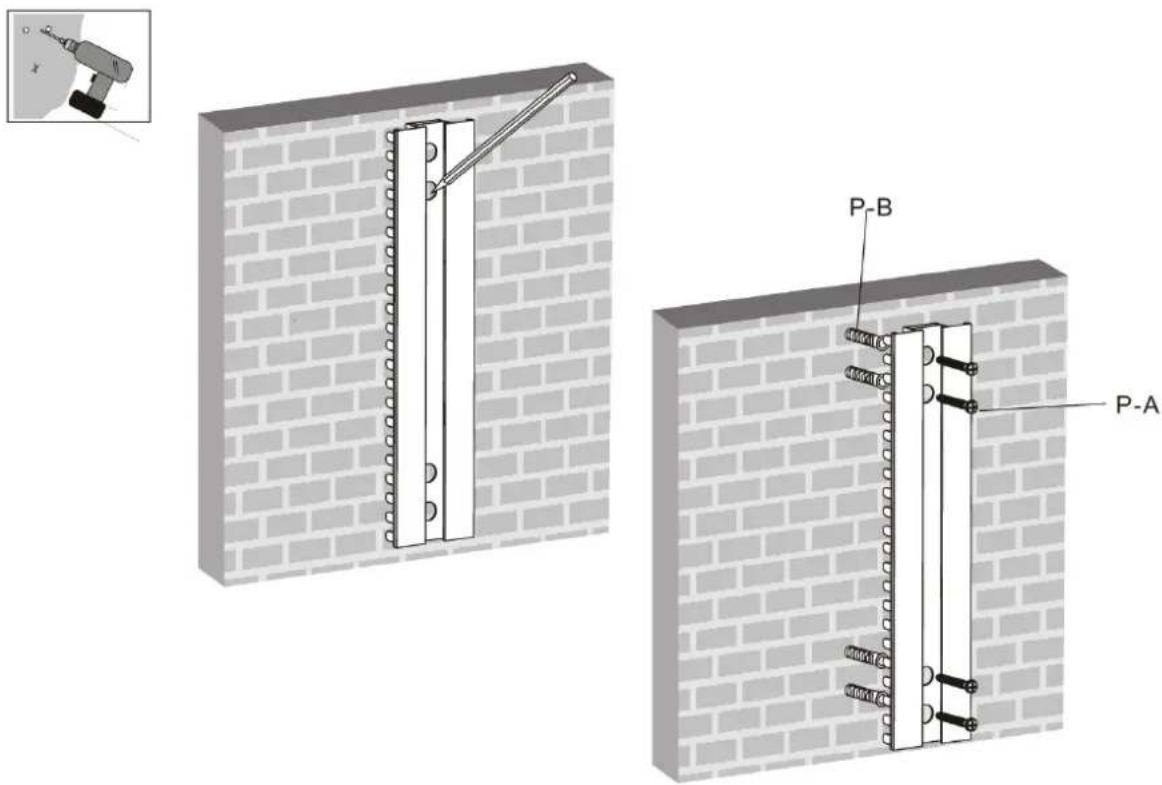
Installation on concrete or brick wall
WARNING:
- Check that the concrete is at least 35 mm thick to accommodate the concrete anchors. Do not drill into mortar joints. Drill into the bricks or concrete blocks, preferably at least 25 mm from the edge. Drill at low speed, not with the hammer drill function, otherwise this could produce a large hole in the other side of the wall if the drill breaks through.
- Check that the wall can support the weight of the bracket and the appliance it is to hold.
- Use the wall plate as a template and mark out the 4 holes on the wall.
- Predrill the holes with a 8 mm masonry drill bit to a depth of at least 50 mm. Insert a concrete anchor (P-B) in each hole. Mount the wall plate on the wall with 4 screws (P-A). Check that the plate is horizontal.
Assembling the shelf supports
• Fit a fastener on one of the shelf supports with 2 screws. Leave a gap of 3 mm (fig. 2.1).
- Fit the other fastener on the other shelf support in the same way.

Fitting the shelf supports
- Fit the two shelf supports on the wall plate at the required heights and tighten the screws with a 3 mm hex key.
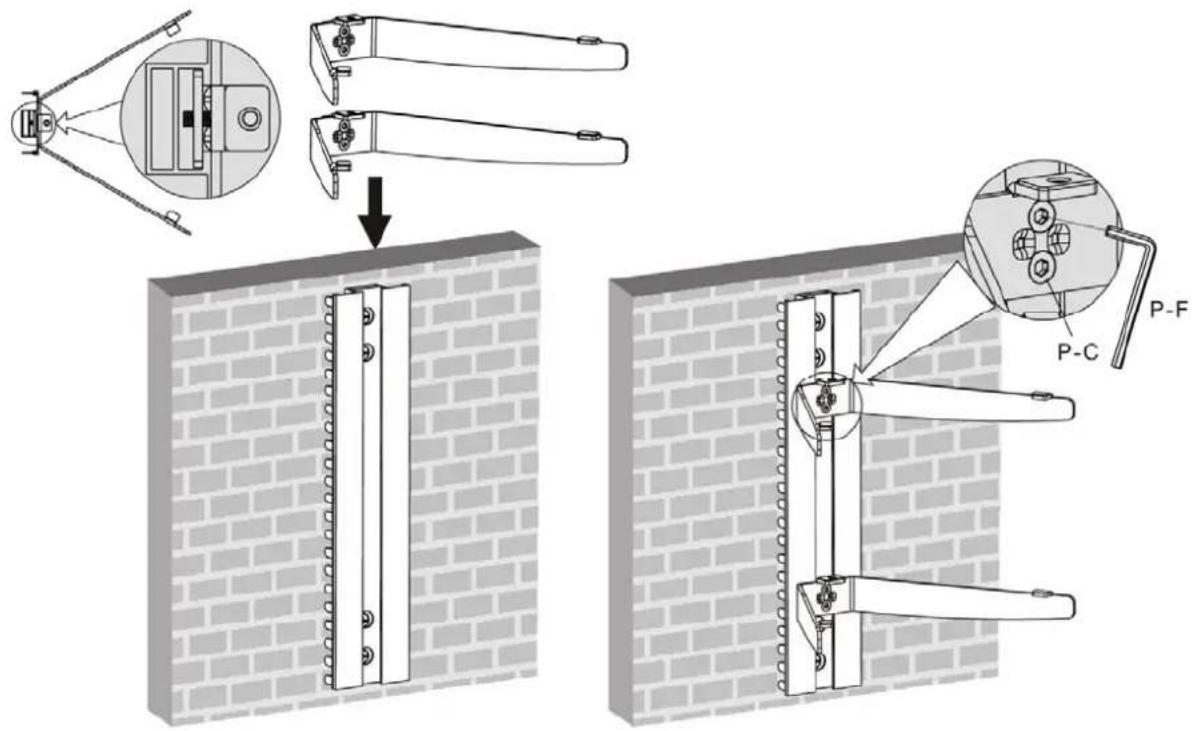
• Fit the decor pieces at the top and bottom of the wall plate and put on the 4 plastic caps.
- To move the shelf supports, unscrew the screws part way with a 3 mm hex key. Move the shelf supports to the required heights, and tighten the screws.

Fitting the glass shelves
Carefully place the glass shelves on the shelf supports. Fasten the glass shelves on the shelf supports with the screws and plastic bushings. Tighten the screws loosely with a 3 mm hex key. Centre the glass shelves in the upper holes and fully tighten the screws with a 3 mm hex key.

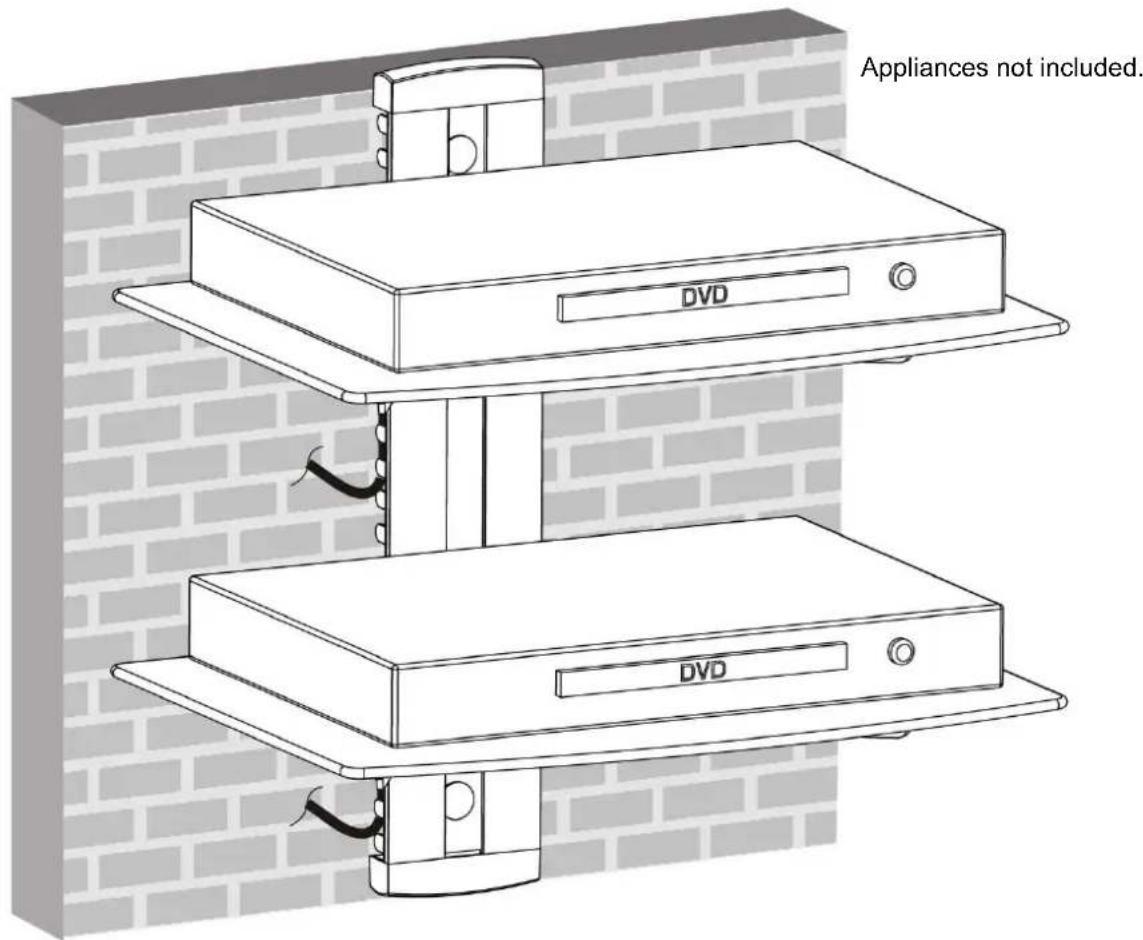
Leads and cables
When the wall bracket is correctly fitted, carefully place the appliances on the glass shelves. Run the leads and cables through the clips.
MAINTENANCE
• After mounting the wall shelf, check that it is firm and safe. Check every other month that all screw connections are properly tightened.
- Contact your dealer if you have any questions concerning the installation.
Jula reserves the right to make changes. In the event of problems, please contact our service department.
www.jula.com
- SVENSKA 4
- SÄKERHETSANVISNINGAR....40
- BESKRIVNING 4
- SÄKERHETSANVISNINGAR
- Delar
- Sladdar och kablar
- Deler
- Ledninger og kabler
- Części
- Przewody i kable
- Read the Installation Instructions carefully before use.
- WARNING:
- DESCRIPTION
- Parts
- Package
- Tools
- INSTALLATION
- Installation on wooden stud in wall
- Installation on concrete or brick wall
- Assembling the shelf supports
- Fitting the shelf supports
- Fitting the glass shelves
- Leads and cables
- MAINTENANCE
Brand : Marquant
Model : 929-082
Category : Wall mount