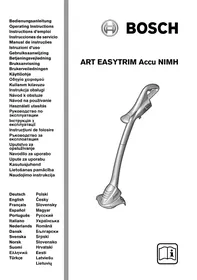
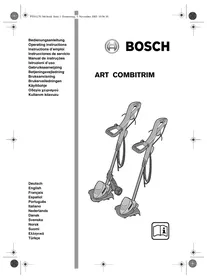
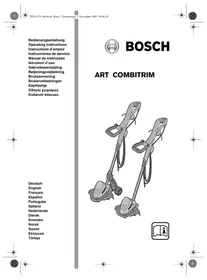
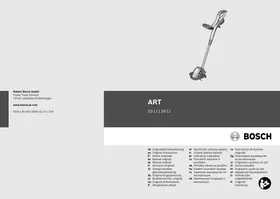
USER MANUAL ART 23 EASYTRIM BOSCH
Operating Instructions
Service +43(0)1/610380
Fax +43 (0)1 / 61 03 84 91
Customer advisor +43 (0)1 / 7 97 22 30 66
E-mail: abe@abe-service.co.at
Switzerland
044/8471511
Fax 044/8471551
Luxembourg
+32(0)70/225565
Fax +32 (0)70 / 22 55 75
E-mail: outillage.gereedschap@be.bosch.com
Senior Vice President
Engineering
Dr. Eckerhard Strötgen
Head of Product
Certification
Robert Bosch GmbH, Power Tools Division
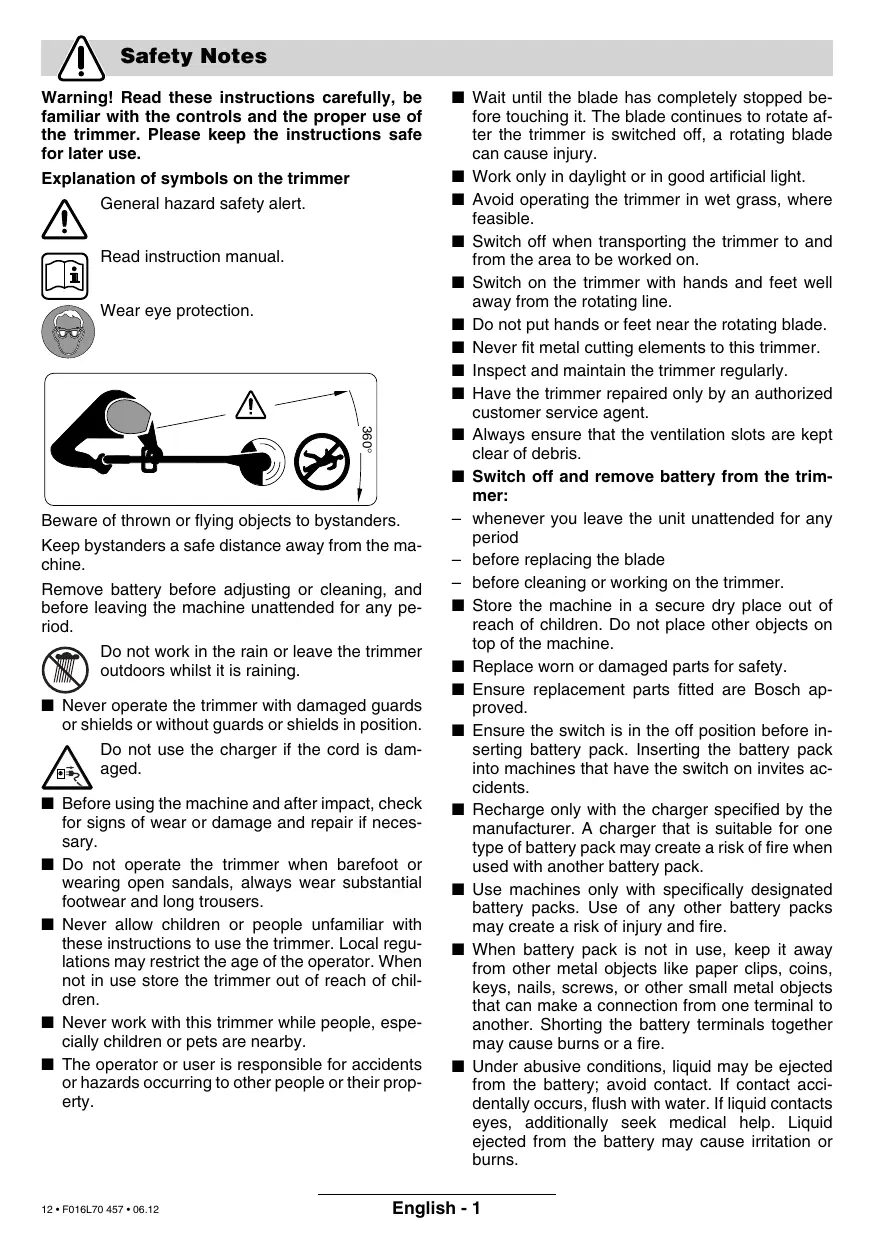
Warning! Read these instructions carefully, be familiar with the controls and the proper use of the trimmer. Please keep the instructions safe for later use.
Explanation of symbols on the trimmer

General hazard safety alert.

Read instruction manual.

Wear eye protection.
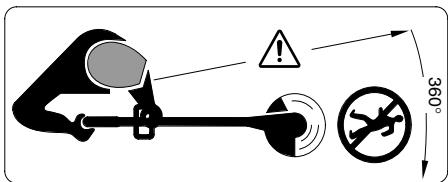
Beware of thrown or flying objects to bystanders.
Keep bystanders a safe distance away from the machine.
Remove battery before adjusting or cleaning, and before leaving the machine unattended for any period.

Do not work in the rain or leave the trimmer outdoors whilst it is raining.
- Never operate the trimmer with damaged guards or shields or without guards or shields in position.

Do not use the charger if the cord is damaged.
Before using the machine and after impact, check for signs of wear or damage and repair if necessary. - Do not operate the trimmer when barefoot or wearing open sandals, always wear substantial footwear and long trousers. - Never allow children or people unfamiliar with these instructions to use the trimmer. Local regulations may restrict the age of the operator. When not in use store the trimmer out of reach of children. Never work with this trimmer while people, especially children or pets are nearby. The operator or user is responsible for accidents or hazards occurring to other people or their property.
Wait until the blade has completely stopped before touching it. The blade continues to rotate after the trimmer is switched off; a rotating blade can cause injury. Work only in daylight or in good artificial light. Avoid operating the trimmer in wet grass, where feasible. Switch off when transporting the trimmer to and from the area to be worked on. Switch on the trimmer with hands and feet well away from the rotating line. Do not put hands or feet near the rotating blade. Never fit metal cutting elements to this trimmer. Inspect and maintain the trimmer regularly. Have the trimmer repaired only by an authorized customer service agent. Always ensure that the ventilation slots are kept clear of debris. Switch off and remove battery from the trimmer: whenever you leave the unit unattended for any period, before replacing the blade, before cleaning or working on the trimmer. Store the machine in a secure dry place out of reach of children. Do not place other objects on top of the machine. Replace worn or damaged parts for safety. Ensure replacement parts fitted are Bosch approved. Ensure the switch is in the off position before inserting battery pack. Inserting the battery pack into machines that have the switch on invites accidents. Recharge only with the charger specified by the manufacturer. A charger that is suitable for one type of battery pack may create a risk of fire when used with another battery pack. Use machines only with specifically designated battery packs. Use of any other battery packs may create a risk of injury and fire. When battery pack is not in use, keep it away from other metal objects like paper clips, coins, keys, nails, screws, or other small metal objects that can make a connection from one terminal to another. Shorting the battery terminals together may cause burns or a fire. Under abusive conditions, liquid may be ejected from the battery; avoid contact. If contact accidentally occurs, flush with water. If liquid contacts eyes, additionally seek medical help. Liquid ejected from the battery may cause irritation or burns.
Product Specification
| Trimmer | ART 23 EASYTRIM ACCU/ ART 2300 EASYTRIM ACCU | ART 26 EASYTRIM ACCU/ ART 2600 EASYTRIM ACCU |
| Part number (typ) | | 3 600 H78 H.. | 3 600 H78 J.. |
| No-load speed | [rpm] | 9 500 | 9 000 |
| Cutting circle | [cm] | 23 | 26 |
| Weight (without optional extras) | [kg] | 1.9 | 2.0 |
| Serial Number | See serial No 14 (rating plate) on machine. |
| Battery type | | NiMH | NiMH |
| Battery order number | | 2 607 335 699 | 2 607 335 699 |
| Battery Voltage | [V] | 14.4 | 14.4 |
| Battery rating | [Ah] | 1.5 | 1.5 |
| Charging time (empty battery) | [h] | 3 - 5* | 3 - 5* |
| Battery charger | | AL 1404 | AL 1404 |
| Order number | | 2 607 225 .. | 2 607 225 .. |
| Charging current | [A] | 0.4 | 0.4 |
| Allowable charging temperature range | [°C] | 0-45 | 0-45 |
*Charging time based on a battery charger input voltage of 230 V.
Intended Use
The product is intended for the cutting of grass and weeds under bushes, as well as on slopes and edges that cannot be reached with the lawn mower. Intended use is related to operation within 0°C and 40°C ambient temperature.
Introduction
This manual gives instructions on the correct assembly and safe use of your machine. It is important that you read these instructions carefully.
Delivered Items
Carefully remove the machine from its packaging and check that you have all the following items:
- Trimmer Cutting guard
- Cutting disc
- Blades Battery charger
- Operating instructions
When parts are missing or damaged, please contact your dealer.
Operating Controls
1 On/Off switch 2 Handle 3 Guide handle 4 Shaft, upper 5 Shaft, lower 6 Trimmer head 7 Ventilation slots 8 Cutting guard 9 Battery
10 Battery charger 11 Charging compartment 12 LED indicator 13 Mains plug** 14 Serial No
**Country specific
Not all of the accessories illustrated or described are included as standard delivery.
Warning! Switch off, remove battery from machine before adjusting or cleaning.
The blade continues to rotate for a few seconds after the trimmer is switched off.
Caution - do not touch rotating blade.
Charging Procedure
The charging procedure starts as soon as the mains plug is plugged into the socket and the battery 9 is inserted into the charging compartment 11.
The green LED 12 is not a charge control indicator! When the green LED is lit, it indicates that a charging current flows.
After the end of the charging process (approx. 3h-5h), pull the mains plug of the battery charger from the socket and remove the battery.
The battery should not be charged for longer than 5.5 hours.
A temperature increase of the battery indicates that it is fully charged.
Charging Advice
With continuous or several repetitive charging cycles without interruption, the charger can warm up. This is not harmful and does not indicate a technical defect of the unit.
A battery that is new or has not been used for a longer period does not develop its full capacity until after approximately 5 charging/discharging cycles. Leave such batteries in the charging compartment until they have clearly warmed up.
A significantly reduced working period after charging indicates that the batteries are used and must be replaced.
Assembly

Do not connect the battery before the product is completely assembled.
Ensure the product is assembled in the following order:
A. Assemble trimmer shaft
Push the upper shaft 4 and lower shaft 5 together until a click can be heard.
Note: Once the upper and lower shaft are assembled, they cannot be disassembled.
Ensure the internal cable is not trapped or twisted.
B. Mounting the Cutting Guard
Place the cutting guard 8 on the trimmer head 6.
Hook the guard onto the trimmer head and push until secure fitting. Push the rear of the guard until secure (click).
Fitting Cutting Disc / Fitting Blade
Press cutting disc 15 onto the drive adaptor as shown (click).
Fit the blade: place the blade 16 over the pivot 17 and pull outwards until it snaps into place.
Cutting and Edging

Remove stones, loose pieces of wood and other objects from the cutting area.
The blade continues to rotate for a few seconds after the trimmer is switched off. Allow the motor/blade to stop rotating before switching "on" again.
Do not rapidly switch off and on.
Switching On and Off
Press switch 1 and hold depressed. Release switch 1 for switching off.
Cutting Grass
Move the trimmer left and right, keeping it well away from the body.
The trimmer can efficiently cut grass up to a height of 15 cm. Cut taller grass in stages.
Cutting Around Trees and Bushes
Carefully cut around trees and bushes so that they do not come into contact with the cutting line.
Plants can die if you damage the bark.
Battery duration
Battery duration is dependent on the working conditions:
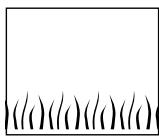
light conditions:
up to 500 metres
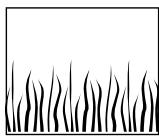
medium conditions:
up to 300 metres
tough conditions:
up to 50 metres
Maintenance

Before any work on the machine itself, remove battery from machine.
Note: To ensure long and reliable service, carry out the following maintenance regularly.
Regularly check for obvious defects such as loose fixings, and worn or damaged components.
Check that covers and guards are undamaged and correctly fitted. Carry out necessary maintenance or repairs before using.
If the trimmer should happen to fail despite the care taken in manufacture and testing, repair should be carried out by an authorized customer service agent for Bosch garden products.
For all correspondence and spare parts orders, always include the 10-digit part number (TYP) from the nameplate of the machine!

Blade Maintenance

Before any work on the machine itself, remove battery from machine.
To remove the worn blade 16 push in direction of the arrow until it snaps off the pivot 17.
Clean the pivot 17 of any residual plastic/debris with a sharp knife.
To refit the new blade 16, place the eyelet over the pivot 17 and pull outwards until it snaps into place.
Note: Only use Bosch replacement blades. They have been developed specially for improved cutting performance. The use of other cutter blades will lead to a deterioration in performance and possible damage to the product.
After Trimming/Storage

Stop and remove battery from product. Ensure battery is removed before storage.
Clean the exterior of the machine thoroughly using a soft brush and cloth. Do not use water, solvents or polishes. Remove all grass and debris, especially from the ventilation slots 7.
Turn the machine on its side and clean the cutting guard 8 inside. If grass cuttings are compacted, remove with a wooden or plastic implement.
Battery should be stored between 0 - 45°C; incorrect storage could result in the battery being damaged.
Fault Finding
The following table gives checks and actions that you can perform if your machine does not operate correctly. If these do not identify/remedy the problem, contact your service agent.
Warning: Switch off and remove battery before investigating fault.
| Symptom | Possible Cause | Remedy |
| Can not fit Guard over cutting disc | Incorrect assembly | Remove cutting disc and fit guard, see also Product assembly |
| Machine fails to operate | Battery discharged | Recharge battery, see also Charging advice |
| Machine functions intermittently | Internal wiring defective
On/Off switch defective | Contact Service Agent
Contact Service Agent |
| Excessive vibration/noise | Machine fault
Blade broken | Contact Service Agent
Replace blade |
| Cutting time low on one battery charge | Battery not used for long period or initial usage
Grass too high
Battery worn out | Fully charge battery, see also charging advice
Cut in stages
Replace the battery |
| Blade will not move | Battery discharged
Machine fault | Recharge battery, see also Charging advice
Contact Service Agent |
| Machine is not cutting | Blade broken
Battery not fully charged
Grass entangled around cutting disc | Replace blade
Recharge battery, see also Charging advice
Remove grass |
| No charging procedure possible due to defective battery | The contacts of the battery are contaminated
The battery is defective, due to a disconnection in the battery (individual cells) | Clean the contacts (e. g. by inserting and removing the battery several times) or replace the battery, as required
Replace the battery |
| The LED indicator 12 does not light up after plugging the mains plug into the socket and inserting the battery into the charging compartment 11 | The charger plug is not inserted (properly)
Socket, cable or charger are defective | Insert the plug (fully) into the socket
Check the mains voltage and if necessary, have the battery charger checked by an authorized customer service station for Bosch garden tools |
Disposal
Product, accessories and packaging should be sorted for environmentally-friendly recycling.
Only for EC countries:
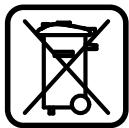
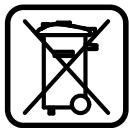
Do not dispose of the product into household waste!
According to the European Directive 2002/96/EC on waste electrical and electronic equipment and its incorporation into national law, products that
are no longer suitable for use must be separately collected and sent for recovery in an environmentally-friendly manner.
Service
Exploded views and information on spare parts can be found under: www.bosch-pt.com
Great Britain
Robert Bosch Ltd. (B.S.C.)
P.O.Box 98
Broadwater Park
North Orbital Road
Denham-Uxbridge
Middlesex UB 95HJ
Service. +44 (0) 18 95 / 83 87 82
Fax Service +44 (0) 18 95 / 83 87 89
Advice line. +44 (0) 18 95 / 83 87 91
Fax Advice +44 (0) 18 95 / 83 87 93
Ireland
Beaver Distribution Ltd.
Greenhills Road
Tallaght-Dublin 24
Service. +353 (0)1 / 45 15 211
Fax +353 (0)1 / 45 17 127
Malaysia
Robert Bosch (SEA.) Pte. Ltd.
No. 8a, Jalan 13/6
Selangor Darul Ehsan
Petaling Jaya 46200
Malaysia
+60379583000
Fax (EW Dept.) +60 3 79 58 38 38
www.bosch.com.sg
Australia
Robert Bosch Australia Ltd.
RBAU/SPT2
1555 Centre Road
P.O. Box 66 Clayton
3168 Clayton/Victoria
+61 (0)1 / 800 804 777
Fax +61 (0)1 / 800 819 520
www.bosch.com.au
E-Mail: CustomerSupportSPT@au.bosch.com
New Zealand
Robert Bosch Limited
14-16 Constellation Drive
Mairangi Bay
Auckland
New Zealand
+64(0)9/4786158
Fax +64 (0)9 / 47 82 914
Measured values determined according to 2000/14/EC (1.60 m height, 1.0 m distance away) and EN 28 662.
Typically the A-weighted noise level of the product is: sound pressure level 72 dB (A); sound power level 88 dB (A).
The typical hand/arm vibration is below 2.5 m/s^2.
We declare under our sole responsibility that this product is in conformity with the following standards or standardization documents: EN 786, EN 60 335 according to the provisions of the directives 89/336/EEC, 98/37/EC, 2000/14/EC.
2000/14/EC: The guaranteed sound power level LWA is lower than 94 dB (A). Conformity assessment procedure according to Annex VI.
Notified body: SRL, Sudbury England
Notified body identifications number: 1088
Leinfelden, 01.06.2006.
Dr. Egbert Schneider
Senior Vice President
Engineering
Dr. Eckerhard Strötgen
Head of Product
Certification
Robert Bosch GmbH, Power Tools Division
Subject to change without notice

Dr. Egbert Schneider Senior Vice President Engineering
Dr. Eckerhard Strötgen Head of Product Certification
Robert Bosch GmbH, Power Tools Division
Senior Vice President
Engineering
Dr. Eckerhard Strötgen
Head of Product
Certification
Robert Bosch GmbH, Power Tools Division
Read the service instruction.

Senior Vice President
Engineering
Dr. Eckerhard Strötgen
Head of Product
Certification
Robert Bosch GmbH, Power Tools Division
Senior Vice President
Engineering
Dr. Eckerhard Strötgen
Head of Product
Certification
Robert Bosch GmbH, Power Tools Division
Senior Vice President
Engineering
Dr. Eckerhard Strötgen
Head of Product
Certification
Robert Bosch GmbH, Power Tools Division
After trimming/storage

Senior Vice President
Engineering
Dr. Eckerhard Strötgen
Head of Product
Certification
Robert Bosch GmbH, Power Tools Division
Only for EU countries:
Senior Vice President
Engineering
Dr. Eckerhard Strötgen
Head of Product
Certification
Robert Bosch GmbH, Power Tools Division
Changes reserved
Senior Vice President
Engineering
Dr. Eckerhard Strötgen
Head of Product
Certification

Robert Bosch GmbH, Power Tools Division
Dr. Egbert Schneider Senior Vice President Engineering
Dr. Eckerhard Strötgen Head of Product Certification

Robert Bosch GmbH, Power Tools Division
Disposal of the machine:
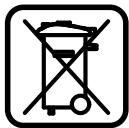
Do not dispose of power tools in household waste! According to the European Directive 2002/96/EC on waste electrical and electronic equipment and its implementation in national law, used power tools must be collected separately and recycled in an environmentally friendly manner.
According to national law, used power tools must be collected separately and recycled in an environmentally friendly manner.
Dr. Egbert Schneider Senior Vice President Engineering
Dr. Eckerhard Strötgen Head of Product Certification
i.v. Mo Tu We Th Fr So Su
Robert Bosch GmbH, Power Tools Division
We reserve the right to make changes.
Bosch San. ve Tic. A.S.
Ahi Evran Cad. No:1 Kat:22
Polaris Plaza
80670 Maslak/Istanbul
Customer Service +90 (0)212 / 335 06 66
Customer Service Hotline +90 (0)212/335 07 52
Declaration of Conformity
Senior Vice President
Engineering
Dr. Eckerhard Strötgen
Head of Product
Certification
Robert Bosch GmbH, Power Tools Division
Dr. Egbert Schneider Senior Vice President Engineering
Dr. Eckerhard Strötgen Head of Product Certification
Robert Bosch GmbH, Power Tools Division
Senior Vice President
Engineering
Dr. Eckerhard Strötgen
Head of Product
Certification
Robert Bosch GmbH, Power Tools Division
Changes reserved
Warning! Carefully read the following instructions. Familiarize yourself with the controls of the cordless lawn mower and its proper use. Keep this instruction manual for future reference. Explanation of symbols on the cordless lawn mower
Senior Vice President
Engineering
Dr. Eckerhard Strötgen
Head of Product
Certification
i.v. Mo Tu We Th Fr So Su
Robert Bosch GmbH, Power Tools Division
Dr. Egbert Schneider Senior Vice President Engineering
Dr. Eckerhard Strötgen Head of Product Certification
i.v. Mo Tu We Th Fr So Su
Robert Bosch GmbH, Power Tools Division
Subject to change without notice.

Safety instructions
Warning! Please read the following instructions carefully, familiarize yourself with the control elements and the rules for working with the battery trimmer. Keep the operating instructions for future use.
Pictograms on the battery trimmer

Read the operating instructions

When working, use protective goggles.

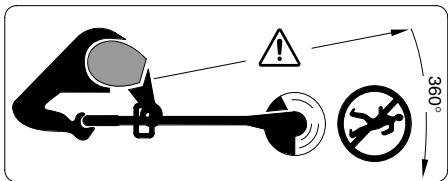
Make sure that the stand is not in the way of other people or objects.
Keep the stand at a safe distance from the machine.
Before switching on, make sure that the trimmer is not in contact with any objects. Remove the battery from the trimmer.

Do not leave the battery trimmer unattended.
Never work with the trimmer if the protective caps or devices are damaged or removed.

Do not use a damaged charging device.
Before using the trimmer after a collision, check it for damage and have it repaired if necessary. Never use the trimmer with the protective cover open. Always wear sturdy, closed shoes and long trousers when working with the battery trimmer. Never allow children or persons unfamiliar with these instructions to use the battery trimmer. Local regulations may restrict the operator's age. Store the trimmer out of reach of children. Never use the trimmer if people (especially children) or pets are nearby. The user is responsible for accidents or damage caused to other people or their property. If the rotating blade is touched, wait until it has come to a complete stop. The blade continues to rotate after switching off and can cause injury due to inertia.
Use the grass trimmer only in daylight or with sufficient artificial lighting. If possible, do not cut wet grass with the battery trimmer. Switch off the battery trimmer when transporting it to or from the area to be trimmed. Before switching on, remove your hands and feet from the danger zone. Make sure that your hands or feet are not near the rotating blade. Never use a metal blade in this trimmer. Regularly check and maintain the battery trimmer. Have the battery trimmer repaired only by authorized service workshops. Always keep the ventilation slots of the motor clean. Switch off the trimmer and remove the battery: - always when you leave the trimmer unattended - before replacing the blade - before cleaning or servicing the battery trimmer. Store the trimmer in a safe place, out of reach of children. Do not place any objects on the trimmer. To maintain safe condition, replace worn or damaged parts. Use only original parts from Bosch. Before installing the battery, check that the power tool is switched off. Installing the battery into a switched-on power tool can lead to accidents. Charge batteries only with chargers recommended by the manufacturer. A charger intended for a specific type of battery may pose a fire hazard when used with other batteries. Use only the batteries provided for this power tool. Using other batteries can lead to injuries and fire hazards. Protect the unused battery from paper clips, coins, keys, nails, screws, and other small metal objects that could short-circuit the contacts. A short circuit of the battery contacts can cause burns or fire. If the battery is used improperly, liquid may leak. Avoid contact with it. In case of accidental contact, rinse with water. If the liquid gets into the eyes, seek medical help. Leaking battery liquid can cause skin irritation or burns.
Technical data
Place the blade 16 on the flange 17, press the blade down and pull it outwards until it locks.
Trimming and edging

Make sure that the area to be trimmed is free of stones, dry grass, and other objects.
After switching off the battery trimmer, the cutting blade continues to rotate for a few seconds due to inertia. Wait for the motor/blade to stop before switching on again.
Do not switch the tool off and on without a pause in between.
Switching on and off
Press and hold the switch 1. To switch off, release the switch 1.

Trimming grass
Tilt the battery trimmer to the left and right while maintaining sufficient distance to the body.
The battery trimmer effectively trims grass up to a height of 15 cm. Taller grass should be trimmed in stages.
Trimming grass around trees and bushes
The trimmer cuts grass around trees and bushes to avoid contact with the forest.
Damage to plant roots may cause them to dry out.
Operating time of the trimmer on a single battery charge
The operating time depends on the working conditions:
Light conditions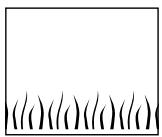
up to 500 m
Medium conditions: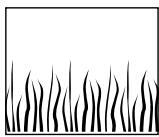
up to 300 m
Heavy conditions: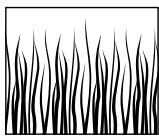
up to 50 m
Maintenance

Before performing maintenance, remove the battery from the electric tool.
Note: To ensure long and reliable operation of the device, regularly perform the following maintenance work.
Regularly check the tool for visible defects, such as loose fasteners and worn or damaged parts.
Clean the tool with a sharp knife from residues of grass and dirt.
HOBbI HOX 16 HacaIITb Ha IHTpT 17, BbIXaTb BHN3 N BYITAHyTb DO qNKcIpOBaHn HApxy.
Yka3aHHe: PpIMeHnTe 3anachbIe pexyuIne HOKToIbKO Of npMBo Bosch. 3Ta CneuaJIbHaPa3pa6oTKa 6bIaDaET yIyUweHHbIMn CBOIcTBAMPe3Kn. PexyuIne HOXn DpyrInx npOn3BOdnteJe IMeIOT XyD7uIIO npOn3BOdnteJbHOCTb.
IocJe cTpuxkN u XpaHeHnA

BbIKHouHTb 3JIeKtpOnHCTpyMeHT n BbIHyTb aKKymJIaTOp. Y6eINTeCb B TOM, 4TO nepei NoctaHOBko Ha xpaHeHne aKKymJIaTOp BbIHyT.
TuaTeNbHO OChNTe TprMMep ChapyKn TprAnKo n MArKO uETKO.He npmEnHne BoYd, pactBopnte nn Nn NOnpyUoMe CpeDCTBa. VdaJIte BCE cKoJNeHn TpaBbN 3aqrA3HeHH, oO6eHHoC BHTnJIauOHNbIX npope3e7.
ПлJOKиTe INHCTpymeHT Ha 6OKOBYu CTOpOHy n OuchTte 3aunTHbI KOJInak 8 n3HyTpN. CnPecCOBaHHbIe CKONJIeHnI TpaBbl ydaJIte DepeBAAHHo IIN NII NaCTIKOBOJ NONaTOUkOi.
Akkymyantop cneJeYeT xpaHnTb npn TeMnepaType Bnpedex at 0 ° C do 45°C
B cneyuioe Ta6bnue npnBeDeHb npn3naK n BO3MOxHOCTn ycTpaHEHn HncnpaBHOCTe Ha cnyaan HeNCnpaBHO paOboBaWoero annapata. Ecn BbI He CMOKeTe C 3ToI NOMOsbIO JokAIN3NpOBaT b UycTpaHnT bp6bnemy, To o6patntecb BaWy cepBnCHyIO MaCtepckyIO.
BHHMaHHe: Do hauJa noncKa HeNCnPabHObTe BbIKJIIOuHTb 3JIeKTPoINHCTpyMeHT N BblHyTb aKKymyIaTOP.
Dr. Egbert Schneider Senior Vice President Engineering
Dr. Eckerhard Strötgen Head of Product Certification
Robert Bosch GmbH, Power Tools Division
C npabOM Ha 3MeHeHnA
Ybara! YbaXHO npOHTaTe HnKxHcNoDAhi BkA3iBKn. O3HaHOMTec3 opraHAm ynpabJInHna I npabNbHM KOpNCTyBaHHM TpMEpom 3 akymyJrTOPOHO 6atapeo. Dope 36epiraTe IHcTpkyuio 3 ekCnIyataui Dnra NpaIbWoro KOpNCTyBaHHHeIO. POnsHeHHa QDo CmBONiB Ha TpImepi 3 akymyJrTOPOHO 6atapeo

3araJIbHa Bka3iBKa Ha He6e3neKy.

Battery packs HX/HX
Insert battery pack HX 15 into the drive unit until it clicks into place.
Insert battery pack HX 16 into the handle 17, press it down until it engages.
Adjusting the cutting height

Remove stones, branches, and other objects from the area where you will be cutting grass.
Starting the trimmer with the battery pack: it will take a few seconds to spin up. To switch the device on again, wait until the motor has stopped.
Do not switch on too soon after switching off.
Switching on/off
Dr. Egbert Schneider Senior Vice President Engineering
Dr. Eckerhard Strötgen Head of Product Certification
i.v. Mo Tu We Th Fr So Su
Robert Bosch GmbH, Power Tools Division
Possible changes
Attention! Read the following instructions carefully. Familiarize yourself with the operating elements and the proper use of the cordless grass trimmer. Keep the instructions in a safe place for future reference.
Bosch Service Center
Romania
Str. Horia Macelariu 30-34, sector 1, Bucuresti
Senior Vice President
Engineering
Dr. Eckerhard Strötgen
Head of Product
Certification
i.v. Mo Tu We Th Fr So Su
Robert Bosch GmbH, Power Tools Division
Warning: Keep the alarm cable away from the cutting area.
In any case, if the alarm cable does not work with the battery, if the cable is damaged or the protective devices are removed or dismantled.

Do not use the charging device if it is damaged.
Before using the power tool, if it has been dropped or hit, check for damage to the accessories and repair them if necessary. Do not work with the battery alarm cable if it is not in perfect condition. In any case, do not allow the battery alarm cable to work unattended. Familiarize yourself with this operating manual. It is possible that national regulations impose restrictions on use. When not using the alarm cable, store it out of reach of children. Never touch it if there are people or animals in the immediate vicinity. You are responsible for injuries to others or for material damage if you work with the power tool.
Before using the hedge trimmer, read the safety instructions carefully. After switching off the electric hedge trimmer, it may take some time for the blades to stop. Use only in daylight or with good artificial lighting. If possible, do not use the hedge trimmer when the grass is wet. When you finish using the hedge trimmer, switch it off. Before switching on, remove the blade guard. Do not place the blade guard near the hedge trimmer. Never use the hedge trimmer with a damaged blade guard. Regularly check the condition of the hedge trimmer. Have repairs carried out only by an authorized service center. Clean the ventilation openings regularly from grass residue. Switch off the electric tool and remove the battery: before leaving the electric tool unattended, before cleaning or servicing, before changing accessories, and before storing. Store the electric tool in a dry, clean place, out of reach of children. Do not place other objects on top of it. From the point of view of safety, replace worn or damaged parts. Make sure that spare parts are original. Before inserting the battery, make sure that the switch is in the off position. Inserting the battery into the electric tool while it is switched on can cause a serious accident. Charge the batteries only in chargers recommended by the manufacturer. If you use a charger with a battery for which it is not intended, there is a risk of fire. Insert the electric tool only with the battery intended for it. Use of other batteries may cause injury or fire. Keep unused battery away from paper clips, coins, keys, nails, screws, or other small metal objects that can bridge the contacts. Short-circuiting the contacts can cause burns or fire. If battery fluid leaks, avoid contact with it. If contact occurs, rinse with water and seek medical help.
The battery terminals may cause burns or fire.
Technical data
| Актуларона
Травokocача | ART 23 EASYTRIM ACCU/
ART 2300 EASYTRIM ACCU | ART 26 EASYTRIM ACCU/
ART 2600 EASYTRIM ACCU |
| Каталожен Home | 3 600 H78 H.. | 3 600 H78 J.. |
| СкорOST на Въртene на праzen
хов | [min-1] 9 500 | 9 000 |
| Диаметър на рязANE | [cm] 23 | 26 |
| Маса (бeЗ доьлнітелни
присноюгеля) | [kg] 1,9 | 2,0 |
| Серейн Home | Вух trade сэрийн Home 14 (Табелka на
maшина. | eilektroinctумента) на
maшинота. |
| Актуларона 6batеря | NiMH | NiMH |
| Каталожен Home | 2 607 335 699 | 2 607 335 699 |
| Номinaлно наразожения | [V] 14,4 | 14,4 |
| Калачten | [Ah] 1,5 | 1,5 |
| В体现在 заразождане (при
разредана akтуларона
6batеря) | [h] 3 - 5* | 3 - 5* |
| Зарадно устroyостvo | AL 1404 | AL 1404 |
| Каталожен Home | 2 607 225 .. | 2 607 225 .. |
| Зарадen TOK | [A] 0,4 | 0,4 |
| Дорустим Temпера的那种
диапазон заразжданe | [°C] 0-45 | 0-45 |
*Charging time is determined at a charging voltage of 230 V.
Intended use
The hedge trimmers are intended for cutting hedges, shrubs, and bushes that cannot be reached with large hedge trimmers.
The hedge trimmer is intended for operation at ambient temperatures between 0°C and 40°C.
Introduction
This operating manual contains instructions for the correct installation and safe operation of your hedge trimmer. It is extremely important to read these instructions carefully.
Unpacking
Carefully remove the hedge trimmer from the packaging and check the following parts:
Type of chainsaw - Protective cover - Cutting chain - Blade - Charging device - Handle
If the device is damaged, contact your dealer.
Parts of the power tool
1 Trigger switch 2 Handle 3 Front handle 4 Top part of the blade 5 Bottom part of the blade 6 Chainsaw head 7 Ventilation openings 8 Protective cover
9 Battery pack 10 Charging device 11 Charging socket for battery pack 12 LED light 13 Electric plug 14 Serial number
**Warning: Read the instructions before use.
The illustrations of the parts and the descriptions in the operating instructions are not included in the scope of delivery.

For your safety
Warning! Disconnect the power tool and remove the battery pack before adjusting or cleaning the power tool.
After switching off the chainsaw, the cutting chain will continue to run for a few seconds due to inertia.
Warning: Do not touch the moving cutting chain.
Charging the battery pack
The charging process begins when the plug is inserted into the socket 11 and the battery pack 9 is inserted.
The green LED 12 does not indicate the state of charge of the battery pack!
The illumination of the green LED indicates that charging is in progress.
Charging the battery takes approximately 3-5 hours. Disconnect the device from the battery charger and the battery from its socket.
The battery must be charged for at least 5.5 hours.
Follow the alarm sequence carefully:
Mounting the alarm siren tube
Insert the upper part 4 and the lower part 5 of the tube into each other until you hear a click.
Note: Once the upper and lower parts of the tube are joined, they cannot be separated again.
Make sure the cables are not pinched or squeezed.
Mounting the protective cover
Place the protective cover 8 on the head of the alarm siren.
Slide the protective cover onto the head of the alarm siren until it stops.
Press the protective cover until it clicks into place.
Mounting the disc/knife blade
Remove stones, wood remnants, and other debris from the cutting area.
After turning off the alarm siren, the disc/knife blade may still be spinning due to inertia. Before turning it on again, wait for the electric motor/blade to stop completely.
Do not turn on the power tool immediately after turning it off.
Switching on and off
Press and hold the start trigger 1. To switch off, release the start trigger 1.

Working with the tool
Hold the tool by the insulated gripping surfaces, keeping a sufficient distance from the blade.
The tool can be used for cutting branches up to 15 cm in diameter. For thicker branches, use a saw.
Cutting near wood and shrubs
When cutting near wood and shrubs, be careful that the blade does not come into contact with the ground.
Plants may be damaged if the bark is broken.
Battery runtime
The battery runtime depends on the working conditions:
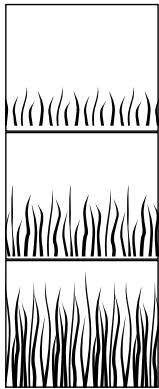
Light working conditions: up to 500 meters
Medium working conditions: up to 300 meters
Heavy working conditions: up to 50 meters
Maintenance

Before performing any maintenance on the power tool, remove the battery.
Warning: Read the operating instructions before using the power tool to ensure safe operation.
Regularly check the power tool for visible defects, such as loose connections, wear, or damaged parts.
Clean the tool with a soft brush or cloth from any remaining dust or plastic residue.
To mount a new blade 16, place blade 16 on the flange 17, press it down and tighten it until you feel resistance.
Warning: Use only original spare blades, manufactured by us. They are specially designed for optimal performance and safe operation. Using other blades may lead to reduced efficiency.
Storage

Disconnect the power tool and remove the battery pack. Before storing the power tool, make sure the battery pack is removed.
Clean the tool with a soft brush and cloth. Do not use water or solvents/cleaners. Remove any debris from the tool, especially from the ventilation slots 7.
Place the power tool on a stable surface and clean the blade guard 8. If the blade is worn, replace it with a suitable spare blade or plastic.
The battery pack must be stored at a temperature between 0 and 45°C.
Troubleshooting
The table below shows the symptoms of defects and how you can fix them when the power tool is not functioning normally. If you cannot locate or fix the problem, contact an authorized service center for power tools.
Attention: Before you start looking for defects, disconnect the power tool and remove the battery pack.
| Симптоми | Възможна рpreciна | Остразнивае |
| Пробларною кожух не моче на бъde иЗserглинад рechема дис. | Нелравлиен мontax | Демоныразиные рechема дис и мочи рachайы рechема кожух отоно, въкту паздени „Моштося" |
| Травокосачкata не се вълочьа | Акymалаторна заегия сизтошени | ЗаPECDEа Akymалаторна заегия, въкту сьщу указаняета за з配电данes |
| Травокосачкata grabotи спекльсваня | Има поvere假и Контакт в машинaitа Deф ekten пухов п教职工свач | ЗаHESEte RA OTOPIANIPAH CEPB33 aЕLEKТПОИСТРУМЕТNи на БОБ 3azeCESEte RA OTOPIANIPAH CEPB33 aELEKТПОИСТРУМЕТNи на БОБ |
| Силии вибраци/шуm | Машина e поvere假и Hoxьт e счунen | ЗаHESEte RA OTOPIANIPAH CEPB33 aELEKТПОИСТРУМЕТNи на БОБ 3azeHESEte HOXA |
| Пробларноюлостта на pa60ta с седно з apeждане e малka | Пробларною Вразeme akymалаторна заегия He e bila nizlolzbaHa Или e bila nizlolzbaHa краTKOTpaioH TpeBaT e TBbprde Bucoka Akymалatорна заегия e nizxaobena | ЗаHESEte NaIbIno Akymalatopnata StafePRA, въкту сьщу указаняета за з配电данes Pexkete Na STILKINZaHESEte Akymalatopnata StafePRA |
| Hoxьт He seDbVIXI | Акymалаторна заегия e niztoшени Машина e поvere假и | ЗаHESEte Akymalatopnata StafePRA, въкту сьщу указаняета за з配电данes Pexkete Na STILKINZaHESEte Akymalatopnata StafePRA |
| Травокосачкata не рөже | Hoxьт e счунen Akymалatорна заегия He e 3azeDEha NaIbIno B pexeшяд дис ce e ucykana trpeba | ЗамETe HOXAЗHESEte Akymalatopnata StafePRA, въкту сьщу укazаняета за з配电данes OTeTrpahete TrpeBaTa |
| He e възможно з apeждане на вьогпага | КонтakTNITE КLEMи Ha akymalatopnata заегия са 3ambpcehi Akymalatopnata заегия e Поврделя, Иma пекьсвае на вьогпага в НЯ (В OTДELNHa KNeTka) | ПочиSTe KOntakTNITE КLEMи (нanр.чрз)!ЕКOLKOKPATNo Izhavdaneи постаяне на вьогпага), респ.ЗамETe Akymalatopnata заегия 3azeHESEte Akymalatopnata StafePRA |
| Светоююьт 12 He CBETBA се徳 вьлочьане на сizencela в контakты и постаянe на akymalatopnha вьогпага в rhe3doto 11 | Шеньselfьт на зардунот устroyстvo He e Вьлочeyн (правлино) KaXpAHBaшяпт kaбел илл зардунOTустroy CTPOICTBO ca Nobpevelni | В��айte Шеньselfа (дokрай) в Контakta П探测ере зхарнвasoTo habржени и постаянe на вьогпага STEDOTy stroy CTPOICTBO 3a ремont в оторизран срвиз 3aЕLEKТПОИСТРУМЕТNи на БОБ |
Dr. Egbert Schneider Senior Vice President Engineering
Dr. Eckerhard Strötgen Head of Product Certification
i.v. Mo Tu We Th Fr Sa Su
Robert Bosch GmbH, Power Tools Division
Attention! Read the following instructions carefully. Familiarize yourself with the working elements and the correct use of the cordless grass trimmer. Please keep the operating instructions safe for later use.
Explanation of symbols on the cordless grass trimmer.

General safety instructions.

Dr. Egbert Schneider Senior Vice President Engineering
Dr. Eckerhard Strötgen
Head of Product
Certification

Robert Bosch GmbH, Power Tools Division
Senior Vice President
Engineering
Dr. Eckerhard Strötgen
Head of Product
Certification
Robert Bosch GmbH, Power Tools Division
We reserve the right to make changes.

Safety instructions
The following instructions must be read carefully. Familiarize yourself with the operating elements and the proper use of the cordless grass trimmer. Keep the instructions in a safe place for later reference. Explanation of symbols on the cordless grass trimmer.

General safety warnings.

Senior Vice President
Engineering
Dr. Eckerhard Strötgen
Head of Product
Certification
Robert Bosch GmbH, Power Tools Division
Dr. Egbert Schneider Senior Vice President Engineering
Dr. Eckerhard Strötgen Head of Product Certification

Robert Bosch GmbH, Power Tools Division
Dr. Egbert Schneider Senior Vice President Engineering
Dr. Eckerhard Strötgen Head of Product Certification
Robert Bosch GmbH, Power Tools Division
We reserve the right to make changes

Safety instructions
Senior Vice President
Engineering
Dr. Eckerhard Strötgen
Head of Product
Certification
paa / 1000 i.v. nuogcu
Robert Bosch GmbH, Power Tools Division
Technical modifications reserved

BOSCH
Robert Bosch GmbH
Power Tools Division
70745 Leinfelden-Echterdingen
www.bosch-pt.com
F016 L70 457 (06.12) O/168