
VOXTEL C115 - Cordless phone AEG - Free user manual and instructions
Find the device manual for free VOXTEL C115 AEG in PDF.
| Product type | Cordless telephone |
| Brand | AEG |
| Model | VOXTEL C115 |
| Power supply | Telephone line (without power adapter) |
| Number of handsets included | 1 |
| Handset type | Corded (with cord) |
| Direct memories | 8 keys (M1 to M8) |
| Indirect memories | 10 memories (0 to 9) |
| Memory capacity | Up to 32 digits per number |
| Last number redial | Yes (key ◎) |
| Mute function | Yes (key ⊗) |
| Pause function | Yes (key P, 3.6 seconds) |
| Ring volume | Adjustable (high/low switch) |
| Ring indicator | Flashes on incoming call |
| Operation indicator | Lit during call |
| Wall mounting | Possible with included bracket |
| Warranty | 24 months |
| Cleaning | Damp cloth, no solvents |
| Environmental conditions | Avoid humidity, heat, direct sunlight |
| Box contents | Base unit, handset, coiled cord, telephone cable, manual, wall bracket |
Frequently Asked Questions - VOXTEL C115 AEG
User questions about VOXTEL C115 AEG
0 question about this device. Answer the ones you know or ask your own.
Ask a new question about this device
Download the instructions for your Cordless phone in PDF format for free! Find your manual VOXTEL C115 - AEG and take your electronic device back in hand. On this page are published all the documents necessary for the use of your device. VOXTEL C115 by AEG.
USER MANUAL VOXTEL C115 AEG
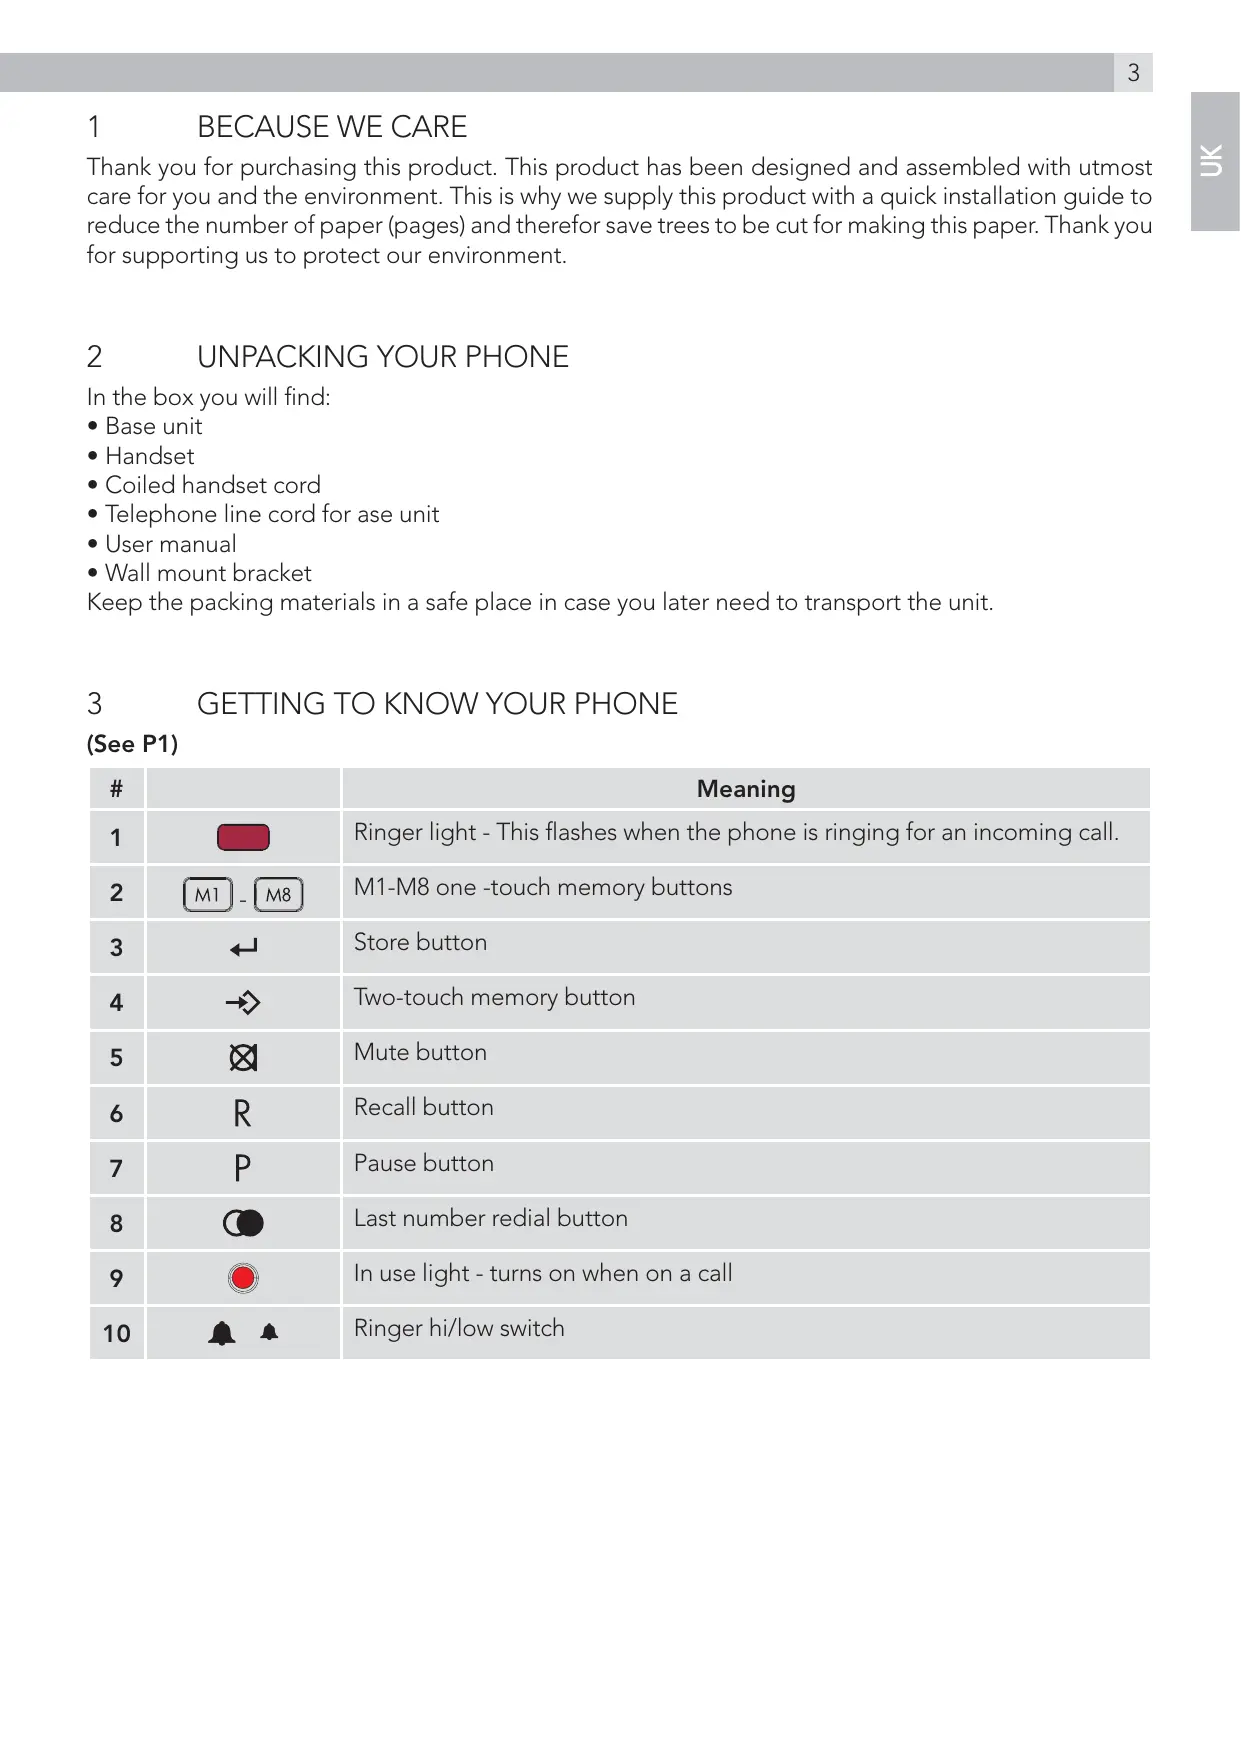
Thank you for purchasing this product. This product has been designed and assembled with utmost care for you and the environment. This is why we supply this product with a quick installation guide to reduce the number of paper (pages) and therefor save trees to be cut for making this paper. Thank you for supporting us to protect our environment.
2 UNPACKING YOUR PHONE
In the box you will find:
- Base unit
Handset - Coiled handset cord
- Telephone line cord for ase unit
- User manual
- Wall mount bracket
Keep the packing materials in a safe place in case you later need to transport the unit.
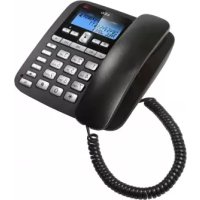
3 GETTING TO KNOW YOUR PHONE
(See P1)
| # | Meaning | |
| 1 | M1 - M8 | Ringer light - This flashes when the phone is ringing for an incoming call. |
| 2 | M1-M8 one -touch memory buttons | |
| 3 | ←↓ | Store button |
| 4 | → | Two-touch memory button |
| 5 | ⊗ | Mute button |
| 6 | R | Recall button |
| 7 | P | Pause button |
| 8 | ◎ | Last number radial button |
| 9 | ◎ | In use light - turns on when on a call |
| 10 | ▲ ▲ | Ringer hi/low switch |
4 INSTALLATION
1. Locating the base unit (See P2 and P3)
The base unit should be placed on a level surface, in a position where:
- the telephone line cable will reach your telephone line socket or extension socket.
- it is not close to a sink, bath or shower, or anywhere else where it might get wet.
-
it is not close to other electrical equipment - fridges, washing machines, microwave ovens, TVs, fluorescent lights, etc.
-
Plug the coiled handset cord into the handset. Plug the other end into the socket on the side of the base unit.
- Place the handset on the base unit.
- Plug the telephone line cord into the phone line socket at the back of the base unit and the other end into your telephone line socket.
- Lift the handset and check for dial tone in the earpiece.
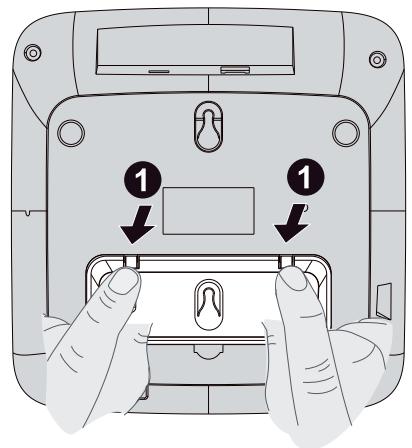
5 WALL MOUNT INSTALLATION
To place the Voxtel C100 on a wall, connect the wall mount bracket to the bottom of the phone in the slots near the front of the base as shown below.
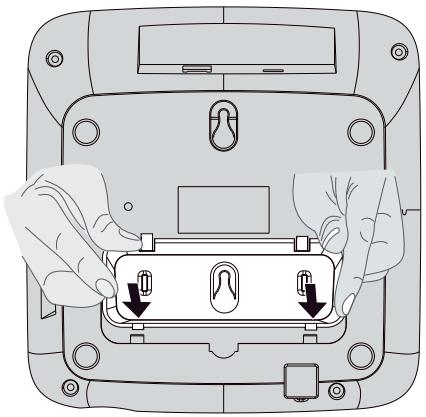
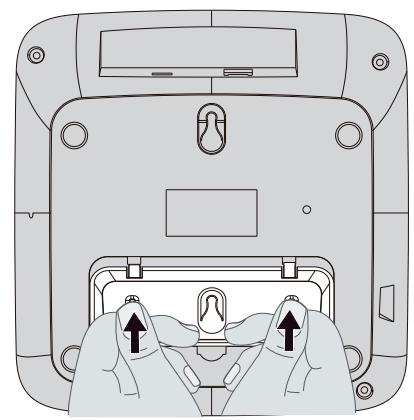
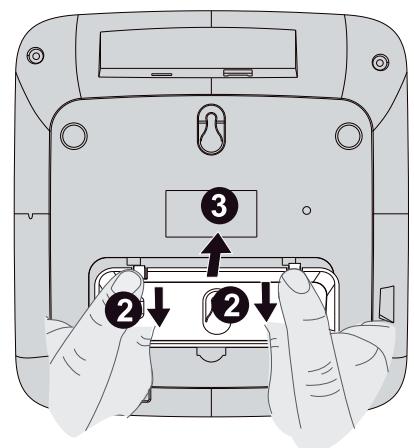
Insert the rigid clips of the bracket into the slots on the bottom of the phone (nearer the front of the base). Press down firmly until the flexible clips click into place in the slots nearer the centre of the base. To remove the bracket, (1) pinch the flexible clips, (2) back the bracket, and then (3) slide up and forward as shown below.
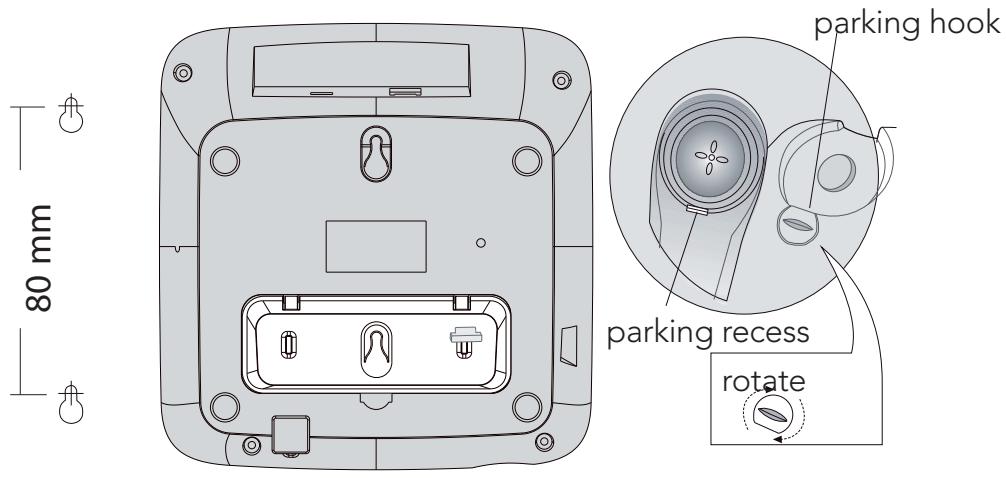
Mark two points on the wall that are 80 ~mm apart to lay the fixing centres as shown below.
BE CAREFUL to check that there are no pipes or electrical wires hidden in the wall.
Fix two screws (7mm head screws required, not supplied) at the marked locations, leaving approximately 7mm between the wall and the screw head.
Hang the telephone on the screws using the wall mount slots. You may need adjust the screws so that the telephone is securely fixed and does not wobble.
Place the handset on the cradle with the parking hook on the cradle arranged to fit in the parking recess under the earpiece on the handset.
The ringer high/low switch located at the back of the base unit allows you to adjust the volume of the ringer.
| High volume | |
| Low volume |
6.2 Making a call
- Lift the handset, listen for a dial tone.
- Dial the telephone number you wish to call.
- To end the call, return the handset to the base unit.
6.3 To answer a call
- Lift the handset to answer a call.
6.4 To end a call
- Replace the handset on the base unit cradle.
6.5 Last number redial
- Lift the handset and listen for dial tone.
- Press the radial button
The phone automatically dials the last number you called (maximum of 32 digits).
6.6 Mute Function
- During a call press the mute button.
When the mouthpiece is muted, the person at the other end of the call cannot hear you out you can hear his side.
- To get back to the call, press the mute button again.
6.7 Use on PBX
If you are using your Voxtel C100 phone on a PBX, and the PBX user guide tells you to press recall or flash;
- Press the recall button R on your phone.
6.8 Inserting a pause in the dialling sequence
For some switchboard systems, an access number must be dialled (usually an 0 or 9) to get another dial tone and an outside line.
- Press the pause button P immediately after the access number, a pause of about 3.6 seconds will be entered, and the desired number can be dialled immediately.
Note:
If you use the P , the pause will be included automatically.
- Press the pause button P to insert a pause when storing numbers in memories, if a pause is required.
6.9 Storing a number in M1-M8 one-touch memories
- Lift up the handset, press the store button ←J.
Key in the telephone number you wish to store.
Up to a maximum 32 digits.
- Press one of the M1-M8 buttons 1 - 8 to store the number in the selected memory.
If you try to store more than 32 digits, only the first 32 digits will be saved.
6.10 Storing a number in (0-9) two-touch memories
- Lift up the handset, press the store button ←J.
Key in the telephone number you wish to store.
Up to a maximum 32 digits.
- Press store button and then one of the 0-9 buttons to store the number in the selected memory location.
- Replace the handset on the base unit cradle.
6.11 Dial out a one-touch memory number
- Lift up the handset, press the M1-M8 button 1 - 8 for the selected number.
The number dials automatically.
6.12 Dial out a (0-9) two-touch memory number
To dial a number stored in a two-touch memory (0-9)
- Lift up the handset.
- Press the memory button.
Key in the memory location number (0-9) for the selected number.
The number dials automatically.
Warning:
All one-touch, two-touch and radial memories will be erased if the phone is disconnected from the telephone line for longer than about 2 hours, and they will need to be stored again, if required.
7 GUARANTEE AND SERVICE
The unit is guaranteed for 24 months from the date of purchase shown on your sales receipt. This guarantee does not cover any faults or defects caused by accidents, misuse, fair wear and tear, neglect, faults on the telephone line, lightning, tampering with the equipment, or any attempt at adjustment or repair other than through approved agents.
Please keep your sales (till) receipt this is your proof for guarantee.
7.1 While the unit is under Guarantee
- Disconnect the base unit from the telephone line and the mains electricity supply.
- Pack up all parts of your unit, using the original package.
- Return the unit to the shop where you bought it, making sure you take your sales receipt.
- Remember to include the mains adapter. (if applicable)
7.2 After the Guarantee has expired
If the unit is no longer under Guarantee, contact us via www.aegtelephones.eu
8 CE DECLARATION
This product is in compliance with the essential requirements and other relevant provisions of the R&TTE directive 1999/5/EC.
The Declaration of conformity can be found on: www.aegtelephones.eu
9 DISPOSAL OF THE DEVICE (ENVIRONMENT)

At the end of the product lifecycle, you should not throw this product into the normal household garbage but bring the product to a collection point for the recycling of electrical and electronic equipments. The symbol on the product, user guide and/or box indicate this. Some of the product materials can be re-used if you bring them to a recycling point. By reusing some parts or raw materials from used products you make an important contribution to the protection of the environment. Please contact your local authorities in case you need more information on the collection points in your area.
Batteries must be removed before disposing of the device. Dispose of the batteries in an environmental manner according to your country regulations.
10 CLEANING AND CARE
Do not clean any part of your phone system with benzene, thinners or other solvent chemicals as this may cause permanent damage which is not covered by the Guarantee.
When necessary, clean it with a damp cloth.
Keep your phone system away from hot, humid conditions or strong sunlight, and don't let it get wet.
11 INTENDED USE
This telephone is intended to be connected to a public analogue telephone network or to an analogue extension of an approved compatible PBX system.
7 GWARANCJA I SERWIS
© 2012 Binatone Electronics International Limited
All rights reserved
Subject to availability. Rights of modification reserved.
AEG is a registered trademark used under license from AB Electrolux (publ)
www.aegtelephones.eu


- UNPACKING YOUR PHONE
- GETTING TO KNOW YOUR PHONE
- INSTALLATION
- Locating the base unit (See P2 and P3)
- WALL MOUNT INSTALLATION
- Making a call
- To answer a call
- To end a call
- Last number redial
- Mute Function
- Use on PBX
- Inserting a pause in the dialling sequence
- Note:
- Storing a number in M1-M8 one-touch memories
- Storing a number in (0-9) two-touch memories
- Dial out a one-touch memory number
- Dial out a (0-9) two-touch memory number
- Warning:
- GUARANTEE AND SERVICE
- While the unit is under Guarantee
- After the Guarantee has expired
- CE DECLARATION
- DISPOSAL OF THE DEVICE (ENVIRONMENT)
- CLEANING AND CARE
- INTENDED USE
- GWARANCJA I SERWIS
Brand : AEG
Model : VOXTEL C115
Category : Cordless phone