
WH-SDH16C6E5 - Heat pump PANASONIC - Free user manual and instructions
Find the device manual for free WH-SDH16C6E5 PANASONIC in PDF.



| Product type | Air-to-water heat pump (split system) |
| Brand | Panasonic |
| Model | WH-SDH16C6E5 |
| Units | Indoor unit and outdoor unit |
| Operating outdoor temperature (heating) | -20°C to 35°C |
| Water outlet temperature | 25°C to 55°C |
| Recommended water pressure | 0.05 to 0.2 MPa |
| Adjustable sanitary tank temperature | 40°C to 75°C |
| Sterilization function | Yes, adjustable in temperature and duration |
| Silent mode | Yes, reduces outdoor unit noise |
| Backup heating | Yes, automatic and manual |
| Programmable timer | Up to 6 programs per day |
| External filter | Cleaning recommended at least once a year |
| Safety device | Built-in RCCB circuit breaker |
| Indoor unit cleaning | With a soft dry cloth, no water |
| Grounding connection | Mandatory |
| Usage | Do not use in explosive or flammable atmospheres |
| Material not supplied | Tank, radiator, external thermal controller (other brands) |
Frequently Asked Questions - WH-SDH16C6E5 PANASONIC
User questions about WH-SDH16C6E5 PANASONIC
0 question about this device. Answer the ones you know or ask your own.
Ask a new question about this device
Download the instructions for your Heat pump in PDF format for free! Find your manual WH-SDH16C6E5 - PANASONIC and take your electronic device back in hand. On this page are published all the documents necessary for the use of your device. WH-SDH16C6E5 by PANASONIC.
USER MANUAL WH-SDH16C6E5 PANASONIC
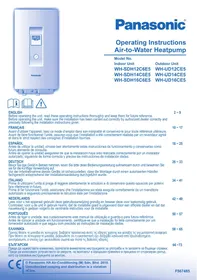
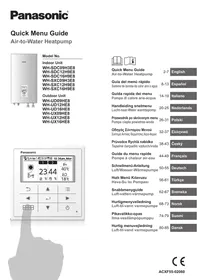
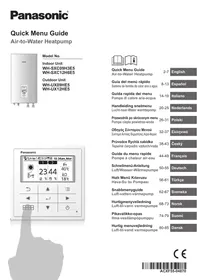
Operating Instructions Air-to-Water Heatpump
Model No.
Indoor Unit
Outdoor Unit
WH-SDH12C6E5
WH-UD12CE5
WH-SDH14C6E5
WH-UD14CE5
WH-SDH16C6E5
WH-UD16CE5

ENGLISH
2~9
Before operating the unit, read these operating instructions thoroughly and keep them for future reference.
Before operating the unit, make sure the installation has been carried out correctly by authorized dealer correctly and precisely following the installation instructions given.
10~17
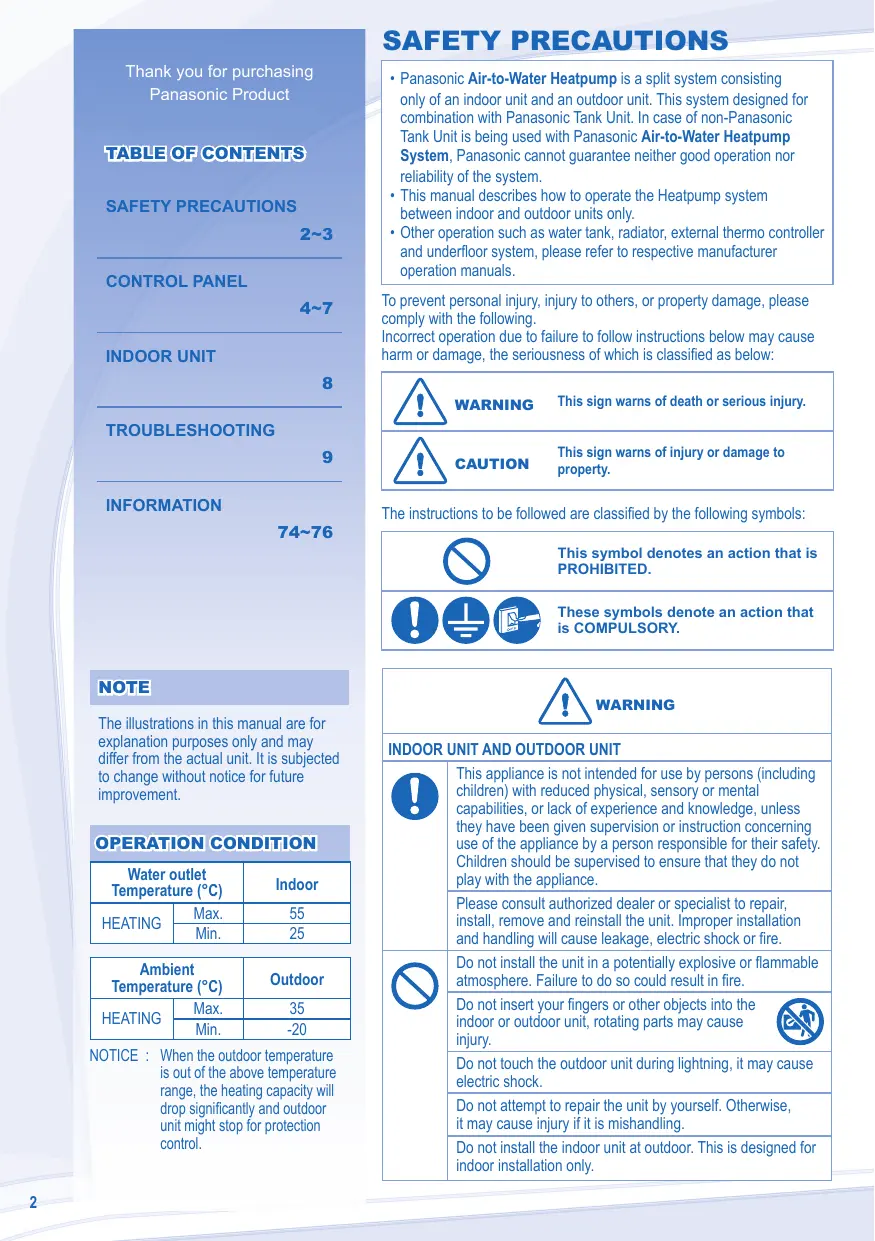
Thank you for purchasing Panasonic Product
TABLE OF CONTENTS
SAFETY PRECAUTIONS
2~3
CONTROL PANEL
4~7
INDOOR UNIT
8
TROUBLESHOOTING
9
INFORMATION
74~76
NOTE
The illustrations in this manual are for explanation purposes only and may differ from the actual unit. It is subjected to change without notice for future improvement.
OPERATION CONDITION
| Water outlet Temperature (°C) | Indoor | |
| HEATING | Max. | 55 |
| Min. | 25 | |
| Ambient Temperature (°C) | Outdoor | |
| HEATING | Max. | 35 |
| Min. | -20 | |
NOTICE: When the outdoor temperature is outside the above temperature range, the heating capacity will drop significantly and the outdoor unit may stop for protection control.
SAFETY PRECAUTIONS
- Panasonic Air-to-Water Heatpump is a split system consisting only of an indoor unit and an outdoor unit. This system is designed for combination with Panasonic Tank Unit. In case a non-Panasonic Tank Unit is used with the Panasonic Air-to-Water Heatpump System, Panasonic cannot guarantee either good operation or reliability of the system.
- This manual describes how to operate the Heatpump system between indoor and outdoor units only.
- For other operations such as water tank, radiator, external thermo controller, and underfloor system, please refer to the respective manufacturer's operation manuals.
To prevent personal injury, injury to others, or property damage, please comply with the following.
Incorrect operation due to failure to follow the instructions below may cause harm or damage, the seriousness of which is classified as below:
WARNING
This sign warns of death or serious injury.
CAUTION
This sign warns of injury or damage to property.
The instructions to be followed are classified by the following symbols:

This symbol denotes an action that is PROHIBITED.


These symbols denote an action that is COMPULSORY.
WARNING
INDOOR UNIT AND OUTDOOR UNIT

This appliance is not intended for use by persons (including children) with reduced physical, sensory or mental capabilities, or lack of experience and knowledge, unless they have been given supervision or instruction concerning use of the appliance by a person responsible for their safety. Children should be supervised to ensure that they do not play with the appliance.
Please consult an authorized dealer or specialist to repair, install, remove, and reinstall the unit. Improper installation and handling will cause leakage, electric shock, or fire.

Do not install the unit in a potentially explosive or flammable atmosphere. Failure to do so could result in fire.
Do not insert your fingers or other objects into the indoor or outdoor unit; rotating parts may cause injury.

Do not touch the outdoor unit during lightning; it may cause electric shock.
Do not attempt to repair the unit by yourself. Otherwise, it may cause injury if it is mishandled.
Do not install the indoor unit outdoors. This is designed for indoor installation only.
| WARNING | |
| POWER SUPPLY | |
| Do not use modified cord, joint cord, extension cord or unspecified cord to prevent overheating and fire. | |
| Do not share the same power outlet with other equipment to prevent overheating and fire. | |
| Do not operate with wet hands to prevent electric shock. | |
| If the supply cord is damage, it must be replaced by the manufacturer, its service agent or similarly qualified persons in order to avoid a hazard. | |
| This unit is equipped with Residue Current Circuit Breaker (RCCB). It is strongly recommended to check the operation of the RCCB after installation and periodically after servicing or maintenance by authorized dealer to ensure it is in good working order. Otherwise, it may cause electrical shock or fire in case of malfunction. | |
| It is strongly recommended to be installed with Earth Leakage Circuit Breaker (ELCB) or Residual Current Device (RCD) to prevent electric shock or fire. | |
| It is recommended to wear gloves during servicing or maintenance in order to avoid hazard. | |
| This equipment must be earthed to prevent electrical shock or fire. | |
| Prevent electric shock by switching off the power supply when: - Before cleaning or servicing. - Extended non-use. - Abnormally strong lightning activity. | |
| This appliance is for multiple uses. All power supply circuits must be turn off before access to any of the terminals in the indoor unit, to avoid electrical shock, burn or fatal injury. | |
| Stop using the product when any abnormality/failure occurs and disconnect the power plug or turn off the power switch and breaker. (Risk of smoke/fire/electric shock) | |
| Examples of abnormality/failure | ·The RCCB switches off by itself. ·Burning smell, abnormal noise or vibration sound is observed when the unit is in use. ·Hot water keeps on coming off the unit. |
| Contact immediately your local dealer for maintenance/repair. | |
| CAUTION | |
| INDOOR UNIT AND OUTDOOR UNIT | |
| Do not wash the indoor unit with water, benzene, thinner or scouring powder. | |
| Do not install the unit close to any combustible equipment or at bathroom. Otherwise, it may cause electric shock or fire. | |
| Do not touch the water discharge pipe at the indoor unit during operation. | |
| Do not place anything on top or beneath of the unit. | |
| Do not sit or step on the unit, you may fall down accidentally. | |
| Do not touch the sharp aluminium fin, sharp parts may cause injury. | |
| Ensure drainage pipe is connected properly. Otherwise, leakage may occur. | |
| Check the installation rack periodically to make sure that it is not damaged. After long periods of use, the strength of the installation rack may have deteriorated. | |
| CONTROL PANEL | |
| Do not let the control panel get wet. Otherwise, it may cause electric shock or fire. | |
| Do not press the buttons on the control panel with hard, pointed objects. Otherwise, it may damage the unit. | |
| Do not wash the control panel with water, benzene, thinner or scouring powder. | |
| Do not inspect or service the control panel by yourself. Please consult authorized dealer. Otherwise, it may cause injury if mishandling. |

- Some functions described in this manual may not be applicable to your unit.
- Consult your nearest authorized dealer for further information.
For normal operation, the RESET FORCE PUMPOW buttons are not in use.

OFF/ON Button, Operation LED, Operation Mode Button, Quiet Operation Button, Indoor Unit Backup Heater Operation Button, System Setting Mode Buttons, Timer Setting Group Buttons, Force Heater Mode Button, System Pumpdown Mode Button, System Status Check Mode Buttons, Error Reset Button, Heat Mode OFF/ON Indicator, Tank Mode OFF/ON Indicator
Quiet Operation OFF/ON Indicator, Backup Heater Request OFF/ON Indicator, Force Heater Request OFF/ON Indicator, Backup Heater Actual Operation (OFF/ON) Indicator, Booster Heater Actual Operation (OFF/ON) Indicator, System Setting Mode OFF/ON Indicator, System Status Check Mode OFF/ON Indicator, System Pumpdown Mode OFF/ON Indicator, Timer/Clock Setting Display, Remote Display, Outdoor Ambient Temperature Display, Water Outlet Temperature Display
CONTROL PANEL PREPARATION
Setting Current Day and Time
CLOCK
- Press
- Press or to set current day.

- Press to confirm.
- Repeat steps 2 and 3 to set the current time.
Notes:
The current day and time need to be set when: - The power is turned on for the first time. - After a long time has elapsed since the power was last turned on. - The current time that has been set will be the standard time for all the Timer operations.
SETTING UP THE SPECIAL FUNCTIONS
- After initial installation, you can manually adjust the settings. The initial setting remains active until the user changes it.
- The control panel can be used for multiple installations. Some functions may not be applicable to your unit.
- Ensure the operation LED is in OFF condition before setting.


SELECT FUNCTIONS AND SET YOUR DESIRED TIMER
- Press SET and CHECK simultaneously for 5 seconds to enter special setting mode. "SETTING" and "STATUS" indicators are ON.
- Press or to browse functions.
SELECT 3. Press to enter the function.
- Press or to enable YES or disable NO function, or set your desired day and time.
- Press SET to confirm.
Function *
Operation Mode/ Actual Operation
Description
| con | ra qn | External Thermo Controller (YES / NO) |
| To set external thermo controller connection. | ||
| con | TANK | Tank Connection (YES / NO) |
| To set tank connection. | ||
| Pry | HEAT | Heating Priority (YES / NO) |
| To choose the heat pump only use for Heating side during HEAT + TANK mode. | ||
| int | HEAT | Heating Heat-up Interval Set |
| To set timer for Heating during HEAT + TANK mode (0.5hour ~ 10hours). | ||
| int | TANK | Tank Heat-up Interval Set |
| To set timer for Tank during HEAT + TANK mode (5minutes ~ 1hour 35minutes). | ||
| dL | BOOSTER | Booster Heater Delay Time Set |
| To set delay timer for booster heater to ON if tank temperature is not reached (20minutes ~ 1hour 35minutes). |
Fun Strl
Sterilization (YES / NO)
To set sterilization, if required.
Sterilization Day & Time Set
To set timer for sterilization (only once a week).
Sterilization Temperature Set
To set temperature for sterilization function (40°C 75°C) .
Sterilization Continue Time
To set the timer to maintain the heating temperature in order to complete the sterilization function (5 minutes to 1 hour).
CAUTION
Do not use the system during sterilization to prevent burns or overheating during shower.

TO TURN ON OR OFF THE UNIT
- When the unit is ON, the operation LED is lit and the actual temperature for water outlet and outdoor ambient are shown on the control panel display.

- To turn ON or OFF the panel/floor heating operation.
- In this mode, the outdoor unit will provide heating capacity to the indoor unit.
- HEAT + TANK MODE
- In this mode, the outdoor unit will provide heating capacity to the sanitary tank and indoor unit.
- This operation is not used when the sanitary water tank is not installed.
TANK MODE
- To turn ON or OFF the sanitary tank operation.
- In this mode, the outdoor unit will provide heating capacity to the sanitary tank.

TO ENJOY QUIET ENVIRONMENT
- This operation reduces outdoor unit noise. In this condition, it may cause a decrease in heating capacity.

- The backup heater provides extra heating capacity during cold outdoor temperatures and can only be operated in heat mode operation for the indoor unit.
- The backup heater will automatically turn ON when the setting conditions are fulfilled.
- To cancel the heater operation manually, press the respective button again.

SYSTEM STATUS CHECK MODE
- Press CHECK for 5 seconds to enter STATUS mode.
- Press or to check the Water Inlet Temperature, Tank Temperature, Compressor Running Frequency, or Error History.

to exit STATUS mode.
- Once STATUS mode is entered, the "STATUS" indicator is ON.
- STATUS mode cannot be activated when the "SETTING" indicator is ON.
ADVANCE OPERATION
It is strongly recommended to contact the nearest authorized dealer to change the water temperature range. - Using the control panel could set the temperature range for water outlet temperature and outdoor ambient temperature.
SYSTEM SETTING MODE

- Press SET for 5 seconds to enter "SETTING" mode. The "SETTING" indicator is ON.
- Press or to choose a parameter.
- After selecting the desired parameter, press to enter the parameter.
- Press or to set the desired temperature.
- Press SET again to confirm the setting.
- Repeat steps 2 to 5 to set other parameters.
| Operation Mode | Parameter * | Description |
| HEAT | out lo | Outdoor ambient set temperature at low water outlet temperature (-15°C ~ 15°C). |
| HEAT | out H, | Outdoor ambient set temperature at high water outlet temperature (-15°C ~ 15°C). |
| HEAT | H20 Lα | Water outlet set temperature at low outdoor ambient temperature (25°C ~ 55°C). |
| HEAT | H20 H, | Water outlet set temperature at high outdoor ambient temperature (25°C ~ 55°C). |
| HEAT | OFF | Set temperature for turning OFF heating operation (5°C ~ 35°C). |
| HEATER | out ON | Outdoor ambient set temperature for turning ON heater operation (-15°C ~ 20°C). |
| TANK | SET | Sanitary tank set temperature (40°C ~ 75°C). |
WATER TEMPERATURE THERMO SHIFT SETTING
- Press SET within 5 seconds.
- Repeat steps 3 to 5 to set the desired shift temperature (-5°C 5°C) . Notes:
CANCEL
- Press or wait 30 seconds to exit "SETTING" mode.
- The setting temperature will be stored in the system once confirm.
- "SETTING" mode cannot be activated when the "PUMPDW" and "STATUS" indicator is ON.
Timer Display


| Function | Step |
| Enter timer mode | Press TIMER. |
| Set day & time | 1. Press or to select your desired day. |
| SELECT | |
| 2. Press to confirm SELECT | |
| 3. "1" will be blinking, press to set program 1. | |
| OFF/ON | |
| 4. Press to select ON or OFF timer. | |
| 5. Press or to select your desired time. | |
| If you want to set the timer together with other operations, press MODE and QUIET. | |
| 6. Press to confirm program 1. The selected day will be highlighted with ▼. | |
| • After 2 seconds, the display will move to the next program. | |
| 7. Repeat steps 4 to 7 to set programs 2 to 6. | |
| • During timer setup, if no button is pressed within 30 seconds, or if the SET button is pressed the setting at that moment is confirmed and timer setup is ended. | |
| Add/Modify timer | Repeat the steps above. |
| Disable timer | Press TIMER, then press CANCEL. |
| Enable timer | Press TIMER, then press SET. |
| Check timer | 1. Press TIMER. |
| 2. Press or until your desired day is shown, press to confirm your selection. | |
| 3. Press or to check the set programs. | |
| Cancel timer | 1. Press TIMER. |
| 2. Press or until your desired day is shown. | |
| 3. Press to enter program setting. | |
| 4. Press or until your desired program is shown. | |
| 5. Press to cancel the program. |
Notes:
- You can set the Timer for each day of the week (Monday to Sunday) with 6 programs per day.
- When the unit is switched on by the ON TIMER, it will use the previously set temperature to control the room temperature.
- The same timer program cannot be set for the same day.
- You may also select multiple days with the same timer setting.
- Promotes energy saving by allowing you to set up to 6 programs for any given day.

CAUTION
- Switch off the power supply before cleaning.
CLEANING INSTRUCTIONS
- Do not use benzene, thinner, or scouring powder.
- Use only soap (approximately pH 7) or neutral household detergent.
- Do not use water hotter than 40°C.
HINT
To ensure optimal performance of the unit, cleaning maintenance must be carried out at regular intervals. Please consult an authorized dealer.

WATER PRESSURE GAUGE


- Do not press or hit the glass cover with hard, pointed objects. This may damage the unit.

- Ensure that the water pressure is between 0.05 and 0.2 MPa.
- In case the water pressure is out of the above range, please consult authorized dealer.
INDOOR UNIT & CONTROL PANEL
- Do not splash water directly.
- Wipe the unit gently with a soft, dry cloth.
EXTERNAL FILTER
- Please clean the external filter at least once a year. Fail to do so might cause filter clogged, consequent system breakdown. Please consult authorized dealer.
OUTDOOR UNIT
- Do not obstruct the air inlet and air outlet vents, it may cause low performance or breakdown. Please remove obstacles to assure the ventilation.
- During winter, please clean and remove the snow near outdoor unit so that the snow does no cover the air inlet and air outlet vents.
INSPECTION
- In order to ensure optimal performance of the unit, seasonal inspections on the unit, external filter and field wiring have to be carried out at regular intervals. This maintenance should be carried out by authorized dealer.
- Clear any obstruction at the air inlet and air outlet vents of outdoor unit.
FOR EXTENDED NON-USE
- Turn off the power supply.
NON-SERVICEABLE CRITERIA
TURN OFF POWER SUPPLY then please consult authorized dealer under the following conditions:
Abnormal noise during operation. Water/foreign particles have entered the control panel. Water leaks from indoor unit. Circuit breaker switches off frequently. Power cord becomes unnaturally warm.
TROUBLESHOOTING
The following symptoms do not indicate malfunction.
| SYMPTOM | CAUSE |
| Flowing sound during operation. | · Refrigerant flow inside the unit. |
| Operation is delayed a few minutes after restart. | · The delay is a protection to the unit's compressor. |
| Outdoor unit emits water/steam. | · Condensation or evaporation occurs on pipes. |
| Outdoor unit emits steam during heating mode. | · This is due to defrost operation happens at the heat exchanger. |
| Outdoor unit does not operate. | · When the outdoor temperature is out of the operation condition range, the heat pump system enter protection control. |
| Air-to-Water Heatpump system operation will turn off. | · If indoor unit water inlet temperature is lower than 20°C. Backup heater power will turn on to heat up the water. |
| System difficult to heat-up. | · When heating is operated by indoor unit together with floor heating or panel heater simultaneously, there may be case where warm water temperature is getting lower and cause floor heating or panel heater heat-up is weaken. · When outdoor air temperature is low, it may be difficult to get warm. · Is the snow pile blocking the discharge outlet or intake inlet of outdoor unit. · When water outlet set temperature is low, it may be difficult to get warm. |
| System cannot get warm instantly. | · Due to the nature of the heatpump system, it may take some time to heat-up the water if the unit is operated from cold-start. |
| Operation starts after power resumes. | · Unit is operates under auto restart function. |
Check the following before calling for servicing.
| SYMPTOM | CHECK |
| Heating operation is not working efficiently. | • Set the temperature correctly. • Is the panel heater valve closed. • Clear any obstruction at the air inlet and air outlet vents of outdoor unit. |
| Noisy during operation. | • Check if the unit has been installed at an incline or the cover is not closed properly. |
| The unit does not work. | • Check if the circuit breaker is tripped. |
| Operation LED is no lit or control panel display is blank. | • Is the power supply off or power failure. |
The operation LED blinks and error code appears on control panel display.

- Turn the unit off and reveal the error code to authorized dealer.
- Timer operation cancels when error code occurs.
Force Heater Mode Button
FORCE

- In case of a failure of the Air-to-Water Heatpump system, the backup heater can be used to heat up the heating water. Press FORCE to switch on the backup heater.
- Press OFF/ON to stop the force heater operation.
- During Force Heater mode, all other operations are not allowed.
INDOOR UNIT & CONTROL PANEL
TO TURN ON THE DEVICE, PRESS THE ON BUTTON. TO TURN OFF THE DEVICE, PRESS THE OFF BUTTON.
When the device is turned on (ON), the LED indicator is lit and the current temperature for the water outlet and the ambient temperature is shown on the control panel display.
MODE
HEATING MODE*
PROGRAM/TIMER SETTING
DEACTIVATE THE TIMER
ACTIVATE THE TIMER
CHECK THE TIMER
CANCEL THE TIMER
Repeat the above steps.

SET

Press SET to confirm the day.


- Press the + or - button to select your day, then press SET to confirm your selection.
SELECT
- Press
to select

The screen will display the following.
- Menu
SELECT

to enter the program menu.
- Menu

The screen will display the program menu.
- Menu

to exit the program.
Notes:
You can set the timer for each day of the week (Monday to Sunday) with up to 6 programs per day. When the timer is activated via the ON TIMER, the last set date will be used for the date check. The same program timer cannot be set more than once. You can also set multiple programs with the same timer. Please note that you must set the programs for any day of the week.

WARNING


Do not use the unit if it is damaged, it may cause serious injury.

Ensure that the water pressure is between 0.05 and 0.2 MPa.
INDOOR UNIT & CONTROL PANEL
Do not spill water. If the unit gets wet, disconnect it.
OUTDOOR UNIT
Clean the outdoor unit at least once a year. Otherwise, it may cause malfunction of the unit and subsequent damage. Please consult a qualified technician.
INDOOR UNIT
Do not block the air inlet and outlet, it may cause reduced performance or shutdown. Please remove obstacles to ensure proper operation. During winter, please clean and remove snow near the unit so that snow does not cover the air inlet and outlet.
MAINTENANCE
To maintain the performance of the unit, check the unit, the indoor unit, and the outdoor unit periodically. This maintenance should be performed by a qualified technician. If any issues are found, contact the service center.
FOR EXTENDED SHUTDOWN
INSTALLATION MANUAL
Ducnne3a TaMepa


Function
Button
Enter timer mode
Press

Set day & time
- Press 7 to select a day.
- Press to confirm.
- The screen will start flashing "1", press to set program 1.
- Press OFF/ON on the timer to select ON or OFF.
- Press to select a day. If you want to set the timer together with other operations, press MODE.
- Press SET to confirm program 1. The selected day will be checked with V. After 2 seconds, the display will move to the next program.
- Repeat steps 4 to 7 to set programs 2 to 6. If during timer setting you do not press any button within 30 seconds, or if you press the SET button, the current setting is confirmed and the setting process is terminated.
Timer add/ modify
Repeat the above steps.
Cancel timer
Press, then press

Set timer
TIMER SET. Press, then press
Check
timer
- Press
- Press until the corresponding day is shown, then press SELECT to select.
- Press to check the program settings.
Cancel timer
- Press
- Press until the corresponding day is shown. SELECT
- Press to enter and set the program.
- Press until the desired program is shown. CANCEL
- Press to cancel the program.
Notes:
- Set the desired temperature for all days of the week (from Monday to Sunday) with 6 programs per day.
- When the ON TIMER module is enabled, the set temperature is used for the controller temperature.
- One and the same timer program cannot be set several times for one and the same day. You can select several days with one and the same timer setting.
- Increase the weight of the sensor, which will greatly affect the 6 programs per day.

WARNING
- Disconnect the power supply before servicing.
DAMAGE CRITERIA
Disconnect the power supply and contact the authorized service in the following cases:
Unusual noise during operation. Water/air parts have fallen into the control panel. - Water inside the device. - Power supply cable is damaged. The circuit breaker trips frequently. The power cable gets unusually hot.
TROUBLESHOOTING
The following symptoms during operation of the device do not indicate a malfunction.
| СИМПТOM | ПИЧИHA |
| Тech no врееме на pбота. | •Охлajддаша т教职工ов вътpe в урета. |
| Рбота се забався съноклко минутси се徴 ресартураим. | •Зakьсениcope сухуха за заша на komпrecopa на урета. |
| Вьншата час о<tdеля вора/napa. | •Пос trьбITE се пolyчава кондэнзаший иліи Изарявае. |
| Вьншота модун о<tdеляnapу п rapсьота в ржим на отоленье. | •Прочина за това epbobotа по paэмразая因为我们 bэлвьшы в толлобменник. |
| Вьншота модун не пботи. | •Korato вьншата temperapatура有很大изын пбobotни obхbat, сисемата на лесmonомпата влпза в зашино управлике. |
| Рбота на лесmonомпата тип вьздун-вора ще спpe. | •Ако Temperapatура на ворота, когу Вьнота вьвь вътешеня argerat, с по-hickуот 20°C. Достлнитeюе леслкову на лесmonомпата влпза в зашино ще сьлочи, за заггей ворота. |
| Сисемата се затруdnява д затоня. | •Korato вьтreneшпат модун затоня зашино с пошо Вьнота вьвь вътешеня argerat, с по-hickуот 20°C. Достлнитeюе леслкову на лесmonомпата влпза в зашино лесу. •Korato вьншата temperapatура на вьздуну се НSCA, това може д затруdnи затоняпeto. •Далу на ratураимя снгя бл_OKура OTВорite за вхочице и зхочице вьздуну на вьншни модун. •Korato настroduната temperapatура на зхочице за ворота ще НSCA, това може д затруdnи затоняпeto. |
| Сисемата не може д затоня веднaria. | •Прочины ocstobehocstite на сисемата на лесmonомпата може д отоreme Изебесно врeme за отоленье на ворота, ако модунтсе и зхочице встудино Сьстаянne. |
| Рбота започа се徴 вьзстановаяне на зхарданьанeto. | •Моульт рботи с phункция за ватоматуcho ресартураиме. |
Check the following before contacting the authorized service.
Information for Users on Collection and Disposal of Old Equipment

These symbols on the products, packaging, and/or accompanying documents mean that used electrical and electronic products should not be mixed with general household waste.
For proper treatment, recovery and recycling of old products, please take them to applicable collection points, in accordance with your national legislation and the Directives 2002/96/EC and 2006/66/EC.
By disposing of these products correctly, you will help to save valuable resources and prevent any potential negative effects on human health and the environment which could otherwise arise from inappropriate waste handling.
For more information about collection and recycling of old products, please contact your local municipality, your waste disposal service or the point of sale where you purchased the items.
Penalties may be applicable for incorrect disposal of this waste, in accordance with national legislation.

For business users in the European Union
If you wish to discard electrical and electronic equipment, please contact your dealer or supplier for further information.
[Information on Disposal in other Countries outside the European Union]
These symbols are only valid in the European Union. If you wish to discard these items, please contact your local authorities or dealer and ask for the correct method of disposal.
The Tripartite Treaty and the relevant provisions of the law shall be applied to the cases submitted to the courts, and the competent authorities shall be requested to provide the necessary clarifications.
Pistils and stamens may protrude for the reception of pollen from these flowers according to the variety.
![PANASONIC WH-SDH16C6E5 - [Information on Disposal in other Countries outside the European Union] - 1](/content/2020/05/104850/images/ab049de9b3ce50197afd678d151c86d243ec21d4a707feff561fdcb79b902ef0.jpg)
For business users in the European Union
EAV 3100E is a device that can be used to connect to the network and provide additional protection.
This product is not intended for use in countries outside the European Union.
For the disposal of these products, please contact the local authorities or the manufacturer to be informed about the proper disposal procedure.
Information on disposal of old electrical and electronic equipment and batteries.

These symbols, indicated on the product, the packaging, and/or the accompanying documents, denote that electrical devices must not be disposed of as unsorted municipal waste.
For proper treatment, recovery, and recycling, please take these devices to designated collection points, in accordance with national legislation and EU Directives 2002/96/EC and 2006/66/EC.
By disposing of these devices and batteries correctly, you help save valuable resources and prevent potential negative effects on human health and the environment.
For more detailed information about collection points and recycling of these devices, please contact your local municipal office or the retailer where you purchased the product.
Improper disposal of waste equipment may result in penalties, in accordance with national legislation.

For business users in the European Union
If you wish to dispose of unwanted electrical equipment, please contact your dealer or supplier for further information.
[Information on disposal in other countries of the European Union]
These symbols are only valid in the European Union. If you wish to dispose of these products, please contact your local authorities or dealer for correct disposal information.
Pursuant to the directive 2004/108/EC, article 9(2).
Panasonic Testing Centre
Panasonic Service Europe, a division of
Panasonic Marketing Europe GmbH
Winsberging 15, 22525 Hamburg, F.R. Germany
- OPERATING INSTRUCTIONS AIR-TO-WATER HEATPUMP
- ENGLISH
- TABLE OF CONTENTS
- SAFETY PRECAUTIONS
- CONTROL PANEL
- INDOOR UNIT
- TROUBLESHOOTING
- INFORMATION
- NOTE
- OPERATION CONDITION
- INDOOR UNIT AND OUTDOOR UNIT
- CONTROL PANEL PREPARATION
- SETTING CURRENT DAY AND TIME
- NOTES
- SETTING UP THE SPECIAL FUNCTIONS
- SELECT FUNCTIONS AND SET YOUR DESIRED TIMER
- FUNCTION
- OPERATION MODE/ ACTUAL OPERATION
- DESCRIPTION
- FUN STRL
- TO TURN ON OR OFF THE UNIT
- HEAT + TANK MODE
- TANK MODE
- TO ENJOY QUIET ENVIRONMENT
- SYSTEM STATUS CHECK MODE
- ADVANCE OPERATION
- SYSTEM SETTING MODE
- WATER TEMPERATURE THERMO SHIFT SETTING
- TIMER DISPLAY
- CAUTION
- SWITCH OFF THE POWER SUPPLY BEFORE CLEANING
- CLEANING INSTRUCTIONS
- HINT
- WATER PRESSURE GAUGE
- INDOOR UNIT & CONTROL PANEL
- EXTERNAL FILTER
- OUTDOOR UNIT
- INSPECTION
- FOR EXTENDED NON-USE
- NON-SERVICEABLE CRITERIA
- THE FOLLOWING SYMPTOMS DO NOT INDICATE MALFUNCTION
- CHECK THE FOLLOWING BEFORE CALLING FOR SERVICING
- THE OPERATION LED BLINKS AND ERROR CODE APPEARS ON CONTROL PANEL DISPLAY
- FORCE HEATER MODE BUTTON
- TO TURN ON THE DEVICE, PRESS THE ON BUTTON. TO TURN OFF THE DEVICE, PRESS THE OFF BUTTON
- PROGRAM/TIMER SETTING
- REPEAT THE ABOVE STEPS
- WARNING
- MAINTENANCE
- FOR EXTENDED SHUTDOWN
- INSTALLATION MANUAL
- DUCNNE3A TAMEPA
- BUTTON
- DAMAGE CRITERIA
- THE FOLLOWING SYMPTOMS DURING OPERATION OF THE DEVICE DO NOT INDICATE A MALFUNCTION
- CHECK THE FOLLOWING BEFORE CONTACTING THE AUTHORIZED SERVICE
- INFORMATION FOR USERS ON COLLECTION AND DISPOSAL OF OLD EQUIPMENT
- FOR BUSINESS USERS IN THE EUROPEAN UNION
- [INFORMATION ON DISPOSAL IN OTHER COUNTRIES OUTSIDE THE EUROPEAN UNION]
- THIS PRODUCT IS NOT INTENDED FOR USE IN COUNTRIES OUTSIDE THE EUROPEAN UNION
- INFORMATION ON DISPOSAL OF OLD ELECTRICAL AND ELECTRONIC EQUIPMENT AND BATTERIES
- [INFORMATION ON DISPOSAL IN OTHER COUNTRIES OF THE EUROPEAN UNION]
Brand : PANASONIC
Model : WH-SDH16C6E5
Category : Heat pump