
JUNIOR MAXI - Car seat GRACO - Free user manual and instructions
Find the device manual for free JUNIOR MAXI GRACO in PDF.
| Product type | Child booster seat |
| Brand | GRACO |
| Model | JUNIOR MAXI |
| Category | Car seat Group 2/3 |
| Standard | ECE R 44.04 |
| Child weight | 15 - 36 kg |
| Child height (with backrest) | 96 - 150 cm |
| Child height (without backrest) | 101 - 150 cm |
| Recommended age (with backrest) | Approximately 3 to 12 years |
| Recommended age (without backrest) | Approximately 4 to 12 years |
| Usage | With or without backrest (depending on model), forward facing |
| Headrest adjustment | Adjustable height (red bar) |
| Armrest adjustment | Adjustable height via screws and tabs |
| Strap positioning clip | Yes, to adjust the diagonal belt |
| Cup holders | 1 on each side |
| Cover maintenance | Machine washable gentle cycle, hang to dry |
| Cleaning plastic/metal parts | Mild soap and warm water |
| Manual storage | Under the seat base |
| Included accessories | Armrest protectors, body pillows (depending on model) |
| Safety | Do not use with active frontal airbag, replace after accident |
| Approval | Universal for vehicles with approved 3-point belt |
Frequently Asked Questions - JUNIOR MAXI GRACO
User questions about JUNIOR MAXI GRACO
0 question about this device. Answer the ones you know or ask your own.
Ask a new question about this device
Download the instructions for your Car seat in PDF format for free! Find your manual JUNIOR MAXI - GRACO and take your electronic device back in hand. On this page are published all the documents necessary for the use of your device. JUNIOR MAXI by GRACO.
USER MANUAL JUNIOR MAXI GRACO
Adult assembly required.
1 Head Support (on certain models)
2 Lower back support (on certain models)
3 Shoulder belt positioning clip
4 Armrest covers (on certain models)
5 Base
6 Body pillows (on certain models)
F
Listedespieces
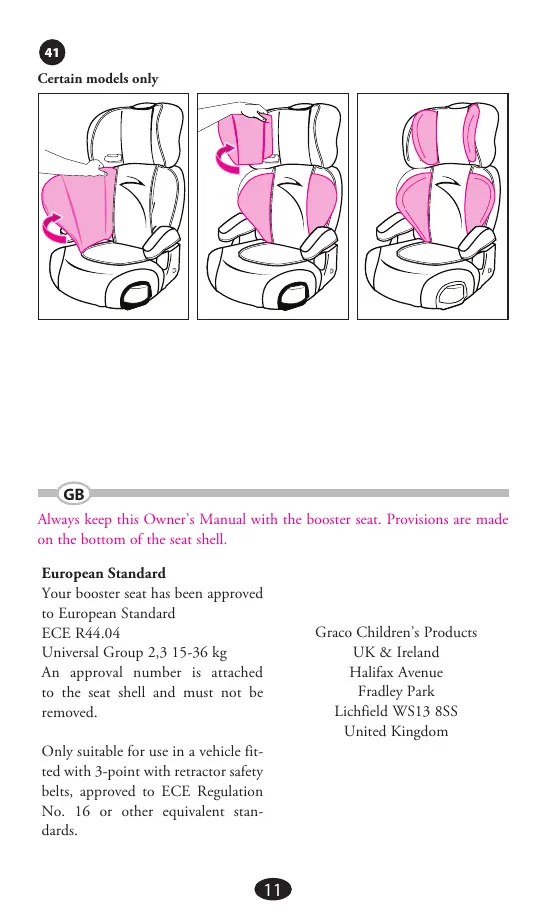
Always keep this Owner's Manual with the booster seat. Provisions are made on the bottom of the seat shell.
European Standard
Your booster seat has been approved to European Standard
ECE R44.04
Universal Group 2,3 15 - 36kg
An approval number is attached to the seat shell and must not be removed.
Only suitable for use in a vehicle fitted with 3-point with retractor safety belts, approved to ECE Regulation No. 16 or other equivalent standards.
Graco Children's Products
UK & Ireland
Halifax Avenue
Fradley Park
Lichfield WS13 8SS
United Kingdom
WARNING
DO NOT INSTALL OR USE THIS BOOSTER SEAT UNTIL YOU READ AND UNDERSTAND THE INSTRUCTIONS IN THIS MANUAL AND IN YOUR VEHICLE OWNER'S MANUAL.
IT IS MOST IMPORTANT that the booster seat is correctly routed with the lap portion of the belt across the red belt guides under the armrests and the diagonal belt through the red shoulder belt guides when used with a back support or through the red shoulder belt positioning clip when used as a back-less booster. Ensure the belt webbing is not twisted.
DO TAKE CARE to locate and install the booster seat so that it is not liable to become trapped by a moveable seat or in a door of the vehicle.
FAILURE TO PROPERLY USE THIS BOOSTER SEAT INCREASES THE RISK OF SERIOUS INJURY OR DEATH IN A SHARP TURN, SUDDEN STOP OR CRASH.
DO NOT use another manufacturers seat cover with this booster seat. See your retailer for Graco replacement parts only.
DO NOT USE in any configuration not shown in the instructions.
DO NOT use alternative load-bearing points not shown in these instructions.
According to accident statistics, CHILDREN ARE SAFER WHEN PROPERLY RESTRAINED IN REAR VEHICLE SEATING POSITIONS, RATHER THAN FRONT SEATING POSITIONS. For a vehicle with a front passenger air bag, refer to your vehicle owner's manual as well as these instructions for booster seat installation.
NEVER LEAVE A BOOSTER SEAT UNSECURED IN YOUR VEHICLE. An unsecured booster seat can be thrown around and may injure occupants in a sharp turn, sudden stop or crash. Remove it or make sure that it is securely belted in the vehicle.
WARNING
NEVER LEAVE LUGGAGE or other objects unsecured in a vehicle, they are liable to cause injuries in the event of a collision.
REPLACE THE BOOSTER SEAT AFTER AN ACCIDENT OF ANY KIND. An accident can cause damage to the booster seat that you cannot see.
DO NOT MODIFY YOUR BOOSTER SEAT or use any accessories or parts supplied by other manufacturers.
NEVER USE BOOSTER SEAT IF IT HAS DAMAGED OR MISSING PARTS. DO NOT use a cut, frayed or damaged vehicle seat belt.
THE BOOSTER SEAT CAN BECOME VERY HOT IF LEFT IN THE SUN. Contact with these parts can burn your child's skin. Always touch the surface of any metal or plastic parts before putting your child in the booster seat.
NEVER GIVE THIS BOOSTER SEAT to someone else without also giving them this manual.
NEVER USE A SECOND-HAND BOOSTER SEAT or a booster seat whose history you do not know.
NEVER USE THIS BOOSTER SEAT without the armrests attached to the base.
Care and Maintenance
- CONTINUOUS USE OF BOOSTER SEAT MAY CAUSE DAMAGE TO VEHICLE SEAT. Use a towel or thin blanket to protect upholstery.
- METAL AND PLASTIC PARTS: clean with mild soap and cool water. No bleach or detergents.
- FROM TIME TO TIME CHECK YOUR BOOSTER SEAT for worn parts, torn material and stitching. If damage is found, DO NOT try to modify the booster seat. Replace the booster seat.
DO NOT USE BOOSTER SEAT without its cover.
Assembling the booster seat
1 2
To adjust armrests, remove screw and press in button on side of base as shown to raise or lower. Reinsert screw and tighten. CHECK to make sure armrests are securely attached by pulling up on them.
3
Slip armrest covers (on certain models) onto armrests as shown.
4
Your Graco booster seat is now ready to use. See "Securing Child in Vehicle with Shoulder Belt Positioning Clip".
FOR MODELS with a back support continue on to 5
5
Flip head support and lower back support over as shown.
6
Squeeze red adjustment button and slide two pieces together until they snap into place.
CHECK to make sure two pieces are securely snapped together by pulling on them.
7
Attach elastic strap as shown.
8
Flip seat over and insert the fabric from the head support underneath the fabric on the lower back support as shown.
To make insertion of fabric easier, slide the upper and lower back pieces apart by squeezing the red adjustment button.
9
Attach backrest to base. "U"-shaped hooks on bottom of backrest will interlock with bars on base.
Make sure that no part of the seat covering interferes when attaching backrest to the base.
10
Once backrest is securely attached to the base, push backrest up as shown.
11
Your Graco booster seat is now ready to use. See "Using your Graco Booster Seat" and "Securing Your Child in Vehicle".
FAILURE TO USE booster seat in a manner appropriate for your child's size may increase the risk of serious injury or death.
Weight and Height Limits
To use this Graco booster seat, your child MUST meet ALL of the following requirements:

With back support (approximately 3 to 12 years old):
- weigh between 15 - 36kg and
are between 96 and 150~cm in height, and - the shoulder belt MUST lay across child's shoulders in red zone as shown in 12 and the lap portion is positioned low on the child's hips, and
- the child's ears are below top of booster seat. If tops of ears are above top of seat, your child is too large for the booster seat

Without back support (approximately 4 to 12 years old):
- weigh between 15 - 36kg , and
are between 101 and 150~cm in height, and - the shoulder belt MUST lay across child's shoulders in red zone as shown in 13 and the lap portion is positioned low on the child's hips, and
- when sitting on the booster seat, your child's ears are below the top of the vehicle seat cushion / head rest.
Your Graco booster seat can be used with or without the back support (on certain models) as long as the above requirements are met.
UNSAFE Vehicle Seat Belt Systems
DO NOT USE ANY OF THE FOLLOWING VEHICLE BELT SYSTEMS.

- NEVER use a lap-only belt.

- NEVER use a Passive Restraint Lap or Shoulder Belt Mounted on Door
Vehicle belts MUST lay flat against child and MUST not be twisted.
16 DO NOT use shoulder belt loose or positioned under child's arm.
17 DO NOT position vehicle belt over top of the armrests. It must pass underneath the armrests.
Make sure vehicle belt is NOT twisted.
Lap portion of lap/shoulder belt MUST be low and snug on hips, just touching thighs.
18 DO NOT allow child to slide down in booster seat. If child will not keep vehicle restraint properly positioned, DO NOT use this booster seat. Use a different child restraint system.
Vehicle seat headrest must not interfere with booster seat head support. The front of booster seat MUST NOT hang over front of vehicle seat.
The back of the booster seat MUST fit tight against the vehicle seat back as shown.
Booster Seat Positions
21 Your booster seat has two positions as shown.
The back of the booster seat MUST fit tight against the vehicle seat back as shown in either the first or second position.
23 DO NOT USE booster seat beyond reclined position.
Securing your Child in Vehicle
24 Place booster seat firmly against the back of a forward-facing vehicle seat equipped with a lap/shoulder belt only.
Have your child sit in booster seat with their back flat against back of booster seat.
25 Position shoulder belt through the shoulder belt guide shown in 25,
26 NOT as shown in 26. Fasten buckle and pull up on the shoulder belt to tighten.
27 To ensure the correct head support height is obtained, the bottom of the
headrest MUST be even with the top of child's shoulders as shown in 27 and the shoulder belt must be positioned in the red zone as shown in 28.
The lap belt portion MUST pass under the armrests and be positioned low on the hips.
Belt MUST NOT be twisted.
29 If the belt lays across child's neck, head or face, readjust head support
30 height. Follow instructions, "Adjusting the Head Support".
Adjusting the Head Support
BEFORE adjusting the head support height, have your child lean forward slightly.
31 Squeeze the red adjustment button on top of seat and pull back support up until it snaps into one of the 6 height positions.
32 To lower, squeeze red adjustment button and push down.
CHECK to make sure it is securely snapped into one of the 6 height positions by pulling up on head support.
Securing Child in Vehicle with Shoulder Belt Positioning Clip
33 The shoulder belt MUST lay across child's shoulders in red zone as shown.
If shoulder belt lays outside this zone, the shoulder belt positioning clip MUST be used.
To attach clip to booster seat:
34 Insert the loop end of strap around vertical bar on rear of seat as shown. The shoulder belt positioning clip MUST be attached onto the vertical bar of the base farthest from where the vehicle shoulder belt lays across the child.
35 Pass the clip and strap through the loop end as shown and pull strap up.
36 NOTE: Free end of strap should face front of seat.
37 Slide the vehicle shoulder belt onto the clip as shown and pull strap down to tighten clip against child's shoulder.
38 Rear view of child sitting in seat
The lap belt portion MUST pass under the armrests and be positioned low on the hips.
The belt MUST NOT be twisted.
Cupholders
To avoid burns, NEVER put hot liquids in your cupholders.
39
Cupholders are included on both sides of the seat.
To Remove Seat Cover
40
Remove elastic loops and hooks from seat as shown.
41
On some models, there is a plastic clip in the front of the seat pad on the base that will need to be removed before washing.
Machine wash cover in cold water on delicate cycle and drip-dry. DO NOT USE BLEACH.
To put the seat cover back on, reverse preceding instructions.
42
Body Pillows (on certain models)
Slide pillows through headrest and backrest as shown.
SICHER, DASSIE ALLES VERSTEHEN.
Care and Maintenance
Care and Maintenance
- NEPRETRZITE POUZIVANIE DETSKEJ AUTOSEDACKY MOZE SPOSOBIT POSKODENIE SEDADLA VOZIDLA.
- KOVOVÉ A PLASTOVEČASTI: Čistě jemným mydlo m a studenou vodou. Nepoužívajte Žiadne bielidlá alebo Čistace prostriedky.
- OBCAS DETSKU AUTOSEDACKU SKONTROLUJTE, Či němá opotrebované Častí, pothane materiály alebo stehy.
- NEPOUZIVAJTE DETSKU AUTOSEDACKU bez potahu.
Your Graco booster seat is now ready to use. See "Securing Child in Vehicle with Shoulder Belt Positioning Clip".
Care and Maintenance
- VEDVARENDE BRUG AF BOOSTER-SÄDET KAN FORÄRSAGE SKADE.
METAL-OG PLASTDELE kan rengore med en mild saebe- og vandoplosning. Ingen blege-ller rengoringsmidler ma anvendes.
EFTERSE MED J/EVNE MELLEMRUM BOOSTER-S/EDET for slide dele, iturevet stof ell er skadede somme. - ANVEND IIKE BOOSTER-S/EDET uden sadebetrak.
Montering af booster-sedet

NOTICE: 1. This is a "Universal" child restraint. It is approved to Regulation No. 44, 04 series of amendments, for general use in vehicles and it will fit most, but not all, car seats. 2. A correct fit is likely if the vehicle manufacturer has declared in the vehicle handbook that the vehicle is capable of accepting a "Universal" child restraint for this age group. 3. This child restraint has been classified as "Universal" under more stringent conditions than those which applied to earlier designs which do not carry this notice. 4. If in doubt, consult either the child restraint manufacturer or the retailer. Only suitable if the approved vehicles are fitted with 3 point with retractor safety belts, approved to UN/ECE Regulation No. 16 or other equivalent standards. DO NOT USE THIS CAR SEAT ON ANY VEHICLE SEAT WHERE AN AIRBAG IS FITTED.
- F
- Listedespieces
- European Standard
- WARNING
- Care and Maintenance
- Assembling the booster seat
- Weight and Height Limits
- With back support (approximately 3 to 12 years old):
- Without back support (approximately 4 to 12 years old):
- UNSAFE Vehicle Seat Belt Systems
- Booster Seat Positions
- Securing your Child in Vehicle
- Cupholders
- To Remove Seat Cover
- Body Pillows (on certain models)
- Montering af booster-sedet
Brand : GRACO
Model : JUNIOR MAXI
Category : Car seat