
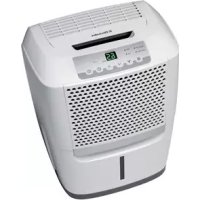
EXD16DN3W - Humidifier ELECTROLUX - Free user manual and instructions
Find the device manual for free EXD16DN3W ELECTROLUX in PDF.


| Product Type | Ultrasonic Humidifier |
| Model | EXD16DN3W |
| Brand | Electrolux |
| Color | White |
| Dimensions (W x D x H) | 11.8 x 9.4 x 14.6 inches |
| Weight | 5.5 lbs |
| Water Tank Capacity | 3.5 liters |
| Mist Output | Up to 300 ml/h |
| Coverage Area | Up to 300 sq ft |
| Power Supply | 120V, 60Hz |
| Power Consumption | 25 Watts |
| Noise Level | ≤ 30 dB |
| Humidity Control | Adjustable with digital display |
| Auto Shut-Off | When tank empty |
| Filter Type | Washable pre-filter |
| Water Level Indicator | Yes |
| Night Light | Yes, with timer |
| Essential Oil Diffuser | No |
| Cleaning Method | Weekly descaling with vinegar |
| Replacement Parts | Pre-filter (available separately) |
| Warranty | 1 year limited |
Frequently Asked Questions - EXD16DN3W ELECTROLUX
User questions about EXD16DN3W ELECTROLUX
0 question about this device. Answer the ones you know or ask your own.
Ask a new question about this device
Download the instructions for your Humidifier in PDF format for free! Find your manual EXD16DN3W - ELECTROLUX and take your electronic device back in hand. On this page are published all the documents necessary for the use of your device. EXD16DN3W by ELECTROLUX.
USER MANUAL EXD16DN3W ELECTROLUX
WE'RE THINKING OF YOU
Thank you for purchasing an Electrolux appliance. You've chosen a product that brings with it decades of professional experience and innovation. Ingenious and stylish, it has been designed with you in mind. So whenever you use it, you can be safe in the knowledge that you'll get great results every time.
Welcome to Electrolux.
Visit our website to:

Get usage advice, brochures, trouble shooter, service information: www.electrolux.com

Register your product for better service: www.registerelectrolux.com

Buy Accessories, Consumables and Original spare parts for your appliance: www.electrolux.com/shop
CUSTOMER CARE AND SERVICE
Always use original spare parts.
When contacting our Authorised Service Centre, ensure that you have the following data available: Model, PNC, Serial Number.
The information can be found on the rating plate.

Warning / Caution-Safety information.

General information and tips.

Environmental information.
Subject to change without notice.
1. SAFETY INFORMATION
This USER MANUAL provides specific operating instructions for your model. Use the dehumidifier only as instructed in this USER MANUAL. These instructions are not meant to cover every possible condition and situation that may occur. Common sense and caution must be practiced when installing, operating, and maintaining any appliance.
WARNING! Avoid t
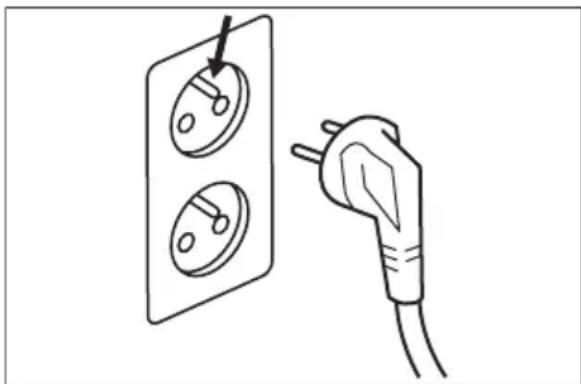
Avoid fire hazard or electric shock. Do not use an extension cord or an adaptor plug. Do not remove any prong from the power cord.
- Do not, under any circumstances, cut, remove or bypass the grounding prong.
natural_image
Line drawing of a hand holding an electrical plug, with two socket covers mounted on a wall (no text or symbols)- Do not store or use gasoline or other flammable vapors and liquids in the vicinity of this or any other appliance. Read product labels for flammability and other warnings.
- Discard water from bucket. Water is not potable and cannot be used for drinking.
1.1 Children and Vulnerable People Safety
WARNING! Risk of
Risk of suffocation, injury or permanent disability.
- This appliance can be used by children aged from 8 years and above and persons with reduced physical, sensory or mental capabilities or lack of experience and knowledge if they have been given supervision or instruction concerning use of the appliance in a safe way and understand the hazards involved.
- Do not let children play with the appliance.
-
Children of less than 3 years should be kept away unless continuously supervised.
-
Keep all packaging away from children.
- Keep all detergents away from children.
- Keep children and pets away from the appliance door when it is open.
- If the appliance has a child safety device, we recommend you activate it.
- Cleaning and user maintenance shall not be made by children without supervision.
1.2 Electrical Information

WARNING!
Avoid fire hazard or electric shock.
- If you are not sure the outlet is adequately grounded or protected by a time delay fuse or circuit breaker, have a qualified electrician install the proper outlet according to the National Electrical Code and applicable local codes and ordinances. Do not use an extension cord or an adapter plug.
- Never unplug the dehumidifier by pulling on the power cord. Always grip the plug firmly and pull straight out from the receptacle.
- Do not pinch, bend, or knot the power cord.
2. SAFETY INSTRUCTION
2.1 Safety Precautions

CAUTION!
Avoid Serious Injury or Death
- This dehumidifier contains no user-serviceable parts. Always call an authorized Electrolux servicer for repairs.
- Do not insert or place fingers or objects into the air discharge area or front grille of the unit.
-
Do not start or stop the dehumidifier by unplugging the power cord or turning off the power at the electrical box.
-
Do not cut or damage the power cord.
- If the power cord is damaged, it should only be replaced by an authorized Electrolux servicer.
- In the event of a malfunction (sparks, burning smell, etc.), immediately stop the operation, disconnect the power cord, and call an authorized Electrolux servicer.
- Do not operate the dehumidifier with wet hands.
- Do not pull on the power cord.
- Do not drink any water from the dehumidifier.
CAUTION!
Avoid Injury or damage to the unit or other property
- Do not direct airflow at fireplaces or other heat related sources as this could cause flare ups.
- Do not climb on or place objects on the unit.
- Do not hang objects off the unit.
-
Do not place containers with liquids on the unit.
-
Turn off the dehumidifier at the power source when it will not be used for an extended period of time.
- Operate the unit with air filter in place.
- Do not block or cover the intake grille, discharge area and outlet ports.
- Ensure that any electrical/electronic equipment is one yard away from the unit.
- Do not use or store flammable gases near the unit.
3. BEFORE FIRST USE
3.1 Selecting a Location
Important
- Dehumidifier must be operated in an enclosed area to be most effective. Close all doors, windows, and other outside openings to the room. The effectiveness of the dehumidifier depends on the rate at which new moisture-laden air enters the room.
- Place dehumidifier in a location that does not restrict airflow through the front of the unit.
- A dehumidifier operating in a basement will have little or no effect in drying an adjacent enclosed storage area, such as a closet, unless there is adequate circulation of air in and out of the area. It may be necessary to install a second dehumidifier in the enclosed area for satisfactory drying.
- The dehumidifier must be installed on a level floor that will support it with a full bucket of water.
4.1 Connect the Unit to Power
Allow the unit to reach room temperature before operating.
Unit must be upright for one hour prior to operating.
To begin operating the dehumidifier, follow these steps:
- There should be a minimum of 12 inches clearance around the dehumidifier.
3.2 How It Works
When the unit is started, the fan begins to pull moisture-laden air across the dehumidifying coils. The coils condense or draw moisture from the air, and air flows into the room as dry, warm air. Moisture removed from air is collected in a bucket on the front of the dehumidifier. The unit is designed to operate between 5°C (41°F) and 35°C (96°F). The unit will not work properly if the temperature is out of this temperature range, or the performance of the unit will fall greatly. The “Compressor” circuit has an automatic 3 minute time delayed start if the unit is turned off and on quickly. This prevents overheating of the compressor and possible circuit breaker tripping. Make sure the tank is fitted correctly otherwise unit will not turn on.
- Plug the power cord into a properly grounded 220-240V AC outlet.
- If the BUCKET FULL light is on, remove the bucket and re-install to reset the float switch.

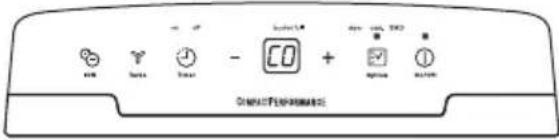
4.2 To Run in Continuous Mode
- Press the ON/OFF button.
- Pressing the Option button until the Cont. indicator light.
4.3 To Set Desired Humidity
After a few days when the Relative Humidity has declined, press the HUMIDITY — or +buttons to choose a value between 35% to 85%, so the room is kept at a comfortable humidity. Pressing the — or +buttons will change the humidity selection in 5% increments. After you have set the desired humidity, the readout will display the actual room humidity.
4.4 Change the Fan Speed
You can use the Turbo button to change the fan speed to HIGH or LOW. In the high fan speed, the indicator which above the turbo button will light. A higher fan speed will result in quicker moisture removal.

4.5 ION Function
Press the Ion button to activate the ionizer. Anions air automatically generated by ionization. The anions deactive the airborne chemical vapors and dust particles. When the Ion function is activated the indicator which above the Ion button will light. Press the Ion button again to stop the function.

4.6 SMD mode
At smart dehumidifying mode, the unit will automatically control room humidity in a comfortable range 45%\~55% according to the room temperature. The humidity setting function will be invalid. To activate the SMD mode, press the Option button √ until the SMD indicator light. During the SMD mode the humidity is controlled by the unit automatically, no need to change the setting humidity manually.
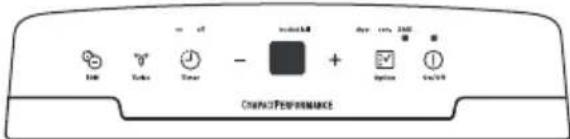
4.7 Dryer Mode
The unit can reach the MAX dehumidification performance when it is under the Dryer mode. The fan speed is fixed at high fan speed. The humidity level is automatically controlled according to the actual room humidity. The unit will quit dryer mode after a maximum 10 hours' operation.
To activate the Dryer mode, press the Option button: until the Dryer indicator light.

1) Air flow direction; 2) Wet clothes.
NOTE:
- The Dryer mode must be operated in a close room, do not open the door and window.
-
To make the best effective dehumidification, please first dehydrate the wet clothes.
-
Make sure to direct airflow at the wet clothes shown as picture below.
- For thick and heavy wet clothes may not get the best effective dehumidification.

CAUTION!
- Do not cover the air outlet of the unit with clothes. It may cause excessive heat, fire or failure of unit.
- Do not place the wet clothes on the top of the unit and do not make the water drop into the unit. It may cause electric shock, creepage or failure of unit.
4.8 How to Use Timer Function
The TIMER function enables you to either Delay Start or Delay Stop the unit in the choice from 0.5 hour to 24 hours.
When the unit is on, first press the Timer Button, the Timer Off indicator light illuminates. It indicates the Auto Stop program is initiated. Press it again the Time On indicator light illuminates. It indicates the Auto Start is initiated.
Press or hold the + or - pad to change the Auto time by 0.5 hour increments, up to 10 hours, then at 1 hour increments up to 24 hours. The control will count down the time remaining until start.
The selected time will register in 5 seconds and the system will automatically revert back to display the previous humidity setting.
When the Auto start & Auto stop times are set, within the same program sequence, TIMER ON OFF indicator lights illuminate identifying both ON and OFF times are now programmed.
Turning the unit ON or OFF at any time or adjusting the timer setting to 0.0 will cancel the Auto Start/Stop function.
When LED display window displays the code of P2, the Auto Start/Stop function will also be cancelled.
NOTE:
- Before entering TIMER setting, make sure power is being supplied to the unit.
- Before entering TIMER setting, make sure pressing HUMIDITY or button sets one desired room humidity first.
4.9 Fault Codes
AS- Humidity sensor error--Unplug the unit and plug it back in. If error repeats, call for service.
ES- Temperature sensor error-- Unplug the unit and plug it back in. If error repeats, call for service.
P1- Unit is defrosting-- Allow the unit time to automatically defrost. The protection will clear after the unit self defrosts.
P2- Bucket is full or bucket is not in right position-- Empty the bucket and replace it in the right position.
E3- Unit malfunction-- Unplug the unit and plug it back in. If error repeats, call for service.
EC- Refrigerant leakage detection-- With this new technology, the display area will appear EC when the unit detects refrigerant leakage, call for service.
4.10 Removing collected water
There are two ways to remove collected water.
4.11 Use the bucket
When the unit is off, if the bucket is full, the unit will beep 8 times and the Full indicator light will flash, the digital display shows P2.
When the unit is on, if the bucket is full, the compressor turns off and the fan turns off after 30 seconds for drying the water of the condenser, then the unit will beep 8 times and the Full indicator light will flash, the digital display shows P2.
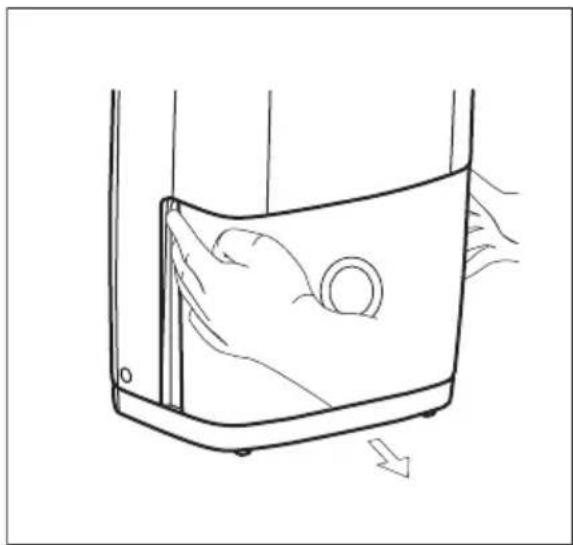
Follow the step below to remove the collected water from the bucket:
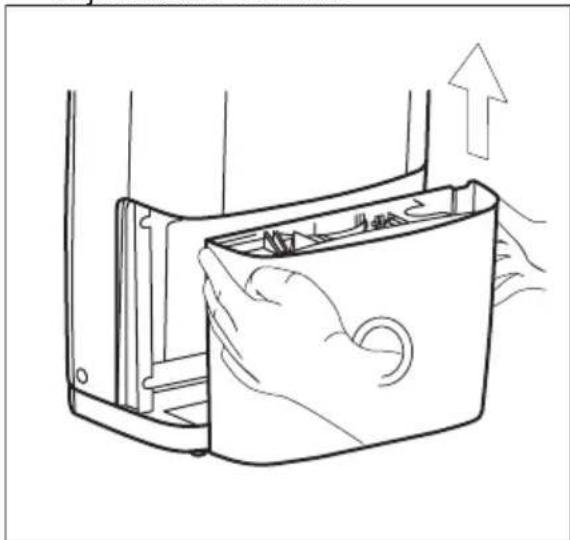
- Grip the left and right handles securely, then pull out the bucket a little.
natural_image
Line drawing of a container with a handle and circular object inside, showing motion direction (no text or symbols)- Hold both sides of the bucket with even strength, and pull it out from the unit.

natural_image
Line drawing of a hand inserting a plastic bag into a door frame, with an upward arrow indicating motion (no text or symbols)- Throw away the water and replace the bucket. The bucket must be in place and securely seated for the dehumidifier to operate.
The unit will re-start when the bucket is restored in its correct position.
- Do not put the tank on the floor because the bottom of the bucket is uneven. Otherwise the bucket will fall and cause the water to spill.
- When you remove the bucket, do not touch any parts inside of the unit. Doing so may damage the product.
- Be sure to push the bucket gently all the way into the unit. Banging the bucket against anything or failing to
push it in securely may cause the unit not to operate.
- Discard water from bucket. Water is not potable and cannot be used for drinking.
4.12 Continuous Drainage
Water can be automatically emptied into a floor drain by attaching the unit with a water hose (not included).
- Cut the cover down from the back drain hose outlet.
- Insert a drain hose(ID=13.5mm) onto the drain connector of the unit. Make sure the hose is secure so there are no leaks.
- Direct the hose toward the drain, making sure that there are no kinks that will stop the water flowing.
- Place the end of the hose into the drain and make sure the end of the hose is level or down to let the water flow smoothly.

natural_image
Line drawing of a portable air purifier with a hose and outlet (no text or symbols)i
- Check the seal between the hose and the drain connector. If there is a small leak then replace the hose gasket and re-tighten the hose.
- If the mode of continuous drainage is not chosen, the drain cap must be screwed securely to prevent leakage.
5. CARE AND CLEANING
5.1 To Clean the Filter

WARNING! Before cleaning the unit, make sure to disconnect the unit from power source.
-
Clean the Grille and Case
-
Use water and a mild detergent. Do not use bleach or abrasives.
- Do not splash water directly onto the main unit. Doing so may cause an electrical shock, cause the insulation to deteriorate, or cause the unit to rust
-
The air intake and outlet grilles get soiled easily, so use a vacuum attachment or brush to clean.
-
Clean the bucket
Every few weeks, clean the bucket to prevent growth of mold, mildew and bacteria. Partially fill the bucket with clean water and add a little mild detergent. Swish it around in the bucket, empty and rinse.
NOTE: Do not use a dishwasher to clean the bucket. After clean, the bucket must be in place and securely seated for the dehumidifier to operate.
- Clean the air filter
The air filter behind the front grille should be checked and cleaned at least every 30 days or more often if necessary.
NOTE: DO NOT RINSE OR PUT THE FILTER IN AN AUTOMATIC DISHWASHER.
6. WHAT TO DO IF...
Before calling for service, review this list. It may save you time and expense. This list includes common occurrences that
a. Grip the tab on the filter and pull it upward, then pull it out as shown below.

b. Clean the filter with warm, soapy water. Rinse and let the filter dry before replacing it. Do not clean the filter in a dishwasher.
c. Insert the air filter into the unit from underside to upside.
4. Re-install the filter, then replace bucket.
NOTE: Please insert the filter with the front side outwards.

CAUTION!
DO NOT operate the dehumidifier without a filter because dirt and lint will clog it and reduce performance.

- This unit contains a R134A refrigerant fluid with a GWP equal to 1430. Refrigerant weight: 0.105/0.12KG (depending on different models).
are not the result of defective workmanship or materials in this appliance.
| Occurrence Solution | |
| Dehumidifier does not operate Wall plug | disconnected. Push plug firmly into wall outlet. |
| House fuse blown or circuit breaker tripped. Replace fuse with time delay type or reset circuit breaker. | |
| The dryness level you selected has been reached. Dehumidifier automatically shuts off when selected amount of moisture has been removed from the air. If you want to remove more moisture, select CONTINUOUS by using the humidity button or knob. After the dehumidifier starts, reset the control to the desired setting. | |
| Bucket not installed properly. See “Removing Collected Water”. | |
| Water in the bucket has reached its preset level. Dehumidifier automatically turns off when this occurs. Empty bucket and return bucket to position. | |
| Dehumidifier is not turned on. Turn unit on. | |
| BUCKET FULL light is on. Remove bucket, empty water and re-install correctly. | |
| Dehumidifier runs too much Windows or doors near dehumidifier are open to outdoors. Close all windows or doors to outside. | |
| Dehumidifier is operating, but room is not dry enough. | Humidity setting is too high. Press the HUMIDITY button or rotate knob to a lower setting or choose CONTINUOUS for maximum dryness. |
| Dehumidifier has been installed or re-started recently. The higher the moisture in the room air, the longer it takes for the room air to become dry. | |
| Dehumidifier does not have sufficient clearance to operate. Air flow to front grill is blocked. See “Selecting a Location”. | |
| Room temperature is too low. Unit will not operate satisfactorily if the room temperature is below 5°C (41°F). See “Operating Conditions”. | |
| Refer to causes under DEHUMIDIFIER RUNS TOO MUCH. | |
| frost appears on coils above bucket. Dehumidifier has been turned on recently. This is normal due to refrigerant rushing through the coil. Frost will usually disappear within 60 minutes. | |
| Fan noise. Room Temperature is too low. All models will operate satisfactorily at temperatures greater than 5°C (41°F). | |
7. ENVIRONMENT CONCERNS
Recycle the materials with the symbol 📊. Put the packaging in applicable containers to recycle it. Help protect the environment and human health and to recycle waste of electrical and electronic appliances. Do not dispose appliances
marked with the symbol ✉ with the household waste. Return the product to your local recycling facility or contact your municipal office.
F-Gas
Refrigerant leakage contributes to climate change. Refrigerant with lower global warming potential (GWP) would contribute less to global warming than a refrigerant with higher GWP, if leaked to the atmosphere. This appliance contains a refrigerant fluid with a GWP equal to 1430. This means that if 1 kg of this refrigerant fluid would be leaked to the atmosphere, the impact on global warming would be 1430 times higher than 1 kg of CO2, over a period of 100 years. Never try to interfere with the refrigerant circuit yourself or disassemble the product yourself and always ask a professional.
The product or equipment contains fluorinated greenhouse gases, and the fluorinated greenhouse gases are contained in hermetically sealed equipment.
| Model EXD16DN3W EXD20DN3W | ||
| Charge (kg) | 0.105 0.12 | |
| CO2 Equivalent (tonnes) | 0.15 0.17 | |
СЪДЪРЖАНИЕ
natural_image
Illustration of a hand holding an electrical plug next to two wall-mounted socket (no text or symbols)natural_image
Line drawing of a container with internal fluid and a circular object inside, showing airflow or movement (no text or symbols)natural_image
Line drawing of a hand inserting a device into a container with an upward arrow (no text or symbols)natural_image
Line drawing of a portable air purifier with a hose and outlet, no text or symbols presenti
natural_image
Line drawing of a hand inserting a plug into an electrical outlet (no text or symbols)4.5 Λειτουργία ION
4.6 Λειτουργία SMD
natural_image
Line drawing of a device with a handle and circular component, showing motion direction (no text or symbols)natural_image
Line drawing of a hand inserting a bag into a container with an upward arrow (no text or symbols)natural_image
Line drawing of a portable air purifier with a hose and outlet (no text or symbols)i
natural_image
Line drawing of a hand holding an electrical plug next to two wall-mounted socket (no text or symbols)natural_image
Line drawing of a container with a handle and internal components, showing motion direction (no text or symbols)natural_image
Line drawing of a hand inserting a bag into a device, with an upward arrow indicating motion (no text or symbols)natural_image
Line drawing of a portable air purifier with a hose and outlet, no text or symbols presenti
natural_image
Illustration of a hand holding an electrical plug next to two wall-mounted socket (no text or symbols)4.6 Tryb SMD
natural_image
Line drawing of a hand pressing down inside a container with a circular object on the side (no text or symbols)natural_image
Line drawing of a hand inserting a plastic bag into a container, with an upward arrow indicating motion (no text or symbols)natural_image
Line drawing of a portable air purifier with attached tubing (no text or symbols)i
natural_image
Line drawing of a hand holding an electrical plug, with two socket covers and a power outlet (no text or symbols)- Nemojte u blizini ovog ni bilo kojeg drugog uređaja spremati ni koristiti benzin ili druge zapaljive pare i tekućine. Pročitajte informativne naljepnice o zapaljivosti proizvoda i druga upozorenja.
- Izbacite vodu iz posude. Voda nije pitka i ne može se koristiti za piće.
4.5 Funkcija ION
Pritisnite tipku Ion za aktiviranje ionizatora. Pri ionizaciji automatski se stvaraju anioni u zraku. Anioni deaktiviraju zračne kemijske pare i čestice prašine. Kada je aktivirana funkcija ionizacije, svijetlit će indikator iznad gumba za ionizaciju. Pritisnite ponovno gumb za ionizaciju kako biste obustavili funkciju.

4.6 SMD(pametno odvlaživanje) modus rada
Kod modusa pametnog odvlaživanja, uređaj će automatski regulirati vlažnost u prostoriji na udoban raspon od 45%\~55% prema temperaturi u prostoriji. Funkcija postavljanja vlažnosti bit će nevaljana. Za aktiviranje SMD modusa rada pritisnite gumb Opcija:☑ dok ne zasvijetli lampica indikatora SMD.
natural_image
Line drawing of a container with a handle and circular object inside, showing fluid flow direction (no text or symbols)- Obje strane posude držite jednakom snagom i izvucite je iz uređaja.

natural_image
Line drawing of a hand inserting a plastic bag into a container, with an upward arrow indicating motion (no text or symbols)natural_image
Line drawing of a portable air purifier with attached tubing and control buttons (no text or symbols)i
b. Očistite filtar toplom sapunicom. Filtar prije ponovnog postavljanja isperite i pustite da se osuši. Filtar nemojte prati u perilici posuđa.
c. Umetnite filtar zraka u uređaj s donje strane do gornje.
4. Ponovno instalirajte filtar, zatim ponovno postavite posudu.
NAPOMENA: Umetnite filtar tako da mu prednja strana bude okrenuta prema van.

POZOR!
Odvlaživač NEMOJTE puštati u rad bez filtra, jer bi ga prljavština i dlačice mogle začepiti i smanjiti mu radni učinak.

- Ovaj uređaj sadrži rashladnu tekućinu R134A s GWP-om jednakovrijednim 1430. Masa rashladnog sredstva: 0,105/0,12 ka (ovisno o različitim modelima).
6. ŠTO UČINITI AKO...
Prije nego što nazovete servis, proučite ovaj popis. To vam može uštedjeti vrijeme i novac. Ovaj popis sadrži uobičajene pojave
koje nisu rezultat pogrešnog rukovanja ili materijala u ovome uređaju.
| Pojava Rješenje | |
| Odvlaživač ne radi Zidni utikač odspojen. | Utikač utaknite čvrsto u zidnu utičnicu. |
| Pregorio je kućni osigurač ili je aktiviran prekidač strujnog kruga. Nadomjestite osigurač onime s vremenskom odgodom ili ponovno postavite prekidač strujnog kruga. | |
| Postignuta je razina suhoće koju ste odabrali. Odvlaživač se automatski isključuje kada se odabrana količina vlage odstrani iz zraka. Ako želite ukloniti više vlage, odaberite BESPREKIDNO pomoću gumba ili ručice za vlagu. Nakon pokretanja odvlaživača, resetirajte kontrolu na željenu postavku. | |
| Prihvatn posuda nije pravilno instalirana. Pogledajte “Uklanjanje sakupljene vode”. | |
| Voda u prihvatnoj posudi dostigla je zadanu razinu. Odvlaživač se automatski isključi kada se to dogodi. Ispraznite prihvatnu posudu i vratite je u njen položaj. | |
| Odvlaživač se ne uključuje. Uključenje uređaja. | |
| Lampica PRIHVATNA POSUDA PUNA je uključena. Skinite prihvatnu posudu, ispustite vodu i ponovno postavite posudu. | |
| Odvlaživač radi previše Prozori i vrata pored odvlaživača su otvorena prema van. Zatvorite sve prozore i vrata prema van. | |
| Odvlaživač radi, ali se prostorija ne suši dovoljno. | Postavka vlažnosti je previsoka. Pritisnite gumb VLAŽNOST ili okrenite ručicu na nižu postavku ili izaberite BESPREKIDNO za maksimalnu suhoću. |
| Odvlaživač je nedavno instaliran ili ponovno pokrenut. Što je veća vlaga u zraku u prostoriji, to će odvlaživač dulje raditi da bi se prostorija osušila. | |
| Odvlaživač nema dovoljno mjesta za rad. Protok zraka na prednjoj rešetci je za-blokiran. Pogledajte “Odabir lokacije“. | |
| Temperatura u prostoriji je preniska. Uređaj neće pravilno raditi ako je temperatura u prostoriji ispod 5°C (41°F). Pogledajte “Radni uvjeti”. | |
| Odnosi se na slučajeve pod ODVLAŽIVAČ RADI PREVIŠE. | |
| Na zavojnicama iznad prihvatne posude pojavilo se inje. | Odvlaživač je nedavno uključen. To je normalno jer rashladno sredstvo navaljuje kroz zavojnicu. Inje će obično nestati unutar 60 minuta. |
| Ventilator je bučan. Temperatura u prostoriji je preniska.Svi modeli radit će zadovoljavajuće na temperaturama višima od 5°C (41°F). | |
7. PITANJA ZAŠTITE OKOLIŠA
Reciklirajte materijal sa simbolom
Pakirni materijal stavite u prikladne spremnike za recikliranje. Pomognite u zaštiti okoliša i ljudskog zdravlja i reciklirajte otpad od električnih i elektroničkih uređaja.
natural_image
Illustration of a hand holding an electrical plug next to two wall-mounted socket (no text or symbols)- V bližini te ali katerekoli druge naprave ne shranjujte ali uporabljajte bencina ali drugih vnetljivih hlapov in tekočin. Preberite etikete na izdelku glede vnetljivosti in druga opozorila.
- Zavrzite vodo iz posode za vodo. Voda ni pitna in je ne smete piti.
4.7 Način sušenja
natural_image
Line drawing of a device with a handle and circular component, showing airflow or movement (no text or symbols)- Enako močno držite obe strani posode in jo izvlecite iz enote.
natural_image
Line drawing of a hand inserting a plastic bag into a container, with an upward arrow indicating motion (no text or symbols)natural_image
Line drawing of a portable air purifier with attached tubing and control buttons (no text or symbols)i
b. Filter očistite s toplo milnico. Izperite ga in pustite, da se posuši, preden ga namestite nazaj. Filtra ne pomivajte v pomivalnem stroju.
c. Zračni filter vstavite v enoto od spodaj navzgor.
4. Namestite nazaj filter in nato še posodo za vodo.
natural_image
Repeating pattern of gray geometric shapes on white background, no text or symbols present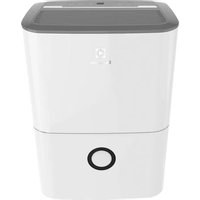


- WE'RE THINKING OF YOU
- Visit our website to:
- CUSTOMER CARE AND SERVICE
- SAFETY INFORMATION
- WARNING! Avoid t
- Children and Vulnerable People Safety
- WARNING! Risk of
- Electrical Information
- WARNING!
- SAFETY INSTRUCTION
- Safety Precautions
- CAUTION!
- BEFORE FIRST USE
- Selecting a Location
- Important
- Connect the Unit to Power
- How It Works
- To Run in Continuous Mode
- To Set Desired Humidity
- Change the Fan Speed
- ION Function
- SMD mode
- Dryer Mode
- NOTE:
- How to Use Timer Function
- Fault Codes
- Removing collected water
- Use the bucket
- Continuous Drainage
- i
- CARE AND CLEANING
- To Clean the Filter
- WHAT TO DO IF...
- ENVIRONMENT CONCERNS
- F-Gas
- СЪДЪРЖАНИЕ
- Λειτουργία ION
- Λειτουργία SMD
- Tryb SMD
- Funkcija ION
- SMD(pametno odvlaživanje) modus rada
- POZOR!
- ŠTO UČINITI AKO...
- PITANJA ZAŠTITE OKOLIŠA
- Način sušenja
Brand : ELECTROLUX
Model : EXD16DN3W
Category : Humidifier