-Schaltfläche, um eine Option auszuführen.
Hauptmenü
Das Hauptmenü enthält die folgenden acht Optionen. Wenn eine Hauptmenüoption ausgewählt wird, wechselt die Projektionsfläche zu einem Untermenü-Auswahlbildschirm.
[Eingang] [PC-Anpassung] [Bildauswahl] [Image adjust] [Format Bild] [Einstellung] ### [Information] [7701] [Projektorname]
Untermenü
Der Untermenü-Bildschirm der aus dem Hauptmenü ausgewählten Option wird angezeigt, und Sie können verschiedene Optionen im Untermenü einstellen und anpassen.
[ingang]
Untermenüoption Werkseinstellung Seite [Eingang 1] [RGB(PC analog)] 42 [Eingang 2] [RGB] 42 [Eingang 3] —* 1 — [Eingang 4] —* 1 —
*1: Hängt vom Eingangssignal ab.
Anmerkung
- Das für [Eingang 3] und [Eingang 4] angezeigte Signal ändert sich, abhängig von der Art des eingesetzten Eingangsmoduls.
C-Anpassung]
Untermenüoption Werkseinstellung Seite [Auto PC-Anpassung] — 44 [Fine Sync.] —* 1 44 [Tracking] —* 1 44 [H Position] —* 1 44 [V Position] —* 1 45 [PC-Konfiguration] —* 1 45 [Clamp] —* 1 45 [Displayfläche H] —* 1 45 [Displayfläche V] —* 1 45 [Reset] — 46 [Lösch-Modus] — 46 [Speichern] — 46
*1: Hängt vom Eingangssignal ab.
ildauswahl]
Einzelheiten (→ Seite 47)
Menünavigation
[Image adjust]
Untermenüoption Werkseinstellung Seite [Kontrast] 32 48 [Helligkeit] 32 48 [Farbsättigung]*1 32 48 [Farbton]*1 32 48 [Farbmanagement] — 49 [Farbtemperatur] [Mittel] 50 Weißabgleich ([Rot]/[Grün]/[Blau]) 32 50 [Schwarzabgleich] 32 50 [Autom. Bildkontrolle] [L 1] 50 [Farbraumerweiterung] [Auto] 50 [Schärfe] Für den Computereingang:0Für den Videoeingang: 15 51 [Gamma] 8 51 [Rauschunterdrückung]*1 [Ein] 51 [Progressiv]*1 [Ein] 51 [Reset] — 51 [Speichern] — 52
*1: Wird nur angezeigt und kann nur ausgewählt werden, wenn der Videoeingang verwendet wird.
[brmat Bild]
Untermenüoption Werkseinstellung Seite [Normal] — 53 [Voll] — 53 [Breitbild(16:9)] — 53 [Zoom] — 53 [Original]* 1 — 53 [Benutzerdefiniert] — 54 [Benutzereinstellung] — 54 [Digitaler Zoom +]* 1 — 54 [Digitaler Zoom -]* 1 — 55 [Trapezkorrektur] — 55 [Deckenpro.] [Aus] 56 [Rückpro.] [Aus] 56 [Reset] — 56
*1: Wird nur angezeigt und kann nur ausgewählt werden, wenn der Computereingang verwendet wird.
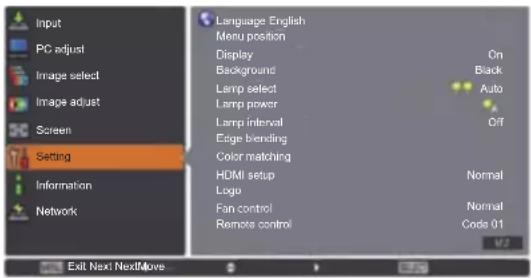
[instellung]
Untermenüoption Werkseinstellung Seite [Sprache] [English] 57 [Menü position] — 57 [Anzeige] [Ein] 57 [Hintergrund] [Blau] 58 [Lampenwahl] [4 Lampen] 58 [Lampen leistung] (AUTO) 58 [Lampenintervall] [Aus] 59 [Edge-Blending] [Aus] 59 [Farbabgleich] [Aus] 60 [HDMI] [Normal] 63 [Logo] — 63 [Lüfterkontrolle] [Normal] 65 [Fernbedienung] [Alle] 65 [Fernbedienungssensor] [Vorne & Hinten] 65 [Automatische Lampenabschaltung] [Aus], [Timer] 30 Minuten 66 [Sofortstart] [Aus] 66 [Sicherheit] — 67 [Projektor ID] [Alle] 68 [Shutter] — 68 [Videoverzögerungssteuerung] [Aus] 69 [Untertitel] [Aus] 70 [Zähluhr Filter] — 70 [Vorführungstimer] [Vorwärtszähler] 71 [Testmuster] — 72 [Fabrikeinstellungen] — 72
Einzelheiten (→ Seite 73)
[projektorname]
Beziehen Sie sich auf „Bedienungsanleitung für den Netzwerkbetrieb“.
Einzelheiten (→ Seite 74)
[Eingang]-Menü
Wählen Sie [Eingang] aus dem Hauptmenü im Menübildschirm aus und wählen Sie die Option aus dem Untermenü aus.
Beziehen Sie sich für die Bedienung des Menübildschirms auf „Navigation durch das Menü“ (→ Seite 38).
- Drücken Sie nach der Wahl der Option ▲▼◀▶, um die Einstellung vorzunehmen.
BedienfeldFernbedie
[Eingang 1]
1) Drücken Sie ▲▼, um [Eingang 1] auszuwählen, und drücken Sie die -Schaltfläche. -Schaltfläche.
[RGB(PC analog)] Wählen Sie dies aus, wenn Sie ein analoges Signal von einem Computer zum-Anschluss eingeben. [RGB(Scart)] Wählen Sie dies aus, wenn Sie ein SCART-Signal von einem Computer zum-Anschluss eingeben. [RGB(PC digital)] Wählen Sie dies aus, wenn Sie ein digitales Signal von einem Computer zum-Anschluss eingeben. [RGB(AV HDCP)] Wählen Sie dies aus, wenn Sie ein HDCP-kompatibles digitales Signal zum-Anschluss eingeben. [HDMI] Wählen Sie dies aus, wenn Sie ein HDMI-kompatibles digitales Signal zum-Anschluss eingeben.
Anmerkung
- Der SCART21-Pin-Anschluss ist ein Videoausgangsanschluss, der in Video-Playern vorhanden ist, die hauptsächlich in Europa verkauft werden. Um eine RGB-Ausgabe von diesem Anschluss am Projektor anzusehen, schließen Sie den SCART21-Pin-Anschluss des Video-Players mit dem zugehörigen Kabel an den -Anschluss des Projektors. Die RGB SCART-Signale, die über den -Anschluss abgespielt werden sollen, sind auf die 480i- und 576i-RGB-Signale beschränkt. Komposit-Videosignale können nicht wiedergegeben werden.
[Eingang 2]
1) Drücken Sie ▲▼, um [Eingang 2] auszuwählen, und drücken Sie die -Schaltfläche. -Schaltfläche.
[RGB] Wählen Sie dies aus, wenn Sie ein analoges Signal von einem Computer zum-Anschluss eingeben. [Y, Pb/Cb, Pr/ Cr] Wählen Sie dies aus, wenn Sie ein Komposit-Videosignal zum-Anschluss eingeben. [Video] Wählen Sie dies aus, wenn Sie ein Komposit-Videosignal zum-Anschluss eingeben. [S-Video] Wählen Sie dies aus, wenn Sie ein S-Video-Signal von einem Computer zum-Anschluss eingeben.
Anmerkung
- Während einige RGB-Signale automatisch erkannt werden, werden nicht erkannte RGB-Signale als „Y,Pb/Cb,Pr/Cr“ erkannt, und es muss [RGB] aus dem Menü ausgewählt werden.
[System]
[System] wird unter dem Untermenü angezeigt.
1) Drücken Sie ▲▼, um [System] unter dem Untermenü auszuwählen, und drücken Sie die - Schaltfläche.
● Das Untermenü 2 wird angezeigt.
2) Drücken Sie ▲▼, um eine Option auszuwählen, und drücken Sie die -Schaltfläche.
- Drücken Sie die -Schaltfläche oder ◀, um zum Untermenü zurückzukehren.
För den Computereingang
[Auto] Wenn kein Eingangssignal mit dem Signal eines angeschlossenen Computers am Projektorkompatibel ist, funktioniert die automatische PC-Abstimmung und [Auto] wird im System angezeigt.Wenn Bilder nicht ordnungsgemäß projiziert werden, passen Sie die Einstellungen manuell passend für Ihren Computer an und registrieren Sie sie unter [Speichern]. — Es gibt kein Eingangssignal vom Computer.Überprüfen Sie die Verbindungen. [Modus 1] - [Modus 10] Wählen Sie dies aus, wenn Sie ein digitales Signal von einem Computer zum-Anschluss eingeben.
För den Video- und S-Videoeingang
[Auto] Der Projektor wählt automatisch das Farbsystem des Eingangssignals aus. [PAL]/ [SECAM]/ [NTSC]/ [NTSC4.43]/ [PAL-M]/ [PAL-N] Dies ist eine Liste der unterstützten Farbsysteme. Das japanische Farbsystem ist NTSC. Wenn die Qualität des Eingangssignals schlecht ist (ungleichmäßige Farbe, keine Farbe usw.) und das Farbsystem nicht ausgewählt wird, auch wenn [Auto] eingestellt ist, wählen Sie [NTSC].
■r den Komponenteneingang
[Auto] Der Projektor wählt automatisch das Abtastverfahren des Eingangssignals aus. Komponentenvideo-Abtast-verfahren ([480p], [576p], [720p], [480i], [576i], [1035i], [1080i], [1080p]) Wenn das Video nicht ordnungsgemäß wiedergegeben wird, wählen Sie das richtige Abtastverfahren aus dem Menü aus.
[PC-Anpassung]-Menü
Wählen Sie [PC-Anpassung] aus dem Hauptmenü im Menübildschirm aus und wählen Sie die Option aus dem Untermenü aus. Beziehen Sie sich für die Bedienung des Menübildschirms auf „Navigation durch das Menü“ (→ Seite 38).
- Drücken Sie nach der Wahl der Option ▲▼◀▶, um die Einstellung vorzunehmen.
BedienfeldFernbedie
[Auto PC-Anpassung]
Passt automatisch die Synchronisierung, die Gesamtanzahl der Bildpunkte, die horizontale Verschiebung und die vertikale Verschiebung an.
1) Drücken Sie ▲▼, um [Auto PC-Anpassung] auszuwählen. - Schaltfläche.
- Dadurch wird die automatische Anpassung ausgeführt.
Anmerkung
Sie können auch den [Auto PC-Anpassung] durch Drücken der -Schaltfläche auf der Fernbedienung verwenden.
Einige Computer können [Fine Sync.], [Tracking], [H Position] oder [V Position] nicht anpassen. Passen Sie in diesem Fall manuell an und registrieren Sie sie unter [Speichern].
Nach der Registrierung der automatisch angepassten Einstellungen, können Sie diesen Modus mit [System] im Menü [Eingang] auswählen.
Die automatische PC-Abstimmung funktioniert nicht, wenn eine der Optionen [480p], [576p], [720p], [480i], [576i], [1035i], [1080i], oder [1080p] mit [System] im Menü [Eingang] ausgewählt wurde.
Bei einigen Computern und Signalarten ist es u.U. nicht möglich, die Bilder ordnungsgemäß zu projizieren.
[Fine Sync.]
Passt den Projektor an, wenn Flimmern aufgrund einer Verfolgungsfehlanpassung (Synchronisierung) auftritt.
1) Drücken Sie ▲▼, um [Fine Sync.] auszuwählen. -Schaltfläche.
- Das erweiterte Menü wird angezeigt.
- Drücken Sie ▲▼, während das erweiterte Menü angezeigt wird, um zwischen den Menüs vor- und zurückzugehen.
3) Drücken Sie ◀▶, während Sie auf die Projektionsfläche schauen, um die Einstellung anzupassen.
- Drücken Sie die -Schaltfläche, um zum Untermenü zurückzukehren.
Anmerkung
Der Anpassungswert kann von 0 bis 31 eingestellt werden.
Bei einigen Computern ist es u.U. nicht möglich, das Bildschirmflimmern vollständig zu beseitigen.
[Tracking]
Passen Sie die Gesamtanzahl der Bildpunkte im horizontalen Intervall an.
1) Drücken Sie ▲▼, um [Tracking] auszuwählen. -Schaltfläche. -Schaltfläche, um zum Untermenü zurückzukehren.
[H Position]
Passt die horizontale Position der Projektionsfläche an.
1) Drücken Sie ▲▼, um [H Position] auszuwählen. -Schaltfläche.
3) Drücken Sie ◀▶, während Sie auf die Projektionsfläche schauen, um die Einstellung anzupassen.
- Drücken Sie die -Schaltfläche, um zum Untermenü zurückzukehren.
[V Position]
Passt die vertikale Position der Projektionsfläche an.
1) Drücken Sie ▲▼, um [V Position] auszuwählen. - Schaltfläche.
- Das erweiterte Menü wird angezeigt.
- Drücken Sie ▲▼, während das erweiterte Menü angezeigt wird, um zwischen den Menüs vor- und zurückzugehen.
3) Drücken Sie ◀▶, während Sie auf die Projektionsfläche schauen, um die Einstellung anzupassen.
- Drücken Sie die -Schaltfläche, um zum Untermenü zurückzukehren.
[PC-Konfiguration]
Zeigt die aktuellen Werte für die H-sync-Frequenz und die V-sync-Frequenz für den derzeit angeschlossenen Computer an.
1) Drücken Sie ▲▼, um [PC-Konfiguration] auszuwählen. - Schaltfläche oder ▶.
● Das erweiterte Menü wird angezeigt.
- Drücken Sie die -Schaltfläche oder ◀, um zum Untermenü zurückzukehren.
[Clamp]
Passt die Clamp-Position an.
Verwenden Sie dies, wenn eine schwarze Linie im projizierten Bild sichtbar ist.
1) Drücken Sie ▲▼, um [Clamp] auszuwählen. - Schaltfläche.
● Das erweiterte Menü wird angezeigt.
- Drücken Sie ▲▼, während das erweiterte Menü angezeigt wird, um zwischen den Menüs vor- und zurückzugehen.
3) Drücken Sie ◀▶, während Sie auf die Projektionsfläche schauen, um die Einstellung anzupassen.
- Drücken Sie die -Schaltfläche, um zum Untermenü zurückzukehren.
[Displayfläche H]
Passt die horizontale Auflösung an.
1) Drücken Sie ▲▼, um [Displayfläche H] auszuwählen. - Schaltfläche.
Das erweiterte Menü wird angezeigt.
Drücken Sie ▲▼, während das erweiterte Menü angezeigt wird, um zwischen den Menüs vor- und zurückzugehen.
3) Drücken Sie ◀▶, während Sie auf die Projektionsfläche schauen, um die Einstellung anzupassen.
- Drücken Sie die -Schaltfläche, um zum Untermenü zurückzukehren.
Anmerkung
- Sie können [Displayfläche H] nicht anpassen, wenn eine der Optionen [480p], [576p], [720p], [480i], [576i], [1035i], [1080i], oder [1080p] mit [System] im Menü [Eingang] ausgewählt wurde.
[Displayfläche V]
Passt die vertikale Auflösung an.
1) Drücken Sie ▲▼, um [Displayfläche V] auszuwählen. - Schaltfläche.
Das erweiterte Menü wird angezeigt.
Drücken Sie ▲▼, während das erweiterte Menü angezeigt wird, um zwischen den Menüs vor- und zurückzugehen.
3) Drücken Sie ◀▶, während Sie auf die Projektionsfläche schauen, um die Einstellung anzupassen.
- Drücken Sie die -Schaltfläche, um zum Untermenü zurückzukehren.
Anmerkung
- Sie können [Displayfläche V] nicht anpassen, wenn eine der Optionen [480p], [576p], [720p], [480i], [576i], [1035i], [1080i], oder [1080p] mit [System] im Menü [Eingang] ausgewählt wurde.
[PC-Anpassung]-Menü
[Reset]
Die Einstellung kehrt zu ihrem Wert vor der Anpassung zurück.
1) Drücken Sie ▲▼, um [Reset] auszuwählen. - Schaltfläche. -Schaltfläche. -Schaltfläche, um zum Untermenü zurückzukehren.
[Lösch-Modus]
Löscht die unter [Speichern] registrierten Werte.
1) Drücken Sie ▲▼, um [Lösch-Modus] auszuwählen. - Schaltfläche oder ▶. - Schaltfläche. -Schaltfläche.
Der ausgewählte Modus wird gelöscht und der Projektor kehrt zum Untermenü 2 zurück.
Wählen Sie [Nein] und drücken Sie die -Schaltfläche, um zum Untermenü 2 zurückzukehren.
[Speichern]
Registriert die angepassten Werte unter [Speichern].
1) Drücken Sie ▲▼, um [Speichern] auszuwählen. - Schaltfläche oder ▶.
- Der registrierte Inhalt jedes Modus wird im Untermenü 2 angezeigt.
3) Drücken Sie ▲▼, um den zu registrierenden Modus auszuwählen.
4) Drücken Sie die - Schaltfläche.
5) Wählen Sie [Ja] und drücken Sie die -Schaltfläche.
Der ausgewählte Modus wird registriert und der Projektor kehrt zum Untermenü 2 zurück.
Wählen Sie [Nein] und drücken Sie die -Schaltfläche, um zum Untermenü 2 zurückzukehren.
[Bildauswahl]-Menü
Wählen Sie [Bildauswahl] aus dem Hauptmenü im Menübildschirm aus und wählen Sie die Option aus dem Untermenü aus.
Beziehen Sie sich für die Bedienung des Menübildschirms auf „Navigation durch das Menü“ (→ Seite 38).
- Drücken Sie nach der Wahl der Option ▲▼◀▶, um die Einstellung vorzunehmen.
BedienfeldFernbedie
- Sie können Untermenüs auch mit der -Schaltfläche auf der Fernbedienung anzeigen.
Anpassen der Bildqualität
Passen Sie die Bildqualität des projizierten Bildes so an, dass sie für die Umgebung, in der Projektor verwendet wird, geeignet ist.
[standard]
Setzt die Menüoptionen [Image adjust] auf die Standardeinstellungen zurück.
[Luthentisch]
In diesem Modus werden Zwischeneinstellungen so angepasst, dass sie heller sind, um die Sicht an helleren Orten zu verbessern.
- Dieser Modus kann nur für Computereingänge ausgewählt werden.
[■noeinstellung]
Verstärkt die Abstufung, damit dieser Modus für das Anschauen von Filmen geeignet ist.
- Dieser Modus kann nur für Video- oder Komponenteneingänge ausgewählt werden.
[ynamik]
Erzeugt Bilder mit einem stärkeren Kontrast als [Standard].
[■Id 1] - [Bild 10]
Ruft Bildqualitätseinstellungen auf, die manuell mit dem Menü [Image adjust] eingestellt wurden.
- Bilder können mit den Computereingängen und den Videoeingängen registriert werden.
[Image adjust]-Menü
Wählen Sie [Image adjust] aus dem Hauptmenü im Menübildschirm aus und wählen Sie die Option aus dem Untermenü aus.
Beziehen Sie sich für die Bedienung des Menübildschirms auf „Navigation durch das Menü“ (→ Seite 38).
- Drücken Sie nach der Wahl der Option ▲▼◀▶, um die Einstellung vorzunehmen.
BedienfeldFernbedie
- Sie können Untermenüs auch mit der -Schaltfläche auf der Fernbedienung anzeigen.
[Kontrast]
1) Drücken Sie ▲▼, um [Kontrast] auszuwählen. -Schaltfläche.
Bedienung Anpassung Bereich Drücken Sie ▶. Verstärkt den Kontrast. Maximalwert 63 Drücken Sie ◀. Schwächt den Kontrast. Minimalwert 0
[Helligkeit]
1) Drücken Sie ▲▼, um [Helligkeit] auszuwählen. -Schaltfläche.
3) Drücken Sie ◀▶, während Sie auf die Projektionsfläche schauen, um die Einstellung anzupassen.
Bedienung Anpassung Bereich Drücken Sie ▶. Erhöht die Helligkeit. Maximalwert 63 Drücken Sie ◀. Verringert die Helligkeit. Minimalwert 0
[Farbsättigung]
Diese Einstellung kann nur für Video- oder Komponenteneingänge angepasst werden.
1) Drücken Sie ▲▼, um [Farbsättigung] auszuwählen. - Schaltfläche.
- Das erweiterte Menü wird angezeigt.
- Drücken Sie ▲▼, während das erweiterte Menü angezeigt wird, um zwischen den Menüs vor- und zurückzugehen.
3) Drücken Sie ◀▶, während Sie auf die Projektionsfläche schauen, um die Einstellung anzupassen.
Bedienung Anpassung Bereich Drücken Sie ▶. Verdunkelt das Bild. Maximalwert 63 Drücken Sie ◀. Erhellt das Bild. Minimalwert 0
[Farbton]
Diese Einstellung kann nur für Video- oder Komponenteneingänge angepasst werden.
1) Drücken Sie ▲▼, um [Farbton] auszuwählen. - Schaltfläche.
- Das erweiterte Menü wird angezeigt.
- Drücken Sie ▲▼, während das erweiterte Menü angezeigt wird, um zwischen den Menüs vor- und zurückzugehen.
3) Drücken Sie ◀▶, während Sie auf die Projektionsfläche schauen, um die Einstellung anzupassen.
Bedienung Anpassung Bereich Drücken Sie ▶. Verstärkt grün. Maximalwert 63 Drücken Sie ◀. Verstärkt lila. Minimalwert 0
[Farbmanagement]
Passt die Farbe des projizierten Bildes wie gewünscht an.
1) Drücken Sie ▲▼, um [Farbmanagement] auszuwählen. -Schaltfläche.
Azeigen des [COLOR SELECTION]-Menüs
1) Drücken Sie die -Schaltfläche. -Schaltfläche.
Passen der Farbe des [COLOR SELECTION]-Menüs
1) Drücken Sie ▲▼◀▶, um den Cursor zur Mitte der [COLOR], zu bewegen, und drücken Sie die -Schaltfläche. - Schaltfläche.
- Die Projektionsfläche geht zur [GAMMA]-Anpassung über.
4) Drücken Sie ▲▼◀▶, um die anzuzeigende Farbe nach der Anpassung auszuwählen, drücken Sie dann die -Schaltfläche. -Schaltfläche mit dem Cursor auf der [LIST].
[LIST] Zeigt die [COLOR MANAGEMENT LIST] an. [COLOR M.] Bricht die Anpassung ab und bringt den Cursor zurück in den farblosen Zustand. [MENU] Beendet die Anzeige der [COLOR MANAGEMENT LIST].
6) Die [COLOR MANAGEMENT LIST] wird angezeigt.
- Sie können überprüfen, ob die registrierte Farbe gespeichert wurde.
[■OLOR MANAGEMENT LIST]-Bedienungen
●Erneute Anpassung der gespeicherten Farben
1) Drücken Sie ▲▼, um die Farbe für die erneute Anpassung auszuwählen. - Schaltfläche, um zum [COLOR SELECTION]-Menü zurückzukehren.
- Sie können die Farbe erneut anpassen.
- Löschen der gespeicherten Farben
1) Drücken Sie ▲▼, um die zu löscheide Farbe auszuwählen. - Schaltfläche. -Schaltfläche.
● Die registrierte Farbe wird gelöscht.
[ALL DEL] Löscht alle gespeicherten Optionen in der Liste. [MENU] Beendet die Anzeige der [COLOR MANAGEMENT LIST], und kehrt zum Menü [Image adjust] zurück. [COLOR M.] Speichert die Anpassung. Ein neuer farbloser Cursor wird angezeigt und Sie können weiter Anpassungen vornehmen.
[Image adjust]-Menü
[Farbtemperatur]
1) Drücken Sie ▲▼, um [Farbtemperatur] auszuwählen. - Schaltfläche.
Das erweiterte Menü wird angezeigt.
Drücken Sie ▲▼, während das erweiterte Menü angezeigt wird, um zwischen den Menüs vor- und zurückzugehen.
Bedienung Anpassung Bereich Drücken Sie ▶. Erhöht die Farbtemperatur. [Sehr niedrig]-[Niedrig]-[Mittel]-[Hoch] Drücken Sie ◀. Senkt die Farbtemperatur.
Anmerkung
[Sehr niedrig] (verstärkt rot) – [Hoch] (verstärkt blau)
Beachten Sie, dass durch die Anpassung dieser Option auch die Weißabgleichseinstellung geändert wird.
[Anpassung] wird angezeigt, wenn Sie den Weißabgleich anpassen (eine dieser Optionen [Rot], [Grün], und [Blau]).
Weißabgleich ([Rot]/[Grün]/[Blau])
1) Drücken Sie ▲▼, um [Rot] (oder [Grün] oder [Blau]) auszuwählen. - Schaltfläche.
Bedienung Anpassung Bereich Drücken Sie ▶. Schwächt die Farbe ab. Maximalwert 63 Drücken Sie ◀. Vertieft die Farbe. Minimalwert 0
[Schwarzabgleich]
1) Drücken Sie ▲▼, um [Schwarzabgleich] auszuwählen. - Schaltfläche oder ▶.
3) Drücken Sie ▲▼, um [Rot] (oder [Grün] oder [Blau]) auszuwählen.
4) Drücken Sie die - Schaltfläche.
5) Drücken Sie ◀▶, während Sie auf die Projektionsfläche schauen, um die Einstellung anzupassen.
[Rot] Mindestwert 0 - Maximalwert 63 [Grün] Mindestwert 0 - Maximalwert 63 [Blau] Mindestwert 0 - Maximalwert 63
[Autom. Bildkontrolle]
Verstärkt die dunklen Teile des projizierten Bildes.
1) Drücken Sie ▲▼, um [Autom. Bildkontrolle] auszuwählen. - Schaltfläche.
- Die Einstellung wird mit jedem Druck auf die Schaltfläche wie folgt geändert.
[Farbraumerweiterung]
Stellt den Betrieb des Farbsteuerungsgeräts ein, das den Betrag des gelben Lichts unabhängig steuert.
1) Drücken Sie ▲▼, um [Farbraumerweiterung] auszuwählen. - Schaltfläche.
3) Drücken Sie ◀▶, um die Einstellung zu wechseln.
- Die Einstellung wird mit jedem Druck auf die Schaltfläche wie folgt geändert.
- Der Weißabgleich kann sich abhängig vom Bild ändern.
[Schärfe]
1) Drücken Sie ▲▼, um [Schärfe] auszuwählen. - Schaltfläche.
- Das erweiterte Menü wird angezeigt.
- Drücken Sie ▲▼, während das erweiterte Menü angezeigt wird, um zwischen den Menüs vor- und zurückzugehen.
3) Drücken Sie ◀▶, während Sie auf die Projektionsfläche schauen, um die Einstellung anzupassen.
Bedienung Anpassung Bereich Drücken Sie ▶. Verstärkt die Schärfe. Maximalwert 31 Drücken Sie ◀. Verringert die Schärfe. Minimalwert 0
[Gamma]
1) Drücken Sie ▲▼, um [Gamma] auszuwählen. - Schaltfläche.
● Das erweiterte Menü wird angezeigt.
- Drücken Sie ▲▼, während das erweiterte Menü angezeigt wird, um zwischen den Menüs vor- und zurückzugehen.
3) Drücken Sie ◀▶, während Sie auf die Projektionsfläche schauen, um die Einstellung anzupassen.
Bedienung Anpassung Bereich Drücken Sie ▶. Erhellt die Zwischenabstufungen. Maximalwert 15 Drücken Sie ◀. Verdunkelt die Zwischenabstufungen. Minimalwert 0
[Rauschunterdrückung]
Verringert Rauschen beim Betrachten von alten Videos oder anderen Bildern, die von Rauschen betroffen sind.
1) Drücken Sie ▲▼, um [Rauschunterdrückung] auszuwählen. - Schaltfläche.
● Die Einstellung wird mit jedem Druck auf die Schaltfläche wie folgt geändert.
[Progressiv]
Kann für die Videoeingangssignale von 480i, 576i, 1035i, und 1080i eingestellt werden.
1) Drücken Sie ▲▼, um [Progressiv] auszuwählen. - Schaltfläche.
- Die Einstellung wird mit jedem Druck auf die Schaltfläche wie folgt geändert.
Stellen Sie auf [Aus] ein, wenn ein Video mit viel Bewegung durch Flimmern oder horizontale Linien beeinflusst wird.
[Filmmodus] ermöglicht die Wiedergabe von 3-2 Pull-down-/2-2 Pull-down-Bildern am Projektor, ohne das die Bildqualität der Bilder verloren geht.
Beim Wechseln wird das Bild für einen Moment verzerrt dargestellt.
[Reset]
Die Einstellung kehrt zu ihrem Wert vor der Anpassung zurück.
1) Drücken Sie ▲▼, um [Reset] auszuwählen. - Schaltfläche oder ▶. -Schaltfläche.
● Die Einstellung kehrt zu ihrem Wert vor der Anpassung zurück. -Schaltfläche, um zum Untermenü zurückzukehren.
[Image adjust]-Menü
[Speichern]
1) Drücken Sie ▲▼, um [Speichern] auszuwählen. - Schaltfläche oder ▶.
- Der registrierte Inhalt jedes Modus wird im Untermenü 2 angezeigt.
3) Drücken Sie ▲▼, um den zu registrierenden Modus auszuwählen.
● [Bild 1] - [Bild 10] - Schaltfläche. -Schaltfläche.
- Der ausgewählte Modus wird registriert und der Projektor kehrt zum Untermenü 2 zurück.
- Wählen Sie [Nein] und drücken Sie die -Schaltfläche, um zum Untermenü 2 zurückzukehren.
Anmerkung
Die angepasste Option ist unter [Speichern] registriert und gespeichert.
Mit [Speichern] können Sie die Computereingänge und die Videoeingänge speichern.
Wählen Sie [Format Bild] aus dem Hauptmenü im Menübildschirm aus und wählen Sie die Option aus dem Untermenü aus.
Beziehen Sie sich für die Bedienung des Menübildschirms auf „Navigation durch das Menü“ (→ Seite 38).
- Drücken Sie nach der Wahl der Option ▲▼◀▶, um die Einstellung vorzunehmen.
BedienfeldFernbedi
- Sie können Untermenüs auch mit der -Schaltfläche auf der Fernbedienung anzeigen.
[Normal]
Zeigt die maximal zulässige Größe an, während das Seitenverhältnis des Eingangssignals beibehalten wird.
1) Drücken Sie ▲▼, um [Normal] auszuwählen. - Schaltfläche.
[Voll]
Zeigt die Vollbildgröße an.
Wenn kein Eingangssignal vorhanden ist, wird diese Option ausgegraut und kann nicht ausgewählt werden. - Schaltfläche.
[Breitbild(16:9)]
Zeigt im Breitbild-Format mit einem Seitenverhältnis von 16:9.
Wenn kein Eingangssignal vorhanden ist, wird diese Option ausgegraut und kann nicht ausgewählt werden. - Schaltfläche.
[Zoom]
Speichert das Seitenverhältnis und projiziert auf der gesamten Flächengröße.
Wenn kein Eingangssignal vorhanden ist, wird diese Option ausgegraut und kann nicht ausgewählt werden.
Wenn das Bild horizontal breiter ist als die Fläche, dann werden die rechten und linken Ränder beschnitten. Wenn es vertikal länger ist als die Fläche, dann werden die oberen und unteren Ränder beschnitten.
1) Drücken Sie ▲▼, um [Zoom] auszuwählen. - Schaltfläche.
[Original]
Projiziert das Bild in der Originalgröße.
Dieser Modus kann nur für Computereingänge angepasst werden.
Wenn kein Eingangssignal vorhanden ist, wird diese Option ausgegraut und kann nicht ausgewählt werden.
1) Drücken Sie ▲▼, um [Original] auszuwählen. - Schaltfläche.
Wenn die Bildgröße kleiner als die Flächenauflösung *1 ist
Das Bild wird in der Mitte der Projektionsfläche projiziert und [Original] wird oben links auf der Projektionsfläche angezeigt. *1 .
[Original] wird oben links auf der Projektionsfläche projiziert, aber das Bild wird anschließend im Modus [Normal] projiziert.
Wenn die Bildgröße größer als die Flächenauflösung *1 ist.
[Original] wird oben links auf der Projektionsfläche projiziert und △(△) werden oben, unten, links und rechts auf der Projektionsfläche angezeigt.
Drücken Sie ▲▼◀▶, um das Bild zu verschieben.
Der Pfeil in der Bewegungsrichtung wird rot angezeigt.
Bei den Positionen der maximalen Verschiebung werden die Pfeile ausgeblendet.
*1: Die Flächenauflösung des Projektors beträgt 1 024 x 768 Bildpunkte.
[Benutzerdefiniert]
Das Bild wird mit den Werten projiziert, die unter [Speichern] im Menü [PC-Anpassung] registriert sind.
- Wenn kein Eingangssignal vorhanden ist, kann [Benutzerdefiniert] ausgewählt werden, aber das Bild wird im Modus [Normal] projiziert.
1) Drücken Sie ▲▼, um [Benutzerdefiniert] auszuwählen. - Schaltfläche.
[Benutzereinstellung]
Passt den horizontalen und vertikalen Maßstab und die Position an.
Wenn kein Eingangssignal vorhanden ist, wird diese Option ausgegraut und kann nicht ausgewählt werden.
Wenn das Eingangssignal während der Anpassung verloren geht, wird der Anpassungswert gespeichert und der [Verhältnis]-Einstellbildschirm wird gelöscht.
1) Drücken Sie ▲▼, um [Benutzereinstellung] auszuwählen, und drücken Sie ▶. -Schaltfläche.
- Drücken Sie die -Schaltfläche, um [H&V], anzupassen und nehmen Sie die Anpassung am Untermenü 2-Bildschirm vor.
- Drücken Sie die -Schaltfläche für [Übernehmen] und [Reset]. Wählen Sie [Ja] und drücken Sie die -Schaltfläche.
- Drücken Sie ▲▼, während das erweiterte Menü angezeigt wird, um der Reihe nach andere Menüs als [H&V], [Übernehmen] und [Reset] anzuzeigen.
4) Drücken Sie ◀▶, um die Einstellung anzupassen.
- Drücken Sie die -Schaltfläche, um zum Untermenü zurückzukehren.
[Hor. Vergrößerung] Passt den horizontalen Maßstab an. [Vert. Vergrößerung] Passt den vertikalen Maßstab an.
[H&V] Wählen Sie bei der Anpassung des vertikalen und horizontalen Maßstabs [Ein], um die vertikalen und horizontalen Maßstäbe zu verbinden und das Seitenverhältnis des Bildes zu bewahren.● Während Sie den numerischen Wert von [Hor. Vergrößerung] anpassen, ändert sich der numerische Wert von [Vert. Vergrößerung] dementsprechend. [H Position] Passt die horizontale Verschiebung an. [V Position] Passt die vertikale Verschiebung an. [Übernehmen] Verwendet die angepassten Inhalte für alle Eingänge. [Reset] Setzt alle angepassten Inhalte zurück.
[Digitaler Zoom +]
1) Drücken Sie ▲▼, um [Digitaler Zoom +] auszuwählen. - Schaltfläche oder ▶.
- Der Menübildschirm wird gelöscht und [Digitaler Zoom +] wird angezeigt.
3) Drücken Sie die - Schaltfläche.
Mit jedem Druck auf die Schaltfläche wird das Bild vergrößert.
Drücken Sie ▲▼◀▶, um das Bild zu verschieben.
Die Bildverschiebung funktioniert nur, wenn die Bildgröße größer als die Flächenauflösung *1 ist.
*1: Die Flächenauflösung des Projektors beträgt 1 024 x 768 Bildpunkte.
Anmerkung
Wenn kein Eingangssignal vorhanden ist, wird [Digitaler Zoom +] ausgegraut und kann nicht ausgewählt werden.
Wenn [Original] ausgewählt ist, kann [Digitaler Zoom +] nicht ausgewählt werden.
Um den [Digitaler Zoom +]-Betrieb zu beenden, drücken Sie auf eine andere Schaltfläche als , und ▲▼◀▶.
[Digitaler Zoom -]
1) Drücken Sie ▲▼, um [Digitaler Zoom -] auszuwählen. - Schaltfläche oder ▶.
- Der Menübildschirm wird gelöscht und [Digitaler Zoom -] wird angezeigt.
3) Drücken Sie die - Schaltfläche.
Mit jedem Druck auf die Schaltfläche wird das Bild verkleinert.
Drücken Sie ▲▼◀▶, um das Bild zu verschieben.
Die Bildverschiebung funktioniert nur, wenn die Bildgröße größer als die Flächenauflösung *1 ist.
*1: Die Flächenauflösung des Projektors beträgt 1 024 x 768 Bildpunkte.
Anmerkung
Wenn kein Eingangssignal vorhanden ist, wird [Digitaler Zoom -] ausgegraut und kann nicht ausgewählt werden.
Wenn [Original] ausgewählt ist, kann [Digitaler Zoom -] nicht ausgewählt werden.
Wenn [Benutzerdefiniert] ausgewählt ist, können Sie [Digitaler Zoom -] nicht auf [Normal] oder kleiner einstellen.
Wenn [Speichern], das im Menü [PC-Anpassung] registriert ist, im [System] des Menüs [Eingang] ausgewählt wird, funktioniert die Bildverschiebung von [Digitaler Zoom -] u.U. nicht ordnungsgemäß.
Wenn VGA, SVGA, SXGA, WXGA, oder UXGA unter [System] des Menüs [Eingang] ausgewählt ist und die [Trapezkorrektur]-Anpassung nach oben beim Maximalwert liegt, funktioniert der [Digitaler Zoom -] u.U. nicht ordnungsgemäß.
Um den [Digitaler Zoom -]-Betrieb zu beenden, drücken Sie auf eine andere Schaltfläche als , , und ▲▼◀▶.
[Trapezkorrektur]
1) Drücken Sie ▲▼, um [Digitaler Zoom -] auszuwählen. - Schaltfläche oder ▶.
- Der Einstellbildschirm der Untermenüs 2 wird angezeigt.
3) Drücken Sie ▲▼, um eine Option auszuwählen.
[standard]
Korrigiert den Trapezeffekt vertikal und horizontal.
1) Wählen Sie [Standard] und drücken Sie die -Schaltfläche.
- Der Menübildschirm wird gelöscht und [Trapezkorrektur] wird angezeigt.
- Drücken Sie ▲▼◀▶, um die Korrektur vorzunehmen.
[ckenkorrektur]
Korrigiert die Verzerrung an den Bildecken.
1) Wählen Sie [Eckenkorrektur] und drücken Sie die - Schaltfläche.
- Der Bildschirm für die Wahl der Ecke, die korrigiert werden soll, wird angezeigt.
2) Drücken Sie die - Schaltfläche, um die Ecke für die Korrektur auszuwählen.
3) Drücken Sie ▲▼◀▶, um die Ecke zu korrigieren.
[uster Eckenkorrekt.]
Wählt den Eckenmuster-Modus aus, der während der Eckenkorrektur angezeigt wird.
1) Wählen Sie [Muster Eckenkorrekt.], und drücken Sie die - Schaltfläche.
- Der Einstellungsbildschirm wird angezeigt.
2) Drücken Sie ▲▼, um eine Option auszuwählen.
[Rot] Zeigt das Eckenmuster rot an. [Weiß] Zeigt das Eckenmuster weiß an. [Blau] Zeigt das Eckenmuster blau an. [Aus] Löscht die Anzeige des Eckenmusters.
[Speichern]
Speichert den Korrekturstatus.
1) Wählen Sie [Speichern], und drücken Sie die -Schaltfläche. -Schaltfläche.
[Speichern] Der Anpassungsstatus bleibt im Speicher erhalten, auch nachdem das Netzkabel abgezogen wurde. [Reset] Der Anpassungsstatus wird zurückgesetzt, wenn das Netzkabel abgezogen wird.
- Sie können entweder [Standard] oder [Eckenkorrektur] registrieren.
[Deckenpro.]
Stellt die Projektionsmethode gemäß des Installationsstatus des Projektors ein.
Wenn die Bildschirmanzeige auf dem Kopf steht, wählen Sie [Ein] aus.
- Diese Einstellung wird verwendet, wenn der Projektor mit Deckenmontageträgern (optionales Zubehör) installiert wird.
1) Drücken Sie ▲▼, um [Deckenpro.] auszuwählen. - Schaltfläche.
[Aus] [Ein]
[Rückpro.]
Stellt die Projektionsmethode gemäß des Installationsstatus des Projektors ein. Wenn die Bildschirmanzeige umgedreht ist, wählen Sie [Ein] aus.
1) Drücken Sie ▲▼, um [Rückpro.] auszuwählen. - Schaltfläche.
[Aus] [Ein]
[Reset]
Die Einstellung kehrt zu ihrem Wert vor der Anpassung zurück.
1) Drücken Sie ▲▼, um [Reset] auszuwählen. - Schaltfläche. -Schaltfläche.
- Die Einstellung kehrt zu ihrem Wert vor der Anpassung zurück.
- Wählen Sie [Nein] und drücken Sie die -Schaltfläche, um zum Untermenü zurückzukehren.
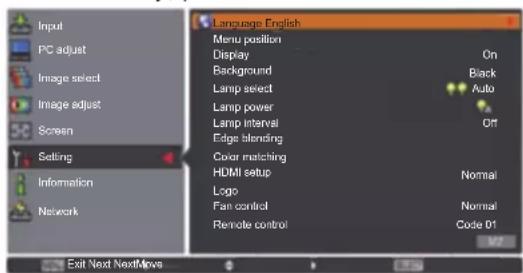
[Einstellung]-Menü
Wählen Sie [Einstellung] aus dem Hauptmenü im Menübildschirm aus und wählen Sie die Option aus dem Untermenü aus. Beziehen Sie sich für die Bedienung des Menübildschirms auf „Navigation durch das Menü“ (→ Seite 38).
- Drücken Sie nach der Wahl der Option ▲▼◀▶, um die Einstellung vorzunehmen.
BedienfeldFernbedie
[Sprache]
Wechselt die Anzeigesprache.
1) Drücken Sie ▲▼, um [Sprache] auszuwählen. - Schaltfläche oder ▶.
● Das Untermenü 2 wird angezeigt.
- Es sind zehn Sprachen verfügbar (Englisch, Deutsch, Französisch, Italienisch, Spanisch, Portugiesisch, Russisch, Chinesisch, Koreanisch und Japanisch).
3) Drücken Sie ▲▼, um eine Option auszuwählen.
[Menü position]
Passt die Anzeigeposition des Bildschirmmenüs an.
1) Drücken Sie ▲▼, um [Menü position] auszuwählen. - Schaltfläche.
Die Pfeile werden im Untermenü 2 angezeigt. Drücken Sie ▲▼◀▶, um die Position anzupassen.
Bei den Positionen der maximalen Verschiebung werden die Pfeile ausgeblendet.
[Anzeige]
Stellt die Anzeige des Bildschirmmenüs ein.
1) Drücken Sie ▲▼, um [Anzeige] auszuwählen. - Schaltfläche.
[Aus] Die folgenden Bildschirmanzeigen werden eingeblendet.● Menüanzeige● Anzeige von [Ausschalten ?], wenn der Strom abgeschaltet wird● Timer-Anzeige, wenn der Präsentationstimer verwendet wird● Anzeige von [Bitte warten] bei [Auto PC-Anpassung]● Timer-Anzeige, wenn die Stromversorgung verwendet wird● Die Pfeile, die angezeigt werden, wenn [Menü position] unter [Einstellung] ausgewählt wird● Fehlermeldungen, die angezeigt werden, wenn eine Schaltfläche gedrückt wird, die nicht für die aktuellen Einstellungen verwendet wird● △ Pfeile, die angezeigt werden, wenn die Bildgröße größer als die Flächenauflösung (1 024 x 768 Bildpunkte) ist● Anzeige von [Muster Eckenkorrekt.] [Countdown aus] Dadurch projiziert der Projektor sofort, nachdem die Lampe aufleuchtet, ohne den Countdown für etwa 20 Sekunden anzuzeigen.● Wählen Sie dies aus, wenn Sie das Bild schnell projizieren möchten und es nicht wichtig ist, dass das projizierte Bild etwas dunkel ist. [Ein] Zeigt alle Bildschirmanzeigen.● Wählen Sie dies aus, wenn Sie das Bild projizieren möchten, nachdem die Projektionsfläche eine bestimmte Helligkeitsstufe erreicht hat.
[Einstellung]-Menü
[Hintergrund]
Wählt die Hintergrundprojektionsfläche aus, wenn kein Eingangssignal vorhanden ist.
1) Drücken Sie ▲▼, um [Hintergrund] auszuwählen. -Schaltfläche.
● ▲▼ werden über dem Untermenü 2 angezeigt.
[Blau] [Benutzer] [Schwarz]
[Lampenwahl]
Wählt die Lampe aus, die für die Projektion verwendet wird.
1) Drücken Sie ▲▼, um [Lampenwahl] auszuwählen. - Schaltfläche oder ▶.
[Lampen]
Schaltet vier Lampen ein.
1) Wählen Sie [4 Lampen] und drücken Sie die -Schaltfläche. -Schaltfläche. - Schaltfläche, um zum Untermenü 2 zurückzukehren.
[Lampen]
Schaltet zwei Lampen ein.
1) Wählen Sie [2 Lampen] und drücken Sie die -Schaltfläche.
2) Wählen Sie [Ja] und drücken Sie die -Schaltfläche.
Die Einstellung wird beendet und der Projektor kehrt zum Untermenü 2 zurück.
Wählen Sie [Nein] und drücken Sie die - Schaltfläche, um zum Untermenü 2 zurückzukehren.
[Auto] Erkennt automatisch die Lampe mit der kürzesten Gesamtzeit und gibt ihr den Vorrang beim Einschalten. Schaltet die Lampe 2 und die Lampe 3 ein. Schaltet die Lampe 1 und die Lampe 4 ein.
Anmerkung
Wenn die Lampe aufgrund einer Störung oder weil sie das Ende Ihrer Betriebszeit erreicht hat ausfällt, blinkt die Anzeige für die Lampe vorn am Projektorgehäuse und die Anzeige für die Lampe ( - ) am Projektorgehäuse über der ausgefallenen Lampe. Ein X-Symbol wird ebenfalls als Lampenstatus oben auf der Projektionsfläche eingeblendet.
Wenn [4 Lampen] ausgewählt wird und eine Lampe ausfällt, führen zwei sich diagonal gegenüberliegende Lampen (ohne die ausgefallene Lampe) die Projektion durch. Wenn eine weitere Lampe ausfällt, wird die Projektion mit einer Lampe fortgeführt.
Wenn [2 Lampen] ausgewählt wird und eine Lampe ausfällt, führen zwei sich diagonal gegenüberliegende Lampen (ohne die ausgefallene Lampe) die Projektion durch. Wenn eine weitere Lampe ausfällt, wird die Projektion mit einer Lampe fortgeführt.
Wenn alle Lampen ausfallen, wird der Strom abgeschaltet. Wird der Strom eingeschaltet, ohne dass die Lampen nach der Überschreitung der Laufzeit von 2 200 Betriebsstunden für alle Lampen ausgetauscht werden, schaltet sich das Gerät automatisch nach etwa zehn Minuten aus, um eine Fehlfunktion des Projektors zu verhindern.
[Lampen leistung]
Stellt den Wechsel der Lampenhelligkeit ein. Die Verwendung des Eco-Modus wird empfohlen, wenn Sie den Stromverbrauch reduzieren möchten.
1) Drücken Sie ▲▼, um [Lampen leistung] auszuwählen.
2) Drücken Sie die -Schaltfläche.
3) Drücken Sie ▲▼, um eine Option auszuwählen.
- Die Einstellung wird mit jedem Druck auf die Schaltfläche wie folgt geändert.
(AUTO) Stellt die Helligkeit automatisch mit einem Belichtungsmess-Stromkreis ein. (Standard) Arbeitet bei bestimmten Helligkeiten. (Eco-Modus 1) Der Lufteinlass/-auslass verringert sich im Vergleich zu und das Geräusch des Lüfters wird leiser. (Eco-Modus 2) Der Lufteinlass/-auslass erhöht sich im Vergleich zu und das Geräusch des Lüfters wird lauter.
[Lampenintervall]
Stellt den Austauschzyklus ein, wenn [Lampenwahl] auf [2 Lampen] eingestellt ist. Nach dem Austauschzyklus wird die Lampe für den Einsatz automatisch gewechselt.
- Der hier eingestellte Zeitpunkt ist ein Richtlinienzeitpunkt.
1) Drücken Sie ▲▼, um [Lampenintervall] auszuwählen. -Schaltfläche.
[Aus] Wechselt die Lampen nicht. [24 Std.]/[200 Std.]/[500 Std.]/[1000 Std.]/[2000 Std.] Wechselt die Lampen zu den festgelegten Intervallen.Wenn der eingestellte Zeitpunkt erreicht wird, erleuchtet der Projektor eine Lampe und gibt der Lampe mit der kürzesten Gesamtbetriebszeit den Vorrang.
[Edge-Blending]
Dadurch wird es schwerer, die Verbindungsstelle zwischen den Projektionsflächen zu sehen, wenn mehrere Projektionsflächen verwendet werden.
1) Drücken Sie ▲▼, um [Edge-Blending] auszuwählen. -Schaltfläche.
- Zeigt den [Edge-Blending]-Einstellungsbildschirm an.
3) Drücken Sie ▲▼, um [Edge-Blending] auszuwählen. -Schaltfläche.
- Wenn [Edge-Blending] nicht ausgeführt wird, wählen Sie [Aus]. Andere Optionen als [Zurück] werden ausgegraut und können nicht ausgewählt werden.
6) Drücken Sie die -Schaltfläche.
- Die Flächenkante wird grün angezeigt und wechselt zu rot, wenn der Einstellwert für die Breite der „Kanten überblenden“-Option 1 oder größer ist.
Anmerkung
Auch wenn der [Edge-Blending]-Einstellungsbildschirm angezeigt wird, wenn Sie die -Schaltfläche, die -Schaltfläche, die -Schaltfläche oder die -Schaltfläche drücken, wird der Einstellungsbildschirm gelöscht und der ausgewählten Funktion wird Vorrang gewährt. Zum Abschluss der Funktion kehrt der Projektor zum Einstellungsbildschirm zurück.
Die Verbindungsstelle zwischen den Projektionsflächen kann bei bestimmten Bildern hervorstechen. Wenn der Wert für den [Kontrast] im Menü [Image adjust] verringert wird, wirkt die Verbindungsstelle u.U. natürlicher.
passen der Überblendungsstartposition und der Überblendbreite
1) Drücken Sie ▲▼, um die zu korrigierende Stelle zu wählen ([Start]/[Breite] von [Links]/[Rechts]/[Oben]/[Unten]).
[Start] Legt die Überblendungsstartposition fest.● Der Rahmen (grün) bewegt sich, wenn Sie den nummerischen Wert ändern. [Breite] Passt die Überblendbreite an.● Die rote Linie bewegt sich, wenn Sie den nummerischen Wert ändern.
2) Drücken Sie die - Schaltfläche.
Die nummerischen Werte können auch mit den Zifferntasten (<0>-<9>) auf der Fernbedienung eingegeben werden.
Drücken Sie die -Schaltfläche, um den Einstellmodus zu beenden.
4) Drücken Sie die - Schaltfläche.
Anmerkung
● [Links] und [Rechts] einstellbarer Wert: 0 - 512
Instellen des Schwarzwertes
Passt den Schwarzwert im Bild an.
1) Drücken Sie ▲▼, um [Schwarzpegel] auszuwählen. - Schaltfläche.
[Alle] Ändert sich mit R/G/B. [R]/[G]/[B] Passt jede Farbe an.● Einstellwert: ± 127
[Einstellung]-Menü
Azeige des Testmusters
1) Drücken Sie ▲▼, um [Testmuster] auszuwählen. - Schaltfläche.
- Drücken Sie die -Schaltfläche, um den Einstellmodus zu beenden.
[Aus] Löscht die Anzeige des Testmusters. [Ein] Zeigt das Testmuster an.
Hine Anzeige der Menüs
Die Einstellungsbildschirme und Linien werden vorübergehend gelöscht.
1) Drücken Sie ▲▼, um [Menü aus] auszuwählen. - Schaltfläche.
- Betätigen Sie irgendeine Schaltfläche, um zum Einstellungsbildschirm zurückzukehren.
Zrücksetzung eines Wertes während der Anpassung
Die Einstellung kehrt zu ihrem Wert vor der Anpassung zurück.
1) Drücken Sie ▲▼, um [Reset] auszuwählen. - Schaltfläche.
- Es wird ein Bildschirm zur Bestätigung der Zurücksetzung angezeigt.
3) Wählen Sie [Ja] und drücken Sie die -Schaltfläche. -Schaltfläche.
Rückkehr zum Untermenü
Kehrt den Projektor zum Untermenü zurück.
1) Drücken Sie ▲▼, um [Zurück] auszuwählen. - Schaltfläche.
[Farbabgleich]
Dadurch wird es schwerer, eine andere Projektorfarbe zu sehen, wenn mehrere Projektionsflächen verwendet werden.
1) Drücken Sie ▲▼, um [Farbabgleich] auszuwählen. - Schaltfläche.
- Zeigt den [Farbabgleich]-Einstellungsbildschirm an.
3) Drücken Sie ▲▼, um [Farbabgleich] auszuwählen. - Schaltfläche.
- Wenn der [Farbabgleich] nicht ausgeführt wird, wählen Sie [Aus]. Andere Optionen als [Erweiterter Farbabgleich] werden ausgegraut und können nicht ausgewählt werden.
6) Drücken Sie die - Schaltfläche.
Passen der Farbe
1) Drücken Sie ▲▼, um die anzupassende Farbe auszuwählen. - Schaltfläche.
Die nummerischen Werte können auch mit den Zifferntasten (<0>-<9>) auf der Fernbedienung eingegeben werden.
Der nummerische Wert ändert sich gemäß des Wertes der [Farbtemperatur] im Menü [Image adjust].
Farbe x y [Rot] 0.000 - 1.000 0.000 - 1.000 [Grün] 0.000 - 1.000 0.000 - 1.000 [Blau] 0.000 - 1.000 0.000 - 1.000 [Weiß] 0.000 - 1.000 0.000 - 1.000
Azeige des Testmusters
1) Drücken Sie ▲▼, um [Autom. Testmuster] auszuwählen. - Schaltfläche.
- Drücken Sie die -Schaltfläche, um den Einstellmodus zu beenden.
[Aus] Löscht die Anzeige des Testmusters.
[Ein] Zeigt das Testmuster an.
Zrücksetzung eines Wertes während der Anpassung
Die Einstellung kehrt zu ihrem Wert vor der Anpassung zurück.
Der Wert kehrt zum Standardwert zurück, der unter [Speichern] gespeichert ist.
1) Drücken Sie ▲▼, um [Reset] auszuwählen. - Schaltfläche.
- Es wird ein Bildschirm zur Bestätigung der Zurücksetzung angezeigt.
3) Wählen Sie [Ja] und drücken Sie die -Schaltfläche. -Schaltfläche.
■gistrierung des angepassten Inhalts, den Sie geändert haben
Registriert Werte nach der Anpassung.
1) Drücken Sie ▲▼, um [Speichern] auszuwählen. - Schaltfläche. -Schaltfläche.
Fickkehr zum Untermenü
Kehrt den Projektor zum Untermenü zurück.
1) Drücken Sie ▲▼, um [Zurück] auszuwählen. - Schaltfläche.
[Erweiterter Farbabgleich]
Es sind mehr erweiterte Einstellungen als [Farbabgleich] möglich.
1) Drücken Sie ▲▼, um [Farbabgleich] auszuwählen.
2) Drücken Sie die - Schaltfläche.
- Zeigt den [Farbabgleich]-Einstellungsbildschirm an.
3) Drücken Sie ▲▼, um [Erweiterter Farbabgleich] auszuwählen.
4) Drücken Sie die - Schaltfläche.
- Zeigt den [Erweiterter Farbabgleich]-Einstellungsbildschirm an.
5) Drücken Sie ▲▼, um die Einstellung zu wechseln.
[Aus] [Ein]
[Aus]
Wenn der Modus [Testmuster] oder [Zurück] nicht ausgewählt ist, wird diese Option ausgegraut und kann nicht ausgewählt werden.
[Ein]
Stellt den erweiterten Farbabgleich ein.
Überprüfen der Einstellungen
Zeigt den Einstellstatus von [Image adjust] an.
1) Drücken Sie ▲▼, um [Istwerte information] auszuwählen.
2) Drücken Sie die - Schaltfläche.
● Die gemessenen Informationen können durch Drücken einer Schaltfläche verlassen werden.
[Dynamik]
[Standard]
[Authentisch/ Kinoeinstellung]
[Einstellung]-Menü
Überprüfen von [Istwerte]
Zeigt Daten für R/G/B an.
1) Drücken Sie ▲▼, um die zu messende Farbe auszuwählen ([Rot]/[Grün]/[Blau] unter [Istwerte]). - Schaltfläche.
- Die nummerischen Werte können auch mit den Zifferntasten (<0>-<9>) auf der Fernbedienung eingegeben werden.
Farbe x y L [Rot] 0.000 - 1.000 0.000 - 1.000 0.000 - 1.000 [Grün] 0.000 - 1.000 0.000 - 1.000 0.000 - 1.000 [Blau] 0.000 - 1.000 0.000 - 1.000 0.000 - 1.000
Überprüfen von [Sollwerte]
1) Drücken Sie ▲▼, um die anzupassende Farbe auszuwählen ([Rot]/[Grün]/[Blau]/[Zyan]/[Magenta]/[Gelb]/[Weiß] unter [Sollwerte]). - Schaltfläche.
Die nummerischen Werte können auch mit den Zifferntasten (<0>-<9>) auf der Fernbedienung eingegeben werden.
Der nummerische Wert ändert sich gemäß des Wertes der [Farbtemperatur] im Menü [Image adjust].
Farbe x y g [Rot] 0.000 - 1.000 0.000 - 1.000 0.000 - 1.000 [Grün] 0.000 - 1.000 0.000 - 1.000 0.000 - 1.000 [Blau] 0.000 - 1.000 0.000 - 1.000 0.000 - 1.000 [Zyan] 0.000 - 1.000 0.000 - 1.000 0.000 - 1.000 [Magenta] 0.000 - 1.000 0.000 - 1.000 0.000 - 1.000 [Gelb] 0.000 - 1.000 0.000 - 1.000 0.000 - 1.000 [Weiß] 0.000 - 1.000 0.000 - 1.000 0.000 - 1.000
Azeige des Testmusters
1) Drücken Sie ▲▼, um [Autom. Testmuster] auszuwählen. - Schaltfläche.
- Drücken Sie die -Schaltfläche, um den Einstellmodus zu beenden.
[Aus] Löscht die Anzeige des Testmusters.
[Ein] Zeigt das Testmuster an.
■rübergehende Löschung des Einstellungsbildschirms
1) Drücken Sie ▲▼, um [Menü aus] auszuwählen. - Schaltfläche.
- Betätigen Sie irgendeine Schaltfläche, um zum Einstellungsbildschirm zurückzukehren.
■rchführung der [Fabrikeinstellungen]-Einstellung
Wenn die derzeit ausgewählten Optionen [Istwerte] und [Sollwerte] zurückgesetzt werden, werden die Werte auf Ihre Standardeinstellungen zurückgesetzt.
1) Drücken Sie ▲▼, um [Fabrikeinstellungen] auszuwählen. - Schaltfläche.
- Es wird ein Bildschirm zur Zurücksetzung der Standardeinstellungen angezeigt.
3) Wählen Sie [Ja] und drücken Sie die -Schaltfläche. -Schaltfläche.
Zrücksetzung eines Wertes während der Anpassung
Die Einstellung kehrt zu ihrem Wert vor der Anpassung zurück.
1) Drücken Sie ▲▼, um [Reset] auszuwählen. - Schaltfläche. -Schaltfläche.
■gistrierung des angepassten Inhalts, den Sie geändert haben
Registriert Werte nach der Anpassung.
1) Drücken Sie ▲▼, um [Speichern] auszuwählen. - Schaltfläche. -Schaltfläche.
Azeige des Testmusters
1) Drücken Sie ▲▼, um [Testmuster] auszuwählen. - Schaltfläche.
- Zeigt den Testmuster-Auswahlbildschirm an.
3) Drücken Sie ▲▼, um das Testmuster auszuwählen, das angezeigt werden soll, und drücken Sie die -Schaltfläche.
Der Auswahlbildschirm wird gelöscht und das Testmuster wird angezeigt.
Betätigen Sie irgendeine Schaltfläche, um zum Einstellungsbildschirm zurückzukehren.
Drücken Sie ▲▼, um [Zurück] auszuwählen, und drücken Sie die -Schaltfläche, um zum Einstellungsbildschirm von [Erweiterter Farbabgleich] zurückzukehren.
[Istwerte] [Rot]/[Grün]/[Blau] [Sollwerte] [Rot]/[Grün]/[Blau]/[Zyan]/[Magenta]/[Gelb]/[Weiß]
Flockkehr zum Untermenü
Kehrt den Projektor zum Untermenü zurück.
1) Drücken Sie ▲▼, um [Zurück] auszuwählen. - Schaltfläche.
[HDMI]
Wenn das Bild nicht ordnungsgemäß angezeigt werden kann, wenn ein externes Gerät mit HDMI am Projektor angeschlossen ist, ändern Sie die Einstellungen.
1) Drücken Sie ▲▼, um [HDMI] auszuwählen. - Schaltfläche.
● ▲▼ werden über dem Untermenü angezeigt.
3) Drücken Sie ▲▼, um die Einstellung zu wechseln.
[Normal] Wählen Sie dies aus, wenn der Ausgang von einem externen Gerät „NORMAL“1“ist. [Erhöht] Wählen Sie dies aus, wenn der Ausgang von einem externen Gerät „ENHANCED“1“ ist.
*1: Die Titel der Ausgangseinstellungen unterscheiden sich je nach Gerät. Weitere Einzelheiten finden Sie in der Bedienungsanleitung für das externe Gerät.
[Logo]
Legt die Logoauswahl und den PIN-Code für die Logoauswahl fest.
1) Drücken Sie ▲▼, um [Logo] auszuwählen. -Schaltfläche.
[logoauswahl]
1) Wählen Sie [Logoauswahl] und drücken Sie die -Schaltfläche.
- Die Einstellung wird mit jedem Druck auf die Schaltfläche wie folgt geändert.
[Aus] [Benutzer] [Voreinstellung]
[Aus] Löscht das Logo von der Projektionsfläche. [Benutzer] Zeigt das Bild an, das vom Benutzer aufgezeichnet wurde. [Voreinstellung] Zeigt die Standardeinstellungen an.
[Aufzeichnen]
Mit dieser Funktion können projizierte Bilder aufgezeichnet werden, um sie als Startbildschirm oder Hintergrundbildschirm anzeigen zu lassen.
1) Wählen Sie [Aufzeichnen] und drücken Sie die -Schaltfläche.
- Der Bestätigungsbildschirm wird angezeigt.
2) Drücken Sie ▲▼, um [Ja] auszuwählen.
Das projizierte Bild wurde aufgezeichnet.
Wenn Sie unter [Logoauswahl] die Option [Benutzer] wählen, wird das aufgezeichnete Bild ab der nächsten Nutzung des Projektors angezeigt.
[Einstellung]-Menü
Anmerkung
Die Aufzeichnungsfunktion wird abgebrochen, wenn Sie auf dem Bildschirm [Verlassen?] die Option [Ja] wählen.
Wählen Sie in dem Menü [Bildauswahl] die Option [Standard], bevor Sie ein Bild aufzeichnen, um sicherzugehen, dass ein richtiges Bild aufgezeichnet wird (→ Seite 47).
Wenn Sie ein Bild aufzeichnen, das mit der Trapezkorrektur-Funktion angepasst wurde, werden die angepassten Daten automatisch zurückgesetzt und der Projektor zeichnet ein Bild ohne Trapezkorrektur auf.
Wenn die [Logo PIN Code Sperre] auf [Ein] geschaltet ist, kann [Aufzeichnung] nicht ausgewählt werden.
Wenn Sie ein neues Bild aufzeichnen, wird das vorher gespeicherte Bild gelöscht, selbst wenn die Aufzeichnung abgebrochen wird.
Wenn kein aufgezeichnetes Bild existiert oder die Aufzeichnung unterbrochen wurde, kann nur zwischen [Voreinstellung] und [Aus] gewählt werden, die Option [Benutzer] fällt weg.
[Logo PIN Code Sperre]
Stellen Sie das System so ein, dass nur der Administrator die „logo“ Einstellung und Änderung des „Logos“ vornehmen kann.
1) Wählen Sie [Logo PIN Code Sperre] und drücken Sie die -Schaltfläche. -Schaltfläche.
[Aus] Die Logoauswahl kann ohne PIN-Code geändert werden. [Ein] Der PIN-Code ist erforderlich, um die Logoauswahl zu ändern.
Anmerkung
Der eingegebene PIN-Code wird mit einem *-Symbol auf der Projektionsfläche angezeigt.
Die Standardeinstellung für den Logo-PIN-Code lautet „4321“.
Um eine Nummer erneut einzugeben, drücken Sie ◀▶, um die Zahl auszuwählen, die erneut eingegeben werden soll, verwenden Sie dann ▲▼ oder die Zifferntasten (<0> - <9>), um die Nummer erneut auszuwählen.
- Bewegen Sie den Cursor zu [Abbrechen] und drücken Sie die -Schaltfläche, um zum Untermenü 2 zurückzukehren.
- Wenn der [Logo PIN Code] und die Nummer rot angezeigt werden, ist ein Fehler aufgetreten. Geben Sie die Nummer erneut ein.
[Logo PIN Code Wechsel]
Ändert den Logo-PIN-Code.
1) Wählen Sie [Logo PIN Code Wechsel] und drücken Sie die - Schaltfläche.
- Der PIN-Code-Eingabebildschirm wird angezeigt.
2) Drücken Sie ▲▼◀▶ oder die Zifferntasten (<0> - <9>), um Ihren Pin-Code einzugeben.
3) Drücken Sie ▲▼◀▶, um [Bestätigen] auszuwählen.
4) Drücken Sie die - Schaltfläche.
- Wenn der PIN-Code akzeptiert wird, wird der neue Logo-PIN-Code auf der Projektionsfläche angezeigt.
5) Drücken Sie ▲▼◀▶ oder die Zifferntasten (<0> - <9>), um Ihren neuen Pin-Code einzugeben.
6) Drücken Sie die - Schaltfläche.
7) Wählen Sie [Ja] und drücken Sie die -Schaltfläche.
- Wenn der PIN-Code akzeptiert wird, kehrt der Projektor zum Untermenü 2 zurück.
Anmerkung
Um eine Nummer erneut einzugeben, drücken Sie ◀▶, um die Zahl auszuwählen, die erneut eingegeben werden soll, drücken Sie dann ▲▼ oder die Zifferntasten (<0> - <9>), um die Nummer erneut auszuwählen.
Bewegen Sie den Cursor zu [Abbrechen] und drücken Sie die -Schaltfläche, um zum Untermenü 2 zurückzukehren.
[Lüfterkontrolle]
Der Projektor steuert die Rotation des Lüfters automatisch. Sie können die Rotation des Lüfters abhängig von der Umgebungstemperatur oder vom Installationsort verstärken (wenn er z.B. in Höhenlagen verwendet wird).
1) Drücken Sie ▲▼, um [Lüfterkontrolle] auszuwählen. -Schaltfläche.
● ▲▼ werden über dem Untermenü 2 angezeigt.
[Normal] [Maximal]
[Normal] Steuert den Lüfterbetrieb automatisch. [Maximal] Lässt den Lüfter bei maximaler Leistung laufen. Das Geräusch des Lüfters beim Rotieren ist lauter als bei der Einstellung [Normal].
[Fernbedienung]
Überprüfen Sie die Steuerung oder die individuelle Steuerung immer gleichzeitig mit einer einzigen Fernbedienung, wenn mehrere Projektoren nebeneinander verwendet werden.
1) Drücken Sie ▲▼, um [Fernbedienung] auszuwählen. -Schaltfläche.
● ▲▼ werden über dem Untermenü angezeigt.
● Die Standardeinstellung ist [Alle].
[Alle] Der Projektor akzeptiert dadurch die Eingabe von der Fernbedienung irgendeiner ID-Nummer. [Code 01] - [Code 64] Legt die ID-Nummern von 1 – 64 fest.
4) Drücken Sie die -Schaltfläche. -Schaltfläche.
● Die [Fernbedienung] wird geändert.
- Kehrt den Projektor zum Untermenü zurück.
Anmerkung
Wenn die ID-Nummer des Projektors geändert wird, muss die ID-Nummer der Fernbedienung an die ID-Nummer des Projektor angepasst werden.
Wenn ein Projektor auf [Alle] eingestellt ist, wenn mehrere Projektoren verwendet werden, kann der Projektor nicht separat von den Projektoren mit anderen ID-Nummern gesteuert werden.
[Fernbedienungssensor]
Aktiviert und deaktiviert den Fernbedienungssensor am Projektorgehäuse.
1) Drücken Sie ▲▼, um [Fernbedienungssensor] auszuwählen.
2) Drücken Sie die - Schaltfläche.
● Das Untermenü 2 wird angezeigt.
3) Drücken Sie ▲▼, um die Einstellung zu wechseln.
[Alle] Aktiviert die Fernbedienungssensoren an drei Stellen. [Vorne & Oben] Aktiviert nur die Fernbedienungssensoren an der Vorder- und Oberseite des Projektorgehäuses. [Oben & Hinten] Aktiviert nur die Fernbedienungssensoren an der Ober- und Rückseite des Projektorgehäuses. [Vorne & Hinten] Aktiviert nur die Fernbedienungssensoren an der Vorder- und Rückseite des Projektorgehäuses. [Vorne] Aktiviert nur den Fernbedienungssensor an der Vorderseite des Projektorgehäuses. [Oben] Aktiviert nur den Fernbedienungssensor an der Oberseite des Projektorgehäuses. [Hinten] Aktiviert nur den Fernbedienungssensor an der Rückseite des Projektorgehäuses.
Anmerkung
- Wird der Projektor in einer aufrechten Position statt an einer Deckenhalterung installiert, kann Leuchtstofflampenbeleuchtung den Betrieb der Fernbedienung negativ beeinträchtigen, wenn der Fernbedienungssensor an der Oberseite des Projektorgehäuses aktiviert wird. Es wird empfohlen, dass Sie den oberen Fernbedienungssensor (wählen Sie aus [Vorne & Hinten], [Vorne], [Hinten]) deaktivieren, wenn der Projektor in einer aufrechten Position installiert wird.
[Einstellung]-Menü
[Automatische Lampenabschaltung]
1) Drücken Sie ▲▼, um [Automatische Lampenabschaltung] auszuwählen. - Schaltfläche.
● Das Untermenü 2 wird angezeigt.
3) Drücken Sie ▲▼, um die Einstellung zu wechseln.
[Aus] Bricht die Stromversorgungsfunktion ab. [Bereitschaft] Schaltet die Lampen aus und beginnt mit der Abkühlung, wenn die mit dem [Timer] eingestellte Zeit abgelaufen ist. Während die Lampe sich abgekühlt, blinken die Standby-Anzeigeund die Betriebsanzeige, und Sie können den Projektor nicht bedienen.Wenn die Lampenabkühlung abgeschlossen ist, blinkt die Betriebsanzeigeweiter und die Standby-Anzeigeleuchtet auf statt zu blinken, um anzuzeigen, dass sich der Projektor jetzt im Stromversorgungsmodus befindet. Ab diesem Punkt schalten sich die Lampen ein und die Projektion beginnt, wenn ein Signal eingegeben wird oder Bedienvorgänge am Projektordurchgeführt werden. [Herunterfahren] Schaltet die Lampen aus und beginnt mit der Abkühlung, wenn die mit dem [Timer] eingestellte Zeit abgelaufen ist. Während der Lampenabkühlung können Sie den Projektor nicht bedienen.Wenn die Lampenabkühlung abgeschlossen ist, schaltet sich der Strom ab. [Timer] Legt Zeiten von 1 – 30 Minuten fest.
Anmerkung
● Die Standardeinstellung ist [Aus].
[Sofortstart]
Es gibt eine Funktion für die automatische Stromeinschaltung des Projektors, wenn das Netzkabel angeschlossen ist, ohne dass der Netzschalter auf der Fernbedienung oder der Netzschalter auf dem Bedienfeld betätigt werden muss.
1) Drücken Sie ▲▼, um [Sofortstart] auszuwählen. - Schaltfläche.
3) Drücken Sie ▲▼, um die Einstellung zu wechseln.
[Aus] Aktiviert die normalen Bedienungen, um den Strom ein-/auszuschalten. [Ein] Dadurch kann der Strom direkt eingeschaltet werden.
Anmerkung
Achten Sie darauf, dass Sie den Strom mit den richtigen Bedienungen ein-/ausschalten.
Durch Drücken des Netzschalters auf der Fernbedienung oder des Netzschalters am Projektor, wird der Strom erst eingeschaltet, wenn die Lampenabkühlung abgeschlossen ist und die Lampen wieder eingeschaltet werden können.
[Sicherheit]
Sperrt die Projektorbedienungen mit der Tastensperre und dem PIN-Code.
1) Drücken Sie ▲▼, um [Sicherheit] auszuwählen. - Schaltfläche.
● Das Untermenü 2 wird angezeigt.
3) Drücken Sie ▲▼, um eine Option auszuwählen.
[astatursperre]
Sperrt die Bedientasten, um unabsichtliche Bedienungen des Projektors zu verhindern.
1) Wählen Sie [Tastatursperre] und drücken Sie die - Schaltfläche.
● ▲▼ werden über dem Untermenü 2 angezeigt.
2) Drücken Sie ▲▼, um die Einstellung zu wechseln.
- Die Einstellung wird mit jedem Druck auf die Schaltfläche wie folgt geändert.
Die Tastensperre ist nicht aktiviert. Sperrt die Bedienungen vom Bedienfeld. Sperrt die Bedienungen von der Fernbedienung.
3) Drücken Sie die - Schaltfläche. -Schaltfläche.
Anmerkung
● Die Standardeinstellung ist aus.
[N Code Sperre]
Stellt den PIN-Code so ein, dass Projektorbedienungen nur für den Administrator möglich sind.
1) Wählen Sie [PIN Code Sperre] und drücken Sie die - Schaltfläche.
- Der PIN-Code-Eingabebildschirm wird angezeigt.
2) Drücken Sie ▲▼◀▶ oder die Zifferntasten (<0> - <9>), um Ihren Pin-Code einzugeben. - Schaltfläche.
- Wenn der PIN-Code akzeptiert wird, kehrt der Projektor zum Untermenü 2 zurück.
5) Drücken Sie ▲▼, um die Einstellung zu wechseln.
[Aus] Ermöglicht eine normale Bedienung ohne den PIN-Code. [Ein 1] Der PIN-Code ist erforderlich, um den Projektor einzuschalten. [Ein 2] Der PIN-Code wird abgefragt, wenn Sie das nächste Mal den Strom nach einer Abtrennung des Netzkabels einschalten.Wenn der Strom mit den Schaltflächen auf der Fernbedienung oder dem Bedienfeld ein-/ausgeschaltet wird, aber ohne das Netzkabel abzutrennen, arbeitet der Projektor normalerweise ohne die Abfrage des PIN-Codes.
Anmerkung
Der eingegebene PIN-Code wird mit einem *-Symbol auf der Projektionsfläche angezeigt.
Die Standardeinstellung für den Logo-PIN-Code lautet „1234“.
Um eine Nummer erneut einzugeben, drücken Sie ◀▶, um die Zahl auszuwählen, die erneut eingegeben werden soll, drücken Sie dann ▲▼ oder die Zifferntasten (<0> - <9>), um die Nummer erneut auszuwählen.
Bewegen Sie den Cursor zu [Abbrechen] und drücken Sie die -Schaltfläche, um zum Untermenü 2 zurückzukehren.
Wenn der „PIN code“ und die Nummern rot angezeigt werden, ist ein Fehler aufgetreten. Geben Sie die Nummer erneut ein.
[Einstellung]-Menü
[N Code Wechsel]
Ändert den Logo-PIN-Code.
1) Wählen Sie [PIN Code Wechsel] und drücken Sie die - Schaltfläche.
- Der PIN-Code-Eingabebildschirm wird angezeigt.
2) Drücken Sie ▲▼◀▶ oder die Zifferntasten (<0> - <9>), um Ihren Pin-Code einzugeben. -Schaltfläche.
- Wenn der PIN-Code akzeptiert wird, wird der neue Logo-PIN-Code auf der Projektionsfläche angezeigt.
5) Drücken Sie ▲▼◀▶ oder die Zifferntasten (<0> - <9>), um Ihren neuen Pin-Code einzugeben. -Schaltfläche. -Schaltfläche.
- Wenn der PIN-Code akzeptiert wird, kehrt der Projektor zum Untermenü 2 zurück.
Anmerkung
Um eine Nummer erneut einzugeben, drücken Sie ◀▶, um die Zahl auszuwählen, die erneut eingegeben werden soll, drücken Sie dann ▲▼ oder die Zifferntasten (<0> - <9>), um die Nummer erneut auszuwählen.
Bewegen Sie den Cursor zu [Abbrechen] und drücken Sie die -Schaltfläche, um zum Untermenü 2 zurückzukehren.
[Projektor ID]
Legt die Projektor-ID (1 bis 64) für die RS-232C serielle Kommunikation fest.
1) Drücken Sie ▲▼, um [Projektor ID] auszuwählen. -Schaltfläche.
● Die Standardeinstellung ist [Alle].
[Alle] Dadurch lässt der Projektor Betriebe unabhängig von einer ID-Nummer zu, die mit der Fernbedienung oder dem Computer festgelegt wurden. 1 - 64 Legt die ID-Nummern von 1 – 64 für den Projektor fest.
[Shutter]
Stellt die Verschlussfunktion ein.
1) Drücken Sie ▲▼, um [Shutter] auszuwählen. - Schaltfläche.
● Das Untermenü 2 wird angezeigt.
3) Drücken Sie ▲▼, um eine Option auszuwählen.
[chutz]
Sperrt die Schaltfläche, um Verschlussbedienungen zu verhindern.
1) Wählen Sie [Schutz] und drücken Sie die -Schaltfläche.
Der Schutz ist nicht aktiviert. Die Bedienung kann von der Fernbedienung und vom Projektor aus durchgeführt werden. Sperrt die Bedienungen von der Fernbedienung. Sperrt die Bedienungen vom Bedienfeld. Sperrt die Bedienungen von der Fernbedienung und dem Bedienfeld.
[ffekt]
Stellt Spezialeffekte ein, wenn der Verschluss geöffnet und geschlossen wird.
1) Wählen Sie [Effekt] und drücken Sie die -Schaltfläche.
[Aus] Schaltet den Spezialeffekt aus.● Standardeinstellung [L 1] Stellt das Einblenden und Ausblendenein, wenn der Verschluss geöffnetund geschlossen wird. [L 2] Stellt ein langsameres Einblendenund Ausblenden als L1 ein.
[ntriegelung]
Stellt den Auslöser ein, wenn der Verschluss geschlossen wird.
1) Wählen Sie [Entriegelung] und drücken Sie die -Schaltfläche.
[Beliebig] Die Verschlussfunktion wird abgebrochen, wenn eine Schaltfläche außer der-Schaltfläche auf der Fernbedienung gedrückt wird, und die Funktion der gedrückten Schaltfläche ausgeführt wird. [SHUTTER] Nur die-Schaltfläche auf der Fernbedienung oder auf dem Bedienfeld kann abgebrochen werden.
Anmerkung
Wenn der Strom wider eingeschaltet wird, nachdem der Strom während der Einstellung ausgeschaltet wird, oder die Lampe mit der Einstellung [Management] ausgeschaltet wird, wird die Verschlussfunktion abgebrochen.
[Management]
Stellt einen Zeitpunkt zwischen dem Schließen des Verschlusses und dem Ausschalten der Lampen ein.
1) Wählen Sie [Management] und drücken Sie die -Schaltfläche.
Bedienungsanleitung LX1750
020-000638-01 rev.1 (11-2013)
Anmerkung
Wenn die Steuerungsfunktion aktiv ist, wird die Lampe ausgeschaltet und der Projektor beginnt mit dem Abkühlungsbetrieb.
Wenn das Abkühlen abgeschlossen ist, wird der Strom des Projektorgehäuses ausgeschaltet und die Standby-Anzeige eingeschaltet.
Die Verschlussanzeige fängt an blau zu blinken, wenn der Abkühlungsbetrieb beginnt.
Das Blinken wird fortgeführt, nachdem das Abkühlen abgeschlossen ist, und die Standby-Anzeige sich eingeschaltet hat.
Das Blinken hört auf, wenn der Projektor wieder eingeschaltet wird.
Die Stromsteuerungsfunktion funktioniert nicht, wenn das Bild vom [Shutter] blockiert wird.
Die Standardeinstellung ist „180 Minuten“.
Sie können den Zeitpunkt nicht einstellen, während die Funktion ausgeschaltet ist.
[Videoverzögerungssteuerung]
Stellen Sie dies ein, wenn Sie die digitale Verarbeitung der projizierten Bilder beschleunigen möchten.
1) Drücken Sie ▲▼, um [Videoverzögerungssteuerung] auszuwählen. - Schaltfläche.
Anmerkung
Die Geschwindigkeit der digitalen Verarbeitung wird durch [Niedrig], [Mittel] und [Hoch] erhöht.
Wenn jede Option ausgewählt ist, werden die folgenden Optionen ausgegraut und können nicht ausgewählt werden.
[Niedrig] ● [Trapezkorrektur] des [Format Bild]-Menüs [Mittel] ● [Progressiv] und [Rauschunterdrückung] des Menüs [Image adjust] [Hoch] ● [Trapezkorrektur] des [Format Bild]-Menüs● [Progressiv] und [Rauschunterdrückung] des Menüs [Image adjust]
[Einstellung]-Menü
[Untertitel]
Stellt die Farbe der Untertitel und der Auswahlen ein.
1) Drücken Sie ▲▼, um [Untertitel] auszuwählen. - Schaltfläche.
[Untertitel] [Aus], [CC1], [CC2], [CC3], [CC4] [Farbe] [Farbe]/[Weiß]● Wird in den Originalfarben angezeigt.
Anmerkung
Diese Funktion kann nur verwendet werden, wenn das Eingangssignal ein Komposit-Video- oder S-Videosignal ist.
Der Untertitel wird nicht angezeigt, wenn der Menübildschirm angezeigt wird.
[Zähluhr Filter]
1) Drücken Sie ▲▼, um [Zähluhr Filter] auszuwählen. - Schaltfläche.
[ähluhr Filter]
Zeigt die Betriebszeit an.
- Dies wird rot angezeigt, wenn eine Blockierung erkannt wird oder wenn die Betriebszeit die unter [Timer für Zähluhr Filter] eingestellte Zeit übersteigt.
[■Iter verbleibend]
Die verbleibende Zeit für den Filterzähler wird in Einheiten von 10% angezeigt.
- Dies wird rot angezeigt, wenn die verbleibende Zeit 10% beträgt.
Anmerkung
- Wenn die verbleibende Zeit auf 10% oder darunter fällt, wird 📄 angezeigt, und wenn sie 0% erreicht, wird 🔍 angezeigt.
[Iter typ]
Wählt die Filterart aus, die verwendet werden soll.
1) Wählen Sie [Filter typ] und drücken Sie die -Schaltfläche.
2) Drücken Sie ▲▼, um eine Option auszuwählen.
[Normal] Wenn ein normaler Filter verwendet wird [Special] Wenn ein Rauchresistenzfilter (optional) verwendet wird
3) Drücken Sie die - Schaltfläche. -Schaltfläche.
Achtung
Verwenden Sie den Projektor stets mit installiertem Filter.
Wählen Sie die gleiche Filterart aus, die Sie verwenden.
[■mer für Zähluhr Filter]
Stellt einen Zeitpunkt ein, der eine Benachrichtigung anzeigt, dass der Filter das Ende seines Austauschzyklus erreicht hat.
1) Wählen Sie [Timer für Zähluhr Filter] und drücken Sie die - Schaltfläche.
2) Drücken Sie ▲▼, um eine Option auszuwählen. - Schaltfläche.
Anmerkung
Wenn [Aus] ausgewählt ist, werden die Blockierungen automatisch erkannt.
Wenn der Rauchresistenzfilter (optional) verwendet wird, wird der eingestellte Zeitpunkt aus [Aus], [10 Std.], [15 Std.] und [20 Std.] ausgewählt.
WWenn der eingestellte Zeitpunkt überschritten wird, wird 📊 angezeigt.
[■eset Zähluhr Filter]
Setzt den Wert vom [Zähluhr Filter] zurück. Achten Sie darauf, den Zähler zurückzusetzen, wenn Sie den Filter ausgetauscht haben.
1) Wählen Sie [Reset Zähluhr Filter] und drücken Sie die - Schaltfläche.
- Es wird ein Bildschirm zur Bestätigung der Zurücksetzung angezeigt.
2) Wählen Sie [Ja] und drücken Sie die -Schaltfläche.
- Der Bestätigungsbildschirm wird angezeigt.
3) Wählen Sie [Ja] und drücken Sie die -Schaltfläche.
Anmerkung
Setzen Sie nur nach dem Austausch des Filters zurück.
Nach der Zurücksetzung wird die Anzeige [Filterwarnung] ausgeblendet.
[Vorführungstimer]
1) Drücken Sie ▲▼, um [Vorführungstimer] auszuwählen. - Schaltfläche.
[■orwärtszähler]
Die verstrichene Zeit wird ab 00 Min. 00 Sek. gezählt. Die verstrichene Zeit von 00 Min. 00 Sek. bis 180 Min. 00 Sek. wird angezeigt.
[ückwärtszähler]
Die verstrichene Zeit wird vom eingestellten Zeitpunkt herunter gezählt.
Stellen Sie den Zeitpunkt mit [Timer] ein.
[mer]
Stellt den Zeitpunkt mit [Rückwärtszähler] ein.
1) Wählen Sie [Timer] und drücken Sie die -Schaltfläche.
● ▲▼ werden über dem Untermenü 2 angezeigt.
2) Drücken Sie ▲▼, um eine Option auszuwählen.
Anmerkung
Die Standardeinstellung ist „10 Minuten“.
Wenn [Vorwärtszähler] ausgewählt ist, wird diese Option ausgegraut und kann nicht ausgewählt werden.
[art]
Startet das Hochzählen oder den Countdown.
1) Wählen Sie [Start] und drücken Sie die -Schaltfläche.
- Der Menübildschirm wird gelöscht und der Timer wird angezeigt.
[topp]
Stoppt das Hochzählen oder den Countdown.
1) Wählen Sie [Stopp] und drücken Sie die -Schaltfläche.
- Der Stoppstatus des Timers wird etwa drei Sekunden lang angezeigt, anschließend kehrt die Anzeige zurück zum Menübildschirm.
[■eustart]
Startet das Hochzählen oder den Countdown neu, der mit der Option [Stopp] gestoppt wurde.
1) Wählen Sie [Neustart] und drücken Sie die -Schaltfläche.
- Der Menübildschirm wird gelöscht und der Timer wird angezeigt.
[eset]
Startet die gezählte Zeit während des Betriebs neu.
1) Wählen Sie [Reset] und drücken Sie die -Schaltfläche.
- Das Hochzählen kehrt zu „000:00“ und der Countdown kehrt zum am Timer eingestellten Zeitpunkt zurück.
[erlassen]
Beendet den Präsentationstimer während des Betriebs.
1) Wählen Sie [Verlassen] und drücken Sie die -Schaltfläche.
- Der Timer endet und die Bildschirmanzeige kehrt zum Untermenü zurück.
Anmerkung
- Sie können auch den [Vorführungstimer] durch Drücken der -Schaltfläche auf der Fernbedienung verwenden.
[Einstellung]-Menü
[Testmuster]
1) Drücken Sie ▲▼, um [Testmuster] auszuwählen. - Schaltfläche.
● Das Untermenü 2 wird angezeigt.
3) Drücken Sie ▲▼, um eine Option auszuwählen. - Schaltfläche.
- Das Testmuster und der Name des Testmusters werden angezeigt.
- Drücken Sie ▲▼, während der Name des Testmusters angezeigt wird, um zwischen den Testmustern vor- und zurückzugehen.
[Farben] [Grauabstufung 1], [Grauabstufung 2], [Grauabstufung 3], [Grauabstufung 4] [Komplett weiß] [Komplett schwarz] [Kreuz]
Anmerkung
Drücken Sie die -Schaltfläche oder die -Schaltfläche, während das Testmuster angezeigt wird, um zum Menübildschirm zurückzukehren.
Selbst bei angezeigtem Testmuster haben der Zoom, Fokus, die Objektivverschiebung, der Verschluss und die Abschaltfunktionen Vorrang.
Wenn der Zoom-, Fokus- oder Objektivverschiebungsbetrieb beendet wird, kehrt der Projektor zum Testmuster zurück.
[Werkseinstellung]
Kehrt die Einstellungen außer der folgenden zu den Standardeinstellungen zurück.
[Logo PIN Code Sperre] [PIN Code Sperre] [Zähluhr Filter] (Alle Optionen) [Logo] [Netzwerk] (AMX D.D. ausgenommen)
1) Drücken Sie ▲▼, um [Fabrikeinstellungen] auszuwählen. - Schaltfläche.
- Es wird ein Bildschirm zur Zurücksetzung der Standardeinstellungen angezeigt.
3) Wählen Sie [Ja] und drücken Sie die -Schaltfläche. -Schaltfläche.
Anmerkung
- Wenn Sie die Einstellungen initialisieren, gehen alle von Ihnen vorgenommenen Einstellungen verloren und die Einstellungen werden auf die Standardeinstellungen zurückgesetzt.
Wählen Sie [Information] aus dem Hauptmenü im Menübildschirm aus.
Beziehen Sie sich für die Bedienung des Menübildschirms auf „Navigation durch das Menü“ (→ Seite 38).
- Drücken Sie ◀▶, um die Optionen zu wechseln.
BedienfeldFernbedi
- Sie können Untermenüs auch mit der - Schaltfläche auf der Fernbedienung anzeigen.
Bestätigen der Einstellungen und des Verwendungsstatus
Zeigt den Status der Signale während der Projektion und die aktuellen Einstellungen an.
[ngang]
Zeigt die Art der Eingänge und Signale während der Projektion an.
[ystem]
Zeigt den Status des Eingangssignals während der Projektion an.
[■Sync.-Freq.]
Zeigt die H-sync-Frequenz an.
[■Sync.-Freq.]
Zeigt die V-sync-Frequenz an.
[brmat Bild]
Zeigt den Einstellstatus von [Format Bild] an.
[ampenwahl]
Zeigt den aktuellen [Lampenwahl]-Einstellstatus an.
[■ampen leistung]
Zeigt den aktuellen [Lampen leistung]-Einstellstatus an.
[■ampenintervall]
Zeigt den Einstellwert des automatischen Austauschzyklus der Lampe an, die verwendet wird.
[■ampe 1]
Zeigt die Betriebszeit und den Status der Lampe 1 an.
[ampe 2]
Zeigt die Betriebszeit und den Status der Lampe 2 an.
[ampe 3]
Zeigt die Betriebszeit und den Status der Lampe 3 an.
[ampe 4]
Zeigt die Betriebszeit und den Status der Lampe 4 an.
[prache]
Zeigt die aktuelle Sprache an.
[Ähluhr Filter]
Zeigt die tatsächliche Betriebszeit des Filters an.
Automatische
Lampenabschaltung]
Zeigt den aktuellen [Automatische
Lampenabschaltung]-Einstellstatus an.
[astatursperre]
Zeigt den aktuellen [Tastatursperre]-Einstellstatus an.
N Code Sperre]
Zeigt den aktuellen [PIN Code Sperre]-Einstellstatus an.
[nuttermanagement]
Zeigt den aktuellen [Shuttermanagement]-Einstellstatus an.
[ernbedienung]
Zeigt den aktuellen [Fernbedienung]-Einstellstatus an.
[ ]erien nummer]
Zeigt die Seriennummer des Projektors an.
Option control No.]
Einzelheiten finden Sie unter „Verwenden des Eingangsmoduls“ (→ Seite 28).
[Projektorname]-Menü
Wählen Sie [Projektorname] aus dem Hauptmenü im Menübildschirm aus und wählen Sie die Option aus dem Untermenü aus. Beziehen Sie sich für die Bedienung des Menübildschirms auf „Navigation durch das Menü“ (→ Seite 38).
- Drücken Sie nach der Wahl der Option ◀▶▲▼, um die Einstellung vorzunehmen.
BedienfeldFernbedie
Nitzwerk
Schalten Sie die Netzwerkeinstellung ein/aus.
Nitzwerkeinstellung
Stellen Sie die Netzwerkumgebung ein.
Nitzwerk PIN-Code
Richten Sie ein Passwort für das Netzwerk ein.
Nitzwerkstatus
Zeigen Sie den Netzwerkstatus des Projektors an.
AIX D.D.
Erlauben Sie der Anwendung „AMX Device Discovery“ den Projektor zu finden.
Besuchen Sie die Seite http://www.amx.com/ für weitere Informationen über AMX D.D.
Nitzwerk-Standardeinstellung
Kehren Sie die Netzwerkeinstellungen zu den Standardeinstellungen zurück.
Über den Anzeigenstatus
Wenn sich eine Anzeige einschaltet
Wenn ein Problem innerhalb des Projektors auftritt, wird dies durch die Temperaturanzeige , die Filteranzeige , die Verschlussanzeige und die Anzeige für die Lampe angezeigt.
Überprüfen Sie den Status der Anzeigen und ergreifen Sie die folgende Maßnahme.
Achtung
Achten Sie darauf, die Verfahren unter „Ausschalten des Projektors“ (→ Seite 32) zu befolgen, um den Strom zu steuern, wenn Sie die Maßnahmen durchführen.
Wenn sich mehrere Anzeigen eingeschaltet haben oder blinken, überprüfen Sie den Status jeder Anzeige und ergreifen Sie die entsprechende Maßnahme.
Anmerkung
- Überprüfen Sie den Betriebsstaus mit der Betriebsanzeige . (→ Seite 30)
Über den Anzeigenstatus
■im ordnungsgemäßen Betrieb
Der Status der Anzeige wird mit den folgenden Symbolen angezeigt.
▲: Aus, ●: Ein, ★: Blinkt, ■: Ein oder Blinkt
Anzeige Status des Projektors <STAND-BY> Rot <WARNING TEMP.> Rot <WARNING FILTER> Orange <SHUTTER> Blau <LAMP REPLACE> Orange ▲ ▲ ▲ ▲ ▲ ▲ Der Netzstecker wurde aus der Steckdose gezogen. ▲ ● ▲*1 ■*1 ■*1 ■*1 Der Projektor befindet sich im Standby-Modus.Schaltet sich ein, wenn der Netzschalterauf der Fernbedienung oder der Netzschalterauf dem Bedienfeld gedrückt wird. ● ▲ ▲*1 ■*1 ▲ ■*1 Der Projektor funktioniert normal. ▲ ★*2 ▲*1 ■*1 ■*1 ■*1 Die Lampe kühlt sich ab.Der Projektor schaltet sich nicht ein, wenn der Netzschalterauf der Fernbedienung oder der Netzschalterauf dem Bedienfeld gedrückt wird, erst wenn sich die Standby-Anzeigeeinschaltet. ★*2 ● ▲*1 ■*1 ▲ ■*1 Der Projektor befindet sich im Stromversorgungsmodus.Die Lampe schaltet sich bei der Steuerung des Projektors ein, so dass der Benutzer ihn in Betrieb nehmen kann. ★*2 ★*2 ▲*1 ■*1 ▲ ■*1 Der Stromversorgungsmodus ist eingeschaltet und die Lampe kühlt sich ab. ● ▲ ▲*1 ■*1 ● ■*1 Die Verschlussfunktion hat sich eingeschaltet.Drücken Sie irgendeine Schaltfläche auf der Fernbedienung oder auf dem Bedienfeld, um die Funktion abzubrechen. ▲ ● ▲ ■*1 ★*2 ■*1 Der Projektor befindet sich im Verschlusssteuerungsmodus.Die Lampe schaltet sich bei der Steuerung des Projektors ein, so dass der Benutzer ihn in Betrieb nehmen kann. ▲ ★*2 ▲ ■*1 ★*2 ■*1 Der Verschlusssteuerungsmodus ist eingeschaltet und die Lampe kühlt sich ab.
*1: Die Anzeige ändert sich je nach Bedingungen, unabhängig vom Status der anderen Anzeigen.
Über den Anzeigenstatus
Ei einem Problem mit der Innentemperatur
Der Status der Anzeige wird mit den folgenden Symbolen angezeigt.
▲: Aus, ●: Ein, ★: Blinkt, ■: Ein oder Blinkt
Anzeige Status des Projektors <STAND-BY> Rot <WARNING TEMP.> Rot <WARNING FILTER> Orange <SHUTTER> Blau <LAMP REPLACE> Orange ● ▲ ★*1 ■*2 ■*2 ■*2 Wenn die Temperatur im Inneren des Projektors zu hoch wird, beginnt die Temperaturanzeige <WARNING TEMP.> langsam zu blinken. ▲ ★*3 ★*4 ■*2 ■*2 ■*2 Wenn die Temperatur im Inneren des Projektors noch weiter ansteigt, blinkt die Temperaturanzeige <WARNING TEMP.> schneller, die Betriebsanzeige <POWER> schaltet sich aus und der Projektorschaltet sich automatisch aus. Der Projektorschaltet sich nicht wieder ein, auch wenn der Netzschalterauf der Fernbedienung oder der Netzschalterauf dem Bedienfeld gedrückt wird.Wenn der Projektor zur normalen Betriebstemperatur zurückkehrt, schaltet sich die Standby-Anzeige <STAND-BY> ein. Der Projektorschaltet sich wieder ein, wenn der Netzschalterauf der Fernbedienung oder der Netzschalterauf dem Bedienfeld gedrückt wird.(Die Temperaturanzeige <WARNING TEMP.> blinkt weiterhin.) Überprüfen Sie den Luftfilter. ▲ ● ★*4 ■*2 ■*2 ■*2 Der Projektor hat sich im Inneren abgekühlt und ist zur Betriebstemperatur zurückkehrt. Durch Drücken des Netzschaltersauf der Fernbedienung oder des Netzschalterauf dem Bedienfeld, hört die Temperaturanzeige <WARNING TEMP.> auf zu blinken und der Projektor wird in Betrieb gesetzt. Überprüfen Sie den Luftfilter.
*1: Die Anzeige ändert sich je nach Bedingungen, unabhängig vom Status der anderen Anzeigen.
Über den Anzeigenstatus
■i einem Problem mit dem Innenbetrieb
Der Status der Anzeige wird mit den folgenden Symbolen angezeigt.
▲: Aus, ●: Ein, ★: Blinkt, ■: Ein oder Blinkt
Anzeige Status des Projektors <STAND-BY> Rot <WARNING TEMP.> Rot <WARNING FILTER> Orange <SHUTTER> Blau <LAMP REPLACE> Orange [CK07] Es wurde ein Problem im Inneren des Projektors erkannt.Der Projektor schaltet sich nicht wieder ein, auch wenn der Netzschalterauf der Fernbedienung oder der Netzschalterauf dem Bedienfeld gedrückt wird. Ziehen Sie den Netzstecker aus der Steckdose und stecken Sie ihn wieder ein.Wenn sich der Strom abschaltet oder die Anzeige sich einschaltet oder wieder blinkt, ziehen Sie den Netzstecker aus der Steckdose und wenden Sie sich an Ihren Händler und beauftragen Sie ihn mit der Inspektion und Reparatur. Lassen Sie den Projektornicht eingesteckt, wenn die Anzeige eingeschaltet ist oder blinkt. Anderenfalls könnte dies einen Brand oder Stromschlag verursachen.
*1: Die Anzeige ändert sich je nach Bedingungen, unabhängig vom Status der anderen Anzeigen.
■i einem Problem mit dem Luftfilter
Der Status der Anzeige wird mit den folgenden Symbolen angezeigt.
▲: Aus, ●: Ein, ★: Blinkt, ■: Ein oder Blinkt
Anzeige Status des Projektors <STAND-BY>Rot <WARNING TEMP.>Rot <WARNING FILTER>Orange <SHUTTER>Blau <LAMP REPLACE>Orange [GH28] Die Anzeige benachrichtigt Sie, wenn der mit dem „[Timer für Zähluhr Filter]“ (→ Seite 70) eingestellte Zeitpunkt erreicht wurde. Tauschen Sie den Luftfilter aus. (wird gleichzeitig oben rechts auf der Projektionsfläche gezeigt.)Anderenfalls benachrichtigt Sie die Anzeige, wenn der [Filter verbleibend] 0% erreicht. Tauschen Sie den Luftfilter aus. (wird gleichzeitig oben rechts auf der Projektionsfläche gezeigt.*2)
*1: Die Anzeige ändert sich je nach Bedingungen, unabhängig vom Status der anderen Anzeigen.
*2: Wenn [Anzeige] (→ Seite 57) auf [Ein] eingestellt ist, wird die Einfrierfunktion (→ Seite 35) oder die Verschlussfunktion (→ Seite 35) während des Betriebs nicht auf dem Bildschirm angezeigt.
Über den Anzeigenstatus
■i einem Problem mit der Lampe
Der Status der Anzeige wird mit den folgenden Symbolen angezeigt.
▲: Aus, ●: Ein, ★: Blinkt, ■: Ein oder Blinkt
Anzeige Status des Projektors <STAND-BY>Rot <WARNING TEMP.>Rot <WARNING FILTER>Orange <SHUTTER>Blau <LAMP REPLACE>Orange ■*1 ■*1 ■*1 ■*1 ■*1 ★*2 Eine der Lampen schaltet sich nicht ein. (Die Lampe kühlt sich ab. Drücken Sie den Netzschalterauf der Fernbedienung oder den Netzschalterauf dem Bedienfeld, nachdem sich die Standby-Anzeigewieder eingeschaltet hat.) ■*1 ■*1 ■*1 ■*1 ■*1 ★*3 Eine der Lampen schaltet sich nicht ein. (Die Lampe hat sich abgekühlt und ist zur Betriebstemperatur zurückkehrt. Durch Drücken des Netzschalterauf der Fernbedienung oder des Netzschalterauf dem Bedienfeld, hört die Anzeige auf zu blinken und der Projektor wird in Betrieb gesetzt.) ■*1 ■*1 ■*1 ■*1 ■*1 ● Der empfohlene Zeitpunkt für den Lampenaustausch wurde erreicht. wird oben rechts auf der Projektionsfläche angezeigt, um den Benutzer über den Austausch zu benachrichtigen.Tauschen Sie die Lampeneinheit so bald wie möglich aus. Durch den Austausch der Lampe schaltet sich die Anzeige für die Lampeaus.
*1: Die Anzeige ändert sich je nach Bedingungen, unabhängig vom Status der anderen Anzeigen.
Anmerkung
- Der Status jeder Lampe kann überprüft werden, während die Anzeigen für die Lampe ( bis ) oben am Projektor sich einschalten oder blinken. (→ Seite 83)
Über den Anzeigenstatus
Ei einem Problem mit dem Verschluss
Der Status der Anzeige wird mit den folgenden Symbolen angezeigt.
▲: Aus, ●: Ein, ★: Blinkt, ■: Ein oder Blinkt
Anzeige Status des Projektors <STAND-BY> Rot <WARNING TEMP.> Rot <WARNING FILTER> Orange <SHUTTER> Blau <LAMP REPLACE> Orange [64VHZ] [67T0] [1001] [SC3A] [4082] Der Verschluss kann nicht geöffnet oder geschlossen werden. Die Lampe schaltet sich aus, das Abkühlen beginnt und der Projektor wechselt in den Standby-Modus. Der Strom schaltet sich ein und der Projektor versucht automatisch den Verschluss bis zu dreimal zu öffnen. Nach drei fehlgeschlagenen Versuchen wechselt der Projektor in den Standby-Modus, nachdem sich die Lampe abgekühlt hat. [52VZ] [HV5D] [88T6] [BYXH] [DCX7] Es gibt ein Problem beim Öffnen und Schließen des Verschlusses und die Lampe hat sich ausgeschaltet und kühlt sich ab. [57Z3] [OT03] [XTW7] [HZWO] Es gibt ein Problem beim Öffnen und Schließen des Verschlusses und der Projektor wechselt in den Standby-Modus, nachdem sich die Lampe ausgeschaltet und abgekühlt hat.
*1: Die Anzeige ändert sich je nach Bedingungen, unabhängig vom Status der anderen Anzeigen.
Anmerkung
- Der Status jeder Lampe kann überprüft werden, während die Anzeigen für die Lampe ( bis ) oben am Projektor sich einschalten oder blinken. (→ Seite 83)
Wartung/Austausch
Vor der(m) Wartung/Austausch der Einheit
Wenn Sie die Einheit warten oder austauschen, schalten Sie stets den Strom ab und ziehen Sie den Netzstecker aus der Steckdose. (■ Seiten 29, 32)
Achten Sie beim Stromabschalten darauf, die Verfahren unter „Ausschalten des Projektors“ (→ Seite 32) zu befolgen.
Wartung
Aßengehäuse
Wischen Sie Schmutz und Staub mit einem weichen, trockenen Tuch ab.
Wenn der Schmutz hartnäckig ist, tränken Sie das Tuch in Wasser und wringen Sie es gründlich aus, bevor Sie das Gerät abwischen. Trocknen Sie den Projektor mit einem trockenen Tuch ab.
Verwenden Sie keine Lösungsmittel wie Benzin, Verdünnungsmittel, Reinigungsalkohol, Haushaltsreiniger oder chemische Reinigungstücher. Sonst könnte das Außengehäuse abgenutzt werden.
Vorderseite des Objektivs
Wischen Sie den Schmutz und den Staub von der Vorderseite des Objektivs mit einem weichen, trockenen und sauberen Tuch ab.
Verwenden Sie kein flauschiges, staubiges oder in Öl/Wasser getränktes Tuch.
Seien Sie vorsichtig, wenn Sie das Objektiv abwischen, da es zerbrechlich ist.
Achtung
Die Objektive bestehen aus Glas. Stöße oder übermäßiger Kraftaufwand beim Abwischen kann die Oberfläche zerkratzen. Bitte mit Vorsicht handhaben.
Verwenden Sie in der Nähe des Projektors nie brennbare Lösungsmittel oder Luftsprühdosen. Die Temperatur im Inneren des Projektors kann extrem heiß sein, da die Projektionslampe in Betrieb ist. Eine Explosion oder ein Brand kann auch dann noch entstehen, wenn der Projektor ausgeschaltet wurde. Außer der brennbaren Luftsprays können die internen Teile ebenfalls aufgrund von kalter Luft beschädigt werden.
Austausch der Bauteile
Liftfilter
Der Ersatzfilter (003-004738-01 / Serviceteile-Nr.: T1FTX0069--) ist optional. Wenden Sie sich an Ihren Händler, um das Produkt zu erwerben.
A stausch des Luftfilters
1) Ziehen Sie die Luftfiltereinheit heraus.
- Verwenden Sie einen Kreuzschlitzschraubendreher, um die Schrauben gegen den Uhrzeigersinn zu drehen, bis sie sich lösen, und nehmen Sie anschließend die Luftfiltereinheit ab.
Schraube
Wartung/Austausch
2) Nehmen Sie den Halter heraus.
- Lösen Sie die drei Schrauben am Halter (A, B), schieben Sie den Halter in Pfeilrichtung (wie in der Abbildung gezeigt) und heben Sie ihn an, um den Halter herauszunehmen.
3) Nehmen Sie den Luftfilter heraus.
- Haken Sie Ihre Finger in den Schacht ein, um den Luftfilter anzuheben und herauszunehmen.
4) Bringen Sie den neuen Luftfilter an.
Setzen Sie den neuen Luftfilter ein, indem Sie ihn langsam schieben, so dass man ihn leichter befestigen kann.
Die Seite mit dem Schwamm ist die Oberseite. Wird er mit der falschen Seite angebracht oder wird er gewaltsam angebracht, kann Luft eindringen. Der Luftfilter funktioniert nicht vollständig und dadurch gelangt Staub in den Projektor.
5) Bringen Sie den Halter an.
Legen Sie den Halter (A, B) oben auf den Filter.
Schieben Sie den Halter so hinein, dass seine Pfeile mit den Pfeilen an der Einheit ausgerichtet sind, und bringen Sie den Halter an.
Ziehen Sie die drei Halterschrauben fest.
6) Bringen Sie die Luftfiltereinheit am Projektor an.
● Führen Sie 1) in umgekehrter Reihenfolge aus.
7) Setzen Sie den Filterzähler zurück.
- Schalten Sie den Strom ein und führen Sie die [Reset Zähluhr Filter] im Menü [Einstellung] durch.
Achtung
Achten Sie darauf, das Gerät vor dem Austausch des Luftfilters auszuschalten.
Achten Sie darauf, dass Sie das Verpackungsmaterial des Luftfilters entfernen, bevor Sie den neuen Luftfilter einsetzen.
Wenn Sie die Einheit anbringen, achten Sie darauf, dass der Projektor stabil ist. Führen Sie den Austausch an einem sicheren Ort durch, wo der Projektor nicht beschädigt wird, auch wenn Sie die Luftfiltereinheit fallen lassen.
Wenn Sie den Projektor einschalten, achten Sie darauf, dass die Luftfiltereinheit installiert ist, bevor Sie den Projektor verwenden. Anderenfalls könnte das Gerät beschädigt werden.
Luftfilter können nicht wieder verwendet werden.
Der Luftfilter und die Einheit können nicht im Wasser gewaschen werden. Achten Sie darauf, den Luftfilter nicht mit Wasser oder anderen Substanzen nass zu machen. Anderenfalls könnte dies Beschädigungen verursachen.
Setzen Sie den Filterzähler zurück, wenn Sie den Luftfilter ausgetauscht haben. Anderenfalls schaltet sich der Strom des Projektors u.U. aus Sicherheitsgründen ab.
Achten Sie darauf, die Schrauben festzuziehen, nachdem Sie die Filtereinheit angebracht haben. Falls nicht, könnte die Luftfiltereinheit während der Projektion herunterfallen.
Limpeneinheit
Die Lampeneinheit ist ein Verschleißteil. Überprüfen Sie die Lampen-Verwendungsdauer im „Menü [Information]“ (→ Seite 73) und führen Sie regelmäßig einen Austausch durch.
Wenn die Austauschmeldung auf der Projektionsfläche angezeigt wird und die Anzeigen für die Lampe bis sich einschalten, tauschen Sie die Lampeneinheiten aus. Es wird empfohlen, dass Sie einen qualifizierten Techniker mit dem Austausch der Lampeneinheit beauftragen. Wenden Sie sich an Ihren Händler.
Wenden Sie sich an Ihren Händler, um das Ersatzteil 002-120599-01 (Wartungsteil) zu erwerben.
Achtung
- Tauschen Sie die Lampeneinheit erst aus, wenn sie sich ausreichend abgekühlt hat. (Warten Sie nach der Verwendung mindestens 60 Minuten.)
Das Innere der Abdeckung kann sehr heiß werden und Brandverletzungen verursachen.
Amerkungen zum Austausch der Lampeneinheit
Da die leuchtende Lampe aus Glas besteht, kann sie bersten, wenn sie fallengelassen wird oder wenn sie von einem harten Gegenstand getroffen wird. Bitte mit Vorsicht handhaben.
Ein Kreuzschlitzschraubendreher wird für den Austausch der Lampeneinheit benötigt.
Halten Sie die Lampeneinheit am Griff fest, wenn Sie sie austauschen.
Die Lampe enthält Quecksilber. Wenn Sie die benutzte Lampeneinheit entsorgen, fragen Sie bei den zuständigen Behörden oder Ihrem Händler nach der ordnungsgemäßen Entsorgung der Einheit nach.
Achtung
Verwenden Sie nur spezifizierte Lampeneinheiten.
Die Produktnummern der Zubehörteile und der Teile, die separat verkauft wurden, können ohne Ankündigung geändert werden.
Der Austausch aller vier Lampen gleichzeitig wird empfohlen, um das Helligkeits- und Farbtongleichgewicht zu gewährleisten.
Zitpunkt des Austauschs der Lampeneinheit
Die Lampeneinheit ist ein Verschleißteil. Tauschen Sie die Lampeneinheit regelmäßig aus, da die Helligkeit mit der Zeit allmählich abnimmt. Die geschätzte Dauer bis zum Austausch beträgt 2 000 Stunden (wenn [Lampen leistung] auf Standard eingestellt ist). Diese Angabe kann sich jedoch abhängig von den einzelnen Lampeneigenschaften, Nutzungsbedingungen und der Installationsumgebung verkürzen. Daher wird ein früherer Austausch der Lampeneinheiten empfohlen.
Die Laufzeit übersteigt 2 200 Betriebsstunden für zwei Lampen, die Lampen werden auf die anderen zwei Lampen umgeschaltet, wenn sie verfügbar sind. Nach der Umschaltung leuchtet nur die andere Lampe, wenn die Laufzeit 2 200 Betriebsstunden für eine der beiden Lampen übersteigt und die Lampe nicht leuchtet. Wird der Strom eingeschaltet, ohne dass die Lampen nach der Überschreitung der Laufzeit von 2 200 Betriebsstunden für alle Lampen ausgetauscht werden, schaltet sich das Gerät automatisch nach etwa zehn Minuten aus, um eine Fehlfunktion des Projektors zu verhindern.
Bildschirmanzeige Anzeige für Lampe Anzeigen für Lampenbis Anzeigen für Lampenbis Die Anweisungen für den Lampenaustausch zeigen den Austauschzeitpunkt an und der Lampenstatus zeigt an, welche Lampe ausgetauscht werden muss. Wird orange. Wird orange, um anzuzeigen, welche Lampe ausgetauscht werden muss.
Wartung/Austausch
A-stauschen der Lampeneinheit
Achtung
Schalten Sie die UV-Lampe aus, bevor Sie die Lampenabdeckung öffnen.
Wenn der Projektor an der Decke angebracht ist, halten Sie Ihr Gesicht von der Lampeneinheit fern.
Bringen Sie die Lampeneinheit sicher an.
Wenn die Lampeneinheit nicht ordnungsgemäß angebracht wird, entfernen Sie sie und bringen Sie sie erneut an. Wird die Lampeneinheit gewaltsam hineingedrückt, kann der Anschluss kaputt gehen.
Die Glasoberfläche kann heiß sein. Halten Sie die Lampeneinheit am Griff fest, wenn Sie sie austauschen.
1) Überprüfen Sie mit dem auf der Projektionsfläche angezeigtem Lampenstatus, oder den Anzeigen für die Lampe bis , welche Lampe ausgetauscht werden muss.
Lampenanzeige bis
2) Nachdem Sie die unter „Ausschalten des Projektors“ (→ Seite 32) beschriebenen Verfahren befolgt haben, drücken Sie die <○>-Seite des Hauptschalters, um den Strom abzuschalten, ziehen Sie den Netzstecker aus der Steckdose und warten Sie mindestens 60 Minuten und überprüfen Sie dann, ob sich die Lampeneinheit abgekühlt hat.
- Öffnen Sie die Abdeckung, bis sie sich in einem 90°-Winkel zum Projektor befindet.
Schraube
4) Verwenden Sie einen Kreuzschlitzschraubendreher, um die Befestigungsschrauben der Lampeneinheit (zwei Schrauben) zu lösen, halten Sie dann die Griffe fest und ziehen Sie langsam die Lampeneinheit heraus.
Schraube
5) Setzen Sie die neue Lampeneinheit ein und beachten Sie dabei die Ausrichtung und verwenden Sie einen Kreuzschlitzschraubendreher, um die Befestigungsschrauben der Lampeneinheit (zwei Schrauben) festzuziehen.
- Beschmieren Sie die Glasoberfläche nicht, indem Sie sie mit Ihrer Hand berühren.
6) Schließen Sie die Lampenabdeckung und verwenden Sie einen Kreuzschlitzschraubendreher, um die Befestigungsschraube der Lampeneinheit festzuziehen.
Anmerkung
Wenn Sie sie mit der neuen Lampeneinheit austauschen (Produkt-Nr.: 002-120599-01), setzt der Projektor die Gesamtbetriebszeit der Lampeneinheit automatisch zurück.
Achten Sie nach dem Austausch der Lampeneinheit darauf, die Befestigungsschraube der Lampenabdeckung festzuziehen. Falls nicht, könnte die Lampeneinheit während der Projektion herunterfallen.
SCHALTEN SIE DIE UV-LAMPE AUS, BEVOR SIE DIE LAMPENABDECKUNG ÖFFNEN
Halten Sie die Lampeneinheit beim Austausch senkrecht, um zu vermeiden, dass Glasscherben verstreut werden. Wenn der Projektor an der Decke angebracht ist, arbeiten Sie nicht direkt unter der Lampenabdeckung und halten Sie Ihr Gesicht von ihr fern. Nehmen Sie die Lampenabdeckung langsam ab.
LAMPEN-NR.: 002-120599-01
Fehlerbehebung
Überprüfen Sie die folgenden Punkte. Beziehen Sie sich für Einzelheiten auf die entsprechenden Seiten.
Problem Zu überprüfende Punkte Seite Das Gerät schaltet sich nicht ein. ● Ist der Netzstecker fest in der Steckdose eingesteckt? —● Ist der Hauptschalterauf geschaltet? 32● Kommt Strom aus der Steckdose? —● Wurden die Schutzschalter ausgelöst? —● Ist die Betriebsanzeigeausgeschaltet? 30● Blinkt die Temperaturanzeige? 75 Es erscheint kein Bild. ● Ist das Bildgerät (Ausgang) ordnungsgemäß angeschlossen? 24● Stimmt die Einstellung für die Eingangsauswahl? 35● Funktioniert das externe Gerät, das am Projektor angeschlossen ist, ordnungsgemäß?● Wird der Projektor innerhalb des Betriebstemperaturbereichs (5°C (41°F) bis 40°C (104°F)) verwendet?● Ist der Verschluss geschlossen? 35 Das Bild ist unscharf. ● Ist die Bildschärfe richtig eingestellt? 34● Stimmt der Projektionsabstand? 104● Ist das Objektiv schmutzig? 81● Ist der Projektor senkrecht zur Projektionsfläche installiert?● Befindet sich Kondensation auf dem Objektiv? Die Farbe ist blass/ Der Farbton ist gräulich. ● Sind [Farbsättigung] und [Farbton] richtig eingestellt?● Ist das mit dem Projektor verbundene Gerät richtig eingestellt?● Ist das RGB-Kabel beschädigt? Das Bild ist dunkel. ● Sind [Kontrast] und [Helligkeit] richtig eingestellt?● Ist [Bildauswahl] richtig eingestellt?● Ist die [Lampenwahl] auf [2 Lampen] eingestellt?● Ist die [Lampen leistung] auf den Eco-Modus eingestellt?● Muss die Lampe ausgetauscht werden? Die Fernbedienung funktioniert nicht. ● Sind die Batterien leer?● Sind die Batterien richtig ausgerichtet?● Ist der Fernbedienungsschalteraufeingestellt?● Gibt es zwischen der Fernbedienung und dem Fernbedienungssensor des Projektors Blockierungen?● Wird die Fernbedienung über ihren Wirkungsbereich hinaus verwendet?● Beeinflussen andere Lichtformen, wie Leuchtstofflampenlichter, die Projektion?● Ist das Fernbedienungskabel am Projektor oder der Fernbedienung angeschlossen?● Ist der Fernbedienungsbetrieb mit [Tastatursperre] im Menü [Einstellung] gesperrt?● Ist der [Fernbedienungssensor] im Menü [Einstellung] richtig eingestellt?● Wurde die Fernbedienungsnummer geändert?
Fehlerbehebung
Problem Zu überprüfende Punkte Seite Die Bedientasten des Projektors funktionieren nicht. ● Ist der Projektorbetrieb mit [Tastatursperre] im Menü [Einstellung] gesperrt? 67 Das richtige Bild wird nicht angezeigt. ● Ist der [Eingang] richtig ausgewählt? 42● Ist die [Image adjust] richtig eingestellt? 48● Ist die [Format Bild] richtig ausgewählt? 53● Befindet sich die Objektivverschiebung an ihrer max. Position? 33● Gibt es ein Problem mit dem Videoband oder anderen Bildquellen? —● Empfängt der Projektor nicht kompatible Signale? 97 Das Bild vom Computer wird nicht angezeigt. ● Ist das Kabel zu lang? (Verwenden Sie ein Kabel, das 10 m oder kürzer lang ist.)● Ist der [Eingang] richtig ausgewählt? 42● Ist die [PC-Anpassung] richtig eingestellt? 44● Ist der externe Videoausgang des Laptops richtig eingestellt? (Beispiel: Die externen Ausgangseinstellungen können sich durch gleichzeitiges Drücken der Fn + F3 oder Fn + F10-Tasten umschalten. Beziehen Sie sich auf die Bedienungsanleitung Ihres Computers, da sich die Methode abhängig vom Computertyp unterscheidet.) — [Auto PC-Anpassung] funktioniert nicht. ● Empfängt der Projektor nicht kompatible Signale? 97● Ist ein nicht kompatibles Signal mit [System] ausgewählt? 43 Es gibt kein Bild von mit HDMI-kompatiblen Geräten, oder das Bild ist verzerrt. ● Ist das HDMI-Kabel fest angeschlossen? 24, 25● Schalten Sie den Projektor und die angeschlossenen Geräte aus/ein. —● Ist ein nicht kompatibles Signal angeschlossen? 99 Das Gerät schaltet sich von selbst aus. ● Ist die [Herunterfahren] mit der [Automatische Lampenabschaltung] im Menü [Einstellung] eingestellt?● Wird der Projektor verwendet, ohne dass der Luftfilter ausgetauscht wurde oder das eine [Reset Zähluhr Filter] durchgeführt wurde, nachdem oben rechts auf der Projektionsfläche angezeigt wird? 6671 Die Verschlussfunktion funktioniert nicht. ● Ist die [Schutz] unter [Shutter] im Menü [Einstellung] richtig eingestellt? 68
Achtung
Wenn das Problem weiterhin bestehen bleibt, auch nachdem die vorhergehenden Punkte überprüft wurden, wenden Sie sich an Ihren Händler.
Wenden Sie sich an Ihren Händler, wenn Sie das Logo-Passwort oder das Passwort vergessen haben.
Projektionsflächen mit mehreren projizierten Bildern einstellen
Mit den Optionen [Edge-Blending] und [Farbabgleich] lassen sich Bilder von mehreren Projektoren nahtlos überlappen.
[Edge-Blending]
1) Überprüfen Sie, dass die Einstellungen von [Format Bild] und [Image adjust] für jeden Projektor gleich sind.
- Im folgenden Beispiel wird dargestellt, wie die Bilder von Projektor A und B überlappt werden.
Projektor A Projektor B
3) Wählen Sie [Edge-Blending] im [Einstellung]-Menü und blenden Sie die Projektionsflächen-Einstellungen ein.
● Die nachstehenden Werte sind ein Beispiel.
Projektor A: [Rechts] in [Breite] auf 100 einstellen
Projektor B: [Links] in [Breite] auf 100 einstellen
5) Passen Sie bei Bedarf [Fokus] und [Zoom] für die Bildposition aus jedem Projektor an.
6) Überlappen Sie dann mit [Lensshift] die schattierten Bereiche.
- Bei korrekter Überlappung wird die rote Linie gelb.
7) Setzen Sie [Testmuster] auf [Ein], um ein 50%-weißes Testmuster anzuzeigen.
- Die überlappenden Bereiche werden heller angezeigt als die anderen Bereiche.
8) Passen Sie [Schwarzpegel] so an, dass kein Unterschied mehr zwischen den überlappenden und den anderen Bereichen sichtbar ist.
- Um die überlappenden Bereiche anzupassen, ist es empfehlenswert, den [Kontrast]-Wert im [Image adjust]-Menü einzustellen.
Wenn die Farben links und rechts nicht übereinstimmen, fahren Sie mit dem folgenden Schritt fort.
[■arbabgleich]
9) Wählen Sie [Farbabgleich] im [Einstellung]-Menü und blenden Sie die Projektionsflächen-Einstellungen ein.
10) Aktivieren Sie den Farbabgleich mit [Ein] und passen Sie [Rot]/[Grün]/[Blau]/[Weiß] an.
11) Falls weitere Details erforderlich sind, wählen Sie [Erweiterter Farbabgleich] und blenden Sie den Einstellungsbildschirm ein.
12) Aktivieren Sie den erweiterten Farbabgleich mit [Ein] und passen Sie jede Farbe mit [Sollwerte] an.
- Stellen Sie den [Sollwerte]-Wert innerhalb des [Istwerte]-Wertebereichs ein.
Beispiel) Wert für „[Rot], x“
„[Istwerte]=0,674“, somit wird [Sollwerte] auf einen kleineren Wert von „0,650“ gesetzt.
13) Falls die Farben selbst nach der Einstellung von [Sollwerte] noch immer nicht übereinstimmen, verwenden Sie ein Kolorimeter, um die Chromatizitätskoordinaten und die Luminanz für weitere Einstellungen zu messen.
●Anpassen der Farben mit einem Kolorimeter
1) Setzen Sie [Erweiterter Farbabgleich] auf [Ein]. -Taste.
3) Wählen Sie [Rot] (oder [Grün], [Blau]) aus [Istwerte] und drücken Sie die -Taste.
4) Messen Sie die Chromatizitätskoordinaten (x, y) und die Luminanz (Lx) mit dem Kolorimeter. -Taste.
- Kehren Sie in den Einstellungsbildschirm für den erweiterten Farbabgleich zurück.
6) Geben Sie den in Schritt 4) erhaltenen Wert ein.
Luminanz (Lx) von Rot
Luminanz von Rot + Luminanz von Grün + Luminanz von Blau (Lx)
8) Stellen Sie den [Sollwerte]-Wert erneut ein.
- Stellen Sie die anderen Projektoren bei Bedarf auf die gleiche Weise ein.
Etikett zum Benachrichtigen über die Passwort-Registrierung
Bringen Sie das mitgelieferte Etikett an einer sichtbaren Stelle am Projektor an, wenn das Passwort registriert und gültig ist.
Serieller Anschluss
Die /-Anschlüsse des Projektors stimmen mit RS-232C überein, so dass der Projektor an einen Computer angeschlossen und vom Computer aus gesteuert werden kann.
Aschluss
Siftzuweisungen und Signalnamen
D-Sub 9-polig (Stecker) Außenansicht Stift-Nr. Signalname Einzelheiten (1) — NC (2) RXD Empfangene Daten (3) TXD Übertragene Daten (4) — NC (5) GND Masse (6) — NC (7) — (8) — (9) —
Serielle Steuerschnittstelle
Dieser Projektor verfügt über eine Funktion zur Steuerung des Projektorbetriebs über die serielle RS-232C-Buchse.
Edienung
1) Schließen Sie ein serielles gekreuztes RS-232C-Kabel an der CONTROL PORT-Buchse des Projektors und an der seriellen Buchse des Computers an (→ Seite 24).
Baudrate : 9600 / 19200 Bit/s
Übertragungssteuerung : keine
Paritätsprüfung : keine
Datenbit : 8
Stopbit : 1
3) Geben Sie einen funktionalen Befehl ein und drücken Sie die Eingabetaste.
Beispiel) Auswahl der Buchse INPUT 2 „C06“ [CR].
Hinweise
Die Voreinstellung der Baudrate ist 19200 Bit/s. Beim Auftreten eines Kommunikationsfehlers müssen die serielle Buchse und die Kommunikationsgeschwindigkeit (Baudrate) geändert werden.
Zur Eingabe ASCII 64-Byte Großbuchstaben und 1-Byte Zeichen verwenden.
Funktionsbefehle
Der Befehl vom Computer wird mit dem folgenden Format auf den Projektor übertragen;
„C“ [Befehl] [CR]
Befehl: zwei Zeichen (siehe nachstehende Tabelle)
Der Projektor decodiert den Befehl und sendet „ACK“ im folgenden Format zurück; [ACK] [CR]
Falls der Projektor den Befehl nicht decodieren kann, wird er im folgenden Format zurückgesendet. „?“ [CR]
Befehl Funktion Befehl Funktion C00 Einschalten des Projektors C3D Zeiger AB C01 Ausschalten des Projektors (sofort ausschalten) C3F Eingabe C05 Eingang 1 wählen C46 Zoom AB C06 Eingang 2 wählen C47 Zoom AUF C07 Eingang 3 wählen C4A Fokus AB C08 Eingang 4 wählen C4B Fokus AUF C0D Videostummschaltung EIN C5D Objektivverschiebung AUF C0E Videostummschaltung AUS C5E Objektivverschiebung AB C0F Normales Bildformat C5F Objektivverschiebung LINKS C10 Vollbildschirm C60 Objektivverschiebung RECHTS C1C Menü EIN C89 Auto PC-Anpassung C1D Menü AUS C8E Trapezverzerrung AUF C3A Zeiger RECHTS C8F Trapezverzerrung AB C3B Zeiger LINKS C90 Trapezverzerrung RECHTS C3C Zeiger AUF C91 Trapezverzerrung LINKS
Statusbefehle
Der Befehl vom Computer wird mit dem folgenden Format auf den Projektor übertragen; „CR“ [Befehl] [CR]
Befehl: ein Zeichen (siehe nachstehende Tabelle)
Der Projektor decodiert den Befehl und sendet die 'Zeichenfolge' im folgenden Format zurück;
Befehl Funktion Rückgabewert Projektorstatus CR0 Status lesen lesen 00 Einschalten 80 Betriebsbereitschaft 40 Zurückzählen 20 Abkühlen 10 Stromversorgungsstörung 28 Abkühlen bei einer abnormalen Temperatur 24 Abkühlen in der Betriebsart automatische Lampenabschaltung 04 Betriebsart automatische Lampenabschaltung nach dem Abkühlen 21 Abkühlen nach dem Ausschalten des Projektors bei ausgeschalteter Lampe. 81 Betriebsbereitschaft nach dem Abkühlen des Projektors bei ausgeschalteter Lampe. 88 Betriebsbereitschaft nach dem Abkühlen des Projektors bei einer abnormalen Temperatur. 2C Abkühlen, wenn der Projektor durch die Shuttermanagementfunktion ausgeschaltet wurde. 8C Betriebsbereitschaft nach dem Abkühlen durch die Shuttermanagementfunktion. CR6 Temperatur lesen %1 %2 %1 = Temperatur des Sensors 1 (°C)%2 = Temperatur des Sensors 2 (°C)(z.B.) %1 = 12,3 (°C), %2 = 23,4 (°C)→ Der Projektor gibt „12,3 23,4“ zurück.(Für jeden Sensor werden 2 Stellen und eine Dezimalstelle angezeigt, mit einem Leerzeichen zwischen den einzelnen Temperaturen.) ? Kommunikationsstörung
In den Tabellen auf der Seite 93 sind die typischen Befehle für die Projektorsteuerung aufgelistet. Wenden Sie sich an Ihren Händler für weitere Informationen zu anderen Befehlen.
Weitere Anschlüsse
-VIDEO IN> Anschlussstiftzuweisungen und Signalnamen
Außenansicht Stift-Nr. Signalname (1) GND (Luminanzsignal) (2) GND (Farbsignal) (3) Luminanzsignal (4) Farbsignal
NALOG IN> Anschlussstiftzuweisungen und Signalnamen
Außenansicht Stift-Nr. Signalname (1) R (2) G (3) B (9) +5 V (12) DDC-Daten (13) HD/SYNC (14) VD (15) DDC-Takt
(4) wird nicht verwendet.
<■DMI IN> Anschlussstiftzuweisungen und Signalnamen
AußenansichtStifte mit ungeraden Nummern (1) bis (19) Stift-Nr. Signalname Stift-Nr. Signalname (1) T.M.D.S-Daten 2 + (11) T.M.D.S-Takt Abschirmung (2) T.M.D.S-Daten 2 Abschirmung (12) T.M.D.S-Takt - (3) T.M.D.S-Daten 2 - (13) CEC (4) T.M.D.S-Daten 1 + (14) — (5) T.M.D.S-Daten 1 Abschirmung (15) SCL (6) T.M.D.S-Daten 1 - (16) SDA (7) T.M.D.S-Daten 0 + (17) DDC/CEC GND (8) T.M.D.S-Daten 0 Abschirmung (18) +5 V (9) T.M.D.S-Daten 0 - (19) Hot-Plug-Erkennung (10) T.M.D.S-Takt +
IGITAL (DVI-D) IN> Anschlussstiftzuweisungen und Signalnamen
Außenansicht Stift-Nr. Signalname Stift-Nr. Signalname (1) T.M.D.S-Daten 2 - (13) - (2) T.M.D.S-Daten 2 + (14) +5 V (3) T.M.D.S-Daten 2/4 Abschirmung (15) GND (4) -(16) Hot-Plug-Erkennung (5) -(17) T.M.D.S-Daten 0 - (6) DDC-Takt (18) T.M.D.S-Daten 0 + (7) DDC-Daten (19) T.M.D.S-Daten 0/5 Abschirmung (8) -(20) - (9) T.M.D.S-Daten 1 - (21) - (10) T.M.D.S-Daten 1 + (22) T.M.D.S-Takt Abschirmung (11) T.M.D.S-Daten 1/3 Abschirmung (23) T.M.D.S-Takt + (12) - (24) T.M.D.S-Takt -
Liste kompatibler Signale
Die nachstehende Tabelle gibt die Signalarten an, die mit dem Projektor kompatibel sind.
Wenn das Signal analog ist
Bildschirmanzeige Auflösung*1Modus (Bildpunkte) Horizontal (kHz) Vertikal (Hz) Frequenz (MHz) Abtastfrequenz Pixeltakt VGA 1 640 x 480 31,470 59,880 25,149 VGA 2 720 x 400 31,470 70,090 28,322 VGA 3 640 x 400 31,470 70,090 25,175 VGA 4 640 x 480 37,860 74,380 31,500 VGA 5 640 x 480 37,860 72,810 31,500 VGA 6 640 x 480 37,500 75,000 31,500 VGA 7 640 x 480 43,269 85,000 36,000 MAC LC13 640 x 480 34,970 66,600 31,330 MAC 13 640 x 480 35,000 66,670 30,240 480p 640 x 480 31,470 59,880 25,200 576p 768 x 576 31,250 50,000 29,500 576i 768 x 576i 15,625 50,000 14,750 480i 640 x 480i 15,734 60,000 12,273 SVGA 1 800 x 600 35,156 56,250 36,000 SVGA 2 800 x 600 37,880 60,320 40,000 SVGA 3 800 x 600 46,875 75,000 49,500 SVGA 4 800 x 600 53,674 85,060 56,250 SVGA 5 800 x 600 48,080 72,190 50,000 SVGA 6 800 x 600 37,900 61,030 40,020 SVGA 7 800 x 600 34,500 55,380 36,432 SVGA 8 800 x 600 38,000 60,510 40,128 SVGA 9 800 x 600 38,600 60,310 38,600 SVGA 10 800 x 600 32,700 51,090 32,700 SVGA 11 800 x 600 38,000 60,510 40,128 MAC 16 832 x 624 49,720 74,550 57,283 XGA 1 1 024 x 768 48,360 60,000 65,000 XGA 2 1 024 x 768 68,677 84,997 94,504 XGA 3 1 024 x 768 60,023 75,030 78,750 XGA 4 1 024 x 768 56,476 70,070 75,000 XGA 5 1 024 x 768 60,310 74,920 79,252 XGA 6 1 024 x 768 48,500 60,020 65,179 XGA 7 1 024 x 768 44,000 54,580 59,129 XGA 8 1 024 x 768 63,480 79,350 83,410 XGA 9 1 024 x 768i 36,000 87,170 47,300 XGA 10 1 024 x 768 62,040 77,070 84,375 XGA 11 1 024 x 768 61,000 75,700 81,000 XGA 12 1 024 x 768i 35,522 86,960 44,900 XGA 13 1 024 x 768 46,900 58,200 63,030 XGA 14 1 024 x 768 47,000 58,300 61,664 XGA 15 1 024 x 768 58,030 72,000 74,745 MAC 19 1 024 x 768 60,240 75,080 80,010 SXGA 1 1 152 x 864 64,200 70,400 94,560 SXGA 2 1 280 x 1 024 62,500 58,600 108,000 SXGA 3 1 280 x 1 024 63,900 60,000 107,350 SXGA 4 1 280 x 1 024 63,340 59,980 108,180 SXGA 5 1 280 x 1 024 63,740 60,010 109,497 SXGA 6 1 280 x 1 024 71,690 67,190 117,004 SXGA 7 1 280 x 1 024 81,130 76,107 135,008 SXGA 8 1 280 x 1 024 63,980 60,020 108,000 SXGA 9 1 280 x 1 024 79,976 75,025 135,000 SXGA 10 1 280 x 960 60,000 60,000 108,000 SXGA 11 1 152 x 900 61,200 65,200 92,000 SXGA 12 1 152 x 900 71,400 75,600 105,100 SXGA 13 1 280 x 1 024i 50,000 86,000 80,000 SXGA 14 1 280 x 1 024i 50,000 94,000 80,000
Technische Informationen
Bildschirmanzeige Auflösung Modus (Bildpunkte) Horizontal (kHz) Vertikal (Hz) Frequenz (MHz) Abtastfrequenz Pixeltakt SXGA 15 1 280 x 1 024 63,370 60,010 111,520 SXGA 16 1 280 x 1 024 76,970 72,000 130,080 SXGA 17 1 152 x 900 61,850 66,000 94,500 SXGA 18 1 280 x 1 024i 46,430 86,700 78,745 SXGA 19 1 280 x 1 024 63,790 60,180 108,190 SXGA 20 1 280 x 1 024 91,146 85,024 157,500 SXGA+ 1 1 400 x 1 050 63,970 60,190 107,990 SXGA+ 2 1 400 x 1 050 65,350 60,120 122,850 SXGA+ 3 1 400 x 1 050 65,120 59,900 122,430 SXGA+ 4 1 400 x 1 050 64,030 60,010 108,160 SXGA+ 5 1 400 x 1 050 62,500 58,600 108,000 SXGA+ 6 1 400 x 1 050 64,744 59,948 101,000 SXGA+ 7 1 400 x 1 050 65,317 59,978 121,750 MAC 21 1 152 x 870 68,680 75,060 100,000 MAC 1 280 x 960 75,000 75,080 126,000 MAC 1 280 x 1 024 80,000 75,080 135,200 WXGA 1 1 366 x 768 48,360 60,000 86,670 WXGA 2 1 360 x 768 47,700 60,000 86,670 WXGA 3 1 376 x 768 48,360 60,000 86,670 WXGA 4 1 360 x 768 56,160 72,000 100,190 WXGA 6 1 280 x 768 47,776 59,870 79,500 WXGA 7 1 280 x 768 60,289 74,893 102,250 WXGA 8 1 280 x 768 68,633 84,837 117,500 WXGA 9 1 280 x 800 49,600 60,050 79,360 WXGA 10 1 280 x 800 41,200 50,000 68,557 WXGA 11 1 280 x 800 49,702 59,810 83,500 WXGA 12 1 280 x 800 63,980 60,020 108,000 WXGA 17 1 280 x 800 58,289 69,975 98,858 WXGA 18 1 280 x 800 60,044 71,995 102,795 WXGA 19 1 280 x 800 62,790 74,928 106,492 WXGA 20 1 280 x 800 71,553 84,879 122,498 WXGA 21 1 280 x 800 55,993 69,991 94,964 WXGA 22 1 280 x 800 57,675 72,004 97,817 WUXGA 1*2 1 920 x 1 200 74,556 59,885 193,250 WUXGA 2 1 920 x 1 200 74,038 59,950 154,000 WSXGA+ 1 1 680 x 1 050 65,290 59,954 146,250 WXGA+ 1 1 440 x 900 55,935 59,887 106,500 WXGA+ 2 1 440 x 900 74,918 60,000 161,850 UXGA 1 1 600 x 1 200 75,000 60,000 162,000 UXGA 2*2 1 600 x 1 200 81,250 65,000 175,500 UXGA 3*2 1 600 x 1 200 87,500 70,000 189,000 UXGA 4*2 1 600 x 1 200 93,750 75,000 202,500 UXGA 5*2 1 600 x 1 200 106,250 85,000 29,500 720p 1 280 x 720 45,000 60,000 74,250 720p 1 280 x 720 37,500 50,000 74,250 1035i 1 920 x 1 035i 33,750 60,000 74,250 1080i 1 920 x 1 080i 33,750 60,000 74,250 1 920 x 1 080i 28,125 50,000 74,250 1080p 1 920 x 1 080 33,750 30,000 74,250 1 920 x 1 080 28,125 25,000 74,250 1 920 x 1 080 27,000 24,000 74,250 1 920 x 1 080 67,500 60,000 148,500 1 920 x 1 080 56,250 50,000 148,500 1080psf/30 1 920 x 1 080 33,750 60,000 74,250 1080psf/25 1 920 x 1 080 28,125 50,000 74,250 1080psf/24 1 920 x 1 080 27,000 48,000 74,250
*1: Das „i“ hinter der Auflösung weist auf ein Zeilensprungsignal hin.
Wenn das Signal digital ist
Bildschirmanzeige Auflösung*1Modus (Bildpunkte) Horizontal (kHz) Vertikal (Hz) Frequenz (MHz) Abtastfrequenz Pixeltakt D-VGA 640 x 480 31,470 59,940 25,175 D-480i2 720 (1 440) x 480 15,734 59,940 27,000 D-576i2 720 (1 440) x 576 15,625 50,000 27,000 D-480p 720 x 480 31,470 60,000 27,000 D-576p 768 x 576 31,250 50,000 27,000 D-SVGA 800 x 600 37,879 60,320 40,000 D-XGA 1 024 x 768 43,363 60,000 65,000 D-WXGA 1 1 366 x 768 48,360 60,000 86,670 D-WXGA 2 1 360 x 768 47,700 60,000 86,670 D-WXGA 3 1 376 x 768 48,360 60,000 86,670 D-WXGA 4 1 360 x 768 56,160 72,000 100,190 D-WXGA 5 1 366 x 768 46,500 50,000 67,400 D-WXGA 6 1 280 x 768 47,776 59,870 79,500 D-WXGA 7 1 280 x 768 60,289 74,893 102,250 D-WXGA 8 1 280 x 768 68,633 84,837 117,500 D-WXGA 9 1 280 x 800 49,600 60,050 79,360 D-WXGA 10 1 280 x 800 41,200 50,000 68,557 D-WXGA 11 1 280 x 800 49,702 59,810 83,500 D-WXGA 12 1 280 x 800 63,980 60,020 108,000 D-WXGA 17 1 280 x 800 58,289 69,975 98,858 D-WXGA 18 1 280 x 800 60,044 71,995 102,795 D-WXGA 19 1 280 x 800 62,790 74,928 106,492 D-WXGA 20 1 280 x 800 71,553 84,879 122,498 D-WXGA 21 1 280 x 800 55,993 69,991 94,964 D-WXGA 22 1 280 x 800 57,675 72,004 97,817 D-SXGA 1 1 280 x 1 024 63,980 60,020 108,000 D-SXGA 2 1 280 x 1 024 60,276 58,069 93,067 D-SXGA+ 1 1 400 x 1 050 63,970 60,190 107,990 D-SXGA+ 2 1 400 x 1 050 65,350 60,120 122,850 D-SXGA+ 3 1 400 x 1 050 65,120 59,900 122,430 D-SXGA+ 4 1 400 x 1 050 64,030 60,010 108,160 D-SXGA+ 5 1 400 x 1 050 62,500 58,600 108,000 D-SXGA+ 6 1 400 x 1 050 64,744 59,948 101,000 D-SXGA+ 7 1 400 x 1 050 65,317 59,978 121,750 D-UXGA 1 600 x 1 200 75,000 60,000 162,000 D-WUXGA 2 1 920 x 1 200 74,038 59,950 154,000 D-WSXGA+ 1 1 680 x 1 050 65,290 59,954 146,250 D-WXGA+ 1 1 440 x 900 55,935 59,887 106,500 D-720p 1 280 x 720 45,000 60,000 74,250 1 280 x 720 37,500 50,000 74,250 D-1035i 1 920 x 1 035i 33,750 60,000 74,250 D-1080i 1 920 x 1 080i 33,750 60,000 74,250 1 920 x 1 080i 28,125 50,000 74,250 D-1080psf/30 1 920 x 1 080 33,750 60,000 74,250 D-1080psf/25 1 920 x 1 080 28,125 50,000 74,250 D-1080psf/24 1 920 x 1 080 27,000 48,000 74,250 D-1080p 1 920 x 1 080 33,750 30,000 74,250 1 920 x 1 080 28,125 25,000 74,250 1 920 x 1 080 27,000 24,000 74,250 1 920 x 1 080 67,500 60,000 148,500 1 920 x 1 080 56,250 50,000 148,500
*1: Das „i“ hinter der Auflösung weist auf ein Zeilensprungsignal hin. -Anschluss verbundenes HDMI-Kabel nutzen.
Hinweis
● Die Anzahl der Bildpunkte der Anzeige ist 1 024 x 768.
Technische Daten
Die nachstehende Tabelle führt die technischen Daten des Projektors auf.
Modell-Nr. LX1750 Stromversorgung 200 V - 240 V Wechselstrom 50 Hz/60 Hz Stromverbrauch 200 V - 240 V 11 A 1 850 W Wenn [Lampen leistung] im [Einstellung]-Menü auf Ecomodus eingestellt ist: 1 450 W Standby: 18 W LCD-Panel Größe 4,57 cm (1,8 Zoll) (Bildseitenverhältnis 4:3) Anzeigesystem Drei transparente LCD-Felder (RGB) Antriebssystem Polysilicon-TFT mit aktivem Matrixsystem Anzahl der Pixel 786 432 Pixel (1 024 x 768 Bildpunkte) x 3 Felder Selbstleuchtende Lampe 380 W NSHA UHM-Lampe x 4 Lichtausgabe 16 000 lm (ANSI) (wenn [Lampenwahl] auf [4 Lampen] eingestellt ist und [Lampen leistung] auf Standard eingestellt ist) Bildsignale, die projiziert werden können Siehe „Liste kompatibler Signale“ (→ Seite 97). Farbsystem Sechs Normen (NTSC/NTS C4.43/PAL/PAL-N/PAL-M/SECAM) Bildschirmgröße 1,02 m (40 Zoll) – 15,24 m (600 Zoll) Bildseitenverhältnis des Bildschirms 4:3 Projektionsmethode Siehe „Projektionsmethode“ ( → Seite 22). Kontrastverhältnis 2 500:1 (wenn [Lampen leistung] auf automatisch gesetzt wird und [Farbraumerweiterung] auf [Auto]) Anschlüsse INPUT 1 DVI-D-Eingangsanschluss 1 Satz, DVI-D 24-poligDigitales Signal TMDS (Transition Minimized Differential Signaling) HDMI-Eingangsanschluss 1 Satz, HDMI 19-polig (HDCP, Deep color-konform) Computer-Eingangsanschluss 1 Satz (D-Sub 15-polig (Buchse))RGB-Signal 0,7 V [p-p] 75 Ω (G-SYNC: 1,0 V [p-p] 75 Ω)HD/SYNC TTL hohe Impedanz, automatische positive/negative PolaritätskompatibilitätVD, TTL hohe Impedanz, automatische positive/negative Polaritätskompatibilität INPUT 2 Analoges RGB-Eingangssignal 1 Satz (BNC 5-polig)RGB-Signal 0,7 V [p-p] 75 Ω (G-SYNC: 1,0 V [p-p] 75 Ω)HD/SYNC TTL hohe Impedanz, automatische positive/negative PolaritätskompatibilitätVIDEO-Signal 1,0 V [p-p] 75 Ω negative Synchronisation YPB /CB PR /CR -Signal Y: 1,0 V [p-p] negative Synchronisation, PB /CB : 0,7 V [p-p] 75 Ω, PR /CR : 0,7 V [p-p] 75 Ω S-VIDEO-Eingangsanschluss 1 Satz, Mini-DIN 4-polig Y 1,0 V [p-p], C 0,286 V [p-p] 75 Ω S1 signalkonform Serieller Eingangsanschluss D-Sub 9-polig 1 Satz, RS-232C-kompatible Computersteuerung Serieller Ausgangsanschluss D-Sub 9-polig 1 Satz USB-Anschluss (für die Verwendung durch Wartungspersonal) USB-Stecker (1 Satz, Serie B) Kabelfernbedienung Klinkenstecker LAN-Anschluss 1 Satz, RJ-45 für Netzwerkanschluss, 10Base-T/100Base-TX
Technische Daten
Modell-Nr. LX1750 Länge des Netzkabels 3,0 m (118-1/8 Zoll) Außengehäuse Geformter Kunststoff Abmessungen Breite: 650 mm (25-5/8 Zoll) Höhe: 349 mm (13-3/4 Zoll) (Füße vollständig eingezogen) Tiefe: 815 mm (32-1/8 Zoll) (Füße vollständig eingezogen, ohne Objektiv) Gewicht Ca. 46,5 kg (102,5 Pfund) Betriebsumgebung Betriebstemperatur 1 : 5°C (41°F) bis 40°C (104°F)Betriebsluftfeuchtigkeit: 20% bis 80% (keine Kondensation) Fernbedienung Stromversorgung 3 V Gleichstrom (AAA/R03/LR03 Batterie x 2) Reichweite Ca. 5 m (196-7/8 Zoll) (innerhalb von 30° in jeder Richtung) Gewicht 102 g (3,6 Unzen) (einschließlich Batterien) Abmessungen Breite: 48 mm (1-7/8 Zoll) Höhe: 27 mm (1-1/8 Zoll) Tiefe: 145 mm (5-3/4 Zoll)
*1: Die Betriebstemperatur kann je nach dem verwendeten Luftfilter und bei Einsatz des Projektors in höheren Lagen abweichen.
- Die Produktnummern der Zubehörteile und der separat erhältlichen Komponenten können ohne Ankündigung geändert werden.
Abmessungen
* Die tatsächlichen Abmessungen können je nach dem Produkt abweichen.
Sicherheitsvorkehrungen für die Deckenmontageträger
Die Installation der Deckenmontageträger sollte nur durch einen qualifizierten Techniker durchgeführt werden.
Christie übernimmt keine Verantwortung für Schäden am Projektor aufgrund der Verwendung von Deckenmontageträgern, die nicht von Christie hergestellt wurden oder aufgrund einer ungeeigneten Wahl des Montageorts, auch dann nicht, wenn die Gewährleistungsfrist noch nicht abgelaufen ist.
Ein unbenutzter Deckenmontageträger muss unverzüglich durch einen qualifizierten Techniker entfernt werden.
Verwenden Sie einen Drehmomentschraubendreher oder einen Sechskant-Drehmomentschraubendreher, wenn Sie die Schrauben anziehen und ziehen Sie sie um ein Anzugsdrehmoment innerhalb der vorgeschriebenen Werte an. Verwenden Sie keine Werkzeuge, wie elektrische Schraubendreher oder Schlagschraubendreher.
Weitere Informationen finden Sie in der dem Deckenmontageträger beiliegenden Installationsanleitung.
Die Produktnummern der Zubehörteile und der separat erhältlichen Komponenten können ohne Ankündigung geändert werden.
Unterseiten-Ansicht
Schraubenlöcher für einstellbare Füße (zur Verwendung mit dem Deckenmontageträger)
Schraubendurchmesser: M10
Tiefe: 40 mm
Schraubenlöcher für den Deckenmontageträger
Schraubendurchmesser: M8
Tiefe: 32 mm
Schrauben-Anzugsmoment
M10: 20 ± 1 N·m
M8: 10 ± 0.5 N·m
Hinweise zur Befestigung des Objektivs
Die technischen Mitarbeiter oder die Kundendienstmitarbeiter dürfen das Objektiv nur entsprechend der mit dem optional erhältlichen Objektiv mitgelieferten Bedienungsanleitung anbringen.
- Verwenden Sie die mit dem Projektor mitgelieferten Lichtabschirmplatten, die Objektivbefestigung, den Abstandshalter und den Objektivsperrhebel-Befestigungsbügel, wenn Sie das Objektiv anbringen. Einzelheiten finden Sie in der mit dem Objektiv mitgelieferten Bedienungsanleitung.
Technische Daten des Objektivs
Beziehen Sie sich bezüglich der Objektivspezifikationen auf die folgenden Tabellen.
Alle Messwerte in den folgenden Tabellen sind Näherungswerte. Sie können etwas von den tatsächlichen Messwerten abweichen.
Projektionsabstand und Projektionsflächengröße
Projektionsabstand (m) Objektiv-Nr. 38-809037-52 103-135100-01 38-809094-51 103-103101-01 38-809039-52 38-809044-52 103-130105-01 38-809070-51 103-129103-01 Projektionsflächengröße(m (Zoll)) TELE WEIT FEST TELE WEIT TELE WEIT TELE WEIT TELE WEIT TELE WEIT TELE WEIT TELE WEIT TELE 1,02 (40") 1,4 1,1 0,6 1,2 1,2 0,9 2,0 1 5 — — 5,1 3,7 6,5 3,7 2,9 1,52 (60") 2,2 1,7 0,9 2,4 1,8 1,8 1,4 3,1 2 3 — — 7,6 5,5 11,2 7,7 5,5 4,3 2,03 (80") 2,9 2,2 1,3 3,2 2,4 2,4 1,9 4,2 3 2 — — 10,1 7,3 14,8 10,2 7,3 5,6 2,54 (100") 3,7 2,8 1,6 4,1 3,1 3,1 2,4 5,3 4,0 7,1 5,2 12,5 9,0 8,4 12,7 9,1 7,0 3,05 (120") 4,4 3,4 1,9 4,9 3,7 3,7 2,9 6,4 4,8 8,6 6,3 15,0 10,8 22,0 15,1 10,9 8,4 3,81 (150") 5,6 4,3 2,4 6,2 4,7 4,7 3,6 8,0 6,1 10,7 7,9 18,7 13,4 27,5 18,8 13,6 10,5 4,57 (180") 6,7 5,1 2,9 7,4 5,7 5,6 4,3 9,6 7,4 12,9 9,5 22,4 16,1 32,9 22,5 16,3 12,6 5,08 (200") 7,5 5,7 3,3 8,3 6,3 6,2 4,8 10,7 8,2 14,4 10,6 24,9 17,8 36,5 24,9 18,1 14,0 6,35 (250") 9,3 7,2 4,1 10,4 7,9 7,8 6,0 13,5 10,3 18,0 13,3 31,0 22,2 45,5 31,1 22,6 17,5 7,62 (300") 11,2 8,6 4,9 12,5 9,5 9,4 7,3 16,2 12,4 21,6 16,0 37,2 26,6 54,6 37,2 27,1 20,9 8,89 (350") 13,1 10,1 5,8 14,6 11,1 11,0 8,5 18,9 14,5 25,3 18,7 43,4 31,0 63,6 43,4 31,5 24,4 10,16 (400") 15,0 11,5 6,6 16,7 12,7 12,6 9,7 21,7 16,6 28,9 21,4 49,5 35,4 72,6 49,5 36,0 27,9 12,70 (500") 18,8 14,4 8,3 20,9 15,9 15,8 12,1 27,1 20,8 36,2 26,8 61,9 44,2 90,7 61,8 45,0 34,8 15,24 (600") 22,5 17,3 9,9 25,1 19,2 18,9 14,6 32,6 25,0 43,4 32,2 74,2 53,0 108,8 74,1 54,0 41,8
Objektivverschiebung und Verhältnis der optischen Achse
Objektiv-Nr. 38-809037-52 103-135100-01 38-809094-51 103-103101-01 38-809039-52 38-809044-52 103-130105-01 38-809070-51 103-129103-01 Objektivver-schiebung/Verhältnis der optischen Achse Vertikal (max.) H1 0 1 0 0 0 0 0 0 0 H2 10 1 10 10 10 10 10 10 10 Horizontal (max.) W1 2 1 2 1 2 2 2 2 2 W2 3 1 3 1 3 3 3 3 3
Lensshift (Höchste Position)
Lensshift (Tiefste Position)
Lensshift (Ganz links)
Lensshift (Ganz rechts)
Hinweise zur Befestigung des Objektivs
Lichtabschirmplatte für jedes Objektiv
Es werden drei Arten von Lichtabschirmplatten mit dem Projektor geliefert. Verwenden Sie die Lichtabschirmplatte, die dem dazugehörigen Objektiv entspricht. Siehe folgende Tabelle.
Zubehör (Produktbezeichnung) Objektiv-Produktnr. Lichtabschirmende Platte-1(T0CRS0008--1) 103-135100-01*1 Lichtabschirmende Platte-2(T0CRM0014--1) 38-809094-51,103-103101-01,38-809039-52,38-809044-52,38-809070-51 Lichtabschirmende Platte-3(T0CRM0013--1) 38-809037-52,103-135100-01*1,103-130105-01,103-129103-01
Achtung
- Die Lichtabschirmplatte-2 und die Lichtabschirmplatte-3 sollten getrennt als obere und untere Platte angebracht werden.
*1: Verwenden Sie das Licht-Abschirmblech-1 und das Licht-Abschirmblech-3 zusammen.
Diese Symbole auf den Produkten, Verpackungen und/oder Begleitdokumenten bedeuten, dass benutzte elektrische und elektronische Produkte und Batterien nicht in den allgemeinen Hausmüll gegeben werden sollen.
Bitte bringen Sie diese alten Produkte und Batterien zur Behandlung, Aufarbeitung bzw. zum Recycling gemäß Ihrer Landesgesetzgebung und den Richtlinien 2002/96/EG und 2006/66/EG zu Ihren zuständigen Sammelpunkten.
Indem Sie diese Produkte und Batterien ordnungsgemäß entsorgen, helfen Sie dabei, wertvolle Ressourcen zu schützen und eventuelle negative Auswirkungen auf die menschliche Gesundheit und die Umwelt zu vermeiden, die anderenfalls durch eine unsachgemäße Abfallbehandlung auftreten können.
Wenn Sie ausführlichere Informationen zur Sammlung und zum Recycling alter Produkte und Batterien wünschen, wenden Sie sich bitte an Ihre örtlichen Verwaltungsbehörden, Ihren Abfallentsorgungsdienstleister oder an die Verkaufseinrichtung, in der Sie die Gegenstände gekauft haben.
Gemäß Landesvorschriften können wegen nicht ordnungsgemäßer Entsorgung dieses Abfalls Strafgelder verhängt werden.
Für geschäftliche Nutzer in der Europäischen Union
Wenn Sie elektrische oder elektronische Geräte entsorgen möchten, wenden Sie sich wegen genauerer Informationen bitte an Ihren Händler oder Lieferanten.
Diese Symbole gelten nur innerhalb der Europäischen Union. Wenn Sie solche Gegenstände entsorgen möchten, erfragen Sie bitte bei den örtlichen Behörden oder Ihrem Händler, welches die ordnungsgemäße Entsorgungsmethode ist.
Hinweis zum Batteriesymbol (unten zwei Symbolbeispiele):
Dieses Symbol kann in Kombination mit einem chemischen Symbol verwendet werden. In diesem Fall erfüllt es die Anforderungen derjenigen Richtlinie, die für die betreffende Chemikalie erlassen wurde.
Dieses Symbol gilt nur in China.
CHKISTIE®
LX1750
* La lente de proyección se vende por separado.
Manual del usuario Operaciones del proyector
Aviso importante de seguridad
ADVERTENCIA: ESTE APARATO DEBE SER CONECTADO A MASA.
ADVERTENCIA: Para evitar daños que puedan conducir a incendios o descargas eléctricas, no exponga este aparato a la lluvia ni la humedad.
Ordenanza 3 sobre ruidos de máquinas. GSGV, 18 de enero de 1991: El nivel de presión de sonido en la posición del operador es igual o menor a 70 dB (A) de acuerdo a ISO 7779.
ADVERTENCIA:
Desconecte la clavija de la toma de corriente cuando no vaya a utilizar el equipo durante un período prolongado de tiempo.
Para evitar descargas eléctricas, no retire la cubierta. No existen partes intercambiables en el interior del equipo. Para realizar una revisión, consulte a un Servicio Técnico cualificado.
No retire el contacto de puesta a tierra de la clavija de alimentación. Este aparato está equipado con una clavija de alimentación de tres contactos, del tipo conexión a tierra. Esta clavija sólo puede conectarse a una toma de corriente con conexión a tierra. Esta es una característica de seguridad. Si no puede insertar la clavija en la toma de corriente, póngase en contacto con un electricista. Pero no modifique la clavija de manera que no se pueda usar el contacto de conexión a tierra.
ADVERTENCIA:
Este es un producto de clase A. En un entorno doméstico este producto podría ocasionar interferencias de radio en cuyo caso el usuario debe tomar las medidas adecuadas.
PRECAUCIÓN:
Para garantizar una conformidad permanente, siga las instrucciones de instalación adjuntas, en las que se describe el uso del cable de alimentación suministrado y de cables de interfaz blindados para conectar el equipo a un ordenador o a un dispositivo periférico. Si utiliza el puerto serie para conectar un PC para control externo del proyector, deberá utilizar un cable de interfaz serie RS-232C (opcional) con núcleo de ferrita. Cualquier cambio o modificación no autorizada de este equipo invalidará la autoridad de los usuarios a usarlo.
Este dispositivo está diseñado para proyectar imágenes en una pantalla u otras superficies y no está pensado como sistema de iluminación interior para entornos domésticos.
Directiva 2009/125/CE
ADVERTENCIA:
APAGUE LA LÁMPARA UV ANTES DE ABRIR LA CUBIERTA DE LA LÁMPARA
ADVERTENCIA: PARA REDUCIR EL RIESGO DE INCENDIO O CHOQUE ELÉCTRICO, NO EXPONGA ESTE PRODUCTO A LA LLUVIA O HUMEDAD.
ADVERTENCIA: RIESGO DE GOLPE ELÉCTRICO, NO ABRIR.
El símbolo de rayo con cabeza de flecha dentro de un triángulo equilátero pretende alertar al usuario de la presencia de un “voltaje peligroso” sin aislar, dentro del recinto del producto que puede ser de suficiente magnitud para constituirse en un riesgo de choque eléctrico a una persona.
El punto de exclamación dentro de un triángulo equilátero pretende alertar al usuario de la presencia de importantes instrucciones de operación y mantenimiento (servicio) en la literatura que acompaña al producto.
PRECAUCIÓN (EE.UU. y Canadá)
PRECAUCIÓN:
Este equipo está equipado con un cable de energía tipo tierra con tres clavijas. No retire el contacto de puesta a tierra de la clavija de alimentación. La clavija de alimentación encajará solamente en tomacorriente tipo tierra. Esta es una característica de seguridad. Si no puede insertar la clavija en la toma de corriente, póngase en contacto con un electricista. Pero no modifique la clavija de manera que no se pueda usar el contacto de conexión a tierra.
ADVERTENCIA (EE.UU. y Canadá)
No es para usar en cuarto de computadoras como un Estándar definido para la Protección de Computadoras Electrónicas/Equipo de Procesamiento de Datos, ANSI/NFPA 75.
Para equipos que permanecen conectados permanentemente, un dispositivo de desconexión rápida y accesible debe ser incorporado al cableado del edificio.
Para equipos conectables, enchufe/tomacorriente será instalado cerca del equipo y será de fácil acceso.
IMPORTANTE: CLAVIJA MODULAR (SOLO PARA REINO UNIDO)
PARA SU SEGURIDAD LEA CUIDADOSAMENTE EL SIGUIENTE TEXTO.
Este aparato tiene una clavija de alimentación modular de tres contactos para su seguridad y conveniencia. Existe un fusible de 13 amperios dentro de la clavija. Si fuera necesario cambiar el fusible, asegúrese de que sea de 13 amperios y que haya sido aporobado por ASTA o BSI a BS1362.
Verifique la marca ASTA 📣 o la marca BSI 🌐 en el cuerpo del fusible.
Si la clavija tiene una cubierta de fusible desmontable, debe asegurarse de volver a colocarla cuando se vuelva a colocar el fusible. Si afloja la cubierta del fusible, la clavija no debe utilizarse sin la cubierta del fusible. Puede comprar una cubierta de fusible de repuesto en un centro de servicio autorizado.
Si la clavija modular suministrada no es apropiada para la toma de corriente de su hogar, deberá retirar el fusible y cortar la clavija y desecharla de forma segura. Existe peligro de una descarga eléctrica severa si se inserta la clavija en una toma de corriente de 13 amperios.
Si fuera necesario instalar una nueva clavija, tenga en cuenta el código de cableado indicado a continuación. Si tuviera alguna duda, consulte a un electricista cualificado.
ADVERTENCIA: ESTE APARATO DEBE SER CONECTADO A TIERRA.
IMPORTANTE: Los conductores del cable de alimentación están codificados con color según lo siguiente:
Verde y amarillo: Tierra
Azul: Neutro
Marrón: Corriente
Si los colores de los conductores en el cable de este aparato no corresponden con las marcas coloreadas identificadoras de color en los terminales de su clavija, proceda de la siguiente manera.
El conductor de color VERDE Y AMARILLO debe ser conectado al terminal de la clavija que está marcado con la letra E o con el símbolo de tierra 1/2 o es de color VERDE o VERDE Y AMARILLO.
El conductor de color AZUL debe ser conectado al terminal de la clavija que está marcado con la letra N o que es de color NEGRO.
El conductor de color MARRÓN debe ser conectado al terminal de la clavija que está marcado con la letra L o que es de color ROJO.
Para cambiar el fusible: Abra el compartimiento del fusible con un destornillador y sustituya el fusible.
Aviso importante de seguridad
ADVERTENCIA:
ALIMENTACIÓN
La toma de red o el cortacorriente debe instalarse junto al equipo y debe ser fácilmente accesible cuando ocurran problemas. Si ocurren los siguiente problemas, interrumpa el suministro de energía inmediatamente.
Si continúa usando el proyector bajo éstas condiciones podría producirse un incendio o descargas eléctricas.
Si penetran objetos extraños o agua dentro del proyector, interrumpa el suministro de energía.
Si el proyector se cae o la carcasa se rompe, interrumpa el suministro de energía.
Si nota la presencia de humo, olores o ruidos extraños que salen desde el proyector, interrumpa el suministro de energía.
Contacte con un centro de servicio autorizado para la reparación, y no trate de reparar el proyector usted.
Durante una tormenta, no toque el proyector ni el cable.
Podría sufrir golpes eléctricos.
No haga nada que pueda dañar el cable de alimentación o el enchufe del cable de alimentación.
Si se usa el cable de alimentación dañado, pueden producirse choques eléctricos, cortocircuitos o un incendio.
- No dañe el cable de alimentación, no le realice ninguna modificación, no lo coloque cerca de objetos calientes, no lo doble excesivamente, no lo tuerza, no tire de él, no coloque objetos pesados sobre él ni lo enrolle.
Pida a un centro de servicio autorizado que realice cualquier reparación necesaria del cable de alimentación.
Inserte completamente la clavija de alimentación en la toma de corriente y el conector de alimentación en el terminal del proyector.
Si el enchufe no se inserta correctamente, podrían ocurrir choques eléctricos o sobrecalentamientos.
- No use enchufes que estén dañados ni tomas que no estén bien fijadas en la pared.
No utilice otro cable que no sea el cable de alimentación suministrado.
De lo contrario se puede ocasionar un incendio o descargas eléctricas.
Limpie regularmente el enchufe del cable de alimentación para evitar la acumulación de polvo.
El no observar esta medida puede provocar un incendio.
Si se acumula polvo en el enchufe del cable de alimentación, la humedad resultante puede dañar el aislamiento.
Si no va a usar el proyector por un largo tiempo, desenchufe el cable de alimentación del tomacorriente de la pared.
Desconecte el enchufe de la toma de corriente y límpielo con un paño seco regularmente.
No toque el enchufe del cable de alimentación con las manos húmedas.
Si no observa esto podrían producirse descargas eléctricas.
No sobre cargue el tomacorriente.
Si se sobrecarga el suministro de alimentación (por ejemplo, usando demasiados adaptadores), puede producirse un sobrecalentamiento que podría ocasionar un incendio.
■ SOBRE EL USO/INSTALACIÓN
No coloque el proyector sobre materiales suaves como alfombras o superficies acolchadas.
De lo contrario el proyector se puede sobrecalentar, lo que puede causar quemaduras, incendios o daños al proyector.
No coloque el proyector en lugares húmedos o polvorientos o lugares donde el proyector pueda entrar en contacto con humo grasiento o vapor.
DEI uso del proyector en tales condiciones puede ocasionar un incendio, descargas eléctricas o deterioro de componentes. El deterioro de componentes (como los soportes de montaje del techo), puede hacer que se caiga el proyector, si está montado en el techo.
No instale este proyector en un lugar que no sea lo suficientemente fuerte como para soportar el peso completo del proyector o encima de una superficie inclinada o poco estable.
Si no observa esto podría ocasionar que el proyector se desequilibre y caiga, lo cual podría ocasionar daños o heridas graves.
ADVERTENCIA:
No tape los orificios de entrada/salida de aire ni coloque nada a una distancia de 1 m (39") de los mismos.
Esto puede hacer que el proyector se sobrecaliente y causar un incendio o daños al proyector.
No coloque el proyector en lugares estrechos y con mala ventilación.
No sitúe el proyector sobre paños o papeles, ya que estos materiales podrían tapar el orificio de entrada de aire.
No coloque sus manos ni cualquier otro objeto cerca del orificio de salida de aire.
El hacerlo podría causar quemaduras o dañar sus manos u otros objetos.
- El orificio de salida de aire expulsa aire caliente. No coloque sus manos ni otros objetos cerca del puerto de salida de aire.
No mire ni coloque su piel en el rayo de luz emitido por la lente mientras se usa el proyector.
Esto podría causar quemaduras o pérdida de visión.
La lente del proyector emite una luz fuerte. No mire ni coloque sus manos directamente en esta luz.
Tenga mucho cuidado de que los niños no miren directamente la lente. Además, apague la unidad y desconecte el cable de alimentación cuando deje de usar el proyector.
Nunca intente modificar o desmontar el proyector.
Hay alto voltaje dentro del proyector que podría causar un incendio o descargas eléctricas.
- Para cualquier trabajo de inspección, ajuste y reparación, consulte a un centro de servicio autorizado.
No proyecte una imagen con la cubierta del lente adjunta.
Hacerlo podría provocar un incendio.
No permita que entren en el interior del proyector objetos de metal, objetos inflamables ni líquidos. No permita que el proyector se moje.
De lo contrario, se pueden producir cortocircuitos o sobrecalentamiento que podrían causar incendios, descargas eléctricas o fallos de funcionamiento en el proyector.
No coloque recipientes con líquidos ni objetos de metal cerca del proyector.
En caso de que entre líquido en el interior del proyector, consulte con su distribuidor.
Se debe prestar especial atención a los niños.
No toque excepto la parte especificada o elimine los componentes.
De lo contrario se puede perjudicar el funcionamiento o la seguridad.
Utilice el soporte de techo especificado por Christie.
Utilizando otro soporte de montaje en el techo fuera del indicado resultará en accidentes de caída.
- Conecte el cable de seguridad suministrado al soporte de techo para evitar que el proyector se caiga.
El trabajo de instalación (tal como el soporte de techo) debería ser realizado solamente por un técnico calificado.
Si la instalación no se lleva a cabo y se asegura correctamente, podrían ocurrir lesiones o accidentes, como es el caso de choques eléctricos.
No utilice otro soporte de techo que no sea autorizado.
Asegúrese de usar el cable accesorio incluido con un perno de arillo como una medida de seguridad extra para prevenir que el proyector se caiga. (Instalado en un lugar distinto que el soporte de techo.)
Al colocar o reemplazar una lente, póngase en contacto con el personal técnico o de servicio con un distribuidor especialista.
El producto podría ser dañado si se hace de manera errónea.
Al colocar o reemplazar una lente, observe los procedimientos relativos para obtener un resultado óptimo.
Aviso importante de seguridad
ADVERTENCIA:
ACCESORIOS
No use o maneje las pilas inadecuadamente, consulte lo siguiente.
De lo contrario esto podría causar que las baterías tengan pérdidas, se sobrecalienten, exploten o se incendien.
No use pilas que no sean las especificadas.
Utilice baterías de manganeso o alcalinas no baterías recargables.
No desmantele las pilas secas.
No caliente las pilas ni las coloque en agua o fuego.
No permita que los terminales + y - de las baterías hagan contacto con objetos metálicos como collares u horquillas.
No almacene las pilas junto con objetos metálicos.
Guarde las baterías en una bolsa de plástico y manténgala lejos de los objetos metálicos.
Cuando inserte las pilas, asegúrese que la polaridad (+ y -) sea la correcta.
No use pilas nuevas junto con pilas viejas ni mezcle diferentes tipos de pilas.
No use pilas cuya cubierta externa esté despegada o ausente.
Mantenga alejados a los niños de las baterías (AAA/R03/LR03).
- La batería puede ocasionar lesiones personales si son ingeridas.
- Si son ingeridas, busque atención médica de inmediato.
Si hay un escape de líquido de pilas, no las toque con las manos, y tome las siguientes medidas en caso de ser necesario.
El líquido de las pilas sobre su piel o ropa podría causar la inflamación de la piel o lesiones.
El contacto del líquido de las pilas con sus ojos podría provocar la pérdida de la visión. En éste caso, no se frote sus ojos. Lávese inmediatamente con agua y busque asistencia médica.
No desarme la unidad de lámpara.
Si la lámpara se rompe, podría provocar lesiones.
Sustitución de la lámpara
La lámpara tiene un presión interna alta. Si no se usa correctamente, podría explotar y causar lesiones o accidentes graves.
La lámpara puede explotar fácilmente si se si se golpea contra objetos duros o se cae.
Antes de cambiar la lámpara, asegúrese de desenchufar el cable de alimentación del tomacorriente de la pared. Caso contrario se pueden producir choques eléctricos o explosiones.
Cuando cambie la lámpara, apague la alimentación y permita que la lámpara se enfríe por al menos 60 minutos antes de manipularla, de lo contrario, puede sufrir quemaduras.
No permita que los niños o mascotas toquen el mando a distancia.
- Mantenga el mando a distancia lejos del alcance de los niños y mascotas después de usarlo.
No utilice el cable de alimentación suministrado con dispositivos que no sean este proyector.
- Si utiliza el cable de alimentación suministrado con dispositivos distintos de este proyector, se pueden producir cortocircuitos o sobrecalentamiento que podrían causar un incendio o descargas eléctricas.
Retire rápidamente las pilas agotadas del mando a distancia.
- Si las deja en la unidad, las pilas podrían sufrir fugas de líquido o podrían sobrecalentarse o explotar.
PRECAUCIÓN:
ALIMENTACIÓN
Cuando desconecte el cable asegúrese de sostener el enchufe y el conector de energía.
Si el cable mismo es halado, el cable puede dañarse, e incendios, cortocircuitos o choque eléctricos serios pueden producirse.
Cuando no vaya a utilizar el proyector durante un período prolongado de tiempo, desconecte el enchufe de la toma de corriente y extraiga las pilas del mando a distancia.
Desconecte el enchufe de alimentación de la toma de pared antes de llevar a cabo cualquier tarea de limpieza y sustitución de la unidad.
Podría provocar descargas eléctricas si esto no se hace.
■ SOBRE EL USO/INSTALACIÓN
No coloque objetos pesados en la parte superior del proyector.
Si no observa esto podría ocasionar que el proyector se desequilibre y caiga, lo cual podría ocasionar daños o heridas. El proyector resultaría dañado o deformado.
No se apoye sobre éste proyector.
Usted se podría caer y herirse, y el aparato se podría dañar.
- Tenga mucho cuidado que los niños no se paren o sienten encima del proyector.
No coloque el proyector en ubicaciones excesivamente calientes.
El hacerlo provocará que la cubierta externa o que los componentes internos se deterioren, o podría causar un incendio.
- Tenga mucho cuidado con las ubicaciones expuestas a la luz directa del sol o a las que estén cerca de estufas.
No coloque sus manos en las aberturas junto al lente óptico, mientras esté moviendo los lentes.
El no observar esto puede resultar en un accidente.
Cuando levante o transporte el proyector, no lo sujete del parasol de la lente ni de la lente.
De lo contrario el proyector se puede dañar.
Cuando desconecte el cable de alimentación, sujete el enchufe, no el cable.
Si se tira del cable de alimentación mismo, el cable se dañará, lo cual podría ocasionar un incendio, cortocircuitos o choques eléctricos serios.
Utilice la lente especificada por Christie.
Si utiliza otra lente fuera de la especificada resultará en malfuncionamiento.
Antes de colocar la lente, verifique el núm. de modelo del proyector y el núm. de modelo de la lente opcional y use la lente adecuada para el proyector.
Para más detalles, consulte a su distribuidor.
ACCESORIOS
No use la unidad de lámpara vieja.
Si la usa puede provocar que la lámpara explote.
Si la lámpara se rompe, ventile la habitación inmediatamente. No toque ni se acerque a la cara las piezas rotas.
No seguir esta instrucción puede hacer que el usuario absorba el gas que se ha liberado al romperse la lámpara y que contiene casi la misma cantidad de mercurio que las lámparas fluorescentes y las piezas rotas pueden provocar lesiones.
Si cree que ha absorbido el gas o que le ha entrado gas en la boca o en los ojos, busque asistencia médica inmediatamente.
Pida a su proveedor que sustituya la lámpara y que compruebe el interior del proyector.
No vuelva a usar la unidad de filtro de aire.
De lo contrario puede funcionar incorrectamente.
No limpie la unidad de filtro de aire con agua.
De lo contrario puede funcionar incorrectamente.
- Tenga cuidado de no mojar la unidad del filtro de aire.
Pida a su distribuidor que realice la limpieza en el interior del proyector una vez al año.
El uso continuo cuando se haya acumulado el polvo en el interior del proyector podría producir incendios.
- Pregunte a su distribuidor sobre los cargos de limpieza.
Aviso importante de seguridad
Para retirar las pilas Pilas del mando a distancia
Pulse la guía y levante la tapa.
Retire las pilas.
Marcas comerciales
HDMI, el logotipo de HDMI y High-Definition Multimedia Interface son marcas comerciales o marcas comerciales registradas de HDMI Licensing LLC.
Los otros nombres, nombres de empresa y nombres de producto que aparecen en este manual del usuario son marcas comerciales o marcas comerciales registradas de sus respectivos propietarios.
Ilustraciones de este manual del usuario
- Tenga en cuenta que es posible que las ilustraciones del proyector y de las pantallas sean diferentes de las que se observan en la realidad.
Referencias de página
- En estas instrucciones, las referencias a las páginas se indican del siguiente modo: (→ página 00).
Término
- En estas instrucciones, a los accesorios “Unidad de mando a distancia inalámbrico/alámbrico” se les denomina únicamente “Mando a distancia”.
Características del proyector
Imagen en alta claridad y en alto contraste
▶ Calidad de imagen en alta claridad con 16 000 lúmenes y alto contraste con 2 500:1.1.
Configuración más flexible
Permite realizar la instalación en una dirección de 360° verticalmente. Equipado con función eléctrica de cambio de lente que permite el ajuste de posicionamiento vertical y horizontal así como también patrones de prueba. También, puede usar luces para el panel de control y los terminales de conexión. En adición, puede elegir uno de nueve tipos de lentes opcionales.
Alta confiabilidad y capacidad de mantenimiento
▶ Equipado con cuatro lámparas de cambio automático que permiten la proyección continua cuando se haya fundido alguna lámpara. El filtro de aire y el filtro de corte de humo (opcional) evitan la penetración de polvo y de humo conservando de este modo las imágenes nítidas y alta duración del proyector.
Guía rápida
Para más detalles, consulte las páginas correspondientes.
Configuración de su proyector. (→ página 22)
Conexión de dispositivos externos. (→ página 24)
Conexión del cable de alimentación. (→ página 29)
Encendido. (→ página 31)
Selección de la señal de entrada. (→ página 33)
Ajuste de la imagen.
(→ página 33)
Contenido
Asegúrese de leer “Aviso importante de seguridad”. (→ páginas 2 to 8)
Aviso importante de seguridad...... 2
Precauciones de uso 12
Precauciones durante el transporte ..... 12
Precauciones durante la instalación....12
Seguridad 13
Desecho....13
Advertencias sobre el uso 13
Accesorios....15
Accesorios opcionales .... 16
Preparativos
Acerca del proyector 17
Mando a distancia....17
Cuerpo del proyector....18
Uso del mando a distancia 21
Inserción y extracción de las baterías......21
Cómo establecer números para el mando a distancia ...21
Uso del mando a distancia como mando a distancia alámbrico....21
Comienzo
Configuración....22
Colocación de la lente....22
Método de proyección....22
Opciones de instalación (opcional) 23
Pies ajustables ....23
Conexiones 24
Antes de conectar el proyector....24
Ejemplo de conexión: Ordenadores .....24
Ejemplo de conexión: Equipo AV 25
Ate los cables usando sujetacables....26
Instalación de un módulo de entrada (opcional) 27
Instalación de un módulo de entrada .....27
Lista de señales compatibles 28
Conexión de señales en el módulo de entrada .....28
Funcionamiento básico
Encendido/apagado 29
Conexión del cable de alimentación .....29
Indicador de alimentación....30
Encendido del proyector....31
Realización de ajustes y selecciones....31
Apagado del proyector....32
Función de apagado directo....32
Función de administración de energía ......32
Proyección 33
Selección de la señal de entrada 33
Ajuste de la imagen....33
Uso del mando a distancia 35
Uso de la función de obturador ....35
Uso de la función de congelación ....35
Cambio de la señal de entrada 35
Corrección del efecto Keystone ....36
Selección del modo de calidad de imagen .....36
Ajuste de la calidad de imagen....37
Botón de pantalla 37
Visualización de un temporizador para las presentaciones....37
Verificación de ajustes 37
Ajustes
Navegación de menú 38
Navegación a través del menú....38
Menú principal 39
Submenú 39
Menú [Entrada] 42
[Entrada 1]....42
[Entrada 2]....42
[Sistema]......43
Menú [Ajuste de PC] 44
[Ajuste automático de PC]....44
[Sincro. fino]......44
[Total puntos] 44
[Posición H]......44
[Posición V]......45
[Modo actual]......45
[Clamp]......45
[Área de imagen H]......45
[Área de imagen V] 45
[Reset]......46
[Modo libre]......46
[Memorizado]......46
Menú [Selección de imagen] 47
Ajuste de la calidad de imagen....47
Menú [Ajuste de imagen] 48
[Contraste] 48
[Brillo] 48
[Color]....48
Contenido
[Tinte]....48
[Control de color]....49
[Temp. de color]....50
Balance de blancos ([Rojo]/[Verde]/[Azul]) .....50
[Nivel de Negro]....50
[Control auto. imagen]......50
[Color avanzado]....50
[Nítidez]....51
[Ajuste gamma] 51
[Reducción de ruido]....51
[Progresivo]......51
[Reset]....51
[Memorizado]....52
Menú [Pantalla]....53
[Normal] 53
[Completo] 53
[Panorámico(16:9)]......53
[Zoom]....53
[Real]....53
[Usuario]....54
[Ajuste Personalizado] 54
[Zoom digital +]....54
[Zoom digital -]......55
[Keystone]......55
[Techo] 56
[Trasero]......56
[Reset]......56
Menú [Ajuste]......57
[Idioma] 57
[Posición de menú]......57
[Visualizar] 57
[Fondo]....58
[Selección de lámpara] 58
[Alim. lámpara]....58
[Intervalo de lámpara]....59
[Edge blending] 59
[Correspondencia de color]......60
[Correspondencia de color avanzado] ....61
[Config. HDMI]....63
[Logotipo]....63
[Control ventiladores]....65
[Control remoto]......65
[Sensor control remoto]......65
[Modo bajo consumo]......66
[Conexión Directa]......66
[Seguridad] 67
[ID Proyector]......68
[Shutter] 68
[Control de demora de vídeo]......69
[Closed caption]....70
[Contador filtro]....70
[Presentación temporizada]....71
[Carta de ajuste]....72
[Ajuste predeterminado]....72
Confirmación de ajustes y del estado de uso .....73
Menú [Nombre proyector] 74
Mantenimiento
Acerca del estado de los indicadores ..... 75
Si se enciende un indicador....75
Mantenimiento/sustitución 81
Antes de dar mantenimiento/sustituir la unidad .....81
Mantenimiento....81
Reemplazo de piezas....81
Solución de problemas 86
Apéndice
Ajuste de pantallas de las imágenes de pantalla múltiple 88
Etiqueta de notificación de registro de contraseña...91
Terminal serial 92
Interfaz de control serial....93
Otros terminales....95
Lista de señales compatibles .....97
Especificaciones ....100
Dimensiones 102
Protecciones de soporte de montaje en techo 103
Notas sobre la instalación de la lente .....104
Especificaciones de la lente ....104
Precauciones de uso
Precauciones durante el transporte
Cuando transporte el proyector, sujételo de forma segura del asa de transporte y evite la vibración excesiva y los impactos durante la manipulación como por ejemplo arrastrarlo por el piso. De lo contrario se pueden dañar las piezas internas dando como resultado un mal funcionamiento.
No transporte el proyector con los pies ajustables extendidos. De lo contrario se pueden dañar los pies ajustables.
Precauciones durante la instalación
El proyector está diseñado para usarlo únicamente en interiores.
No lo use en los siguientes lugares.
Lugares donde existan vibraciones e impactos como en un vehículo o contenedor: De lo contrario se pueden dañar las piezas internas dando como resultado un mal funcionamiento.
Cerca de la salida de un acondicionador de aire o cerca de luces (lámparas de estudio, etc.) donde existan grandes cambios de temperatura ("Entorno de operación" (→ página 101)): De lo contrario se podría acortar la duración de la lámpara o la carcasa exterior podría deformarse dando como resultado fallos de funcionamiento.
Cerca de líneas de alimentación de alto voltaje o cerca de motores: Puede ocurrir interferencia.
Alegúrese de solicitar asesoría a un técnico cualificado o a su distribuidor antes de instalar el producto en un techo.
Si el producto debe ser instalado suspendido del techo, compre el soporte de montaje para techo opcional.
instale el proyector a alturas de 2 700 m (8 858 pies) o superiores al nivel del mar.
De lo contrario se puede acortar la vida útil de las piezas internas dando como resultado fallos de funcionamiento.
utilice el proyector cuando esté inclinado (→ página 22).
Si usa el proyector cuando está inclinado puede acortar la vida útil de las piezas internas.
Recauciones durante la configuración de los proyectores
No bloquee los orificios de ventilación (admisión y salida) del proyector.
Evite que el aire caliente o frío proveniente de un sistema de aire acondicionado sople directamente hacia los orificios de ventilación (admisión y salida) del proyector.
Evite configurar el proyector en un lugar húmedo o con mucho polvo.
(más 1 m (39") para la parte superior y lateral)
- No instale el proyector en un espacio reducido.
Si es necesario instalarlo en un espacio reducido, instale un sistema de aire acondicionado o un sistema de ventilación para el espacio. Si la ventilación es insuficiente, el calor de salida podría acumularse activando de este modo el circuito de protección del proyector.
Seguridad
Al usar este producto, implemente medidas de seguridad apropiadas para evitar lo siguiente:
Información personal expuesta a través de este producto
Operación no autorizada de este producto por terceros de forma maliciosa
Interferencia o suspensión de este producto por terceros de forma maliciosa
Tome las medidas de seguridad suficientes. (→ página 67)
Utilice un código PIN que sea difícil de adivinar.
Cambie su código PIN periódicamente.
Christie Digital Systems y sus compañías afiliadas nunca le pedirán directamente su código PIN. Si lo piden directamente, no proporcione su código PIN.
Asegúrese de usar una red segura con cortafuegos, etc.
Configure un código PIN y establezca restricciones a los usuarios que puedan conectarse.
Desecho
Cuando deseche el producto, pregunte a las autoridades locales o a su distribuidor cuáles son los métodos correctos de desecho.
La lámpara contiene mercurio. Cuando deseche la unidad de lámpara usada, pregunte a las autoridades locales más cercanas o a su distribuidor cuál es el método correcto de desecho de la unidad.
Disponga de las pilas usadas de acuerdo con las instrucciones o los lineamientos o reglamentos locales de desecho.
Advertencias sobre el uso
Para obtener una calidad de imagen alta
Podrá obtener una calidad de imagen alta cerrando las cortinas o las persianas de las ventanas y apagando las luces que estén cerca de la pantalla para evitar que la luz exterior o la luz de las lámparas interiores brillen sobre la pantalla.
Dependiendo de las condiciones, la imagen podría parpadear debido al aire caliente proveniente del orificio de salida de aire o por el aire caliente o frío del acondicionador de aire.
Tenga cuidado para asegurarse de que la salida del proyector o de otro equipo, o que el aire proveniente del acondicionador de aire no esté dirigido hacia la parte delantera del proyector.
La lente de proyección es calentada por la luz de la fuente luminosa, haciendo que el enfoque sea inestable durante ese periodo justo después del encendido. El enfoque se estabilizará después de transcurridos 30 minutos con la imagen proyectada.
toque la superficie de la lente de proyección con las manos descubiertas.
Si la superficie de la lente está contaminada por las huellas dactilares o por el polvo, esto será amplificado y proyectado en la pantalla, degradando la calidad de la imagen.
Fnel LCD
El panel LCD está hecho con precisión. Tenga en cuenta que en raras ocasiones, podrían faltar píxeles de alta precisión o estos podrían estar encendidos siempre. Esto no indica un mal funcionamiento.
Cuando se proyecte una imagen fija durante un periodo prolongado, la imagen podría quemarse en el panel LCD. En este caso, proyecte la pantalla blanca de los patrones de prueba (→ página 72) por al menos una hora. Tenga en cuenta, sin embargo, que no siempre es posible erradicar totalmente la imagen quemada.
Precauciones de uso
■mponentes ópticos
Si usa la proyección en un entorno de alta temperatura o en un entorno donde exista mucho polvo o esté lleno de humo de cigarro, etc. podría reducirse el ciclo de reemplazo para los componentes ópticos como el panel LCD y el polarizador a tan solo un año. Para más información, consulte a su distribuidor.
Lmpara
La fuente luminosa del proyector es una lámpara de mercurio con alta presión interna.
Una lámpara de mercurio de alta presión cuenta con las siguientes características.
El brillo de la lámpara se reducirá con el transcurso del tiempo.
Si durante el uso de la lámpara se presenta un impacto, rayones o deterioro, la bombilla podría fundirse o se puede reducir la vida útil de la misma.
La vida útil de la lámpara varía significativamente dependiendo de cada lámpara individual y de las condiciones de uso. En particular, el uso continuo durante periodos de 24 horas o más y el encendido/apagado frecuente de la alimentación acelerarán el deterioro de la lámpara y afectará la duración de la misma.
- En raras ocasiones, la lámpara se puede fundir justo después de haber iniciado la proyección.
- El riesgo de fundirse se incrementa cuando la lámpara se usa después de su ciclo de reemplazo. Asegúrese de reemplazar la lámpara de forma consistente. “Cuando sustituya la unidad de lámpara” (→ página 83)
- Si se funde la lámpara, el gas contenido en la misma será liberado en forma de humo.
- Se recomienda que almacene lámparas de sustitución en caso de contingencia.
- Se recomienda que solicite a un técnico cualificado que reemplace la lámpara. Póngase en contacto con su proveedor.
Accesorios
Asegúrese de que los siguientes accesorios hayan sido suministrados con su proyector.
Accesorio (nombre de producto) Cantidad Unidad de mando a distanciainalámbrico/alámbrico(N2QAYA000066) 1 Batería AAA/R03/LR03 (para el mandoa distancia) 2 Cable de alimentación para (E)(T0K3K0003--1) 1 Cable de alimentación para (U)(T0K3K0001--1) 1 Cable de alimentación para (UK)(T0K3K0004--1) 1 Cable de ordenador (para D-sub)(T0K3K0013--1) 1 CD-ROM Manual del usuario(TXFQB02ZHC2) 1 CD-ROM PJ Network Manager(T1U13B27601) 1 CD-ROM Real Color Manager Pro(T1U13B58100) 1 Manual del usuario-Guía Básica(TQBJ0658) 1 Manual para la administración decolores(TQBH0270-1) 1 Soporte de fijación de la palanca debloqueo de la lente 1 (T0STF0039--1)[IMAGE] 1(juego) Distanciador 1 (T0SAS0001--)[IMAGE][IMAGE][IMAGE] 1(juego)
Placa de protección de luz-1 *1 (T0CRS0008--1)
*1: Se usa al instalar la lente (opcional). (→ página 104)
Atención
Después de desempacar el proyector, deseche de acuerdo a las regulaciones establecidas la tapa del cable de alimentación y el material de empaque.
Si pierde alguno de los accesorios, consulte a su distribuidor.
Los números de producto de los accesorios y los componentes vendidos por separado están sujetos a cambio sin previo aviso.
Almacene las piezas pequeñas de forma apropiada, y manténgalas alejadas de los niños.
Precauciones de uso
Ontenido del CD-ROM
En el CD-ROM suministrado se encuentra el siguiente contenido (Manual del usuario / Real Color Manager Pro / PJ Network Manager).
Manual/Índice (PDF) Software ● Manual del usuario–Operaciones del proyector● Manual del usuario–Operaciones de red● Manual del usuario–Operaciones del PJ Network Manager ● Real Color Manager Pro● PJ Network Manager
Accesorios opcionales
Accesorios opcionales(nombre de producto) Núm. de producto Unidad de lámpara de reemplazo 002-120599-01 Filtro de reemplazo 003-004 738-01 / Número de piezas de servicio: T1FTX0069-- Filtro resistente al humo Unidad: Número de pieza 003-004739-01 / Número de referencia NOP-FTU-61EFSFiltro: Número de pieza 003-003705-01 / Número de referencia POA-FIL-160 Módulo de entrada 103-132 107-02 Lente 38-809037-52, 103-135100-01, 38-809094-51, 103-103101-01, 38-809039-52, 38-809044-52, 103-129103-01, 103-130105-01, 38-809070-51
Acerca del proyector
Mando a distancia
(1) Emisores de señal del mando a distancia alimentación para contar el tiempo transcurrido desde que se pulsó el botón o realiza una cuenta regresiva a partir del tiempo establecido. (→ página 37) / cuando use el mando a distancia. cuando no use el mando a distancia durante un periodo prolongado. del proyector. alimentación
Acerca del proyector
Atención
No deje caer el mando a distancia.
Evite el contacto con líquidos o humedad.
No intente modificar o desensamblar el mando a distancia.
Nota
El mando a distancia se puede usar a una distancia de aproximadamente 5 m si se apunta directamente al sensor de mando a distancia. El mando a distancia es efectivo en ángulos de hasta ±30° verticalmente y horizontalmente, pero el rango podría verse reducido.
Si existen obstáculos entre el mando a distancia y el sensor del mando a distancia, el mando a distancia podría no operar correctamente.
Puede controlar el proyector reflejando la señal fuera de la pantalla, pero el rango efectivo de operación dependerá de las características de la pantalla.
Si el sensor del mando a distancia recibe una luz intensa como por ejemplo la luz fluorescente, el mando a distancia podría no operar correctamente. Coloque el proyector lo más alejado posible de otras fuentes de iluminación.
Cuerpo del proyector
(1) Cubierta del juego de lente
(11) Cubierta de la lámpara
Recinto de la unidad de lámpara. (→ página 84)
Atención
Mantenga sus manos así como otros objetos alejados del orificio de salida de aire.
Mantenga alejadas sus manos y cara.
No inserte sus dedos.
Mantenga alejados los artículos sensibles al calor.
Panel de control
(1) Botón de alimentación
(8) Botón
Acerca del proyector
Términales de conexión
(1) Terminal de entrada DVI-D Este terminal se usa para introducir la señal DVI-D.
Este terminal se usa para introducir la señal HDMI.
Este terminal se usa para introducir una señal RGB. //
Este terminal se usa para introducir la señal G,B,R,H/HV,V, señal de video, y señal Y,Pb/Cb,Pr/Cr.
Este terminal es usado por el personal de servicio.
(6) Terminal de entrada serial
Este terminal de entrada es compatible con RS-232C y para el control externo del proyector mediante la conexión del proyector.
Este terminal es para la señal conectada en el terminal de entrada serial.
Este terminal es para conectar el mando a distancia cuando se usa como mando a distancia alámbrico.
Este terminal es para conectar el proyector en la red.
Este terminal se usa para introducir las señales S-VIDEO.
Atención
- Asegúrese de conectar el cable LAN en el equipo de uso para interiores.
Uso del mando a distancia
1) Abra la cubierta.
2) Inserte las baterías y cierre la cubierta.
Para extraer las baterías, siga el procedimiento descrito anteriormente en el orden inverso.
Cómo establecer números para el mando a distancia
Cuando esté usando múltiples proyectores, puede establecer un número de mando a distancia en cada proyector para permitir el control simultáneo con un solo mando a distancia.
Después de establecer un número de mando a distancia para un proyector dado, especifique ese proyector usando el número de mando a distancia.
Metodo de ajuste
1) Manteniendo pulsado el botón
, pulse los botones numéricos (<0> - <9>) (2 dígitos) para ingresar el número de mando a distancia deseado.
Cuando suelte el botón, el número de mando a distancia cambiará al nuevo número.
Para establecer el número de mando a distancia en 09, pulse <0>, <9> manteniendo pulsado el botón .
Nota
El ajuste predeterminado de fábrica es [Todos]. [Todos] es compatible con todos los números de mando a distancia.
Establezca el número de mando a distancia del proyector usando [Control remoto] del menú [Ajuste] (→ página 65).
Para restaurar el número de mando a distancia (para ajustarlo en [Todos]), pulse simultáneamente el botón y el botón <0> por al menos cinco segundos.
Uso del mando a distancia como mando a distancia alámbrico
Conecte el terminal del cuerpo del proyector en el terminal del mando a distancia alámbrico del mando a distancia cuando el cable del mando a distancia (comercialmente disponible).
Asegúrese de insertar las baterías en el mando a distancia.
Para usar el mando a distancia de forma inalámbrica, desconecte el cable del mando a distancia del proyector y del mando a distancia. Cuando esté conectado el cable del mando a distancia, no puede usar de forma inalámbrica el mando a distancia.
Configuración
Colocación de la lente
Antes de colocar el proyector en posición, coloque la lente en el cuerpo del proyector.
Primero, determine la lente correcta para el entorno en el cual va a utilizar el proyector.
Para saber sobre los números de producto de la lente y de las especificaciones de la misma que son adecuados para el proyector, consulte a su distribuidor. Por su seguridad, al colocar o reemplazar una lente, póngase en contacto con el personal técnico o de servicio con un distribuidor especialista. No intente colocar o reemplazar la lente usted mismo. Para más detalles, consulte "Notas sobre la instalación de la lente" (→ página 104).
Precaución
Cuando configure el proyector después de instalar una lente, siempre coloque la cubierta de la lente en la lente. Cuando transporte o sujete el cuerpo del proyector, nunca sujete únicamente la lente. De lo contrario se puede dañar el proyector.
Método de proyección
Puede proyectar imágenes vertical y diagonalmente. En el menú puede seleccionar la proyección en la parte posterior (→ página 56) y desde el techo (→ página 56). Seleccione el método de proyección que sea apropiado para el entorno.
Montaje en el techo y proyección hacia el frente
Elemento de menú Ajuste [Techo] [On] [Trasero] [Off]
■locación del proyector sobre un escritorio/suelo y proyección desde la parte posterior
Elemento de menú Ajuste [Techo] [Off] [Trasero] [On]
Montaje en el techo y proyección desde la parte posterior
Elemento de menú Ajuste [Techo] [On] [Trasero] [On]
■locación del proyector sobre un escritorio/suelo y proyección hacia el frente
Elemento de menú Ajuste [Techo] [Off] [Trasero] [Off]
Atención
Para obtener una calidad de imagen alta, configure la pantalla en un sitio que esté, lo más alejada posible, que se vea afectada por la luz natural o la luz eléctrica. Cierre las cortinas o persianas y apague las luces.
Cuando configure el proyector de forma inclinada, no utilice el proyector en un ángulo de inclinación que exceda ±10° verticalmente al plano horizontal. Si instala el proyector en un ángulo de inclinación que exceda este valor podría reducir la duración de los componentes y fallos de funcionamiento.
Opciones de instalación (opcional)
Puede instalar el proyector en el techo usando el soporte de montaje en el techo opcional.
Utilice solamente los soportes de montaje para techo especificados para este proyector.
Para obtener más detalles sobre la instalación del proyector con el soporte, consulte el manual de instalación del soporte de montaje.
Atención
- Para garantizar el rendimiento y la seguridad el proyector, la instalación del soporte de montaje en el techo debe ser realizada por su distribuidor o por un técnico cualificado.
Pies ajustables
Los pies ajustables se pueden extender girándolos como se muestra en la figura. Se retraen girándolos en la dirección opuesta. Esto ajusta con precisión la altura y la inclinación de la imagen proyectada. Cuando se extiendan las pies ajustables, el proyector se puede inclinar hasta un máximo de 3°. (El ángulo de proyección se puede ajustar verticalmente).
Atención
A través del orificio de salida de aire se expulsa aire caliente cuando la lámpara está encendida. No toque el orificio de salida de aire directamente cuando ajuste los pies.
Si se presenta el efecto Keystone (distorsión trapezoidal) en la imagen proyectada, realice [Keystone] (→ página 55) en el menú [Pantalla].
Nota
No exceda la línea rojo al extender los pies ajustables. De lo contrario se pueden dañar.
La posición vertical y horizontal de la imagen se puede ajustar usando la función de cambio de lente.
Conexiones
Antes de conectar el proyector
Lea cuidadosamente el manual de instrucciones del dispositivo que intenta conectar.
Apague el interruptor de alimentación del dispositivo antes de conectar el cable.
Si no se suministra un cable de conexión con el dispositivo y el cable opcional no está disponible, prepare un cable de conexión que sea adecuado para el dispositivo.
Las señales de video que contienen mucha inestabilidad podrían ocasionar que las imágenes de la pantalla parpadeen aleatoriamente. En este caso, debe conectarse un corrector de base de tiempos (TBC).
El proyector acepta las siguientes señales: señales de video, señales de S-video, señales analógicas RGB (las señales de sincronización son del nivel TTL) y señales digitales.
Algunos modelos de ordenador no son compatibles con el proyector.
Cuando conecte un dispositivo en el proyector usando un cable largo, podría no ser posible obtener una imagen normal sin la ayuda de un compensador.
Para más detalles sobre las señales de video que son compatibles con el proyector, consulte “Lista de señales compatibles” (→ página 97).
Ejemplo de conexión: Ordenadores
Nota
Utilice un cable HDMI High Speed que esté en conformidad con el estándar HDMI. El uso de un cable que no se encuentre en conformidad con el estándar HDMI, podría dar como resultado la operación anormal como el corte de la imagen, fallas de proyección, etc.
El terminal se puede conectar con un dispositivo externo con un terminal DVI usando un cable de conversión HDMI/DVI. Con algunos dispositivos, sin embargo, la imagen podría no aparecer. (→ página 63)
Cuando use el terminal , podría no ser posible la operación normal con ciertos dispositivos y podría no aparecer la imagen.
El terminal (en el modo de entrada de señal digital) es compatible solamente con las señales de enlace único.
Para más detalles sobre las señales RGB de ordenadores que son compatibles con el proyector, consulte “Lista de señales compatibles” (→ página 97).
Si opera el proyector usando el ordenador con la función de reanudación (última memoria), podría ser requerido restaurar la función de reanudación para operar el proyector.
El terminal (en el modo de entrada de señal digital) podría requerir el ajuste EDID dependiendo del dispositivo conectado.
Para conectar el proyector con un ordenador conectada en una LAN alámbrica, consulte las “Instrucciones de operación–Operaciones de red” en el CD-ROM suministrado.
Ejemplo de conexión: Equipo AV
Video, S-video, Reproduc-
tor de DVD y dispositivos
de salida de video HDMI
Atención
Siempre use uno de los siguientes cuando conecte un VCR.
Un VCR con corrector de base de tiempos integrado (TBC)
Un corrector de base de tiempos (TBC) entre el proyector y el VCR
Si se conectan señales en negro con señales que no son estándares, la imagen podría distorsionarse. En tal caso, conecte un corrector de base de tiempos (TBC) entre el proyector y el dispositivo.
Nota
Utilice un cable HDMI High Speed que esté en conformidad con el estándar HDMI. El uso de un cable que no se encuentre en conformidad con el estándar HDMI, podría dar como resultado la operación anormal como el corte de la imagen, fallas de proyección, etc.
El terminal se puede conectar con un dispositivo externo con un terminal DVI usando un cable de conversión HDMI/DVI. Con algunos dispositivos, sin embargo, la imagen podría no aparecer. (→ página 63)
El terminal se puede conectar en dispositivos compatibles con HDMI y DVI-D, pero la operación normal podría no ser posible con ciertos dispositivos y podría no aparecer la imagen.
El terminal (en el modo de entrada de señal digital) es compatible solamente con las señales de enlace único.
Conexiones
Ate los cables usando sujetacables
Mantenga los cables ordenados fijando los cables conectados en los terminales en los sujetadores de cable del cuerpo del proyector.
- Se pueden reutilizar los sujetacables. (La pestaña se puede aflojar y liberar).
☐mo aflojar los sujetacables
1) Tire de la lengüeta en la dirección de la flecha (i).
- El bucle del sujetacables será ampliado.
Atención
- Debe tener en cuenta los siguientes elementos cuando use el sujetacables.
Pueden ocurrir ruidos en raras ocasiones.
No tire del cable a la fuerza. De lo contrario puede desconectar los cables.
Se recomienda que permita cierta holgura cuando apriete los cables.
Precaución
Cuando conecte el proyector en un ordenador o en un dispositivo externo, use el cable de alimentación con el dispositivo y con cables protegidos disponibles en el comercio.
Instalación de un módulo de entrada (opcional)
Instalación de un módulo de entrada
Tpos de módulo de entrada
Adquiera un módulo de entrada (opcional) que coincida con las señales de entrada del sistema.
Nombre de módulo SD/HD-SDI Módulo de entrada Número de módulo 103-132107-02 Terminal de entrada/salida Sistema de entrada BNC 2, sistema de salida BNC 1 Formato de señal compatible SMPTE259M-C estándar:480-60i (59,94 Hz *1 ), 576-50i (50 Hz)SMPTE260M estándar:1035-60i (60/59,94 Hz *1 )SMPTE274M estándar:1080-24psf (48/47,95 Hz *1 ), 1080-24p (24/23,98 Hz *1 ), 1080-25psf (50 Hz),1080-25p (25 Hz), 1080-30psf (60/59,94 Hz *1 ), 1080-30p (30/29,97 Hz *1 ),1080-50i (50 Hz), 1080-60i (60/59,94 Hz *1 )SMPTE296M estándar:720-60p (60/59,94 Hz *1 ), 720-50p (50 Hz)
*1: Se distinguen de forma automática la frecuencia de sincronización V 60/59,94, 48/47,95 Hz, 24/23,98 Hz.
Nota
- La lista anterior muestra los formatos de señal que son compatibles con los módulos de entrada. Los formatos de señal compatibles con el proyector difieren dependiendo del modelo. Para más información, consulte a su distribuidor.
Rocedimiento de instalación
Desconecte la alimentación antes de instalar el módulo de entrada.
1) Quite la cubierta de ranura.
Cubierta de ranura
2) Inserte el módulo de entrada.
- Inserte firmemente el módulo de entrada en la ranura, asegurándose de que el enchufe del terminal de conexión esté insertado correctamente en la clavija en el interior del cuerpo del proyector.
3) Fije el módulo de entrada en su lugar usando dos tornillos.
Atención
Asegúrese de apretar los tornillos. De lo contrario, podría fallar el módulo de entrada.
Una instalación incorrecta podría resultar en daños en el módulo de entrada.
Instalación de un módulo de entrada (opcional)
Uo del módulo de entrada
Consulte a su distribuidor antes de usar cualquiera de los módulos de entrada opcionales. Cuando consulte a su distribuidor, asegúrese de informarle el [Option control No.] del proyector. El [Option control No.] se visualiza en el menú [Informacion].
Informe al distribuidor de este número.
Lista de señales compatibles
La siguiente tabla especifica los tipos de señales compatibles con el proyector.
Modo de visualización en pantalla (puntos) Resolución Frecuencia de barrido Frecuencia del reloj Horizontal (kHz) Vertical (Hz) de puntos (MHz) D-480i 720 (1 440) x 480 15,734 59,940 27,000 D-576i 720 (1 440) x 576 15,625 50,000 27,000 D-1035i 1 920 x 1 035 33,750 60,000 74,250 D-1080i 1 920 x 1 080 33,750 60,000 74,250 1 920 x 1 080 28,125 50,000 74,250 D-720p 1 280 x 720 37,500 50,000 74,250 1 280 x 720 45,000 60,000 74,250 D-1080psf/24 1 920 x 1 080 27,000 48,000 74,250 D-1080psf/25 1 920 x 1 080 28,125 50,000 74,250 D-1080psf/30 1 920 x 1 080 33,750 60,000 74,250 D-1080p 1 920 x 1 080 27,000 24,000 74,250 1 920 x 1 080 28,125 25,000 74,250 1 920 x 1 080 33,750 30,000 74,250
Conexión de señales en el módulo de entrada
VCR digital para uso comercial
Encendido/apagado
Conexión del cable de alimentación
Istalación
1) Inserte el soporte del cable de alimentación en los orificios proporcionados en la parte superior e inferior del terminal de entrada de CA.
- Desplace el soporte del cable de alimentación hacia la izquierda para permitir la inserción del cable de alimentación.
2) Coloque la cubierta del cable de alimentación en el cable en la dirección de (i) y presiónela firmemente en la dirección de (ii).
3) Conecte el cable de alimentación en el terminal de entrada de CA.
4) Mueva el soporte del cable de alimentación para asegurar el cable de alimentación.
Remoción
1) Desplace el soporte del cable de alimentación hacia la izquierda.
2) Quite el cable de alimentación del terminal de entrada de CA.
3) Quite el soporte del cable de alimentación.
Encendido/apagado
Indicador de alimentación
El indicador de alimentación le informa el estado de la alimentación. Verifique el estado del indicador de alimentación y el indicador de modo de espera antes de operar el proyector.
Estado de indicador Estado del proyector Indicador de alimentación(verde) Indicador de modo en espera(rojo) Apagado La alimentación principal está apagada. Apagado Encendido La alimentación está apagada (modo de espera). Encendido Apagado El proyector está en el modo de proyección. Apagado Parpadeando El proyector se está preparando para apagar la alimentación.Después de un breve tiempo, la alimentación se apagará (en el modo de espera).
Nota
Cuando el proyector se está preparando para apagar la alimentación (el indicador de alimentación se apaga y parpadea ), se enciende el ventilador interno para enfriar el proyector.
Cuando el proyector se está preparando para apagar la alimentación, no podrá encenderla con el botón de encendido del panel de control o con el botón de encendido del mando a distancia. Si el indicador de modo de espera está encendido, puede encender la alimentación.
El proyector consume electricidad incluso en el modo en espera (el indicador de modo en espera se enciende).
Encendido del proyector
Panel de control Mando a distancia
Botón de alimentación
Botón de alimentación
Antes de encender la alimentación, quite la cubierta de la lente.
1) Conecte la clavija de alimentación en la toma de corriente.
(CA 200 V - 240 V 50 Hz/60 Hz)
2) Pulse el lado <|> del interruptor de alimentación principal para encender la alimentación.
- Después de un momento, el indicador de modo en espera se encenderá y el proyector ingresará al modo de espera.
3) Pulse el botón en el panel de control o el botón en el mando a distancia.
- Después de un momento, se proyectará una imagen y se visualizarán la señal de entrada seleccionada en ese momento y el estado de la lámpara (→ página 83) por aproximadamente cuatro segundos.
Nota
Cuando [Bloqueo de código PIN] (→ página 67) haya sido ajustado en [On] usando [Seguridad] en el menú [Ajuste], ingrese su código PIN.
El proyector realizará un ruido cuando se encienda la lámpara, pero esto no representa un mal funcionamiento.
Durante la proyección, el ventilador gira, produciendo ruido. El sonido podría cambiar dependiendo de la temperatura ambiental y cuando la lámpara esté encendida, el sonido será más fuerte.
Si se apaga la lámpara y se enciende nuevamente, la imagen recién proyectada podría parpadear durante unos instantes. Esto se debe a las características de la lámpara y no representa un mal funcionamiento.
Cuando establezca [Conexión Directa] (→ página 66) del menú [Ajuste] en [On], se encenderá la alimentación tan pronto inserte la clavija de alimentación en la toma de corriente o cuando ajuste el interruptor principal en el lado .
Cuando ajuste [Visualizar] (→ página 57) del menú [Ajuste] en [On] y [Logotipo] (→ página 63) en [Off], la cuenta regresiva se visualizará pero la visualización de inicio no.
Cuando establezca [Visualizar] (→ página 57) del menú [Ajuste] en [Off] o [Contador apagado], la proyección iniciará tan pronto como se encienda la lámpara, sin importar el ajuste de [Selección logo] (→ página 63).
Después de encender la alimentación, se podrían visualizar notas en [Alerta filtro] y [Cambio lámpara] dependiendo del estado del proyector. (→ página 84)
Realización de ajustes y selecciones
Se recomienda que las imágenes sean proyectadas continuamente por al menos 30 minutos antes de ajustar el foco.
4) Pulse el botón para ajustar el enfoque de la imagen sin mucha precisión. (→ página 34)
- Extienda los pies ajustables para ajustar el ángulo de proyección.
7) Pulse el botón para ajustar la posición de la imagen. (→ página 33) para ajustar el tamaño de la imagen de tal modo que se adapte a la pantalla. (→ página 34) para ajustar el enfoque. para ajustar el zoom y el tamaño de la imagen de tal modo que se adapte a la pantalla.
Encendido/apagado
Apagado del proyector
Panel de control Mando a distancia
Botón de alimentación
Botón de alimentación
1) Pulse el botón de alimentación en el panel de control o el botón de alimentación en el mando a distancia.
[¿ Apagar ?] se visualiza en la pantalla.
La visualización de la pantalla desaparecerá cuando se pulse cualquier botón diferente al botón de alimentación en el panel de control y el botón de alimentación en el mando a distancia o cuando hayan transcurrido aproximadamente cuatro segundos.
2) Pulse nuevamente el botón de alimentación en el panel de control o el botón de alimentación en el mando a distancia.
La lámpara se apaga y se detiene la proyección.
El indicador de alimentación se apaga mientras sigue girando el ventilador de enfriamiento, y parpadea el indicador de modo en espera .
3) Cuando se encienda el indicador del modo en espera , pulse el lado del interruptor de alimentación principal para apagar la alimentación.
Nota
No encienda la alimentación justo después de apagarla. cambie a color rojo, y después encienda nuevamente la alimentación. Si enciende la alimentación cuando la lámpara aún está caliente, podría acortar la duración de la lámpara.
Cuando apague la alimentación con el botón de encendido del panel de control o con el botón de encendido del mando a distancia con el interruptor de alimentación principal en el cuerpo del proyector encendido, el proyector seguirá consumiendo energía. Para más detalles sobre el consumo de alimentación, consulte “Consumo de alimentación” (→ página 100).
- Verifique que el bloqueo de teclas esté apagado en el menú [Seguridad].(→ página 67)
- Si usa el proyector por más de 24 horas, apague la alimentación cada 24 horas y espere durante una hora. Esto incrementará la duración de la lámpara.
Función de apagado directo
Puede desconectar el cable de alimentación, apagar la alimentación mediante el interruptor del cortacorriente de alimentación, etc. sin pulsar el botón de encendido del mando a distancia o el interruptor de alimentación principal del proyector. Esto es útil en casos donde se pueda acceder fácilmente al interruptor, por ejemplo cuando el proyector esté suspendido en el techo. Esta función también proporciona seguridad si se presenta un corte de luz o si se desconecta accidentalmente el cable de alimentación de la toma de corriente inmediatamente después de apagar la alimentación.
Nota
- Cuando se haya enfriado la lámpara con la función de apagado directo, algunas veces podría requerir mayor tiempo del normal para que se pueda encender nuevamente la lámpara.
Función de administración de energía
El proyector cuenta con una función de administración de energía. Si no se detecta ninguna señal durante 30 segundos y no se realiza ninguna operación en el proyector, [No hay señal] y el temporizador aparecen en la pantalla e inicia una cuenta regresiva.
Si el conteo finaliza sin introducir ninguna señal o sin realizar ninguna operación en el proyector, esta función se activa para ahorrar energía y extender la vida útil de la lámpara.
Nota
- El ajuste predeterminado de fábrica es [Off]. Para más detalles, consulte [Modo bajo consumo] (→ página 66).
Proyección
Compruebe las conexiones del dispositivo externo (→ página 24) y las conexiones del cable de alimentación (→ página 29) y enseguida encienda la alimentación (→ página 31) para iniciar la proyección. Seleccione la señal de entrada y ajuste la imagen.
Selección de la señal de entrada
Seleccione una señal de entrada.
Se proyectan las imágenes seleccionadas usando el botón
Atención
Ajuste de la imagen
Ajuste de la posición de la lente
1) Pulse el botón en el mando a distancia o en el panel de control.
- [Lens shift] se visualiza en la pantalla durante cuatro segundos.
2) Cuando aparezca la visualización, pulse ▲▼◀▶ para mover la imagen horizontal y verticalmente.
Conforme se mueve la imagen, existe una cierta posición en la cual la flecha que apunta hacia arriba, hacia abajo, hacia la izquierda y hacia la derecha se enciende en color rojo. Esta posición está en el centro de la lente.
En las posiciones de cambio máximo, las flechas desaparecen.
El proyector almacena el ajuste realizado usando la función de desplazamiento de lente cuando la alimentación está apagada.
Al cambiar la posición de la imagen, la imagen podría oscurecer un poco.
Mueve la imagen hacia abajo aproximadamente el 50% de su altura.
Proyección
Ajuste del enfoque y del zoom
1) Pulse el botón y el botón en el mando a distancia o en el panel de control.
- [Enfocar] y [Zoom] se visualizan en la pantalla durante cuatro segundos.
2) Cuando aparezca la visualización, pulse ▲▼ para ajustar el enfoque y el zoom.
Nota
Cuando ajuste [Visualizar] en [Off], no aparecerá la pantalla de ajuste.
Se recomienda que las imágenes sean proyectadas continuamente por al menos 30 minutos antes de ajustar el enfoque.
Si se presenta el efecto Keystone (distorsión trapezoidal), consulte “Corrección del efecto Keystone” (→ página 36) para más detalles.
Uso del mando a distancia
Uso de la función de obturador
Puede bloquear completamente la luz de proyección.
Botón
1) Pulse el botón en el mando a distancia.
- Esto bloquea la luz de proyección. El indicador de obturador se enciende en color azul.
2) Pulse nuevamente el botón .
- Esto abre el obturador y reinicia la operación. El indicador de obturador se apaga.
Nota
Las operaciones del obturador difieren dependiendo de los ajustes. Realice los ajustes usando [Shutter] en el menú [Ajuste].
El botón también está en el panel de control.
Si aparece un mensaje de error cuando pulse el botón , se habilitará el bloqueo de botón. Verifique el ajuste [Shutter] en el menú [Ajuste].
Uso de la función de congelación
Puede congelar temporalmente la imagen proyectada sin importar el estado de reproducción en un dispositivo externo.
Botón
1) Pulse el botón en el mando a distancia.
- Esto congelará la imagen.
2) Pulse el botón en el mando a distancia o en el panel de control.
- Libera la imagen congelada.
Cambio de la señal de entrada
Puede cambiar la señal de entrada para la proyección.
Botones
Botón
Uso del mando a distancia
Nota
Corrección del efecto Keystone
Puede corregir el efecto Keystone (distorsión trapezoidal) que ocurre cuando se instala el proyector de forma inclinada o cuando la pantalla está inclinada.
La cantidad y el rango de corrección difieren dependiendo de la señal de entrada.
Con ciertos ajustes, la imagen podría aparecer distorsionada por un momento.
Para obtener la imagen corregida, la señal se somete a compresión digital antes de la proyección y las líneas y el texto podrían alterarse ligeramente en relación con aquellos de la imagen original.
Para más detalles sobre la corrección, consulte [Keystone] en el menú [Pantalla].
Botón
1) Pulse el botón en el mando a distancia.
- Cada vez que pulse el botón, la visualización cambia entre la visualización de corrección de efecto Keystone estándar y la visualización de corrección de esquinas.
Corrección de efecto Keystone estándar
Corrige el efecto Keystone vertical y horizontalmente.
1) Al visualizar [Keystone], pulse ▲▼ ◀▶ en relación con la dirección que desea realizar la corrección.
Nota
- Al pulsar el botón en el mando a distancia por al menos tres segundos cuando se visualiza [Keystone] se regresa la imagen al estado sin corrección.
Corrección de esquinas
Corrige la distorsión en las esquinas de la imagen.
1) Al visualizar [Keystone], pulse el botón y seleccione la esquina que desea corregir.
- Cada vez que pulse el botón se mueve la esquina seleccionada en el sentido de las manecillas del reloj.
2) Pulse ▲▼◀▶ para corregir la distorsión.
Nota
- Al pulsar el botón en el mando a distancia por al menos tres segundos cuando se visualiza [Keystone] se regresa la imagen al estado sin corrección.
Selección del modo de calidad de imagen
Al pulsar el botón en el mando a distancia se visualiza el menú para la imagen seleccionada en ese momento [Selección de imagen], enseguida cada vez que pulse el botón cambia el modo.
Botón
Nota
- Para más detalles, consulte “Menú [Selección de imagen]” (→ página 47).
Ajuste de la calidad de imagen
Al pulsar el botón en el mando a distancia se visualiza el menú [Ajuste de imagen].
Botón
1) Pulse el botón en el mando a distancia. .
Nota
- Para más detalles, consulte “Menú [Ajuste de imagen]” (→ página 48).
Botón de pantalla
Puede cambiar el ajuste del menú [Pantalla].
Botón
Al pulsar el botón en el mando a distancia se visualiza el menú seleccionado en ese momento [Pantalla], enseguida cada vez que pulse el botón cambia el modo.
Nota
Para más detalles, consulte "Menú [Pantalla]" (→ página 53).
Si pulsa el botón durante al menos cinco segundos, los ajustes del menú [Pantalla] se restaurarán a los ajustes predeterminados de fábrica.
Visualización de un temporizador para las presentaciones
Cuando pulse el botón en el mando a distancia, el proyector muestra un conteo del tiempo transcurrido a partir del momento en el que pulsó el botón o realiza una cuenta regresiva.
Al pulsar nuevamente el botón se detiene el conteo y se visualiza el tiempo transcurrido hasta ese punto.
Al pulsar nuevamente el botón se restaura el conteo.
Botón
Nota
Para más detalles, consulte [Presentación temporizada] (→ página 71).
Al pulsar el botón durante al menos tres segundos se restaura el tiempo. El conteo se regresa a "000:00" y la cuenta regresiva regresa al tiempo establecido en el temporizador.
Verificación de ajustes
Puede verificar el estado de las señales y la lámpara en la pantalla durante la proyección.
Botón
Al pulsar el botón en el mando a distancia se visualiza la primera página de información.
Al pulsar nuevamente el botón se visualiza la segunda página de información.
Al pulsar el botón se cierra la información.
Nota
Para más detalles, consulte "Menú [Informacion]" (→ página 73).
Para moverse de la información a otro menú, pulse ▲▼.
También existe el botón en el panel de control.
Navegación de menú
Navegación a través del menú
Rocedimiento de operación
- Se visualiza el menú.
2) Pulse ▲▼ para seleccionar el elemento del menú principal.
- Seleccione el elemento que desea ajustar entre [Entrada], [Ajuste de PC], [Selección de imagen], [Ajuste de imagen], [Pantalla], [Ajuste], [Informacion] y [Nombre proyector]. El elemento seleccionado actualmente aparece con un cursor de color naranja, y el submenú del elemento seleccionado se visualiza en el lado derecho.
3) Pulse el botón .
Se visualiza el menú y se pueden seleccionar los elementos del submenú.
Alternativamente, pulse ▶ para tener acceso al submenú.
4) Pulse ▲▼ para seleccionar el elemento del submenú que desea cambiar, enseguida pulse el botón y ◀▶ para cambiar los ajustes o para ajustar los valores del parámetro.
Para algunos submenús, se visualizará un menú adicional (submenú 2) el cual contiene los ajustes avanzados.
Para algunos elementos donde se pueda cambiar el ajuste o si existe una escala de barra, la pantalla de menú desparece y, tal como se ilustra a continuación, se visualiza una pantalla de ajuste para el ajuste seleccionado (pantalla de ajustes individuales).
Nota
Para ciertos formatos para la entrada de señales en el proyector, no será posible ajustar algunos elementos o usar algunas funciones. Los elementos de menú que no se pueden ajustar o usar estarán en color gris, y no pueden seleccionarse.
Algunos elementos se pueden ajustar sin una entrada de señal.
Si no se realiza ninguna operación por aproximadamente cuatro o diez segundos, la pantalla de ajuste limpia toda la información automáticamente. El tiempo necesario para que se borre la información en la pantalla de ajuste varía dependiendo de la pantalla.
Para más detalles sobre los elementos del submenú, consulte “Submenú” (→ páginas 39 a 41).
Debajo del menú se visualizará un menú guía. Se visualizan los botones que serán seleccionados y ejecutados.
(Debajo del submenú se mostrará un menú guía).
(1) Pulse el botón
para cerrar el menú. para ejecutar un elemento.
Menú principal
El menú principal contiene los siguientes ocho elementos.
Al seleccionar un elemento del menú principal, la pantalla cambia a la pantalla de selección del submenú.
[Entrada] [Ajuste de PC] [Selección de imagen] [Ajuste de imagen] [Pantalla] [Ajuste] [###] [Informacion] [###] [Nombre proyector]
Submenú
Se visualiza la pantalla del submenú del elemento seleccionado del menú principal, y podrá configurar y ajustar los distintos elementos en el submenú.
Elemento de submenú Ajuste predeterminado Página [Entrada 1] [RGB(PCanalógico)] 42 [Entrada 2] [RGB] 42 [Entrada 3] —* 1 — [Entrada 4] —* 1 —
*1: Difiere dependiendo de la señal de entrada.
Nota
- La señal visualizada para [Entrada 3] y [Entrada 4] cambia dependiendo del tipo de módulo de entrada insertado.
Elemento de submenú Ajuste predeterminado Página [Ajuste automático de PC] — 44 [Sincro. fino] —* 1 44 [Total puntos] —* 1 44 [Posición H] —* 1 44 [Posición V] —* 1 45 [Modo actual] —* 1 45 [Clamp] —* 1 45 [Área de imagen H] —* 1 45 [Área de imagen V] —* 1 45 [Reset] — 46 [Modo libre] — 46 [Memorizado] — 46
*1: Difiere dependiendo de la señal de entrada.
Detalles (→ página 47)
Navegación de menú
[Juste de imagen]
Elemento de submenú Ajuste predeterminado Página [Contraste] 32 48 [Brillo] 32 48 [Color]* 1 32 48 [Tinte]* 1 32 48 [Control de color] — 49 [Temp. de color] [Med.] 50 Balance de blancos ([Rojo]/[Verde]/[Azul]) 32 50 [Nivel de Negro] 32 50 [Control auto. imagen] [L 1] 50 [Color avanzado] [Auto] 50 [Nítidez] Para la entrada del ordenador: 0 Para la entrada de video: 15 51 [Ajuste gamma] 8 51 [Reducción de ruido]* 1 [On] 51 [Progresivo]* 1 [On] 51 [Reset] — 51 [Memorizado] — 52
*1: Solo se puede visualizar y seleccionar cuando se use la entrada de video.
[antalla]
Elemento de submenú Ajuste predeterminado Página [Normal] — 53 [Completo] — 53 [Panorámico(16:9)] — 53 [Zoom] — 53 [Real]*1 — 53 [Usuario] — 54 [Ajuste Personalizado] — 54 [Zoom digital +]*1 — 54 [Zoom digital -]*1 — 55 [Keystone] — 55 [Techo] [Off] 56 [Trasero] [Off] 56 [Reset] — 56
*1: Solo se puede visualizar y seleccionar cuando se use la entrada de ordenador.
uste]
Elemento de submenú Ajuste predeterminado Página [Idioma] [English] 57 [Posición de menú] — 57 [Visualizar] [On] 57 [Fondo] [Azul] 58 [Selección de lámpara] [4 Lámparas] 58 [Alim. lámpara] (Auto) 58 [Intervalo de lámpara] [Off] 59 [Edge blending] [Off] 59 [Correspondencia de color] [Off] 60 [Config. HDMI] [Normal] 63 [Logotipo] — 63 [Control ventiladores] [Normal] 65 [Control remoto] [Todos] 65 [Sensor control remoto] [Frontal&Trasero] 65 [Modo bajo consumo] [Off], [Contador de tiempo]30 minutos 66 [Conexión Directa] [Off] 66 [Seguridad] — 67 [ID Proyector] [Todos] 68 [Shutter] — 68 [Control de demora de vídeo] [Off] 69 [Closed caption] [Off] 70 [Contador filtro] — 70 [Presentación temporizada] [Contar] 71 [Carta de ajuste] — 72 [Ajustes fábrica] — 72
formacion]
Detalles (→ página 73)
ombre proyector]
Consulte "Manual del usuario-Operaciones de red".
Detalles (→ página 74)
Menú [Entrada]
Seleccione [Entrada] del menú principal en la pantalla de menú y seleccione el elemento del submenú.
Para la operación de la pantalla de menú, consulte "Navegación a través del menú"
(→ página 38).
- Después de seleccionar el elemento, pulse ▲▼
◀▶ para realizar los ajustes.
Panel de controlMandc
[Entrada 1]
1) Pulse ▲▼ para seleccionar [Entrada 1], y pulse el botón .
- Se visualiza el submenú 2.
2) Pulse ▲▼ para seleccionar un elemento, y pulse el botón .
[RGB(PCanalógico)] Seleccione cuando introduzca una señal analógica proveniente de un ordenador en el terminal. [RGB(Scart)] Seleccione cuando introduzca la señal SCART en el terminal. [RGB(PCdigital)] Seleccione cuando introduzca una señal digital proveniente de un ordenador en el terminal. [RGB(AVHDCP)] Seleccione cuando introduzca una señal digital compatible con HDCP en el terminal. [HDMI] Seleccione cuando introduzca una señal digital compatible con HDMI en el terminal.
Nota
- El terminal de pin SCART21 es un terminal de salida de video proporcionado en los reproductores de video vendidos principalmente en Europa. Para ver la salida RGB desde este terminal en el proyector, conecte el terminal de pin SCART21 del reproductor de video en el terminal del proyector usando un cable dedicado. Las señales RGB SCART que se van a reproducir por medio del terminal están limitadas a las señales RGB 480i y 576i. No se pueden reproducir señales de video compuesto.
[Entrada 2]
1) Pulse ▲▼ para seleccionar [Entrada 2], y pulse el botón .
- Se visualiza el submenú 2.
2) Pulse ▲▼ para seleccionar un elemento y pulse el botón .
[RGB] Seleccione cuando introduzca una señal analógica proveniente de un ordenador en el terminal. [Y, Pb/Cb, Pr/ Cr] Seleccione cuando introduzca una señal de video compuesto en el terminal. [Video] Seleccione cuando introduzca una señal de video compuesto en el terminal. [S-video] Seleccione cuando introduzca una señal S-video en el terminal.
Nota
- Algunas señales RGB se reconocen automáticamente, las señales RGB que no se reconocen son detectadas como "Y,Pb/Cb,Pr/Cr" y es necesario seleccionar [RGB] en el menú.
[Sistema]
[Sistema] se visualiza debajo del submenú.
1) Pulse ▲▼ para seleccionar [Sistema] debajo del submenú y pulse el botón .
- Se visualiza el submenú 2.
2) Pulse ▲▼ para seleccionar un elemento y pulse el botón .
- Pulse el botón o el botón ◀ para regresar al submenú.
Para la entrada del ordenador
[Auto] Cuando no exista ninguna señal que sea compatible con la señal de un ordenador conectado en el proyector, se activa la función de ajuste automático de PC y se visualiza [Auto] en el sistema. Si las imágenes no se proyectan correctamente, ajuste manualmente de tal modo que los ajustes sean adecuados para su ordenador y regístrelos en [Memorizado]. — No existe ninguna señal de entrada del ordenador.Compruebe las conexiones. [Modo 1] - [Modo 10] Seleccione cuando introduzca una señal digital proveniente de un ordenador en el terminal.
Para la entrada de video y S-video
[Auto] El proyector selecciona automáticamente el sistema de color de la señal de entrada. [PAL]/ [SECAM]/ [NTSC]/ [NTSC4.43]/ [PAL-M]/ [PAL-N] Esta es una lista de los sistemas de color compatibles. El sistema de color japonés es NTSC. Cuando la calidad de la señal de entrada es mala (color irregular, ausencia de color, etc.), y no se ha seleccionado el sistema de color aun cuando se haya ajustado [Auto], seleccione [NTSC].
ra la entrada de componente
[Auto] El proyector selecciona automáticamente el método de barrido de la señal de entrada. Métodos de barrido de video componente ([480p], [576p], [720p], [480i], [576i], [1035i], [1080i], [1080p]) Cuando no se reproduce correctamente el video, seleccione el método adecuado de barrido en el menú.
Menú [Ajuste de PC]
Seleccione [Ajuste de PC] del menú principal en la pantalla de menú y seleccione el elemento del submenú.
Para la operación de la pantalla de menú, consulte “Navegación a través del menú” (→ página 38).
- Después de seleccionar el elemento, pulse ▲▼
◀▶ para realizar los ajustes.
Panel de controlMandc
[Ajuste automático de PC]
Ajusta automáticamente la sincronización, el número total de puntos, el cambio horizontal y el cambio vertical.
1) Pulse ▲▼ para seleccionar [Ajuste automático de PC]. .
- Esto ejecuta el ajuste automático.
Nota
También puede usar [Ajuste automático de PC] pulsando el botón en el mando a distancia.
Algunos ordenadores no son capaces de ajustes cualquiera de las opciones [Sincro. fino], [Total puntos], [Posición H] o [Posición V]. En este caso, ajuste manualmente y regístrelo en [Memorizado].
Después de registrar los ajustes modificados automáticamente, puede seleccionar ese modo usando [Sistema] en el menú [Entrada].
La función de ajuste automático de PC no se activa cuando se haya seleccionado alguna de las opciones [480p], [576p], [720p], [480i], [576i], [1035i], [1080i], o [1080p] usando [Sistema] en el menú [Entrada].
Con algunos ordenadores y tipos de señal, podría no ser posible proyectar las imágenes correctamente.
[Sincro. fino]
Ajusta el proyector cuando existe parpadeo debido a la falta de seguimiento (sincronización).
1) Pulse ▲▼ para seleccionar [Sincro. fino]. .
- Se visualiza el menú avanzado.
- Cuando visualice el menú avanzado, pulse ▲▼ para moverse hacia atrás y hacia delante entre los menús.
3) Mientras visualiza la pantalla, pulse ◀▶ para ajustar la configuración.
- Pulse el botón para regresar al submenú.
Nota
El valor de ajuste se puede establecer entre 0 y 31.
Para algunos ordenadores, podría no ser posible eliminar completamente el parpadeo de la pantalla.
[Total puntos]
Ajusta el número total de puntos en el intervalo horizontal.
1) Pulse ▲▼ para seleccionar [Total puntos]. .
- Se visualiza el menú avanzado.
- Cuando visualice el menú avanzado, pulse ▲▼ para moverse hacia atrás y hacia delante entre los menús.
3) Cuando visualice la pantalla, pulse ◀▶ para ajustar la configuración.
- Pulse el botón para regresar al submenú.
[Posición H]
Ajusta la posición horizontal de la pantalla.
1) Pulse ▲▼ para seleccionar [Posición H]. .
- Se visualiza el menú avanzado.
- Cuando visualice el menú avanzado, pulse ▲▼ para moverse hacia atrás y hacia delante entre los menús.
3) Mientras visualiza la pantalla, pulse ◀▶ para ajustar la configuración.
- Pulse el botón para regresar al submenú.
[Posición V]
Ajusta la posición vertical de la pantalla.
1) Pulse ▲▼ para seleccionar [Posición V]. .
- Se visualiza el menú avanzado.
- Cuando visualice el menú avanzado, pulse ▲▼ para moverse hacia atrás y hacia delante entre los menús.
3) Cuando visualice la pantalla, pulse ◀▶ para ajustar la configuración.
- Pulse el botón para regresar al submenú.
[Modo actual]
Muestra los valores actuales de la frecuencia de sincronización H y la frecuencia de sincronización V para el ordenador conectado en ese momento.
1) Pulse ▲▼ para seleccionar [Modo actual]. o ▶.
- Se visualiza el menú avanzado.
- Pulse el botón o ◀ para regresar al submenú.
[Clamp]
Ajusta la posición de fijación.
Utilice esta opción cuando esté visible una línea negra en la imagen proyectada.
1) Pulse ▲▼ para seleccionar [Clamp]. .
- Se visualiza el menú avanzado.
- Cuando visualice el menú avanzado, pulse ▲▼ para moverse hacia atrás y hacia delante entre los menús.
3) Cuando visualice la pantalla, pulse para regresar al submenú.
[Área de imagen H]
Ajusta la posición horizontal.
1) Pulse ▲▼ para seleccionar [Área de imagen H]. .
Se visualiza el menú avanzado.
Cuando visualice el menú avanzado, pulse ▲▼ para moverse hacia atrás y hacia delante entre los menús.
3) Cuando visualice la pantalla, pulse ◀▶ para ajustar la configuración.
- Pulse el botón para regresar al submenú.
Nota
- No puede ajustar [Área de imagen H] cuando se haya seleccionado [480p], [576p], [720p], [480i], [576i], [1035i], [1080i], o [1080p] usando [Sistema] en el menú [Entrada].
[Área de imagen V]
Ajusta la resolución vertical.
1) Pulse ▲▼ para seleccionar [Área de imagen V]. .
Se visualiza el menú avanzado.
Cuando visualice el menú avanzado, pulse ▲▼ para moverse hacia atrás y hacia delante entre los menús.
3) Cuando visualice la pantalla, pulse ◀▶ para ajustar la configuración.
Cuando visualice la pantalla, pulse ◀▶ para ajustar la configuración.
- Pulse el botón para regresar al submenú.
Nota
- No puede ajustar [Área de imagen V] cuando se haya seleccionado [480p], [576p], [720p], [480i], [576i], [1035i], [1080i], o [1080p] usando [Sistema] en el menú [Entrada].
Menú [Ajuste de PC]
[Reset]
El ajuste regresa a su valor original antes de realizar cambios.
1) Pulse ▲▼ para seleccionar [Reset]. . . para regresar al submenú.
[Modo libre]
Elimina los valores registrados en [Memorizado].
1) Pulse ▲▼ para seleccionar [Modo libre]. o ▶. . . para regresar al submenú 2.
[Memorizado]
Registra los valores ajustados en [Memorizado].
1) Pulse ▲▼ para seleccionar [Memorizado]. o ▶. . . para regresar al submenú 2.
Menú [Selección de imagen]
Seleccione [Selección de imagen] del menú principal en la pantalla de menú y seleccione el elemento del submenú.
Para la operación de la pantalla de menú, consulte "Navegación a través del menú"
(→ página 38).
- Después de seleccionar el elemento, pulse ▲▼
◀▶ para realizar los ajustes.
Panel de controlMandc
- También puede visualizar los submenús usando el botón en el mando a distancia.
Ajuste de la calidad de imagen
Ajuste la calidad de imagen de la imagen proyectada para que sea adecuada para el entorno en el cual está usando el proyector.
[standard]
Restaura los elementos del menú [Ajuste de imagen] a los ajustes predeterminados de fábrica.
[real]
En este modo, los ajustes intermedios se configuran de tal modo que tengan más brillo, mejorando la vista en lugares con mucho brillo.
- Este modo solo se puede seleccionar para las entradas de ordenador.
[■ne]
Enfatiza la gradación, haciendo que este modo sea adecuado para ver películas.
- Este modo solo se puede seleccionar para las entradas de video o de ordenador.
[námico]
Le brinda a la imagen mayor contraste que [Standard].
[■hagen 1] - [Imagen 10]
Recupera los ajustes de calidad de imagen ajustados manualmente usando el menú [Ajuste de imagen].
- Las imágenes se pueden registrar para las entradas de ordenador y para las entradas de video.
Menú [Ajuste de imagen]
Seleccione [Ajuste de imagen] del menú principal en la pantalla de menú y seleccione el elemento del submenú.
Para la operación de la pantalla de menú, consulte "Navegación a través del menú"
(→ página 38).
- Después de seleccionar el elemento, pulse ▲▼
◀▶ para realizar los ajustes.
Panel de controlMandc
- También puede visualizar los submenús usando el botón en el mando a distancia.
[Contraste]
1) Pulse ▲▼ para seleccionar [Contraste]. .
Se visualiza el menú avanzado.
Cuando visualice el menú avanzado, pulse
▲▼ para moverse hacia atrás y hacia delante entre los menús.
3) Cuando visualice la pantalla, pulse ◀▶ para ajustar la configuración.
Funcionamiento Ajuste Rango Pulse ▶. Hace que el contraste sea más intenso. Valor máximo 63 Pulse ◀. Hace que el contraste sea más débil. Valor mínimo 0
[Brillo]
1) Pulse ▲▼ para seleccionar [Brillo]. .
Se visualiza el menú avanzado.
Cuando visualice el menú avanzado, pulse
▲▼ para moverse hacia atrás y hacia delante entre los menús.
3) Cuando visualice la pantalla, pulse ◀▶ para ajustar la configuración.
Funcionamiento Ajuste Rango Pulse ▶. Incrementa el brillo. Valor máximo 63 Pulse ◀. Disminuye el brillo. Valor mínimo 0
[Color]
Este ajuste solo se puede ajustar para las entradas de video o de componente.
1) Pulse ▲▼ para seleccionar [Color]. .
- Se visualiza el menú avanzado.
- Cuando visualice el menú avanzado, pulse ▲▼ para moverse hacia atrás y hacia delante entre los menús.
3) Cuando visualice la pantalla, pulse ◀▶ para ajustar la configuración.
Funcionamiento Ajuste Rango Pulse ▶. Hace que la imagen sea más oscura. Valor máximo 63 Pulse ◀. Hace que la imagen sea más clara. Valor mínimo 0
[Tinte]
Este ajuste solo se puede ajustar para las entradas de video o de componente.
1) Pulse ▲▼ para seleccionar [Tinte]. .
- Se visualiza el menú avanzado.
- Cuando visualice el menú avanzado, pulse ▲▼ para moverse hacia atrás y hacia delante entre los menús.
3) Cuando visualice la pantalla, pulse ◀▶ para ajustar la configuración.
Funcionamiento Ajuste Rango Pulse ▶ . Enfatiza el verde. Valor máximo 63 Pulse ◀ . Enfatiza el púrpura. Valor mínimo 0
[Control de color]
Ajusta el color de la imagen proyectada según lo deseado.
1) Pulse ▲▼ para seleccionar [Control de color]. .
Visualización del menú [COLOR SELECTION]
1) Pulse el botón . .
Ajuste del color del menú [COLOR SELECTION]
1) Pulse ▲▼◀▶ para mover el cursor en el centro de [COLOR], y pulse el botón . .
- La pantalla mueve el ajuste [GAMMA].
4) Pulse ▲▼◀▶ para seleccionar el color que se va a visualizar después del ajuste, después pulse el botón .
- El cursor se mueve hacia [LIST].
5) Pulse el botón con el cursor en [LIST].
[LIST] Muestra [COLOR MANAGEMENT LIST]. [COLOR M.] Cancela el ajuste y regresa el cursor al estado sin color. [MENU] Finaliza la visualización de [COLOR MANAGEMENT LIST].
6) Se visualiza [COLOR MANAGEMENT LIST].
- Puede comprobar si se ha almacenado el color registrado.
Operaciones de [COLOR MANAGEMENT LIST]
●Reajuste los colores almacenados
1) Pulse ▲▼ para seleccionar el color que se va a reajustar. para regresar al menú [COLOR SELECTION].
- Puede reajustar el color.
- Eliminación de colores almacenados
1) Pulse ▲▼ para seleccionar el color que se va a eliminar. . .
- El color registrado será eliminado.
[ALL DEL] Elimina todos los elementos almacenados en la lista. [MENU] Finaliza la visualización de [COLOR MANAGEMENT LIST], y regresa al menú [Ajuste de imagen]. [COLOR M.] Almacena el ajuste. Se visualiza un cursor sin color y puede continuar con los ajustes.
Menú [Ajuste de imagen]
[Temp. de color]
1) Pulse ▲▼ para seleccionar [Temp. de color]. .
Se visualiza el menú avanzado.
Cuando visualice el menú avanzado, pulse ▲▼ para moverse hacia atrás y hacia delante entre los menús.
3) Cuando visualice la pantalla, pulse ◀▶ para ajustar la configuración.
Funcionamiento Ajuste Rango Pulse ▶ . Hace que la temperatura del color sea más alta. [XLow]-[Baja]-[Med.-][Alta] Pulse ◀ . Hace que la temperatura del color sea muy baja.
Nota
● [XLow] (enfatiza nivel de rojo) - [Alta] (enfatiza nivel de azul)
Balance de blancos ([Rojo]/[Verde]/[Azul])
1) Pulse ▲▼ para seleccionar [Rojo] (o [Verde] o [Azul]). .
- Se visualiza el menú avanzado.
- Cuando visualice el menú avanzado, pulse ▲▼ para moverse hacia atrás y hacia delante entre los menús.
3) Cuando visualice la pantalla, pulse ◀▶ para ajustar la configuración.
Funcionamiento Ajuste Rango Pulse ▶ . Debilita el color. Valor máximo 63 Pulse ◀ . Profundiza el color. Valor mínimo 0
[Nivel de Negro]
1) Pulse ▲▼ para seleccionar [Nivel de Negro]. o ▶.
● Se visualiza el submenú 2. .
[Rojo] Valor mínimo 0 - valor máximo 63 [Verde] Valor mínimo 0 - valor máximo 63 [Azul] Valor mínimo 0 - valor máximo 63
[Control auto. imagen]
Enfatiza las partes oscuras de la imagen proyectada.
1) Pulse ▲▼ para seleccionar [Control auto. imagen]. .
[Color avanzado]
Ajusta la operación del dispositivo de control de color que controla independientemente la cantidad de la luz amarilla.
1) Pulse ▲▼ para seleccionar [Color avanzado]. .
- La configuración cambiará como sigue cada vez que pulse el botón.
- El balance de blancos puede cambiar dependiendo de la imagen.
[Nítidez]
1) Pulse ▲▼ para seleccionar [Nítidez]. .
- Se visualiza el menú avanzado.
- Cuando visualice el menú avanzado, pulse ▲▼ para moverse hacia atrás y hacia delante entre los menús.
3) Cuando visualice la pantalla, pulse ◀▶ para ajustar la configuración.
Funcionamiento Ajuste Rango Pulse ▶ . Incrementa la nitidez. Valor máximo 31 Pulse ◀ . Disminuye la nitidez. Valor mínimo 0
[Ajuste gamma]
1) Pulse ▲▼ para seleccionar [Ajuste gamma]. .
- Se visualiza el menú avanzado.
- Cuando visualice el menú avanzado, pulse ▲▼ para moverse hacia atrás y hacia delante entre los menús.
3) Cuando visualice la pantalla, pulse ◀▶ para ajustar la configuración.
Funcionamiento Ajuste Rango Pulse ▶. Proporciona brillo a las gradaciones intermedias. Valor máximo 15 Pulse ◀. Oscurece las gradaciones intermedias. Valor mínimo 0
[Reducción de ruido]
Reduce el ruido cuando se visualice un video antiguo u otras imágenes afectadas por el ruido.
1) Pulse ▲▼ para seleccionar [Reducción de ruido]. .
- La configuración cambiará como sigue cada vez que pulse el botón.
[Progresivo]
Se puede ajustar para las señales de entrada de video de 480i, 576i, 1035i y 1080i.
1) Pulse ▲▼ para seleccionar [Progresivo]. .
- La configuración cambiará como sigue cada vez que pulse el botón.
Ajuste en [Off] cuando un video con mucho movimiento se vea afectado por el parpadeo o por líneas horizontales.
[Película] permite la reproducción de imágenes desplegables 3-2/2-2 en el proyector sin que se pierda la calidad en las imágenes.
Al realizar el cambio, la imagen se distorsionará durante un momento.
[Reset]
El ajuste regresa a su valor original antes de realizar cambios.
1) Pulse ▲▼ para seleccionar [Reset]. o ▶. .
El ajuste regresa a su valor original antes de realizar cambios.
Seleccione [No] y pulse el botón para regresar al submenú.
Menú [Ajuste de imagen]
[Memorizado]
1) Pulse ▲▼ para seleccionar [Memorizado]. o ▶.
- El contenido registrado de cada modo se visualiza en el submenú 2.
3) Pulse ▲▼ para seleccionar el modo que se va a registrar. . .
- El modo seleccionado es registrado y el proyector regresa al submenú 2.
- Seleccione [No] y pulse el botón para regresar al submenú 2.
Nota
El elemento ajustado se registra y almacena en [Memorizado].
Con [Memorizado], puede almacenar las entradas de ordenador y las entradas de video.
Menú [Pantalla]
Seleccione [Pantalla] del menú principal en la pantalla de menú y seleccione el elemento del submenú.
Para la operación de la pantalla de menú, consulte "Navegación a través del menú"
(→ página 38).
- Después de seleccionar el elemento, pulse ▲▼
◀▶ para realizar los ajustes.
Panel de controlMando
- También puede visualizar los submenús usando el botón en el mando a distancia.
[Normal]
Visualiza el tamaño máximo permisible conservando la relación de aspecto de la señal de entrada.
1) Pulse ▲▼ para seleccionar [Normal]. .
[Completo]
Muestra el tamaño de completo de la pantalla.
Cuando no exista una señal de entrada, este elemento estará en color gris y no se podrá seleccionar. .
[Panorámico(16:9)]
Se muestra a pantalla ancha con una relación de aspecto de 16:9.
Cuando no exista una señal de entrada, este elemento estará en color gris y no se podrá seleccionar. .
[Zoom]
Almacena la relación de aspecto y proyecta en el tamaño máximo del panel.
Cuando no exista una señal de entrada, este elemento estará en color gris y no se podrá seleccionar.
Si la imagen es más ancha horizontalmente que el panel, se recortarán los bordes derecho e izquierdo. Si es verticalmente más larga que el panel, se recortarán los bordes superior e inferior.
1) Pulse ▲▼ para seleccionar [Zoom]. .
[Real]
Proyecta la imagen en el tamaño original.
Este modo solo se puede ajustar para las entradas de ordenador.
Cuando no exista una señal de entrada, este elemento estará en color gris y no se podrá seleccionar.
1) Pulse ▲▼ para seleccionar [Real]. .
■ando el tamaño de la imagen sea menor que la resolución del panel 4
La imagen es proyectada en el centro de la pantalla, y se visualiza [Real] en la parte superior izquierda de la pantalla.
■ando el tamaño de la imagen es igual que la resolución del panel 1
[Real] se visualiza en la parte superior izquierda de la pantalla, pero la imagen se proyecta subsecuentemente en el modo [Normal].
■ando el tamaño de la imagen sea más grande que la resolución del panel 1
[Real] se visualiza en la parte superior izquierda de la pantalla, y se visualizan △ (△ en la parte superior, inferior, izquierda y derecha de la pantalla.
Pulse ▲▼◀▶ para mover la imagen.
La flecha en la dirección del movimiento se visualiza en rojo.
En las posiciones de cambio máximo, las flechas desaparecen.
*1: La resolución del panel del proyector es de 1 024 x 768 puntos.
Menú [Pantalla]
[Usuario]
La imagen se proyecta usando los valores registrados como [Memorizado] en el menú [Ajuste de PC].
- Cuando no exista una señal de entrada, [Usuario] se puede seleccionar pero la imagen será proyectada en el modo [Normal].
1) Pulse ▲▼ para seleccionar [Usuario]. .
[Ajuste Personalizado]
Ajusta la escala horizontal y vertical y la posición.
Cuando no exista una señal de entrada, este elemento estará en color gris y no se podrá seleccionar.
Si se pierde la señal de entrada durante el ajuste, el valor de ajuste se almacena y se borra la pantalla de ajuste [Aspecto].
1) Pulse ▲▼ para seleccionar [Ajuste Personalizado] y pulse ▶.
- Se visualiza la pantalla de ajuste del submenú 2.
2) Pulse ▲▼ para seleccionar un elemento y pulse el botón .
- Para ajustar [H y V], pulse el botón y realice el ajuste en la pantalla del submenú 2.
- Pulse el botón para [Común] y [Reset]. Seleccione [Sí] y pulse el botón .
- Cuando visualice el menú avanzado, pulse ▲▼ para visualizar menús diferentes a [H y V], [Común] y [Reset] en ese orden.
4) Pulse ◀▶ para ajustar la configuración.
- Pulse el botón para regresar al submenú.
[Escala H] Ajusta la escala horizontal. [Escala V] Ajusta la escala vertical. [H y V] Cuando ajuste la escala vertical y horizontal, seleccione [On] para enlazar las escalas vertical y horizontal y conservar la relación de aspecto de la imagen.● Conforme ajuste el valor numérico de [Escala H], el valor numérico de [Escala V] cambia respectivamente. [Posición H] Ajusta el cambio horizontal. [Posición V] Ajusta el cambio vertical. [Común] Aplica el contenido ajustado en todas las entradas. [Reset] Restaura todo el contenido ajustado.
[Zoom digital +]
1) Pulse ▲▼ para seleccionar [Zoom digital +]. o ▶.
- Se borra la información de la pantalla de menú y se visualiza [Zoom digital +].
3) Pulse el botón .
Cada vez que pulse el botón se amplía la imagen.
La función de movimiento de imagen se activa cuando el tamaño de la imagen es más grande que la resolución del panel +1
*1: La resolución del panel del proyector es de 1 024 x 768 puntos.
Nota
Cuando no exista una señal de entrada, [Zoom digital +] estará en color gris y no se podrá seleccionar.
Al seleccionar [Real], no se puede seleccionar [Zoom digital +].
Para finalizar la operación de [Zoom digital +], pulse cualquier botón diferente a , y ▲▼◀▶.
[Zoom digital -]
1) Pulse ▲▼ para seleccionar [Zoom digital -]. o ▶.
- Se borra la información de la pantalla de menú y se visualiza [Zoom digital -].
3) Pulse el botón .
Cada vez que pulse el botón se reduce la imagen.
La función de movimiento de imagen se activa cuando el tamaño de la imagen es más grande que la resolución del panel *1
*1: La resolución del panel del proyector es de 1 024 x 768 puntos.
Nota
Cuando no exista una señal de entrada, [Zoom digital -] estará en color gris y no se podrá seleccionar.
Al seleccionar [Real], no se puede seleccionar [Zoom digital -].
Al seleccionar [Usuario], no podrá ajustar [Zoom digital -] en [Normal] o menor.
Cuando se selecciona [Memorizado] registrado en el menú [Ajuste de PC] en [Sistema] del menú [Entrada], la función de movimiento de imagen de [Zoom digital -] podría no funcionar correctamente.
Cuando seleccione VGA, SVGA, SXGA, WXGA o UXGA en [Sistema] del menú [Entrada] y el ajuste [Keystone] hacia arriba está en el valor máximo, [Zoom digital -] podría no funcionar correctamente.
Para finalizar la operación de [Zoom digital -], pulse cualquier botón diferente a , y ▲▼◀▶.
[Keystone]
1) Pulse ▲▼ para seleccionar [Zoom digital -]. o ▶.
- Se visualiza la pantalla de ajuste del submenú 2.
3) Pulse ▲▼ para seleccionar un elemento.
standard]
Corrige el efecto keystone vertical y horizontalmente.
1) Seleccione [Standard], y pulse el botón .
- Se borra la información de la pantalla de menú y se visualiza [Keystone].
- Pulse ▲▼◀▶ para corregir.
[Corrección de esquinas]
Corrige la distorsión en las esquinas de la imagen.
1) Seleccione [Corrección de esquinas], y pulse el botón .
- Se visualiza la pantalla para seleccionar la esquina que se va a corregir.
2) Pulse el botón para seleccionar la esquina que se va a corregir.
3) Pulse ▲▼◀▶ para corregir la esquina.
Menú [Pantalla]
[■atrón de esquinas ]
Selecciona el modo de patrón de esquina visualizado durante la corrección de esquina.
1) Seleccione [Patrón de esquinas ], y pulse el botón .
- Se visualiza la pantalla de ajustes.
2) Pulse ▲▼ para seleccionar un elemento.
[Rojo] Muestra el patrón de esquina en rojo. [Blanco] Muestra el patrón de esquina en blanco. [Azul] Muestra el patrón de esquina en azul. [Off] Borra la visualización del patrón de esquina.
[■emorizado]
Almacena el estado de corrección.
1) Seleccione [Memorizado], y pulse el botón . .
[Memorizado] El estado de ajuste permanece en la memoria aun después de desconectar el cable de alimentación. [Reset] El estado de ajuste se restaura cuando se desconecte el cable de alimentación.
- Solo puede registrar uno de [Standard] y [Corrección de esquinas].
[Techo]
Establece el método de proyección en conformidad con el estado de instalación del proyector.
Si se visualiza la pantalla invertida, seleccione [On].
- Este ajuste se usa cuando el proyectar se instala usando el soporte de montaje en techo (accesorio opcional).
1) Pulse ▲▼ para seleccionar [Techo]. .
[Off] [On]
[Trasero]
Establece el método de proyección en conformidad con el estado de instalación del proyector.
Si se visualiza la pantalla volteada, seleccione [On].
1) Pulse ▲▼ para seleccionar [Trasero]. .
[Off] [On]
[Reset]
El ajuste regresa a su valor original antes de realizar cambios.
1) Pulse ▲▼ para seleccionar [Reset]. .
3) Seleccione [Sí], y pulse el botón .
El ajuste regresa a su valor original antes de realizar cambios.
Seleccione [No] y pulse el botón para regresar al submenú.
Menú [Ajuste]
Seleccione [Ajuste] del menú principal en la pantalla de menú y seleccione el elemento del submenú.
Para la operación de la pantalla de menú, consulte "Navegación a través del menú"
(→ página 38).
- Después de seleccionar el elemento, pulse ▲▼
◀▶ para realizar los ajustes.
Panel de controlMandc
[Idioma]
Cambia el idioma de visualización.
1) Pulse ▲▼ para seleccionar [Idioma]. o ▶.
- Se visualiza el submenú 2.
- Están disponibles diez idiomas (inglés, alemán, francés, italiano, español, portugués, ruso, chino, coreano y japonés).
3) Pulse ▲▼ para seleccionar un elemento.
[Posición de menú]
Ajusta la posición de visualización del menú en pantalla.
1) Pulse ▲▼ para seleccionar [Posición de menú]. .
Se visualizan las flechas en el submenú 2. Pulse ▲▼◀▶ para ajustar la posición.
En las posiciones de cambio máximo, las flechas desaparecen.
[Visualizar]
Ajusta la visualización del menú en pantalla.
1) Pulse ▲▼ para seleccionar [Visualizar]. .
[Off] Aparecen las siguientes visualizaciones de pantalla.● Visualización de menú● Visualización de [¿ Apagar ?] al apagar la alimentación● Visualización de temporizador usando el temporizador de presentación● Visualización de [Esperar...] en [Ajuste automático de PC]● Visualización de temporizador usando la administración de energía● Flechas visualizadas al seleccionar [Posición de menú] en [Ajuste]● Mensaje de error visualizado cuando se pulsa un botón que no se usa para los ajustes actuales.● △ flechas visualizadas cuando el tamaño de imagen es mayor que la resolución del panel (1 024 x 768 puntos)● Visualización de [Patrón de esquinas ] [Contador apagado] Hace que el proyector proyecte de inmediato después de que se enciende la lámpara sin mostrar el conteo regresivo por aproximadamente 20 segundos.● Seleccione cuando desee proyectar la imagen rápidamente y no es importante que la imagen proyectada esté un poco oscura. [On] Muestra todas las visualizaciones de pantalla.● Seleccione cuando desee proyectar la imagen después de que la pantalla de proyección ha alcanzado cierto nivel de brillo.
Menú [Ajuste]
[Fondo]
Selecciona la pantalla de fondo cuando no existe una señal de entrada.
1) Pulse ▲▼ para seleccionar [Fondo]. .
- ▲▼ se visualiza sobre el submenú 2.
3) Pulse ▲▼ para seleccionar un elemento.
- La configuración cambiará como sigue cada vez que pulse el botón.
[Selección de lámpara]
Selecciona la lámpara usada para la proyección.
1) Pulse ▲▼ para seleccionar [Selección de lámpara]. o ▶.
- Se visualiza el submenú 2.
3) Pulse ▲▼ para seleccionar.
- Pulse el botón ◀ para regresar al submenú.
[Lámparas]
Enciende cuatro lámparas.
1) Seleccione [4 Lámparas], y pulse el botón . .
- El ajuste finaliza y el proyector regresa a la pantalla del submenú 2.
- Seleccione [No] y pulse el botón para regresar al submenú 2.
[Lámparas]
Enciende dos lámparas.
1) Seleccione [2 Lámparas], y pulse el botón . .
El ajuste finaliza y el proyector regresa a la pantalla del submenú 2.
Seleccione [No] y pulse el botón para regresar al submenú 2.
[Auto] Detecta automáticamente la lámpara con el tiempo total más corto, y le da prioridad para encenderla. Enciende la lámpara 2 y lámpara 3. Enciende la lámpara 1 y lámpara 4.
Nota
Si la lámpara no enciende como resultado de un fallo o por haber alcanzado el fin de su vida útil, el indicador de lámpara en la parte delantera del cuerpo del proyector y el indicador de lámpara ( - ) en el cuerpo del proyector encima de la lámpara con fallos parpadearán. También aparecerá una marca X de acuerdo al estado de la lámpara en la parte superior de la pantalla.
Cuando seleccione [4 Lámparas] y falle una lámpara, las dos lámparas opuestas diagonalmente (sin incluir la lámpara con fallos) realizarán la proyección. Si falla una lámpara más, la proyección continuará con una lámpara.
Cuando seleccione [2 Lámparas] y falle una lámpara, las dos lámparas opuestas diagonalmente (sin incluir la lámpara con fallos) realizarán la proyección. Si falla una lámpara más, la proyección continuará con una lámpara.
Si todas las lámparas fallas, se apagará la alimentación. Si se enciende la alimentación sin reemplazar las lámparas después de que la duración exceda las 2 200 horas de uso para todas las lámparas, la alimentación se apaga automáticamente después de aproximadamente diez minutos para evitar que el proyector funcione incorrectamente.
[Alim. lámpara]
Ajusta el cambio de brillo de la lámpara.
Se recomienda usar el modo ecológico si desea reducir el consumo de energía.
1) Pulse ▲▼ para seleccionar [Alim. lámpara]. .
- La configuración cambiará como sigue cada vez que pulse el botón.
(Auto) Ajusta el brillo automáticamente usando un circuito de medición de luz. (Estándar) Opera en ciertos brillos. (Modo ecológico 1) La entrada/salida de aire disminuye en comparación con 2 , y el sonido del ventilador es menor. (Modo ecológico 2) La entrada/salida de aire incrementa en comparación con 1 el ventilador produce mayor ruido.
[Intervalo de lámpara]
Ajusta el ciclo de sustitución cuando ajuste [Selección de lámpara] en [2 Lámparas]. Después del ciclo de sustitución, la lámpara de uso se cambia automáticamente.
- El tiempo establecido es solo una guía.
1) Pulse ▲▼ para seleccionar [Intervalo de lámpara]. .
[Off] No cambia las lámparas. [24 H]/[200 H]/[500 H]/[1000 H]/[2000 H] Cambia las lámparas en los intervalos establecidos.● Cuando se alcance el tiempo establecido, el proyector enciende una lámpara, dándole prioridad a la lámpara con el tiempo de uso total más corto.
[Edge blending]
Hace que sea menos fácil ver la unión entre las pantallas cuando se usen múltiples pantallas.
1) Pulse ▲▼ para seleccionar [Edge blending]. . .
5) Pulse ▲▼ para seleccionar [On].
- Cuando no realice [Edge blending], seleccione [Off]. Los elementos diferentes a [Anterior] estarán en color gris y no se podrán seleccionar.
6) Pulse el botón .
- El borde del panel se visualiza en verde, y cambia a rojo cuando el valor de ajuste para el ancho de fusión de bordes es 1 o más grande.
Nota
Aun cuando se visualice la pantalla de ajuste [Edge blending], si pulsa el botón , el botón , el botón o el botón , se borra la información de la pantalla de ajustes y se le da prioridad a la función seleccionada. Al completar la función, el proyector regresa a la pantalla de ajustes.
La fusión entre las pantallas puede permanecer con ciertos tipos de imagen. Al reducir el valor de [Contraste] en el menú [Ajuste de imagen] puede hacer que la fusión parezca más natural.
ra ajustar el punto inicia de fusión y el ancho de fusión
1) Pulse ▲▼ para seleccionar la ubicación ([Empezar]/[Anchura] de [Izquierdo]/[Derecho]/[Arriba]/[Abajo]) que se va a corregir.
[Empezar] Ajusta la posición inicial de fusión.● El marco (verde) se mueve conforme cambia el valor numérico. [Anchura] Ajusta el ancho de fusión.● La línea roja se mueve conforme cambia el valor numérico.
2) Pulse el botón .
- Los valores numéricos también se pueden introducir usando los botones numéricos (<0>-<9>) del mando a distancia.
- Pulse el botón para finalizar el modo de edición.
4) Pulse el botón .
Nota
Valor ajustable [lzquierdo] y [Derecho]. 0 - 512
Valor ajustable [Arriba] y [Abajo]. 0 - 384
ra ajustar el nivel de negro
Ajusta el nivel de negro en la imagen.
1) Pulse ▲▼ para seleccionar [Nivel de negro]. .
[Todos] Cambia con R/G/B. [R]/[G]/[B] Ajusta cada color.● Valor de ajuste: ±127
Menú [Ajuste]
Para visualizar el patrón de prueba
1) Pulse ▲▼ para seleccionar [Carta de ajuste]. . para finalizar el modo de edición.
[Off] Borra la visualización del patrón de prueba. [On] Muestra el patrón de prueba.
Para no visualizar los menús
La pantalla de ajustes y las líneas se borran temporalmente.
1) Pulse ▲▼ para seleccionar [Apagar Menú]. .
Para restaurar un valor durante el ajuste
El ajuste regresa a su valor original antes de realizar cambios.
1) Pulse ▲▼ para seleccionar [Reset]. . . .
Para regresar al submenú.
Regresa el proyector al submenú.
1) Pulse ▲▼ para seleccionar [Anterior]. .
[Correspondencia de color]
Hace que sea menos fácil ver el color de un proyector diferente cuando se usen múltiples pantallas.
1) Pulse ▲▼ para seleccionar [Correspondencia de color].
2) Pulse el botón .
- Muestra la pantalla de ajuste [Correspondencia de color].
3) Pulse ▲▼ para seleccionar [Correspondencia de color].
4) Pulse el botón .
5) Pulse ▲▼ para seleccionar [On].
- Cuando no realice [Correspondencia de color], seleccione [Off]. Los elementos diferentes a [Correspondencia de color avanzado] estarán en color gris y no se podrán seleccionar.
6) Pulse el botón .
Para ajustar el color
1) Pulse ▲▼ para seleccionar el color que se va ajustar.
2) Pulse el botón .
3) Pulse ▲▼ para cambiar el valor, y pulse ◀▶ para moverse entre los dígitos.
Los valores numéricos también se pueden introducir usando los botones numéricos (<0>-<9>) del mando a distancia.
El valor numérico cambia de acuerdo al valor de [Temp. de color] en el menú [Ajuste de imagen].
Color x y [Rojo] 0.000 - 1.000 0.000 - 1.000 [Verde] 0.000 - 1.000 0.000 - 1.000 [Azul] 0.000 - 1.000 0.000 - 1.000 [Blanco] 0.000 - 1.000 0.000 - 1.000
Para visualizar el patrón de prueba
1) Pulse ▲▼ para seleccionar [Auto test pattern]. .
- Pulse el botón para finalizar el modo de edición.
[Off] Borra la visualización del patrón de prueba. [On] Muestra el patrón de prueba.
Para restaurar un valor durante el ajuste
El ajuste regresa a su valor original antes de realizar cambios.
El valor regresa al valor estándar almacenado en [Memorizado].
1) Pulse ▲▼ para seleccionar [Reset]. .
- Se visualiza una pantalla para confirmar si desea restaurar.
3) Seleccione [Sí], y pulse el botón . .
Para registrar el contenido ajustado que ha modificado
Registra los valores después del ajuste.
1) Pulse ▲▼ para seleccionar [Memorizado]. . .
Para regresar al submenú
Regresa el proyector al submenú.
1) Pulse ▲▼ para seleccionar [Anterior]. .
[Correspondencia de color avanzado]
Es posible realizar más ajustes avanzados que [Correspondencia de color].
1) Pulse ▲▼ para seleccionar [Correspondencia de color]. .
- Muestra la pantalla de ajuste [Correspondencia de color].
3) Pulse ▲▼ para seleccionar [Correspondencia de color avanzado]. .
- Muestra la pantalla de ajuste [Correspondencia de color avanzado].
5) Pulse ▲▼ para cambiar el ajuste.
[Off] Cuando no se encuentre en el modo [Carta de ajuste] o [Anterior], este elemento estará en color gris y no se podrá seleccionar. [On] Ajusta la coincidencia de color avanzada.
ra comprobar los ajustes
Muestra el estado de ajuste de [Ajuste de imagen].
1) Pulse ▲▼ para seleccionar [Medidas informacion]. .
Se puede salir de la información medida pulsando cualquier botón.
El elemento seleccionado se visualiza normal. Los otros elementos en color gris.
Para el elemento que se está ajustando, se visualiza [Adj.].
[Dinámico] [Standard] [Real/Cine]
Menú [Ajuste]
Para comprobar [Medidas]
Muestra los datos para R/G/B.
1) Pulse ▲▼ para seleccionar el color ([Rojo]/[Verde]/[Azul] en [Medidas]) que se va a medir. .
- Los valores numéricos también se pueden introducir usando los botones numéricos (<0>-<9>) del mando a distancia.
Color x y L [Rojo] 0.000 - 1.000 0.000 - 1.000 0.000 - 1.000 [Verde] 0.000 - 1.000 0.000 - 1.000 0.000 - 1.000 [Azul] 0.000 - 1.000 0.000 - 1.000 0.000 - 1.000
Para comprobar [Objetivo]
1) Pulse ▲▼ para seleccionar el color [Rojo]/[Verde]/[Azul]/[Cyan]/[Magenta]/[Amarillo]/[Blanco] en [Objetivo]) que se va a ajustar. .
Los valores numéricos también se pueden introducir usando los botones numéricos (<0>-<9>) del mando a distancia.
El valor numérico cambia de acuerdo al valor de [Temp. de color] en el menú [Ajuste de imagen].
Color x y g
[Rojo] 0.000 - 1.000 0.000 - 1.000 0.000 - 1.000
[Verde] 0.000 - 1.000 0.000 - 1.000 0.000 - 1.000
[Azul] 0.000 - 1.000 0.000 - 1.000 0.000 - 1.000
[Cyan] 0.000 - 1.000 0.000 - 1.000 0.000 - 1.000
Magenta] 0.000 - 1.000 0.000 - 1.000 0.000 - 1.000
Amarillo] 0.000 - 1.000 0.000 - 1.000 0.000 - 1.000
[Blanco] 0.000 - 1.000 0.000 - 1.000 0.000 - 1.000
Para visualizar el patrón de prueba
1) Pulse ▲▼ para seleccionar [Auto test pattern]. .
- Pulse el botón para finalizar el modo de edición.
[Off] Borra la visualización del patrón de prueba. [On] Muestra el patrón de prueba.
1) Pulse ▲▼ para seleccionar [Apagar Menú]. .
- Pulse cualquier botón para regresar a la pantalla de ajustes.
Para realizar el ajuste [Ajustes fábrica]
Cuando se restauren [Medidas] y [Objetivo] seleccionados actualmente, los valores se restauran a los ajustes predeterminados de fábrica.
1) Pulse ▲▼ para seleccionar [Ajustes fábrica]. .
- Se visualiza una pantalla para confirmar si desea restaurar el ajuste predeterminado.
3) Seleccione [Sí], y pulse el botón . .
Para restaurar un valor durante el ajuste
El ajuste regresa a su valor original antes de realizar cambios.
1) Pulse ▲▼ para seleccionar [Reset]. . .
Para registrar el contenido ajustado que ha modificado
Registra los valores después del ajuste.
1) Pulse ▲▼ para seleccionar [Memorizado]. . .
Para visualizar el patrón de prueba
1) Pulse ▲▼ para seleccionar [Carta de ajuste]. .
- Muestra la pantalla de selección de patrón de prueba.
3) Pulse ▲▼ para seleccionar el patrón de prueba que se va a visualizar, y pulse el botón .
Se borra la información de la pantalla de selección y se visualiza el patrón de prueba.
Pulse cualquier botón para regresar a la pantalla de ajustes.
Pulse ▲▼ para seleccionar [Anterior], y pulse el botón para regresar a la pantalla de ajustes de [Correspondencia de color avanzado].
[Medidas] [Rojo]/[Verde]/[Azul] [Objetivo] [Rojo]/[Verde]/[Azul]/[Cyan]/[Magenta]/[Amarillo]/[Blanco]
Fra regresar al submenú.
Regresa el proyector al submenú.
1) Pulse ▲▼ para seleccionar [Anterior]. .
[Config. HDMI]
Si no se puede visualizar correctamente la imagen cuando se conecta un dispositivo externo al proyector usando HDMI, cambie los ajustes.
1) Pulse ▲▼ para seleccionar [Config. HDMI].
2) Pulse el botón .
- ▲▼ se visualiza sobre el submenú.
3) Pulse ▲▼ para cambiar el ajuste.
[Normal] [Mejorado]
[Normal] Seleccione cuando la salida del dispositivo externo sea “NORMAL*1”. [Mejorado] Seleccione cuando la salida del dispositivo externo sea “MEJORADA*1”.
*1: Los títulos de los ajustes de salida difieren dependiendo del dispositivo. Para más detalles, consulte las instrucciones de operación del dispositivo externo.
[Logotipo]
Ajusta la selección del logo y el código PIN para la selección del logo.
1) Pulse ▲▼ para seleccionar [Logotipo]. .
- Se visualiza el submenú 2.
3) Pulse ▲▼ para cambiar el ajuste.
[elección logo]
1) Seleccione [Selección logo], y pulse el botón .
- La configuración cambiará como sigue cada vez que pulse el botón.
[Off] Borra el logotipo de la pantalla. [Usuario] Muestra la imagen capturada. [Por defecto] Se muestra en los ajustes predeterminados de fábrica.
[apturar]
Esta función le permite capturar una imagen proyectada para que pueda ser usada como pantalla de inicio o fondo.
1) Seleccione [Capturar], y pulse el botón .
- Se visualiza la pantalla de confirmación.
Menú [Ajuste]
2) Pulse ▲▼ para seleccionar [Sí].
- La imagen proyectada es capturada.
- Seleccionando [Usuario] en [Selecció logo], la imagen capturada se mostrará la próxima vez que se encienda el proyector.
Nota
La función de captura será cancelada al seleccionar [Si] en la pantalla [¿Salir?].
Antes de capturar una imagen, seleccione [Standard] en el menú [Selección de imagen] para capturar una imagen apta (→ página 47).
Al capturar una imagen que ha sido ajustado mediante la función keystone, los datos ajustados son reiniciados completamente y el proyector capturará una imagen sin la corrección keystone.
Cuando el [Bloqueo cóigo PIN logo] está en [On], no se podrá seleccionar [Capturar].
Al comenzar a capturar una nueva imagen, la imagen qua había sido guardada anteriormente se borrará, incluso si la captura es cancelada.
Si no hay ninguna imagen capturada, o la captura es interrumpida, el [Usuario] no puede ser seleccionado, solo se podrá elegir entre [Por defecto] y [Off].
[■oqueo código PIN logo]
Ajuste el sistema para realizar el ajuste y cambiar el "logo" solo por el administrador.
1) Seleccione [Bloqueo código PIN logo], y pulse el botón . .
- Si es aceptado el código PIN, el proyector regresa al submenú 2.
5) Pulse ▲▼ para cambiar el ajuste.
[Off] Se puede cambiar la selección del logotipo sin el código PIN. [On] Se requiere el código PIN para cambiar la selección del logo.
Nota
El código PIN se visualiza con un * en la pantalla.
El ajuste predeterminado de fábrica para el código PIN es "4321".
Para reingresar un número, pulse ◀▶ para seleccionar el dígito que va a reingresar, después use el ▲▼ o los botones numéricos (<0> - <9>) para volver a seleccionar el número.
Mueva el cursor hacia [Cancelar] y pulse el botón
para regresar al submenú 2.
- Si se visualizan [Código PIN logo] y el número en color rojo, ha ocurrido un error. Reingreso de número.
[■ambio código PIN logo]
Cambia el código PIN del logo.
1) Seleccione [Cambio código PIN logo], y pulse el botón .
4) Pulse el botón .
- Si es aceptado el código PIN, se visualiza el nuevo código PIN del logo en la pantalla.
5) Pulse ▲▼◀▶ o los botones numéricos (<0> - <9>) para establecer su nuevo código PIN.
6) Pulse el botón .
7) Seleccione [Sí], y pulse el botón .
- Si es aceptado el código PIN, el proyector regresa al submenú 2.
Nota
Para reingresar un número, pulse ◀▶ para seleccionar el dígito que va a reingresar, después use ▲▼ o los botones numéricos (<0> - <9>) para volver a seleccionar el número.
Mueva el cursor hacia [Cancelar] y pulse el botón para regresar al submenú 2.
[Control ventiladores]
El proyector controla la rotación del ventilador de forma automática. Puede hacer que la rotación del ventilador sea más intensa dependiendo de la temperatura ambiental o de dónde se haya realizado la instalación del proyector (por ejemplo, cuando se va a usar a una altitud elevada).
1) Pulse ▲▼ para seleccionar [Control ventiladores].
2) Pulse el botón .
- ▲▼ se visualiza sobre el submenú 2.
3) Pulse ▲▼ para cambiar el ajuste.
[Normal] Controla automáticamente la operación del ventilador. [Máx] Fuerza al ventilador para que trabaje a la máxima capacidad. Enseguida el sonido de rotación del ventilador será más intenso que con [Normal].
[Control remoto]
Permite el control simultáneo o individual con un solo mando a distancia cuando se usen múltiples proyectores conjuntamente.
1) Pulse ▲▼ para seleccionar [Control remoto].
2) Pulse el botón .
- ▲▼ se visualiza sobre el submenú.
3) Presione ▲▼ para seleccionar un elemento.
- El ajuste predeterminado de fábrica es [Todos].
[Todos] Hace que el proyector acepte la entrada desde el mando a distancia de cualquier número ID. [Código 01] - [Código 64] Establece números de ID entre 1 y 64.
4) Pulse el botón .
5) Seleccione [Sí], y pulse el botón .
- Cambiará [Control remoto].
- Regresa el proyector al submenú.
Nota
Cuando se cambia el número ID del proyector, el número ID del mando a distancia debe coincidir con el número ID del proyector.
Si un proyector está ajustado en [Todos] con múltiples proyectores en uso, el proyector no puede ser controlador por separado desde los proyectores con otros números ID.
[Sensor control remoto]
Habilita y deshabilita el sensor del mando a distancia en el cuerpo del proyector.
1) Pulse ▲▼ para seleccionar [Sensor control remoto]. .
- Se visualiza el submenú 2.
3) Pulse ▲▼ para cambiar el ajuste.
[Todos] Habilita los sensores de mando a distancia en tres lugares. [Frontal & Superior] Habilita solo el sensor del mando a distancia en la parte delantera y superior del cuerpo del proyector. [Superior & Trasero] Habilita solo los sensores del mando a distancia en la parte superior y trasera del cuerpo del proyector. [Frontal & Trasero] Habilita solo los sensores del mando a distancia en la parte delantera y trasera del cuerpo del proyector. [Frontal] Habilita solo el sensor del mando a distancia en la parte delantera del cuerpo del proyector. [Superior] Habilita solo el sensor del mando a distancia en la parte superior del cuerpo del proyector. [Trasero] Habilita solo el sensor del mando a distancia en la parte trasera del cuerpo del proyector.
Nota
- Si el proyector se instala en posición vertical en lugar del soporte de montaje en techo, la luz fluorescente podría afectar adversamente la operación del mando a distancia cuando esté habilitado el sensor de mando a distancia en la parte superior del cuerpo del proyector. Se recomienda que deshabilite el sensor del mando a distancia en la parte superior (seleccione cualquier opción de [Frontal&Trasero], [Frontal], [Trasero]) cuando el proyector esté instalado en posición vertical.
Menú [Ajuste]
[Modo bajo consumo]
1) Pulse ▲▼ para seleccionar [Modo bajo consumo]. .
- Se visualiza el submenú 2.
3) Pulse ▲▼ para cambiar el ajuste.
[Off] Cancela la función de administración de energía [Listo] Apaga las lámparas e inicia el enfriamiento cuando haya transcurrido el tiempo establecido usando [Contador de tiempo].Cuando la lámpara se esté enfriando, el indicador de modo en espera, y el indicador de alimentaciónparpadearán, no podrá operar el proyector.Cuando la lámpara se haya enfriado, el indicador de alimentacióncontinúa parpadeando y el indicador de modo en esperase enciende en lugar de parpadear, indicando que el proyector se encuentra ahora en el modo de administración de energía.A partir de este punto, si se ingresa una señal o si se realizan operaciones en el proyector, las lámparas se encenderán y dará inicio la proyección. [Desconectar] Apaga las lámparas e inicia el enfriamiento cuando haya transcurrido el tiempo establecido usando [Contador de tiempo].Duran el enfriamiento de la lámpara no podrá operar el proyector.Cuando se haya enfriado la lámpara, se apaga la alimentación. [Contador de tiempo] Establece el tiempo entre 1 y 30 minutos.
Nota
El ajuste predeterminado de fábrica es [Off].
La función de administración de energía no se puede usar cuando la función de congelación
Cuando haya iniciado la función de administración de energía, se restaura [Presentación temporizada].
[Conexión Directa]
Esta es una función para encender de forma automática la alimentación del proyector cuando se conecta el cable de alimentación, sin tener que realizar las operaciones en el botón de alimentación en el mando a distancia o el botón de alimentación en el panel de control.
1) Pulse ▲▼ para seleccionar [Conexión Directa]. .
● ▲▼ se visualiza sobre el submenú 2.
3) Pulse ▲▼ para cambiar el ajuste.
[Off] Habilita las operaciones normales de encendido/apagado de alimentación. [On] Permite que se pueda apagar directamente la alimentación.
Nota
Asegúrese de encender/apagar la alimentación usando las operaciones correctas.
Al pulsar el botón de alimentación en el mando a distancia o el botón de alimentación en el proyector no se encenderá la alimentación hasta que se haya enfriado la lámpara y las lámparas estén listas para encenderse nuevamente.
[Seguridad]
Bloquea las operaciones del proyector usando el bloqueo del botón y el código PIN.
1) Pulse ▲▼ para seleccionar [Seguridad].
2) Pulse el botón .
- Se visualiza el submenú 2.
3) Pulse ▲▼ para seleccionar un elemento.
[protección]
Bloquea los botones de control para evitar operaciones erróneas del proyector.
1) Seleccione [Protección], y pulse el botón .
- ▲▼ se visualiza sobre el submenú 2.
2) Pulse ▲▼ para cambiar el ajuste.
- La configuración cambiará como sigue cada vez que pulse el botón.
El bloqueo de teclas está desactivado. Bloquea las operaciones desde el panel de control. Bloquea las operaciones desde el mando a distancia.
3) Pulse el botón .
4) Seleccione [Sí], y pulse el botón .
Nota
El ajuste predeterminado de fábrica es desactivado.
Si no puede desbloquear, consulte a su distribuidor.
[■oqueo de código PIN]
Establece el código PIN para restringir las operaciones del proyector al administrador.
1) Seleccione [Bloqueo de código PIN], y pulse el botón . .
- Si es aceptado el código PIN, el proyector regresa al submenú 2.
5) Pulse ▲▼ para cambiar la configuración.
[Off] Permite la operación normal sin el código PIN. [On 1] El código PIN se requiere para encender la alimentación del proyector. [On 2] El código PIN será solicitado la próxima vez que encienda la alimentación después de haber desconectado el cable de alimentación.● Cuando se enciende/apaga la alimentación usando el botón del mando a distancia o el panel de control pero sin desconectar el cable de alimentación, el proyector opera normalmente sin solicitar el código PIN.
Nota
El código PIN se visualiza con un * en la pantalla.
El ajuste predeterminado de fábrica para el código PIN es "1234".
Para reingresar un número, pulse ◀▶ para seleccionar el dígito que va a reingresar, después use ▲▼ o los botones numéricos (<0> - <9>) para volver a seleccionar el número.
Mueva el cursor hacia [Cancelar] y pulse el botón para regresar al submenú 2.
Si se visualizan el “código PIN” y los números en color rojo, ha ocurrido un error. Reingreso de número.
Menú [Ajuste]
[■ambio de código PIN]
Cambia el código PIN del logo.
1) Seleccione [Cambio de código PIN], y pulse el botón . .
- Si es aceptado el código PIN, se visualiza el nuevo código PIN del logo en la pantalla.
5) Pulse ▲▼◀▶ o los botones numéricos (<0> - <9>) para establecer su nuevo código PIN. . .
- Si es aceptado el código PIN, el proyector regresa al submenú 2.
Nota
Para reingresar un número, pulse ◀▶ para seleccionar el dígito que va a reingresar, después pulse ▲▼ o los botones numéricos (<0> - <9>) para volver a seleccionar el número.
Mueva el cursor hacia [Cancelar] y pulse el botón para regresar al submenú 2.
[ID Proyector]
Establece el ID del proyector (1 a 64) para la comunicación serial de RS-232C.
1) Pulse ▲▼ para seleccionar [ID Proyector]. .
- El ajuste predeterminado de fábrica es [Todos].
[Todos] Hace que el proyector acepte operaciones sin importar el número ID especificado por el mando a distancia o PC. 1 - 64 Establece números de ID entre 1 y 64 para el proyector.
[Shutter]
Ajusta la función de obturador.
1) Pulse ▲▼ para seleccionar [Shutter]. .
- Se visualiza el submenú 2.
3) Pulse ▲▼ para seleccionar un elemento.
[protección]
Bloquea el botón para evitar las operaciones del obturador.
1) Seleccione [Protección], y pulse el botón .
● ▲▼ se visualiza sobre el submenú 2.
2) Pulse ▲▼ para seleccionar un elemento.
- La configuración cambiará como sigue cada vez que pulse el botón.
La protección está desactivada. La operación se puede realizar desde el mando a distancia y el proyector. Bloquea las operaciones desde el mando a distancia. Bloquea las operaciones desde el panel de control. Bloquea las operaciones desde el mando a distancia y del panel de control.
[fecto]
Ajusta efectos especiales cuando se abre y se cierra el obturador.
1) Seleccione [Efecto], y pulse el botón .
- ▲▼ se visualiza sobre el submenú 2.
2) Pulse ▲▼ para seleccionar un elemento.
[Off] [L 1] [L 2]
[Off] Desactiva el efecto especial. ● Ajuste predeterminado de fábrica [L 1] Ajusta el fundido de entrada y de salida cuando se abre y se cierra el obturador. [L 2] Ajusta un fundido de entrada y de salida más lento que L1.
[Botón liberación]
Ajusta el botón de liberación cuando se cierra el obturador.
1) Seleccione [Botón liberación], y pulse el botón .
- ▲▼ se visualiza sobre el submenú 2.
2) Pulse ▲▼ para seleccionar un elemento.
[Cualquier] [SHUTTER]
[Cualquier] La función del obturador se cancela pulsando cualquier botón excepto el botónen el mando a distancia, y se ejecuta la función del botón pulsado. [SHUTTER] Solo se puede cancelar el botónen el mando a distancia o en el panel de control.
Nota
- Si se enciende la alimentación nuevamente después de haberse apagado durante el ajuste o si se apaga la lámpara con el ajuste [Control], se cancela la función de obturador.
- Se habilita el ajuste del elemento seleccionado.
[ontrol]
Establece el tiempo entre el cierre del obturador y el momento en el que se apagan las lámparas.
1) Seleccione [Control], y pulse el botón .
● ▲▼ se visualiza sobre el submenú 2.
2) Pulse ▲▼ para seleccionar un elemento.
- Puede establecer el tiempo entre 5 y 480 minutos.
Manual del usuario LX1750
020-000638-01 Rev.1 (11-2013)
Nota
Cuando esté activa la función de administración, la lámpara se apaga y el proyector empezará la operación de enfriamiento.
Cuando haya finalizado el enfriamiento, la alimentación del proyector se apaga y se enciende el indicador de modo en espera .
El indicador de obturador empieza a parpadear en color azul conforme inicia la operación de enfriamiento.
El parpadeo continúa después de que haya finalizado el enfriamiento y se haya encendido el indicador de modo en espera .
El parpadeo se detiene cuando se enciende nuevamente el proyector.
La función de administración de energía no se activa cuando se bloquea la imagen mediante [Shutter].
El ajuste predeterminado de fábrica es "180 minutos".
No puede ajustar el tiempo cuando la función está desactivada.
[Control de demora de vídeo]
Ajuste la opción cuando desee acelerar el proceso digital de las imágenes que se están reproduciendo.
1) Pulse ▲▼ para seleccionar [Control de demora de vídeo]. .
Nota
La velocidad del proceso digital incrementa a través de [Baja], [Med.] y [Alta].
Cuando se haya seleccionado un elemento, los siguientes elementos estarán en color gris y no se podrán seleccionar.
[Baja] ● [Keystone] del menú [Pantalla] [Med.] ● [Progresivo] y [Reducción de ruido] del menú [Ajuste de imagen] [Alta] ● [Keystone] del menú [Pantalla]● [Progresivo] y [Reducción de ruido] del menú [Ajuste de imagen]
Menú [Ajuste]
[Closed caption]
Ajusta el color de los subtítulos y de las selecciones.
1) Pulse ▲▼ para seleccionar [Closed caption]. .
- Se visualiza el submenú 2.
3) Pulse ▲▼ para seleccionar un elemento.
[Closed caption] [Off], [CC1], [CC2], [CC3], [CC4] [Color] [Color]/[Blanco]● Se visualiza en los colores originales.
Nota
Esta función solo se puede usar cuando la señal de entrada es video compuesto o S-video.
Los subtítulos no se visualizan cuando se visualiza la pantalla de menú.
[Contador filtro]
1) Pulse ▲▼ para seleccionar [Contador filtro]. .
[ontador filtro]
Muestra el tiempo de uso.
- Esto se visualiza en color rojo si se detecta un bloqueo o si el tiempo de uso excede el tiempo establecido en [Indicador Contador filtro].
[■ontador de filtros restantes]
El tiempo restante para el contador del filtro se visualiza en unidades del 10%.
- Esto se visualiza en color rojo cuando el tiempo restante es del 10%.
Nota
- Cuando el tiempo restante disminuye al 10% o inferior, se visualiza 📋 y cuando alcanza 0%, se visualiza 🌐
[■pon de filtro]
Selecciona el tipo de filtro que se va a usar.
1) Seleccione [Tipon de filtro], y pulse el botón .
● ▲▼ se visualiza sobre el submenú 2.
2) Pulse ▲▼ para seleccionar un elemento.
[Normal] Cuando se usa un filtro normal [Special] Cuando se usa un filtro resistente al humo (opcional)
3) Pulse el botón . .
Atención
Siempre use el proyector con el filtro instalado.
Seleccione el tipo de filtro el cual tiene que ser igual al que está usando.
[■dicador Contador filtro]
Establece un tiempo para mostrar una notificación de que el filtro ha alcanzado el fin de su ciclo de sustitución.
1) Seleccione [Indicador Contador filtro], y pulse el botón . .
Nota
Cuando seleccione [Off], los bloqueos se detectan automáticamente.
Cuando se usa el filtro resistente al humo (opcional), el tiempo establecido se selecciona entre [Off], [10 H], [15 H] y [20 H].
Cuando se exceda el tiempo establecido, se visualiza 📋.
[Juste del contador de filtro]
Restaura el valor de [Contador filtro].
Después de sustituir el filtro, asegúrese de restaurar el contador.
1) Seleccione [Ajuste del contador de filtro], y pulse el botón .
- Se visualiza una pantalla para confirmar si desea restaurar.
2) Seleccione [Sí], y pulse el botón .
- Se visualiza la pantalla de confirmación.
3) Seleccione [Sí], y pulse el botón .
Nota
Se restaura solamente después de sustituir el filtro.
Cuando se restaura, desaparece la visualización de [Alerta filtro].
[Presentación temporizada]
1) Pulse ▲▼ para seleccionar [Presentación temporizada].
2) Pulse el botón .
- Se visualiza el submenú 2.
3) Pulse ▲▼ para seleccionar un elemento.
[ontar]
El tiempo transcurrido tiene un conteo de 00 min 00 seg. El tiempo transcurrido se visualiza desde 00 min 00 seg. hasta 180 min 00 seg.
[■uenta atrás]
El tiempo transcurrido se visualiza en cuenta regresiva a partir del tiempo establecido. Establezca el tiempo usando [Contador de tiempo].
[ontador de tiempo]
Establece el tiempo [Cuenta atrás].
1) Seleccione [Contador de tiempo], y pulse el botón .
● ▲▼ se visualiza sobre el submenú 2.
2) Pulse ▲▼ para seleccionar un elemento.
Nota
El ajuste predeterminado de fábrica es "10 minutos".
Cuando seleccione [Contar], este elemento estará en color gris y no se podrá seleccionar.
[mpezar]
Inicia el conteo ascendente o regresivo.
1) Seleccione [Empezar], y pulse el botón .
- Se borra la información de la pantalla de menú y se visualiza el temporizador.
nalizar]
Pausa el conteo ascendente o la cuenta regresiva.
1) Seleccione [Finalizar], y pulse el botón .
- El estado detenido del temporizador se visualiza por aproximadamente tres segundos, enseguida la visualización regresa a la pantalla de menú.
[■einiciar]
Reinicia el conteo ascendente o regresivo que se pausó usando [Finalizar].
1) Seleccione [Reiniciar], y pulse el botón .
- Se borra la información de la pantalla de menú y se visualiza el temporizador.
[□eset]
Restaura el tiempo del conteo durante la operación.
1) Seleccione [Reset], y pulse el botón .
- El conteo ascendente regresa a "000:00" y la cuenta regresiva regresa al tiempo establecido en el temporizador.
[alir]
Sale del temporizador de presentación durante la operación.
1) Seleccione [Salir], y pulse el botón .
- El temporizador finaliza y la visualización de pantalla regresa al submenú.
Nota
- También puede usar [Presentación temporizada] pulsando el botón en el mando a distancia.
Menú [Ajuste]
[Carta de ajuste]
1) Pulse ▲▼ para seleccionar [Carta de ajuste]. .
- Se visualiza el submenú 2.
3) Pulse ▲▼ para seleccionar un elemento. .
- Se visualizan el patrón de prueba y el nombre del patrón de prueba.
- Cuando visualice el nombre del patrón de prueba, pulse ▲▼ para moverse hacia atrás y hacia delante entre los patrones.
[Color] [Gradación 1], [Gradación 2], [Gradación 3], [Gradación 4] [Carta ajuste blanca] [Carta ajuste negra] [Carta ajuste convergencia]
Nota
Cuando se visualice el patrón de prueba, pulse el botón o el botón para regresar a la pantalla de menú.
Aun cuando se visualice el patrón de prueba, tendrán prioridad las funciones de zoom, enfoque, desplazamiento del objetivo, obturador y apagado.
Cuando hayan finalizado las operaciones de zoom, enfoque o desplazamiento de objetivo, el proyector regresar al patrón de prueba.
[Ajuste predeterminado]
Regresa los ajustes a excepción de los siguientes a los ajustes predeterminados de fábrica.
[Bloqueo código PIN logo] [Bloqueo de código PIN] [Contador filtro] (Todos los elementos) Logo registrado usando el “Logo Transfer Software” [######] (exceptuando AMX D.D.)
1) Pulse ▲▼ para seleccionar [Ajustes fábrica]. .
- Se visualiza una pantalla para confirmar si desea restaurar el ajuste predeterminado.
3) Seleccione [Sí], y pulse el botón .
- Se visualiza la pantalla de confirmación.
4) Seleccione [Sí], y pulse el botón .
Nota
- Cuando inicialice los ajustes, todos los ajustes que haya realizado se perderán, y los ajustes serán restaurados a los ajustes predeterminados de fábrica.
Seleccione [Informacion] en el menú principal en la pantalla de menú.
Para la operación de la pantalla de menú, consulte "Navegación a través del menú"
(→ página 38).
● Pulse ◀▶ para cambiar los elementos.
Panel de controlMandc
- También puede visualizar los submenús usando el botón en el mando a distancia.
Confirmación de ajustes y del estado de uso
Muestra el estado de las señales durante la proyección y los ajustes actuales.
[■ntrada]
Muestra el tipo de entradas y señales durante la proyección.
[■stema]
Muestra el estado de la señal de entrada durante la proyección.
[■ec. sinc-H]
Muestra la frecuencia de sincronización H.
[■ec. sinc-V]
Muestra la frecuencia de sincronización V.
[antalla]
Muestra el estado de ajuste de [Pantalla].
[■elección de lámpara]
Muestra el estado de ajuste [Selección de lámpara] actual.
[■im. lámpara]
Muestra el estado de ajuste [Alim. lámpara] actual.
[■tervalo de lámpara]
Muestra el valor de ajuste del ciclo de sustitución automático de la lámpara que está siendo usada.
[ampara 1]
Muestra el tiempo de uso y el estado de la lámpara 1.
[ámpara 2]
Muestra el tiempo de uso y el estado de la lámpara 2.
[ámpara 3]
Muestra el tiempo de uso y el estado de la lámpara 3.
[ámpara 4]
Muestra el tiempo de uso y el estado de la lámpara 4.
[■ioma]
Muestra el idioma actual.
[ontador filtro]
Muestra el tiempo de uso real del filtro.
[odo bajo consumo]
Muestra el estado de ajuste [Modo bajo consumo] actual.
[rotección]
Muestra el estado de ajuste [Protección] actual.
[Oqueo de código PIN]
Muestra el estado de ajuste [Bloqueo de código PIN] actual.
[ontrol de Shutter]
Muestra el estado de ajuste [Control de Shutter] actual.
[ontrol remoto]
Muestra el estado de ajuste [Control remoto] actual.
Numero de serie]
Muestra el número de serie del proyector.
Option control No.]
Para más detalles, consulte “Uso del módulo de entrada” (→ página 28).
Menú [Nombre proyector]
Seleccione [Nombre proyector] del menú principal en la pantalla de menú y seleccione el elemento del submenú.
Para la operación de la pantalla de menú, consulte "Navegación a través del menú"
(→ página 38).
- Después de seleccionar el elemento, pulse ◀▶
▲▼ para realizar los ajustes.
Panel de controlMandc
Enciende o apaga (on/off) los ajustes de red.
Ajustes de red
Ajuste el entorno de red.
digo PIN de la red
Configura la contraseña de la red.
Información acerca de la red
Muestra el estado de la red del proyector.
AIX D.D.
Permite que el proyector sea detectado por AMX Device Discovery.
Para más detalles acerca de AMX D.D., visite http://www.amx.com/.
Ajustes de fábrica para la red
Restaura los ajustes de red a los ajustes predeterminados de fábrica.
Acerca del estado de los indicadores
Si se enciende un indicador
Si ocurre un problema con el proyector, será notificado con el indicador de temperatura , el indicador de filtro , el indicador de obturador y el indicador de lámpara .
Verifique el estado de los indicadores y realice las acciones siguientes.
Atención
Asegúrese de seguir los procedimientos descritos en "Apagado del proyector" (→ página 32) para controlar la alimentación cuando se implementen las medidas.
Si se han encendido o si están parpadeando múltiples indicadores, verifique el estado de cada indicador y realice las acciones apropiadas.
Nota
- Verifique el estado de alimentación con el indicador de alimentación . 30
Acerca del estado de los indicadores
■ando funcione correctamente
El estado del indicador se visualizará con los siguientes símbolos.
▲: Apagado, ●: Encendido, ★: Parpadeando, ■: Encendido o Parpadeando
Indicador Estado del proyector Rojo Rojo Naranja Azul Naranja ▲ ▲ ▲ ▲ ▲ ▲ La clavija de alimentación ha sido desconectada de la toma de corriente. ▲ ● ▲*1 ■*1 ■*1 ■*1 El proyector está en el modo de espera.Se enciende al pulsar el botón de alimentaciónen el mando a distancia o el botón de alimentaciónen el panel de control. ● ▲ ▲*1 ■*1 ▲ ■*1 El proyector está funcionando normalmente. ▲ ★*2 ▲*1 ■*1 ■*1 ■*1 La lámpara se está enfriando.El proyector no se enciende al pulsar el botón de alimentaciónen el mando a distancia o el botón de alimentaciónen el panel de control hasta que el indicador de modo en esperacambie a encendido. ★*2 ● ▲*1 ■*1 ▲ ■*1 El proyector está en el modo de administración de energía.La lámpara se encenderá cuando controle el proyector, permitiendo que el usuario empiece la operación. ★*2 ★*2 ▲*1 ■*1 ▲ ■*1 El modo de administración de energía se activa y la lámpara se enfría. ● ▲ ▲*1 ■*1 ● ■*1 Se ha activado la función de obturador.Pulse cualquier botón en el mando a distancia o en el panel de control para cancelar la función. ▲ ● ▲ ■*1 ★*2 ■*1 El proyector está en el modo de administración de obturador.La lámpara se encenderá cuando controle el proyector, permitiendo que el usuario empiece la operación. ▲ ★*2 ▲ ■*1 ★*2 ■*1 El modo de administración de obturador se activa y la lámpara se enfría.
*1: El indicador cambia en función de distintas situaciones, independientemente del estado de otros indicadores.
Acerca del estado de los indicadores
■ando exista un problema con la temperatura interna
El estado del indicador se visualizará con los siguientes símbolos.
▲: Apagado, ●: Encendido, ★: Parpadeando, ■: Encendido o Parpadeando
Indicador Estado del proyector Verde Rojo Rojo Naranja Azul Naranja ● ▲ ★*1 ■*2 ■*2 ■*2 Si la temperatura en el interior del proyector es demasiado alta, el indicador de temperatura empezará a parpadear lentamente. ▲ ★*3 ★*4 ■*2 ■*2 ■*2 Si la temperatura interna del proyector incrementa aún más, el indicador de temperaturaparpadeará más rápido, el indicador de alimentaciónse apagará, y también se apagará el proyector automáticamente. El proyector no se encenderá nuevamente aun cuando se pulse el botón de alimentaciónen el mando a distancia o el botón de alimentaciónen el panel de control.Cuando el proyector regrese a la temperatura normal de operación, el indicador de modo en esperacambiará a activado. El proyector se volverá a encenderá al pulsar el botón de alimentaciónen el mando a distancia o el botón de alimentaciónen el panel de control. (El indicador de temperaturapermanecerá parpadeando.) Verifique el filtro de aire. ▲ ● ★*4 ■*2 ■*2 ■*2 El proyector se ha enfriado y ha regresado a la temperatura de operación. Al pulsar el botón de alimentaciónen el mando a distancia o el botón de alimentaciónen el panel de control el indicador de temperaturadejará de parpadear y se podrá operar el proyector. Verifique el filtro de aire.
*1: El indicador cambia en función de distintas situaciones, independientemente del estado de otros indicadores.
Acerca del estado de los indicadores
¿ando exista un problema con la alimentación interna
El estado del indicador se visualizará con los siguientes símbolos.
▲: Apagado, ●: Encendido, ★: Parpadeando, ■: Encendido o Parpadeando
Indicador Estado del proyector ★*1 ● ★*1 ★*1 ★*1 ★*1 Se ha detectado un problema en el interior del proyector.El proyector no se encenderá nuevamente aun cuando se pulse el botón de alimentaciónen el mando a distancia o el botón de alimentaciónen el panel de control. Desconecte la clavija de alimentación de la toma de corriente y conéctela nuevamente.Si se apaga la alimentación, o se enciende el indicador o parpadea nuevamente, desconecte la clavija de alimentación de la toma de corriente y póngase en contacto con su distribuidor para solicitar que inspeccione la unidad y las posibles reparaciones. No deje conectado el proyector con el indicador encendido o parpadeando. De lo contrario se puede provocar algún incendio o descargas eléctricas.
*1: El indicador cambia en función de distintas situaciones, independientemente del estado de otros indicadores.
■ando exista un problema con el filtro de aire
El estado del indicador se visualizará con los siguientes símbolos.
▲: Apagado, ●: Encendido, ★: Parpadeando, ■: Encendido o Parpadeando
Indicador Estado del proyector Rojo Rojo Naranja Azul Naranja [23HY] +1 *1 ● +1 *1 El indicador le notifica cuando ha transcurrido el tiempo establecido con “[Indicador Contador filtro]” (→ página 70). Reemplace el filtro de aire. (Simultáneamente se visualizará en la parte superior derecha de la pantalla). Alternativamente, el indicador le notifica cuando [Contador de filtros restantes] llegue a 0%. Reemplace el filtro de aire. (Simultáneamente se visualizará en la parte superior derecha de la pantalla.*2)
*1: El indicador cambia en función de distintas situaciones, independientemente del estado de otros indicadores.
Acerca del estado de los indicadores
■ando exista un problema con la lámpara
El estado del indicador se visualizará con los siguientes símbolos.
▲: Apagado, ●: Encendido, ★: Parpadeando, ■: Encendido o Parpadeando
Indicador Estado del proyector Verde Rojo Rojo Naranja Azul Naranja ■*1 ■*1 ■*1 ■*1 ■*1 ★*2 Alguna de las lámparas no enciende. (La lámpara se está enfriando. Después de que se haya encendido nuevamente el indicador de modo en espera, pulse el botón de alimentaciónen el mando a distancia o el botón de alimentaciónen el panel de control). ■*1 ■*1 ■*1 ■*1 ■*1 ★*3 Alguna de las lámparas no enciende. (La lámpara se ha enfriado y ha regresado a la temperatura de operación. Al pulsar el botón de alimentaciónen el mando a distancia o el botón de alimentaciónen el panel de control el indicador dejará de parpadear y se podrá operar el proyector). ■*1 ■*1 ■*1 ■*1 ■*1 ● Ha transcurrido el tiempo recomendado para reemplazar la lámpara.Se visualizará en la parte superior derecha de la pantalla para notificarle al usuario sobre el reemplazo. Reemplace la unidad de lámpara lo más pronto posible. Al reemplazar la lámpara se apagará el indicador de lámpara.
*1: El indicador cambia en función de distintas situaciones, independientemente del estado de otros indicadores.
Nota
- El estado de cada lámpara se puede verificar ya que se encenderán o parpadearán los indicadores de lámpara ( a ) en la parte superior del proyector. (→ página 83)
Acerca del estado de los indicadores
■ando exista un problema con el obturador
El estado del indicador se visualizará con los siguientes símbolos.
▲: Apagado, ●: Encendido, ★: Parpadeando, ■: Encendido o Parpadeando
Indicador Estado del proyector Rojo Rojo Naranja Azul Naranja [TSKT] [CBXA] [K30K] [70TZ] [Y00C] [8DK0] El obturador no se puede abrir o cerrar. La lámpara se apagará, el enfriamiento dará inicio y el proyector cambiará al modo en espera. La alimentación se encenderá y el proyector intentará abrir el obturador automáticamente hasta en tres ocasiones. Después de tres intentos fallidos, el proyector cambiará al modo en espera después de que se haya enfriado la lámpara. [2ZW0] [277Y] [40W0] Existe un problema al abrir o cerrar el obturador, y la lámpara se ha apagado y se está enfriando. [KASD] [TOYW] [A05Y] Existe un problema al abrir o cerrar el obturador, y el proyector cambiará al modo en espera después de que la lámpara se ha apagado y se ha enfriando.
*1: El indicador cambia en función de distintas situaciones, independientemente del estado de otros indicadores.
Nota
- El estado de cada lámpara se puede verificar ya que se encenderán o parpadearán los indicadores de lámpara ( a ) en la parte superior del proyector. (→ página 83)
Mantenimiento/sustitución
Antes de dar mantenimiento/sustituir la unidad
Cuando le de mantenimiento o sustituya la unidad, siempre apague la alimentación y desconecte la clavija del tomacorriente de la pared. (→ páginas 29, 32)
Cuando apague la alimentación, asegúrese de seguir los procedimientos descritos en “Apagado del proyector” (→ página 32).
Mantenimiento
Binete externo
Limpie la suciedad y el polvo con un paño suave y seco.
Si la suciedad es difícil de quitar, moje el paño con agua y exprímaco perfectamente antes de limpiar. Seque el proyector con un paño seco.
No utilice solventes tales como benceno, thinner, alcohol, limpiadores domésticos o paños que contenga químicos. Si usa este tipo de materiales se puede deteriorar el gabinete externo.
Superficie delantera de la lente
Limpie la suciedad y el polvo de la superficie delantera de la lenta con un paso suave, seco y limpio.
No utilice ningún paño que desprenda pelusa, polvo o que contenga aceite/agua.
No utilice fuerza excesiva cuando limpie la lente ya que ésta es frágil.
Atención
Las lentes están hechas de vidrio. Cualquier impacto o fuerza excesiva durante la limpieza podría dañar la superficie. Manipule con cuidado.
Nunca utilice solventes inflamables o atomizadores de aire sobre o cerca del proyector. La temperatura interna del proyector podría ser extremadamente alta debido a la operación de proyección de la lámpara. Podría ocurrir una explosión o un incendio incluso después de apagar el proyector. Además de la atomización de aire inflamable, las piezas internas podrían llegar a dañarse debido al aire frío.
Reemplazo de piezas
Fetro de aire
El filtro de reemplazo (003-004738-01 / Número de piezas de servicio: T1FTX0069--) es opcional. Para adquirir el producto, póngase en contacto con su distribuidor.
Remplazo del filtro de aire
- Utilice un desatornillador Phillips para girar los tornillos en el sentido contrario al de las manecillas del reloj hasta que giren libremente y después quite la unidad del filtro de aire.
Tornillo
Mantenimiento/sustitución
2) Quite el soporte.
- Afloje los tres tornillos del soporte (A, B), deslice el soporte en la dirección mostrada con la flecha como se muestra en la imagen, y levante para extraer el soporte.
3) Quite el filtro de aire.
- Enganche sus dedos en la ranura para levantarlo y quite el filtro de aire.
4) Coloque el nuevo filtro de aire.
Si inserta el nuevo filtro de aire deslizándolo lentamente se facilitará la colocación.
El lado que contiene la esponja debe estar en la parte superior. Si lo coloca con el lado equivocado orientado hacia arriba o forzándolo ocasionará que el aire se filtre. El filtro de aire no funcionará completamente y como resultado el polvo ingresará en el proyector.
5) Coloque el soporte.
Coloque el soporte (A, B) en la parte superior del filtro.
Deslice el soporte de tal modo que las flechas estén alineadas con las flechas de la unidad y coloque el soporte.
Apriete los tres tornillos del soporte.
6) Colocación de la unidad de filtro de aire en el proyector.
● Realice el paso 1) en el orden inverso.
7) Restaure el contador del filtro.
- Encienda la alimentación y realice [Ajuste del contador de filtro] en el menú [Ajuste].
Atención
Asegúrese de apagar la alimentación antes de reemplazar el filtro de aire.
Antes de instalar un nuevo filtro de aire, retire el material del embalaje del filtro.
Cuando coloque la unidad, asegúrese de que el proyector tiene estabilidad. Realice la sustitución en un lugar seguro donde el proyector no sea averiado incluso si deja caer la unidad de filtro de aire.
Cuando encienda el proyector, asegúrese de que la unidad de filtro de aire esté instalada antes de usar el proyector. De lo contrario se pueden producir daños.
Los filtros de aire no pueden ser reutilizados.
El filtro de aire y la unidad no se pueden lavar con agua. Asegúrese de no mojar el filtro de aire con agua o con otras sustancias. De lo contrario se puede dañar.
Después de reemplazar el filtro de aire, restaure el contador. De lo contrario, por razones de seguridad la alimentación del proyector podría apagarse.
Después de colocar la unidad de filtro de aire, asegúrese de apretar los tornillos. Si no, podría caerse la unidad de filtro de aire durante la proyección.
Uidad de lámpara
La unidad de lámpara es un componente consumible. Verifique la duración del uso de la lámpara con “Menú [Informacion]” (→ página 73) y realice la sustitución regular.
Si visualiza el mensaje de sustitución en la pantalla y se encienden los indicadores de lámpara a , sustituya las unidades de lámpara.
Se recomienda que solicite a un técnico cualificado que reemplace la lámpara. Póngase en contacto con su distribuidor.
Para adquirir la pieza 002-120599-01 (pieza que requiere servicio), póngase en contacto con su distribuidor.
Atención
- No cambie la unidad de lámpara hasta que se haya enfriado lo suficiente. (Espere por al menos 60 minutos después del uso).
El interior de la cubierta está muy caliente y puede producir quemaduras.
Notas sobre el reemplazo de la unidad de lámpara
Debido a que la lámpara luminosa está hecha de vidrio, podría estallar si se deja caer o si se golpea con un objeto duro. Manipule con cuidado.
Es necesario un desatornillador Phillips cuando requiera sustituir la unidad de lámpara.
Cuando sustituya la unidad de lámpara, asegúrese de sujetarla por la perilla.
La lámpara contiene mercurio. Cuando deseche la unidad de lámpara usada, pregunte a las autoridades locales más cercanas o a su distribuidor cuál es el método correcto de desecho de la unidad.
Atención
Utilice solamente unidades de lámpara especificadas.
Los números de producto de los accesorios y los componentes vendidos por separado están sujetos a cambio sin previo aviso.
Se recomienda que sustituya las cuatro lámparas simultáneamente para asegurarse de que el brillo y el tinte estén equilibrados.
Oando sustituya la unidad de lámpara
La unidad de lámpara es un componente consumible. Sustituya la unidad de lámpara regularmente, ya que el brillo disminuye gradualmente con el tiempo. La duración estimada antes de la sustitución es de 2 000 horas (cuando [Alim. lámpara] esté establecido en el valor estándar). Sin embargo, esto se puede acortar dependiendo de las características individuales de la lámpara, las condiciones de uso y le entorno de instalación. Por esta razón se recomienda la sustitución de las unidades de lámpara oportunamente. La duración excede 2 200 horas de uso para las dos lámparas, las lámparas cambiarán a las otras dos lámparas si están disponibles. Después de realizar el cambio, si la duración excede las 2 200 horas de uso para una de las dos lámparas y la lámpara falla, solo la otra lámpara se encenderá.
Si se enciende la alimentación sin reemplazar las lámparas después de que la duración exceda las 2 200 horas de uso para todas las lámparas, la alimentación se apaga automáticamente después de aproximadamente diez minutos para evitar que el proyector funcione incorrectamente.
Visualización en pantalla Indicador de lámpara Indicadores de lámparaa Las instrucciones de sustitución de la lámpara le notificarán el tiempo de sustitución y el estado de la lámpara le notificará cuál es la lámpara que debe sustituir. Se enciende en color naranja. Se enciende en naranja para notificarle qué lámpara debe sustituir.
Mantenimiento/sustitución
Sistución de la unidad de lámpara
Atención
Apague la lámpara UV antes de abrir la cubierta de la lámpara.
Cuando el proyector esté instalado en el techo, no coloque su rostro cerca de la unidad de lámpara.
Coloque firmemente la unidad de lámpara.
Si la unidad de la lámpara no se coloca correctamente, quítela y vuélvala a colocarla nuevamente. Forzar la unidad de lámpara podría romper el conector.
La superficie de vidrio podría estar caliente. Cuando sustituya la unidad de lámpara, asegúrese de sujetarla por la perilla.
1) Verifique cuál es la lámpara que debe sustituir visualizando en la pantalla el estado de la lámpara, o los indicadores de lámpara a .
Indicador de lámpara a
2) Después de haber seguido los procedimientos descritos en “Apagado del proyector” (→ página 32) y de haber pulsado el lado del interruptor de alimentación principal para apagar la alimentación, desconecte la clavija de alimentación de la toma de corriente y espere al menos 60 minutos, y enseguida verifique si la unidad de lámpara se ha enfriado.
- Abra la cubierta hasta que se encuentre a 90° del proyector.
Tornillo
4) Use un desatornillador Phillips para aflojar los tornillos de fijación de la unidad de lámpara (dos tornillos) hasta que los tornillos giren libremente, y sujetando las asas, extraiga lentamente la unidad de lámpara del proyector.
Tornillo
5) Inserte la nueva unidad de lámpara teniendo en cuenta su dirección y utilice un desatornillador Phillips para apretar firmemente los tornillos de fijación de la unidad de lámpara (dos tornillos).
- No manche la superficie de vidrio tocándola con su mano.
6) Cierre la cubierta de lámpara y utilice un desatornillador Phillips para apretar firmemente el tornillo de fijación de la cubierta de la lámpara.
Nota
Cuando sustituya la unidad de lámpara nueva (Núm. de producto: 002-120599-01), el proyector restaura el tiempo de uso total de la unidad de lámpara de forma automática.
Después de sustituir la unidad de lámpara, asegúrese de apretar el tornillo de fijación de la cubierta de la lámpara. Si no, podría caerse la unidad de lámpara durante la proyección.
APAGUE LA LÁMPARA UV ANTES DE ABRIR LA CUBIERTA DE LA LÁMPARA
Para evitar que los fragmentos de vidrio se dispersen, sujete la unidad de lámpara verticalmente cuando la sustituya. Cuando el proyector esté instalado en el techo, no trabaje directamente debajo de la cubierta de la lámpara ni coloque su rostro cerca de la misma. Quite la cubierta de la lámpara lentamente.
Núm. de lámpara: 002-120599-01
Solución de problemas
Revise los siguientes puntos. Para más detalles, consulte las páginas correspondientes.
Problema Puntos que se deben verificar página La alimentación no enciende. ● ¿Está insertada firmemente la clavija de alimentación en la toma de corriente?● ¿Se ha colocado el interruptor de alimentación principal en?● ¿Existe suministro de alimentación en la toma de corriente? —● ¿Se han activado los cortacorriente de circuito? —● ¿Se ha apagado el indicador de alimentación? 30● ¿Está parpadeando el indicador de temperatura? 75 —32 No aparecen imágenes. ● ¿Está conectado correctamente el dispositivo de imágenes (salida)? 24● ¿Se ha seleccionado correctamente la entrada? 35● ¿Está funcionando correctamente el dispositivo externo que está conectado en el proyector?● ¿Se ha usado el proyector dentro del rango de temperatura de operación (5°C (41°F) a 40°C (104°F))?● ¿Está cerrado el obturador? 35 —101 La imagen está borrosa. ● ¿Está ajustado correctamente el enfoque de la lente? 34● ¿Es apropiada la distancia de proyección? 104● ¿Está sucia la lente? 81● ¿Se ha instalado el proyector de forma perpendicular a la pantalla? —● ¿Existe condensación en la lente? — El color es opaco/el Tinte es grisáceo. ● ¿Se han ajustado correctamente [Color] y [Tinte]?● ¿Se ha ajustado correctamente el dispositivo que está conectado en el proyector?● ¿Está averiado el cable RGB? 48—— La imagen está oscura. ● ¿Se han ajustado correctamente [Contraste] y [Brillo]?● ¿Se ha ajustado correctamente [Selección de imagen]?● ¿Se ha ajustado [Selección de lámpara] en [2 Lámparas]?● ¿Se ha ajustado [Alim. lámpara] en el modo ecológico?● ¿Es tiempo de sustituir la lámpara? 4847585883 El mando a distancia no funciona. ● ¿Se han agotado las baterías?● ¿Se han insertado las baterías en la dirección correcta?● ¿Se ha ajustado el interruptor del mando a distancia/en?● ¿Existen obstrucciones entre el mando a distancia y el sensor del mando a distancia del proyector?● ¿Se está excediendo el rango de operación efectivo del mando a distancia?● ¿Existen otras formas de luz, tales como las luces fluorescentes, que afectan la proyección?● ¿Está conectado el cable del mando a distancia en el proyector o en el mando a distancia?● ¿Está bloqueada la operación del mando a distancia con [Protección] en el menú [Ajuste]?● ¿Se ha ajustado correctamente [Sensor control remoto] en el menú [Ajuste]?● ¿Se ha cambiado el número del mando a distancia? —211717171721676521, 65
Solución de problemas
Problema Puntos que se deben verificar página Los botones de control del proyector no funcionan. ¿Está bloqueada la operación del proyector con [Protección] en el menú [Ajuste]? 67 No se visualiza la imagen correcta. ¿Se ha seleccionado correctamente [Entrada]? 42¿Se ha ajustado correctamente [Ajuste de imagen]? 48¿Se ha seleccionado correctamente [Pantalla]? 53¿Se encuentra en su máxima posición el desplazamiento del objetivo? 33¿Existe algún problema con la cinta de video o con otras fuentes de video?¿Está recibiendo el proyector señales incompatibles? 97 — No se visualiza la imagen del ordenador. ¿Está demasiado largo el cable? (Utilice un cable que sea de 10 m de longitud o menos).¿Se ha seleccionado correctamente [Entrada]? 42¿Se ha ajustado correctamente [Ajuste de PC]? 44¿Se ha ajustado correctamente la salida de video externa del ordenador portátil? (Ejemplo: Los ajustes de salida externa podrían cambiar pulsando las teclas Fn + F3 o Fn + F10. Consulte el manual de usuario proporcionado con su ordenador, ya que el método difiere dependiendo del tipo de ordenador). — [Ajuste automático de PC] no funciona. ¿Está recibiendo el proyector señales incompatibles? 97¿Se ha seleccionado una señal incompatible con [Sistema]? 43 No hay imágenes de dispositivos compatibles HDMI, o la imagen está distorsionada. ¿Está conectado firmemente el cable HDMI? 24, 25Apague/encienda la alimentación del proyector y los dispositivos conectados¿Se ha conectado una señal incompatible? 99 — La alimentación se apaga por sí misma. ¿Se ha ajustado [Desconectar] con [Modo bajo consumo] en el menú [Ajuste]?¿Se ha usado el proyector sin sustituir el filtro de aire o al realizar [Ajuste del contador de filtro] después de visualizar en la parte superior derecha de la pantalla? 6671 La función de obturador no funciona. ¿Se ha ajustado correctamente [Protección] en [Shutter] el menú [Ajuste]? 68
Atención
Si persisten los problemas incluso después de verificar los puntos anteriores, consulte a su distribuidor.
Consulte a su distribuidor si ha olvidado la contraseña del logotipo o la contraseña.
Ajuste de pantallas de las imágenes de pantalla múltiple
[Edge blending] y [Correspondencia de color] permite que las imágenes de múltiples proyectores estén superpuestas sin ningún problema.
[edge blending]
1) Verifique que los ajustes de [Pantalla] y [Ajuste de imagen] de cada proyector sean los mismos.
2) Proyecte las imágenes de cada proyector que desea superponer.
- A continuación se muestra un ejemplo la forma en la cual puede superponer las imágenes del proyector A y B.
Proyector A Proyector B
3) Seleccione [Edge blending] en el menú [Ajuste] y visualice la pantalla de ajustes.
4) Seleccione [Edge blending] para activarlo [On], y después pulse [Empezar] y [Anchura] para ajustar la posición de superposición y la cantidad que se va a superponer (anchura de combinación) de las imágenes de los proyectores A y B respectivamente.
Los siguientes valores son un ejemplo.
Ajuste [Anchura] en el mismo valor para todos los proyectores que se van a superponer.
Proyector A: Ajuste [Derecho] en [Anchura] hasta 100
Proyector B: Ajuste [Izquierdo] en [Anchura] hasta 100
5) Cuando se requiera, ajuste [Enfocar] y [Zoom] para la posición de imagen de cada proyector.
6) Enseguida use [Lens shift] para superponer las áreas sombreadas.
- La línea roja cambiará a color amarillo si se superpone correctamente.
7) Ajuste [Carta de ajuste] en [On] para visualizar un patrón de prueba de blancos del 50%.
- Las áreas superpuestas serán visualizadas de forma más brillante que otras áreas.
8) Ajuste [Nivel de negro] de tal modo que no exista diferencia entre las áreas superpuestas y el resto de las áreas.
- Para ajustar las áreas superpuestas, se recomienda realizar el ajuste del valor [Contraste] en el menú [Ajuste de imagen].
Si los colores del lado izquierdo y derecho no coinciden, proceda con el siguiente paso.
[Correspondencia de color]
9) Seleccione [Correspondencia de color] en el menú [Ajuste] y visualice la pantalla de ajustes.
10) Haga que coincida el color con [On] y ajuste [Rojo]/[Verde]/[Azul]/[Blanco].
11) Seleccione [Correspondencia de color avanzado] si se requieren ajustes más detallados, y visualice la pantalla de ajustes.
12) Haga que coincida el color avanzado con [On] y ajuste cada color con [Objetivo].
- Ajuste el valor de [Objetivo] de tal modo que se encuentre dentro del rango del valor [Medidas].
Ejemplo) Valor para “[Rojo], x”
"[Medidas]=0,674", de tal modo que [Objetivo] esté ajustado en el valor más pequeño de "0,650".
13) Si los colores no coinciden aun después de ajustar [Objetivo], utilice un colorímetro para medir las coordenadas de cromaticidad y la luminancia y así realizar ajustes más precisos.
- Ajuste de colores con un colorímetro
1) Ajuste [Correspondencia de color avanzado] en [On]. .
- Muestra la pantalla de selección de patrón de prueba.
3) Seleccione [Rojo] (o [Verde], [Azul]) de [Medidas] y pulse el botón .
- Se visualiza el patrón de prueba.
4) Mida las coordenadas de cromaticidad (x, y) y de luminancia (Lx) usando el colorímetro. .
- Regrese a la pantalla de ajuste avanzado de coincidencia de color.
6) Ingrese el valor obtenido en el paso 4).
Ejemplo) Calculo de "L" para el valor de rojo medido.
Luminancia (Lx) de rojo
Luminancia de rojo + luminancia de verde + luminancia de azul (Lx)
8) Ajuste nuevamente el valor de [Objetivo].
- Cuando sea requerido, ajuste otros proyectores del mismo modo.
Etiqueta de notificación de registro de contraseña
Aplique la etiqueta suministrada en el proyector en un lugar visible cuando la contraseña esté registrada y sea válida.
Terminal serial
Los terminales de conexión / del proyector se encuentran en conformidad con RS-232C de tal modo que el proyector se pueda conectar y controlar desde un ordenador.
nexión
Alignaciones de pines y nombres de señal
D-Sub 9-pines (macho) Vista externa No. de Pin Nombre de señal Detalles (1) — NC (2) RXD Datos recibidos (3) TXD Datos transmitidos (4) — NC (5) GND Tierra (6) — NC (7) — (8) — (9) —
Interfaz de control serial
Este proyector cuenta con una función para controlar y monitorear las operaciones del proyector usando el puerto serial RS-232C.
Operación
1) Conecte un cable serial cruzado RS-232C al SERIAL PORT IN del proyector y al puerto serial del PC (→ página 24).
Tasa de baudios : 9600 / 19200 bps
Control de flujo : none
Control de paridad : ninguno
Bit de datos : 8
Bit de parada : 1
3) Introduzca un comando de ejecución de una función y pulse la tecla Enter.
Ejemplo) Para seleccionar el puerto INPUT 2, introduzca "C06" [CR].
Nota
La tasa de baudios por defecto se ajusta a 19200 bps. Si ocurre un error en la comunicación, cambie el puerto serial y la velocidad de la comunicación (tasa de baudios).
Ingrese caracteres en mayúscula ASCII de 64 bytes y caracteres de 1 byte.
■mandos de ejecución de funciones
El comando se envía desde el PC al proyector con el formato indicado a continuación;
"C" [Comando] [CR]
Comando: dos caracteres (consulte la tabla de comandos a continuación.)
El proyector decodifica el comando y devuelve el "ACK" con el formato indicado a continuación; [ACK] [CR]
Cuando el proyector no puede decodificar el comando, éste vuelve con el formato indicado a continuación; "?" [CR]
Comando Función Comando Función C00 Enciende el proyector C3D Puntero hacia abajo C01 Apaga el proyector (inmediatamente apagado) C3F Enter C05 Selecciona Entrada 1 C46 BAJAR Zoom C06 Selecciona Entrada 2 C47 AUMENTAR Zoom C07 Selecciona Entrada 3 C4A BAJAR enfoque C08 Selecciona Entrada 4 C4B SUBIR enfoque C0D Apagado de vídeo activado C5D Desplazamiento de la lente ARRIBA C0E Apagado de vídeo desactivado C5E Desplazamiento de la lente ABAJO C0F Tamaño normal de la pantalla C5F Desplazamiento de la lente IZQUIERDA C10 Tamaño completo de la pantalla C60 Desplazamiento de la lente DERECHA C1C Menú activado C89 Ajuste automático de PC C1D Menú desactivado C8E Keystone ARRIBA C3A Puntero a la derecha C8F Keystone ABAJO C3B Puntero a la izquierda C90 Keystone DERECHA C3C Puntero hacia arriba C91 Keystone IZQUIERDA
■mando de lectura de estado
El comando se envía desde el PC al proyector con el formato indicado a continuación;
"CR" [Comando] [CR]
Comando: un carácter (consulte la tabla de comandos a continuación.)
El proyector decodifica el comando y devuelve la 'Cadena de caracteres' con el formato indicado a continuación;
Comando Función Valor de retorno Estado del proyector CR0 Lectura de estado 00 Conexión de la alimentación 80 Modo de espera 40 Cuenta regresiva 20 Enfriamiento 10 Mal funcionamiento de la alimentación 28 Enfriamiento con anomalía de temperatura 24 Enfriamiento en el modo de bajo consumo 04 Modo de administración de alimentación después de enfriamiento 21 Enfriamiento después de apagado el proyector cuando las lámparas tan agotadas. 81 Modo de espera después del enfriamiento cuando las lámparas están agotadas. 88 Modo de espera después del enfriamiento cuando hay anomalías en la temperatura. 2C Enfriándose cuando se apaga el proyector mediante la función Control de Shutter. 8C En modo de espera después de enfriarse mediante la función Control de Shutter. CR6 Lectura de temperatura %1 %2 %1 = Temperatura en el Sensor 1 (°C)%2 = Temperatura en el Sensor 2 (°C)(ex.) %1 = 12.3 (°C), %2 = 23.4 (°C)→ El proyector indica “ 12.3 23.4”.( Para cada sensor, se exhiben dos dígitos y los números de décimo lugar con un espacio entre cada temperatura.) ? Falla de la comunicación
Las tablas en la página 93 exhibe la lista de comandos típicos para controlar el proyector. Por favor consulte a su concesionario local para obtener más información de otros comandos.
Otros terminales
Alignaciones de pin y nombres de señal de terminal
Vista externa No. de Pin Nombre de señal (1) GND (señal de luminancia) (2) GND (señal de color) (3) Señal de luminancia (4) Señal de color
■ignaciones de pin y nombres de señal del terminal
Vista externa No. de Pin Nombre de señal (1) R (2) G (3) B (9) +5 V (12) Datos DDC (13) HD/SYNC (14) VD (15) Reloj DDC
(4) no se usa.
Alignaciones de pin y nombres de señal del terminal
Vista externaPines de números impares entre (1) y (19) No. de Pin Nombre de señal No. de Pin Nombre de señal (1) Datos T.M.D.S 2 + (11) Reloj T.M.D.S protección (2) T.M.D.S data 2 protección (12) Reloj T.M.D.S - (3) T.M.D.S data 2 - (13) CEC (4) Datos T.M.D.S 1 + (14) — (5) Datos T.M.D.S 1 protección (15) SCL (6) Datos T.M.D.S 1 - (16) SDA (7) Datos T.M.D.S 0 + (17) DDC/CEC GND (8) Datos T.M.D.S 0 protección (18) +5 V (9) Datos T.M.D.S 0 - (19) Detección de conexión en caliente (10) Reloj T.M.D.S +
■ignaciones de pin y nombres de señal del terminal
Vista externa No. de Pin Nombre de señal No. de Pin Nombre de señal (1) Datos T.M.D.S 2 - (13) - (2) Datos T.M.D.S 2 + (14) +5 V (3) Datos T.M.D.S 2/4 protección (15) GND (4) -(16) Detección de conexión en caliente (5) -(17) Datos T.M.D.S 0 - (6) Reloj DDC (18) Datos T.M.D.S 0 + (7) Datos DDC (19) Datos T.M.D.S 0/5 protección (8) -(20) - (9) Datos T.M.D.S 1 - (21) - (10) Datos T.M.D.S 1 + (22) Campo de reloj protección (11) Datos T.M.D.S 1/3 protección (23) Reloj T.M.D.S + (12) - (24) Reloj T.M.D.S -
Lista de señales compatibles
La siguiente tabla especifica los tipos de señales compatibles con el proyector.
¿ando la señal es analógica
Modo de visualización en pantalla (puntos) Horizontal (kHz) Vertical (Hz) de puntos (MHz) Frecuencia de barrido Frecuencia de reloj VGA 1 640 x 480 31,470 59,880 25,149 VGA 2 720 x 400 31,470 70,090 28,322 VGA 3 640 x 400 31,470 70,090 25,175 VGA 4 640 x 480 37,860 74,380 31,500 VGA 5 640 x 480 37,860 72,810 31,500 VGA 6 640 x 480 37,500 75,000 31,500 VGA 7 640 x 480 43,269 85,000 36,000 MAC LC13 640 x 480 34,970 66,600 31,330 MAC 13 640 x 480 35,000 66,670 30,240 480p 640 x 480 31,470 59,880 25,200 576p 768 x 576 31,250 50,000 29,500 576i 768 x 576i 15,625 50,000 14,750 480i 640 x 480i 15,734 60,000 12,273 SVGA 1 800 x 600 35,156 56,250 36,000 SVGA 2 800 x 600 37,880 60,320 40,000 SVGA 3 800 x 600 46,875 75,000 49,500 SVGA 4 800 x 600 53,674 85,060 56,250 SVGA 5 800 x 600 48,080 72,190 50,000 SVGA 6 800 x 600 37,900 61,030 40,020 SVGA 7 800 x 600 34,500 55,380 36,432 SVGA 8 800 x 600 38,000 60,510 40,128 SVGA 9 800 x 600 38,600 60,310 38,600 SVGA 10 800 x 600 32,700 51,090 32,700 SVGA 11 800 x 600 38,000 60,510 40,128 MAC 16 832 x 624 49,720 74,550 57,283 XGA 1 1 024 x 768 48,360 60,000 65,000 XGA 2 1 024 x 768 68,677 84,997 94,504 XGA 3 1 024 x 768 60,023 75,030 78,750 XGA 4 1 024 x 768 56,476 70,070 75,000 XGA 5 1 024 x 768 60,310 74,920 79,252 XGA 6 1 024 x 768 48,500 60,020 65,179 XGA 7 1 024 x 768 44,000 54,580 59,129 XGA 8 1 024 x 768 63,480 79,350 83,410 XGA 9 1 024 x 768i 36,000 87,170 47,300 XGA 10 1 024 x 768 62,040 77,070 84,375 XGA 11 1 024 x 768 61,000 75,700 81,000 XGA 12 1 024 x 768i 35,522 86,960 44,900 XGA 13 1 024 x 768 46,900 58,200 63,030 XGA 14 1 024 x 768 47,000 58,300 61,664 XGA 15 1 024 x 768 58,030 72,000 74,745 MAC 19 1 024 x 768 60,240 75,080 80,010 SXGA 1 1 152 x 864 64,200 70,400 94,560 SXGA 2 1 280 x 1 024 62,500 58,600 SXGA 3 1 280 x 1 024 63,900 60,000 SXGA 4 1 280 x 1 024 63,340 59,980 SXGA 5 1 280 x 1 024 63,740 60,010 SXGA 6 1 280 x 1 024 71,690 67,190 SXGA 7 1 280 x 1 024 81,130 76,107 SXGA 8 1 280 x 1 024 63,980 60,020 SXGA 9 1 280 x 1 024 79,976 75,025 SXGA 10 1 280 x 960 60,000 60,000 SXGA 11 1 152 x 900 61,200 65,200 92,000 SXGA 12 1 152 x 900 71,400 75,600 SXGA 13 1 280 x 1 024i 50,000 86,000 80,000 SXGA 14 1 280 x 1 024i 50,000 94,000 80,000
Información técnica
Modo de visualización en pantalla (puntos) Resolución Horizontal (kHz) Frecuencia de barrido Frecuencia de reloj al (Hz) de puntos (MHz) SXGA 15 1 280 x 1 024 63,370 60,010 111,520 SXGA 16 1 280 x 1 024 76,970 72,000 130,080 SXGA 17 1 152 x 900 61,850 66,000 94,500 SXGA 18 1 280 x 1 024i 46,430 86,700 78,745 SXGA 19 1 280 x 1 024 63,790 60,180 108,190 SXGA 20 1 280 x 1 024 91,146 85,024 157,500 SXGA+ 1 1 400 x 1 050 63,970 60,190 107,990 SXGA+ 2 1 400 x 1 050 65,350 60,120 122,850 SXGA+ 3 1 400 x 1 050 65,120 59,900 122,430 SXGA+ 4 1 400 x 1 050 64,030 60,010 108,160 SXGA+ 5 1 400 x 1 050 62,500 58,600 108,000 SXGA+ 6 1 400 x 1 050 64,744 59,948 101,000 SXGA+ 7 1 400 x 1 050 65,317 59,978 121,750 MAC 21 1 152 x 870 68,680 75,060 100,000 MAC 1 280 x 960 75,000 75,080 126,000 MAC 1 280 x 1 024 80,000 75,080 135,200 WXGA 1 1 366 x 768 48,360 60,000 86,670 WXGA 2 1 360 x 768 47,700 60,000 86,670 WXGA 3 1 376 x 768 48,360 60,000 86,670 WXGA 4 1 360 x 768 56,160 72,000 100,190 WXGA 6 1 280 x 768 47,776 59,870 79,500 WXGA 7 1 280 x 768 60,289 74,893 102,250 WXGA 8 1 280 x 768 68,633 84,837 WXGA 9 1 280 x 800 49,600 60,050 79,360 WXGA 10 1 280 x 800 41,200 50,000 WXGA 11 1 280 x 800 49,702 59,810 WXGA 12 1 280 x 800 63,980 60,020 108,000 WXGA 17 1 280 x 800 58,289 69,975 98,858 WXGA 18 1 280 x 800 60,044 71,995 WXGA 19 1 280 x 800 62,790 74,928 WXGA 20 1 280 x 800 71,553 84,879 WXGA 21 1 280 x 800 55,993 69,991 94,964 WXGA 22 1 280 x 800 57,675 72,004 97,817 WUXGA 12 1 920 x 1 200 74,556 59,885 193,250 WUXGA 2 1 920 x 1 200 74,038 59,950 154,000 WSXGA+ 1 1 680 x 1 050 65,290 59,954 146,250 WXGA+ 1 1 440 x 900 55,935 59,887 106,500 WXGA+ 2 1 440 x 900 74,918 60,000 161,850 UXGA 1 1 600 x 1 200 75,000 60,000 162,000 UXGA 22 1 600 x 1 200 81,250 65,000 175,500 UXGA 32 1 600 x 1 200 87,500 70,000 189,000 UXGA 42 1 600 x 1 200 93,750 75,000 202,500 UXGA 52 1 600 x 1 200 106,250 85,000 229,500 720p 1 280 x 720 45,000 60,000 74,250 720p 1 280 x 720 37,500 50,000 74,250 1035i 1 920 x 1 035i 33,750 60,000 74,250 1080i 1 920 x 1 080i 33,750 60,000 74,250 1 920 x 1 080i 28,125 50,000 74,250 1080p 1 920 x 1 080 33,750 30,000 74,250 1 920 x 1 080 28,125 25,000 74,250 1 920 x 1 080 27,000 24,000 74,250 1 920 x 1 080 67,500 60,000 148,500 1 920 x 1 080 56,250 50,000 148,500 1080psf/30 1 920 x 1 080 33,750 60,000 74,250 1080psf/25 1 920 x 1 080 28,125 50,000 74,250 1080psf/24 1 920 x 1 080 27,000 48,000 74,250
*1: La "i" después de la resolución indica una señal entrelazada.
■ando la señal es digital
Modo de visualización en pantalla (puntos) Resolución*1 Horizontal (kHz) Vertical Frecuencia de barrido Frecuencia de reloj (Hz) de puntos (MHz) D-VGA 640 x 480 31,470 59,940 25,175 D-480i*2 720 (1 440) x 480 15,734 59,940 27,000 D-576i*2 720 (1 440) x 576 15,625 50,000 27,000 D-480p 720 x 480 31,470 60,000 27,000 D-576p 768 x 576 31,250 50,000 27,000 D-SVGA 800 x 600 37,879 60,320 40,000 D-XGA 1 024 x 768 43,363 60,000 65,000 D-WXGA 1 1 366 x 768 48,360 60,000 86,670 D-WXGA 2 1 360 x 768 47,700 60,000 86,670 D-WXGA 3 1 376 x 768 48,360 60,000 86,670 D-WXGA 4 1 360 x 768 56,160 72,000 100,190 D-WXGA 5 1 366 x 768 46,500 50,000 67,400 D-WXGA 6 1 280 x 768 47,776 59,870 79,500 D-WXGA 7 1 280 x 768 60,289 74,893 102,250 D-WXGA 8 1 280 x 768 68,633 84,837 117,500 D-WXGA 9 1 280 x 800 49,600 60,050 79,360 D-WXGA 10 1 280 x 800 41,200 50,000 68,557 D-WXGA 11 1 280 x 800 49,702 59,810 D-WXGA 12 1 280 x 800 63,980 60,020 D-WXGA 17 1 280 x 800 58,289 69,975 D-WXGA 18 1 280 x 800 60,044 71,995 D-WXGA 19 1 280 x 800 62,790 74,928 D-WXGA 20 1 280 x 800 71,553 84,879 D-WXGA 21 1 280 x 800 55,993 69,991 D-WXGA 22 1 280 x 800 57,675 72,004 D-SXGA 1 1 280 x 1 024 63,980 60,020 D-SXGA 2 1 280 x 1 024 60,276 58,069 D-SXGA+ 1 1 400 x 1 050 63,970 60,190 D-SXGA+ 2 1 400 x 1 050 65,350 60,120 D-SXGA+ 3 1 400 x 1 050 65,120 59,900 D-SXGA+ 4 1 400 x 1 050 64,030 60,010 D-SXGA+ 5 1 400 x 1 050 62,500 58,600 D-SXGA+ 6 1 400 x 1 050 64,744 59,948 D-SXGA+ 7 1 400 x 1 050 65,317 59,978 D-UXGA 1 600 x 1 200 75,000 60,000 D-WUXGA 2 1 920 x 1 200 74,038 59,950 D-WSXGA+ 1 1 680 x 1 050 65,290 59,954 D-WXGA+ 1 1 440 x 900 55,935 59,887 106,500 D-720p 1 280 x 720 45,000 60,000 74,250 1 280 x 720 37,500 50,000 74,250 D-1035i 1 920 x 1 035i 33,750 60,000 74,250 D-1080i 1 920 x 1 080i 33,750 60,000 74,250 1 920 x 1 080i 28,125 50,000 74,250 D-1080psf/30 1 920 x 1 080 33,750 60,000 74,250 D-1080psf/25 1 920 x 1 080 28,125 50,000 74,250 D-1080psf/24 1 920 x 1 080 27,000 48,000 74,250 D-1080p 1 920 x 1 080 33,750 30,000 74,250 1 920 x 1 080 28,125 25,000 74,250 1 920 x 1 080 27,000 24,000 74,250 1 920 x 1 080 67,500 60,000 148,500 1 920 x 1 080 56,250 50,000 148,500
*1: La "i" después de la resolución indica una señal entrelazada. .
Nota
El número de puntos de visualización es de 1 024 x 768.
Una señal con una diferente resolución será proyectada después de convertir la resolución para que coincida con la visualización del proyector.
Cuando se conecten señales entrelazadas, podría existir un parpadeo en la imagen proyectada.
El proyector no es compatible con señales que cuenten con una frecuencia de reloj de puntos de 230 MHz o superior.
Especificaciones
La siguiente tabla describe las especificaciones del proyector.
Núm. de modelo LX1750 Suministro de alimentación CA 200 V - 240 V 50 Hz/60 Hz Consumo de alimentación 200 V - 240 V 11 A 1 850 W Cuando se ajuste [Alim. lámpara] en el menú [Ajuste] en el modo ecológico: 1 450 WModo en espera: 18 W Panel LCD Tamaño 4,57 cm (1,8") (relación de aspecto 4:3) Sistema de visualización Tres paneles LCD transparentes (RGB) Sistema de control Sistema de matriz activa TFT de polisilicio Número de píxeles 786 432 píxeles (1 024 x 768puntos) x 3 paneles Lámpara luminosa Lámpara NSHA UHM de 380 W x 4 Emisión de luz 16 000 lm (ANSI) (cuando [Selección de lámpara] esté establecido en [4 Lámparas] y [Alim. lámpara] en estándar) Señales de imagen que se pueden proyectar Consulte “Lista de señales compatibles” (→ página 97). Sistema de color Seis estándares (NTC/NTSC4.43/PAL/PAL-N/PAL-M/SECAM) Tamaño de pantalla 1,02 m (40") – 15,24 m (600") Relación de aspecto de pantalla 4:3 Método de proyección Consulte “Método de proyección” ( ➔ página 22). Relación de contraste 2 500:1 (al ajustar [Alim. lámpara] en automático, y [Color avanzado]en [Auto]) Terminales INPUT 1 Terminal de entrada DVI-D 1 juego, DVI-D24 pSeñal digital TMDS (Transition Minimized Differential Signaling) Terminal de entrada HDMI 1 juego, HDMI19 pines (en conformidad con HDCP, Deep color) Terminal de entrada de ordenador 1 juego (D-sub 15 pines (hembra))Señal RGB 0,7 V [p-p] 75 Ω (G-SYNC: 1,0 V [p-p] 75 Ω)Compatible con HD/SYNC impedancia alta TTL, polaridad positiva/negativa automáticaCompatible con VD, impedancia alta TTL, polaridad positiva/negativa automática INPUT 2 Terminal de entrada RGB analógica 1 juego (BNC 5 p)Señal RGB 0,7 V [p-p] 75 Ω (G-SYNC: 1,0 V [p-p] 75 Ω)Compatible con HD/SYNCimpedancia alta TTL, polaridad positiva/negativa automáticaSeñal VIDEO 1,0 V [p-p] 75 Ωsincronización negativaSeñal YP_B/C_B P_R/C_RY: 1,0 V [p-p] sincronización negativa,P_B/C_B: 0,7 V [p-p] 75 Ω,P_R/C_R$ : 0,7 V [p-p]75 Ω Terminal de entrada S-VIDEO 1 juego, en conformidad con la señal Mini DIN 4 p Y 1,0 V [p-p], C 0,286 V [p-p] 75 Ω S1 Terminal de entrada serial D-Sub9 p 1 juego, control de ordenador compatible con RS-232C Terminal de salida serial D-Sub9 p 1 juego Terminal USB (usado por el personal de servicio) Conector USB (1 juego, serie B) Mando a distancia alámbrico Mini clavija Terminal LAN 1 juego, RJ-45 para la conexión en red, 10Base-T/100Base-TX Longitud del cable de alimentación 3,0 m (118-1/8")
Especificaciones
Núm. de modelo LX1750 Gabinete externo Plástico moldeado Dimensiones Anchura: 650 mm (25-5/8") Altura: 349 mm (13-3/4") (pies completamente retraídos)Profundidad: 815 mm (32-1/8") (pies completamente retraídos, no incluida la lente) Peso Aprox. 46,5 kg (102,5 lbs.) Entorno de operación Temperatura de entorno de operación 1 : 5°C (41°F) a 40°C (104°F)Humedad de entorno de operación: 20% a 80% (sin condensación) Mando a distancia Suministro de alimentación CC 3 V (Batería AAA/R03/LR03 x 2) Rango de operación Aprox. 5 m (196-7/8") (en 30° en cada dirección) Peso 102 g (3,6 ozs.) (incluidas las baterías) Dimensiones Anchura: 48 mm (1-7/8") Altura: 27 mm (1-1/8") Profundidad: 145 mm (5-3/4")
*1: La temperatura del entorno de operación podría diferir dependiendo del tipo de filtro de aire utilizado al usar el proyector a alturas elevadas.
- Los números de producto de los accesorios y los componentes vendidos por separado están sujetos a cambio sin previo aviso.
Dimensiones
* Las dimensiones reales podrían diferir dependiendo del producto.
Protecciones de soporte de montaje en techo
El trabajo de instalación del soporte de montaje en techo debe ser realizado por un técnico cualificado.
Christie no se hace responsable por cualquier daño que pudiera sufrir el proyector ocasionado por el uso de un soporte de montaje en techo no fabricado por Christie o por haber elegido incorrectamente el sitio de instalación, aun cuando se encuentre vigente el periodo de garantía del proyector.
Un soporte de montaje en techo debe ser desinstalado a la brevedad con ayuda de un técnico cualificado.
Utilice un desatornillador de par de torsión o un destornillador de par de torsión hexagonal cuando apriete los tornillos, y apriételos a un par de torsión especificado. No utilice herramientas tales como desatornilladores eléctricos o de impacto.
Para más detalles, lea el manual de instalación incluido con el soporte de montaje en techo.
Los números de producto de los accesorios y los componentes vendidos por separado están sujetos a cambio sin previo aviso.
Vista inferior
Orificios de tornillo para los pies ajustables
(para uso con el soporte de montaje en el techo)
Diámetro del tornillo: M10
Profundidad: 40 mm
Orificios de tornillo para el soporte de montaje en el techo
Diámetro del tornillo: M8
Profundidad: 32 mm
Par de torsión de tornillo
M10: 20 ± 1 N·m
M8: 10 ± 0,5 N·m
Notas sobre la instalación de la lente
El personal técnico o el personal de servicio deben colocar la lente siguiendo el manual de instrucciones suministrado con la lente opcional.
- Utilice las placas de protección de luz, el conjunto de la lente, el distanciador y el soporte de fijación de palanca de bloqueo de lente suministrados con el proyector cuando realice la instalación. Para más detalles, consulte el manual de instrucciones suministrado con la lente opcional.
Especificaciones de la lente
Consulte las siguientes tablas para las especificaciones de la lente.
Todas las mediciones en las siguientes tablas son aproximadas. Podrían diferir ligeramente de las mediciones reales.
Distancia de proyección y tamaño de la pantalla
Distancia de proyección (m) No. de lente 38-809037-52 103-135100-01 38-809094-51 103-103101-01 38-809039-52 38-809044-52 103-130105-01 38-809070-51 103-129103-01 Tamaño de pantalla (m (")) TELE ANCHO FIJO TELE ANCHO TELE ANCHO TELE ANCHO TELE ANCHO TELE ANCHO TELE ANCHO TELE 1,02 (40") 1,4 1,1 0,6 1,2 1,2 0,9 2,0 1,5 — 5,1 3,7 6,5 3,3 7,2 9 1,52 (60") 2,2 1,7 0,9 1,8 1,8 1,4 3,1 2,3 — 7,6 5,5 11,2 7,7 5,5 4,3 2,03 (80") 2,9 2,2 1,3 2,4 2,4 1,9 4,2 3,2 — 10,1 7,3 14,8 10,2 7,3 5,6 2,54 (100") 3,7 2,8 1,6 3,1 3,1 2,4 5,3 4,0 7,1 5,2 12,5 9,0 8,4 12,7 9,1 7,0 3,05 (120") 4,4 3,4 1,9 4,9 3,7 3,7 2,9 6,4 4,8 6,3 15,0 10,8 22,0 15,1 10,9 8,4 3,81 (150") 5,6 4,3 2,4 6,2 4,7 4,7 3,6 8,0 6,1 7,9 18,7 1,3 3,4 27,5 18,8 13,6 10,5 4,57 (180") 6,7 5,1 2,9 7,4 5,7 5,6 4,3 9,6 7,4 9,5 22,4 16,1 32,9 22,5 16,3 12,6 5,08 (200") 7,5 5,7 3,3 8,3 6,3 6,2 4,8 10,7 8,2 14,4 10,6 24,9 17,8 36,5 24,9 18,1 6,35 (250") 9,3 7,2 4,1 10,4 7,9 7,8 6,0 13,5 10,3 18,0 13,3 31,0 22,2 45,5 31,1 22,6 7,62 (300") 11,2 8,6 4,9 12,5 9,5 9,4 7,3 16,2 12,4 21,6 16,0 37,2 26,6 54,6 37,2 27,1 8,89 (350") 13,1 10,1 5,8 14,6 11,1 11,0 8,5 18,9 14,5 25,3 18,7 43,4 31,0 63,6 43,4 31,5 10,16 (400") 15,0 11,5 6,6 16,7 12,7 12,6 9,7 21,7 16,6 28,9 21,4 49,5 35,4 72,6 49,5 36,0 12,70 (500") 18,8 14,4 8,3 20,9 15,9 15,8 12,1 27,1 20,8 36,2 26,8 61,9 44,2 90,7 61,8 45,0 15,24 (600") 22,5 17,3 9,9 25,1 19,2 18,9 14,6 32,6 25,0 43,4 32,2 74,2 53,0 108,8 74,1 54,0
Fllación de eje de lente y eje óptico
No. de lente 38-809037-52 103-135100-01 38-809094-51 103-103101-01 38-809039-52 38-809044-52 103-130105-01 38-809070-51 103-129103-01 Relación de eje de lente/eje óptico Vertical (máx.) H1 0 1 0 0 0 0 0 0 0 H2 10 1 10 10 10 10 10 10 10 Horizontal (máx.) W1 2 1 2 1 2 2 2 2 2 W2 3 1 3 1 3 3 3 3 3
Lens shift (Parte más alta)
Lens shift (Parte más baja)
Lens shift (Parte extrema izquierda)
Lens shift (Parte extrema derecha)
Notas sobre la instalación de la lente
Placa de protección de luz para cada lente
Se suministran tres placas de protección de luz con el proyector. Utilice la placa de protección de luz que corresponda con la lente apropiada. Consulte la siguiente tabla.
Accessoire (nom du produit) Num. de producto de lente Plaque 1 du pare-lumière(T0CRS0008--1) 103-135100-01 1 Plaque 2 du pare-lumière(T0CRM0014--1) 38-809094-51, 103-103101-01,38-809039-52, 38-809044-52,38-809070-51 Plaque 3 du pare-lumière(T0CRM0013--1) 38-809037-52, 103-135100-01 1 ,103-130105-01, 103-129103-01
Atención
- La placa de protección de luz 2 y la placa de protección de luz 3 deben estar separadas en relación con las placas superior e inferior.
*1: Utilice la placa de protección de luz 1 y la placa de protección de luz 3 conjuntamente.
Estos símbolos en los productos, embalajes y/o documentos adjuntos, significan que los aparatos eléctricos y electrónicos y las baterías no deberían ser mezclados con los desechos domésticos. Para el tratamiento apropiado, la recuperación y el reciclado de aparatos viejos y baterías usadas, por favor, observe las normas de recolección aplicables, de acuerdo a su legislación nacional y a las Directivas 2002/96/CE y 2006/66/CE.
Al desechar estos aparatos y baterías correctamente, Usted estará ayudando a preservar recursos valiosos y a prevenir cualquier potencial efecto negativo sobre la salud de la humanidad y el medio ambiente que, de lo contrario, podría surgir de un manejo inapropiado de los residuos.
Para mayor información sobre la recolección y el reciclado de aparatos y baterías viejos, por favor, contacte a su comunidad local, su servicio de eliminación de residuos o al comercio donde adquirió estos aparatos.
Podrán aplicarse penas por la eliminación incorrecta de estos residuos, de acuerdo a la legislación nacional.
Para usuarios empresariales en la Unión Europea
Si usted desea descartar aparatos eléctricos y electrónicos, por favor contacte a su distribuidor o proveedor a fin de obtener mayor información.
Estos símbolos sólo son válidos dentro de la Unión Europea. Si desea desechar estos objetos, por favor contacte con sus autoridades locales o distribuidor y consulte por el método correcto de eliminación.
Nota sobre el símbolo de la bateria (abajo, dos ejemplos de símbolos):
Este símbolo puede ser usado en combinación con un símbolo químico. En este caso, el mismo cumple con los requerimientos establecidos por la Directiva para los químicos involucrados.
Este símbolo sólo es válido en China.
CHKISTIE®
LX1750
* La lentille de projection est vendue séparément.
Mode d'emploi Opérations sur le projecteur
Avis important concernant la sécurité
AVERTISSEMENT : CET APPAREIL DOIT ETRE RELIE A LA MASSE.
AVERTISSEMENT : Afin d'éviter des dommages qui risquent de causer un incendie ou des chocs électriques, ne pas exposer cet appareil à la pluie ou à l'humidité.
Décret 3 d'information sur le bruit des machines. GSGV, 18 janvier 1991 : Le niveau de pression sonore à la hauteur de l'opérateur est inférieur ou égal à 70 dB (A) selon ISO 7779.
AVERTISSEMENT :
Débrancher l'appareil de sa prise secteur lorsque celui-ci n'est pas utilisé pendant une longue période.
Pour prévenir tout risque d'électrocution, ne retirez pas le capot. Cet appareil ne contient aucune pièce réparable par l'utilisateur. Confiez les réparations à un technicien qualifié.
Ne pas retirer la goupille de mise à la terre de la fiche d'alimentation. Cet appareil est équipé d'une fiche d'alimentation de type mise à la terre à trois broches. Cette fiche ne s'adapte que sur une prise de secteur de type mise à la terre. Il s'agit d'une caractéristique de sécurité. S'il n'est pas possible d'insérer la fiche dans la prise, contacter un électricien. Ne pas invalider le but de la mise à la terre.
AVERTISSEMENT :
Il s'agit d'un produit de classe A. Dans un environnement domestique, ce produit pourrait provoquer des interférences radio auquel cas l'utilisateur pourrait avoir à prendre des mesures adéquates.
MISE EN GARDE : Afin d'assurer une compatibilité totale et un fonctionnement sans failles, veuillez respecter les consignes d'utilisation de l'appareil, qui recommandent l'utilisation du cordon d'alimentation fourni et de câbles d'interface à blindage pour toutes les connexions à votre ordinateur ou périphériques. En cas d'utilisation du port série pour commander le projecteur depuis un PC, vous devrez utiliser un câble à interface série RS-232C en option avec noyau en ferrite. Tout changement ou modification non autorisé à cet équipement annule l'autorité de faire fonctionner cet appareil.
Il s'agit d'un appareil conçu pour projeter des images sur un écran, etc. et qui n'est pas destiné à servir d'éclairage intérieur dans un environnement domestique.
Directive 2009/125/CE
AVERTISSEMENT :
DÉSACTIVEZ LA LAMPE U.V. AVANT D'OUVRIR LE COUVERCLE DE LAMPE
AVERTISSEMENT: POUR RÉDUIRE LES RISQUES D'INCENDIE OU D'ÉLECTROCUTION, NE PAS EXPOSER CE PRODUIT À LA PLUIE OU À L'HUMIDITÉ.
AVERTISSEMENT: RISQUE D'ÉLECTROCUTION, NE PAS OUVRIR.
Le symbole éclair avec une tête en forme de flèche à l'intérieur d'un triangle équilatéral, est destiné à alerter l'utilisateur de la présence de tensions dangereuses non isolées à l'intérieur du produit. Ces tensions peuvent être d'une puissance suffisante pour constituer un risque d'électrocution pour les individus.
Le point d'exclamation dans un triangle équilatéral a pour but d'alerter l'utilisateur de la présence d'importantes instructions de fonctionnement et de maintenance (entretien) dans les documents accompagnant l'appareil.
MISE EN GARDE (États-Unis et Canada)
MISE EN GARDE:
Cet appareil est équipé d'une fiche d'alimentation de type mise à la terre à trois broches. Ne pas retirer la goupille de mise à la terre de la fiche d'alimentation. Il s'agit d'une caractéristique de sécurité. S'il n'est pas possible d'insérer la fiche dans la prise, contacter un électricien. Ne pas invalider le but de la mise à la terre.
Ne pas retirer
Avis important concernant la sécurité
NOTIFICATION (Canada)
Cet appareil numeique de la classe A est conforme à la norme NMB-003 du Canada.
AVERTISSEMENT (États-Unis et Canada)
Ne pas utiliser dans une salle informatique telle que définie dans la norme pour la protection des appareils électroniques de traitement informatique / de données, ANSI/NFPA 75.
Pour un appareil connecté en permanence, un appareil déconnecté directement accessible devra être incorporé dans le câblage de l'installation du bâtiment.
Pour des appareils enfichables, la prise de courant devra être installée à proximité des appareils et doit être facile d'accès.
IMPORTANT : FICHE MOULÉE (GB seulement)
POUR VOTRE SÉCURITÉ, LISEZ ATTENTIVEMENT LE TEXTE SUIVANT.
Cet appareil est fourni avec une fiche secteur moulée à trois broches sûre et pratique. Un fusible de 13 ampères est fixé à cette fiche. Si le fusible doit être remplacé, veillez à ce que le nouveau fusible ait une valeur nominale de 13 ampères et qu'il soit approuvé par ASTA ou BSI à BS1362.
Assurez-vous que le corps du fusible porte bien la marque ASTA ou la marque BSI
Si la fiche contient un couvercle de fusible amovible, veillez à bien le remettre en place une fois que le fusible a été remplacé. Si vous perdez le couvercle du fusible, la fiche ne doit pas être utilisée avant qu'un nouveau couvercle ait été mis en place. Vous pouvez acheter un couvercle de fusible de remplacement dans un centre technique agréé.
Si la fiche secteur moulée s'avère incompatible avec les prises du secteur à domicile, il sera nécessaire de retirer le fusible et de sectionner la prise avant de la mettre au rebut en prenant toutes les précautions nécessaires. Si vous insérez la fiche sectionnée dans n'importe quelle prise de 13 ampères, vous risquerez un choc électrique grave.
Si vous devez fixer une nouvelle fiche, respectez le code de câblage indiqué ci-dessous. En cas de doute, adressez-vous à un électricien qualifié.
AVERTISSEMENT : CET APPAREIL DOIT ETRE RELIE A LA TERRE.
IMPORTANT : Chaque fil conducteur peut être identifié par sa couleur suivant l'ordre suivant:
Vert et jaune : Terre Bleu : Neutre Brun : Electrisé
Comme les couleurs des fils du conducteur secteur de cet appareil peuvent ne pas correspondre aux marques colorées identifiant les bornes de votre fiche, procédez de la manière suivante.
Le fil de couleur VERT ET JAUNE doit être raccordé à la borne de la fiche marquée de la lettre E ou du symbole de terre W ou colorée en VERT ou VERT ET JAUNE.
Le fil de couleur BLEU doit être raccordé à la borne de la fiche marquée de la lettre N ou colorée en NOIR.
Le fil de couleur BRUN doit être raccordé à la borne de la fiche marquée de la lettre L ou colorée en ROUGE.
Remplacement du fusible : Ouvrir le compartiment des fusibles à l'aide d'un tournevis puis remplacer le fusible.
Avis important concernant la sécurité
AVERTISSEMENT:
ALIMENTATION
La prise de courant ou le disjoncteur doivent être installés à proximité de l'appareil et doivent être d'accès facile en cas de problèmes. Si les problèmes suivants surviennent, coupez immédiatement l'alimentation électrique.
Si l'on continue d'utiliser le projecteur dans ces conditions, cela peut entraîner un incendie ou des chocs électriques.
Si des objets étrangers ou de l'eau pénètrent dans le projecteur, couper immédiatement l'alimentation électrique.
Si le projecteur tombe ou si le cabinet est cassé, couper l'alimentation électrique.
Si l'on remarque une émission de fumée, d'odeurs suspectes ou de bruits provenant du projecteur, couper l'alimentation électrique.
Veuillez contacter un centre technique agréé pour des réparations et ne pas tenter de réparer le projecteur vous-même.
Pendant un orage, ne pas toucher le projecteur ou le câble.
Il y a risque d'électrocution.
Faire attention à ne pas endommager le cordon d'alimentation.
Si le cordon d'alimentation est endommagé, cela peut entraîner un incendie et des chocs électriques.
- Ne pas endommager le cordon d'alimentation, ne pas le modifier, ne pas le placer sous des objets lourds, ne pas le chauffer, ne pas le placer près d'objets chauffants, ne pas le tordre, ne pas le plier ou le tirer excessivement et ne pas le rouler en boule.
Si le cordon d'alimentation est endommagé, le faire réparer par un centre technique agréé.
Insérez complètement la fiche dans la prise murale, et le connecteur d'alimentation dans la borne du projecteur.
Si la fiche n'est pas complètement insérée, cela peut entraîner des chocs électriques ou la faire surchauffer.
- Si la fiche est endommagée ou la plaque de la prise desserrée, celles-ci ne doivent pas être utilisées.
Ne pas utiliser un câble électrique autre que celui fourni.
Le non-respect de cette consigne provoquera un incendie ou une électrocution.
Nettoyer la prise d'alimentation régulièrement afin d'éviter toute accumulation de poussière.
Le fait de ne pas respecter ces consignes peut entraîner un incendie.
Si de la poussière s'accumule sur la fiche du cordon d'alimentation, l'humidité peut endommager l'isolant.
Si le projecteur n'est pas utilisé pendant une période prolongée, débrancher la fiche du cordon d'alimentation de la prise de courant.
Débrancher la fiche du cordon d'alimentation de la prise de courant et l'essuyer régulièrement avec un tissu sec.
Ne pas manipuler la prise d'alimentation avec les mains mouillées.
Cela peut entraîner des chocs électriques.
Ne pas surcharger la prise murale.
Si l'alimentation est surchargée (par exemple, par l'utilisation de trop d'adaptateurs), cela risque de faire surchauffer le projecteur et peut entraîner un incendie.
■ LORS DE L'UTILISATION/INSTALLATION
Ne pas placer le projecteur sur des matériaux comme un tapis ou du tissu éponge.
Cela peut provoquer une surchauffe du projecteur, pouvant entraîner des brûlures, un incendie ou endommager le projecteur.
L'utilisation du projecteur dans de telles conditions provoque un incendie, une électrocution ou une détérioration des composants. Une détérioration des composants (tels que les supports de fixation au plafond) peut entraîner la chute du projecteur monté au plafond.
Ne pas installer ce projecteur dans un endroit qui n'est pas assez résistant pour supporter le poids du projecteur ou sur une surface en pente ou instable.
Cela peut faire tomber le projecteur ou le faire basculer, ce qui peut entraîner des dommages ou des blessures.
AVERTISSEMENT:
Ne couvrez pas le port d'arrivée d'air/la sortie d'air et ne placez rien à moins de 1 m (39") de ces deux éléments.
Cela risque de faire surchauffer le projecteur, et causer un incendie ou endommager le projecteur.
N'installez pas le projecteur dans un lieu étroit et mal ventilé.
N'installez pas le projecteur sur du tissu ou du papier, ces matériaux pourraient être aspirés dans le port d'arrivée d'air.
Ne placez pas vos mains ou tout autre objet à proximité de la sortie d'air.
Cela peut entraîner des brûlures ou abîmer vos mains ou d'autres objets.
- De l'air chaud est évacué par la sortie d'air. Nepas placer les mains ou le visage ou des objets incapables de supporter la chaleur près de l'orifice de sortie d'air.
Ne pas exposer vos yeux et votre peau aux faisceaux lumineux émis depuis l'objectif du projecteur lors de son utilisation.
Cela peut entraîner des brûlures ou une perte de la vue.
Une lumière intense est émise par l'objectif du projecteur. Ne pas exposer vos yeux ou vos mains directement à cette lumière.
Veiller particulièrement à ce que les enfants ne regardent pas dans l'objectif. En outre, éteindre le projecteur et le débrancher si vous vous en éloignez.
Ne jamais entreprendre de modification quelconque ou le démontage du projecteur.
Des hautes tensions peuvent entraîner un incendie ou des chocs électriques.
- Pour toute inspection, réglage ou réparation, s'adresser à un centre technique agréé.
Ne pas projeter une image avec l'objectif fourni installé.
Cela peut entraîner un incendie ou des chocs électriques.
Veiller à ce qu'aucun objet métallique, objet inflammable ni liquide n'entre à l'intérieur du projecteur. Veiller à ce que le projecteur ne prenne pas l'humidité.
Cela peut entraîner un court-circuit ou une surchauffe et peut causer un incendie, un choc électrique ou endommager le projecteur.
Ne pas placer de récipients contenant du liquide ou des objets métalliques à proximité du projecteur.
Si du liquide entre à l'intérieur du projecteur, entrez en contact avec votre revendeur.
Faire particulièrement attention aux enfants.
Ne touchez rien d'autre que la partie spécifiée ou retirez les composants.
Cela pourrait nuire aux performances ou à la sécurité.
Utiliser le support au plafond indiqué par Christie.
Utiliser un autre support de montage au plafond que celui spécifié risque de provoquer la chute de l'appareil.
Toute installation (tel que le support au plafond) doit être effectuée uniquement par un technicien qualifié.
Si l'installation n'est pas faite correctement, cela peut entraîner des blessures ou des accidents, comme des chocs électriques.
N'utilisez aucun support autre que le support au plafond agréé.
Veillez à utiliser le câble auxiliaire fourni avec un boulon à œil comme mesure de sécurité supplémentaire pour éviter que le projecteur tombe. (Installer dans un endroit différent du support au plafond.)
Lors de la fixation ou du remplacement d'un objectif, pour la sécurité, consultez un technicien ou le personnel de réparation chez un revendeur spécialisé.
Un remplacement de lentille maladroit peut endommager le produit.
Lors de la fixation ou du remplacement d'un objectif, veuillez suivre les procédures connexes afin d'effectuer l'opération correctement.
Avis important concernant la sécurité
AVERTISSEMENT:
ACCESSOIRES
Ne pas utiliser ou manipuler les piles de manière inappropriée, se référer à ce qui suit.
Sinon, cela peut entraîner des brûlures, les piles risquent de fuir, de surchauffer, d'exploser ou de prendre feu.
Utiliser uniquement les piles spécifiées.
Utilisez des piles alcalines ou au manganèse, mais pas de piles rechargeables.
Ne pas démonter des piles à anode sèche.
Ne pas chauffer les piles ou ne pas les mettre dans de l'eau ou au feu.
Veiller à ce que les bornes + et - des piles n'entrent pas en contact avec des objets métalliques tels que colliers ou épingles à cheveux.
Ne pas ranger les piles avec des objets métalliques.
Ranger les piles dans un sac en plastique, et ne pas les ranger à proximité d'objets métalliques.
Lorsqu'on insère les piles, veiller à ce que les polarités (+ et -) soient bien respectées.
Ne pas utiliser une pile neuve avec une ancienne, ni mélanger différents types de piles.
Ne pas utiliser des piles dont le revêtement externe s'écaille ou a été retiré.
Tenir les piles à l'écart des enfants (AAA/R03/LR03).
Une pile peut provoquer des blessures si elle est ingérée.
Si une pile est ingérée, consultez immédiatement un médecin.
Si le fluide de la pile fuit, ne pas le toucher à mains nues et prendre les mesures suivantes le cas échéant.
Si du fluide de pile touche votre peau ou un vêtement, cela peut entraîner une inflammation cutanée ou des blessures. Rincer à l'eau claire et consulter un médecin immédiatement.
Si du fluide de pile entre en contact avec vos yeux, cela peut entraîner une perte de la vue. Dans ce cas, ne pas se frotter les yeux. Rincer à l'eau claire et consulter un médecin immédiatement.
Ne pas démonter la lampe.
Si la lampe se casse, cela risque d'entraîner des blessures.
Remplacement de la lampe
La lampe a une pression interne élevée. Si elle est manipulée incorrectement, une explosion et de graves blessures ou des accidents peuvent s'ensuivre.
La lampe peut facilement exploser si elle est heurtée contre des objets durs ou si on la laisse tomber.
Avant de remplacer la lampe, veiller à débrancher la fiche du cordon d'alimentation de la prise de courant. Il y a risque d'électrocution ou d'explosion.
Pour remplacer la lampe, mettez l'appareil hors tension et laissez la lampe refroidir pendant au moins 60 minutes avant de la manipuler sans quoi vous pourriez vous brûler.
Ne pas laisser des enfants ou des animaux domestiques toucher la télécommande.
- Après avoir utilisé la télécommande, la ranger hors de portée des enfants ou des animaux domestiques.
Ne pas utiliser le cordon d'alimentation fourni avec un autre appareil que ce projecteur.
- L'utilisation du cordon d'alimentation fourni avec d'autres appareils que ce projecteur peut entraîner un court-circuit ou une surchauffe et causer un choc électrique ou un incendie.
Retirer les piles épuisées de la télécommande au plus vite.
- Laisser les piles dans la télécommande peut entraîner la fuite du fluide des piles, une surchauffe ou l'explosion des piles.
MISE EN GARDE:
ALIMENTATION
Lors du débranchement du cordon d'alimentation, assurez-vous de tenir la prise et le connecteur d'alimentation.
Si vous tirez sur le cordon d'alimentation lui-même, il sera endommagé et cela peut causer un incendie, des courts-circuits ou des chocs électriques sérieux.
Si vous n'utilisez pas le projecteur pendant une longue période de temps, débrancher la fiche du cordon d'alimentation de la prise de courant et retirer les piles de la télécommande.
Débrancher la fiche du cordon d'alimentation de la prise de courant avant d'effectuer tout nettoyage ou remplacement de l'unité.
Sinon cela peut causer des chocs électriques.
■ LORS DE L'UTILISATION/INSTALLATION
Ne placez pas d'objets lourds sur le projecteur.
Cela peut déséquilibrer le projecteur et le faire tomber, ce qui peut entraîer des dommages ou des blessures.
Le projecteur sera endommagéou déormé.
Ne pas peser de tout son poids sur ce projecteur.
Vous risquez de tomber ou le projecteur peut casser ce qui peut causer des blessures.
- Veiller tout particulièrement à ce que les enfants ne se tiennent pas debout ou ne s'asseyent pas sur le projecteur.
Ne pas utiliser le projecteur dans des lieux extrêmement chauds.
Cela peut entraîner la détérioration du boîtier externe ou des composants internes ou un incendie.
- Soyez particulièrement vigilant(e) dans des lieux exposés à la lumière solaire directe ou à proximité d'un four.
Ne placez pas vos mains dans les orifices à côté de la lentille optique, tandis que vous déplacez la lentille.
Le fait de ne pas respecter cette consigne peut entraîner des blessures corporelles.
Ne tenez jamais le projecteur par le capuchon de la lentille ou la lentille elle-même si vous désirez soulever ou transporter le projecteur.
Cela pourrait endommager le projecteur.
Débrancher toujours tous les câbles avant de déplacer le projecteur.
Le fait de déplacer le projecteur avec des câbles branchés peut endommager les câbles, ce qui pourrait causer un incendie ou des chocs électriques.
Utilisez les objectifs recommandés par Christie.
Utiliser un objectif autre que celui spécifié provoquera des dysfonctionnements.
Avant de fixer l'objectif, vérifiez le n° de modèle du projecteur et le n° de modèle de l'objectif optionnel et utilisez l'objectif adapté au projecteur.
Consultez votre revendeur pour obtenir plus d'informations.
ACCESSOIRES
Ne pas utiliser l'ancienne lampe.
Cela risque d'entraîner une explosion de la lampe.
Si la lampe s'est cassée, ventiler immédiatement la pièce. Ne pas toucher ni approcher le visage des morceaux cassés.
Le non respect de cette consigne peut entraîner l'absorption du gaz par l'utilisateur. Ce gaz se dégage lorsque la lampe est cassée et il contient presque autant de mercure qu'une lampe fluorescente, de plus les morceaux cassés peuvent provoquer des blessures.
Si vous pensez avoir inhalé du gaz ou que du gaz a pénétré dans votre bouche ou dans vos yeux, contactez un médecin immédiatement.
S'adresser au revendeur pour le remplacement de la lampe et l'inspection de l'intérieur du projecteur.
Ne pas réutiliser l'unité de filtre à air.
Cela pourrait engendrer des dysfonctionnements.
Ne pas nettoyer l'unité de filtre à air à l'eau.
Cela pourrait engendrer des dysfonctionnements.
- Veillez à ne pas mouiller l'unité de filtre à air.
Demandez à votre revendeur de nettoyer l'intérieur du projecteur une fois par an.
Une utilisation ininterrompue alors que de la poussière se trouve accumulée à l'intérieur du projecteur pourrait provoquer un incendie.
- Demandez à votre revendeur le tarif du nettoyage.
Avis important concernant la sécurité
Pour retirer les piles Piles de la télécommande
Appuyer sur le guide et soulever le couvercle.
Retirer les piles.
Marques commerciales
HDMI, le logo HDMI et High-Definition Multimedia Interface sont des marques commerciales ou des marques déposées de HDMI Licensing LLC.
Les autres noms, noms d'entreprises ou noms de produits utilisés dans ce mode d'emploi sont des marques commerciales ou des marques déposées de leurs propriétaires respectifs.
Veuillez noter que le mode d'emploi ne contient pas les symboles ® et TM.
Illustrations de ce mode d'emploi
- Notez que les illustrations du projecteur et des écrans peuvent être différentes de celles que vous voyez réellement.
Références aux pages
- Dans ce mode d'emploi, les références aux pages sont indiquées comme suit : (→ page 00).
Terminologie
- Dans ces instructions, les accessoires connus comme « Télécommande sans fil/filaire » seront nommés « télécommande ».
Caractéristiques du projecteur
Clarté élevée et haut contraste d'image
Qualité d'image avec clarté élevé de 16 000 lumens et haut contraste de 2500 :1.
Configuration plus souple
Permet l'installation dans la direction verticale à 360°. Doté de la fonction de décalage électrique de l'objectif qui permet l'ajustement de la position verticale et horizontale ainsi que les mires de test. Vous pouvez également utiliser les lampes pour le panneau de commande et les bornes de connexion. De plus, vous pouvez choisir parmi 9 types d'objectifs optionnels.
Haute fiabilité et entretien aisé
Doté de quatre lampes auto-permutables qui permettent la projection ininterrompue lorsqu'une lampe est usée. Le filtre à air et le filtre résistant à la fumée (optionnel) bloquent la poussière et la fumée, et maintiennent les images nettes tout en assurant une longue durée de vie au projecteur.
Étapes rapides
Pour les détails, voir les pages correspondantes.
Installez votre projecteur.
(→ page 22)
Connectez l'appareil à des périphériques externe.
(→ page 24)
Branchez le cordon d'alimentation. (→ page 29)
Mise sous tension.
(→ page 31)
Sélectionnez le signal d'entrée. (→ page 33)
Réglez l'image.
(→ page 33)
Sommaire
Assurez-vous de lire la section « Avis important concernant la sécurité ». (→ pages2 à 8)
Avis important concernant la sécurité..... 2
Précautions d'emploi.... 12
Précautions lors du transport....12
Précautions lors de l'installation ....12
Sécurité....13
Mise au rebut....13
Précautions d'utilisation .... 13
Accessoires ....15
Accessoires optionnels 16
Préparation
À propos de votre projecteur .... 17
Télécommande ....17
Boîtier du projecteur....18
Utilisation de la télécommande .... 21
Insertion et retrait des piles....21
Réglage des numéros de la télécommande .....21
Utilisation de la télécommande comme une
télécommande filaire....21
Mise en route
Installation....22
Fixation de l'objectif....22
Méthode de projection ...... 22
Options d'installation (en option) 23
Pieds réglables....23
Branchements ......24
Avant de brancher le projecteur ....24
Exemple de branchement : Ordinateurs....24
Exemple de branchement : Équipement AV ...... 25
Lier les câbles à l'aide des liens de câble....26
Installation d'un module d'entrée (optionnel)....27
Installation d'un module d'entrée....27
Liste des signaux compatibles....28
Connexion d'un signal à un module d'entrée .....28
Fonctionnement de base
Mise sous/hors tension 29
Branchement du cordon d'alimentation .....29
Voyant d'alimentation....30
Mise sous tension du projecteur....31
Effectuer des ajustements et des sélections......31
Mise hors tension du projecteur ....32
Fonction d'arrêt direct de l'alimentation....32
Fonction de gestion de l'alimentation....32
Projection 33
Sélection du signal d'entrée....33
Ajustement de l'image....33
Utilisation de la télécommande ...... 35
Utilisation de la fonction obturateur .... 35
Utilisation de la fonction de gel....35
Commutation du signal d'entrée....35
Correction de l'effet keystone 36
Sélection d'un mode de qualité d'image ....36
Ajustement de la qualité d'image ....37
Touche de l'écran....37
Affichage d'une minuterie pour les exposés .....37
Vérification des paramètres....37
Réglages
Naviguer dans les menus....38
Menu principal....39
Sous-menu 39
[Entrée 1]....42
[Entrée 2]....42
[Système]......43
[Réglage PC auto.]....44
[Synchro fine]......44
[Total de points] 44
[Position horiz.] 44
[Position vert.] 45
[Mode actuel]......45
[Clamp]......45
[Surface affich.horiz.]....45
[Surface affich.vert.] 45
[Réinitialiser] 46
[Effaçer]......46
[Mémoriser]......46
Ajustement de la qualité de l'image....47
[Contraste] 48
[Luminosité] 48
[Couleur]....48
Sommaire
[Teinte]......48
[Réglages des paramètres couleur] ....49
[Température de couleur]......50
Balance des blancs ([Rouge]/[Vert]/[Bleu]) .....50
[Couleurs sombres]....50
[Réglage automatique de l'image]......50
[Couleur avancée]....50
[Netteté] 51
[Gamma]....51
[Réducteur de bruit]....51
[Progressif]....51
[Réinitialiser] 51
[Mémoriser]....52
[Normal] 53
[Pleine largeur] 53
[Large(16:9)] 53
[Zoom]....53
[Vrai]....53
[Personnalisé]....54
[Ajustement personnalisé] 54
[Zoom digital +]....54
[Zoom digital -]......55
[Trapèze]......55
[Plafond]......56
[Arrière] 56
[Réinitialiser] 56
[Langue]....57
[Position du menu]......57
[Affichage]......57
[Fond]....58
[Sélection lampe]......58
[Puissance lampe]....58
[Intervalle lampe]....59
[Fusion des côtés]....59
[Colorimétrie] 60
[Colorimétrie avancée]....61
[HDMI]......63
[Logo]....63
[Contrôle du ventilateur]......65
[Télécommande] 65
[Capteur de télécommande]......65
[Extinction automatique]......66
[Démarrage immédiat] 66
[Sécurité]......67
[Identité du PJ]......68
[Shutter] 68
[Contrôle retardement vidéo]....69
[Closed caption]....70
[Compteur du filtre]....70
[Minuteur présentation]....71
[Echantillon test]....72
[Réglage d'usine]....72
Confirmation de l'état des réglages et de l'utilisation...73
Entretien
À propos de l'état des voyants ..... 75
Si un voyant s'allume 75
Entretien/Remplacement 81
Avant l'entretien/le remplacement de l'unité .....81
Entretien....81
Remplacement des pièces 81
Guide de dépannage 86
Annexe
Ajuster les écrans d'images de plusieurs écrans .....88
Étiquette d'indication de l'enregistrement de mot de passe....91
Borne de série....92
Interface des commandes latérales .....93
Autres bornes....95
Liste des signaux compatibles....97
Caractéristiques techniques .... 100
Dimensions 102
Instructions de sécurité concernant le système de fixation au plafond .... 103
Remarques concernant la fixation de l'objectif....104
Caractéristiques techniques de l'objectif ....104
Précautions d'emploi
Précautions lors du transport
Lors du transport du projecteur, maintenez-le fermement par ses poignées de transport et évitez de le soumettre à des chocs et vibrations excessifs tel qu'un déplacement en le trainant sur le sol. Le non-respect de cette consigne pourrait entraîner des dommages aux pièces internes et entraîner un dysfonctionnement.
Ne transportez pas le projecteur avec les pieds réglables déployés. Cela pourrait endommager les pieds réglables.
Précautions lors de l'installation
Ninstallez pas le projecteur à l'extérieur.
Le projecteur a été conçu pour une utilisation en intérieur uniquement.
■ l'utilisez pas dans les emplacements suivants.
Dans des endroits où des vibrations et des chocs peuvent se produire, tels que dans une voiture ou tout autre véhicule : Cela pourrait endommager les pièces internes et entraîner un dysfonctionnement.
À proximité d'un échappement de climatiseur, ou à côté de lampes (éclairages de studio, etc.) où il y a d'importantes fluctuations de température (« Environnement de fonctionnement » (→ page 101)) : Cela pourrait réduire la durée de vie de la lampe ou provoquer des déformations du boîtier, et par conséquent, des dysfonctionnements.
À proximité de lignes à haute tension ou de moteurs : Des interférences pourraient survenir.
A surez-vous de faire appel à un technicien qualifié ou à votre revendeur avant l'installation du produit à un plafond.
Si le produit doit être installé suspendu au plafond, achetez le support optionnel de fixation au plafond.
■ pas installer le projecteur à des altitudes de 2 700 m (8 858 pieds) ou plus au-dessus du niveau de la mer.
Ne pas suivre cette précaution peut abréger la durée de vie des composants et provoquer des dysfonctionnements.
pas utiliser le projecteur lorsqu'il est incliné (→ page 22).
L'utilisation du projecteur alors qu'il est incliné pourrait abréger la durée de vie des pièces internes.
Récautions lors de l'installation des projecteurs
Ne pas entraver les orifices de ventilation du projecteur (entrée et échappement).
Évitez de diriger de l'air chaud ou de l'air froid provenant d'un climatiseur directement sur les orifices de ventilation du projecteur (entrée et échappement).
Évitez d'installer le projecteur dans un endroit humide ou poussiéreux.
(plus d'1 m (39") pour chaque extrémité et côté)
Ne pas installer le projecteur dans un espace confiné.
Sécurité
Lors de l'utilisation de ce produit, prenez les mesures de sécurité appropriées pour éviter les points suivants :
Divulgation d'informations personnelles par l'intermédiaire de ce produit
Utilisation non autorisée de ce produit par un tiers malveillant
Interférence ou arrêt de ce produit par un tiers malveillant
Prendre des mesures de sécurité suffisantes. (→ page 67)
Assurez-vous de rendre votre code PIN aussi difficile à deviner que possible.
Changez régulièrement votre code PIN.
Christie Digital Systems et ses compagnies affiliées ne vous demanderons jamais directement votre code PIN. Si on vous le demande directement, ne donnez pas votre code PIN.
Veillez à utiliser un réseau doté d'un pare-feu, etc.
Définissez un code PIN et appliquez des restrictions pour les utilisateurs pouvant se connecter.
Mise au rebut
Lorsque vous vous débarrassez du produit, contactez les autorités locales ou votre revendeur pour connaître les méthodes appropriées de mise au rebut.
La lampe contient du mercure. Lors de la mise au rebus des lampes usagées, demandez à votre centre de traitement des déchets le plus proche ou à votre revendeur comment les jeter correctement.
Jetez les piles usagées conformément aux instructions, ou aux règlements et directives de mise au rebut locaux.
Précautions d'utilisation
Fur obtenir une haute qualité d'image
Vous obtiendrez une haute qualité d'image si vous fermez les rideaux ou les volets des fenêtres et éteignez toutes les lumières à proximité de l'écran afin d'empêcher la lumière extérieure ou la lumière des lampes intérieures de briller sur l'écran.
En fonction des conditions d'utilisation, l'image peut osciller à cause de l'air chaud sortant de l'échappement d'air, ou de l'air chauffé ou refroidi provenant d'un climatiseur.
L'objectif de projection est chauffé par la lumière de la source lumineuse, ce qui rend la mise au point instable immédiatement après avoir mis le projecteur sous tension. La mise au point se stabilisera une fois 30 minutes de projection d'image écoulées.
pas toucher la surface de l'objectif de projection à main nue.
Si la surface de l'objectif présente des empreintes de doigts ou toute autre saleté, celles-ci seront agrandies et projetées sur l'écran, dégradant l'image.
Moniteur LCD
Le moniteur LCD est fabriqué avec précision. Veuillez noter que dans de rares cas, des pixels de haute précision peuvent ne pas s'allumer ou au contraire rester toujours allumés. Ce n'est pas un dysfonctionnement.
Lorsqu'une image fixe est projetée pendant une longue période, elle pourrait blanchir le moniteur LCD. Le cas échéant, projetez l'écran blanc des motifs de test (→ page 72) pendant au moins une heure. Notez qu'il pourrait cependant ne pas être possible d'éliminer complètement l'image blanchie.
Précautions d'emploi
■mposants optiques
Si vous utilisez le projecteur dans des environnements à température élevée, poussièreux ou sujet à la présence de fumée de cigarette, etc., le cycle de remplacement des composants optiques comme le moniteur LCD et le polariseur pourrait se réduire à un an. Consultez votre revendeur pour obtenir plus d'informations.
Lmpe
La source lumineuse du projecteur est une lampe à mercure à haute pression interne.
Une lampe à mercure sous haute pression présente les caractéristiques suivantes.
La luminosité de la lampe se réduit selon la durée d'utilisation.
De fait, des rayures ou détériorations avec de l'usure pourraient provoquer l'éclatement de l'ampoule ou encore la réduction de sa durée de vie.
La durée de vie de la lampe varie considérablement en fonction de chaque lampe et des conditions d'utilisation. Une utilisation en continu pendant plus de 24 heures et la mise sous et hors tension fréquente de l'alimentation accélèrent tout particulièrement la détérioration de la lampe et affectent sa durée de vie.
Dans de rares cas, il se peut que la lampe éclate peu de temps après le démarrage de la projection.
Le risque d'éclatement augmente lorsque la lampe est utilisée au-delà de son cycle de remplacement. Assurez-vous de toujours remplacer la lampe. « Quand remplacer la lampe » (→ page 83)
Si la lampe éclate, le gaz contenu à l'intérieur de la lampe est libéré sous forme de fumée.
Nous vous recommandons de stocker une lampe de remplacement pour pallier aux imprévus.
Il est recommandé de demander les services d'un technicien qualifié pour remplacer la lampe. Consultez votre revendeur.
Accessoires
Assurez-vous que les accessoires suivants sont fournis avec votre projecteur.
Accessoire (nom du produit) Quantité Télécommande sans fil/filaire (N2QAYA000066) 1 Pile AAA/R03/LR03 (pour la télécommande) 2 Cordon d'alimentation pour (E) (T0K3K0003--1) 1 Cordon d'alimentation pour (U) (T0K3K0001--1) 1 Cordon d'alimentation pour (UK) (T0K3K0004--1) 1 Câble d'ordinateur (pour D-sub) (T0K3K0013--1) 1 CD-ROM Mode d'emploi (TXFQB02ZHC2) 1 CD-ROM PJ Network Manager (T1U13B27601) 1 CD-ROM Real Color Manager Pro (T1U13B58100) 1 Mode d'emploi-Guide de base (TQBJ0658) 1 Manuel de réglage des paramètres couleurs (TQBH0270-1) 1 Support de fixation du levier de verrouillage d'objectif*1 (T0STF0039--1) 1(pièce) Entretoise*1(T0SAS0001--)[IMAGE][IMAGE][IMAGE] 1(pièce) Fixation d'objectif*1(T0HLA0045--) 1(pièce)
Accessoire (nom du produit) Quantité Étiquette du code PIN 1 Lien de câble 3 Support du cordon d'alimentation,couvercle du cordon d'alimentation(T0STF0037--1) 1(pièce) Plaque 1 du pare-lumière*1(T0CRS0008--1) 1(pièce) Plaque 2 du pare-lumière*1(T0CRM0014--1) 1(pièce) Plaque 3 du pare-lumière*1(T0CRM0013--1) 1(pièce)
*1: Utilisé pour la fixation de l'objectif (optionnel). (→ page 104)
Attention
Après avoir déballé le projecteur, jetez le capuchon du cordon d'alimentation et le matériau d'emballage de manière appropriée.
Si vous perdez un des accessoires, consultez votre revendeur.
Les numéros de produit des accessoires et les composants vendus séparément sont sujets à des changements sans préavis.
Entreposez les petites pièces de manière appropriée et gardez-les à distance des jeunes enfants.
Précautions d'emploi
ontenu du CD-ROM
Les éléments suivants sont stockés sur le CD-ROM fourni (Mode d'emploi / Real Color Manager Pro / PJ Network Manager).
Manuel/Liste (PDF) Logiciel ● Mode d’emploi–Opérations sur le projecteur● Mode d’emploi–Utilisation du réseau● Mode d’emploi–Opérations de PJ Network Manager ● Real Color Manager Pro● PJ Network Manager
Accessoires optionnels
Accessoires optionnels (nom du produit) N° de produit Lampe de remplacement 002-120599-01 Filtre de remplacement 003-004738-01 / Code des pièces de service: T1FTX0069-- Filtre résistant à la fumée Unité: Code des pièces de service 003-004739-01 / Numéro de modèle NOP-FTU-61EFSFiltre: Code des pièces de service 003-003705-01 / Numéro de modèle POA-FIL-160 Module d'entrée 103-132107-02 Objectif 38-809037-52, 103-135100-01, 38-809094-51, 103-103101-01, 38-809039-52, 38-809044-52, 103-129103-01, 103-130105-01, 38-809070-51
À propos de votre projecteur
Télécommande
(1) Émetteurs du signal de télécommande pour compter le temps écoulé à partir de la pression sur la touche ou exécuter un compte à rebours depuis le temps réglé. (→ page 37) / lorsque vous utilisez la télécommande. lorsque vous n'utilisez pas la télécommande pendant une longue période. du projecteur.
La télécommande nécessite des piles. (→ page 21)
À propos de votre projecteur
Attention
Ne pas laisser tomber la télécommande.
Évitez tout contact avec des liquides ou de l'humidité.
Ne jamais essayer de modifier ou de démonter la télécommande.
Remarque
Il est possible d'utiliser la télécommande dans une plage de 5 m si on la pointe directement sur le récepteur de la télécommande. La télécommande peut commander à des angles atteignant ±30° verticalement et horizontalement, mais la plage de contrôle efficace peut être réduite.
La présence d'obstacles entre la télécommande et le capteur de la télécommande peut empêcher la télécommande de fonctionner correctement.
Vous pouvez commander le projecteur en reflétant le signal par l'écran, mais la portée d'utilisation réelle dépendra alors des caractéristiques de l'écran.
Si le capteur de la télécommande reçoit une forte lumière, comme par exemple une lumière fluorescente, la télécommande pourrait ne pas fonctionner correctement. Installez le projecteur aussi loin que possible d'autres sources lumineuses.
Boîtier du projecteur
(1) Couvercle de fixation de l'objectif
(10) Port d'échappement d'air
Attention
Ne pas placer les mains ou d'autres objets près de l'orifice d'échappement d'air
Gardez vos mains et votre visage éloignés.
Ne glissez pas vos doigts à l'intérieur.
Gardez les articles sensibles à la chaleur éloignés.
À propos de votre projecteur
Rinneau de commande
(1) Touche d'alimentation
Met hors/sous tension lorsque le commutateur
d'alimentation principale du projecteur est placé sur <|>.
Ouvre et ferme l'obturateur. Ajuste la protection de la lumière de projection. (→ page 35)
Règle le zoom de l'objectif. (→ page 34)
Règle la mise au point. (→ page 34)
Affiche l'écran de menu. (→ page 38)
Ajuste automatiquement la synchronisation, le nombre total de points, le déplacement horizontal et le déplacement vertical.
(8) Touche
Chaque pression sur cette touche active/désactive le panneau de commande et les bornes de connexion.
Fait glisser l'objectif verticalement et horizontalement pour déplacer la position de l'image projetée verticalement et horizontalement. (→ page 33)
Sélectionne un élément indiqué par le curseur sur le menu à l'écran.
Également utilisé pour étirer ou comprimer l'image en mode de zoom numérique. (→ page 38)
Affiche l'état des signaux pendant la projection et les réglages actuels. (→ page 37)
À propos de votre projecteur
Bornes de connexion
(1) DVI-D Borne d'entrée Cette borne permet de connecter le signal DVI-D.
Cette borne permet de connecter le signal HDMI.
Cette borne permet de connecter un signal RVB. //
Cette borne permet de connecter un signal G,B,R,H/HV,V, un signal vidéo et un signal Y,Pb/Cb,Pr/Cr.
Cette borne est réservée au personnel de service.
(6) Borne d'entrée sérielle
Cette borne d'entrée est compatible avec RS-232C et est destinée à la commande externe de projecteur par la connexion d'un projecteur.
Cette borne est destinée au signal connecté à la borne d'entrée sérielle.
Cette borne permet de connecter la télécommande lors de son utilisation en tant que télécommande filaire.
Cette borne permet de connecter le projecteur au réseau.
Cette borne permet de connecter les signaux S-VIDEO.
Attention
- Veillez à connecter le câble de réseau local aux appareils d'intérieur.
Utilisation de la télécommande
Insertion et retrait des piles
1) Ouvrez le couvercle.
2) Insérez les piles et fermez le couvercle.
- Insérez d'abord le côté ⊖.
Pour retirer les piles, suivez la procédure ci-dessus dans l'ordre inverse.
Réglage des numéros de la télécommande
Lorsque vous utilisez plusieurs projecteurs, vous pouvez configurer un numéro de télécommande pour chaque projecteur afin de les commander simultanément avec une seule télécommande.
Après la configuration du numéro de télécommande d'un projecteur donné, spécifiez ce projecteur à l'aide du numéro de télécommande.
Methode de configuration
1) En maintenant la touche
enfoncée, appuyez sur les touches numériques (<0> - <9>) (2 chiffres) pour saisir le numéro de télécommande souhaité.
Lorsque vous relâchez la touche, le numéro de télécommande va passer au nouveau numéro.
Pour configurer le numéro de la télécommande sur 09, appuyez sur <0>, <9> tout en maintenant enfoncée la touche .
Remarque
Le réglage d'usine est [Tous]. [Tous] prends en charge tous les numéros de télécommande.
Configurez le numéro de télécommande du projecteur à l'aide de [Télécommande] depuis le menu [Réglages] (→ page 65).
Pour réinitialiser le numéro de la télécommande (pour régler sur [Tous]), maintenez enfoncées simultanément les touches et <0> pendant au moins cinq secondes.
Utilisation de la télécommande comme une télécommande filaire
Connectez la borne du boîtier du projecteur à la borne de télécommande filaire sur la télécommande en utilisant le câble de télécommande (disponible dans le commerce).
Assurez-vous que les piles sont insérées dans la télécommande.
Pour utiliser la télécommande de façon sans-fil, déconnectez le câble de télécommande du projecteur et de la télécommande. Quand le câble de télécommande est connecté, vous ne pouvez pas utiliser la télécommande de façon sans-fil.
Installation
Fixation de l'objectif
Avant de mettre le projecteur en place, fixez l'objectif au boîtier du projecteur.
Tout d'abord, déterminez l'objectif qui convient à l'environnement d'utilisation du projecteur.
Pour obtenir les numéros de produit des objectifs et leurs spécifications correspondants au projecteur, contactez votre revendeur. Lors de la fixation ou du remplacement d'un objectif, pour la sécurité, consultez un technicien ou le personnel de réparation chez un revendeur spécialisé. N'essayez pas de fixer ou de remplacer l'objectif vous-même. Se référer à « Remarques concernant la fixation de l'objectif » (→ page 104) pour plus de détails.
Mise en garde
Lors de la mise en place du projecteur après l'installation de l'objectif, mettez toujours le cache-objectif sur ce dernier. Lors du transport du boîtier du projecteur, ne le tenez jamais par l'objectif. Cela pourrait endommager le projecteur.
Méthode de projection
Vous pouvez projeter les images verticalement et à la diagonale. Vous pouvez sélectionner arrière (→ page 56) et plafond(→ page 56) depuis le menu.
Rikation au plafond et projection vers l'avant
Élément de menu Configuration [Plafond] [On] [Arrière] [Off]
Installation sur un bureau/sur le sol et projection par l'arrière
Élément de menu Configuration [Plafond] [Off] [Arrière] [On]
Rikation au plafond et projection par l'arrière
Élément de menu Configuration [Plafond] [On] [Arrière] [On]
Installation sur un bureau/sur le sol et projection vers l'avant
Élément de menu Configuration [Plafond] [Off] [Arrière] [Off]
Attention
Pour obtenir une haute qualité d'image, installez l'écran à un endroit aussi éloigné que possible des sources naturelles ou artificielles de lumière l'affectant directement. Fermez les rideaux ou les volets et éteignez les lumières.
Lors de l'installation du projecteur avec une inclinaison, n'utilisez pas le projecteur si l'angle d'inclinaison dépasse ±10° verticalement à partir de la surface plane. L'installation du projecteur à un angle d'inclinaison dépassant cette valeur pourrait réduire la durée de vie des composants et provoquer des dysfonctionnements.
Options d'installation (en option)
Vous pouvez installer le projecteur au plafond en utilisant le support de montage au plafond.
Utilisez uniquement les supports de montage au plafond spécifiés pour ce projecteur.
Pour connaître les détails de l'installation du projecteur avec le support, référez-vous au manuel d'installation du support de montage au plafond.
Attention
- Pour assurer la performance et la sécurité du projecteur, l'installation du support de montage au plafond doit être effectuée par votre revendeur ou par un technicien qualifié.
Pieds réglables
Les pieds réglables peuvent être prolongés en les tournants comme indiqués dans le schéma. Vous pouvez les rétracter en les tournant dans le sens opposé. Cette procédure ajuste précisément la hauteur et l'inclinaison de l'image projetée.
Lorsque les pieds réglables sont étendus, le projecteur peut être incliné d'au maximum 3°.
(Vous pouvez régler l'angle de projection verticalement.)
Attention
L'air chaud s'échappe du port d'échappement d'air pendant que la lampe est allumée. Ne pas toucher directement le port d'échappement d'air lors de l'ajustement des pieds réglables.
Si l'effet keystone affecte l'image projetée, effectuez [Trapèze] (→ page 55) depuis le menu [Écran].
Remarque
N'étendez pas les pieds réglables au-delà de la ligne rouge. Cela pourrait les endommager.
La position verticale et horizontale de l'image peut être ajustée à l'aide de la fonction de décalage d'objectif.
Branchements
Avant de brancher le projecteur
Lisez très attentivement le mode d'emploi concernant le périphérique que vous désirez connecter.
Mettez les périphériques hors tension avant le raccordement du câble.
Si aucun câble de connexion n'est fourni avec le périphérique et si le câble optionnel n'est pas disponible, procurez-vous un câble de connexion approprié au périphérique.
Les signaux vidéo contenant trop de parasites peuvent provoquer l'oscillation des images de façon aléatoire. Dans ce cas, un correcteur de base temporelle (TBC) doit être raccordé.
Le projecteur reconnaît les signaux suivants : signaux vidéo, signaux S-vidéo, signaux analogiques RVB (les signaux synchrones sont au niveau TTL) et les signaux numériques.
Certains modèles d'ordinateur ne sont pas compatibles avec le projecteur.
Lors de la connexion d'un appareil au projecteur à l'aide d'un long câble, il ne pourra peut-être pas être possible d'obtenir une image normale sans compensateur.
Pour obtenir le détail des signaux vidéos pris en charge par le projecteur, référez-vous à « Liste des signaux compatibles » (→ page 97).
Exemple de branchement : Ordinateurs
Remarque
Utilisez un câble HDMI High Speed qui est conforme à la norme HDMI. L'utilisation d'un câble qui n'est pas conforme à la norme HDMI pourrait provoquer un fonctionnement anormal, comme des coupures d'image, un échec de la projection, etc.
La borne peut être connectée à un périphérique externe avec une borne DVI à l'aide d'un câble de conversion HDMI/DVI. Toutefois, l'image peut ne pas apparaître avec certains périphériques. (→ page 63)
Lorsque la borne est utilisée, le fonctionnement normal peut être impossible avec certains appareils et l'image peut ne pas s'afficher.
La borne (en mode d'entrée de signal numérique) n'est compatible qu'avec les signaux à lien unique.
Se référer à « Liste des signaux compatibles » (→ page 97) pour obtenir plus de détails sur les signaux RVB d'ordinateurs pris en charge par le projecteur.
Si vous utilisez le projecteur à l'aide d'un ordinateur avec la fonction de reprise (dernière mémoire), il pourra être nécessaire de réinitialiser la fonction de reprise pour faire fonctionner le projecteur.
La borne (en mode d'entrée de signal numérique) pourrait nécessiter le réglage EDID en fonction du périphérique connecté.
Pour connecter le projecteur avec un ordinateur à travers un réseau local câblé, référez-vous au « Mode d'emploi–Utilisation du réseau » sur le CD-ROM fourni.
Exemple de branchement : Équipement AV
Dispositifs de sortie Vidéo, S-vidéo, lecteur DVD et vidéo HDMI
Attention
Utilisez toujours l'un des appareils suivants lors du branchement d'un magnétoscope.
Un magnétoscope avec un correcteur de base temporelle intégré (TBC).
Un correcteur de base temporelle (TBC) entre le projecteur et le magnétoscope
Si des signaux de salve sont connectés à des signaux non-standards, l'image peut être déformée. Dans ce cas, raccordez un correcteur de base temporelle (TBC) entre le projecteur et l'appareil.
Remarque
Utilisez un câble HDMI High Speed qui est conforme à la norme HDMI. L'utilisation d'un câble qui n'est pas conforme à la norme HDMI pourrait provoquer un fonctionnement anormal, comme des coupures d'image, l'échec de la projection, etc.
La borne peut être connectée à un périphérique externe avec une borne DVI à l'aide d'un câble de conversion HDMI/DVI. Toutefois, l'image peut ne pas apparaître avec certains périphériques. (→ page 63)
La borne peut être connectée avec des appareils compatibles avec HDMI et DVI-D, mais le fonctionnement normal peut être impossible avec certains appareils et l'image peut ne pas s'afficher.
La borne (en mode d'entrée de signal numérique) n'est compatible qu'avec les signaux à lien unique.
Branchements
Lier les câbles à l'aide des liens de câble
Maintenez les câbles liés en fixant les câbles connectés aux bornes dans les supports de câbles du boîtier du projecteur.
- Les liens de câble peuvent être réutilisés. (L'onglet peut être serré et relâché.)
Flâcher les liens de câble
1) Tirez l'onglet dans la direction de la flèche (i).
- La boucle du lien de câble va s'élargir.
Attention
- Les éléments suivants sont soumis à précaution lors de l'utilisation de lien de câble.
Des parasites peuvent faire leur apparition en de rares occasions.
Ne pas tirer sur le câble en forçant. Cela pourrait provoquer leur débranchement.
Nous vous recommandons de garder un peu de mou lorsque les câbles sont liés.
Mise en garde
Lors du raccordement du projecteur à un ordinateur ou à un périphérique externe, utilisez le cordon d'alimentation fourni avec le périphérique et des câbles blindés disponibles dans le commerce.
Installation d'un module d'entrée (optionnel)
Installation d'un module d'entrée
Tipes de module d'entrée
Procurez-vous un module d'entrée (optionnel) correspondant aux signaux d'entrée du système.
Nom du module Module d'entrée SD/HD-SDI Numéro du module 103-132107-02 Borne d'entrée/de sortie Système d'entrée BNC 2, Système de sortie BNC 1 Format de signal compatible Norme SMPTE259M-C :480-60i (59,94 Hz*1 ), 576-50i (50 Hz)Norme SMPTE260M :1035-60i (60/59,94 Hz*1 )Norme SMPTE274M :1080-24psf (48/47,95 Hz*1 ), 1080-24p (24/23,98 Hz*1 ), 1080-25psf (50 Hz),1080-25p (25 Hz), 1080-30psf (60/59,94 Hz*1 ), 1080-30p (30/29,97 Hz*1 ),1080-50i (50 Hz), 1080-60i (60/59,94 Hz*1 )Norme SMPTE296M :720-60p (60/59,94 Hz*1 ), 720-50p (50 Hz)
*1: Les fréquences V-synchro 60/59,94 Hz, 48/47,95 Hz, 24/23,98 Hz sont automatiquement détectées.
Remarque
- La liste précédente indique les formats de signal pris en charge par les modules d'entrée. Les formats de signal pris en charge par le projecteur divergent en fonction du modèle. Consultez votre revendeur pour obtenir plus d'informations.
Procédure d'installation
Débranchez l'alimentation avant d'installer le module d'entrée.
1) Retirez le couvercle d'emplacement.
Couvercle d'emplacement
2) Insérez le module d'entrée.
- Insérez fermement le module d'entrée dans l'emplacement en vous assurant que la prise de la borne de connexion s'engage correctement avec la fiche dans le boîtier du projecteur.
Fiche
3) Fixez le module d'entrée à l'aide de deux vis.
Attention
Veillez à serrer les vis. Sans quoi le module d'entrée pourrait se décrocher.
Une installation erronée pourrait provoquer l'endommagement du module d'entrée.
Installation d'un module d'entrée (optionnel)
Utilisation du module d'entrée
Consultez votre revendeur avant d'utiliser un des modules d'entrée optionnels.
Lorsque vous consultez votre revendeur, veillez à l'informer du [Option control No.] du projecteur. [Option control No.] est affiché dans le menu [Information].
Liste des signaux compatibles
Le tableau suivant spécifie les types de signaux compatibles avec le projecteur.
Affichage de l'écran Résolution Fréquence de b mode (points) Horizontal (kHz) Vertical (Hz) fréquence (MHz) D-480i 720 (1 440) x 480 15,734 59,940 27 000 D-576i 720 (1 440) x 576 15,625 50,000 27 000 D-1035i 1 920 x 1 035 33,750 60,000 74,250 D-1080i 1 920 x 1 080 33,750 60,000 74,250 1 920 x 1 080 28,125 50,000 74,250 D-720p 1 280 x 720 37,500 50,000 74,250 1 280 x 720 45,000 60,000 74,250 D-1080psf/24 1 920 x 1 080 27,000 48,000 74,250 D-1080psf/25 1 920 x 1 080 28,125 50,000 74,250 D-1080psf/30 1 920 x 1 080 33,750 60,000 74,250 D-1080p 1 920 x 1 080 27,000 24,000 74,250 1 920 x 1 080 28,125 25,000 74,250 1 920 x 1 080 33,750 30,000 74,250
Connexion d'un signal à un module d'entrée
Magnétoscope numérique pour utilisation commerciale
Mise sous/hors tension
Branchement du cordon d'alimentation
Installation
1) Insérez le support de cordon d'alimentation dans les orifices prévus au-dessus et endessous de la borne d'entrée CA.
- Poussez le support de cordon d'alimentation sur la gauche pour permettre l'insertion du cordon d'alimentation.
2) Fixez le couvercle du cordon d'alimentation dans la direction de (i) et appuyez fermement dessus dans la direction de (ii).
3) Branchez le cordon d'alimentation à la borne d'entrée CA.
4) Déplacez le support de cordon d'alimentation pour bien fermer le cordon d'alimentation.
Retrait
1) Poussez le support de cordon d'alimentation vers la gauche.
2) Retirez le cordon d'alimentation de la borne d'entrée CA.
3) Retirez le support de cordon d'alimentation.
Mise sous/hors tension
Voyant d'alimentation
Le voyant d'alimentation vous informe de l'état de l'alimentation. Vérifiez l'état du voyant d'alimentation et du voyant de veille avant d'utiliser le projecteur.
État du voyant État du projecteur Voyant d'alimentation(vert) Voyant de veille(rouge) Éteint L'appareil est hors tension. Éteint Allumé L'appareil est hors tension (mode veille). Allumé Éteint Le projecteur est en mode de projection. Éteint Clignotant Le projecteur se prépare à la mise hors tension.Après un instant, l'appareil se met hors tension (en mode veille).
Remarque
Lorsque le projecteur se prépare à la mise hors tension (le voyant d'alimentation est éteint et le voyant de veille est clignotant), le ventilateur interne s'active pour refroidir le projecteur.
Lorsque le projecteur se prépare à la mise hors tension, vous ne pouvez le mettre sous tension via la touche d'alimentation du panneau de commande ou la touche d'alimentation de la télécommande. Si le voyant de veille est allumé, vous pouvez mettre l'appareil sous tension.
Le projecteur consomme de l'électricité même en mode veille (le voyant de veille est allumé).
Panneau de commande Télécommande
- Lorsque [Affichage] (→ page 57) du menu [Réglages] est réglé sur [Off] ou [Arrêt cpte.à reb.], la projection démarrera aussitôt que la lampe s'allume, indépendamment du paramètre [Sélection logo] (→ page 63).
- Après la mise sous tension, des remarques concernant [Avertissement filtre] et [Remplacer lampe] pourraient s'afficher selon l'état du projecteur. (→ page 84)
Touche d'alimentation
Touche d'alimentation
Avant de le mettre sous tension, retirez le cache-objectif.
1) Branchez la prise d'alimentation à la prise murale.
(200 V - 240 V CA 50 Hz/60 Hz)
2) Appuyez sur le côté < > du commutateur d'alimentation principale pour mettre le projecteur sous tension.
- Au bout d'un moment, le voyant de veille s'allume et le projecteur entre en mode veille.
3) Appuyez sur la touche du panneau de commande ou la touche de la télécommande.
- Au bout d'un moment, l'image sera projetée et le signal d'entrée actuellement sélectionné ainsi que l'état de la lampe (→ page 83) seront affichés pendant environ quatre secondes.
Lorsque [Verrouillage code PIN] (→ page 67) a été réglé sur [On] via [Sécurité] dans le menu [Réglages], saisissez votre code PIN.
Le projecteur va émettre un son lorsque la lampe s'allume, mais il ne s'agit pas d'un dysfonctionnement.
Au cours de la projection, le ventilateur tourne en émettant un bruit. Ce bruit peut évoluer en fonction de la température ambiante, et lorsque la lampe est allumée, il pourrait s'intensifier.
Si la lampe est éteinte et immédiatement rallumée, l'image nouvellement projetée pourrait osciller pendant un bref instant. Cela est dû aux caractéristiques mêmes de la lampe et ne constitue pas un dysfonctionnement.
Lorsque [Démarrage immédiat] (→ page 66) du menu [Réglages] est réglé sur [On], l'appareil sera sous tension dès que vous aurez inséré la fiche dans la prise d'alimentation ou basculé le commutateur d'alimentation principale du côté < >.
Lorsque [Affichage] (⇨ page 57) du menu [Réglages] est réglé sur [On] et que [Logo] (⇨ page 63) est réglé sur [Off], le compte à rebours sera affiché mais l'écran d'accueil ne s'affichera pas.
Il est conseillé de projeter les images en continu pendant au moins 30 minutes avant de régler la mise au point.
4) Appuyez sur la touche pour régler approximativement la mise au point de l'image.( → page 34) pour régler la position de l'image.
(→ page 33) pour ajuster la taille de l'image et la faire correspondre à l'écran.( ➔ page 34) pour régler la mise au point. pour régler le zoom et la taille de l'image aîn qu'elle corresponde à celle de l'écran.
- Lorsque [Affichage] (→ page 57) du menu [Réglages] est réglé sur [Off] ou [Arrêt cpte.à reb.], la projection démarrera aussitôt que la lampe s'allume, indépendamment du paramètre [Sélection logo] (→ page 63).
Mise sous/hors tension
Mise hors tension du projecteur
Panneau de commande Télécommande
1) Appuyez sur la touche d'alimentation sur le panneau de commande ou sur la touche d'alimentation de la télécommande.
[Éteindre ?] s'affiche à l'écran.
L'affichage de l'écran disparaît lorsqu'une touche autre que la touche d'alimentation du panneau de commande ou la touche d'alimentation de la télécommande est enfoncée ou lorsqu'environ quatre secondes se sont écoulées.
2) Appuyez de nouveau sur la touche d'alimentation du panneau de commande ou sur la touche d'alimentation de la télécommande.
La lampe s'éteint et la projection s'arrête.
Le voyant d'alimentation s'éteint alors que le ventilateur de refroidissement continue à tourner et que le voyant de veille s'allume.
3) Lorsque le voyant de veille s'allume, appuyez sur le côté <○> du commutateur d'alimentation principale pour mettre le projecteur hors tension.
Remarque
- Ne remettez pas l'alimentation sous tension immédiatement après l'avoir mise hors tension. Dans l'état de refroidissement de la lampe lumineuse après la mise hors tension de l'alimentation, il est possible que la lampe ne s'allume pas même si l'alimentation est sous tension. Dans ce cas, patientez jusqu'à ce que le voyant de veille s'allume en rouge, puis mettez de nouveau l'appareil sous tension. Mettre l'alimentation sous tension pendant que la lampe est encore chaude peut réduire la durée de vie de la lampe.
Lorsque vous coupez l'alimentation via la touche d'alimentation du panneau de commande ou la touche d'alimentation de la télécommande et que le commutateur d'alimentation principale du boîtier du projecteur est basculé sur marche, le projecteur continue à consommer de l'énergie. Pour connaître les détails concernant la consommation d'énergie, référez-vous à « Consommation » (→ page 100).
Vérifiez que le verrouillage de touche est désactivé dans le menu [Sécurité].(→ page 67)
Si vous utilisez le projecteur pendant plus de 24 heures, mettez-le hors tension toutes les 24 heures et patientez une heure. Cela augmentera la durée de vie de la lampe.
Fonction d'arrêt direct de l'alimentation
Vous pouvez débrancher le cordon d'alimentation, couper l'alimentation avec le commutateur de disjoncteur, etc. sans appuyer sur la touche d'alimentation de la télécommande ou le commutateur d'alimentation principale du projecteur.
C'est utile dans les cas où le commutateur est difficile d'accès, comme lorsque le projecteur est monté au plafond. Cette fonction assure également la sécurité au cas où une panne de courant se produirait, ou si le câble d'alimentation se débranche accidentellement de la prise murale immédiatement après la mise hors tension.
Remarque
- Si la lampe a été refroidie en utilisant la fonction d'arrêt direct de l'alimentation, il est possible qu'elle mette parfois plus de temps que d'habitude à se rallumer.
Fonction de gestion de l'alimentation
Le projecteur est doté d'une fonction de gestion de l'alimentation. Si aucun signal n'est détecté pendant 30 secondes et qu'aucune action n'est exécutée sur le projecteur, [Pas de signal] et la minuterie apparaissent sur l'écran et le compte à rebours commence.
Si le compte à rebours se termine sans qu'aucun signal n'ait été connecté ni qu'aucune action n'ait été exécutée sur le projecteur, cette fonction s'enclenche pour économiser de l'énergie et augmenter la durée de vie de la lampe.
Remarque
- Le réglage d'usine est [Off]. Se référer à [Extinction automatique] (→ page 66) pour plus de détails.
Projection
Vérifiez les connexions du périphérique externe (⇨ page 24) et les connexions du cordon d'alimentation (⇨ page 29), puis mettez l'appareil sous tension (⇨ page 31) pour démarrer la projection.
Sélection du signal d'entrée
Sélectionnez un signal d'entrée.
Les images sélectionnées à l'aide de la touche
Attention
Ajustement de l'image
Austement de la position de l'objectif
1) Appuyez sur la touche de la télécommande ou du panneau de commande.
- [Lens-shift] est affiché à l'écran pendant quatre secondes.
2) Appuyez sur ▲▼◀▶ pour déplacer l'image horizontalement et verticalement pendant que l'affichage apparait.
Alors que vous déplacez l'image, il y a une certaine position où les flèches pointant vers le haut, le bas, la gauche et la droite deviennent rouges. Cette position est le centre de l'objectif.
Aux positions de décalage maximum, les flèches disparaissent.
Le projecteur conserve les réglages effectués à l'aide de la fonction de décalage d'objectif lorsqu'il est hors tension.
Lorsque la position de l'image est modifiée, celle-ci peut devenir un peu plus sombre.
Projection
Raglage de la mise au point et du zoom
1) Appuyez sur les touches et de la télécommande ou du panneau de commande.
- [Mise au point] et [Zoom] sont affichés à l'écran pendant quatre secondes.
2) Appuyez sur ▲▼ pour ajuster la mise au point et le zoom pendant que l'affichage apparait.
Remarque
Lorsque [Affichage] est réglé sur [Off], l'écran de réglage n'apparaît pas.
Il est conseillé de projeter les images en continu pendant au moins 30 minutes avant de régler la mise au point.
Si l'effet keystone apparaît, référez-vous à « Correction de l'effet keystone » (→ page 36) pour en apprendre plus.
Utilisation de la télécommande
Utilisation de la fonction obturateur
Vous pouvez bloquer complètement la lumière de projection.
Touche
1) Appuyez sur la touche de la télécommande.
- Cela bloque la lumière de projection. Le voyant de l'obturateur s'allume en bleu.
2) Appuyez à nouveau sur la touche .
- Cela ouvre l'obturateur est redémarre la projection. Le voyant de l'obturateur s'éteint.
Remarque
Le fonctionnement de l'obturateur peut varier suivant les réglages. Effectuez les réglages à l'aide de [Shutter] dans le menu [Réglages].
La touche se trouve également sur le panneau de commande.
Si un message d'erreur apparaît quad vous appuyez sur la touche , le verrouillage de touche est activé. Vérifiez le réglage de [Shutter] depuis le menu [Réglages].
Utilisation de la fonction de gel
Vous pouvez geler temporairement l'image projetée indépendamment de l'état de lecture du périphérique externe.
Touche
1) Appuyez sur la touche de la télécommande.
- Cela gèle temporairement l'image.
2) Appuyez sur la touche de la télécommande ou du panneau de commande.
- Déverrouille le gel de l'image.
Commutation du signal d'entrée
Le signal d'entrée pour la projection peut être commuté.
Touches
1) Appuyez sur les touches
Touche
Utilisation de la télécommande
Remarque
Correction de l'effet keystone
Vous pouvez corriger l'effet keystone qui apparaît lorsque le projecteur est installé incliné ou lorsque l'écran est incliné.
La quantité et la portée de la correction varient selon le signal d'entrée.
Avec certains réglages, l'image pourrait être déformée un instant.
Pour obtenir une image corrigée, le signal subit une compression numérique avant la projection et les lignes ainsi que le texte pourraient être légèrement altérés par rapport à l'image originale.
Pour en savoir plus sur la correction, référez-vous à [Trapèze] dans le menu [Écran].
Touche
1) Appuyez sur la touche de la télécommande.
- Chaque pression sur la touche change l'affichage entre l'affichage de la correction standard de l'effet keystone et l'affichage de la correction de coin.
Correction standard de l'effet keystone
Corrige l'effet keystone verticalement et horizontalement.
1) Appuyez sur ▲▼◀▶ dans la direction où vous voulez effectuer la correction lorsque [Trapèze] est affiché.
Remarque
- Une pression sur la touche de la télécommande pendant au moins trois secondes pendant que [Trapèze] est affiché ramène l'image à son état sans correction.
Correction de coin
Corrige la distorsion aux coins des images.
1) Lorsque [Trapèze] s'affiche, appuyez sur la touche et sélectionnez le coin à corriger.
- Chaque pression sur la touche déplace le coin sélectionné dans le sens horaire.
2) Appuyez sur ▲▼◀▶ pour corriger la distorsion.
Remarque
- Une pression sur la touche de la télécommande pendant au moins trois secondes pendant que [Trapèze] est affiché ramène l'image à son état sans correction.
Sélection d'un mode de qualité d'image
Une pression sur la touche de la télécommande affiche le menu pour le [Sélection image] actuellement sélectionné, puis chaque pression suivante sur la touche change de mode.
Touche
Remarque
- Se référer à « Menu [Sélection image] » (→ page 47) pour plus de détails.
Utilisation de la télécommande
Ajustement de la qualité d'image
Appuyer sur la touche de la télécommande fait s'afficher le menu [Ajust. image].
Touche
1) Appuyez sur la touche de la télécommande. .
- Le menu d'ajustement s'affiche.
3) Appuyez sur ▲▼ pour sélectionner l'élément à ajuster, puis appuyez sur ◀▶ pour changer le réglage.
Remarque
- Se référer à « Menu [Ajust. image] » (→ page 48) pour plus de détails.
Touche de l'écran
Vous pouvez changer le réglage du menu [Écran].
Touche
Une pression sur la touche de la télécommande affiche le menu pour le [Écran] actuellement sélectionné, puis chaque pression suivante sur la touche change de mode.
Remarque
Se référer à « Menu [Écran] » (→ page 53) pour plus de détails.
Si vous maintenez cette touche enfoncée pendant au moins cinq secondes, les paramètres du menu [Écran] se remettront aux valeurs d'usine.
Affichage d'une minuterie pour les exposés
Quand vous appuyez sur la touche de la télécommande, le projecteur affiche soit le compte du temps écoulé depuis la pression sur la touche, soit un compte à rebours.
Une seconde pression sur la touche arrête le compteur et affiche le temps écoulé jusque là.
Appuyez de nouveau sur la touche pour redémarrer le compteur.
Touche
Remarque
Se référer à [Minuteur présentation] (→ page 71) pour plus de détails.
Appuyez sur la touche pendant au moins trois secondes pour remettre le compteur à zéro. Le compteur est remis à "000:00" et le compte à rebours est remis à l'heure réglée sur la minuterie.
Vérification des paramètres
Vous pouvez vérifier l'état des signaux et de la lampe sur l'écran au cours de la projection.
Touche
Une pression sur la touche de la télécommande fait s'afficher la première page d'informations.
Une nouvelle pression sur la touche fait s'afficher la deuxième page d'informations.
Une pression sur la touche ferme l'affichage des informations.
Remarque
Se référer à « Menu [Information] » (→ page 73) pour plus de détails.
Pour se déplacer depuis les informations à un autre menu, appuyez sur ▲▼.
Il y a aussi la touche du panneau de commande.
Procédure d'utilisation
- Le menu s'affiche.
- Sélectionnez l'élément à ajuster entre [Entrée], [Ajust. ordin.], [Sélection image], [Ajust. image], [Écran], [Réglages], [Information] et [Nom du projecteur]. L'élément actuellement sélectionné apparaît avec un curseur orange et le sous-menu de l'élément sélectionné est affiché du côté droit.
3) Appuyez sur la touche .
Le sous-menu est affiché et les éléments du sous-menu peuvent être sélectionnés.
Vous pouvez aussi appuyer sur ▶ pour accéder au sous-menu.
Pour certains sous-menus, un menu supplémentaire (sous-menu 2) comprenant les paramètres avancés sera affiché.
Pour les éléments où les paramètres peuvent être changés ou lorsqu'il y a une échelle des distances, l'écran du menu disparaît et, comme illustré ci-dessous, un écran d'ajustement pour les paramètres sélectionnés (écran d'ajustement individuel) apparaît.
Remarque
Pour certains formats d'entrée de signal vers le projecteur, il ne sera pas possible d'ajuster certains éléments ou d'utiliser certaines fonctions. Les éléments de menu qui ne peuvent pas être ajustés ou utilisés sont grisés et ne peuvent pas être sélectionnés.
Certains éléments peuvent être ajustés sans l'entrée d'un signal.
Si aucune opération n'est exécutée pendant environ quatre secondes ou dix secondes, l'écran d'ajustement est automatiquement quitté. La durée au bout de laquelle l'écran d'ajustement est quitté varie en fonction de l'écran.
Pour plus de détails sur les éléments du sous-menu, reportez-vous à « Sous-menu » (→ pages 39 à 41).
Un menu guide s'affiche sous le menu. Les touches à sélectionner et à actionner sont affichées.
(Le menu guide du sous-menu est représenté ci-dessous.)
(1) Appuyez sur la touche
pour fermer le menu. pour exécuter un élément.
Le menu principal comprend les huit éléments suivants.
Lorsqu'un élément du menu principal est sélectionné, l'écran passe à l'écran de sélection de sous-menu.
[Entrée] [Ajust. ordin.] [Sélection image] [Ajust. image] [Écran] [Réglages] [Information] [Nom du projecteur]
L'écran de sous-menu de l'élément sélectionné depuis le menu principal s'affiche et vous pouvez régler et ajuster les divers éléments du sous-menu.
Élément du sous-menu Réglages d’usine Page [Entrée 1] [RGB(PC analogique)] 42 [Entrée 2] [RGB] 42 [Entrée 3] —* 1 — [Entrée 4] —* 1 —
*1: Varie selon le signal d'entrée.
Remarque
- Le signal est affiché pour [Entrée 3], et [Entrée 4] change en fonction du type de module d'entrée inséré.
Élément du sous-menu Réglages d’usine Page [Réglage PC auto.] — 44 [Synchro fine] —* 1 44 [Total de points] —* 1 44 [Position horiz.] —* 1 44 [Position vert.] —* 1 45 [Mode actuel] —* 1 45 [Clamp] —* 1 45 [Surface affich.horiz.] —* 1 45 [Surface affich.vert.] —*1 45 [Réinitialiser] — 46 [Effaçer] — 46 [Mémoriser] — 46
*1: Varie selon le signal d'entrée.
Détails (→ page 47)
ust. image]
Élément du sous-menu Réglages d’usine Page [Contraste] 32 48 [Luminosité] 32 48 [Couleur]* 1 32 48 [Teinte]* 1 32 48 [Réglages des paramètres couleur] — 49 [Température de couleur] [Médium] 50 Balance des blancs ([Rouge]/[Vert]/[Bleu]) 32 50 [Couleurs sombres] 32 50 [Réglage automatique de l’image] [L 1] 50 [Couleur avancée] [Auto] 50 [Netteté] Pour les entrées ordinateur : 0Pour les entrées vidéo : 15 51 [Gamma] 8 51 [Réducteur de bruit]* 1 [On] 51 [Progressif]* 1 [On] 51 [Réinitialiser] — 51 [Mémoriser] — 52
*1: S'affiche et ne peut être sélectionné que lorsqu'une entrée vidéo est utilisée.
cran]
Élément du sous-menu Réglages d’usine Page [Normal] — 53 [Pleine largeur] — 53 [Large(16:9)] — 53 [Zoom] — 53 [Vrai]* 1 — 53 [Personnalisé] — 54 [Ajustement personnalisé] — 54 [Zoom digital +]* 1 — 54 [Zoom digital -]* 1 — 55 [Trapèze] — 55 [Plafond] [Off] 56 [Arrière] [Off] 56 [Réinitialiser] — 56
*1: Ne s'affiche et ne peut être sélectionné que lorsqu'une entrée ordinateur est utilisée.
[églages]
Élément du sous-menu Réglages d’usine Page [Langue] [English] 57 [Position du menu] — 57 [Affichage] [On] 57 [Fond] [Bleu] 58 [Sélection lampe ] [4 lampes] 58 [Puissance lampe] (Auto) 58 [Intervalle lampe] [Off] 59 [Fusion des côtés] [Off] 59 [Colorimétrie] [Off] 60 [HDMI] [Normal] 63 [Logo] — 63 [Contrôle du ventilateur] [Normal] 65 [Télécommande] [Tous] 65 [Capteur de télécommande] [Avant et arrière] 65 [Extinction automatique] [Off], [Timer]30 minutes 66 [Démarrage immédiat] [Off] 66 [Sécurité] — 67 [Identité du PJ] [Tous] 68 [Shutter] — 68 [Contrôle retardement vidéo] [Off] 69 [Closed caption] [Off] 70 [Compteur du filtre] — 70 [Minuteur présentation] [Compte progressif] 71 [Echantillon test] — 72 [Réglages d’usine] — 72
Détails (→ page 73)
[om du projecteur]
Reportez-vous à "Mode d'emploi—Utilisation du réseau".
Détails (→ page 74)
Sélectionnez [Entrée] à partir du menu principal sur l'écran du menu, et sélectionnez l'élément du sous-menu.
Pour l'utilisation de l'écran du menu, reportez-vous à « Naviguer dans les menus » (→ page 38).
- Après avoir sélectionné l'élément, appuyez sur ▲▼◀▶ pour effectuer le réglage.
Panneau de commandeTél
[Entrée 1]
1) Appuyez sur ▲▼ pour sélectionner [Entrée 1], et appuyez sur la touche .
- Le sous-menu 2 s'affiche.
2) Appuyez sur ▲▼ pour sélectionner un élément, et appuyez sur la touche .
[RGB(PC analogique)] À sélectionner lorsque vous entrez un signal analogique depuis un ordinateur à la borne. [RGB(Scart)] À sélectionner lorsque vous entrez un signal SCART à la borne. [RGB(PC digital)] À sélectionner lorsque vous entrez un signal numérique depuis un ordinateur à la borne. [RGB(AV HDCP)] À sélectionner lorsque vous entrez un signal numérique compatible-HDCP à la borne. [HDMI] À sélectionner lorsque vous entrez un signal numérique compatible-HDMI à la borne.
Remarque
- La borne à broche SCART21 est une borne de sortie vidéo fournie avec les lecteurs vidéos principalement vendus en Europe. Pour visualiser une sortie RVB depuis cette borne sur le projecteur, connectez la borne à broche SCART21 du lecteur vidéo à la borne du projecteur à l'aide du câble approprié. Les signaux RGB SCART qui doivent être lus via la borne sont limités aux signaux RVB 480i et 576i. Les signaux vidéo composites ne peuvent pas être lus.
[Entrée 2]
1) Appuyez sur ▲▼ pour sélectionner [Entrée 2], et appuyez sur la touche .
- Le sous-menu 2 s'affiche.
2) Appuyez sur ▲▼ pour sélectionner un élément, et appuyez sur la touche .
[RGB] À sélectionner lorsque vous entrez un signal analogique depuis un ordinateur à la borne. [Y, Pb/Cb, Pr/ Cr] À sélectionner lorsque vous entrez un signal vidéo composite à la borne. [Viséo] À sélectionner lorsque vous entrez un signal vidéo composite à la borne. [S-vidéo] À sélectionner lorsque vous entrez un signal S-vidéo à la borne.
Remarque
- Alors que certains signaux RVB sont automatiquement reconnus, les signaux RVB non reconnus sont détectés en tant que "Y,Pb/Cb,Pr/ Cr"et il est nécessaire de sélectionner [RGB] dans le menu.
[Système]
[Système] s'affiche sous le sous-menu.
1) Appuyez sur ▲▼ pour sélectionner [Système] sous le sous-menu et appuyez sur la touche .
- Le sous-menu 2 s'affiche.
2) Appuyez sur ▲▼ pour sélectionner un élément et appuyez sur la touche .
- Appuyez sur la touche ou ◀ pour retourner au sous-menu.
Pour les entrées d'ordinateur
[Auto] Lorsqu'il n'y a pas de signal d'entrée compatible avec le signal d'un ordinateur connecté au projecteur, la fonction de réglage automatique d'ordinateur fonctionne et [Auto] s'affiche sur le système.Si les images ne sont pas projetées correctement, ajustez manuellement les paramètres pour correspondre à votre ordinateur et enregistrez sous [Mémoriser]. — Il n'y a pas de signal d'entrée depuis l'ordinateur.Vérifiez les branchements. [Mode 1] - [Mode 10] À sélectionner lorsque vous entrez un signal numérique depuis un ordinateur à la borne.
Pour les entrées vidéo et S-vidéo
[Auto] Le projecteur sélectionne automatiquement le système de couleurs du signal d'entrée. [PAL]/ [SECAM]/ [NTSC]/ [NTSC4.43]/ [PAL-M]/ [PAL-N] Ceci est une liste des systèmes de couleurs compatibles. Le système de couleur Japonais est NTSC. Lorsque la qualité du signal d'entrée est faible (couleurs irrégulières, absence de couleurs, etc.) et que le système de couleur n'est pas sélectionné même lorsque [Auto] est réglé, sélectionnez [NTSC].
■ur les entrées de composants
[Auto] Le projecteur sélectionne automatiquement la méthode de balayage du signal d'entrée. Méthode de balayage vidéo du composant ([480p], [576p], [720p], [480i], [576i], [1035i], [1080i], [1080p]) Lorsque la vidéo n'est pas lue correctement, sélectionnez la méthode de balayage correcte pour le menu.
Sélectionnez [Ajust. ordin.] à partir du menu principal sur l'écran du menu, et sélectionnez l'élément du sous-menu.
Pour l'utilisation de l'écran du menu, reportez-vous à « Naviguer dans les menus » (→ page 38).
- Après avoir sélectionné l'élément, appuyez sur ▲▼◀▶ pour effectuer le réglage.
Panneau de commandeTél
[Réglage PC auto.]
Ajuste automatiquement la synchronisation, le nombre total de points, le décalage horizontal et le décalage vertical.
1) Appuyez sur ▲▼ pour sélectionner [Réglage PC auto.]. .
- Cela déclenche l'ajustement automatique.
Remarque
Vous pouvez aussi utiliser [Réglage PC auto.] en appuyant sur la touche de la télécommande.
Certains ordinateurs ne pourront pas ajuster [Synchro fine], [Total de points], [Position horiz.] et [Position vert.]. Dans ce cas, ajustez manuellement et enregistrez sous [Mémoriser].
Après avoir enregistré les paramètres automatiquement ajustés, vous pouvez sélectionner ce mode en utilisant [Système] dans le menu [Entrée].
La fonction de réglage automatique d'ordinateur ne fonctionne pas lorsque [480p], [576p], [720p], [480i], [576i], [1035i], [1080i] ou [1080p] a été sélectionné à l'aide de [Système] dans le menu [Entrée].
Avec certains ordinateurs et types de signal, il peut être impossible de projeter les images correctement.
[Synchro fine]
Réglez le projecteur lorsqu'il y a un tremblement dû à une erreur d'alignement (de synchronisation).
1) Appuyez sur ▲▼ pour sélectionner [Synchro fine]. .
- Le menu avancé s'affiche.
- Lorsque le menu avancé s'affiche, appuyez sur ▲▼ pour avancer ou reculer dans les menus.
3) Tout en regardant l'écran, appuyez sur ◀▶ pour ajuster le réglage.
- Appuyez sur la touche pour retourner au sous-menu.
Remarque
La valeur d'ajustement peut être réglée de 0 à 31.
Pour certains ordinateurs, il peut être impossible d'éliminer complètement le tremblement de l'écran.
[Total de points]
Réglez le nombre total de points dans l'intervalle horizontal.
1) Appuyez sur ▲▼ pour sélectionner [Total de points]. .
- Le menu avancé s'affiche.
- Lorsque le menu avancé s'affiche, appuyez sur ▲▼ pour avancer ou reculer dans les menus.
3) Tout en regardant l'écran, appuyez sur ◀▶ pour ajuster le réglage.
- Appuyez sur la touche pour retourner au sous-menu.
[Position horiz.]
Règle la position horizontale de l'écran.
1) Appuyez sur ▲▼ pour sélectionner [Position horiz.]. .
- Le menu avancé s'affiche.
- Lorsque le menu avancé s'affiche, appuyez sur ▲▼ pour avancer ou reculer dans les menus.
3) Tout en regardant l'écran, appuyez sur ◀▶ pour ajuster le réglage.
- Appuyez sur la touche pour retourner au sous-menu.
[Position vert.]
Règle la position verticale de l'écran.
1) Appuyez sur ▲▼ pour sélectionner [Position vert.]. .
- Le menu avancé s'affiche.
- Lorsque le menu avancé s'affiche, appuyez sur ▲▼ pour avancer ou reculer dans les menus.
3) Tout en regardant l'écran, appuyez sur ◀▶ pour ajuster le réglage.
- Appuyez sur la touche pour retourner au sous-menu.
[Mode actuel]
Affiche les valeurs actuelles de la fréquence H-synchro et de la fréquence V-synchro pour l'écran actuellement connecté.
1) Appuyez sur ▲▼ pour sélectionner [Mode actuel]. ou sur la touche ▶.
- Le menu avancé s'affiche.
- Appuyez sur la touche ou ◀ pour retourner au sous-menu.
[Clamp]
Ajuste la position de la fixation.
Utilisez ceci lorsqu'une ligne noire est visible sur l'image projetée.
1) Appuyez sur ▲▼ pour sélectionner [Clamp]. .
- Le menu avancé s'affiche.
- Lorsque le menu avancé s'affiche, appuyez sur
▲▼ pour avancer ou reculer dans les menus.
3) Tout en regardant l'écran, appuyez sur ◀▶ pour ajuster le réglage.
- Appuyez sur la touche pour retourner au sous-menu.
[Surface affich.horiz.]
Ajuste la résolution horizontale.
1) Appuyez sur ▲▼ pour sélectionner [Surface affich.horiz.]. .
- Le menu avancé s'affiche.
- Lorsque le menu avancé s'affiche, appuyez sur ▲▼ pour avancer ou reculer dans les menus.
3) Tout en regardant l'écran, appuyez sur ◀▶ pour ajuster le réglage.
- Appuyez sur la touche pour retourner au sous-menu.
Remarque
- Vous ne pouvez pas ajuster [Surface affich.horiz.] lorsque [480p], [576p], [720p], [480i], [576i], [1035i], [1080i] ou [1080p] a été sélectionné à l'aide de [Système] dans le menu [Entrée].
[Surface affich.vert.]
Ajuste la résolution verticale.
1) Appuyez sur ▲▼ pour sélectionner [Surface affich.vert.]. .
- Le menu avancé s'affiche.
- Lorsque le menu avancé s'affiche, appuyez sur ▲▼ pour avancer ou reculer dans les menus.
3) Tout en regardant l'écran, appuyez sur ◀▶ pour ajuster le réglage.
- Appuyez sur la touche pour retourner au sous-menu.
Remarque
- Vous ne pouvez pas ajuster [Surface affich.vert.] lorsque [480p], [576p], [720p], [480i], [576i], [1035i], [1080i] ou [1080p] a été sélectionné à l'aide de [Système] dans le menu [Entrée].
[Réinitialiser]
Le réglage revient à sa valeur d'avant l'ajustement.
1) Appuyez sur ▲▼ pour sélectionner [Réinitialiser]. . .
Le réglage revient à la valeur d'avant l'ajustement.
Sélectionnez [Non] et appuyez sur la touche pour retourner au sous-menu.
[Effaçer]
Supprime les valeurs enregistrées dans [Mémoriser].
1) Appuyez sur ▲▼ pour sélectionner [Effaçer]. ou sur la touche ▶. . . pour retourner au sous-menu 2.
[Mémoriser]
Enregistre les valeurs ajustées dans [Mémoriser].
1) Appuyez sur ▲▼ pour sélectionner [Mémoriser].
2) Appuyez sur ou sur la touche ▶.
- Le contenu enregistré de chaque mode est affiché dans le sous-menu 2.
3) Appuyez sur ▲▼ pour sélectionner le mode à enregistrer.
4) Appuyez sur la touche .
5) Sélectionnez [Oui] et appuyez sur la touche .
Le mode sélectionné est enregistré et le projecteur revient au sous-menu 2.
Sélectionnez [Non] et appuyez sur la touche pour retourner au sous-menu 2.
Sélectionnez [Sélection image] à partir du menu principal sur l'écran du menu, et sélectionnez l'élément du sous-menu.
Pour l'utilisation de l'écran du menu, reportez-vous à « Naviguer dans les menus » (→ page 38).
- Après avoir sélectionné l'élément, appuyez sur ▲▼◀▶ pour effectuer le réglage.
Panneau de commandeTél
- Vous pouvez aussi afficher les sous-menus en utilisant la touche de la télécommande.
Ajustement de la qualité de l'image
Ajustez la qualité d'image de l'image projetée pour correspondre à l'environnement dans lequel vous utilisez le projecteur.
[standard]
Réinitialise les éléments du menu [Ajust. image] aux paramètres par défaut.
[Authentique]
Dans ce mode, les paramètres intermédiaires sont réglés pour être plus lumineux afin d'améliorer la vue dans les endroits lumineux.
- Ce mode ne peut être sélectionné que pour des entrées d'ordinateur.
[néma]
Met en évidence la gradation, rendant ce mode plus adapté au visionnage de films.
- Ce mode ne peut être sélectionné que pour des entrées vidéo ou composant.
[ynamique]
Donne des images avec un plus fort contraste que [Standard].
[image 1] - [Image 10]
Utilise les paramètres de qualité d'image réglés manuellement à l'aide du menu [Ajust. image].
- Les images peuvent être enregistrées à la fois avec des entrées ordinateur et des entrées vidéo.
Sélectionnez [Ajust. image] à partir du menu principal sur l'écran du menu, et sélectionnez l'élément du sous-menu.
Pour l'utilisation de l'écran du menu, reportez-vous à « Naviguer dans les menus » (→ page 38).
- Après avoir sélectionné l'élément, appuyez sur ▲▼◀▶ pour effectuer le réglage.
Panneau de commandeTél
- Vous pouvez aussi afficher les sous-menus en utilisant la touche de la télécommande.
[Contraste]
1) Appuyez sur ▲▼ pour sélectionner [Contraste]. .
Le menu avancé s'affiche.
Lorsque le menu avancé s'affiche, appuyez sur ▲▼ pour avancer ou reculer dans les menus.
3) Tout en regardant l'écran, appuyez sur ◀▶ pour ajuster le réglage.
Fonctionnement Plage de réglage Appuyez sur ▶. Accentue les contrastes. Valeur maximale 63 Appuyez sur ◀. Diminue les contrastes. Valeur minimale 0
[Luminosité]
1) Appuyez sur ▲▼ pour sélectionner [Luminosité]. .
Le menu avancé s'affiche.
Lorsque le menu avancé s'affiche, appuyez sur ▲▼ pour avancer ou reculer dans les menus.
3) Tout en regardant l'écran, appuyez sur ◀▶ pour ajuster le réglage.
Fonctionnement Plage de réglage Appuyez sur ▶. La luminosité augmente. Valeur maximale 63 Appuyez sur ◀. La luminosité diminue. Valeur minimale 0
[Couleur]
Ce réglage ne peut être fait que pour des entrées vidéo ou composant.
1) Appuyez sur ▲▼ pour sélectionner [Couleur]. .
Le menu avancé s'affiche.
Lorsque le menu avancé s'affiche, appuyez sur ▲▼ pour avancer ou reculer dans les menus.
3) Tout en regardant l'écran, appuyez sur ◀▶ pour ajuster le réglage.
Fonctionnement Plage de réglage Appuyez sur ▶. Assombrit l'image. Valeur maximale 63 Appuyez sur ◀. Rend l'image plus lumineuse. Valeur minimale 0
[Teinte]
Ce réglage ne peut être fait que pour des entrées vidéo ou composant.
1) Appuyez sur ▲▼ pour sélectionner [Teinte]. .
Le menu avancé s'affiche.
Lorsque le menu avancé s'affiche, appuyez sur ▲▼ pour avancer ou reculer dans les menus.
3) Tout en regardant l'écran, appuyez sur ◀▶ pour ajuster le réglage.
Fonctionnement Plage de réglage Appuyez sur ▶. Accentue les verts. Valeur maximale 63 Appuyez sur ◀. Accentue les violets. Valeur minimale 0
[Réglages des paramètres couleur]
Ajuste la couleur de l'image projetée comme le souhaitez.
1) Appuyez sur ▲▼ pour sélectionner [Réglages des paramètres couleur]. .
1) Appuyez sur la touche . .
1) Appuyez sur ▲▼◀▶ pour déplacer le curseur au centre de [COLOR] et appuyez sur la touche . .
- L'écran passe au réglage de [GAMMA].
4) Appuyez sur ▲▼◀▶ pour sélectionner la couleur à afficher après ajustement et appuyez sur la touche . avec le curseur sur [LIST].
[LIST] Affiche [COLOR MANAGEMENT LIST]. [COLOR M.] Annule l’ajustement et fait revenir le curseur à l’état sans couleur. [MENU] Arrête l’affichage de [COLOR MANAGEMENT LIST].
6) [COLOR MANAGEMENT LIST] s'affiche.
- Vous pouvez vérifier si la couleur enregistrée a bien été répertoriée.
■ilisations de [COLOR MANAGEMENT LIST]
- Réajustement de couleurs répertoriées
1) Appuyez sur ▲▼ pour sélectionner la couleur à réajuster. pour retourner au menu [COLOR SELECTION].
- Vous pouvez réajuster la couleur.
●Suppression des couleurs répertoriées
1) Appuyez sur ▲▼ pour sélectionner la couleur à supprimer. . .
- La couleur enregistrée sera supprimée.
[ALL DEL] Supprime tous les éléments répertoriés de la liste. [MENU] Arrête l'affichage de [COLOR MANAGEMENT LIST] et revient au menu [Ajust. image]. [COLOR M.] Répertorie l'ajustement. Un nouveau curseur sans couleur apparaît et vous pouvez continuer les ajustements.
[Température de couleur]
1) Appuyez sur ▲▼ pour sélectionner [Température de couleur]. .
- Le menu avancé s'affiche.
- Lorsque le menu avancé s'affiche, appuyez sur ▲▼ pour avancer ou reculer dans les menus.
3) Tout en regardant l'écran, appuyez sur ◀▶ pour ajuster le réglage.
Fonctionnement Plage de réglage Appuyez sur ▶. Augmente la température des couleurs. [Trés Bas]-[Bas]-[Médium]-[Haut] Appuyez sur ◀. Diminue nettement la température des couleurs.
Remarque
● [Trés Bas] (accentuation des rouges) - [Haut] (accentuation des bleus)
Balance des blancs ([Rouge]/[Vert]/[Bleu])
1) Appuyez sur ▲▼ pour sélectionner [Rouge] (ou [Vert] ou [Bleu]). .
Le menu avancé s'affiche.
Lorsque le menu avancé s'affiche, appuyez sur ▲▼ pour avancer ou reculer dans les menus.
3) Tout en regardant l'écran, appuyez sur ◀▶ pour ajuster le réglage.
Fonctionnement Plage de réglage Appuyez sur ▶. Affaibli les couleurs. Valeur maximale 63 Appuyez sur ◀. Renforce les couleurs. Valeur minimale 0
[Couleurs sombres]
1) Appuyez sur ▲▼ pour sélectionner [Couleurs sombres]. ou sur la touche ▶.
3) Appuyez sur ▲▼ pour sélectionner [Rouge] (ou [Vert] ou [Bleu]). .
[Rouge] Valeur minimale 0 – valeur maximale 63 [Vert] Valeur minimale 0 – valeur maximale 63 [Bleu] Valeur minimale 0 – valeur maximale 63
[Réglage automatique de l'image]
Accentue les zones sombres de l'image projetée.
1) Appuyez sur ▲▼ pour sélectionner [Réglage automatique de l'image]. .
- L'effet est plus important avec [L 2].
[Couleur avancée]
Déclenche le dispositif de contrôle des couleurs qui contrôle indépendamment la quantité de lumière jaune.
1) Appuyez sur ▲▼ pour sélectionner [Couleur avancée]. .
- Le réglage changera comme suit à chaque fois que vous appuyez sur la touche.
- La balance des blancs peut changer en fonction de l'image.
[Netteté]
1) Appuyez sur ▲▼ pour sélectionner [Netteté]. .
- Le menu avancé s'affiche.
- Lorsque le menu avancé s'affiche, appuyez sur ▲▼ pour avancer ou reculer dans les menus.
3) Tout en regardant l'écran, appuyez sur ◀▶ pour ajuster le réglage.
Fonctionnement Plage de réglage Appuyez sur ▶. Augmente les détails. Valeur maximale 31 Appuyez sur ◀. Diminue les détails. Valeur minimale 0
[Gamma]
1) Appuyez sur ▲▼ pour sélectionner [Gamma]. .
- Le menu avancé s'affiche.
- Lorsque le menu avancé s'affiche, appuyez sur ▲▼ pour avancer ou reculer dans les menus.
3) Tout en regardant l'écran, appuyez sur ◀▶ pour ajuster le réglage.
Fonctionnement Plage de réglage Appuyez sur ▶. Rend les gradations intermédiaires plus lumineuses. Valeur maximale 15 Appuyez sur ◀. Rend les gradations intermédiaires plus sombres. Valeur minimale 0
[Réducteur de bruit]
Réduit le bruit lors du visionnage de vieilles vidéos ou d'autres images présentant du bruit.
1) Appuyez sur ▲▼ pour sélectionner [Réducteur de bruit]. .
[Off] [On]
[Progressif]
Peut être réglé pour les signaux d'entrée vidéo de 480i, 576i, 1035i et 1080i.
1) Appuyez sur ▲▼ pour sélectionner [Progressif]. .
- Le réglage changera comme suit à chaque fois que vous appuyez sur la touche.
[Off] [On] [Film]
Réglez sur [Off] lorsqu'une vidéo avec beaucoup de mouvement présente des tremblements ou des lignes horizontales.
[Film] permet la lecture d'images de 3-2 trames/2-2 trames sur le projecteur sans perte de qualité des images.
Lorsque vous effectuez le changement, l'image va être déformée un instant.
[Réinitialiser]
Le réglage revient à sa valeur d'avant l'ajustement.
1) Appuyez sur ▲▼ pour sélectionner [Réinitialiser]. ou sur la touche ▶. .
Le réglage revient à sa valeur d'avant l'ajustement.
Sélectionnez [Non] et appuyez sur la touche pour retourner au sous-menu.
[Mémoriser]
1) Appuyez sur ▲▼ pour sélectionner [Mémoriser]. ou sur la touche ▶.
- Le contenu enregistré de chaque mode est affiché dans le sous-menu 2.
3) Appuyez sur ▲▼ pour sélectionner le mode à enregistrer. . .
- Le mode sélectionné est enregistré et le projecteur revient au sous-menu 2.
- Sélectionnez [Non] et appuyez sur la touche pour retourner au sous-menu 2.
Remarque
L'élément réglé est enregistré et répertorié dans [Mémoriser].
Avec [Mémoriser], vous pouvez répertorier des images à la fois avec des entrées ordinateur et des entrées vidéo.
Sélectionnez [Écran] à partir du menu principal sur l'écran du menu, et sélectionnez l'élément du sous-menu.
Pour l'utilisation de l'écran du menu, reportez-vous à « Naviguer dans les menus » (→ page 38).
- Après avoir sélectionné l'élément, appuyez sur ▲▼◀▶ pour effectuer le réglage.
Panneau de commandeTé
- Vous pouvez aussi afficher les sous-menus en utilisant la touche de la télécommande.
[Normal]
Affiche la taille maximale permise tout en maintenant le rapport d'aspect du signal d'entrée.
1) Appuyez sur ▲▼ pour sélectionner [Normal]. .
[Pleine largeur]
Affiche la taille de plein écran.
Lorsqu'il n'y a pas de signal d'entrée, cet élément est grisé et ne peut pas être sélectionné. .
[Large(16:9)]
Affiche en écran large avec un rapport d'aspect de 16:9.
Lorsqu'il n'y a pas de signal d'entrée, cet élément est grisé et ne peut pas être sélectionné. .
[Zoom]
Répertorie le rapport d'aspect et projette en plein écran.
Lorsqu'il n'y a pas de signal d'entrée, cet élément est grisé et ne peut pas être sélectionné.
Si l'image est plus large que l'écran, les bords droit et gauche seront coupés. Si elle est plus haute que l'écran, le haut et le bas seront coupés.
1) Appuyez sur ▲▼ pour sélectionner [Zoom]. .
[Vrai]
Projette l'image à sa taille originale.
Ce mode ne peut être ajusté que pour des entrées d'ordinateur.
Lorsqu'il n'y a pas de signal d'entrée, cet élément est grisé et ne peut pas être sélectionné.
1) Appuyez sur ▲▼ pour sélectionner [Vrai]. .
■orsque la taille de l'image est inférieure à la résolution de l'écran*1
L'image est projetée au centre de l'écran et [Vrai] est affiché en haut à gauche de l'écran.
■rsque la taille de l'image est la même que la résolution de l'écran*1
[Vrai] est affiché en haut à gauche de l'écran mais l'image est ensuite projetée en mode [Normal].
■rsque la taille de l'image est plus large que la résolution de l'écran*1
[Vrai] est affiché en haut à gauche de l'écran et △ (△▽◀▶) est affiché en haut, en bas, à gauche et à droite de l'écran.
Appuyez sur ▲▼◀▶ pour déplacer l'image.
La flèche indiquant la direction du mouvement apparaît en rouge.
Arrivé au décalage maximum, la flèche disparaît.
*1: La résolution de l'écran du projecteur est de 1 024 x 768 points.
[Personnalisé]
L'image est projetée à l'aide des valeurs enregistrées en tant que [Mémoriser] dans le menu [Ajust. ordin.].
- Lorsqu'il n'y a pas de signal d'entrée, [Personnalisé] peut être sélectionné mais l'image sera projetée en mode [Normal].
1) Appuyez sur ▲▼ pour sélectionner [Personnalisé]. .
[Ajustement personnalisé]
Ajuste l'échelle et la position horizontale et verticale.
Lorsqu'il n'y a pas de signal d'entrée, cet élément est grisé et ne peut pas être sélectionné.
Si le signal d'entrée est perdu pendant l'ajustement, la valeur d'ajustement est répertoriée et l'écran d'ajustement [Aspect] disparaît.
1) Appuyez sur ▲▼ pour sélectionner [Ajustement personnalisé], et appuyez sur ▶.
- L'écran d'ajustement du sous-menu 2 est affiché.
2) Appuyez sur ▲▼ pour sélectionner un élément, et appuyez sur la touche .
Pour ajuster [H&V], appuyez sur la touche et faites l'ajustement sur l'écran du sous-menu 2.
Appuyez sur la touche pour [Adapter] et [Réinitialiser]. Sélectionnez [Oui] et appuyez sur la touche .
Pendant que le menu avancé est affiché, appuyez sur ▲▼ pour afficher des menus autres que [H&V], [Adapter] et [Réinitialiser] dans l'ordre.
4) Appuyez sur ◀▶ pour ajuster le réglage.
- Appuyez sur la touche pour retourner au sous-menu.
[Echelle H] Ajuste l’échelle horizontale. [Echelle V] Ajuste l’échelle verticale. [H&V] Lorsque vous ajustez l’échelle verticale et horizontale, sélectionnez [On] pour lier les échelles verticale et horizontale et préserver le rapport d’aspect de l’image.Lorsque vous ajustez la valeur numérique de [Echelle H], la valeur numérique de [Echelle V] change proportionnellement. [Position horiz.] Ajuste le décalage horizontal.
[Position vert.] Ajuste le décalage vertical. [Adapter] Applique le contenu ajusté à toutes les entrées. [Réinitialiser] Réinitialise tout le contenu ajusté.
[Zoom digital +]
1) Appuyez sur ▲▼ pour sélectionner [Zoom digital +]. ou sur la touche ▶.
- L'écran du menu disparaît et [Zoom digital +] est affiché.
3) Appuyez sur la touche .
Chaque pression sur la touche élargit l'image.
Appuyez sur ▲▼◀▶ pour déplacer l'image.
La fonction de déplacement de l'image ne fonctionne que lorsque la taille de l'image est plus large que la résolution de l'écran * 1
*1: La résolution de l'écran du projecteur est de 1 024 x 768 points.
Remarque
Lorsqu'il n'y a pas de signal d'entrée, [Zoom digital +] est grisé et ne peut pas être sélectionné.
Lorsque [Vrai] est sélectionné, [Zoom digital +] ne peut pas être sélectionné.
Pour mettre fin au fonctionnement de [Zoom digital +] appuyez sur n'importe quelle touche autre que , et ▲▼◀▶.
[Zoom digital -]
1) Appuyez sur ▲▼ pour sélectionner [Zoom digital -]. ou sur la touche ▶.
- L'écran du menu disparaît et [Zoom digital -] est affiché.
3) Appuyez sur la touche .
Chaque pression sur la touche rétrécit l'image.
Appuyez sur ▲▼◀▶ pour déplacer l'image.
La fonction de déplacement de l'image ne fonctionne que lorsque la taille de l'image est plus large que la résolution de l'écran *1
*1: La résolution de l'écran du projecteur est de 1 024 x 768 points.
Remarque
Lorsqu'il n'y a pas de signal d'entrée, [Zoom digital -] est grisé et ne peut pas être sélectionné.
Lorsque [Vrai] est sélectionné, [Zoom digital -] ne peut pas être sélectionné.
Lorsque [Personnalisé] est sélectionné, vous ne pouvez pas régler [Zoom digital -] sur [Normal] ou plus petit.
Lorsque [Mémoriser] enregistré dans le menu [Ajust. ordin.] est sélectionné dans [Système] du menu [Entrée], la fonction de déplacement de l'image de [Zoom digital -] peut ne pas fonctionner correctement.
Lorsque VGA, SVGA, SXGA, WXGA ou UXGA est sélectionné dans [Système] du menu [Entrée] et que l'ajustement vers le haut de [Trapèze] est à sa valeur maximale, [Zoom digital -] peut ne pas fonctionner correctement.
Pour mettre fin au fonctionnement de [Zoom digital -] appuyez sur n'importe quelle touche autre que , et ▲▼◀▶.
[Trapèze]
1) Appuyez sur ▲▼ pour sélectionner [Zoom digital -]. ou sur la touche ▶.
- L'écran d'ajustement du sous-menu 2 est affiché.
3) Appuyez sur ▲▼ pour sélectionner un élément.
[standard]
Corrige l'effet keystone vertical et horizontal.
1) Sélectionnez [Standard] et appuyez sur la touche .
- L'écran du menu disparaît et [Trapèze] est affiché.
- Appuyez sur ▲▼◀▶ pour corriger.
[Correction coins]
Corrige la distorsion aux coins des images.
1) Sélectionnez [Correction coins] et appuyez sur la touche .
- L'écran de sélection du coin à corriger s'affiche.
2) Appuyez sur la touche pour sélectionner le coin à corriger.
3) Appuyez sur ▲▼◀▶ pour corriger le coin.
[brme coins]
Sélectionne le mode de motif de coin affiché pendant la correction du coin.
1) Sélectionnez [Forme coins] et appuyez sur la touche .
- L'écran de réglage s'affiche.
2) Appuyez sur ▲▼ pour sélectionner un élément.
[Rouge] Affiche le motif de coin en rouge. [Blanc] Affiche le motif de coin en blanc. [Bleu] Affiche le motif de coin en bleu. [Off] Fait disparaître l'affichage du motif de coin.
[émoriser]
Répertorie l'état de la correction.
1) Sélectionnez [Mémoriser] et appuyez sur la touche . .
[Mémoriser] L’état d’ajustement reste en mémoire même après avoir retiré le cordon d’alimentation. [Réinitialiser] L’état d’ajustement est effacé lorsque le cordon d’alimentation est retiré.
- Vous ne pouvez enregistrer qu'un seul [Standard] et [Correction coins].
[Plafond]
Règle la méthode de projection en fonction de l'état d'installation du projecteur.
Si l'affichage de l'écran est à l'envers, sélectionnez [On].
- Ce réglage sert lorsque le projecteur est installé via un support de montage au plafond (accessoire optionnel).
1) Appuyez sur ▲▼ pour sélectionner [Plafond]. .
[Off] [On]
[Arrière]
Règle la méthode de projection en fonction de l'état d'installation du projecteur.
Si l'affichage de l'écran a basculé, sélectionnez [On].
1) Appuyez sur ▲▼ pour sélectionner [Arrière]. .
[Off] [On]
[Réinitialiser]
Le réglage revient à sa valeur d'avant l'ajustement.
1) Appuyez sur ▲▼ pour sélectionner [Réinitialiser]. . .
Le réglage revient à sa valeur d'avant l'ajustement.
Sélectionnez [Non] et appuyez sur la touche pour retourner au sous-menu.
Sélectionnez [Réglages] à partir du menu principal sur l'écran du menu, et sélectionnez l'élément du sous-menu.
Pour l'utilisation de l'écran du menu, reportez-vous à « Naviguer dans les menus » (→ page 38).
- Après avoir sélectionné l'élément, appuyez sur ▲▼◀▶ pour effectuer le réglage.
Panneau de commandeTél
[Langue]
Change la langue d'affichage.
1) Appuyez sur ▲▼ pour sélectionner [Langue]. ou sur la touche ▶.
- Le sous-menu 2 s'affiche.
- Dix langues sont disponibles (anglais, allemand, français, italien, espagnol, portugais, russe, chinois, coréen et japonais).
3) Appuyez sur ▲▼ pour sélectionner un élément.
Règle la position de l'affichage sur le menu à l'écran.
1) Appuyez sur ▲▼ pour sélectionner [Position du menu]. .
Des flèches s'affichent dans le sous-menu 2.
Appuyez sur ▲▼◀▶ pour ajuster la position.
Arrivé au décalage maximum, la flèche disparaît.
[Affichage]
Règle l'affichage du menu à l'écran.
1) Appuyez sur ▲▼ pour sélectionner [Affichage]. .
[Off] Les affichages d’écran suivants apparaissent.● Affichage du menu● Affichage de [Éteindre ?] lors de la mise hors tension● Affichage de la minuterie lorsque vous utilisez la minuterie de présentation● Affichage de [Patientez] dans [Réglage PC auto.]● Affichage de la minuterie lors de l’utilisation de la gestion d’alimentation● Affichage de flèches lorsque [Position du menu] est sélectionné dans [Réglages]● Affichage d’un message d’erreur lorsqu’une touche qui n’est pas utilisée pour les paramètres en cours est enfoncée● △ affichage de flèches lorsque la taille de l’image est plus large que la résolution de l’écran (1 024 x 768 points)● Affichage de [Forme coins] [Arrêt cpte.à reb.] Fait que le projecteur projette immédiatement après allumage de la lampe sans afficher le compte à rebours d’environ 20 secondes.● À sélectionner lorsque vous voulez projeter rapidement l’image et que le fait que l’image projetée soit un peu sombre n’ait pas d’importance. [On] Affiche tous les affichages d’écran.● À sélectionner lorsque vous voulez projeter l’image une fois que l’écran de projection a atteint un certain niveau de luminosité.
[Fond]
Sélectionne l'écran d'arrière-plan lorsqu'il n'y a pas de signal d'entrée.
1) Appuyez sur ▲▼ pour sélectionner [Fond]. .
3) Appuyez sur ▲▼ pour sélectionner un élément.
● Le réglage changera comme suit à chaque fois que vous appuyez sur la touche.
[Bleu] [Utilisateur] [Noir]
[Sélection lampe ]
Sélectionne la lampe utilisée pour la projection.
1) Appuyez sur ▲▼ pour sélectionner [Sélection lampe]. ou sur la touche ▶.
[lampes]
Allume quatre lampes.
1) Sélectionnez [4 lampes] et appuyez sur la touche . .
Le réglage se termine et le projecteur revient à l'écran du sous-menu 2.
Sélectionnez [Non] et appuyez sur la touche pour retourner au sous-menu 2.
[lampes]
Allume deux lampes.
1) Sélectionnez [2 lampes] et appuyez sur la touche .
2) Sélectionnez [Oui] et appuyez sur la touche .
Le réglage se termine et le projecteur revient à l'écran du sous-menu 2.
Sélectionnez [Non] et appuyez sur la touche pour retourner au sous-menu 2.
[Auto] Détecte automatiquement la lampe avec le temps total le plus court et l'allume en priorité. Allume les lampes 2 et 3. Allume les lampes 1 et 4.
Remarque
Si une lampe ne s'allume pas en raison d'une erreur ou parce qu'elle est en fin de vie, le voyant de la lampe sur le devant du boîtier du projecteur et le voyant de la lampe ( - ) sur le boîtier du projecteur au-dessus de la lampe qui ne s'allume pas clignoteront. Une marque X apparaîtra également pour indiquer l'état de la lampe en haut de l'écran.
Lorsque [4 lampes] est sélectionné et qu'une lampe ne s'allume pas, deux lampes opposées diagonalement (n'incluant pas la lampe qui ne s'allume pas) se chargent de la projection. Si une autre lampe ne s'allume pas, la projection continuera avec une seule lampe.
Lorsque [2 lampes] est sélectionné et qu'une lampe ne s'allume pas, deux lampes opposées diagonalement (n'incluant pas la lampe qui ne s'allume pas) se chargent de la projection. Si une autre lampe ne s'allume pas, la projection continuera avec une seule lampe.
Si aucune des lampes ne s'allume, l'alimentation sera coupée. Si l'appareil est mis sous tension et que les lampes n'ont pas été remplacées après le dépassement des 2 200 heures d'utilisation pour toutes les lampes, le projecteur s'éteint automatiquement après dix minutes pour éviter un dysfonctionnement.
[Puissance lampe]
Règle le changement de la luminosité des lampes. L'utilisation du mode économique est recommandée si vous voulez réduire la consommation d'énergie.
1) Appuyez sur ▲▼ pour sélectionner [Puissance lampe].
2) Appuyez sur la touche .
3) Appuyez sur ▲▼ pour sélectionner un élément.
● Le réglage changera comme suit à chaque fois que vous appuyez sur la touche.
(Auto) Règle automatiquement la luminosité en utilisant un posemètre. (Standard) Fonctionne à certaines luminosités. (Mode économique 1) L’arrivée/l’échappement d’air diminue comparé à éble bruit du ventilateur diminue. (Mode économique 2) L’arrivée/l’échappement d’air augmente en comparaison à et le ventilateur devient plus bruyant.
[Intervalle lampe]
Règle le cycle de remplacement lorsque [Sélection lampe ] est réglé sur [2 lampes]. Après le cycle de remplacement, la lampe utilisée est automatiquement changée.
- Le temps réglé ici est une indication temporelle.
1) Appuyez sur ▲▼ pour sélectionner [Intervalle lampe]. .
[Off] Ne change pas de lampe. [24 h]/[200 h]/[500 h]/[1000 h]/[2000 h] Change de lampe aux intervalles réglés.Lorsque le temps réglé est atteint,le projecteur allume une lampe,en donnant la priorité à la lampeayant le temps d’utilisation le plus court.
[Fusion des côtés]
Il est alors plus difficile de voir le raccord entre écrans lorsque plusieurs écrans sont utilisés.
1) Appuyez sur ▲▼ pour sélectionner [Fusion des côtés]. .
- Affiche l'écran de configuration [Fusion des côtés].
3) Appuyez sur ▲▼ pour sélectionner [Fusion des côtés]. .
- Lorsque vous n'effectuez pas [Fusion des côtés], sélectionnez [Off]. Les éléments autres que [Retour] seront grisés et ne peuvent pas être sélectionnés.
6) Appuyez sur la touche .
- Le bord de l'écran est affiché en vert, et vire au rouge lorsque la valeur du paramètre de largeur de fondu des côtés est de 1 ou plus large.
Remarque
Même lorsque l'écran de configuration [Fusion des côtés] est affiché, si vous appuyez sur la touche , la touche , la touche ou la touche , l'écran de configuration disparaît et la priorité est donnée à la fonction sélectionnée. Une fois la fonction terminée, le projecteur revient à l'écran de configuration.
Le raccord entre écrans peut se voir avec certains types d'image. Le fait de réduire la valeur de [Contraste] dans le menu [Ajust. image] peut rendre l'apparence du raccord plus naturelle.
■ur ajuster la position du début de fondu et la largeur du fondu
1) Appuyez sur ▲▼ pour sélectionner l'emplacement ([Démarrer]/[Largeur] de [Gauche]/[Droite]/[Haut]/[Bas]) à corriger.
[Démarrer] Règle la position du début de fondu.● Le cadre (vert) se déplace lorsque vous changez les valeurs numériques. [Largeur] Ajuste la largeur de fondu.● La ligne rouge se déplace lorsque vous changez les valeurs numériques.
2) Appuyez sur la touche .
- Les valeurs numériques peuvent aussi être entrées en utilisant les touches numériques (<0> - <9>) de la télécommande.
- Appuyez sur la touche pour arrêter le mode d'édition.
4) Appuyez sur la touche .
Remarque
● Valeur ajustable [Gauche] et [Droite] : 0 - 512
Pour ajuster le niveau de noir
Ajuste le niveau de noir de l'image.
1) Appuyez sur ▲▼ pour sélectionner [Niveau de noir]. .
[Tous] Change avec R/V/B. [R]/[G]/[B] Ajuste chaque couleur.● Valeur de l’ajustement : ± 127
Pour afficher la mire de test
1) Appuyez sur ▲▼ pour sélectionner [Echantillon test]. . pour arrêter le mode d'édition.
[Off] Fait disparaître la mire de test. [On] Affiche la mire de test.
L'écran de configuration et les lignes disparaissent temporairement.
1) Appuyez sur ▲▼ pour sélectionner [Menu désactivé]. .
- Appuyez sur n'importe quelle touche pour retourner à l'écran de configuration.
Fleur réinitialiser une valeur pendant l'ajustement
Le réglage revient à sa valeur d'avant l'ajustement.
1) Appuyez sur ▲▼ pour sélectionner [Réinitialiser]. .
- Un écran permettant de confirmer la réinitialisation apparaît.
3) Sélectionnez [Oui] et appuyez sur la touche .
- L'écran de confirmation s'affiche.
4) Sélectionnez [Oui] et appuyez sur la touche .
Fait revenir le projecteur au sous-menu.
1) Appuyez sur ▲▼ pour sélectionner [Retour]. .
[Colorimétrie]
Il est alors plus difficile de voir les différences de couleur du projecteur lorsque plusieurs écrans sont utilisés.
1) Appuyez sur ▲▼ pour sélectionner [Colorimétrie]. .
- Affiche l'écran de configuration [Colorimétrie].
3) Appuyez sur ▲▼ pour sélectionner [Colorimétrie]. .
- Lorsque vous n'effectuez pas [Colorimétrie], sélectionnez [Off]. Les éléments autres que [Colorimétrie avancée] seront grisés et ne peuvent pas être sélectionnés.
6) Appuyez sur la touche .
Pour ajuster la couleur
1) Appuyez sur ▲▼ pour sélectionner la couleur à ajuster. .
Les valeurs numériques peuvent aussi être entrées en utilisant les touches numériques (<0> - <9>) de la télécommande.
La valeur numérique change en fonction de la valeur de [Température de couleur] dans le menu [Ajust. image].
Couleur x y [Rouge] 0.000 - 1.000 0.000 - 1.000 [Vert] 0.000 - 1.000 0.000 - 1.000 [Bleu] 0.000 - 1.000 0.000 - 1.000 [Blanc] 0.000 - 1.000 0.000 - 1.000
Pour afficher la mire de test
1) Appuyez sur ▲▼ pour sélectionner [Test échantillon automatique]. .
- Appuyez sur la touche pour arrêter le mode d'édition.
[Off] Fait disparaître la mire de test. [On] Affiche la mire de test.
Fur réinitialiser une valeur pendant l'ajustement
Le réglage revient à sa valeur d'avant l'ajustement. La valeur revient à la valeur standard répertoriée dans [Mémoriser].
1) Appuyez sur ▲▼ pour sélectionner [Réinitialiser]. .
- Un écran permettant de confirmer la réinitialisation apparaît.
3) Sélectionnez [Oui] et appuyez sur la touche . .
Fur enregistrer les contenus ajustés que vous avez modifiés
Enregistre les valeurs après l'ajustement.
1) Appuyez sur ▲▼ pour sélectionner [Mémoriser]. . .
Fait revenir le projecteur au sous-menu.
1) Appuyez sur ▲▼ pour sélectionner [Retour]. .
[Colorimétrie avancée]
Des paramètres plus avancés que [Colorimétrie] sont possibles.
1) Appuyez sur ▲▼ pour sélectionner [Colorimétrie]. ..
[Off] [On]
[Off]
Lorsqu'il n'est pas en mode [Echantillon test] ou [Retour], cet élément est grisé et ne peut pas être sélectionné.
[On] Règle l'appariement couleur avancé.
Pour vérifier les réglages
Cette fonction affiche l'état des réglages de [Ajust. image].
1) Appuyez sur ▲▼ pour sélectionner [Mesurée information]. .
L'information mesurée peut être quittée en appuyant sur n'importe quelle touche.
L'élément sélectionné est affiché normalement. Les autres éléments sont grisés.
Pour l'élément en cours d'ajustement, [Règl.] est affiché.
[Dynamique]
[Standard]
[Authentique/Cinéma]
Fur vérifier [Mesurée]
Affiche les données pour R/V/B.
1) Appuyez sur ▲▼ pour sélectionner la couleur ([Rouge]/[Vert]/[Bleu] dans [Mesurée]) à mesurer. .
- Les valeurs numériques peuvent aussi être entrées en utilisant les touches numériques (<0> - <9>) de la télécommande.
Couleur x y L [Rouge] 0.000 - 1.000 0.000 - 1.000 0.000 - 1.000 [Vert] 0.000 - 1.000 0.000 - 1.000 0.000 - 1.000 [Bleu] 0.000 - 1.000 0.000 - 1.000 0.000 - 1.000
Fur vérifier [Cible]
1) Appuyez sur ▲▼ pour sélectionner la couleur ([Rouge]/[Vert]/[Bleu]/[Cyan]/[Magenta]/[Jaune]/[Blanc] dans [Cible]) à ajuster. .
Les valeurs numériques peuvent aussi être entrées en utilisant les touches numériques (<0> - <9>) de la télécommande.
La valeur numérique change en fonction de la valeur de [Température de couleur] dans le menu [Ajust. image].
Couleur x y g
[Rouge] 0.000 - 1.000 0.000 - 1.000 0.000 - 1.000
[Vert] 0.000 - 1.000 0.000 - 1.000 0.000 - 1.000
[Bleu] 0.000 - 1.000 0.000 - 1.000 0.000 - 1.000
[Cyan] 0.000 - 1.000 0.000 - 1.000 0.000 - 1.000
[Magenta] 0.000 - 1.000 0.000 - 1.000 0.000 - 1.000
[Jaune] 0.000 - 1.000 0.000 - 1.000 0.000 - 1.000
[Blanc] 0.000 - 1.000 0.000 - 1.000 0.000 - 1.000
Pour afficher la mire de test
1) Appuyez sur ▲▼ pour sélectionner [Test échantillon automatique]. .
- Appuyez sur la touche pour arrêter le mode d'édition.
[Off] Fait disparaître la mire de test. [On] Affiche la mire de test.
Fur faire disparaître temporairement l'écran de configuration
1) Appuyez sur ▲▼ pour sélectionner [Menu désactivé]. .
- Appuyez sur n'importe quelle touche pour retourner à l'écran de configuration.
Pour effectuer le réglage [Réglages d'usine]
Lorsque les [Mesurée] et [Cible] actuellement sélectionnés sont effacés, les valeurs sont réinitialisées aux valeurs par défaut.
1) Appuyez sur ▲▼ pour sélectionner [Réglages d'usine]. .
- Un écran permettant de confirmer la restauration des paramètres par défaut apparaît.
3) Sélectionnez [Oui] et appuyez sur la touche . .
Pour réinitialiser une valeur pendant l'ajustement
Le réglage revient à sa valeur d'avant l'ajustement.
1) Appuyez sur ▲▼ pour sélectionner [Réinitialiser]. . .
Fur enregistrer les contenus ajustés que vous avez modifiés
Enregistre les valeurs après l'ajustement.
1) Appuyez sur ▲▼ pour sélectionner [Mémoriser]. . .
Pour afficher la mire de test
1) Appuyez sur ▲▼ pour sélectionner [Echantillon test]. .
- Affiche l'écran de sélection de la mire de test.
3) Appuyez sur ▲▼ pour sélectionner la mire de test à afficher et appuyez sur la touche .
L'écran de sélection disparaît et la mire de test est affichée.
Appuyez sur n'importe quelle touche pour retourner à l'écran de configuration.
Appuyez sur ▲▼ pour sélectionner [Retour] et appuyez sur la touche pour revenir à l'écran de configuration de [Colorimétrie avancée].
[Mesurée] [Rouge]/[Vert]/[Bleu] [Cible] [Rouge]/[Vert]/[Bleu]/[Cyan]/[Magenta]/[Jaune]/[Blanc]
Fait revenir le projecteur au sous-menu.
1) Appuyez sur ▲▼ pour sélectionner [Retour]. .
[HDMI]
Si l'image ne peut pas être affichée correctement lorsqu'un périphérique externe est branché au projecteur utilisant HDMI, changez les paramètres.
1) Appuyez sur ▲▼ pour sélectionner [HDMI]. . ● ▲▼ s'affichent par-dessus le sous-menu.
[Normal] [Amélioré]
[Normal] À sélectionner lorsque la sortie du périphérique externe est “NORMAL*1”. [Amélioré] À sélectionner lorsque la sortie du périphérique externe est “ENHANCED*1”.
*1: Les titres des paramètres de sortie varient selon le périphérique. Pour plus de détails, reportez-vous aux instructions d'utilisation des périphériques externes.
[Logo]
Règle la sélection du logo et du code PIN pour la sélection du logo.
1) Appuyez sur ▲▼ pour sélectionner [Logo]. . • Le sous-menu 2 s'affiche.
[Élection logo]
1) Sélectionnez [Sélection logo] et appuyez sur la touche .
2) Appuyez sur ▲▼ pour changer le réglage.
- Le réglage changera comme suit à chaque fois que vous appuyez sur la touche.
[Off] Efface le logo de l’écran. [Utilisateur] Affiche l’image capturée par l’utilisateur. [Préréglage] Affiche les paramètres par défaut.
[Capture]
Cette fonction vous permet de capturer une image projetée et d'utiliser cette dernière en tant que page de démarrage ou fond d'écran.
1) Sélectionnez [Capture] etappuyez sur la touche .
- L'éran de confirmation s'affiche.
2) Appuyez sur ▲▼ pour sélectionner [Oui].
- L'image projetée a été enregistrée.
- En sélectionnant [Utilisateur] dans [Sélection logo], l'image capturée s'affichera la prochaine fois que vous allumerez le projecteur.
Remarque
La capture est annulée si vous sélectionnez [Quitter ?] puis [Oui].
• Avant de capturer une image, sélectionnez [Standard] dans le menu [Sélection image] afin de pouvoir régler la qualité de l'image à capturer (→ page 47).
Lors de la capture de l'image au préalable ajustée à l'aide de la fonction keystone, les données ajustées sont automatiquement réinitialisées et le projecteur capture l'image sans correction du l'effet keystone.
Lorsque [Verrouillage logo par code PIN] est réglé sur [On], la [Capture] devient impossible.
Lorsqu'une nouvelle image est sur le point d'être capturée, l'image précédemment enregistrée est alors effacée, et cela même si vous annulez la nouvelle capture.
Lorsque vous n'avez aucune image capturée ou lorsque la capture d'une image est interrompue, [Utilisateur] ne peut pas être sélectionné. Vous ne pouvez alors choisir qu'entre [Préréglage] et [Off].
[Merrouillage logo par code PIN]
Réglez le système pour que le paramétrage et le changement du "logo" ne soit fait que par l'administrateur.
1) Sélectionnez [Verrouillage logo par code PIN] et appuyez sur la touche . .
[Off] La sélection du logo peut être changée sans le code PIN. [On] Le code PIN est nécessaire pour changer la sélection du logo.
Remarque
Le code PIN saisi est affiché sous forme de * à l'écran.
Le code PIN par défaut du logo est "4321".
Pour saisir de nouveau un nombre, appuyez sur ◀ pour sélectionner le chiffre à saisir de nouveau, puis utilisez le ▲▼ ou les touches de nombres (<0> - <9>) pour réélectionner le nombre.
Déplacez le curseur sur [Annuler] et appuyez sur la touche pour retourner au sous-menu 2.
Si [Logo code PIN] et le nombre sont affichés en rouge, une erreur s'est produite. Entrez à nouveau le nombre.
[ hangement logo code PIN]
Change le code PIN du logo.
1) Sélectionnez [Changement logo code PIN] et appuyez sur la touche . .
- Si le code PIN est accepté, le nouveau code PIN du logo est affiché à l'écran.
5) Appuyez sur ▲▼◀▶ ou sur les touches numériques (<0> - <9>) pour entrer votre nouveau code pin. . .
- Si le code PIN est accepté, le projecteur revient au sous-menu 2.
Remarque
Pour saisir de nouveau un nombre, appuyez sur ◀▶ pour sélectionner le chiffre à saisir de nouveau, puis appuyez sur ▲▼ ou sur les touches de nombres (<0> - <9>) pour resélectionner le nombre.
Déplacez le curseur sur [Annuler] et appuyez sur la touche pour retourner au sous-menu 2.
[Contrôle du ventilateur]
Le projecteur contrôle automatiquement la rotation du ventilateur. Vous pouvez accélérer la rotation du ventilateur en fonction de la température ambiante ou de l'emplacement du projecteur (par exemple, lorsque celui-ci doit être utilisé à de hautes altitudes).
1) Appuyez sur ▲▼ pour sélectionner [Contrôle du ventilateur]. . ● ▲▼ s'affichent par-dessus le sous-menu 2.
[Normal] [Max]
[Normal] Contrôle automatiquement le fonctionnement du ventilateur. [Max] Oblige le ventilateur à tourner à pleine capacité. Le bruit du ventilateur en marche sera plus important qu'avec [Normal].
[Télécommande]
Permet un contrôle simultané ou un contrôle individuel avec une seule télécommande lorsque plusieurs projecteurs sont utilisés côte-à-côte.
1) Appuyez sur ▲▼ pour sélectionner [Télécommande]. . ● ▲▼ s'affichent par-dessus le sous-menu.
- Le paramètre par défaut est [Tous].
[Tous] Permet au projecteur d'accepter des signaux de télécommandes portant n'importe quel numéro d'identification. [Code 01] - [Code 64] Règle les numéros d'identification de 1 à 64.
4) Appuyez sur la touche . .
[Télécommande] sera modifié.
Fait revenir le projecteur au sous-menu.
Remarque
Lorsque le numéro d'identification du projecteur est changé, le numéro d'identification de la télécommande doit être modifié pour correspondre au numéro d'identification du projecteur.
Si un projecteur est réglé sur [Tous] avec plusieurs projecteurs en marche, il ne peut pas être commandé séparément des projecteurs dotés de numéros d'indentification différents.
[Capteur de télécommande]
Active/désactive le capteur de télécommande sur le boîtier du projecteur.
1) Appuyez sur ▲▼ pour sélectionner [Capteur de télécommande]. .
[Tous] Active les capteurs de télécommande à trois emplacements. [Avant et dessus] Active/désactive seulement les capteurs de télécommande sur le devant et le dessus du boîtier du projecteur. [Dessus et arrière] Active/désactive seulement les capteurs de télécommande sur l'arrière et le dessus du boîtier du projecteur. [Avant et arrière] Active/désactive seulement les capteurs de télécommande sur le devant et l'arrière du boîtier du projecteur. [Avant] Active/désactive seulement le capteur de télécommande sur le devant du boîtier du projecteur. [Dessus] Active/désactive seulement le capteur de télécommande sur le dessus du boîtier du projecteur. [Arrière] Active/désactive seulement le capteur de télécommande sur l'arrière du boîtier du projecteur.
Remarque
- Si le projecteur est installé en position debout plutôt que sur un support au plafond, les lumières fluorescentes risquent de nuire au fonctionnement de la télécommande lorsque le capteur de télécommande situé sur le dessus du boîtier du projecteur est activé. Nous vous recommandons de désactiver le capteur de télécommande situé sur le dessus (sélectionnez [Avant et arrière], [Avant] ou [Arrière]) lorsque le projecteur est installé en position debout.
[Extinction automatique]
1) Appuyez sur ▲▼ pour sélectionner [Extinction automatique]. .
[Off] Annule la fonction de gestion d'alimentation. [Prêt] Éteint la lampe et démarre le refroidissement lorsque le temps d'utilisation de [Timer] réglé s'est écoulé. Pendant le refroidissement de la lampe, le voyant de veille <STAND-BY> et le voyant d'alimentation <POWER> clignotent, vous ne pouvez pas utiliser le projecteur. Lorsque le refroidissement de la lampe est terminé, le voyant d'alimentation <POWER> continue à clignoter et le voyant de veille <STAND-BY> s'allume au lieu de clignoter, indiquant que le projecteur est maintenant en mode de gestion d'alimentation. À partir de ce point, si un signal entre ou que le projecteur est utilisé, les lampes s'allumeront et la projection débutera. [Extinction] Éteint la lampe et démarre le refroidissement lorsque le temps d'utilisation de [Timer] réglé s'est écoulé. Pendant le refroidissement de la lampe, vous ne pouvez pas faire fonctionner le projecteur. Lorsque le refroidissement de la lampe est terminé, l'alimentation est coupée. [Timer] Règle le temps de 1 à 30 minutes.
Remarque
Le paramètre par défaut est [Off].
La fonction de gestion d'alimentation ne peut pas être utilisée lorsque la fonction de gel de l'image (→ page 35) ou la fonction d'obturateur (→ page 35) est en cours d'utilisation.
Lorsque la fonction de gestion d'alimentation est enclenchée, [Minuteur présentation] est réinitialisé.
[Démarrage immédiat]
Ceci est une fonction permettant de mettre automatiquement le projecteur sous tension lorsque le cordon d'alimentation est branché, sans nécessiter l'emploi de la touche d'alimentation de la télécommande ou de la touche d'alimentation du panneau de commande.
1) Appuyez sur ▲▼ pour sélectionner [Démarrage immédiat]. . ● ▲▼ s'affichent par-dessus le sous-menu 2.
[Off] Active les procédures normales de mise sous/hors tension. [On] Permet la mise sous tension directe.
Remarque
Assurez-vous de mettre sous/hors tension en utilisant les procédures correctes.
Le fait d'appuyer sur la touche d'alimentation de la télécommande ou sur la touche d'alimentation sur le projecteur ne permettra pas la mise sous tension tant que le refroidissement de la lampe ne sera pas terminé et que les lampes ne seront pas prêtes à être à nouveau allumées.
[Sécurité]
Verrouille le fonctionnement du projecteur à l'aide du verrouillage des touches et du code PIN.
1) Appuyez sur ▲▼ pour sélectionner [Sécurité].
2) Appuyez sur la touche .
- Le sous-menu 2 s'affiche.
3) Appuyez sur ▲▼ pour sélectionner un élément.
[errouillage]
Verrouille les touches de commande pour éviter une utilisation fortuite du projecteur.
1) Sélectionnez [Verrouillage] et appuyez sur la touche .
- ▲▼ s'affichent par-dessus le sous-menu 2.
2) Appuyez sur ▲▼ pour changer le réglage.
- Le réglage changera comme suit à chaque fois que vous appuyez sur la touche.
Le verrouillage des touches est désactivé. Désactive toute commande émanent du panneau de commande. Désactive toute commande émanent de la télécommande.
3) Appuyez sur la touche .
4) Sélectionnez [Oui] et appuyez sur la touche .
Remarque
Le paramètre par défaut est désactivé.
Si vous n'arrivez pas à déverrouiller, consultez votre revendeur.
[Merrouillage code PIN]
Règle le code PIN pour réserver l'utilisation du projecteur à l'administrateur.
1) Sélectionnez [Verrouillage code PIN] et appuyez sur la touche . .
- Si le code PIN est accepté, le projecteur revient au sous-menu 2.
5) Appuyez sur ▲▼ pour changer le réglage.
[Off] Permet une utilisation normale sans code PIN. [On 1] Le code PIN est nécessaire pour mettre le projecteur sous tension. [On 2] Le code PIN est demandé à la prochaine mise sous tension après avoir débranché le cordon d'alimentation.Lorsque le projecteur est mis sous/hors tension à l'aide de la touche de la télécommande ou du panneau de commande mais sans débrancher le cordon d'alimentation, celui-ci fonctionne normalement sans demander de code PIN.
Remarque
Le code PIN saisi est affiché sous forme de * à l'écran.
Le réglage par défaut du code PIN est "1234".
Pour saisir de nouveau un nombre, appuyez sur ◀▶ pour sélectionner le chiffre à saisir de nouveau, puis appuyez sur ▲▼ ou sur les touches de nombres (<0> - <9>) pour resélectionner le nombre.
Déplacez le curseur sur [Annuler] et appuyez sur la touche pour retourner au sous-menu 2.
Si "PIN code"et les nombres sont affichés en rouge, une erreur s'est produite. Entrez à nouveau le nombre.
[ hangement code PIN]
Change le code PIN du logo.
1) Sélectionnez [Changement code PIN] et appuyez sur la touche . .
- Si le code PIN est accepté, le nouveau code PIN du logo est affiché à l'écran.
5) Appuyez sur ▲▼◀▶ ou sur les touches numériques (<0> - <9>) pour entrer votre nouveau code pin. . .
- Si le code PIN est accepté, le projecteur revient au sous-menu 2.
Remarque
Pour saisir de nouveau un nombre, appuyez sur ◀
Déplacez le curseur sur [Annuler] et appuyez sur la touche pour retourner au sous-menu 2.
[Identité du PJ]
Règle l'identité du projecteur (1 à 64) pour la communication de série RS-232C.
1) Appuyez sur ▲▼ pour sélectionner [Identité du PJ]. .
[Tous] Fait que les projecteurs acceptent les commandes indépendamment des numéros d'identification spécifiés par la télécommande ou l'ordinateur. 1 - 64 Applique les numéros d'identification de 1 à 64 aux projecteurs.
[Shutter]
Règle la fonction d'obturateur.
1) Appuyez sur ▲▼ pour sélectionner [Shutter]. .
3) Appuyez sur ▲▼ pour sélectionner un élément.
[Protection]
Verrouille la touche pour empêcher le fonctionnement de l'obturateur.
1) Sélectionnez [Protection] et appuyez sur la touche .
- ▲▼ s'affichent par-dessus le sous-menu 2.
2) Appuyez sur ▲▼ pour sélectionner un élément.
- Le réglage changera comme suit à chaque fois que vous appuyez sur la touche.
La protection est désactivée.Le fonctionnement peut être commandé à la fois par la télécommande et le projecteur. Désactive toute commande émanent de la télécommande. Désactive toute commande émanent du panneau de commande. Désactive toute commande émanent de la télécommande et du panneau de commande.
[ffet]
Règle les effets spéciaux lorsque l'obturateur est ouvert et fermé.
1) Sélectionnez [Effet] et appuyez sur la touche .
- ▲▼ s'affichent par-dessus le sous-menu 2.
2) Appuyez sur ▲▼ pour sélectionner un élément.
[Off] [L 1] [L 2]
[Off] Désactive les effets spéciaux. ● Réglage d'usine [L 1] Règle l'affichage en fondu et le fondu enchaîné lorsque l'obturateur est ouvert et fermé. [L 2] Règle un affichage en fondu et un fondu enchaîné moins rapides que L1.
[Éclencher]
Règle la touche de relâchement lorsque l'obturateur est fermé.
1) Sélectionnez [Déclencher] et appuyez sur la touche .
- ▲▼ s'affichent par-dessus le sous-menu 2.
2) Appuyez sur ▲▼ pour sélectionner un élément.
[Toute] [SHUTTER]
[Toute] La fonction d'obturateur est annulée par une pression de n'importe quelle touche sauf la touchede la télécommande et la fonction de la touche enfoncée est activée. [SHUTTER] Seule la touchede la télécommande ou du panneau de commande peut être désactivée.
Remarque
- Si l'appareil est remis sous tension après avoir été mis hors tension pendant le réglage ou que la lampe est éteinte avec le réglage [Gestion], la fonction d'obturateur est désactivée.
- Le réglage de l'élément sélectionné est activé.
[estion]
Règle un temps entre la fermeture de l'obturateur et l'extinction des lampes.
1) Sélectionnez [Gestion] et appuyez sur la touche .
- ▲▼ s'affichent par-dessus le sous-menu 2.
2) Appuyez sur ▲▼ pour sélectionner un élément.
- Vous pouvez régler le temps de 5 à 480 minutes.
Remarque
Lorsque la fonction de gestion est activée, la lampe est éteinte et le projecteur commence la procédure de refroidissement.
Lorsque le refroidissement est terminé, le boîtier du projecteur est mis hors tension et le voyant de veille s'allume.
Le voyant d'alimentation commence à clignoter en bleu lorsque la procédure de refroidissement commence.
Le clignotement continue une fois que le refroidissement est terminé et que le voyant de veille s'est allumé.
Le clignotement s'arrête lorsque le projecteur est de nouveau mis sous tension.
La fonction de gestion d'alimentation ne fonctionne pas lorsqu'une image est immobilisée par le [Shutter].
Le réglage par défaut est "180 minutes".
Vous ne pouvez pas régler le temps pendant que la fonction est désactivée.
[Contrôle retardement vidéo]
Réglez comme cela lorsque vous voulez accélérer le traitement numérique des images en cours de projection.
1) Appuyez sur ▲▼ pour sélectionner [Contrôle retardement vidéo]. .
Remarque
La vitesse de traitement numérique augmente entre [Bas], [Médium] et [Haut].
Lorsque chaque élément est sélectionné, les éléments suivants sont grisés et ne peuvent pas être sélectionnés.
[Bas] ● [Trapèze] du menu [Écran] [Médium] ● [Progressif] et [Réducteur de bruit] du menu [Ajust. image] [Haut] ● [Trapèze] du menu [Écran]● [Progressif] et [Réducteur de bruit] du menu [Ajust. image]
[Closed caption]
Règle la couleur des sous-titres et des éléments sélectionnés.
1) Appuyez sur ▲▼ pour sélectionner [Closed caption]. .
[Closed caption] [Off], [CC1], [CC2], [CC3], [CC4] [Couleur] [Couleur]/[Blanc]● Affiche avec les couleurs d'origine.
Remarque
Cette fonction peut être utilisée uniquement lorsque le signal d'entrée est de type composite ou S-vidéo.
Le sous-titre n'est pas affiché même lorsque l'écran de menu est affiché.
[Compteur du filtre]
1) Appuyez sur ▲▼ pour sélectionner [Compteur du filtre]. .
[ompteur du filtre]
Affiche le temps d'utilisation.
- Il s'affiche en rouge si un blocage est détecté ou si le temps d'utilisation dépasse le temps réglé dans [Minuterie compteur filtre].
[ompteur de filtre restant]
Le temps restant pour la minuterie du filtre est affiché en unités de 10%.
- Cela s'affiche en rouge lorsque le temps restant est de 10%.
Remarque
- Lorsque le temps restant diminue à 10% ou moins, s'affiche et lorsqu'il atteint 0%, s'affiche.
[Type de filtre]
Sélectionne le type de filtre à utiliser.
1) Sélectionnez [Type de filtre] et appuyez sur la touche .
- ▲▼ s'affichent par-dessus le sous-menu 2.
2) Appuyez sur ▲▼ pour sélectionner un élément.
[Normal] Lorsqu’un filtre normal est utilisé [Special] Lorsqu’un filtre résistant à la fumée (optionnel) est utilisé
3) Appuyez sur la touche . .
Attention
Utilisez toujours le projecteur lorsqu'un filtre est en place.
Sélectionnez le type de filtre pour correspondre à celui que vous utilisez.
[inuterie compteur filtre]
Règle le temps où doit s'afficher une notification indiquant que le filtre doit être remplacé.
1) Sélectionnez [Minuterie compteur filtre] et appuyez sur la touche . .
Remarque
Lorsque [Off] est sélectionné, les blocages sont automatiquement détectés.
Lorsque le filtre résistant à la fumée (optionnel) est utilisé, le temps est sélectionné parmi [Off], [10 h], [15 h], et [20 h].
Lorsque le temps réglé est dépassé, 📋 s'affiche.
[éinitialiser le compteur du filtre]
Réinitialise la valeur de [Compteur du filtre]. Après avoir remplacé le filtre, assurez-vous de réinitialiser la minuterie.
1) Sélectionnez [Réinitialiser le compteur du filtre] et appuyez sur la touche .
- Un écran permettant de confirmer la réinitialisation apparaît.
2) Sélectionnez [Oui] et appuyez sur la touche .
- L'écran de confirmation s'affiche.
3) Sélectionnez [Oui] et appuyez sur la touche .
Remarque
Ne réinitialisez qu'après avoir remplacé le filtre.
Une fois réinitialisé, l'affichage de [Avertissement filtre] disparaît.
[Minuteur présentation]
1) Appuyez sur ▲▼ pour sélectionner [Minuteur présentation]. .
- Le sous-menu 2 s'affiche.
3) Appuyez sur ▲▼ pour sélectionner un élément.
[ompte progressif]
Le temps écoulé est compté à partir de 00 min 00 sec. Le temps écoulé entre 00 min 00 sec et 180 min 00 sec est affiché.
[ompte à rebours]
Le temps écoulé est décompté du temps réglé. Réglez le temps en utilisant [Timer].
[mer]
Règle le temps [Compte à rebours].
1) Sélectionnez [Timer] et appuyez sur la touche .
- ▲▼ s'affichent par-dessus le sous-menu 2.
2) Appuyez sur ▲▼ pour sélectionner un élément.
Remarque
Le réglage par défaut est "10 minutes".
Lorsque [Compte progressif] est sélectionné, cet élément est grisé et ne peut pas être sélectionné.
[émarrer]
Démarre le comptage ou compte à rebours.
1) Sélectionnez [Démarrer] et appuyez sur la touche .
- L'écran du menu disparaît et la minuterie est affichée.
[rrêter]
Met en pause le décompte ou le compte à rebours.
1) Sélectionnez [Arrêter] et appuyez sur la touche .
- L'état de pause de la minuterie est affiché pendant environ trois secondes puis l'affichage revient à l'écran du menu.
[edémarrer]
Redémarre le comptage ou le compte à rebours qui a été mis en pause avec [Arrêter].
1) Sélectionnez [Redémarrer] et appuyez sur la touche .
- L'écran du menu disparaît et la minuterie est affichée.
[éinitialiser]
Réinitialise le temps décompté pendant le fonctionnement.
1) Sélectionnez [Réinitialiser] et appuyez sur la touche .
- Le comptage revient à "000:00" et le compte à rebours revient au temps réglé sur la minuterie.
[■uitter]
Quitte la minuterie de présentation pendant le fonctionnement.
1) Sélectionnez [Quitter] et appuyez sur la touche .
- La minuterie se termine et l'affichage écran revient à l'écran du sous-menu.
Remarque
- Vous pouvez aussi utilisez [Minuteur présentation] en appuyant sur la touche de la télécommande.
1) Appuyez sur ▲▼ pour sélectionner [Echantillon test].
2) Appuyez sur la touche .
- Le sous-menu 2 s'affiche.
3) Appuyez sur ▲▼ pour sélectionner un élément.
4) Appuyez sur la touche .
- La mire de test et le nom de la mire de test s'affichent.
- Lorsque le nom de la mire de test s'affiche, appuyez sur ▲▼ pour avancer ou reculer dans les mires de test.
[Couleur]
[Dégradation du gris 1],
[Dégradation du gris 2],
[Dégradation du gris 3],
[Dégradation du gris 4]
[Tout blanc]
[Tout noir]
[Grille]
- Lorsque la mire de test est affichée, appuyez sur la touche ou la touche pour revenir à l'écran du menu.
- Même lorsque la mire de test est affichée, les fonctions de zoom, de mise au point, de décalage d'objectif, d'obturateur et de mise hors tension ont la priorité.
- Lorsque l'utilisation du zoom, de la mise au point ou du décalage d'objectif est terminée, le projecteur revient à la mire de test.
Réinitialise les paramètres autres que le suivant aux réglages par défaut.
[Verrouillage logo par code PIN]
[Verrouillage code PIN]
[Compteur du Íltre] (Tous les éléments)
[Logo]
[Réseau] (à l'exception d'AMX D.D.)
1) Appuyez sur ▲▼ pour sélectionner [Réglages d'usine].
2) Appuyez sur la touche .
- Un écran permettant de confirmer la restauration des paramètres par défaut apparaît.
3) Sélectionnez [Oui] et appuyez sur la touche .
- L'écran de confirmation s'affiche.
4) Sélectionnez [Oui] et appuyez sur la touche .
- Lorsque vous réinitialisez les réglages, tous les réglages que vous avez faits sont perdus et les réglages par défaut sont rétablis.
Sélectionnez [Information] à partir du menu principal sur l'écran du menu.
Pour l'utilisation de l'écran du menu, reportez-vous à « Naviguer dans les menus » (→ page 38).
- Appuyez sur ◀▶ pour changer les éléments.
Panneau de commandeTél
- Vous pouvez aussi afficher les sous-menus en utilisant la touche de la télécommande.
Confirmation de l'état des réglages et de l'utilisation
Affiche l'état des signaux pendant la projection, et les réglages actuels.
[htrée]
Affiche les types d'entrée et de signaux pendant la projection.
[ystème]
Affiche l'état du signal d'entrée pendant la projection.
[■ynchro horiz.]
Affiche la fréquence H-synchro.
[■ynchro vert.]
Affiche la fréquence V-synchro.
[Ícran]
Affiche l'état des réglages de [Écran].
[Élection lampe]
Affiche l'état actuel du réglage [Sélection lampe].
[■uissance lampe]
Affiche l'état actuel du réglage [Puissance lampe].
[■tervalle lampe]
Affiche la valeur du réglage du cycle automatique de remplacement de la lampe en cours d'utilisation.
[ampe 1]
Affiche le temps d'utilisation et l'état de la lampe 1.
[■ampe 2]
Affiche le temps d'utilisation et l'état de la lampe 2.
[ampe 3]
Affiche le temps d'utilisation et l'état de la lampe 3.
[ampe 4]
Affiche le temps d'utilisation et l'état de la lampe 4.
[angue]
Affiche la langue actuelle.
[ompteur du filtre]
Affiche le temps d'utilisation réel du filtre.
[Extinction automatique]
Affiche l'état actuel du réglage [Extinction automatique].
[errouillage]
Affiche l'état actuel du réglage [Verrouillage].
[Merrouillage code PIN]
Affiche l'état actuel du réglage [Verrouillage code PIN].
[estion Obturateur]
Affiche l'état actuel du réglage [Gestion Obturateur].
[élécommande]
Affiche l'état actuel du réglage [Télécommande].
[uméro de série]
Affiche le numéro de série du projecteur.
Option control No.]
Se référer à « Utilisation du module d'entrée » (→ page 28) pour en savoir plus.
Sélectionnez [Nom du projecteur] à partir du menu principal sur l'écran du menu, et sélectionnez l'élément du sous-menu.
Pour l'utilisation de l'écran du menu, reportez-vous à « Naviguer dans les menus » (→ page 38).
- Après avoir sélectionné l'élément, appuyez sur ◀▶▲▼ pour effectuer le réglage.
Panneau de commandeTél
Riseau
Activez/Désactivez les paramètres du réseau.
Rglages réseau
Réglez l'environnement réseau.
de PIN du réseau
Définir un mot de passe réseau.
Affichez l'état du réseau du projecteur.
AIX D.D.
Cette fonction permet au projecteur d'être détecté par les contrôleurs AMX Device Discovery connectés au même réseau.
Pour plus d'informations au sujet d'AMX Device Discovery, consultez le site internet d'AMX : http://www.amx.com/.
Fglages par défaut du réseau
Restaurez les réglages réseau à leurs valeurs d'usine par défaut.
À propos de l'état des voyants
Si un voyant s'allume
Si un problème survient à l'intérieur du projecteur, celui-ci sera signalé par le voyant de température , le voyant du filtre , le voyant d'obturateur et le voyant de la lampe .
Vérifiez l'état des voyants et prenez les mesures suivantes.
Attention
Veillez à suivre les procédures décrites dans « Mise hors tension du projecteur » (→ page 32) pour contrôler l'alimentation lorsque vous prenez ces mesures.
Si plusieurs voyants se sont allumés ou clignotent, vérifiez l'état de chaque voyant et prenez les mesures nécessaires.
Remarque
- Vérifiez l'état de l'alimentation à l'aide du voyant d'alimentation . (→ page 30)
À propos de l'état des voyants
Lors du fonctionnement normal
L'état du voyant est affiché à l'aide des symboles suivants.
▲: Éteint, ●: Allumé, ★: Clignotant, ■: Allumé ou Clignotant
Voyant État du projecteur <STAND-BY> Rouge <WARNING TEMP.> Rouge <WARNING FILTER> Orange <SHUTTER> Bleu <LAMP REPLACE> Orange La fiche d'alimentation a été débranchée de la prise. *1 [H0Z7] Le projecteur est en mode veille.S'active si vous appuyez sur la touche d'alimentationsur le panneau de commande ou sur la touche d'alimentationde la télécommande. *1 [D24C] [CK8S] Le projecteur fonctionne normalement. [S36] [07A] [08B] [09W] [10B] [11A] La lampe est en cours de refroidissement.Le projecteur ne s'allume pas lorsqu'on appuie sur la touche d'alimentationde la télécommande ou la touche d'alimentationdu panneau de commande tant que le voyant de veillen'est pas allumé. • [YH45] [S4YA] [C64K] Le projecteur est en mode de gestion d'alimentation.La lampe s'allumera lors du contrôle du projecteur pour permettre à l'utilisateur de commencer à l'utiliser. • [X4A0] Le mode de gestion d'alimentation est activé et la lampe est en cours de refroidissement. [000] [004] [000] [0038] [0000] La fonction d'obturateur a été activée.Appuyez sur n'importe quelle touche de la télécommande ou du panneau de commande pour annuler la fonction. [001] [070] [001] [001] Le projecteur est en mode de gestion d'obturateur.La lampe s'allumera lors du contrôle du projecteur pour permettre à l'utilisateur de commencer à l'utiliser. [002] [071] [071] [071] [071] [071] Le mode de gestion d'obturateur est activé et la lampe est en cours de refroidissement.
*1: Le voyant s'allume ou clignote sous certaines conditions, peu importe l'état des autres voyants.
À propos de l'état des voyants
Lirsqu'il y a un problème avec la température interne
L'état du voyant est affiché à l'aide des symboles suivants.
▲: Éteint, ●: Allumé, ★: Clignotant, ■: Allumé ou Clignotant
Voyant État du projecteur <POWER>Vert <STAND-BY>Rouge <WARNING TEMP.>Rouge <WARNING FILTER>Orange <SHUTTER>Bleu <LAMP REPLACE>Orange ●▲★ *1 ■*2 ■*2 ■*2 Si la température devient trop importante à l'intérieur du projecteur, le voyant de température <WARNING TEMP.> commencera à clignoter doucement. ▲ ★*3 ★*4 ■*2 ■*2 ■*2 Si la température à l'intérieur du projecteur continue d'augmenter, le voyant de température <WARNING TEMP.> clignotera plus vite, le voyant d'alimentation <POWER> s'éteindra et le projecteur s'éteindra automatiquement. Le projecteur ne se rallume pas même lorsqu'on appuie sur la touche d'alimentation <ON> de la télécommande ou la touche d'alimentation <ON/STAND-BY> du panneau de commande. Lorsque le projecteur revient à une température normale de fonctionnement, le voyant de veille <STAND-BY> s'allumera. Le projecteur se rallumera en appuyant sur la touche d'alimentation <ON> de la télécommande ou la touche d'alimentation <ON/ STAND-BY> du panneau de commande. (Le voyant de température <WARNING TEMP.> continuera de clignoter.) Vérifiez le filtre à air. ▲●★ *4 ■*2 ■*2 ■*2 Le projecteur s'est refroidi à l'intérieur et est revenu à une température normale de fonctionnement. Une pression sur la touche d'alimentation <ON> de la télécommande ou la touche d'alimentation <ON/ STAND-BY> du panneau de commande permettra d'arrêter le clignotement du voyant de température <WARNING TEMP.> et l'utilisation du projecteur. Vérifiez le filtre à air.
*1: Le voyant s'allume ou clignote sous certaines conditions, peu importe l'état des autres voyants.
À propos de l'état des voyants
■rsqu'il y a un problème avec l'alimentation interne
L'état du voyant est affiché à l'aide des symboles suivants.
▲: Éteint, ●: Allumé, ★: Clignotant, ■: Allumé ou Clignotant
Voyant État du projecteur <STAND-BY>Rouge <WARNING TEMP.>Rouge <WARNING FILTER>Orange <SHUTTER>Bleu <LAMP REPLACE>Orange [147] [1883] [1907] [1964] [207] Un problème a été détecté à l'intérieur du projecteur. Le projecteur ne se rallume pas même lorsqu'on appuie sur la touche d'alimentationde la télécommande ou la touche d'alimentationdu panneau de commande. Retirez la fiche d'alimentation de la prise puis rebranchez-la. Si l'appareil s'éteint ou que le voyant s'allume ou clignote à nouveau, retirez la fiche d'alimentation de la prise et contactez votre revendeur pour demander un contrôle ou une réparation. Ne laissez pas le projecteur branché lorsque le voyant est allumé ou clignote. Cela pourrait provoquer un incendie ou une électrocution.
*1: Le voyant s'allume ou clignote sous certaines conditions, peu importe l'état des autres voyants.
Lirsqu'il y a un problème avec le filtre à air
L'état du voyant est affiché à l'aide des symboles suivants.
▲: Éteint, ●: Allumé, ★: Clignotant, ■: Allumé ou Clignotant
Voyant État du projecteur <STAND-BY>Rouge <WARNINGTEMP.>Rouge <WARNINGFILTER>Orange <SHUTTER>Bleu <LAMPREPLACE>Orange [BH84] [CZY7] [###] [###] [###] Le voyant vous indique lorsque le temps réglé avec « [Minuterie compteur filtre] » (→ page 70) a été atteint. Remplacez le filtre à air. (us'affichera simultanément en haut à droite de l'écran.)Autrement, le voyant vous indique lorsque [Compteur de filtre restant] passe à 0%. Remplacez le filtre à air. (s'affichera simultanément en haut à droite de l'écran.*2)
*1: Le voyant s'allume ou clignote sous certaines conditions, peu importe l'état des autres voyants.
À propos de l'état des voyants
Lirsqu'il y a un problème avec la lampe
L'état du voyant est affiché à l'aide des symboles suivants.
▲: Éteint, ●: Allumé, ★: Clignotant, ■: Allumé ou Clignotant
Voyant État du projecteur <STAND-BY>Rouge <WARNING TEMP.>Rouge <WARNING FILTER>Orange <SHUTTER>Bleu <LAMP REPLACE>Orange ■*1 ■*1 ■*1 ■*1 ■*1 ★*2 L'une des lampes de s'allume pas. (La lampe est en cours de refroidissement. Une fois que le voyant de veilles <STAND-BY> s'allume à nouveau, appuyez sur la touche d'alimentationde la télécommande ou la touche d'alimentationdu panneau de commande.) ■*1 ■*1 ■*1 ■*1 ■*1 ★*3 L'une des lampes de s'allume pas. (La lampe s'est refroidie et est revenue à une température de fonctionnement. Une pression de la touche d'alimentationde la télécommande ou de la touche d'alimentationdu panneau de commande arrêtera le clignotement du voyant et permettra le fonctionnement du projecteur.) ■*1 ■*1 ■*1 ■*1 ■*1 ● Le moment recommandé pour le remplacement de la lampe a été atteint.Le sera affiché en haut à droite de l'écran pour informer l'utilisateur du remplacement.Remplacez la lampe aussi tôt que possible. Le remplacement de la lampe fera s'éteindre le voyant de la lampe
*1: Le voyant s'allume ou clignote sous certaines conditions, peu importe l'état des autres voyants.
Remarque
- L'état de chaque lampe peut être vérifié lorsque les voyants de lampe ( à ) sur le dessus du projecteur s'allument ou clignotent. (→ page 83)
À propos de l'état des voyants
Lrsqu'il y a un problème avec l'obturateur
L'état du voyant est affiché à l'aide des symboles suivants.
▲: Éteint, ●: Allumé, ★: Clignotant, ■: Allumé ou Clignotant
Voyant État du projecteur <STAND-BY>Rouge <WARNING TEMP.>Rouge <WARNING FILTER>Orange <SHUTTER>Bleu <LAMP REPLACE>Orange [0AXT] [8XAG] [WKBT] L'obturateur ne peut pas être ouvert ou fermé. La lampe s'éteint, le refroidissement démarre et le projecteur passe en mode veille. Le projecteur est mis sous tension et va essayer d'ouvrir automatiquement l'obturateur jusqu'à trois fois. Après trois échecs, le projecteur passera en mode veille une fois la lampe refroidie. [0BDY] [07AB] [0ACD] [0YWD] [0ABY] Il y a un problème avec l'ouverture ou la fermeture de l'obturateur et la lampe s'est éteinte et est en cours de refroidissement. *1 [1HOKT] [TEXY] Il y a un problème avec l'ouverture ou la fermeture de l'obturateur et le projecteur passera en mode veille une fois la lampe éteinte et refroidie.
*1: Le voyant s'allume ou clignote sous certaines conditions, peu importe l'état des autres voyants.
Remarque
- L'état de chaque lampe peut être vérifié lorsque les voyants de lampe ( à ) sur le dessus du projecteur s'allument ou clignotent. (→ page 83)
Entretien/Remplacement
Avant l'entretien/le remplacement de l'unité
Lors de l'entretien ou du remplacement de l'unité, coupez toujours l'alimentation et retirez le cordon d'alimentation de la prise. (→ pages 29, 32)
Lorsque vous coupez l'alimentation, veillez à suivre les procédures décrites dans « Mise hors tension du projecteur » (⇨ page 32).
Entretien
Bîtier externe
Essuyez la saleté et la poussière avec un chiffon doux et sec.
Si la saleté persiste, humidifiez le chiffon avec de l'eau et essorez-le complètement avant d'essuyez le projecteur. Séchez le projecteur avec un chiffon sec.
N'utilisez pas de solvants tels que le benzène, du diluant, de l'alcool à brûler, des nettoyants ménagers ou des lingettes. eur utilisation pourrait détériorer le boîtier externe.
Surface frontale de l'objectif
Essuyez la saleté et la poussière de la surface frontale de l'objectif avec un chiffon propre, sec et doux.
N'utilisez pas de chiffon pelucheux/duveteux, sale ou imbibé d'huile/d'eau.
N'appliquez pas de force excessive lorsque vous essuyez l'objectif car il est fragile.
Attention
Les objectifs sont en verre. Des impacts ou une force excessive lors du nettoyage pourrait en rayer la surface. Manipulez-la avec attention.
N'utilisez jamais de solvants inflammables ou d'aérosols sur ou à proximité du projecteur. La température à l'intérieur du projecteur peut être extrêmement élevée en raison du fonctionnement de la lampe de projection. Une explosion ou un incendie peuvent encore se produire après extinction du projecteur. Mis à part les aérosols inflammables, l'air froid peut aussi endommager les parties internes.
Remplacement des pièces
Ftre à air
Le filtre de remplacement (003-004738-01 / Code des pièces de service: T1FTX0069--) est optionnel. Pour acheter le produit, consultez votre revendeur.
FAmplacement du filtre à air
1) Sortez le filtre à air.
- Utilisez un tournevis cruciforme pour dévisser les vis dans le sens antihoraire jusqu'à ce qu'elles tournent librement, puis retirez le filtre à air.
Vis
Entretien/Remplacement
2) Retirez le support.
- Dévissez les trois vis du support (A, B), faites glisser le support dans la direction indiquée par la flèche sur l'image et soulevez pour retirer le support.
3) Retirez le filtre à air.
- Passez vos doigts dans la fente pour soulever et retirer le filtre à air.
4) Fixez le nouveau filtre à air.
L'insertion du nouveau filtre à air en le glissant lentement permettra une mise en place plus aisée.
Le côté spongieux doit être sur le dessus. Le fait de le fixer dans le mauvais sens ou de le mettre en place de force provoquera des entrées d'air. Le filtre à air ne fonctionnera alors pas pleinement et de la poussière pénétrera dans le projecteur.
5) Fixez le support.
Placez le support (A, B) par-dessus le filtre.
Glissez le support de manière à ce que ses flèches s'alignent avec les flèches de l'unité puis attachez le support.
Serrez les trois vis du support.
6) Fixez le filtre à air au projecteur.
- Suivez l'étape 1) dans l'ordre inverse.
7) Réinitialisez la minuterie du filtre.
- Mettez sous tension et effectuez [Réinitialiser le compteur du filtre] dans le menu [Réglages].
Attention
Veillez à couper l'alimentation avant le remplacement du filtre à air.
Avant de fixer un nouveau filtre à air, assurez-vous de retirer son emballage.
Lors de la fixation de l'unité, assurez-vous de la stabilité du projecteur. Effectuez le remplacement dans un lieu sûr où le projecteur ne pourra pas être endommagé même si vous faites tomber le filtre à air.
Lorsque vous allumez le projecteur, assurez-vous que le filtre à air est fixé avant d'utiliser le projecteur. Le non respect de cette consigne peut provoquer des dommages.
Les filtres à air ne peuvent pas être réutilisés.
Le filtre à air et l'unité ne peuvent pas être lavés à l'eau. Assurez-vous de ne pas mouiller le filtre à air avec de l'eau ou d'autres substances. Cela pourrait provoquer des dommages.
Après avoir remplacé le filtre à air, réinitialisez la minuterie du filtre. Autrement, l'alimentation du projecteur pourrait être coupée par sécurité.
Après avoir fixé le filtre à air, veillez à serrer les vis. Dans le cas contraire, le filtre à air pourrait se décrocher pendant la projection.
Lmpe
La lampe est un composant consommable. Vérifiez la durée d'utilisation de la lampe avec « Menu [Information] » (→ page 73) et remplacez-la régulièrement.
Si le message de remplacement est affiché à l'écran et que les voyant de lampes à s'allument, remplacez les lampes.
Il est recommandé de demander les services d'un technicien qualifié pour remplacer la lampe. Consultez votre revendeur.
Consultez votre revendeur pour acheter la pièce 002-120599-01 (pièce utilisable).
Attention
- Ne remplacez pas la lampe tant qu'elle n'a pas suffisamment refroidi. (Attendez au moins 60 minutes après l'utilisation.)
L'intérieur du couvercle est très chaud et peut provoquer des brulures.
F marques sur le remplacement de la lampe.
Comme la lampe lumineuse est faite de verre, elle pourrait se briser si elle tombait ou si elle était cognée par un objet dur. Manipulez-la avec attention.
Un tournevis cruciforme est nécessaire pour le remplacement de la lampe.
Lors du remplacement de la lampe, veillez à la tenir par le culot.
Pour éviter que des morceaux de verre ne s'éparpillent, maintenez la lampe à la verticale lorsque vous la remplacez. Lorsque le projecteur est fixé au plafond, ne travaillez pas directement sous le couvercle de la lampe et n'approchez pas votre visage de celui-ci. Retirez lentement le couvercle de la lampe.
La lampe contient du mercure. Lors de la mise au rebut de la lampe usagée, demandez à votre centre de traitement des déchets le plus proche ou à votre revendeur comment les jeter correctement.
Attention
N'utilisez que les lampes spécifiées.
Les numéros de produit des accessoires et des composants vendus séparément sont sujets à des changements sans préavis.
Le remplacement simultané des quatre lampes est recommandé pour assurer une luminosité et une teinte homogène.
and remplacer la lampe
La lampe est un composant consommable. Remplacez régulièrement la lampe car sa luminosité diminue progressivement avec le temps. La durée estimée avant le remplacement est de 2 000 heures (si [Puissance lampe] est réglé sur standard). Cependant, elle peut être plus courte en fonction des caractéristiques de chaque lampe, des conditions d'utilisation et de l'environnement d'installation. Un remplacement précoce de la lampe est recommandé pour cette raison.
La durée dépasse 2 200 heures d'utilisation pour les deux lampes, les lampes vont basculer sur les deux autres lampes si elles sont disponibles. Après le changement, si la durée dépasse 2 200 heures d'utilisation pour l'une des deux lampes et que la lampe ne s'allume pas, seule l'autre lampe va s'allumer.
Si l'appareil est mis sous tension et que les lampes n'ont pas été remplacées après le dépassement des 2 200 heures d'utilisation pour toutes les lampes, le projecteur s'éteint automatiquement après dix minutes pour éviter un dysfonctionnement.
Affichage écran Voyant de lampe Voyants de lampesà[LAMP 1 REPLACE> Voyants de lampesà[LAMP 4 REPLACE> Les instructions de remplacement de la lampe indiquent le moment de remplacement et l’état de la lampe indique quelle lampe doit être remplacée. Vire à l’orange. Vire à l’orange pour indiquer quelle lampe doit être remplacée.
Entretien/Remplacement
Implacement de la lampe
Attention
Désactivez la lampe u.v. avant d'ouvrir le couvercle de lampe.
Lorsque le projecteur est fixé au plafond, n'approchez pas votre visage de la lampe.
Si la lampe n'est pas correctement fixée, retirez-la et fixez-la à nouveau. La mise en place forcée de la lampe peut casser le connecteur.
La surface en verre peut être chaude. Lors du remplacement de la lampe, veillez à la tenir par le culot.
1) Vérifiez quelle lampe doit être remplacée à l'aide de l'état de la lampe sur l'écran ou des voyants de lampe à .
Voyant de la lampe à
2) Après avoir suivi les procédures décrites dans « Mise hors tension du projecteur » (→ page 32) et avoir appuyé sur le côté commutateur d'alimentation pour mettre hors tension, débranchez la fiche de la prise murale, attendez au moins 60 minutes et vérifiez que la lampe a refroidit.
- Ouvrez le couvercle jusqu'à ce qu'il soit à 90° par rapport au projecteur.
4) Utilisez un tournevis cruciforme pour tourner les vis de fixation de la lampe (deux vis) jusqu'à ce qu'elles tournent librement, puis en les tenant par les culots, sortez la lampe du projecteur.
5) Insérez la nouvelle lampe en respectant la bonne direction et utilisez un tournevis cruciforme pour serrer fermement les vis de fixation de l'unité de la lampe (deux vis).
- Ne salissez pas la surface en verre en la touchant avec vos mains.
6) Fermez le couvercle de la lampe et utilisez un tournevis cruciforme pour en serrer fermement les vis de fixation.
Remarque
Lorsque vous mettez en place une lampe neuve (Produit N°: 002-120599-01), le projecteur réinitialise automatiquement la durée d'utilisation de la lampe.
Après avoir remplacé la lampe, assurez-vous de serrer les vis de fixation du couvercle de la lampe. Dans le cas contraire, la lampe pourrait se décrocher pendant la projection.
DÉSACTIVEZ LA LAMPE U.V. AVANT D'OUVRIR LE COUVERCLE DE LAMPE
Pour éviter que des morceaux de verre ne s'éparpillent, maintenez la lampe à la verticale lorsque vous la remplacez. Lorsque le projecteur est fixé au plafond, ne travaillez pas directement sous le couvercle de la lampe et n'approchez pas votre visage de celui-ci. Retirez lentement le couvercle de la lampe.
N° DE LAMPE : 002-120599-01
Guide de dépannage
Passez en revue les points suivants. Pour plus de détails, voir les pages correspondantes.
Problème Points à vérifier page Le projecteur ne s'allume pas. ● Est-ce que la fiche d'alimentation est fermement insérée dans la prise de courant ?● Est-ce que le commutateur d'alimentation principale est sur?● La prise fonctionne-t-elle ? —● Les disjoncteurs se sont-t-ils déclenchés ? —● Est-ce que le voyant d'alimentationest éteint ? 30● Est-ce que le voyant de températureclignote ? 75 —32 Aucune image n'est affichée. ● Est-ce que le périphérique (sortie) d'image est correctement connecté ? 24● Est-ce que la sélection d'entrée est correctement réglée ? 35● Est-ce que le périphérique externe relié au projecteur fonctionne correctement ?● Est-ce que le projecteur est utilisé dans la limite de température de fonctionnement (5°C (41°F) à 40°C (104°F)) ?● Est-ce que l'obturateur est fermé ? 35 —101 L'image est floue. ● Est-ce que la mise au point de l'objectif est correctement paramétrée ? 34● Est-ce que la distance de projection est appropriée ? 104● Est-ce que l'objectif est sale ? 81● Est-ce que le projecteur est installé perpendiculairement à l'écran ? —● Y a-t-il de la condensation sur l'objectif ? — Les couleurs sont pales/les teintes sont grisâtres. ● Est-ce que [Couleur] et [Teinte] sont correctement ajustés ?● Est-ce que le périphérique connecté au projecteur est correctement ajusté ?● Est-ce que le câble RVB est endommagé ? 48— L'image est sombre. ● Est-ce que [Contraste] et [Luminosité] sont ajustés correctement ?● Est-ce que [Sélection image] est correctement réglé ?● Est-ce que [Sélection lampe ] est réglé sur [2 lampes] ?● Est-ce que [Puissance lampe] est en mode économique ? 58● Est-ce qu'il est temps que la lampe soit remplacée ? 48475883 La télécommande ne fonctionne pas. ● Est-ce que les piles sont vides ?● Est-ce que les piles sont insérées dans le bon sens ?● Est-ce que le commutateur/de télécommande est réglé sur?● Y a-t-il des éléments gênant la réception du signal de contrôle entre la télécommande et le capteur du projecteur ?● Est-ce que la télécommande est utilisée au-delà de sa portée de fonctionnement ?● Est-ce que d'autres sources de lumière comme une lampe fluorescente n'affectent pas la projection ?● Est-ce que le câble de télécommande est connecté au projecteur ou à la télécommande ?● Est-ce que le fonctionnement de la télécommande est verrouillé avec [Verrouillage] dans le menu [Réglages] ?● Est-ce que [Capteur de télécommande] est réglé correctement dans le menu [Réglages] ?● Est-ce que le numéro de la télécommande a été changé ? —211717171721676521, 65 Les touches de commande du projecteur ne fonctionnent pas. ● Est-ce que le fonctionnement du projecteur est verrouillé avec [Verrouillage] dans le menu [Réglages] ? 67 La bonne image n'est pas affichée. ● Est-ce que [Entrée] est correctement sélectionné ? 42● Est-ce que [Ajust. image] est correctement réglé ? 48● Est-ce que [Écran] est correctement sélectionné ? 53● Est-ce que le décalage de l'objectif est à son maximum ? 33● Y a t-il un problème avec la cassette vidéo ou une autre source d'image ?● Est-ce que le projecteur reçoit des signaux incompatibles ? 97 — L'image provenant de l'ordinateur n'est pas affichée. ● Est-ce que le câble est trop long ? (Utilisez un câble de 10 m maximum).● Est-ce que [Entrée] est correctement sélectionné ? 42● Est-ce que [Ajust. ordin.] est correctement réglé ? 44● Est-ce que la sortie vidéo de l'ordinateur portable est correctement réglée ? (Exemple : Les réglages de la sortie peuvent être permutés en appuyant simultanément sur les touches Fn + F3 or Fn + F10. Reportez-vous au manuel d'utilisateur fourni avec votre ordinateur car la méthode varie selon le type d'ordinateur.) — [Réglage PC auto.] ne fonctionne pas. ● Est-ce que le projecteur reçoit des signaux incompatibles ? 97● Est-ce qu'un signal incompatible est sélectionné avec [Système] ? 43 Il n'y a pas d'image depuis les périphériques compatibles HDMI ou l'image est déformée. ● Est-ce que le câble HDMI est bien branché ? 24, 25● Mettez le projecteur et les périphériques connectés sous/hors tension. —● Est-ce qu'un signal incompatible est branché ? 99 L'appareil se met hors tension par lui-même. ● Est-ce que [Extinction] est réglé avec [Extinction automatique] dans le menu [Réglages] ?● Est-ce que le projecteur est utilisé alors que le filtre à air n'a pas été remplacé ou que [Réinitialiser le compteur du filtre] n'a pas été effectué après que 📄 s'affiche en haut à droite de l'écran ? 6671 La fonction d'obturateur ne marche pas. ● Est-ce que [Protection] dans [Shutter] est réglé correctement dans le menu [Réglages] ? 68
Attention
Si les problèmes persistent après la vérification des points précédents, consultez votre revendeur.
Consultez votre revendeur si vous avez oublié le lot de passe du logo ou votre mot de passe.
Ajuster les écrans d'images de plusieurs écrans
[Fusion des côtés] et [Colorimétrie] permettent aux images de plusieurs projecteurs d'être superposées en continu.
[usion des côtés]
1) Vérifiez que les réglages de [Écran] et [Ajust. image] de chaque projecteur sont les mêmes.
Projecteur A Projecteur B
3) Sélectionnez [Fusion des côtés] dans le menu [Réglages] et affichez l'écran de réglage.
z Les valeurs suivantes sont un exemple.
Projecteur A : Réglez [Droite] dans [Largeur] sur 100
Projecteur B : Réglez [Gauche] dans [Largeur] sur 100
5) Là où c'est nécessaire, ajustez [Mise au point] et [Zoom] pour la position d'image de chaque projecteur.
6) Utilisez ensuite [Lens-shift] pour superposer les zones ombrées.
- La ligne rouge va devenir jaune si la superposition est correcte.
7) Mettez [Echantillon test] sur [On] pour afficher une mire de test à 50% de blanc.
- Les zones de superposition seront affichées plus brillamment que les autres zones.
8) Ajustez [Niveau de noir] de façon à ce qu'il n'y ait aucune différence entre les zones de superposition et les autres zones.
- Pour ajuster les zones de superposition, le réglage de la valeur [Contraste] dans le menu [Ajust. image] est recommandé.
Si les couleurs de gauche et de droite ne correspondent pas, procédez aux étapes suivantes.
[Colorimétrie]
9) Sélectionnez [Colorimétrie] dans le menu [Réglages] et affichez l'écran de réglage.
10) Activez la correspondance des couleurs avec [On] et ajustez [Rouge]/[Vert]/[Bleu]/[Blanc].
11) Sélectionnez [Colorimétrie avancée] si de plus amples réglages sont nécessaires et faites s'afficher l'écran de réglage.
12) Activez la correspondance de couleur avancée avec [On] et ajustez chaque couleur avec [Cible].
- Réglez la valeur [Cible] dans l'intervalle de valeur [Mesurée].
Exemple) Valeur pour « [Rouge], x »
"[Mesurée]=0,674", donc [Cible] est réglé à une valeur inférieure de "0,650".
13) Si les couleurs ne correspondent pas même après l'ajustement de [Cible], utilisez un colorimètre pour mesurer les coordonnées de chromaticité et la luminance afin d'effectuer de plus amples ajustements.
- Ajustement des couleurs avec un colorimètre
1) Mettez [Colorimétrie avancée] sur [On].
2) Sélectionnez [Echantillon test] et appuyez sur la touche .
- Affiche l'écran de sélection de la mire de test.
3) Appuyez sur [Rouge] (ou [Vert], [Bleu]) depuis [Mesurée] et appuyez sur la touche .
- La mire de test s'affiche.
4) Mesurez les coordonnées de chromaticité (x, y) et la luminance (Lx) à l'aide d'un colorimètre.
5) Sélectionnez [Quitter] et appuyez sur la touche .
- Revenez à l'écran de réglage avancé de l'appariement couleur.
6) Saisissez la valeur obtenue à l'étape 4).
7) Calculez la valeur "L" avec la formule suivante et saisissez la valeur.
Exemple) Calculez "L" pour la valeur de rouge mesurée.
Luminance (Lx) du rouge
Luminance du rouge + luminance du vert + luminance du bleu (Lx)
8) Ajustez de nouveau la valeur [Cible].
9) Sélectionnez [Mémoriser] pour enregistrer la valeur ajustée.
- Si c'est nécessaire, ajustez les autres projecteurs de la même façon.
Étiquette d'indication de l'enregistrement de mot de passe
Appliquez l'étiquette fournie sur le projecteur à un emplacement visible lorsque le mot de passe est enregistré et valide.
Borne de série
Les bornes de connexion / du projecteur sont conformes avec RS-232C afin que le projecteur puisse être connecté à et contrôlé par un ordinateur.
Annexion
Attributions des broches et noms des signaux
D-Sub 9 broches (mâle)Vue extérieure Numéro debroche Nom du signal Détails (1) — NC (2) RXD Données reçues (3) TXD Données transmises (4) — NC (5) GND Terre (6) — NC (7) — (8) — (9) —
Interface des commandes latérales
Ce projecteur possède une fonction permettant de commander et de contrôler les opérations du projecteur en utilisant le port série RS-232C.
Oération
1) Branchez un câble série croisé RS-232C à l'entrée SERIAL PORT IN du projecteur et au port série de l'ordinateur (→ page 24).
Débit en baud : 9600 / 19200 bps
Contrôle de flux : néant
Contrôle de parité : néant
Bit de données : 8
Bit d'arrêt : 1
3) Tapez une commande d'exécution fonctionnelle et appuyez sur la touche Entrée.
Exemple) Pour sélectionner le port INPUT 2, tapez "C06" [CR].
Remarques
La valeur par défaut du débit en baud est de 19200 bits/s. Si une erreur se produit dans la communication, changez la vitesse du port série et de la communication (débit en baud). Si une erreur se produit dans la communication, changez la vitesse du port série et de la communication (débit en baud).
Tapez en utilisant des caractères majuscules de 64 octets ASCII et des caractères mono-octet.
Commande d'exécution des fonctions
La commande est envoyée de l'ordinateur au projecteur dans le format suivant:
"C" [Commande] [CR]
Commande: deux caractères (reportez-vous au tableau des commandes ci-dessous.)
Le projecteur décode la commande et renvoie "ACK" dans le format suivant: [ACK] [CR]
Lorsque le projecteur ne peut pas décoder la commande, il la renvoie dans le format ci-dessous: “?” [CR]
Commande Fonction Commande Fonction C00 Allumer le projecteur C3D Pointeur vers le BAS C01 Eteindre le projecteur (extinction immédiate) C3F Entrer C05 Sélectionner l'entrée 1 C46 Zoom ARRIERE C06 Sélectionner l'entrée 2 C47 Zoom AVANT C07 Sélectionner l'entrée 3 C4A Mise au point ARRIERE C08 Sélectionner l'entrée 4 C4B Mise au point AVANT C0D Sourdine de vidéo activée C5D Décalage image VERS LE HAUT C0E Sourdine de vidéo désactivée C5E Décalage image VERS LE BAS C0F Taille normale de l'écran C5F Décalage image VERS LA GAUCHE C10 Plein écran C60 Décalage image VERS LA DROITE C1C Menu activé C89 Réglage PC auto. C1D Menu désactivé C8E Trapèze VERS LE HAUT C3A Pointeur vers la DROITE C8F Trapèze VERS LE BAS C3B Pointeur vers la GAUCHE C90 Trapèze VERS LA DROITE C3C Pointeur vers le HAUT C91 Trapèze VERS LA GAUCHE
Commande de lecture d'état
La commande est envoyée de l'ordinateur au projecteur dans le format suivant:
"CR" [Commande] [CR]
Commande: un caractère (Reportez-vous au tableau des commandes ci-dessous.)
Le projecteur décode la commande et renvoie la' chaîne de caractères' dans le format ci-dessous;
Commande Fonction Valeur de Retour Etat du projecteur CR0 Lecture d'état 00 Allumé 80 Mode veille 40 Compte à rebours 20 Refroidissement 10 Panne de courant 28 Refroidissement lors d'une anomalie de la température 24 Refroidissement en mode d'extinction automatique 04 Mode d'extinction automatique après le refroidissement 21 Refroidissement après l'extinction du projecteur lorsque les lampes sont éteintes. 81 Mode veille après le refroidissement lorsque les lampes sont éteintes. 88 Mode veille après le refroidissement lors d'une anomalie de la température. 2C Refroidissement lorsque le projecteur est éteint par la fonction Gestion Obturateur. 8C Mode veille après le refroidissement par la fonction Gestion Obturateur. CR6 Lecture de température %1 %2 %1 = Température au capteur 1 (°C)%2 = Température au capteur 2 (°C)(ex.) %1 = 12,3 (°C), %2 = 23,4 (°C)→ Le projecteur retourne “ 12,3 23,4”.(Pour chaque capteur, deux chiffres et les nombres en dixième position sont affichés avec un espace entre chacune des températures.) ? Echec de communication
Les tableaux page (→ page 93) montrent les listes de commandes types utilisées pour commander le projecteur. Pour plus de détails concernant les autres commandes, adressez-vous à votre revendeur.
Autres bornes
Attributions des broches et noms de signaux de la borne
Vue extérieure Numéro de broche Nom du signal (1) GND (Signal de luminance) (2) GND (Signal de couleur) (3) Signal de luminance (4) Signal de couleur
Attributions des broches et noms de signaux de la borne
Vue extérieure Numéro de broche Nom du signal (1) R (2) G (3) B (9) +5 V (12) Données DDC (13) HD/SYNC (14) VD (15) Horloge DDC
(4) n'est pas utilisé.
Attributions des broches et noms de signaux de la borne
Vue extérieure Numéro de broche Nom du signal Numéro de broche Nom du signal (1) T.M.D.S data 2 + (11) T.M.D.S clock blindage Numéro des broches particulières de (1) à (19) (2) T.M.D.S data 2 blindage (12) T.M.D.S clock - (3) T.M.D.S data 2 - (13) CEC (4) T.M.D.S data 1 + (14) — (5) T.M.D.S data 1 blindage (15) SCL Même les numéros des broches de (2) à (18) (6) T.M.D.S data 1 - (16) SDA (7) T.M.D.S data 0 + (17) DDC/CEC GND (8) T.M.D.S data 0 blindage (18) +5 V (9) T.M.D.S data 0 - (19) Détection à connexion à chaud (10) T.M.D.S clock +
Attributions des broches et noms de signaux de la borne
Vue extérieure Numéro de broche Nom du signal Numéro de broche Nom du signal (1) T.M.D.S data 2 - (13) - (2) T.M.D.S data 2 + (14) +5 V (3) T.M.D.S data 2/4 blindage (15) GND (4) -(16) Détection à connexion à chaud (5) -(17) T.M.D.S data 0 - (6) Horloge DDC (18) T.M.D.S data 0 + (7) Données DDC (19) T.M.D.S data 0/5 blindage (8) -(20) - (9) T.M.D.S data 1 - (21) - (10) T.M.D.S data 1 + (22) T.M.D.S clock blindage (11) T.M.D.S data 1/3 blindage (23) T.M.D.S clock + (12) - (24) T.M.D.S clock -
Liste des signaux compatibles
Le tableau suivant spécifie les types de signaux compatibles avec le projecteur.
Lorsque le signal est analogique
Affichage de l'écran Résolution mode (points) Horizontal (kHz) Vertical *1 Fréquence de balayage Horloge à points (Hz) fréquence (MHz) VGA 1 640 x 480 31,470 59,880 25,149 VGA 2 720 x 400 31,470 70,090 28,322 VGA 3 640 x 400 31,470 70,090 25,175 VGA 4 640 x 480 37,860 74,380 31,500 VGA 5 640 x 480 37,860 72,810 31,500 VGA 6 640 x 480 37,500 75,000 31,500 VGA 7 640 x 480 43,269 85,000 36,000 MAC LC13 640 x 480 34,970 66,600 31,330 MAC 13 640 x 480 35,000 66,670 30,240 480p 640 x 480 31,470 59,880 25,200 576p 768 x 576 31,250 50,000 29,500 576i 768 x 576i 15,625 50,000 14,750 480i 640 x 480i 15,734 60,000 12,273 SVGA 1 800 x 600 35,156 56,250 36,000 SVGA 2 800 x 600 37,880 60,320 40,000 SVGA 3 800 x 600 46,875 75,000 49,500 SVGA 4 800 x 600 53,674 85,060 56,250 SVGA 5 800 x 600 48,080 72,190 50,000 SVGA 6 800 x 600 37,900 61,030 40,020 SVGA 7 800 x 600 34,500 55,380 36,432 SVGA 8 800 x 600 38,000 60,510 40,128 SVGA 9 800 x 600 38,600 60,310 38,600 SVGA 10 800 x 600 32,700 51,090 32,700 SVGA 11 800 x 600 38,000 60,510 40,128 MAC 16 832 x 624 49,720 74,550 57,283 XGA 1 1 024 x 768 48,360 60,000 65,000 XGA 2 1 024 x 768 68,677 84,997 94,504 XGA 3 1 024 x 768 60,023 75,030 78,750 XGA 4 1 024 x 768 56,476 70,070 75,000 XGA 5 1 024 x 768 60,310 74,920 79,252 XGA 6 1 024 x 768 48,500 60,020 65,179 XGA 7 1 024 x 768 44,000 54,580 59,129 XGA 8 1 024 x 768 63,480 79,350 83,410 XGA 9 1 024 x 768i 36,000 87,170 47,300 XGA 10 1 024 x 768 62,040 77,070 84,375 XGA 11 1 024 x 768 61,000 75,700 81,000 XGA 12 1 024 x 768i 35,522 86,960 44,900 XGA 13 1 024 x 768 46,900 58,200 63,030 XGA 14 1 024 x 768 47,000 58,300 61,664 XGA 15 1 024 x 768 58,030 72,000 74,745 MAC 19 1 024 x 768 60,240 75,080 80,010 SXGA 1 1 152 x 864 64,200 70,400 94,560 SXGA 2 1 280 x 1 024 62,500 58,600 SXGA 3 1 280 x 1 024 63,900 60,000 SXGA 4 1 280 x 1 024 63,340 59,980 SXGA 5 1 280 x 1 024 63,740 60,010 SXGA 6 1 280 x 1 024 71,690 67,190 SXGA 7 1 280 x 1 024 81,130 76,107 SXGA 8 1 280 x 1 024 63,980 60,020 SXGA 9 1 280 x 1 024 79,976 75,025 SXGA 10 1 280 x 960 60,000 60,000 SXGA 11 1 152 x 900 61,200 65,200 SXGA 12 1 152 x 900 71,400 75,600 SXGA 13 1 280 x 1 024i 50,000 86,000 SXGA 14 1 280 x 1 024i 50,000 94,000
Informations techniques
Affichage de l'écran Résolution mode (points) *1 Horizontal (kHz) Vertical (Hz) fréquence (MHz) SXGA 15 1 280 x 1 024 63,370 60,010 111,520 SXGA 16 1 280 x 1 024 76,970 72,000 130,080 SXGA 17 1 152 x 900 61,850 66,000 94,500 SXGA 18 1 280 x 1 024i 46,430 86,700 78,745 SXGA 19 1 280 x 1 024 63,790 60,180 108,190 SXGA 20 1 280 x 1 024 91,146 85,024 157,500 SXGA+ 1 1 400 x 1 050 63,970 60,190 107,990 SXGA+ 2 1 400 x 1 050 65,350 60,120 122,850 SXGA+ 3 1 400 x 1 050 65,120 59,900 122,430 SXGA+ 4 1 400 x 1 050 64,030 60,010 108,160 SXGA+ 5 1 400 x 1 050 62,500 58,600 108,000 SXGA+ 6 1 400 x 1 050 64,744 59,948 101,000 SXGA+ 7 1 400 x 1 050 65,317 59,978 121,750 MAC 21 1 152 x 870 68,680 75,060 100,000 MAC 1 280 x 960 75,000 75,080 126,000 MAC 1 280 x 1 024 80,000 75,080 135,200 WXGA 1 1 366 x 768 48,360 60,000 86,670 WXGA 2 1 360 x 768 47,700 60,000 86,670 WXGA 3 1 376 x 768 48,360 60,000 86,670 WXGA 4 1 360 x 768 56,160 72,000 100,190 WXGA 6 1 280 x 768 47,776 59,870 79,500 WXGA 7 1 280 x 768 60,289 74,893 102,250 WXGA 8 1 280 x 768 68,633 84,837 117,500 WXGA 9 1 280 x 800 49,600 60,050 79,360 WXGA 10 1 280 x 800 41,200 50,000 68,557 WXGA 11 1 280 x 800 49,702 59,810 83,500 WXGA 12 1 280 x 800 63,980 60,020 108,000 WXGA 17 1 280 x 800 58,289 69,975 98,858 WXGA 18 1 280 x 800 60,044 71,995 102,795 WXGA 19 1 280 x 800 62,790 74,928 106,492 WXGA 20 1 280 x 800 71,553 84,879 122,498 WXGA 21 1 280 x 800 55,993 69,991 94,964 WXGA 22 1 280 x 800 57,675 72,004 97,817 WUXGA 12 1 920 x 1 200 74,556 59,885 193,250 WUXGA 2 1 920 x 1 200 74,038 59,950 154,000 WSXGA+ 1 1 680 x 1 050 65,290 59,954 146,250 WXGA+ 1 1 440 x 900 55,935 59,887 106,500 WXGA+ 2 1 440 x 900 74,918 60,000 161,850 UXGA 1 1 600 x 1 200 75,000 60,000 162,000 UXGA 22 1 600 x 1 200 81,250 65,000 175,500 UXGA 32 1 600 x 1 200 87,500 70,000 189,000 UXGA 42 1 600 x 1 200 93,750 75,000 202,500 UXGA 52 1 600 x 1 200 106,250 85,000 229,500 720p 1 280 x 720 45,000 60,000 74,250 720p 1 280 x 720 37,500 50,000 74,250 1035i 1 920 x 1 035i 33,750 60,000 74,250 1080i 1 920 x 1 080i 33,750 60,000 74,250 1 920 x 1 080i 28,125 50,000 74,250 1080p 1 920 x 1 080 33,750 30,000 74,250 1 920 x 1 080 28,125 25,000 74,250 1 920 x 1 080 27,000 24,000 74,250 1 920 x 1 080 67,500 60,000 148,500 1 920 x 1 080 56,250 50,000 148,500 1080psf/30 1 920 x 1 080 33,750 60,000 74,250 1080psf/25 1 920 x 1 080 28,125 50,000 74,250 1080psf/24 1 920 x 1 080 27,000 48,000 74,250
*1: Le "i" après la résolution indique un signal entrelacé.
Lorsque le signal est numérique
Affichage de l'écran Résolution mode (points) Horizontal (kHz) Vertical (Hz) fréquence (MHz) Fréquence de balayage Horloge à points D-VGA 640 x 480 31,470 59,940 25,175 D-480i2 720 (1 440) x 480 15,734 59,940 27,000 D-576i2 720 (1 440) x 576 15,625 50,000 27,000 D-480p 720 x 480 31,470 60,000 27,000 D-576p 768 x 576 31,250 50,000 27,000 D-SVGA 800 x 600 37,879 60,320 40,000 D-XGA 1 024 x 768 43,363 60,000 65,000 D-WXGA 1 1 366 x 768 48,360 60,000 86,670 D-WXGA 2 1 360 x 768 47,700 60,000 86,670 D-WXGA 3 1 376 x 768 48,360 60,000 86,670 D-WXGA 4 1 360 x 768 56,160 72,000 100,190 D-WXGA 5 1 366 x 768 46,500 50,000 67,400 D-WXGA 6 1 280 x 768 47,776 59,870 79,500 D-WXGA 7 1 280 x 768 60,289 74,893 102,250 D-WXGA 8 1 280 x 768 68,633 84,837 117,500 D-WXGA 9 1 280 x 800 49,600 60,050 79,360 D-WXGA 10 1 280 x 800 41,200 50,000 68,557 D-WXGA 11 1 280 x 800 49,702 59,810 83,500 D-WXGA 12 1 280 x 800 63,980 60,020 108,000 D-WXGA 17 1 280 x 800 58,289 69,975 98,858 D-WXGA 18 1 280 x 800 60,044 71,995 102,795 D-WXGA 19 1 280 x 800 62,790 74,928 106,492 D-WXGA 20 1 280 x 800 71,553 84,879 122,498 D-WXGA 21 1 280 x 800 55,993 69,991 94,964 D-WXGA 22 1 280 x 800 57,675 72,004 97,817 D-SXGA 1 1 280 x 1 024 63,980 60,020 108,000 D-SXGA 2 1 280 x 1 024 60,276 58,069 93,067 D-SXGA+ 1 1 400 x 1 050 63,970 60,190 107,990 D-SXGA+ 2 1 400 x 1 050 65,350 60,120 122,850 D-SXGA+ 3 1 400 x 1 050 65,120 59,900 122,430 D-SXGA+ 4 1 400 x 1 050 64,030 60,010 108,160 D-SXGA+ 5 1 400 x 1 050 62,500 58,600 108,000 D-SXGA+ 6 1 400 x 1 050 64,744 59,948 101,000 D-SXGA+ 7 1 400 x 1 050 65,317 59,978 121,750 D-UXGA 1 600 x 1 200 75,000 60,000 162,000 D-WUXGA 2 1 920 x 1 200 74,038 59,950 154,000 D-WSXGA+ 1 1 680 x 1 050 65,290 59,954 146,250 D-WXGA+ 1 1 440 x 900 55,935 59,887 106,500 D-720p 1 280 x 720 45,000 60,000 74,250 1 280 x 720 37,500 50,000 74,250 D-1035i 1 920 x 1 035i 33,750 60,000 74,250 D-1080i 1 920 x 1 080i 33,750 60,000 74,250 1 920 x 1 080i 28,125 50,000 74,250 D-1080psf/30 1 920 x 1 080 33,750 60,000 74,250 D-1080psf/25 1 920 x 1 080 28,125 50,000 74,250 D-1080psf/24 1 920 x 1 080 27,000 48,000 74,250 D-1080p 1 920 x 1 080 33,750 30,000 74,250 1 920 x 1 080 28,125 25,000 74,250 1 920 x 1 080 27,000 24,000 74,250 1 920 x 1 080 67,500 60,000 148,500 1 920 x 1 080 56,250 50,000 148,500
*1: Le "i" après la résolution indique un signal entrelacé. .
Remarque
Le nombre de points affichés est 1 024 x 768.
Un signal à la résolution différente sera projeté après la conversion de la résolution pour correspondre avec l'affichage du projecteur.
Si des signaux entrelacés sont connectés, des clignotements peuvent apparaître sur l'image projetée.
Le projecteur n'est pas compatible avec les signaux de fréquence d'horloge à point de 230 MHz ou plus.
Caractéristiques techniques
Le tableau suivant décrit les caractéristiques techniques du projecteur.
Numéro de modèle LX1750 Alimentation électrique 200 V - 240 V CA 50 Hz/60 Hz Consommation 200 V - 240 V 11 A 1 850 W Lorsque [Puissance lampe] du menu [Réglages] est réglé sur le mode éco : 1 450 W Veille : 18 W Moniteur LCD Taille 4,57 cm (1 8") (rapport d'aspect 4:3) Système d'affichage Trois panneaux transparents à cristaux liquides (RVB) Système d'entraînement Système de matrice active TFT de polysilicium Nombre de pixels 786 432 pixels (1 024 x 768 points) x 3 panneaux Lampe lumineuse Lampe de 380 W NS HA UHM x 4 Sortie de lumière 16 000 lm (ANSI) (si [Sélection lampe ] est réglé sur [4 lampes] et si [Puissance lampe] est réglé sur standard) Les signaux d'image pouvant être projetés Référez-vous à « Liste des signaux compatibles » (⇨ page 97). Système de couleur Six normes (NTSC/NTSC4.43/PAL/PAL-N/PAL-M/SECAM) Taille d'écran 1,02 m (40") – 15,24 m (600") Rapport d'aspect de l'écran 4:3 Méthode de projection Référez-vous à « Méthode de projection » (⇨ page 22). Rapport de contraste 2 500:1 (lors du réglage de [Puissance lampe] sur auto, et [Couleur avancée] sur [Auto]) Bornes INPUT 1 Borne d'entrée DVI-D 1 pièce, DVI-D 24 brochesSignal numérique TMDS (Transition Minimized Differential Signaling) Borne d'entrée HDMI 1 pièce, HDMI 19 broches (conforme avec HDCP, Deep color) Borne d'entrée ORDINATEUR 1 pièce (D-sub 15 broches (femelle))Signal RVB 0,7 V [p-p] 75 Ω (G-SYNC : 1,0 V [p-p] 75 Ω)HD/SYNC TTL Haute impédance, compatible avec polarité positive/négative automatiqueVD, TTL Haute impédance, compatible avec polarité positive/négative automatique INPUT 2 Borne d'entrée analogique RVB 1 pièce (BNC 5 broches)Signal RVB 0,7 V [p-p] 75 Ω (G-SYNC : 1,0 V [p-p] 75 Ω)HD/SYNC TTL Haute impédance, compatible avec polarité positive/négative automatique Signal VIDEO 1,0 V [p-p] 75 Ω synchro négative Signal Y PB /CB PR /CR Y : 1,0 V [p-p] synchro négative, PB /CB : 0,7 V [p-p] 75 Ω, PR /CR : 0,7 V [p-p] 75 Ω Borne d'entrée S-VIDEO 1 pièce, Mini DIN 4 broches Y 1,0 V [p-p], C 0,286 V [p-p] 75 Ω compatible avec un signal S1 Borne d'entrée de série D-Sub 9 broches 1 pièce, contrôle par ordinateur compatible RS-232C Borne de sortie sérielle D-Sub 9 broches 1 pièce Borne USB (utilisée par le personnel de service) Borne USB (1 pièce, gammes B) Télécommande filaire Mini prise Borne réseau local 1 pièce, RJ-45 pour connexion réseau, 10Base-T/100Base-TX
Caractéristiques techniques
Numéro de modèle LX1750 Longueur du câble d'alimentation 3,0 m (118-1/8") Boîtier externe Plastique moulé Dimensions Largeur : 650 mm (25-5/8") Hauteur : 349 mm (13-3/4") (pieds entièrement rétractés)Profondeur : 815 mm (32-1/8") (pieds entièrement rétractés, sans objectif) Poids Environ 46,5 kg (102,5 livres) Environnement de fonctionnement Température ambiante d'utilisation 1 : 5°C (41°F) à 40°C (104°F)Humidité ambiante d'utilisation : 20% à 80% (sans condensation) Télé-commande Alimentation électrique 3 V CC (2 piles AAA/R03/LR03) Portée d'utilisation Environ 5 m (196-7/8") (plage de 30° dans chaque direction) Poids 102 g (3,6 onces) (avec les piles) Dimensions Largeur : 48 mm (1-7/8") Hauteur : 27 mm (1-1/8") Profondeur : 145 mm (5-3/4")
*1: La température de l'environnement d'utilisation peut varier en fonction du type de filtre à air utilisé et si le projecteur est utilisé en altitude.
Dimensions
* Les dimensions réelles peuvent différer selon le produit.
Instructions de sécurité concernant le système de fixation au plafond
L'installation du système de fixation au plafond ne devrait être effectuée que par un technicien qualifié.
Christie n'est pas responsable des éventuels dommages au projecteur provoqués par l'utilisation d'un système de fixation au plafond qui ne serait pas fabriqué par Christie ou le choix d'un emplacement d'installation inapproprié, même si la période de garantie du projecteur n'est pas expirée.
Un système de fixation au plafond inutilisé doit être rapidement démonté par un technicien qualifié.
Utilisez un tournevis dynamométrique ou une clé hexagonale dynamométrique pour le serrage des vis et serrez-les à un couple de serrage compris dans les valeurs indiquées. N'utilisez pas des outils comme un tournevis électrique ou un tournevis à impact.
Pour plus de détails, consultez le manuel d'installation fourni avec le système de fixation au plafond.
Les numéros de produit des accessoires et les composants vendus séparément sont sujets à des modifications sans préavis.
Vue du dessous
Trous des vis pour les pieds réglables (à utiliser avec le système de fixation au plafond)
Diamètre de vis : M10
Profondeur : 40 mm
Orifices pour les vis du système de fixation au plafond
Diamètre de vis : M8
Profondeur : 32 mm
Couple de serrage de vis
M10:20±1 N·m
M8 : 10 ± 0,5 N·m
Remarques concernant la fixation de l'objectif
Le personnel technique ou de réparation doit fixer l'objectif en fonction du mode d'emploi fourni avec l'objectif optionnel.
- Utilisez les plaques pare-lumière, la fixation d'objectif, l'entretoise et le support de fixation du levier de verrouillage d'objectif fournis avec le projecteur lors de la fixation de l'objectif. Pour en apprendre davantage, référez-vous au mode d'emploi fourni avec l'objectif optionnel.
Caractéristiques techniques de l'objectif
Référez-vous aux tableaux suivants pour voir les caractéristiques des objectifs.
Toutes les mesures des tableaux suivants sont approximatives. Elles peuvent légèrement différer des mesures réelles.
Tille de l'écran et distance de projection
Distance de projection (m) Numéro d' objectif 38-809037-52 103-135100-01 38-809094-51 103-103101-01 38-809039-52 38-809044-52 103-130105-01 38-809070-51 103-129103-01 Taille d' écran (m (")) TÉLÉ LARGE FIXE TÉLÉ LARGE TÉLÉ LARGE TÉLÉ LARGE TÉLÉ LARGE TÉLÉ LARGE TÉLÉ LARGE TÉLÉ LARGE 1,02 (40") 1,4 1,1 0,6 1,2 1,2 0,9 2,0 1 5 — — 5,1 3,7 6,5 3,3 7,2,9 1,52 (60") 2,2 1,7 0,9 1,8 1,8 1,4 3,1 2 3 — — 7,6 5,5 11,2 7,7 5,5 4,3 2,03 (80") 2,9 2,2 1,3 2,4 2,4 1,9 4,2 3 2 — — 10,1 7,3 14,8 10,2 7,3 5,6 2,54 (100") 3,7 2,8 1,6 3,1 3,1 2,4 5,3 4 0 7,1 5,2 12,5 9,0 18,4 12,7 9,1 7,0 3,05 (120") 4,4 3,4 1,9 3,7 3,7 2,9 6,4 4 8 8,6 6,3 15,0 10,8 22,0 15,1 10,9 8,4 3,81 (150") 5,6 4,3 2,4 4,7 4,7 3,6 8,0 6 1 10,7 7,9 18,7 13,4 27,5 18,8 13,6 10,5 4,57 (180") 6,7 5,1 2,9 5,7 5,6 4,3 9,6 7 4 12,9 9,5 22,4 16,1 32,9 22,5 16,3 12,6 5,08 (200") 7,5 5,7 3,3 6,3 6,2 4,8 10,7 8,2 14,4 10,6 24,9 17,8 36,5 24,9 18,1 14,0 6,35 (250") 9,3 7,2 4,1 7,9 7,8 6,0 13,5 10,3 18,0 13,3 31,0 22,2 45,5 31,1 22,6 17,5 7,62 (300") 11,2 8,6 4,9 5,9 5,9 4,7 3,16 2 12,4 21,6 16,0 37 226,6 54,6 37,2 27,1 20,9 8,89 (350") 13,1 10,1 1,5 8,1 4,6 11,1 1,0 8,5 18,9 14,5 25,3 18,7 43,4 31,0 63,6 43,4 31,5 24,4 10,16 (400") 15,0 11,5 6,6 16,7 12,7 12,6 9,7 21,7 16,6 28,9 21,4 49,5 35,4 72,6 49,5 36,0 27,9 12,70 (500") 18,8 14,4 8,3 20,9 15,9 15,8 12,1 27,1 20,8 36,2 26,8 61,9 44,2 90,7 61,8 45,0 34,8 15,24 (600") 22,5 17,3 9,9 25,1 19,2 18,9 14,6 32,6 25,0 43,4 32,2 74,2 53,0 108,8 74,1 54,0 41,8
calage d'objectif et rapport de l'axe optique
Numéro d'objectif 38-809037-52 103-135100-01 38-809094-51 103-103101-01 38-809039-52 38-809044-52 103-130105-01 38-809070-51 103-129103-01 Décalage d'objectif/ rapport de l'axe optique Vertical (maxi.) H1 0 1 0 0 0 0 0 0 0 H2 10 1 10 10 10 10 10 10 10 Horizontal (maxi.) W1 2 1 2 1 2 2 2 2 2 W2 3 1 3 1 3 3 3 3 3
Lens-shift (le plus haut possible)
Lens-shift (le plus bas possible)
Lens-shift (le plus à gauche possible)
Lens-shift (le plus à droite possible)
Remarques concernant la fixation de l'objectif
Raque pare-lumière pour chaque objectif
Trois types de plaques pare-lumière sont fournis avec le projecteur. Utilisez la plaque pare-lumière correspondant à l'objectif approprié. Reportez-vous au tableau suivant.
Accessoire (nom du produit) N° de produit de l’objectif Plaque 1 du pare-lumière(6103379906) 103-135100-01*1 Plaque 2 du pare-lumière(6103370064) 38-809094-51, 103-103101-01,38-809039-52, 38-809044-52,38-809070-51 Plaque 3 du pare-lumière(6103370224) 38-809037-52, 103-135100-01*1,103-130105-01, 103-129103-01
Attention
- La plaque 2 pare-lumière et la plaque 3 pare-lumière doivent être séparées des plaques inférieure et supérieure.
*1: Utilisez ensemble les plaques 1 et 3 de protection contre la lumière.
Avis aux utilisateurs concernant la collecte et l'élimination des piles et des appareils électriques et électroniques usagés
Apposé sur le produit lui-même, sur son emballage, ou figurant dans la documentation qui l'accompagne, ce pictogramme indique que les piles et appareils électriques et électroniques usagés doivent être séparés des ordures ménagères.
Afin de permettre le traitement, la valorisation et le recyclage adéquats des piles et des appareils usagés, veuillez les porter à l'un des points de collecte prévus, conformément à la législation nationale en vigueur ainsi qu'aux directives 2002/96/CE et 2006/66/CE.
En éliminant piles et appareils usagés conformément à la réglementation en vigueur, vous contribuez à prévenir le gaspillage de ressources précieuses ainsi qu'à protéger la santé humaine et l'environnement contre les effets potentiellement nocifs d'une manipulation inappropriée des déchets.
Pour de plus amples renseignements sur la collecte et le recyclage des piles et appareils usagés, veuillez vous renseigner auprès de votre mairie, du service municipal d'enlèvement des déchets ou du point de vente où vous avez acheté les articles concernés.
Le non-respect de la réglementation relative à l'élimination des déchets est passible d'une peine d'amende.
Pour les utilisateurs professionnels au sein de l'Union européenne
Si vous souhaitez vous défaire de pièces d'équipement électrique ou électronique, veuillez vous renseigner directement auprès de votre détaillant ou de votre fournisseur.
Ce pictogramme n'est valide qu'à l'intérieur de l'Union européenne. Pour connaître la procédure applicable dans les pays hors Union Européenne, veuillez vous renseigner auprès des autorités locales compétentes ou de votre distributeur.
Note relative au pictogramme à apposer sur les piles (voir les 2 exemples ci-contre)
Le pictogramme représentant une poubelle sur roues barrée d'une croix est conforme à la réglementation. Si ce pictogramme est combiné avec un symbole chimique, il remplit également les exigences posées par la Directive relative au produit chimique concerné.
Ce symbole n'est valable qu'en Chine.
CHKISTIE®
LX1750
* L'obiettivo del proiettore è venduto separatamente.
Manuale d'uso Utilizzo del proiettore
Avviso importante per la sicurezza
AVVERTENZA: QUEST'APPARECCHIO DEVE ESSERE MESSO ELETTRICAMENTE A TERRA.
AVVERTENZA: Per evitare danni che possano essere causa d'incendio o scossa elettrica, non esporre l'apparecchio a pioggia o umidità.
Ordinanza informativa sul rumore di una macchina 3, GSGV, 18 gennaio 1991: il livello di pressione del suono alla posizione d'ascolto dell'operatore è uguale o inferiore a 70 dB (A) secondo ISO 7779.
AVVERTENZA:
Scollegare la spina dalla presa elettrica se non si usa il proiettore per un periodo di tempo prolungato.
Per evitare scosse elettriche, non rimuovere la copertura. All'interno non ci sono componenti che possono essere riparati dall'utente. Per l'assistenza rivolgersi esclusivamente a tecnici specializzati.
Non rimuovere lo spinotto di messa a terra dalla spina di alimentazione. Questo apparecchio è dotato di una spina di alimentazione tripolare del tipo con messa a terra. La spina entrerà soltanto in una presa di alimentazione del tipo con messa a terra. Questa struttura risponde a una funzione di sicurezza. Se non è possibile inserire la spina nella presa, contattare un elettricista. Non interferire con la funzione della spina con messa a terra.
AVVERTENZA:
Questo è un prodotto di classe A. In ambienti domestici questo prodotto potrebbe causare interferenze radio; in tal caso l'utente dovrà prendere adeguati provvedimenti.
ATTENZIONE: Per garantire una continua conformità, osservare le istruzioni per l'installazione in dotazione, le quali includono l'utilizzo del cavo di alimentazione in dotazione e di cavi di interfaccia schermati per il collegamento ad un computer oppure ad una periferica. Se si usa una porta seriale per collegare un PC per il controllo esterno del proiettore, utilizzare un cavo di interfaccia seriale RS-232C con nucleo in ferrite venduto separatamente. Eventuali modifiche non autorizzate apportate all'apparecchio possono invalidare il diritto dell'utente all'utilizzo.
Il presente dispositivo è pensato per la protezione delle immagini su uno schermo e così via e non è destinato a essere utilizzato come illuminazione interna in un ambiente domestico.
Direttiva 2009/125/EC
AVVERTENZA:
PRIMA DI APRIRE IL COPERCHIO DELLA LAMPADA SPEGNERE LA LAMPADA UV
ATTENZIONE: PER RIDURRE IL RISCHIO DI INCENDIO O SCOSSA ELETTRICA, NON ESPORRE IL PRODOTTO ALLA PIOGGIA ALL'UMIDITÀ.
ATTENZIONE: RISCHIO DI SCOSSE ELETTRICHE, NON APRIRE.
Il simbolo del lampo con la testa a freccia all'interno di un triangolo equilatero ha lo scopo di avvisare l'utente della presenza di "tensione pericolosa" non isolata all'interno della custodia del prodotto che potrebbe essere sufficiente a costituire un rischio di scossa elettrica per le persone.
Il punto esclamativo all'interno di un triangolo equilatero ha lo scopo di avvisare l'utente della presenza di importanti istruzioni di funzionamento e manutenzione (assistenza) nella documentazione allegata al prodotto.
IMPORTANTE: SPINA SAGOMATA (solo G.B.)
PER LA SICUREZZA PERSONALE, LEGGERE ATTENTAMENTE QUANTO SEGUE.
Per comodità e sicurezza questo apparecchio è dotato di spina di rete sagomata tripolare. Nella spina è installato un fusibile di 13 ampere. Quando è necessario sostituire il fusibile, assicurarsi che il fusibile di ricambio abbia una taratura di 13 ampere e che sia conforme alle norme ASTA o BS 1362 del BSI.
Controllare che sul corpo del fusibile sia presente il simbolo ASTA il simbolo BSI
Se la presa è dotata di copertura del fusibile asportabile, dopo avere sostituito il fusibile, assicurarsi di rimontarla. In caso di smarrimento della copertura del fusibile, usare la presa solo dopo avere acquistato una nuova copertura. La copertura del fusibile di ricambio può essere acquistata presso un centro di assistenza autorizzato.
Se la spina sagomata fornita non è adatta alle prese di corrente della propria abitazione, si dovrebbe eliminare il fusibile, tagliare la spina e smaltirla in condizioni di sicurezza. In questo caso, se la spina tagliata viene inserita in una presa da 13 ampere, si corre il rischio di forti scosse elettriche.
Se viene montata una spina nuova, attenersi al codice di collegamento illustrato sotto. In caso di dubbi, consultare un elettricista qualificato.
AVVERTENZA: QUESTO APPARECCHIO DEVE ESSERE MESSO A TERRA.
IMPORTANTE: I fili del conduttore di rete sono di diversi colori, in base al seguente codice:
Verde e Giallo: Terra
Blu: Neutro
Marrone: Sotto tensione
Poiché i colori dei fili del conduttore di rete di questo apparecchio potrebbero non corrispondere con i contrassegni colorati che identificano i morsetti della spina, procedere nel modo seguente.
Il filo di colore VERDE E GIALLO deve essere collegato al morsetto della spina contrassegnato con la lettera E o dal segno di Terra 1 o di colore VERDE o VERDE E GIALLO.
Il filo di colore BLU deve essere collegato al morsetto della spina contrassegnato con la lettera N o di colore NERO.
Il filo di colore MARRONE deve essere collegato al morsetto della spina contrassegnato con la lettera L o di colore ROSSO.
Come sostituire il fusibile: Aprire il compartimento del fusibile con un cacciavite e sostituire il fusibile.
Avviso importante per la sicurezza
AVVERTENZE:
ALIMENTAZIONE
La presa elettrica o o l'interruttore di circuito devono essere installati in prossimità dell'apparecchio e devono essere facilmente accessibili in caso di anomalie. Se si verificano i seguenti problemi, scollegare immediatamente l'alimentazione.
L'uso continuato del proiettore in queste condizioni provoca incendio o scosse elettriche.
Se oggetti estranei o acqua entrano nel proiettore, scollegare l'alimentazione.
Se il proiettore cade o l'alloggiamento si rompe, scollegare l'alimentazione.
Se si nota la presenza di fumo, odori o rumori strani che provengono dal proiettore, scollegare l'alimentazione.
Contattare un centro di assistenza autorizzato per le riparazioni e non cercare di riparare il proiettore da soli.
Durante un temporale, non toccare il proiettore o il cavo.
Ciò potrebbe provocare scosse elettriche.
Non effettuare nessuna azione che possa danneggiare il cavo di alimentazione o la spina di alimentazione.
Se si impiega un cavo di alimentazione danneggiato, sono possibili scosse elettriche, corto circuito o incendio.
- Non danneggiare il cavo di alimentazione, né eseguire alcuna modifica a quest'ultimo, Evitare di collocarlo in prossimità di oggetti oggetti caldi, non piegarlo né torcerlo eccessivamente, non collocare oggetti pesanti su di esso né avvolgerlo formando un fascio.
Chiedere ad un centro di assistenza autorizzato di eseguire tutte le riparazioni necessarie al cavo di alimentazione.
Inserire saldamente e fino alla base la spina di alimentazione nella presa a muro e il connettore di alimentazione nel terminale del proiettore.
Se la spina non è inserita correttamente, potranno verificarsi scosse elettriche e surriscaldamento.
- Non utilizzare spine danneggiate o prese a muro non fissate correttamente alla parete.
Non utilizzare cavi diversi da quello di alimentazione in dotazione.
L'inosservanza di ciò provocherà incendi o scosse elettriche.
Pulire la spina di alimentazione regolarmente per evitare che si copra di polvere.
L'inosservanza di ciò provocherà un incendio.
Se si forma polvere sulla spina di alimentazione, l'umidità che ne risulta può danneggiare l'isolamento.
Se non si usa il proiettore per un lungo periodo di tempo, estrarre la spina di alimentazione dalla presa elettrica.
Estrarre la spina di alimentazione dalla presa elettrica e pulirla con un panno asciutto regolarmente.
Non maneggiare la spina di alimentazione con le mani bagnate.
L'inosservanza di ciò provocherà scosse elettriche.
Non sovraccaricare la presa elettrica.
In caso di sovracarico dell'alimentazione (per es. si usano troppi adattatori), si può verificare surriscaldamento con conseguente incendio.
USO/INSTALLAZIONE
Non collocare il proiettore su materiali morbidi come tappeti o materiali spugnosi.
Il proiettore potrebbe surriscaldarsi al punto da provocare bruciature, incendi o danni al proiettore.
Non installare il proiettore in luoghi umidi o polverosi o soggetti a fumo oleoso o vapore, per esempio in bagno.
L'uso del proiettore in tali condizioni potrebbe causare incendi, scosse elettriche o deterioramento dei componenti. Il deterioramento dei componenti (ad esempio dei supporti di fissaggio a soffitto) potrebbe causare la caduta del proiettore montato a soffitto.
Non installare questo proiettore in una posizione che non sia abbastanza forte per sostenere il peso del proiettore o su una superficie in pendenza o instabile.
L'inosservanza di ciò potrebbe far cadere o rovesciare il proiettore provocando gravi infortuni o danni.
AVVERTENZE:
Non coprire le prese d'aria e le uscite di aerazione né posizionarvi cose ad una distanza inferiore ai 1 m (39").
Il proiettore potrebbe surriscaldarsi al punto da provocare un incendio o danneggiarsi.
Non collocare il proiettore in luoghi stretti o mal ventilati.
Dopo aver lavato il filtro dell'aria, asciugarlo con cura prima di attaccarlo al proiettore.
Non mettere le mani o altri oggetti vicino all'uscita di aerazione.
Farlo potrebbe provocare lesioni o danneggiare le mani o altri oggetti.
- Dall'uscita di aerazione fuoriesce aria calda. Non avvicinare le mani, il viso o oggetti che non sopportano il calore all'uscita di aerazione.
Non guardare né esporre la pelle al fascio di luce emesso dall'obiettivo quando il proiettore è in uso.
Farlo può provocare ustioni o perdita della vista.
L'obiettivo del proiettore emette luce di elevata intensità. Non guardare né mettere le mani direttamente in questa luce.
Evitare che i bambini guardino direttamente nell'obiettivo. Inoltre, spegnere il proiettore e scollegare la spina di alimentazione quando ci si allontana dal proiettore.
Non cercare in nessun caso di modificare o smontare il proiettore.
All'interno del proiettore sono presenti componenti ad alta tensione che potrebbero provocare incendi o scosse elettriche.
- Per qualsiasi intervento di controllo, regolazione e riparazione, rivolgersi ad un centro di assistenza autorizzato.
Non proiettare un'immagine con il copriobiettivo in dotazione montato.
Una simile azione può provocare un incendio.
Evitare l'ingresso di oggetti metallici, materiali infiammabili o liquidi all'interno del proiettore. Evitare che il proiettore si bagni.
Questo può provocare cortocircuiti, surriscaldamento e causare incendi, folgorazioni e il guasto del proiettore.
Non collocare mai contenitori con liquidi oppure oggetti metallici in prossimità del proiettore.
Qualora si verificasse l'ingresso di liquidi nel proiettore, rivolgersi al rivenditore.
Prestare particolare attenzione ai bambini.
Non toccare le parti che non sono specificate o rimuovere i componenti.
Farlo potrebbe compromettere il funzionamento o la sicurezza.
Utilizzare il supporto da soffitto specificato da Christie.
L'uso di supporti di montaggio a soffitto diversi da quello specificato potrebbe causare delle cadute.
- Fissare sempre il cavetto di sicurezza fornito al supporto da soffitto per evitare la caduta del proiettore.
Le operazioni di installazione, ad esempio il supporto da soffitto, dovranno essere eseguite esclusivamente da tecnici qualificati.
Se l'installazione non è eseguita e assicurata in modo corretto, può provocare lesioni o incidenti, come scosse elettriche.
Non usare un supporto da soffitto diverso da quello autorizzato.
Assicurarsi di usare il cavo accessorio in dotazione con un bullone a occhio come misura di sicurezza extra per evitare che il proiettore cada. (Installare in una posizione diversa dal supporto da soffitto.)
Quando si fissa o si sostituisce un obiettivo, consultare lo staff tecnico o il personale di servizio di un rivenditore specializzato.
Sostituire un obiettivo in modo errato potrebbe danneggiare il prodotto.
Quando si fissa o si sostituisce un obiettivo, osservare le relative procedure per effettuare l'operazione correttamente.
Avviso importante per la sicurezza
AVVERTENZE:
ACCESSORI
Non usare né maneggiare le batterie in modo scorretto, far riferimento a quanto segue.
L'inosservanza di questa prescrizione può causare ustioni, perdite, surriscaldamento, esplosione o principio di incendio da parte delle batterie.
Non utilizzare batterie diverse da quelle specificate.
Utilizzare batterie al manganese o alcaline ma non batterie ricaricabili.
Non riscaldare le batterie né gettarle in acqua o fuoco.
Evitare che i terminali + e - delle batterie entrino in contatto con oggetti metallici come collane o forcine per i capelli.
Non conservare le batterie insieme ad oggetti metallici.
Conservare le batterie in un sacchetto di plastica e tenerlo lontano da oggetti metallici.
Accertarsi che le polarità (+ e -) siano disposte correttamente quando si inseriscono le batterie.
Non usare batterie nuove insieme ad altre vecchie né mischiare tipi diversi di batterie.
Non usare batterie con la copertura esterna staccata o rimossa.
Tenere le batterie fuori dalla portata dei bambini (AAA/R03/LR03).
- Se ingoiata, la batteria può provocare lesioni personali.
- Se ingoiata, richiedere subito l'intervento medico.
Se la batteria perde del fluido, non toccare a mani nude e osservare le misure che seguono, se necessario.
Il fluido della batteria sulla pelle o sugli abiti può provocare infiammazioni della pelle stessa o lesioni. Sciacquare con acqua pulita e richiedere subito l'intervento medico.
Se il fluido della batteria entra negli occhi può provocare la perdita della vista.
Non smontare l'unità lampada.
Se la lampada si rompe, può provocare lesioni.
Sostituzione della lampada
La lampada contiene gas ad alta pressione. Se maneggiata in modo errato, potrebbe esplodere provocando lesioni o incidenti gravi.
La lampada può esplodere facilmente se sbattuta contro oggetti duri o se cade.
Prima di sostituire la lampada, accertarsi di scollegare la spina di alimentazione dalla presa elettrica.
Prima di procedere con la sostituzione della lampada, spegnere il proiettore ed attendere il raffreddamento della lampada esausta per almeno 60 minuti in modo da evitare il pericolo di ustioni.
Tenere il telecomando fuori dalla portata di bambini o animali.
- Dopo l'uso, tenere il telecomando fuori dalla portata di bambini e animali.
Utilizzare il cavo di alimentazione fornito esclusivamente con questo proiettore e mai con apparecchi diversi.
- L'utilizzo del cavo di alimentazione fornito con apparecchi diversi dal proiettore può provocare cortocircuiti o surriscaldamenti e causare incendi o folgorazioni.
Rimuovere tempestivamente le batterie esaurite dal telecomando.
- Se vengono lasciate nel telecomando, potrebbero perdere i fluidi interni, surriscaldarsi o esplodere.
PRECAUZIONI:
ALIMENTAZIONE
Quando si scollega il cavo di alimentazione, mantenere ferma la spina e il cavo di alimentazione.
Se il cavo viene tirato, potrebbe danneggiarsi, con conseguente rischio di incendi, cortocircuiti o scosse elettriche.
Quando si prevede di non utilizzare il proiettore per periodi di tempo prolungati, scollegare la spina di alimentazione dalla presa elettrica e rimuovere le batterie dal telecomando.
Disinserire sempre la spina di alimentazione dalla presa a parete prima di eseguire qualsiasi operazione di pulizia o sostituzione sull'apparecchio.
L'inosservanza di questa prescrizione potrebbe provocare scosse elettriche.
USO/INSTALLAZIONE
Non appoggiare oggetti pesanti sul lato superiore del proiettore.
L'inosservanza di questa prescrizione potrebbe rendere instabile il proiettore. La caduta del proiettore può provocare danni o infortuni. Il proiettore si danneggia o si deforma.
Non usare l'unità come appoggio.
Sussiste il rischio di caduta o l'unità potrebbe rompersi e provocare lesioni.
- Evitare che i bambini si mettano in piedi o seduti sul proiettore.
Non collocare il proiettore in ambienti troppo caldi.
Farlo può provocare il deterioramento dell'alloggiamento esterno o dei componenti interni o causare incendi.
- Prestare particolare attenzione agli ambienti esposti alla luce del sole diretta o vicino alle stufe.
Non mettere le mani nelle aperture dietro all'obiettivo quando si estrae l'obiettivo.
La mancata osservanza di ciò può provocare lesioni.
Quando si solleva o si trasporta il proiettore, non afferrarlo dal paraluce e dall'obiettivo.
Così facendo si potrebbe danneggiare il proiettore.
Scollegare sempre tutti i cavi prima di spostare il proiettore.
Lo spostamento del proiettore quando i cavi sono ancora collegati, potrebbe provocarne il danneggiamento, con il conseguente rischio di incendi o scosse elettriche.
Usare l'obiettivo specificato da Christie.
L'uso di obiettivi diversi da quello specificato provoca malfunzionamenti.
Prima di fissare l'obiettivo, controllare il numero di modello del proiettore e quello dell'obiettivo opzionale, ed usare l'obiettivo adatto per il proiettore.
Per maggiori informazioni, consultare il rivenditore.
ACCESSORI
Non usare la vecchia unità lampada.
Usarla può provocare l'esplosione della lampada.
In caso di rottura della lampada, ventilare immediatamente la stanza. Non toccare i frammenti rotti né avvicinare il volto ad essi.
L'inosservanza di tale prescrizione può causare l'inalazione da parte dell'utente del gas rilasciato al momento della rottura della lampada, che contiene una quantità di mercurio simile a quella delle lampade a fluorescenza.
Se si pensa di aver assorbito il gas o che quest'ultimo penetrato in occhi o bocca, rivolgersi immediatamente ad un medico.
Richiedere la sostituzione dell'unità lampada al proprio rivenditore e controllare l'interno del proiettore.
Non riutilizzare il filtro dell'aria.
Questo può provocare guasti.
Non pulire il filtro dell'aria con acqua.
Questo può provocare guasti.
- Evitare di bagnare il filtro dell'aria.
Chiedere al rivenditore di provvedere una volta all'anno alla pulizia dell'interno del proiettore.
L'uso continuato in presenza di un accumulo di polvere all'interno del proiettore potrebbe dar luogo a incendi.
- Per i costi della pulizia, chiedere al rivenditore.
Avviso importante per la sicurezza
Rimozione delle batterie Batterie del telecomando
Premere la linguetta e sollevare il coperchio.
Rimuovere le batterie.
Marchi
HDMI, il logo HDMI e High-Definition Multimedia Interface sono marchi o marchi registrati di HDMI Licensing LLC.
Altri nomi, nomi di aziende o nomi di prodotto utilizzati in questo manuale d'uso sono marchi o marchi registrati dei rispettivi detentori.
Illustrazioni utilizzate nel manuale d'uso
- Le illustrazioni del proiettore e delle schermate potrebbero essere diverse da quelle effettive.
Riferimenti di pagina
- Nelle presenti istruzioni, i riferimenti ad altre pagine all'interno del testo sono indicati con: (→ pagina 00).
Terminologia
- Nelle presenti istruzioni, ci si riferisce agli accessori "Unità telecomando senza fili/cablato" con il termine "Telecomando".
Caratteristiche del proiettore
Immagine ad alta chiarezza e alto contrasto
Qualità dell'immagine ad alta chiarezza con 16 000 lumen e alto contrasto con 2 500:1.
Impostazione più flessibile
Consente l'installazione di direzione verticale a 360°. Dotato di funzione elettrica di spostamento dell'obiettivo che consente la regolazione verticale e orizzontale del posizionamento e inoltre schemi di test. Inoltre, si possono usare luci per il pannello di controllo e i connettori. In aggiunta, si può scegliere uno tra i nove tipi di obiettivi opzionali.
Alta affidabilità e facilità di manutenzione
Dotato di quattro lampade a commutazione automatica che consentono una proiezione continua quando una lampada si è usurata. Il filtro dell'aria e il filtro resistente al fumo (opzionale) bloccano polvere e fumo e garantiscono immagini chiare e una vita lunga del proiettore.
Procedura rapida
Per dettagli, vedere le pagine corrispondenti.
Impostazione del proiettore. (→ pagina 22)
Collegamento a dispositivi esterni. (→ pagina 24)
Collegare il cavo di alimentazione. (→ pagina 29)
Accensione. (→ pagina 31)
Selezione del segnale di ingresso. (→ pagina 33)
Regolazione dell'immagine.
(→ pagina 33)
Contenuti
Assicurarsi di leggere “Avviso importante per la sicurezza”. (→ pagine 2 to 8)
Avviso importante per la sicurezza ...... 2
Precauzioni per l'uso 12
Precauzioni per il trasporto 12
Precauzioni per l'installazione .... 12
Sicurezza....13
Smaltimento....13
Precauzioni per l'uso....13
Accessori 15
Accessori opzionali....16
Preparazione
Telecomando 17
Corpo del proiettore....18
Uso del telecomando 21
Inserimento e rimozione delle batterie ....21
Impostazione dei numeri del telecomando .....21
Utilizzo del telecomando come telecomando cablato ...21
Guida introduttiva
Impostazioni....22
Fissaggio dell'obiettivo 22
Metodo di proiezione....22
Opzioni di installazione (opzionale)....23
Piedini regolabili 23
Collegamenti 24
Prima di collegarsi al proiettore 24
Esempio di collegamento: Computer ....24
Esempio di collegamento: Apparecchio AV .....25
Legare i cavi utilizzando fascette....26
Installazione di un modulo di ingresso (opzionale)....27
Installazione di un modulo di ingresso ......27
Elenco dei segnali compatibili....28
Collegamento del segnale al modulo di ingresso .....28
Funzionamento di base
Accensione/Spegnimento 29
Collegamento del cavo di alimentazione .....29
Indicatore di alimentazione 30
Accensione del proiettore 31
Effettuare regolazioni e selezioni....31
Spegnimento del proiettore....32
Funzione di spegnimento diretto 32
Funzione di gestione alimentazione....32
Proiezione.... 33
Selezione del segnale di ingresso....33
Regolazione dell'immagine....33
Utilizzo del telecomando 35
Utilizzo della funzione shutter 35
Utilizzo della funzione Freeze....35
Commutazione del segnale di ingresso ....35
Correzione dell'effetto di distorsione trapezoidale ....36
Selezione della modalità di qualità dell'immagine ....36
Regolazione della qualità dell'immagine ....37
Pulsante schermata 37
Visualizzazione di un timer per le presentazioni .....37
Controllo delle impostazioni....37
Impostazioni
Navigazione tra i menu 38
Menu principale 39
Sottomenu 39
[Ingresso 1]....42
[Ingresso 2]....42
[Sistema]......43
[Auto regolaz. PC]....44
[Sincron. fine]......44
[Punti totali] 44
[Posizione orizz.] 44
[Posizione vert.] 45
[Configuraz. PC]......45
[Clamp]......45
[Area display orizz.]....45
[Area display vert.]....45
[Azzera]......46
[Cancella modalità]......46
[Memorizza]......46
Regolazione della qualità dell'immagine ....47
[Contrasto] 48
[Luminosità]....48
[Colore] 48
[Tinta] 48
Contenuti
[Regolazione colore] 49
[Temp. colore]....50
Bilanciamento del bianco([Rosso]/[Verde]/[Blu]) .....50
[Gradazione nero]....50
[Controllo automatico immagine]....50
[Colore avanzato]....50
[Nitidezza]....51
[Gamma]....51
[Riduzione rumorosità]....51
[Progressivo]......51
[Azzera]....51
[Memorizza]....52
[Normale] 53
[Piena larghezza]......53
[Espanso(16:9)]....53
[Zoom]....53
[Vero]....53
[Utente] 54
[Reg. Personalizzata]....54
[Zoom digitale +]....54
[Zoom digitale -]......55
[Trapezio]......55
[Soffitto]....56
[Retro] 56
[Azzera]......56
[Lingua] 57
[Posizione menu]......57
[Display] 57
[Sfondo]....58
[Scelta lampada]....58
[Alim. lampada]....58
[Intervallo lampada]....59
[Fusione bordi]....59
[Colorimetria] 60
[Colorimetria avanzata]....61
[HDMI]......63
[Logo]....63
[Controllo ventola] 65
[Telecomando]....65
[Sensore telecomando]......65
[Risparmio energetico]....66
[Accensione immediata]......66
[Sicurezza]......67
[Identifica proiettore]......68
[Otturatore]......68
[Controllo ritardo video]....69
[Closed caption]....70
[Timer filtro]....70
[Timer presentazione] 71
[Immagini test]....72
[Valore predefinito]....72
Confermare le impostazioni e lo stato di utilizzo .....73
Manutenzione
Stato degli indicatori....75
Se un indicatore si accende....75
Manutenzione/sostituzione 81
Prima della manutenzione/sostituzione dell'unità .....81
Manutenzione....81
Sostituzione dei componenti....81
Risoluzione dei problemi 86
Appendice
Regolazione schermate di immagini a schermate multiple 88
Etichetta di notifica per registrazione della password...91
Terminale seriale 92
Interfaccia di controllo seriale ....93
Altri terminali....95
Elenco segnali compatibili....97
Specifiche....100
Dimensioni 102
Salvaguardie del supporto di montaggio a soffitto....103
Note sul fissaggio dell'obiettivo .... 104
Specifiche dell'obiettivo....104
Precauzioni per l'uso
Precauzioni per il trasporto
Quando si trasporta il proiettore, reggerlo saldamente dalla sua maniglia per trasporto ed evitare vibrazioni e impatti eccessivi con azioni come quella di trascinarlo sul pavimento. In caso contrario, si potrebbero danneggiare i componenti interni, provocando malfunzionamenti.
Non trasportare il proiettore con i piedini regolabili estesi. Farlo potrebbe danneggiare i piedini regolabili.
Precauzioni per l'installazione
Non installare il proiettore all'aperto.
Il proiettore è progettato soltanto per uso interno.
Non utilizzare nei luoghi seguenti.
Luoghi in cui si verificano vibrazioni e impatti, come in un veicolo o un natante. Farlo potrebbe danneggiare i componenti interni provocando malfunzionamenti.
Vicino all'uscita di un condizionatore d'aria o vicino a luci (lampade da studio, ecc.), dove ci sono grossi sbalzi di temperatura ("Ambiente operativo" (→ pagina 101)): Farlo potrebbe abbreviare la durata della lampada o provocare deformazioni dell'involucro esterno, che a loro volta potrebbero causare malfunzionamenti.
Vicino a linee di alimentazione ad alta tensione o vicino a motori: potrebbero verificarsi delle interferenze.
A sicurarsi di consultare un tecnico qualificato o il rivenditore prima di installare il prodotto a soffitto.
Se il prodotto deve essere installato a soffitto, acquistare il supporto opzionale di montaggio al soffitto.
Non installare il proiettore ad altezze di 2 700 m (8 858 ft) o superiori sul livello del mare.
La mancata osservanza di questa precauzione potrebbe abbreviare la vita utile dei componenti interni portando a malfunzionamenti.
n usare il proiettore quando è inclinato (→ pagina 22).
L'utilizzo del proiettore quando è inclinato potrebbe abbreviare la vita utile dei componenti interni.
Recauzioni per l'installazione dei proiettori
Non bloccare le bocchette di ventilazione (in ingresso e in uscita) del proiettore.
Evitare che l'aria riscaldata o raffreddata dall'impianto di condizionamento dell'aria colpisca direttamente le bocchette di ventilazione (in ingresso e in uscita) del proiettore.
Evitare di installare il proiettore in un luogo umido o polveroso.
(oltre 1 m (39") per ogni lato superiore e laterale)
- Non installare il proiettore in spazi ristretti.
Quando è necessaria l'installazione in uno spazio ristretto, installare in questo spazio un impianto di condizionamento dell'aria o di ventilazione. Se la ventilazione è insufficiente, l'aria calda in uscita potrebbe accumularsi, facendo scattare il circuito di protezione del proiettore.
Sicurezza
Quando si utilizza questo prodotto, adottare appropriate misure di sicurezza per evitare i seguenti casi:
Informazioni personali fatte trapelare tramite il prodotto
Funzionamento non autorizzato e doloso del prodotto da parte di terzi
Interferenza o arresto doloso del prodotto da parte di terzi
Adottare sufficienti misure di sicurezza (→ pagina 67)
- Rendere il codice PIN il più difficile possibile da indovinare.
- Modificare periodicamente il codice PIN.
- Christie Digital Systems e le sue aziende affiliate non richiederanno mai direttamente il codice PIN all'utente. In caso di richiesta diretta, non comunicare il codice PIN.
- Assicurarsi di usare una rete sicura dotata di firewall ecc.
- Impostare un codice PIN e restrizioni per gli utenti in grado di accedere.
Smaltimento
Per smaltire il prodotto, consultare le autorità locali o il rivenditore per informazioni sui metodi corretti di smaltimento.
La lampada contiene mercurio. Per smaltire il gruppo lampada usato, consultare le autorità locali più vicine o il rivenditore per informazioni sui metodi appropriati di smaltimento dell'unità.
Provvedere allo smaltimento delle batterie esaurite conformemente alle istruzioni o alle norme di smaltimento locali.
Precauzioni per l'uso
R ottenere un'alta qualità dell'immagine
Si ottiene un'alta qualità dell'immagine tirando le tende o gli avvolgibili sulle finestre e spegnendo tutte le luci vicine allo schermo per impedire che la luce esterna o la luce delle lampade interne si rifletta sullo schermo.
A seconda delle condizioni di utilizzo, l'immagine potrebbe presentare un tremolio a causa dell'aria riscaldata proveniente dall'uscita di aerazione o a causa dell'aria riscaldata o raffreddata proveniente dal condizionatore d'aria.
Assicurarsi di garantire che né l'aria in uscita dal proiettore o da altre apparecchiature, né quella proveniente da un condizionatore d'aria sia diretta verso la parte anteriore del proiettore.
- L'obiettivo di proiezione è riscaldato dalla luce proveniente dalla sorgente luminosa, rendendo instabile la messa a fuoco nel periodo immediatamente successivo all'accensione. La messa a fuoco si stabilizza quando sono passati 30 minuti di proiezione dell'immagine.
Non toccare la superficie dell'obiettivo di proiezione a mani nude.
Se la superficie dell'obiettivo viene contaminata da ditate o sporco, l'effetto verrà ingrandito e proiettato sullo schermo, peggiorando l'immagine.
Fnnello LCD
Il pannello LCD è un prodotto di precisione. Si noti che, in casi rari, pixel di alta precisione potrebbero mancare o rimanere sempre illuminati. Questo non è un malfunzionamento.
Quando un'immagine statica viene proiettata per lungo tempo, l'immagine potrebbe venire impressa sul pannello LCD. In questo caso, proiettare lo schermo bianco dagli schemi di test (→ pagina 72) per almeno un'ora. Si noti, tuttavia, che potrebbe non essere sempre possibile eliminare completamente l'immagine impressa.
Precauzioni per l'uso
Componenti ottici
Se si effettua la proiezione in un ambiente ad alta temperatura o che è polveroso, pieno di fumo di sigarette ecc., il ciclo di sostituzione dei componenti ottici come il pannello LCD e il polarizzatore potrebbe ridursi a un anno soltanto. Per maggiori informazioni, si prega di consultare il rivenditore.
Lmpada
La sorgente luminosa del proiettore è una lampada a vapori di mercurio ad alta pressione interna. Una lampada ai vapori di mercurio ad alta pressione ha le seguenti caratteristiche.
La luminosità della lampada si riduce con il tempo di utilizzo.
Un urto, un graffio o un deterioramente dovuto all'utilizzo potrebbero causare lo scoppio accompagnato da rumore oppure la riduzione della vita utile della lampadina.
La vita utile della lampada varia moltissimo a seconda della singola lampada e delle condizioni di utilizzo. In particolare, un uso continuato per periodi di 24 ore o più lunghi e frequenti accensioni/spegnimenti dell'alimentazione accelerano il deterioramente e influenzano la vita della lampada.
- In rari casi, la lampada scoppia poco dopo l'avvio della proiezione.
- Il rischio di scoppio aumenta quando la lampada viene usata oltre il suo ciclo di sostituzione. Assicurarsi di sostituire regolarmente il gruppo lampada. “Quando sostituire il gruppo lampada” (→ pagina 83)
- Se la lampada scoppia, il gas in essa contenuto viene rilasciato sotto forma di fumo.
- Si consiglia di dotarsi di gruppi lampada di sostituzione in caso di imprevisti.
- Per la sostituzione del gruppo lampada, si raccomanda di chiedere a un tecnico qualificato. Consultare il rivenditore.
Accessori
Assicurarsi che i seguenti accessori siano forniti con il proiettore:
Accessorio (nome del prodotto) Quantità Unità telecomando senza fili/cablato (N2QAYA000066) 1 Batteria AAA/R03/LR03 (Per unità telecomando) 2 Cavo di alimentazione per (E) (T0K3K0003--1) 1 Cavo di alimentazione per (U) (T0K3K0001--1) 1 Cavo di alimentazione per (UK) (T0K3K0004--1) 1 Cavo computer (per D-sub) (T0K3K0013--1) 1 CD-ROM Manuale d'uso (TXFQB02ZHC2) 1 CD-ROM PJ Network Manager (T1U13B27601) 1 CD-ROM Real Color Manager Pro (T1U13B58100) 1 Manuale d'uso-Guida di base (TQBJ0658) 1 Manuale per la gestione dei colori (TQBH0270-1) 1 Supporto di fissaggio leva blocco obiettivo*1 (T0STF0039--1) 1(set) Spaziatore*1 (T0SAS0001--) 1(set)
Accessorio (nome del prodotto) Quantità Attacco obiettivo*1(T0HLA0045--) 1(set) Etichetta codice PIN 1 Fascetta 3 Supporto del cavo di alimentazione,copertura del cavo di alimentazione(T0STF0037--1) 1(set) Piastra di schermatura della luce 1*1(T0CRS0008--1) 1(set) Piastra di schermatura della luce 2*1(T0CRM0014--1) 1(set) Piastra di schermatura della luce 3*1(T0CRM0013--1) 1(set)
*1: Utilizzato quando si fissa l'obiettivo (opzionale). (→ pagina 104)
Attenzione
Dopo aver disimballato il proiettore, smaltire la copertura del cavo di alimentazione e il materiale di imballaggio in modo appropriato.
In caso di perdita di qualche accessorio, consultare il rivenditore.
I numeri di prodotto degli accessori e dei componenti venduti separatamente sono soggetti a modifiche senza preavviso.
Conservare i pezzi piccoli in modo appropriato e tenerli lontani dai bambini.
Precauzioni per l'uso
Contenuti del CD-ROM
I seguenti contenuti sono memorizzati nel CD-ROM in dotazione (Manuale d'uso / Real Color Manager Pro / PJ Network Manager).
Manuale/Indice (PDF) Software ● Manuale d’uso–Utilizzo del proiettore● Manuale d’uso–Uso della rete● Manuale d’uso–Utilizzo di PJ Network Manager ● Real Color Manager Pro● PJ Network Manager
Accessori opzionali
Accessori opzionali (nome del prodotto) N° prodotto Gruppo lampada di ricambio 002-120599-01 Filtro di ricambio 003-004738-01 / Comp di servizio N.: T1FTX0069-- Filtro resistente al fumo Unità: Comp N. 003-004739-01 / Rif N. NOP-FTU-61EFSFiltro: Comp N. 003-003705-01 / Rif N. POA-FIL-160 Modulo di ingresso 103-132107-02 Obiettivo 38-809037-52, 103-135100-01, 38-809094-51, 103-103101-01,38-809039-52, 38-809044-52, 103-129103-01, 103-130105-01,38-809070-51
Telecomando
(1) Emettitori del segnale del telecomando per il conteggio del tempo passato dal momento in cui si preme il pulsante o si esegue un conto alla rovescia dall'orario impostato. (→ pagina 37) / quando si usa il telecomando. quando non si usa il telecomando per un lungo periodo. del proiettore.
Attenzione
Non far cadere il telecomando.
Evitare il contatto con liquidi o umidità.
Non cercare di modificare o smontare il telecomando.
Nota
Il telecomando può essere usato da qualsiasi distanza entro i 5 m se puntato direttamente verso il sensore del telecomando. Il telecomando è efficace da angoli fino a ±30° in verticale e in orizzontale, ma il campo potrebbe essere ridotto.
Se ci sono ostacoli tra il telecomando e il sensore del telecomando, il telecomando potrebbe non funzionare correttamente.
Si può controllare il proiettore facendo riflettere il segnale dallo schermo, ma il campo effettivo di azionamento dipenderà dalle caratteristiche dello schermo.
Se il sensore del telecomando riceve una luce forte, come la luce fluorescente, potrebbe non funzionare correttamente. Posizionare il proiettore quanto più lontano possibile da altre sorgenti di luce.
Corpo del proiettore
(1) Coperchio attacco obiettivo
(11) Coperchietto lampada
È la sede del gruppo lampada. (→ pagina 84)
Attenzione
Tenere le mani e altri oggetti lontano dall'uscita di aerazione.
Tenere mani e volto a distanza.
Non inserire le dita.
Tenere oggetti sensibili al calore a distanza.
Fnnello di controllo
(1) Pulsante di alimentazione
Spegne/accende l'alimentazione quando l'interruttore di alimentazione principale del proiettore è impostato su <|>.
Apre e chiude l'otturatore. Regola la schermatura della luce di proiezione. (→ pagina 35)
Regola lo zoom dell'obiettivo. (→ pagina 34)
Regola la messa a fuoco. (→ pagina 34)
Visualizza la schermata dei menu. (→ pagina 38)
Regola automaticamente sincronizzazione, numero totale di punti, spostamento orizzontale e spostamento verticale.
(8) Pulsante
Accende/spegne il pannello di controllo e i connettori a ogni pressione del pulsante.
Fa scorrere l'obiettivo verticalmente e orizzontalmente per spostare la posizione dell'immagine di proiezione verticalmente e orizzontalmente. (→ pagina 33)
Seleziona la voce indicata dal cursore del menu sullo schermo.
Viene usato anche per espandere e contrarre l'immagine in modalità zoom digitale. (→ pagina 38)
Visualizza lo stato dei segnali durante la proiezione e le impostazioni correnti. (→ pagina 37)
Onnettori
(1) DVI-DTerminale di ingresso
Questo terminale serve per immettere il segnale DVI-D.
Questo terminale serve per immettere il segnale HDMI.
Questo terminale serve per immettere un segnale RGB. //
Questo terminale serve per immettere il segnale G,B,R,H/HV,V, il segnale video e il segnale Y,Pb/Cb,Pr/Cr.
Questo terminale è destinato all'uso da parte di personale di servizio.
(6) Terminale di ingresso seriale
Questo terminale di ingresso è compatibile con RS-232C e per un controllo esterno del proiettore mediante collegamento del proiettore.
Questo terminale è per il segnale collegato al terminale di ingresso seriale.
Questo terminale serve a collegare il telecomando quando lo si utilizza come telecomando cablato.
Questo terminale serve a collegare il proiettore alla rete.
Questo terminale serve per immettere i segnali S-VIDEO.
Attenzione
- Assicurarsi di collegare il cavo LAN all'apparecchiatura posta all'interno.
Uso del telecomando
Inserimento e rimozione delle batterie
1) Aprire il coperchio.
2) Inserire le batterie e chiudere il coperchio.
- Inserire per primo il lato ⊖.
- Per rimuovere le batterie, seguire la procedura presentata sopra all'inverso.
Impostazione dei numeri del telecomando
Quando si usano proiettori multipli, si può impostare un numero di telecomando per ciascun proiettore per consentire il controllo simultaneo con un unico telecomando.
Dopo aver impostato un numero di telecomando di un dato proiettore, specificare quel proiettore usando il numero di telecomando.
Metodo di impostazione
1) Tenendo il pulsante , premere i pulsanti numerici (<0> - <9>) (2 cifre) per immettere il numero del telecomando desiderato.
Quando si rilascia il pulsante, il numero del telecomando passa al nuovo numero.
Per impostare il numero del telecomando su 09, premere <0>, <9> mentre si tiene premuto il pulsante .
Nota
Il valore predefinito delle impostazioni è [Tutti]. [Tutti] supporta tutti i numeri del telecomando.
Impostare il numero del telecomando del proiettore usando [Telecomando] dal menu [Impostazione] (→ pagina 65).
Per resettare il numero del telecomando (per impostare su [Tutti]), tenere premuti contemporaneamente il pulsante e il pulsante <0> per almeno cinque secondi.
Utilizzo del telecomando come telecomando cablato
Collegare il terminale sul corpo del proiettore al terminale del telecomando cablato sul telecomando utilizzando il cavo del telecomando (disponibile in commercio).
Assicurarsi che le batterie siano inserite nel telecomando.
Per utilizzare il telecomando senza fili, scollegare il cavo del telecomando dal proiettore e dal telecomando. Quando il cavo del telecomando è collegato, non è possibile utilizzare il telecomando senza fili.
Impostazioni
Fissaggio dell'obiettivo
Prima di mettere in posizione il proiettore, fissare l'obiettivo al corpo del proiettore.
Innanzitutto, stabilire l'obiettivo corretto per l'ambiente nel quale si utilizzerà il proiettore.
Per i numeri di prodotto dell'obiettivo e le specifiche degli obiettivi adatti al proiettore, consultare il rivenditore.
Quando si fissa o si sostituisce un obiettivo, consultare lo staff tecnico o il personale di servizio di un rivenditore specializzato, per ragioni di sicurezza. Non cercare di fissare o sostituire l'obiettivo da soli. Per dettagli, fare riferimento a "Note sul fissaggio dell'obiettivo" (→ pagina 104).
Attenzione
Quando si posiziona il proiettore dopo l'installazione di un obiettivo, applicare sempre il copriobiettivo all'obiettivo. Quando si trasporta o si regge il corpo del proiettore, non sostenere mai dall'obiettivo. Farlo potrebbe danneggiare il proiettore.
Metodo di proiezione
Si possono proiettare immagini in direzione verticale e diagonale. Si possono selezionare il lato posteriore
(→ pagina 56) e il soffitto (→ pagina 56) dal menu. Selezionare il metodo di proiezione adatto all'ambiente.
Montaggio a soffitto e proiezione anteriore
Voce del menu Posizionamento [Soffitto] [On] [Retro] [Off]
Montaggio a soffitto e proiezione
dal lato posteriore
(Uso dello schermo traslucido)
Voce del menu Posizionamento [Soffitto] [On] [Retro] [On]
Fisizionamento su banco/pavimento e proiezione dal lato posteriore
(Uso dello schermo traslucido)
Voce del menu Posizionamento [Soffitto] [Off] [Retro] [On]
■sizionamento su banco/pavimento e proiezione anteriore
Voce del menu Posizionamento [Soffitto] [Off] [Retro] [Off]
Attenzione
Per ottenere un'alta qualità dell'immagine, posizionare lo schermo in un luogo che sia, per quanto possibile, non direttamente influenzato da luce naturale o luce elettrica. Tirare le tende o gli avvolgibili e spegnere le luci.
Quando si posiziona il proiettore con un'inclinazione, non utilizzare il proiettore a un angolo di inclinazione che superi ±10° verticalmente al piano orizzontale. Installare il proiettore a un angolo di inclinazione che superi questo valore potrebbe ridurre la vita dei componenti e provocare malfunzionamenti.
Opzioni di installazione (opzionale)
Si può installare il proiettore a soffitto usando il supporto di montaggio a soffitto.
Utilizzare soltanto supporti di montaggio a soffitto specifici per questo proiettore.
Per dettagli sull'installazione del proiettore con il supporto, fare riferimento al manuale di installazione per il supporto di montaggio a soffitto.
Attenzione
- Per garantire la prestazione e la sicurezza del proiettore, l'installazione del supporto di montaggio a soffitto deve essere effettuata dal rivenditore o da un tecnico qualificato.
Piedini regolabili
I piedini regolabili possono essere estesi ruotandoli come mostrato in figura. Vengono ritratti ruotandoli nella direzione opposta. Ciò regola accuratamente l'altezza e l'inclinazione dell'immagine proiettata. Quando i piedini regolabili sono estesi, il proiettore può essere inclinato al massimo di 3°. (L'angolo di proiezione può essere regolato verticalmente.)
Attenzione
Aria riscaldata è emessa dall'uscita di aerazione quando la lampada è accesa. Non toccare direttamente l'uscita di aerazione quando si regolano i piedini regolabili.
Se si verifica l'effetto di distorsione trapezoidale nell'immagine proiettata, eseguire [Trapezio] (→ pagina 55) dal menu [Schermo].
Nota
- Non estendere i piedini regolabili oltre la linea rossa. Farlo potrebbe danneggiarli.
- La posizione verticale e orizzontale dell'immagine può essere regolata usando la funzione spostamento dell'obiettivo.
Collegamenti
Prima di collegarsi al proiettore
Leggere attentamente il manuale di istruzioni del dispositivo che si intende collegare.
Spegnere l'interruttore di alimentazione del dispositivo prima di collegare il cavo.
Se non è fornito un cavo di collegamento con il dispositivo e il cavo opzionale non è disponibile, preparare un cavo di collegamento che si adatti al dispositivo.
I segnali video che contengono troppa distorsione potrebbero causare un tremolio casuale delle immagini sullo schermo. In questo caso, deve essere collegato un time base corrector (TBC).
Il proiettore accetta i seguenti segnali: segnali video, segnali S-video, segnali analogici RGB (segnali sincroni sono livello TTL) e segnali digitali.
Alcuni modelli di computer non sono compatibili con il proiettore.
Quando si collega un dispositivo al proiettore usando un cavo lungo, potrebbe non essere possibile ottenere un'immagine normale senza un compensatore.
Per dettagli sui segnali video supportati dal proiettore, fare riferimento a “Elenco segnali compatibili” (→ pagina 97).
Esempio di collegamento: Computer
Nota
Utilizzare un cavo HDMI High Speed conforme allo standard HDMI. L'utilizzo di un cavo non conforme allo standard HDMI potrebbe provocare un funzionamento anomalo, per esempio ritaglio dell'immagine, impossibilità di proiettare, ecc.
Il terminale può essere collegato a un dispositivo esterno con un terminale DVI usando un cavo di conversione HDMI/DVI. Tuttavia, con alcuni dispositivi l'immagine potrebbe non apparire. (→ pagina 63)
Quando viene utilizzato il terminale , l'operazione normale potrebbe non essere possibile con alcuni dispositivi e l'immagine potrebbe non apparire.
Il terminale (in modo di ingresso segnale digitale) è compatibile soltanto con segnali a collegamento singolo.
Per dettagli sui segnali RGB da computer supportati dal proiettore, fare riferimento a “Elenco segnali compatibili” (→ pagina 97).
Se si aziona il proiettore usando il computer con la funzione di ripristino (ultimi dati memorizzati), potrebbe essere necessario resettare la funzione di ripristino per azionare il proiettore.
Il terminale (in modo di ingresso segnale digitale) potrebbe richiedere l'impostazione EDID a seconda del dispositivo collegato.
Per collegare il proiettore a un computer tramite LAN cablata, fare riferimento a “Istruzioni per l’uso–Uso della rete” nel CD-ROM in dotazione.
Esempio di collegamento: Apparecchio AV
Video, S-video, lettore
DVD e dispositivi di uscita
video HDMI
Attenzione
- Utilizzare sempre uno dei seguenti dispositivi quando si collega un VCR.
- Un VCR con time base corrector (TBC) integrato
- Un time base corrector (TBC) tra il proiettore e il VCR
- Se segnali a raffica sono collegati a segnali non standard, l'immagine potrebbe risultare distorta. In tal caso, collegare un time base corrector (TBC) tra il proiettore e il dispositivo.
Nota
Utilizzare un cavo HDMI High Speed conforme allo standard HDMI. L'utilizzo di un cavo non conforme allo standard HDMI potrebbe provocare un funzionamento anomalo, per esempio ritaglio dell'immagine, impossibilità di proiettare, ecc.
Il terminale può essere collegato a un dispositivo esterno con un terminale DVI usando un cavo di conversione HDMI/DVI. Tuttavia, con alcuni dispositivi l'immagine potrebbe non apparire. (→ pagina 63)
Il terminale può essere collegato a dispositivi compatibili HDMI e DVI-D, ma l'operazione normale potrebbe non essere possibile con alcuni dispositivi e l'immagine potrebbe non apparire.
Il terminale (in modo di ingresso segnale digitale) è compatibile soltanto con segnali a collegamento singolo.
Collegamenti
Legare i cavi utilizzando fascette
Tenere ordinati i cavi fissando i cavi collegati ai terminali nei supporti per cavi nel corpo del proiettore.
- Le fascette possono essere riutilizzate. (La linguetta può essere allentata e rilasciata.)
Aentamento delle fascette
1) Tirare la linguetta nella direzione della freccia (i).
- L'anello della fascetta si allarga.
Attenzione
- Le seguenti voci sono precauzioni quando si utilizza la fascetta.
In rare occasioni potrebbero verificarsi rumori.
Non tirare il cavo con forza. Farlo potrebbe provocare lo scollegamento.
Si consiglia di lasciare un certo gioco quando si legano i cavi.
Attenzione
Quando si effettua il collegamento del proiettore a un computer o a un dispositivo esterno, usare il cavo di alimentazione in dotazione con ciascun dispositivo e i cavi schermati disponibili in commercio.
Installazione di un modulo di ingresso (opzionale)
Installazione di un modulo di ingresso
Tipi di modulo di ingresso
Acquistare un modulo d'ingresso (opzionale) che corrisponda ai segnali di ingresso del sistema.
Nome del modulo Modulo di ingresso SD/HD-SDI Numero del modulo 103-132107-02 Terminale di ingresso/uscita Sistema ingresso BNC 2, sistema uscita BNC 1 Formato compatibile del segnale SMPTE259M-C standard:480-60i (59,94 Hz*1 ), 576-50i (50 Hz)SMPTE260M standard:1035-60i (60/59,94 Hz*1 )SMPTE274M standard:1080-24psf (48/47,95 Hz*1 ), 1080-24p (24/23,98 Hz*1 ), 1080-25psf (50 Hz),1080-25p (25 Hz), 1080-30psf (60/59,94 Hz*1 ), 1080-30p (30/29,97 Hz*1 ),1080-50i (50 Hz), 1080-60i (60/59,94 Hz*1 )SMPTE296M standard:720-60p (60/59,94 Hz*1 ), 720-50p (50 Hz)
*1: Le frequenze di sintonia verticale 60/59,94 Hz, 48/47,95 Hz, 24/23,98 Hz vengono distinte automaticamente.
Nota
- L'elenco precedente mostra i formati del segnale supportati dai moduli di ingresso. I formati del segnale supportati dal proiettore sono diversi a seconda del modello. Per ulteriori informazioni, si prega di consultare il rivenditore.
Procedura di installazione
Scollegare l'alimentazione prima di installare il modulo di ingresso.
1) Rimuovere il coperchio dello slot.
Coperchio dello slot
2) Inserire il modulo di ingresso.
- Inserire saldamente il modulo di ingresso nello slot, assicurandosi che la presa del connettore sia correttamente innestata con la spina all'interno del corpo del proiettore.
3) Fissare in posizione il modulo di ingresso usando due viti.
Attenzione
Assicurarsi di serrare le viti. In caso contrario, il modulo di ingresso potrebbe cadere.
Un'installazione scorretta potrebbe provocare danni al modulo di ingresso.
Installazione di un modulo di ingresso (opzionale)
Uilizzo del modulo di ingresso
Consultare il rivenditore prima di utilizzare uno qualunque dei moduli di ingresso opzionali. Parlando con il rivenditore, assicurarsi di informarlo del [Option control No.] del proiettore. [Option control No.] è visualizzato nel menu [Informazioni].
Comunicare questo numero al rivendi-
tore.
Elenco dei segnali compatibili
La tabella seguente specifica i tipi di segnale compatibili con il proiettore.
Visualizzazione dello schermo dot clock (punti) Risoluzione Frequenza di scansione Modalità Orizzontale (kHz) Verticae (Hz) frequenza (MHz) D-480i 720 (1 440) x 480 15,734 59,940 27,000 D-576i 720 (1 440) x 576 15,625 50,000 27,000 D-1035i 1 920 x 1 035 33,750 60,000 74,250 D-1080i 1 920 x 1 080 33,750 60,000 74,250 1 920 x 1 080 28,125 50,000 74,250 D-720p 1 280 x 720 37,500 50,000 74,250 1 280 x 720 45,000 60,000 74,250 D-1080psf/24 1 920 x 1 080 27,000 48,000 74,250 D-1080psf/25 1 920 x 1 080 28,125 50,000 74,250 D-1080psf/30 1 920 x 1 080 33,750 60,000 74,250 D-1080p 1 920 x 1 080 27,000 24,000 74,250 1 920 x 1 080 28,125 25,000 74,250 1 920 x 1 080 33,750 30,000 74,250
Collegamento del segnale al modulo di ingresso
VCR digitale per uso commerciale
Accensione/Spegnimento
Collegamento del cavo di alimentazione
I installazione
1) Inserire il supporto del cavo di alimentazione nei fori forniti sopra e sotto il terminale di ingresso CA.
- Spingere il supporto del cavo di alimentazione verso sinistra per consentire l'inserimento del cavo di alimentazione.
2) Fissare la copertura del cavo di alimentazione al cavo nella direzione di (i) e premere decisamente nella direzione di (ii).
3) Collegamento del cavo di alimentazione al terminale di ingresso CA.
4) Spostare il supporto del cavo di alimentazione per assicurare il cavo di alimentazione.
■ mozione
1) Spingere il supporto del cavo di alimentazione a sinistra.
2) Rimuovere il cavo di alimentazione dal terminale di ingresso CA.
3) Rimuovere il supporto del cavo di alimentazione.
Accensione/Spegnimento
Indicatore di alimentazione
L'indicatore di alimentazione informa sullo stato dell'alimentazione. Controllare lo stato dell'indicatore di alimentazione e dell'indicatore standby prima di azionare il proiettore.
Stato dell'indicatore Stato del proiettore Indicatore di alimentazione(verde) Indicatore standby(rozzo) Spento L'alimentazione principale è spenta. Spento Acceso L'alimentazione è spenta (modalità standby). Acceso Spento Il proiettore è in modalità proiezione. Spento Lampeggiante Il proiettore si sta preparando a spegnere l'alimentazione. Dopo breve tempo, l'alimentazione si spegne (in modalità standby).
Nota
Quando il proiettore si sta preparando a spegnere l'alimentazione (l'indicatore di alimentazione è spento e l'indicatore standby lampeggia), la ventola interna si accende per raffreddare il proiettore.
Quando il proiettore si sta preparando a spegnere l'alimentazione, non si può accendere l'alimentazione premendo il pulsante del pannello di controllo o il pulsante di alimentazione del telecomando. Se l'indicatore standby è acceso, si può accendere l'alimentazione.
Il proiettore consuma corrente anche in modalità standby (l'indicatore standby è acceso).
Accensione/Spegnimento
Accensione del proiettore
Pannello di controllo Telecomando
Prima di accendere l'alimentazione, rimuovere il copriobiettivo.
1) Collegare la spina di alimentazione alla presa.
(CA 200 V - 240 V 50 Hz/60 Hz)
2) Premere il lato <|> dell'interruttore di alimentazione principale per accendere l'alimentazione.
\- Dopo un momento, l'indicatore standby si accende e il proiettore entra nella modalità standby.
3) Premere il pulsante del pannello di controllo o il pulsante del telecomando.
\- Dopo un momento, viene proiettata un'immagine e vengono visualizzati il segnale di ingresso correntemente selezionato e lo stato della spia (→ pagina 83) per circa quattro secondi.
Nota
- Quando [Blocca codice PIN] (→ pagina 67) è stato impostato su [On] usando [Sicurezza] nel menu [Impostazione], immettere il codice PIN.
- Il proiettore produrrà un rumore quando la lampada si accende, ma questo non è un malfunzionamento.
- Durante la proiezione, la ventola gira, producendo un suono. Il suono può cambiare in base alla temperatura ambiente e quando la lampada è accesa, il suono può diventare forte.
- Se la lampada viene spenta e immediatamente riaccesa, la nuova immagine proiettata potrebbe tremolare per alcuni momenti. Ciò è dovuto alle caratteristiche della lampada e non è un malfunzionamento.
- Quando [Accensione immediata] (→ pagina 66) del menu [Impostazione] è impostato su [On], l'alimentazione si accende appena si inserisce la spina di alimentazione nella presa o si imposta l'interruttore di alimentazione principale sul lato .
- Quando [Display] (→ pagina 57) del menu [Impostazione] è impostato su [On] e [Logo] (→ pagina 63) è impostato su [Off], il conto alla rovescia viene visualizzato ma la visualizzazione di apertura non verrà visualizzata.
- Quando [Display] (→ pagina 57) del menu [Impostazione] è impostato su [Off] o [Disattiva attesa], la proiezione avrà inizio non appena la lampada si accende, a prescindere dall'impostazione di [Seleziona logo] (→ pagina 63).
- Dopo aver acceso l'alimentazione, potrebbero essere visualizzate note su [Avviso filtro] e [Cambia lampada] in base allo stato del proiettore. (→ pagina 84)
Effettuare regolazioni e selezioni
Si consiglia si proiettare le immagini in modo continuo per almeno 30 minuti prima di regolare la messa a fuoco.
4) Premere il pulsante per regolare approssimativamente la messa a fuoco dell'immagine. (→ pagina 34)
5) Premere i pulsanti da per regolare la posizione dell'immagine. (→ pagina 33)
8) Premere il pulsante per regolare la dimensione dell'immagine in modo che si adatti allo schermo. (→ pagina 34)
9) Premere di nuovo il pulsante per regolare la messa a fuoco.
10) Premere di nuovo il pulsante per regolare lo zoom e la dimensione dell'immagine in modo che si adatti allo schermo.
Accensione/Spegnimento
Spegnimento del proiettore
Pannello di controllo Telecomando

1) Premere il pulsante di alimentazione del pannello di controllo o il pulsante di alimentazione del telecomando.
- [Spegnere ?] viene visualizzato sullo schermo.
- La visualizzazione schermo scompare quando viene premuto qualsiasi pulsante diverso dal pulsante di alimentazione del pannello di controllo e dal pulsante di alimentazione del telecomando o quando passano circa quattro secondi.
2) Premere di nuovo il pulsante di alimentazione del pannello di controllo o il pulsante di alimentazione del telecomando.
- La lampada si spegne e la proiezione si arresta.
- L'indicatore di alimentazione si spegne mentre la ventola continua a girare, e l'indicatore standby lampeggia.
3) Quando l'indicatore standby si accende, premere il lato <○> dell'interruttore di alimentazione principale per spegnere l'alimentazione.
Nota
- Non accendere l'alimentazione immediatamente dopo averla spenta.
Nello stato di raffreddamento della lampada luminosa dopo lo spegnimento dell'alimentazione, la lampada potrebbe non accendersi anche se l'alimentazione viene accesa. In questo caso, attendere che l'indicatore standby diventi rosso, quindi riaccendere l'alimentazione. Accendere l'alimentazione mentre la lampada è ancora molto calda potrebbe abbreviare la vita della lampada.
- Quando si spegne l'alimentazione usando il pulsante di alimentazione del pannello di controllo o il pulsante di alimentazione del telecomando quando l'interruttore di alimentazione principale sul corpo del proiettore è acceso, il proiettore continua a consumare corrente. Per dettagli sul consumo di corrente, fare riferimento a "Consumo corrente" (→ pagina 100).
- Controllare che il blocco pulsante sia spento nel menu [Sicurezza]. (→ pagina 67)
- Se si utilizza il proiettore oltre 24 ore, spegnere l'alimentazione ogni 24 ore e attendere un'ora. Ciò aumenterà la vita della lampada.
Funzione di spegnimento diretto
Si può scollegare il cavo di alimentazione, spegnere l'alimentazione tramite l'interruttore di alimentazione, ecc, senza premere il pulsante di alimentazione del telecomando o l'interruttore di alimentazione principale del proiettore.
Ciò è utile nei casi in cui l'interruttore non è facilmente accessibile, come quando il proiettore è montato a soffitto. Questa funzione fornisce anche sicurezza se si verifica un'interruzione di corrente o se il cavo di alimentazione viene accidentalmente scollegato dalla presa immediatamente dopo lo spegnimento dell'alimentazione.
Nota
\- Quando la lampada è stata raffreddata dalla funzione di spegnimento diretto, a volte è necessario più tempo del solito perché la lampada si riaccenda.
Funzione di gestione alimentazione
Il proiettore è dotato di una funzione di gestione alimentazione. Se non viene rilevato alcun segnale per 30 secondi e non viene effettuata alcuna operazione sul proiettore, [No segnale] e il timer appaiono sullo schermo e inizia un conto alla rovescia.
Se il conto alla rovescia viene completato senza l'immissione di un segnale o un'operazione sul proiettore, la funzione si attiva per risparmiare energia ed estendere la vita utile della lampada.
Nota
\- Il valore predefinito dell'impostazione è [Off]. Per dettagli, fare riferimento a [Risparmio energetico] (→ pagina 66).
Proiezione
Controllare i collegamenti del dispositivo esterno (→ pagina 24) e la connessione del cavo di alimentazione (→ pagina 29) e poi accendere (→ pagina 31) per iniziare la proiezione. Selezionare il segnale di ingresso e regolare l'immagine.
Selezione del segnale di ingresso
Selezionare un segnale di ingresso.
Vengono proiettate le immagini selezionate usando il pulsante Attenzione
- Le immagini potrebbero non essere proiettate in modo corretto a seconda del dispositivo collegato, DVD, video, ecc. da riprodurre.
- Il pulsante Regolazione dell'immagine
Regolazione della posizione dell'obiettivo.
1) Premere il pulsante del telecomando o del pannello di controllo.
\- [Ottica basculante] viene visualizzato sullo schermo per quattro secondi.

2) Mentre appare la visualizzazione, premere ▲▼◀▶ per spostare l'immagine orizzontalmente e verticalmente.
- Quando si sposta l'immagine, c'è una certa posizione in cui le frecce che puntano verso l'alto, verso il basso, a sinistra e a destra diventano rosse. Questa posizione è il centro dell'obiettivo.
- Nelle posizioni di spostamento massimo, le frecce scompaiono.
- Il proiettore memorizza l'impostazione fatta utilizzando la funzione di spostamento dell'obiettivo quando l'alimentazione viene spenta.
- Quando la posizione dell'immagine viene spostata, l'immagine diventa un po' più scura.
* La figura di seguito mostra un esempio quando è fissato l'obiettivo standard.

Proiezione
Rigolazione della messa a fuoco e dello zoom
1) Premere il pulsante e il pulsante del telecomando o del pannello di controllo.
\- [Fuoco] e [Zoom] vengono visualizzati sullo schermo per quattro secondi.
2) Mentre appare la visualizzazione, premere ▲▼ per regolare la messa a fuoco e lo zoom.
Nota
- Quando [Display] è impostato su [Off], la schermata di regolazione non compare.
- Si consiglia si proiettare le immagini in modo continuo per almeno 30 minuti prima di regolare la messa a fuoco.
- Se si verifica l'effetto di distorsione trapezoidale, fare riferimento a “Correzione dell'effetto di distorsione trapezoidale” (→ pagina 36) per dettagli.
Utilizzo del telecomando

Utilizzo della funzione shutter
Si può bloccare completamente la luce di proiezione.
Pulsante
SHUTTER
1) Premere il pulsante sul telecomando.
\- Ciò blocca la luce di proiezione. L'indicatore otturatore si accende il blu.
2) Premere di nuovo il pulsante .
\- Ciò apre l'otturatore e riavvia la proiezione. L'indicatore otturatore si spegne.
Nota
- Le operazioni dell'otturatore sono diverse a seconda delle impostazioni. Eseguire le impostazioni utilizzando [Otturatore] nel menu [Impostazione].
- Il pulsante si trova anche sul pannello di controllo.
- Se appare un messaggio di errore quando si preme il pulsante , il blocco del pulsante è abilitato. Controllare l'impostazione [Otturatore] dal menu [Impostazione].
Utilizzo della funzione Freeze
Si può “congelare” temporaneamente l'immagine proiettata indipendentemente dallo stato della riproduzione in un dispositivo esterno.
Pulsante

1) Premere il pulsante del telecomando.
\- Ciò congela l'immagine.
2) Premere il pulsante sul telecomando o sul pannello di controllo.
\- Rilascia l'immagine congelata.
Commutazione del segnale di ingresso
Si può commutare il segnale di ingresso per la proiezione.

Pulsanti


1) Premere i pulsanti Utilizzo del telecomando
Nota
- Il segnale visualizzato per il pulsante Correzione dell'effetto di distorsione trapezoidale
Si può correggere l'effetto di distorsione trapezoidale che si verifica quando il proiettore è installato con una inclinazione o quando lo schermo è inclinato.
- La quantità e l'intervallo della correzione sono diversi a seconda del segnale di ingresso.
- Con alcune impostazioni, l'immagine potrebbe essere distorta per un momento.
- Per ottenere l'immagine corretta, il segnale viene sottoposto a compressione digitale prima della proiezione e linee e testo potrebbero essere leggermente alterati rispetto a quelli dell'immagine originale.
- Per dettagli sulla correzione, fare riferimento a [Trapezio] nel menu [Schermo].
Pulsante

1) Premere il pulsante del telecomando.
\- A ogni pressione del pulsante, la visualizzazione commuta tra la visualizzazione standard della correzione dell'effetto di distorsione trapezoidale e la visualizzazione della correzione angoli.
Correzione standard dell'effetto di distorsione trapezoidale
Corregge l'effetto di distorsione trapezoidale verticalmente e orizzontalmente.
1) Mentre è visualizzato [Trapezio], premere ▲▼◀▶ della direzione in cui si desidera effettuare la correzione.
Nota
\- Premendo il pulsante del telecomando per almeno tre secondi mentre viene visualizzato [Trapezio] l'immagine torna allo stato non corretto.
Correzione angoli
Corregge la distorsione agli angoli dell'immagine.
1) Mentre è visualizzato [Trapezio], premere il pulsante e selezionare l'angolo da correggere.
\- A ogni pressione del pulsante, l'angolo selezionato si sposta in direzione oraria.
2) Premere ▲▼◀▶ per correggere la distorsione.
Nota
\- Premendo il pulsante del telecomando per almeno tre secondi mentre viene visualizzato [Trapezio] l'immagine torna allo stato non corretto.
Selezione della modalità di qualità dell'immagine
Premendo il pulsante del telecomando si visualizza il menu per il [Selezione immagine] correntemente selezionato, in seguito a ogni pressione successiva del pulsante cambia la modalità.
Pulsante


Nota
\- Per dettagli, fare riferimento a “Menu [Selezione immagine]” (→ pagina 47).
Regolazione della qualità dell'immagine
Premendo il pulsante del telecomando, viene visualizzato il menu [Regolazione immagine].
Pulsante

1) Premere il pulsante del telecomando.
2) Premere ▲▼ per selezionare una voce, quindi premere il pulsante .
- Viene visualizzato il menu di regolazione.
3) Premere ▲▼ per selezionare la voce di regolazione, quindi premere ◀▶ per cambiare l'impostazione.
Nota
- Per dettagli, fare riferimento a “Menu [Regolazione immagine]” (→ pagina 48).
Pulsante schermata
È possibile cambiare l'impostazione del menu [Schermo].
Pulsante

Premendo il pulsante del telecomando si visualizza il menu [Schermo] correntemente selezionato, quindi a ogni pressione successiva del pulsante cambia la modalità.

Nota
- Per dettagli, fare riferimento a "Menu [Schermo]" (→ pagina 53).
- Se si tiene premuto il pulsante per almeno cinque secondi, le impostazioni del menu [Schermo] torneranno ai valori predefiniti delle impostazioni.
Visualizzazione di un timer per le presentazioni
Quando si preme il pulsante del telecomando, il proiettore visualizza un conteggio del tempo passato dal momento in cui si preme il pulsante oppure un conto alla rovescia.
Premere di nuovo il pulsante arresta il conteggio e visualizza il tempo trascorso fino a quel punto.
Premere di nuovo il pulsante fa ripartire il conteggio.
Pulsante

Nota
- Per dettagli, fare riferimento a [Timer presentazione] (→ pagina 71).
- Premendo il pulsante per almeno tre secondi il tempo viene ripristinato. Il conteggio viene riportato a "000:00" e il conto alla rovescia viene riportato al tempo impostato sul timer.
Controllo delle impostazioni
Si può controllare lo stato dei segnali e della lampada sullo schermo durante la proiezione.
Pulsante

Premendo il pulsante del telecomando, viene visualizzata la prima pagina delle informazioni.
Premendo di nuovo il pulsante del telecomando, viene visualizzata la seconda pagina delle informazioni.
Premendo il pulsante , si chiudono le informazioni.
Nota
- Per dettagli, fare riferimento a “Menu [Informazioni]” (→ pagina 73).
- Per spostarsi dalle informazioni a un altro menu, premere ▲▼.
- C'è anche il pulsante del pannello di controllo.
Procedura operativa
\- Viene visualizzato il menu.

2) Premere ▲▼ per selezionare la voce desiderata.
\- Selezionare la voce da regolare fra [Ingresso], [Impostaz. PC], [Selezione immagine], [Regolazione immagine], [Schermo], [Impostazione], [Informazioni] e [Nome proiettore]. La voce attualmente selezionata appare con un cursose arancione e il sottomenu della voce selezionata viene visualizzato sul lato destro.
3) Premere il pulsante .
- Viene visualizzato il sottomenu ed è possibile selezionare le voci del sottomenu.
- In alternativa, premere ▶ per accedere al sottomenu.

- Per alcuni sottomenu viene visualizzato un ulteriore menu (sottomenu 2) contenente impostazioni avanzate.
- Per le voci le cui impostazioni possono essere modificate o presentano una scala su barra, la schermata di menu scompare e, come illustrato in basso, viene visualizzata una schermata di regolazione per l'impostazione selezionata (schermata di regolazione individuale).

Nota
- Per alcuni formati di ingresso segnale al proiettore, non è possibile regolare alcune voci o usare alcune funzioni. Le voci di menu che non possono essere regolate o usate appaiono in grigio e non possono essere selezionate.
- Alcune voci possono essere regolate senza un ingresso segnale.
- La schermata di regolazione scompare automaticamente se non viene effettuata alcuna operazione per un tempo di circa quattro o dieci secondi. Il tempo di scomparsa della schermata di regolazione varia in base alla schermata.
- Per dettagli sulle voci del sottomenu, fare riferimento a "Sottomenu" (→ pagine da 39 a 41).
- Un menu guida viene visualizzato al di sotto del menu. Vengono visualizzati i pulsanti da selezionare ed eseguire.
(Il menu guida del sottomenu è mostrato qui in basso.)

(1) Premere il pulsante per chiudere il menu.
(2) Premere ◀ per tornare al menu principale.
(3) Premere ▲▼ per navigare fra le voci.
(4) Premere ▶ per regolare o selezionare una voce.
(5) Premere il pulsante per eseguire una voce.
Il menu principale contiene le otto voci seguenti. Quando viene selezionata una voce del menu principale, la schermata diventa una schermata di selezione di sottomenu.
[Ingresso] [Impostaz. PC] [Selezione immagine] [Regolazione immagine] [Schermo] [Impostazione] [Informazioni] [Nome proiettore]
Compare la schermata del sottomenu del menu selezionato ed è possibile impostare e regolare le varie voci del sottomenu.

gresso]

Voce del sottomenu Valore predefinito Pagina [Ingresso 1] [RGB(PC analogico)] 42 [Ingresso 2] [RGB] 42 [Ingresso 3] —* 1 — [Ingresso 4] —* 1 —
*1: Cambia in base al segnale di ingresso.
Nota
\- Il segnale visualizzato per [Ingresso 3] e [Ingresso 4] cambia in base al tipo di modulo di ingresso inserito.

npostaz. PC]

Voce del sottomenu Valore predefinito Pagina [Auto regolaz. PC] — 44 [Sincron. fine] —* 1 44 [Punti totali] —* 1 44 [Posizione orizz.] —* 1 44 [Posizione vert.] —* 1 45 [Configuraz. PC] —* 1 45 [Clamp] —* 1 45 [Area display orizz.] —*1 45 [Area display vert.] —*1 45 [Azzera] — 46 [Cancella modalità] — 46 [Memorizza] — 46
*1: Cambia in base al segnale di ingresso.

elezione immagine]

Dettagli (→ pagina 47)
[Legolazione immagine]
Voce del sottomenu Valore predefinito Pagina [Contrasto] 32 48 [Luminosità] 32 48 [Colore]*1 32 48 [Tinta]*1 32 48 [Regolazione colore] — 49 [Temp. colore] [Med] 50 Bilanciamento del bianco([Rosso]/[Verde]/[Blu]) 32 50 [Gradazione nero] 32 50 [Controllo automatico immagine] [L 1] 50 [Colore avanzato] [Auto] 50 [Nitidezza] Per ingresso computer: 0 Per ingresso video: 15 51 [Gamma] 8 51 [Riduzione rumorosità]*1 [On] 51 [Progressivo]*1 [On] 51 [Azzera] — 51 [Memorizza] — 52
*1: Visualizzato e selezionabile solo quando è usato l'ingresso video.
[chermo]
Voce del sottomenu Valore predefinito Pagina [Normale] — 53 [Piena larghezza] — 53 [Espanso(16:9)] — 53 [Zoom] — 53 [Vero]* 1 — 53 [Utente] — 54 [Reg. Personalizzata] — 54 [Zoom digitale +]* 1 — 54 [Zoom digitale -]* 1 — 55 [Trapezio] — 55 [Soffitto] [Off] 56 [Retro] [Off] 56 [Azzera] — 56
*1: Visualizzato e selezionabile solo quando è usato l'ingresso computer.

npostazione]

Voce del sottomenu Valore predefinito Pagina [Lingua] [English] 57 [Posizione menu] — 57 [Display] [On] 57 [Sfondo] [Blu] 58 [Scelta lampada] [4 lampade] 58 [Alim. lampada] (Auto) 58 [Intervallo lampada] [Off] 59 [Fusione bordi] [Off] 59 [Colorimetria] [Off] 60 [HDMI] [Normale] 63 [Logo] — 63 [Controllo ventola] [Normale] 65 [Telecomando] [Tutti] 65 [Sensore telecomando] [Anteriore e posteriore] 65 [Risparmio energetico] [Off], [Timer] 30 minuti 66 [Accensione immediata] [Off] 66 [Sicurezza] — 67 [Identifica proiettore] [Tutti] 68 [Otturatore] — 68 [Controllo ritardo video] [Off] 69 [Closed caption] [Off] 70 [Timer filtro] — 70 [Timer presentazione] [Conteggio incrementale] 71 [Immagini test] — 72 [Impostazioni di fabbrica] — 72


Dettagli (→ pagina 73)

ome proiettore]

Fare riferimento a “Manuale d’uso–Uso della rete”.
Dettagli (→ pagina 74)
Selezionare [Ingresso] dal menu principale nella schermata dei menu e selezionare la voce dal sottomenu.
Per il funzionamento della schermata dei menu, fare riferimento a “Navigazione tra i menu”
(→ pagina 38).
\- Dopo avere selezionato la voce, premere ▲▼◀
- per applicare l'impostazione.
Pannello di controlloTele


[Ingresso 1]
1) Premere ▲▼ per selezionare [Ingresso 1] e premere il pulsante .
\- Viene visualizzato il sottomenu 2.
2) Premere ▲▼ per selezionare una voce e premere il pulsante .
[RGB(PC analogico)] Selezionare quando si immette un segnale analogico proveniente da un computer nel terminale. [RGB(Scart)] Selezionare quando si immette un segnale SCART nel terminale. [RGB(PC digitale)] Selezionare quando si immette un segnale digitale proveniente da un computer nel terminale. [RGB(AV HDCP)] Selezionare quando si immette un segnale digitale HDCP-compatible nel terminale. [HDMI] Selezionare quando si immette un segnale digitale HDMI-compatible nel terminale.
Nota
\- Il terminale a pin SCART21 è un terminale di uscita video in dotazione con i lettori video in commercio principalmente in Europa. Per visualizzare sul proiettore l'uscita RGB da questo terminale, collegare il terminale a pin SCART21 del lettore video al terminale terminal del proiettore mediante un cavo dedicato. I segnali RGB SCART da riprodurre tramite il terminale sono limiati ai segnali RGB 480i e 576i. Non è possibile riprodurre segnali video compositi.
[Ingresso 2]
1) Premere ▲▼ per selezionare [Ingresso 2] e premere il pulsante .
\- Viene visualizzato il sottomenu 2.
2) Premere ▲▼ per selezionare una voce e premere il pulsante .
[RGB] Selezionare quando si immette un segnale analogico proveniente da un computer nel terminale. [Y, Pb/Cb, Pr/ Cr] Selezionare quando si immette un segnale video composito nel terminale. [Video] Selezionare quando si immette un segnale video composito nel terminale. [S-video] Selezionare quando si immette un segnale S-video nel terminale.
Nota
\- Mentre alcuni segnali RGB vengono riconosciuti automaticamente, i segnali RGB non riconosciuti vengono rilevati come “Y,Pb/Cb,Pr/Cr” ed è necessario selezionare [RGB] dal menu.
[Sistema]
Viene visualizzato [Sistema] al di sotto del sottomenu.
1) Premere ▲▼ per selezionare [Sistema] al di sotto del sottomenu e premere il pulsante .
\- Viene visualizzato il sottomenu 2.
2) Premere ▲▼ per selezionare una voce e premere il pulsante .
\- Premere il pulsante o ◀ per tornare al sottomenu.
■r ingresso computer
[Auto] Quando non vi è un segnale in ingresso compatibile con il segnale proveniente da un computer collegato al proiettore, la funzione di regolazione automatica del PC entra in funzione e viene visualizzato [Auto] sul sistema. Se le immagini non vengono proiettate correttamente, regolare manualmente le impostazioni in base al computer e registrarle in [Memorizza]. — Non vi sono segnali di ingresso dal computer. Controllare le connessioni. [Modalità 1] - [Modalità 10] Selezionare quando si immette un segnale digitale proveniente da un computer nel terminale.
Fir ingresso video e S-video
[Auto] Il proiettore seleziona automaticamente il sistema a colori del segnale di ingresso. [PAL]/ [SECAM]/ [NTSC]/ [NTSC4.43]/ [PAL-M]/ [PAL-N] È un elenco dei sistemi a colori supportati. Il sistema a colori giapponese è NTSC. Quando la qualità del segnale di ingresso è bassa (colori irregolari, assenza di colori, ecc.) e il sistema a colori non è selezionato anche quando è impostato [Auto], selezionare [NTSC].
■r ingresso component
[Auto] Il proiettore seleziona automaticamente il metodo di scansione del segnale di ingresso. Metodi di scansione video component ([480p], [576p], [720p], [480i], [576i], [1035i], [1080i], [1080p]) Quando il video non viene riprodotto correttamente, selezionare il metodo di scansione corretto dal menu.
Selezionare [Impostaz. PC] dal menu principale nella schermata dei menu e selezionare la voce dal sottomenu.
Per il funzionamento della schermata dei menu, fare riferimento a “Navigazione tra i menu”
(→ pagina 38).
\- Dopo avere selezionato la voce, premere ▲▼◀
- per applicare l'impostazione.
Pannello di controlloTele


[Auto regolaz. PC]
Regola automaticamente la sincronizzazione, il numero totale di punti, lo spostamento orizzontale e lo spostamento verticale.
1) Premere ▲▼ per selezionare [Auto regolaz. PC].
2) Premere il pulsante .
\- Esegue la regolazione automatica.
Nota
- Si può inoltre usare [Auto regolaz. PC] premendo il tasto del telecomando.
- Alcuni computer possono non essere in grado di regolare [Sincron. fine], [Punti totali], [Posizione orizz.] o [Posizione vert.]. In tal caso, regolare manualmente e registrare in [Memorizza].
- Dopo avere registrato le impostazioni regolate automaticamente, è possibile selezionare tale modo usando [Sistema] nel menu [Ingresso].
- La funzione di regolazione PC automatica non funziona se è stata selezionato [480p], [576p], [720p], [480i], [576i], [1035i], [1080i] o [1080p] usando [Sistema] nel menu [Ingresso].
- Con alcuni computer e tipi di segnale, potrebbe non essere possibile proiettare correttamente le immagini.
[Sincron. fine]
Regolare il proiettore quando si verifica uno sfarfallio dovuto a discrepanza nel tracking (sincronizzazione).
1) Premere ▲▼ per selezionare [Sincron. fine].
2) Premere il pulsante .
\- Viene visualizzato il menu avanzato.
\- Mentre è visualizzato il menu avanzato, premere ▲▼ per spostarsi avanti e indietro nei menu.
3) Mentre si osserva la schermata, premere ◀▶ per regolare l'impostazione.
\- Premere il pulsante per tornare al sottomenu.
Nota
- Il valore di regolazione può essere impostato da 0 a 31.
- Per alcuni computer, potrebbe non essere possibile eliminare completamente lo sfarfallio della schermata.
[Punti totali]
Regolare il numero totale di punti nell'intervallo orizzontale.
1) Premere ▲▼ per selezionare [Punti totali].
2) Premere il pulsante .
\- Viene visualizzato il menu avanzato.
\- Mentre è visualizzato il menu avanzato, premere ▲▼ per spostarsi avanti e indietro nei menu.
3) Mentre si osserva la schermata, premere ◀▶ per regolare l'impostazione.
\- Premere il pulsante per tornare al sottomenu.
[Posizione orizz.]
Regola la posizione orizzontale dello schermo.
1) Premere ▲▼ per selezionare [Posizione orizz.].
2) Premere il pulsante .
\- Viene visualizzato il menu avanzato.
\- Mentre è visualizzato il menu avanzato, premere ▲▼ per spostarsi avanti e indietro nei menu.
3) Mentre si osserva la schermata, premere ◀▶ per regolare l'impostazione.
\- Premere il pulsante per tornare al sottomenu.
[Posizione vert.]
Regola la posizione verticale dello schermo.
1) Premere ▲▼ per selezionare [Posizione vert.].
2) Premere il pulsante .
\- Viene visualizzato il menu avanzato.
\- Mentre è visualizzato il menu avanzato, premere ▲▼ per spostarsi avanti e indietro nei menu.
3) Mentre si osserva la schermata, premere ◀▶ per regolare l'impostazione.
\- Premere il pulsante per tornare al sottomenu.
[Configuraz. PC]
Visualizza i valori attuali della frequenza si sintonia orizzontale e della frequenza si sintonia verticale per il computer attualmente collegato.
1) Premere ▲▼ per selezionare [Configuraz. PC].
2) Premere il pulsante o ▶.
\- Viene visualizzato il menu avanzato.
\- Premere il pulsante o ◀ per tornare al sottomenu.
[Clamp]
Regola la posizione del morsetto.
Da utilizzare quando è visibile una linea nera sull'immagine proiettata.
1) Premere ▲▼ per selezionare [Clamp].
2) Premere il pulsante .
\- Viene visualizzato il menu avanzato.
\- Mentre è visualizzato il menu avanzato, premere ▲▼ per spostarsi avanti e indietro nei menu.
3) Mentre si osserva la schermata, premere ◀▶ per regolare l'impostazione.
\- Premere il pulsante per tornare al sottomenu.
[Area display orizz.]
Regola la risoluzione orizzontale.
1) Premere ▲▼ per selezionare [Area display orizz.].
2) Premere il pulsante .
\- Viene visualizzato il menu avanzato.
\- Mentre è visualizzato il menu avanzato, premere ▲▼ per spostarsi avanti e indietro nei menu.
3) Mentre si osserva la schermata, premere ◀▶ per regolare l'impostazione.
\- Premere il pulsante per tornare al sottomenu.
Nota
\- Non è possibile regolare [Area display orizz.] se è stata selezionato [480p], [576p], [720p], [480i], [576i], [1035i], [1080i] o [1080p] usando [Sistema] nel menu [Ingresso].
[Area display vert.]
Regola la risoluzione verticale.
1) Premere ▲▼ per selezionare [Area display vert.].
2) Premere il pulsante .
\- Viene visualizzato il menu avanzato.
\- Mentre è visualizzato il menu avanzato, premere ▲▼ per spostarsi avanti e indietro nei menu.
3) Mentre si osserva la schermata, premere ◀▶ per regolare l'impostazione.
\- Premere il pulsante per tornare al sottomenu.
Nota
\- Non è possibile regolare [Area display vert.] se è stata selezionato [480p], [576p], [720p], [480i], [576i], [1035i], [1080i] o [1080p] usando [Sistema] nel menu [Ingresso].
[Azzera]
L'impostazione torna al valore precedente alla regolazione.
1) Premere ▲▼ per selezionare [Azzera].
2) Premere il pulsante .
3) Selezionare [Si] e premere il pulsante .
\- L'impostazione torna al valore precedente alla regolazione.
\- Selezionare [No] e premere il pulsante per tornare al sottomenu.
[ cancella modalità ]
Cancella i valori registrati in [Memorizza].
1) Premere ▲▼ per selezionare [Cancella modalità].
2) Premere il pulsante o ▶.
\- Il contenuto registrato per ciascun modo viene visualizzato nel sottomenu 2.
3) Premere ▲▼ per selezionare il modo da cancellare.
4) Premere il pulsante .
5) Selezionare [Sí] e premere il pulsante .
\- Il modo selezionato viene cancellato ed il proiettore torna al sottomenu 2.
\- Selezionare [No] e premere il pulsante per tornare al sottomenu 2.
[Memorizza]
Registra i valori regolati in [Memorizza].
1) Premere ▲▼ per selezionare [Memorizza].
2) Premere il pulsante o ▶.
\- Il contenuto registrato per ciascun modo viene visualizzato nel sottomenu 2.
3) Premere ▲▼ per selezionare il modo da registrare.
4) Premere il pulsante .
5) Selezionare [Sí] e premere il pulsante .
\- Il modo selezionato viene registrato ed il proiettore torna al sottomenu 2.
\- Selezionare [No] e premere il pulsante per tornare al sottomenu 2.
Selezionare [Selezione immagine] dal menu principale nella schermata dei menu e selezionare la voce dal sottomenu.
Per il funzionamento della schermata dei menu, fare riferimento a “Navigazione tra i menu”
(→ pagina 38).
\- Dopo avere selezionato la voce, premere ▲▼◀
- per applicare l'impostazione.
Pannello di controlloTele


\- Inoltre è possibile visualizzare i sottomenu usando il pulsante del telecomando.
Regolazione della qualità dell'immagine
Regolare la qualità dell'immagine proiettata in base all'ambiente in cui si sta usando il proiettore.
[■redefinito]
Reimposta le voci del menu [Regolazione immagine] ai valori predefiniti delle impostazioni.
[beale]
In questo modo, le impostazioni intermedie vengono regolate in modo da essere più luminose, facilitando la visualizzazione in luoghi molto luminosi.
\- Questo modo può essere selezionato solo per ingressi computer.
[nema]
Enfatizza la gradazione, rendendo questo modo adatto per la visualizzazione di film.
\- Questo modo può essere selezionato solo per ingressi video o component.
[namica]
Aumenta il contrasto dell'immagine rispetto a [Predefinito].
[■imagine 1] - [Immagine 10]
Richiama le impostazioni di qualità dell'immagine impostate manualmente usando il menu [Regolazione immagine].
\- Le immagini possono essere registrate sia con ingressi computer, sia con ingressi video.
Selezionare [Regolazione immagine] dal menu principale nella schermata dei menu e selezionare la voce dal sottomenu.
Per il funzionamento della schermata dei menu, fare riferimento a “Navigazione tra i menu”
(→ pagina 38).
\- Dopo avere selezionato la voce, premere ▲▼◀
- per applicare l'impostazione.
Pannello di controlloTele


\- Inoltre è possibile visualizzare i sottomenu usando il pulsante del telecomando.
[Contrasto]
1) Premere ▲▼ per selezionare [Contrasto].
2) Premere il pulsante .
- Viene visualizzato il menu avanzato.
- Mentre è visualizzato il menu avanzato, premere ▲▼ per spostarsi avanti e indietro nei menu.
3) Mentre si osserva la schermata, premere ◀▶ per regolare l'impostazione.
Operazione Regolazione Gamma Premere ▶ . Aumenta il contrasto. Valore massimo 63 Premere ◀ . Diminuisce il contrasto. Valore minimo 0
[Luminosità]
1) Premere ▲▼ per selezionare [Luminosità].
2) Premere il pulsante .
- Viene visualizzato il menu avanzato.
- Mentre è visualizzato il menu avanzato, premere ▲▼ per spostarsi avanti e indietro nei menu.
3) Mentre si osserva la schermata, premere ◀▶ per regolare l'impostazione.
Operazione Regolazione Gamma Premere ▶. La luminosità aumenta. Valore massimo 63 Premere ◀. La luminosità diminuisce. Valore minimo 0
[Colore]
Questa impostazione può essere regolata solo per ingressi video o component.
1) Premere ▲▼ per selezionare [Colore].
2) Premere il pulsante .
- Viene visualizzato il menu avanzato.
- Mentre è visualizzato il menu avanzato, premere ▲▼ per spostarsi avanti e indietro nei menu.
3) Mentre si osserva la schermata, premere ◀▶ per regolare l'impostazione.
Operazione Regolazione Gamma Premere ▶ . Rende l'immagine più scura. Valore massimo 63 Premere ◀ . Rende l'immagine più chiara. Valore minimo 0
[Tinta]
Questa impostazione può essere regolata solo per ingressi video o component.
1) Premere ▲▼ per selezionare [Tinta].
2) Premere il pulsante .
- Viene visualizzato il menu avanzato.
- Mentre è visualizzato il menu avanzato, premere ▲▼ per spostarsi avanti e indietro nei menu.
3) Mentre si osserva la schermata, premere ◀▶ per regolare l'impostazione.
Operazione Regolazione Gamma Premere ▶ . Enfatizza il verde. Valoremassimo 63 Premere ◀ . Enfatizza il viola. Valoreminimo 0
[Regolazione colore]
Regolare i colori dell'immagine proiettata come desiderato.
1) Premere ▲▼ per selezionare [Regolazione colore].
2) Premere il pulsante .
1) Premere il pulsante .
- L'immagine viene messa in pausa ed appare un cursose senza colori al centro dello schermo.
2) Premere ▲▼◀▶ per spostare il
cursose sul colore da regolare, quindi
premere il pulsante .
3) Il cursose diviene di quel colore e viene visualizzato il menu [COLOR SELECTION].
1) Premere ▲▼◀▶ per spostare il
cursose al centro di [COLOR], quindi
premere il pulsante .
2) Premere ▲▼◀▶ per spostare il cursose sul colore da regolare.
3) In seguito alla regolazione del colore desiderato, premere il pulsante .
\- La schermata passa alla regolazione [GAMMA].
4) Premere ▲▼◀▶ per selezionare il colore da visualizzare dopo la regolazione, quindi premere il pulsante .
- Il cursose si sposta a [LIST].
5) Premere il pulsante con il cursose su [LIST].
- Ciò registra il colore regolato.
[LIST] Visualizza [COLOR MANAGEMENT LIST]. [COLOR M.] Cancella la regolazione e fa tornare il cursose allo stato privo di colori. [MENU] Termina la visualizzazione di [COLOR MANAGEMENT LIST].
6) Viene visualizzato [COLOR MANAGEMENT LIST].
\- Si può controllare se il colore registrato è stato memorizzato.
Operazioni [COLOR MANAGEMENT LIST]
●Nuova regolazione dei colori memorizzati
1) Premere ▲▼ per selezionare il colore da regolare nuovamente.
2) Premere il pulsante per tornare al menu [COLOR SELECTION].
\- È possibile regolare nuovamente il colore.
\- Cancellazione dei colori memorizzati
1) Premere ▲▼ per selezionare il colore da cancellare.
2) Premere ◀▶ per spostare il cursose sulla casella [DEL].
3) Premere il pulsante .
4) Selezionare [Sí] e premere il pulsante .
\- Il colore registrato verrà cancellato.
[ALL DEL] Cancella tutte le voci salvate nell'elenco. [MENU] Termina la visualizzazione di [COLOR MANAGEMENT LIST] e torna al menu [Regolazione immagine]. [COLOR M.] Salva la regolazione. Un nuovo cursose privo di colori viene visualizzato ed è possibile continuare ad effettuare regolazioni.
[Temp. colore]
1) Premere ▲▼ per selezionare [Temp. colore].
2) Premere il pulsante .
- Viene visualizzato il menu avanzato.
- Mentre è visualizzato il menu avanzato, premere ▲▼ per spostarsi avanti e indietro nei menu.
3) Mentre si osserva la schermata, premere ◀▶ per regolare l'impostazione.
Operazione Regolazione Gamma Premere ▶ . Aumenta la temperatura del colore. [Molto Bassa]-[Bass]-[Med]-[Alta] Premere ◀ . Diminuisce la temperatura del colore.
Nota
● [Molto Bassa] (enfatizza il rosso) - [Alta] (enfatizza il blu)
- Si noti che la regolazione di questa voce cambierà inoltre l'impostazione del bilanciamento del bianco.
- [Regola] viene visualizzato quando si regola il bilanciamento del bianco (una voce qualsiasi fra [Rosso], [Verde] e [Blu]).
Bilanciamento del bianco([Rosso]/[Verde]/[Blu])
1) Premere ▲▼ per selezionare [Rosso] (o [Verde] o [Blu]).
2) Premere il pulsante .
\- Viene visualizzato il menu avanzato.
\- Mentre è visualizzato il menu avanzato, premere ▲▼ per spostarsi avanti e indietro nei menu.
3) Mentre si osserva la schermata, premere ◀▶ per regolare l'impostazione.
Operazione Regolazione Gamma Premere ▶ . Indebolisce il colore. Valoremassimo 63 Premere ◀ . Rafforza il colore. Valoreminimo 0
[Gradazione nero]
1) Premere ▲▼ per selezionare [Gradazione nero].
2) Premere il pulsante o ▶.
- Viene visualizzato il sottomenu 2.
3) Premere ▲▼ per selezionare [Rosso] (o [Verde] o [Blu]).
4) Premere il pulsante .
5) Mentre si osserva la schermata, premere ◀▶ per regolare l'impostazione.
[Rosso] Valore minimo 0 - valore massimo 63 [Verde] Valore minimo 0 - valore massimo 63 [Blu] Valore minimo 0 - valore massimo 63
[Controllo automatico immagine]
Enfatizza le parti scure dell'immagine proiettata.
1) Premere ▲▼ per selezionare [Controllo automatico immagine].
2) Premere il pulsante .
3) Premere ◀▶ per commutare l'impostazione.
\- L'impostazione cambia come segue ad ogni pressionde del pulsante.
[Off] [L 1] [L 2]
\- L'effetto è maggiore con [L 2].
[Colore avanzato]
Imposta il funzionamento del dispositivo di controllo colore che controlla indipendentemente la quantità della luce gialla.
1) Premere ▲▼ per selezionare [Colore avanzato].
2) Premere il pulsante .
3) Premere ◀▶ per commutare l'impostazione.
\- L'impostazione cambia come segue ad ogni pressionde del pulsante.
[Off] [Auto]
\- Il bilanciamento del bianco potrebbe cambiare in base all'immagine.
[Nitidezza]
1) Premere ▲▼ per selezionare [Nitidezza].
2) Premere il pulsante .
\- Viene visualizzato il menu avanzato.
\- Mentre è visualizzato il menu avanzato, premere ▲▼ per spostarsi avanti e indietro nei menu.
3) Mentre si osserva la schermata, premere ◀▶ per regolare l'impostazione.
Operazione Regolazione Gamma Premere ▶ . Aumenta la nitidezza. Valore massimo 31 Premere ◀ . Diminuisce la nitidezza. Valore minimo 0
[Gamma]
1) Premere ▲▼ per selezionare [Gamma].
2) Premere il pulsante .
\- Viene visualizzato il menu avanzato.
\- Mentre è visualizzato il menu avanzato, premere ▲▼ per spostarsi avanti e indietro nei menu.
3) Mentre si osserva la schermata, premere ◀▶ per regolare l'impostazione.
Operazione Regolazione Gamma Premere ▶ . Aumenta la luminosità delle gradazioni intermedie. Valore massimo 15 Premere ◀ . Diminuisce la luminosità delle gradazioni intermedie. Valore minimo 0
[Riduzione rumorosità]
Riduce i disturbi quando si visualizzano vecchi video o altre immagini con disturbi.
1) Premere ▲▼ per selezionare [Riduzione rumorosità].
2) Premere il pulsante .
3) Premere ◀▶ per commutare l'impostazione.
\- L'impostazione cambia come segue ad ogni pressionde del pulsante.
[Off] [On]
[Progressivo]
Può essere impostato per segnali video di 480i, 576i, 1035i e 1080i.
1) Premere ▲▼ per selezionare [Progressivo].
2) Premere il pulsante .
3) Premere ◀▶ per commutare l'impostazione.
\- L'impostazione cambia come segue ad ogni pressionde del pulsante.
[Off] [On] [Film]

- Impostare a [Off] se un video con molti movimenti presenta sfarfallii o linee orizzontali.
- [Film] abilita la riproduzione sul proiettore di immagini 3-2 pull down/2-2 pull down senza perdita di qualità di immagine.
- Quando si commuta, l'immagine si distorce per un momento.
[Azzera]
L'impostazione torna al valore precedente alla regolazione.
1) Premere ▲▼ per selezionare [Azzera].
2) Premere il pulsante o ▶.
3) Selezionare [Sî] e premere il pulsante .
- L'impostazione torna al valore precedente alla regolazione.
- Selezionare [No] e premere il pulsante per tornare al sottomenu.
[Memorizza]
1) Premere ▲▼ per selezionare [Memorizza].
2) Premere il pulsante o ▶.
\- Il contenuto registrato per ciascun modo viene visualizzato nel sottomenu 2.
3) Premere ▲▼ per selezionare il modo da registrare.
● [Immagine 1] - [Immagine 10]
4) Premere il pulsante .
5) Selezionare [Sí] e premere il pulsante .
\- Il modo selezionato viene registrato ed il proiettore torna al sottomenu 2.
\- Premere [No] e premere il pulsante per tornare al sottomenu 2.
Nota
- La voce regolata viene registrata e salvata in [Memorizza].
- Con [Memorizza], possono essere registrati sia ingressi computer, sia ingressi video.
Selezionare [Schermo] dal menu principale nella schermata dei menu e selezionare la voce dal sottomenu.
Per il funzionamento della schermata dei menu, fare riferimento a “Navigazione tra i menu”
(→ pagina 38).
\- Dopo avere selezionato la voce, premere ▲▼◀
- per applicare l'impostazione.
Pannello di controlloTele


\- Inoltre è possibile visualizzare i sottomenu usando il pulsante del telecomando.
[Normale]
Visualizza la dimensione massima possibile mantenendo il rapporto aspetto del segnale di ingresso.
1) Premere ▲▼ per selezionare [Normale].
2) Premere il pulsante .
[Piena larghezza]
Visualizza la dimensione a tutto schermo.
- Quando non vi sono segnali di ingresso, questa voce appare in grigio e non può essere selezionata.
1) Premere ▲▼ per selezionare [Piena larghezza].
2) Premere il pulsante .
[Espanso(16:9)]
Visualizza a schermo ampio con rapporto aspetto di 16:9.
- Quando non vi sono segnali di ingresso, questa voce appare in grigio e non può essere selezionata.
1) Premere ▲▼ per selezionare [Espanso(16:9)].
2) Premere il pulsante .
[Zoom]
Salva il rapporto aspetto e proietta alle dimensioni piene del pannello.
- Quando non vi sono segnali di ingresso, questa voce appare in grigio e non può essere selezionata.
- Se l'immagine è più ampia in orizzontale rispetto al pannello, i bordi destro e sinistro verranno tagliati. Se è più ampio in verticale rispetto al pannello, i bordi superiore e inferiore verranno tagliati.
1) Premere ▲▼ per selezionare [Zoom].
2) Premere il pulsante .
[Vero]
Proietta l'immagine alle dimensioni originali.
- Questo modo può essere regolato solo per ingressi computer.
- Quando non vi sono segnali di ingresso, questa voce appare in grigio e non può essere selezionata.
1) Premere ▲▼ per selezionare [Vero].
2) Premere il pulsante .
Quando le dimensioni dell'immagine sono minori della risoluzione del pannello *1
L'immagine viene proiettata al centro dello schermo e viene visualizzato [Vero] nell'angolo in alto a sinistra dello schermo.
■ quando le dimensioni dell'immagine sono le stesse della risoluzione del pannello *1
[Vero] viene visualizzato nell'angolo in alto a sinistra dello schermo, ma l'immagine viene successivamente proiettata nel modo [Normale].
■ quando le dimensioni dell'immagine sono maggiori della risoluzione del pannello*1
[Vero] viene visualizzato nell'angolo in alto a sinistra dello schermo e △(△)sono ▷ visualizzate in alto, in basso, sulla sinistra e sulla destra dello schermo.
Premere ▲▼◀▶ per spostare l'immagine.
- La freccia nella direzione del movimento viene visualizzata in rosso.
- Nelle posizioni di spostamento massimo la freccia scompare.
*1: La risoluzione del pannello del proiettore è di 1 024 x 768 punti.
[Utente]
L'immagine viene proiettata usando i valori registrati come [Memorizza] nel menu [Impostaz. PC].
\- Quando non vi sono segnali di ingresso, [Utente] può essere selezionato ma l'immagine sarà proiettata nel modo [Normale].
1) Premere ▲▼ per selezionare [Utente].
2) Premere il pulsante .
[Reg. Personalizzata]
Regola scala e posizione orizzontale e verticale.
- Quando non vi sono segnali di ingresso, questa voce appare in grigio e non può essere selezionata.
- Se il segnale di ingresso viene perso durante la regolazione, il valore di regolazione viene salvato e la schermata di regolazione [Aspetto] viene cancellata.
1) Premere ▲▼ per selezionare [Reg. Personalizzata] e premere ▶.
\- Viene visualizzata la schermata di regolazione del sottomenu 2.
2) Premere ▲▼ per selezionare una voce e premere il pulsante .
3) Viene visualizzato il menu avanzato.
- Per regolare [Orizz. e Vert.], premere il pulsante e regolare dalla schermata del sottomenu 2.
- Premere il pulsante per [Comune] e [Azzera]. Selezionare [Sí] e premere il pulsante .
- Mentre è visualizzato il menu avanzato, premere ▲▼ per visualizzare menu diversi da [Orizz. e Vert.], [Comune] e [Azzera] in ordine.
4) Premere ◀▶ per regolare l'impostazione.
\- Premere il pulsante per tornare al sottomenu.
[Scala H] Regola la scala orizzontale. [Scala V] Regola la scala verticale. [Orizz. e Vert.] Quando si regolano le scale orizzontale e verticale, selezionare [On] per collegare le scale orizzontale e verticale e mantenere il rapporto aspetto dell'immagine.● Regolando il valore numerico di [Scala H], il valore numerico di [Scala V] cambia in relazione ad esso. [Posizione orizz.] Regola lo spostamento orizzontale. [Posizione vert.] Regola lo spostamento verticale. [Comune] Applica il contenuto regolato a tutti gli ingressi. [Azzera] Reimposta tutto il contenuto regolato.
[Zoom digitale +]
1) Premere ▲▼ per selezionare [Zoom digitale +].
2) Premere il pulsante o ▶.
\- La schermata dei menu viene cancellata e viene visualizzato [Zoom digitale +].
3) Premere il pulsante .
- Ogni pressionde del pulsante ingrandisce l'immagine.
- Premere ▲▼◀▶ per spostare l'immagine.
- La funzione di spostamento immagine funziona solo quando le dimensioni dell'immagine sono maggiori della risoluzione del pannello 1
*1: La risoluzione del pannello del proiettore è di 1 024 x 768 punti.
Nota
- Quando non vi sono segnali di ingresso, [Zoom digitale +] appare in grigio e non può essere selezionata.
- Quando è selezionato [Vero], [Zoom digitale +] non può essere selezionato.
- Per terminare l'operazione [Zoom digitale +], premere un qualsiasi pulsante diverso da , e ▲▼◀▶.
[Zoom digitale -]
1) Premere ▲▼ per selezionare [Zoom digitale -].
2) Premere il pulsante o ▶.
\- La schermata dei menu viene cancellata e viene visualizzato [Zoom digitale -].
3) Premere il pulsante .
- Ogni pressionde del pulsante rimpicciolisce l'immagine.
- Premere ▲▼◀▶ per spostare l'immagine.
- La funzione di spostamento immagine funziona solo quando le dimensioni dell'immagine sono maggiori della risoluzione del pannello *1
*1: La risoluzione del pannello del proiettore è di 1 024 x 768 punti.
Nota
- Quando non vi sono segnali di ingresso, [Zoom digitale -] appare in grigio e non può essere selezionata.
- Quando è selezionato [Vero], [Zoom digitale -] non può essere selezionato.
- Quando è selezionato [Utente], non è possibile impostare [Zoom digitale -] a [Normale] o più piccolo.
- Quando [Memorizza] registrato nel menu [Impostaz. PC] viene selezionato in [Sistema] del menu [Ingresso], la funzione di spostamento immagine di [Zoom digitale -] potrebbe non funzionare correttamente.
- Quando è selezionato VGA, SVGA, SXGA, WXGA o UXGA in [Sistema] nel menu [Ingresso] e la regolazione [Trapezio] verso l'alto è al valore massimo, [Zoom digitale -] potrebbe non funzionare correttamente.
- Per terminare l'operazione [Zoom digitale -], premere un qualsiasi pulsante diverso da , e ▲▼◀▶.
[Trapezio]
1) Premere ▲▼ per selezionare [Zoom digitale -].
2) Premere il pulsante o ▶.
\- Viene visualizzata la schermata di regolazione del sottomenu 2.
3) Premere ▲▼ per selezionare una voce.
[redefinito]
Corregge l'effetto di distorsione trapezoidale verticalmente e orizzontalmente.
1) Selezionare [Predefinito] e premere il pulsante .
\- La schermata dei menu viene cancellata e viene visualizzato [Trapezio].

\- Premere ▲▼◀▶ per correggere.
[Correzione angolo]
Corregge la distorsione negli angoli dell'immagine.
1) Selezionare [Correzione angolo] e premere il pulsante .
\- Viene visualizzata la schermata per selezionare l'angolo da correggere.
2) Premere il pulsante per selezionare l'angolo da correggere.

3) Premere ▲▼◀▶ per correggere l'angolo.
[chema correzione]
Seleziona il modo schema angoli da visualizzare durante la correzione degli angoli.
1) Selezionare [Schema correzione] e premere il pulsante .
\- Viene visualizzata la schermata configurazione.
2) Premere ▲▼ per selezionare la voce desiderata.
[Rosso] Visualizza lo schema angoli in rosso. [Bianco] Visualizza lo schema angoli in bianco. [Blu] Visualizza lo schema angoli in blu. [Off] Cancella gli schemi angoli dalla schermata.
[lemorizza]
Salva lo stato di correzione.
1) Selezionare [Memorizza] e premere il pulsante .
2) Premere ▲▼ per selezionare una voce e premere il pulsante .
[Memorizza] Lo stato di regolazione resta in memoria anche dopo avere rimosso il cavo di alimentazione. [Azzera] Lo stato di regolazione viene reimpstato quando viene rimosso il cavo di alimentazione.
\- Si può registrare solo uno [Predefinito] ed un [Correzione angolo].
[Soffitto]
Imposta il metodo di proiezione in base allo stato di installazione del proiettore.
Se la schermata appare capovolta, selezionare [On].
\- Questa impostazione va usata quando il proiettore è installato usando il supporto di montaggio a soffitto (accessorio opzionale).
1) Premere ▲▼ per selezionare [Soffitto].
2) Premere il pulsante .
3) Premere ▲▼ per selezionare la voce desiderata.
[Off] [On]

[Retro]
Imposta il metodo di proiezione in base allo stato di installazione del proiettore.
Se la schermata appare rivoltata in senso orizzontale, selezionare [On].
1) Premere ▲▼ per selezionare [Retro].
2) Premere il pulsante .
3) Premere ▲▼ per selezionare la voce desiderata.
[Off] [On]

[Azzera]
L'impostazione torna al valore precedente alla regolazione.
1) Premere ▲▼ per selezionare [Azzera].
2) Premere il pulsante .
3) Selezionare [Sí] e premere il pulsante .
- L'impostazione torna al valore precedente alla regolazione.
- Selezionare [No] e premere il pulsante per tornare al sottomenu.
Selezionare [Impostazione] dal menu principale nella schermata dei menu e selezionare la voce dal sottomenu.
Per il funzionamento della schermata dei menu, fare riferimento a “Navigazione tra i menu”
(→ pagina 38).
\- Dopo avere selezionato la voce, premere ▲▼◀
- per applicare l'impostazione.
Pannello di controlloTele


[Lingua]
Cambia la lingua di visualizzazione.
1) Premere ▲▼ per selezionare [Lingua].
2) Premere il pulsante o ▶.
- Viene visualizzato il sottomenu 2.
- Sono disponibili dieci lingue (inglese, tedesco, francese, italiano, spagnolo, portoghese, russo, cinese, coreano e giapponese).
3) Premere ▲▼ per selezionare la voce desiderata.
Regola la posizione del menu sullo schermo.
1) Premere ▲▼ per selezionare [Posizione menu].
2) Premere il pulsante .
- Vengono visualizzate frecce sul sottomenu 2. Premere ▲▼◀▶ per regolare la posizione.
- Nelle posizioni di spostamento massimo la freccia scompare.

[Display]
Imposta la visualizzazione del menu sullo schermo.
1) Premere ▲▼ per selezionare [Display].
2) Premere il pulsante .
3) Premere ▲▼ per selezionare una voce.
[Off] Appare la seguente schermata.● Visualizzazione del menu● Visualizzazione di [Spegnere ?] quando si spegne il proiettore● Visualizzazione del timer usando il timer presentazione● Visualizzazione di [Attendere] in [Auto regolaz. PC]● Visualizzazione del timer quando si usa la gestione alimentazione● Frecce visualizzate quando è selezionato [Posizione menu] in [Impostazione]● Messaggio di errore visualizzato quando viene premuto un pulsante che non è utilizzato con le impostazioni correnti● Freccevisualizzate quando le dimensioni dell'immagine sono maggiori della risoluzione del pannello (1 024 x 768 punti)● Visualizzazione di [Schema correzione] [Disattiva attesa] Attiva la proiezione immediatamente dopo l'accensione della lampada, senza visualizzare il conto alla rovescia per circa 20 secondi.● Selezionare se si desidera proiettare l'immagine rapidamente e non importa se l'immagine appare leggermente oscurata. [On] Visualizza tutte le schermate.● Selezionare se si desidera proiettare l'immagine solo dopo che la schermata di proiezione ha raggiunto un certo livello di luminosità.
[Off]
[Disattiva attesa]
[On]
[Sfondo]
Seleziona la schermata di sfondo quando non vi sono segnali di ingresso.
1) Premere ▲▼ per selezionare [Sfondo].
2) Premere il pulsante .
● Vengono visualizzate ▲▼ sul sottomenu 2.
3) Premere ▲▼ per selezionare una voce.
\- L'impostazione cambia come segue ad ogni pressionde del pulsante.

[Scelta lampada]
Seleziona la lampada da usare per la proiezione.
1) Premere ▲▼ per selezionare [Scelta lampada].
2) Premere il pulsante o ▶.
\- Viene visualizzato il sottomenu 2.
3) Premere ▲▼ per selezionare.
\- Premere ◀ per tornare al sottomenu.
[lampade]
Accende quattro lampade.
1) Selezionare [4 lampade] e premere il pulsante .
2) Selezionare [Sí] e premere il pulsante .
- L'impostazione termina e il proiettore torna alla schermata del sottomenu 2.
- Premere [No] e premere il pulsante per tornare al sottomenu 2.
[lampade]
Accende due lampade.
1) Selezionare [2 lampade] e premere il pulsante .
2) Selezionare [Si] e premere il pulsante .
- L'impostazione termina e il proiettore torna alla schermata del sottomenu 2.
- Selezionare [No] e premere il pulsante per tornare al sottomenu 2.
[Auto] Rileva automaticamente la lampada con il minore tempo di utilizzo totale e le assegna la priorità di accensione. Accende le lampade 2 e 3. Accende le lampade 1 e 4.
Nota
\- Se una lampada non funziona a causa di un guasto o
poiché ha raggiunto la fine della sua durata, lampeggiano l'indicatore lampada sulla parte frontale del proiettore e l'indicatore lampada ( - ) sul proiettore al di sopra della lampada difettosa. Inoltre nella parte alta dello schermo appare un segno X come stato della lampada.
- Quando è selezionato [4 lampade] ed una lampada non funzione, la proiezione viene effettuata da due lampade opposte diagonalmente (esclusa la lampada non funzionante).
Se un'ulteriore lampada non funziona, la proiezione continua con una sola lampada.
- Quando è selezionato [2 lampade] ed una lampada non funzione, la proiezione viene effettuata da due lampade opposte diagonalmente (esclusa la lampada non funzionante).
Se un'ulteriore lampada non funziona, la proiezione continua con una sola lampada.
- Se tutte le lampade non funzionano, l'alimentazione si disattiva. Se l'alimentazione è accesa senza che siano state sostituite le lampade quando la durata ha superato le 2 200 ore di utilizzo per tutte le lampade, l'alimentazione si spegnerà automaticamente dopo circa dieci minuti per evitare guasti del proiettore.
[Alim. lampada]
Imposta la commutazione della luminosità della lampada.
L'uso della modalità ecologica è consigliato se si desidera ridurre i consumi energetici.
1) Premere ▲▼ per selezionare [Alim. lampada].
2) Premere il pulsante .
3) Premere ▲▼ per selezionare una voce.
\- L'impostazione cambia come segue ad ogni pressionde del pulsante.

Imposta automaticamente la luminosità usando un circuito di misurazione della luce. Funziona con alcune luminosità. Il flusso della presa d'aria/uscita di areazione diminuisce rispetto a 🎨2, ed il suono della ventola diminuisce di volume. Il flusso della presa d'aria/uscita di areazione aumenta rispetto a 🎨1 ed il suono della ventola aumenta di volume.
[Intervallo lampada]
Imposta il ciclo di sostituzione quando [Scelta lampada] è impostato a [2 lampade]. In seguito al ciclo di sostituzione, la lampada per l'utilizzo viene cambiata automaticamente.
\- Il tempo impostato qui è di riferimento.
1) Premere ▲▼ per selezionare [Intervallo lampada].
2) Premere il pulsante .
3) Premere ▲▼ per selezionare la voce desiderata.
[Off] Non cambia le lampade. [24 ore]/[200 ore]/[500 ore]/[1000 ore]/[2000 ore] Cambia le lampade negli intervalli stabiliti.Quando viene raggiunto il tempo impostato, il proiettore accende una lampada, dando priorità alla lampada con il minore tempo di utilizzo totale.
[Fusione bordi]
Rende più difficile notare le giunzioni fra le diverse schermate quando sono usate le schermate multiple.
1) Premere ▲▼ per selezionare [Fusione bordi].
2) Premere il pulsante .
\- Visualizza la schermata configurazione [Fusione bordi].
3) Premere ▲▼ per selezionare [Fusione bordi].
4) Premere il pulsante .
5) Premere ▲▼ per selezionare [On].
\- Quando non è in esecuzione [Fusione bordi], selezionare [Off]. Le voci diverse da [Indietro] appaiono in grigio e non possono essere selezionate.
6) Premere il pulsante .
\- Il bordo del pannello viene visualizzato in verde e diventa rosso se il valore di impostazione per l'ampiezza dell'unione bordi è 1 o più.
Nota
- Viene inoltre visualizzata la schermata configurazione [Fusione bordi] , se si preme il pulsante , il pulsante , il pulsante o il pulsante , la schermata di impostazione viene cancellata e viene data priorità alla funzione selezionata. Al termine della funzione il proiettore torna alla schermata configurazione.
- La giuntura fra le schermate potrebbe notarsi facilmente con alcuni tipi di immagine. Riducendo il valore di [Contrasto] nel menu [Regolazione immagine] si può ottenere un'aspetto più naturale della giuntura.
■r regolare la posizione di inizio e la larghezza di unione
1) Premere ▲▼ per selezionare la posizione ([Start]/[Larghezza] di [Sinistra]/[Destra]/[Alto]/[Basso]) da correggere.
[Start] Imposta la posizione di inizio unione.● La cornice (verde) si sposta mentre si cambia il valore numerico. [Larghezza] Regola la larghezza di unione.● La linea rossa si sposta mentre si cambia il valore numerico.
2) Premere il pulsante .
3) Premere ▲▼ per cambiare il valore e premere ◀▶ per spostarsi fra le cifre.
\- I valori numerici possono inoltre essere immessi usando i pulsanti numerici (<0>-<9>) del telecomando.
\- Premere il pulsante per uscire dalla modalità modifica.
4) Premere il pulsante .
Nota
- Valore regolabile di [Sinistra] e [Destra]: 0 - 512
- Valore regolabile di [Alto] e [Basso]: 0 - 384
■r regolare il livello del nero
Regola il livello di nero dell'immagine.
1) Premere ▲▼ per selezionare [Livello nero].
2) Premere il pulsante .
3) Premere ▲▼ per selezionare una voce.
[Tutti] Cambia con R/G/B. [R]/[G]/[B] Regola ciascun colore.● Valore di regolazione: ± 127
R visualizzare lo schema di test
1) Premere ▲▼ per selezionare [Immagini test].
2) Premere il pulsante .
3) Premere ▲▼ per commutare l'impostazione.
- Premere il pulsante per uscire dalla modalità modifica.
[Off] Cancella la visualizzazione dello schema di test. [On] Visualizza lo schema di test.
Fir non visualizzare lo schema di test
La schermata di impostazione e le linee vengono temporaneamente cancellate.
1) Premere ▲▼ per selezionare [Menu off].
2) Premere il pulsante .
- Premere un pulsante qualsiasi per tornare alla schermata configurazione.
R reimpostare un valore durante la regolazione
L'impostazione torna al valore precedente alla regolazione.
1) Premere ▲▼ per selezionare [Azzera].
2) Premere il pulsante .
- Viene visualizzata una schermata per confermare la reimpostazione.
3) Selezionare [Sí] e premere il pulsante .
- Viene visualizzata la schermata di conferma.
4) Selezionare [Sí] e premere il pulsante .
Fa tornare il proiettore al sottomenu.
1) Premere ▲▼ per selezionare [Indietro].
2) Premere il pulsante .
[Colorimetria]
Rende più difficile notare i colori differenti dei proiettori quando sono usate le schermate multiple.
1) Premere ▲▼ per selezionare [Colorimetria].
2) Premere il pulsante .
- Visualizza la schermata di impostazione [Colorimetria].
3) Premere ▲▼ per selezionare [Colorimetria].
4) Premere il pulsante .
5) Premere ▲▼ per selezionare [On].
\- Quando non è in esecuzione [Colorimetria], selezionare [Off]. Le voci diverse da [Colorimetria avanzata] appaiono in grigio e non possono essere selezionate.
6) Premere il pulsante .
R regolare i colori
1) Premere ▲▼ per selezionare il colore da regolare.
2) Premere il pulsante .
3) Premere ▲▼ per cambiare il valore e premere ◀▶ per spostarsi fra le cifre.
- I valori numerici possono inoltre essere immessi usando i pulsanti numerici (<0>-<9>) del telecomando.
- Il valore numerico cambia in base al valore di [Temp. colore] nel menu [Regolazione immagine].
Colore x y [Rosso] 0.000 - 1.000 0.000 - 1.000 [Verde] 0.000 - 1.000 0.000 - 1.000 [Blu] 0.000 - 1.000 0.000 - 1.000 [Bianco] 0.000 - 1.000 0.000 - 1.000
R visualizzare lo schema di test
1) Premere ▲▼ per selezionare [Test immagini automatico].
2) Premere il pulsante .
3) Premere ▲▼ per commutare l'impostazione.
\- Premere il pulsante per uscire dalla modalità modifica.
[Off] Cancella la visualizzazione dello schema di test. [On] Visualizza lo schema di test.
Rr reimpostare un valore durante la regolazione
L'impostazione torna al valore precedente alla regolazione.
Il valore ritorna al valore standard salvato in [Memorizza].
1) Premere ▲▼ per selezionare [Azzera].
2) Premere il pulsante .
\- Viene visualizzata una schermata per confermare la reimpostazione.
3) Selezionare [Sí] e premere il pulsante .
- Viene visualizzata la schermata di conferma.
4) Selezionare [Sí] e premere il pulsante .
Fir registrare il contenuto regolato che è stato modificato
Registra i valori dopo la regolazione.
1) Premere ▲▼ per selezionare [Memorizza].
2) Premere il pulsante .
3) Selezionare [Sí] e premere il pulsante .
Fa tornare il proiettore al sottomenu.
1) Premere ▲▼ per selezionare [Indietro].
2) Premere il pulsante .
[Colorimetria avanzata]
Sono possibili impostazioni più avanzate di [Colorimetria].
1) Premere ▲▼ per selezionare [Colorimetria].
2) Premere il pulsante .
\- Visualizza la schermata di impostazione [Colorimetria].
3) Premere ▲▼ per selezionare [Colorimetria avanzata].
4) Premere il pulsante .
\- Visualizza la schermata di impostazione [Colorimetria avanzata].
5) Premere ▲▼ per commutare l'impostazione.
[Off] Quando non si è in modalità [Immagini test] o [Indietro], questa voce appare in grigio e non può essere selezionata. [On] Imposta la corrispondenza colori avanzata.
r controllare le impostazioni
Visualizza lo stato dell'impostazione di [Regolazione immagine].
1) Premere ▲▼ per selezionare [Valori misurati informazioni].
2) Premere il pulsante .
- Si può uscire dalle informazioni misurate premendo un pulsante qualsiasi.
- La voce selezionata viene visualizzata normalmente. Le altre voci sono in grigio.
- Per la voce che si sta regolando, viene visualizzato [Regola].
[Dinamica] [Predefinito] [Reale/Cinema]
■r controllare [Valori misurati]
Visualizza i dati per R/G/B.
1) Premere ▲▼ per selezionare il colore ([Rosso]/[Verde]/[Blu] in [Valori misurati]) da misurare.
2) Premere il pulsante .
3) Premere ▲▼ per cambiare il valore e premere ◀▶ per spostarsi fra le cifre.
- I valori numerici possono inoltre essere immessi usando i pulsanti numerici (<0>-<9>) del telecomando.
Colore x y L [Rosso] 0.000 - 1.000 0.000 - 1.000 0.000 - 1.000 [Verde] 0.000 - 1.000 0.000 - 1.000 0.000 - 1.000 [Blu] 0.000 - 1.000 0.000 - 1.000 0.000 - 1.000
Fir controllare [Valori finali]
1) Premere ▲▼ per selezionare il colore ([Rosso]/[Verde]/[Blu]/[Ciano]/[Magenta]/[Giallo]/[Bianco] in [Valori finali]) da misurare.
2) Premere il pulsante .
3) Premere ▲▼ per cambiare il valore e premere ◀▶ per spostarsi fra le cifre.
- I valori numerici possono inoltre essere immessi usando i pulsanti numerici (<0>-<9>) del telecomando.
- Il valore numerico cambia in base al valore di [Temp. colore] nel menu [Regolazione immagine].
Colore x y g [Rosso] 0.000 - 1.000 0.000 - 1.000 0.000 - 1.000 [Verde] 0.000 - 1.000 0.000 - 1.000 0.000 - 1.000 [Blu] 0.000 - 1.000 0.000 - 1.000 0.000 - 1.000 [Ciano] 0.000 - 1.000 0.000 - 1.000 0.000 - 1.000 [Magenta] 0.000 - 1.000 0.000 - 1.000 0.000 - 1.000 [Giallo] 0.000 - 1.000 0.000 - 1.000 0.000 - 1.000 [Bianco] 0.000 - 1.000 0.000 - 1.000 0.000 - 1.000
R visualizzare lo schema di test
1) Premere ▲▼ per selezionare [Test immagini automatico].
2) Premere il pulsante .
3) Premere ▲▼ per commutare l'impostazione.
\- Premere il pulsante per uscire dalla modalità modifica.
[Off] Cancella la visualizzazione dello schema di test. [On] Visualizza lo schema di test.
R cancellare temporaneamente la schermata configurazione
1) Premere ▲▼ per selezionare [Menu off].
2) Premere il pulsante .
\- Premere un pulsante qualsiasi per tornare alla schermata configurazione.
Fir effettuare l'impostazione [Impostazioni di fabbrica]
Quando [Valori misurati] e [Valori finali] attualmente selezionati vengono reimpostati, i valori tornano a quelli predefiniti di fabbrica.
1) Premere ▲▼ per selezionare [Impostazioni di fabbrica].
2) Premere il pulsante .
\- Viene visualizzata una schermata per confermare la reimpostazione ai valori predefiniti.
3) Selezionare [Sí] e premere il pulsante .
- Viene visualizzata la schermata di conferma.
4) Selezionare [Sí] e premere il pulsante .
R reimpostare un valore durante la regolazione
L'impostazione torna al valore precedente alla regolazione.
1) Premere ▲▼ per selezionare [Azzera].
2) Premere il pulsante .
3) Selezionare [Sí] e premere il pulsante .
R registrare il contenuto regolato che è stato modificato
Registra i valori dopo la regolazione.
1) Premere ▲▼ per selezionare [Memorizza].
2) Premere il pulsante .
3) Selezionare [Sí] e premere il pulsante .
R visualizzare lo schema di test
1) Premere ▲▼ per selezionare [Immagini test].
2) Premere il pulsante .
\- Visualizza la schermata di selezione dello schema di test.
3) Premere ▲▼ per selezionare un numero di programma da impostare e premere il pulsante .
- La schermata di selezione viene cancellata e viene visualizzato lo schema di test.
- Premere un pulsante qualsiasi per tornare alla schermata configurazione.
- Premere ▲▼ per selezionare [Indietro] e premere il pulsante per tornare alla schermata configurazione di [Colorimetria avanzata].
[Valori misurati] [Rosso]/[Verde]/[Blu] [Valori finali] [Rosso]/[Verde]/[Blu]/[Ciano]/[Magenta]/[Giallo]/[Bianco]
Fa tornare il proiettore al sottomenu.
1) Premere ▲▼ per selezionare [Indietro].
2) Premere il pulsante .
[HDMI]
Se non è possibile visualizzare correttamente un'immagine quando un dispositivo esterno viene connesso al proiettore mediante HDMI, cambiare le impostazioni.
1) Premere ▲▼ per selezionare [HDMI].
2) Premere il pulsante .
● Vengono visualizzate ▲▼ sul sottomenu.
3) Premere ▲▼ per commutare l'impostazione.
[Normale] [Avanzata]
[Normale] Selezionare quando l’uscita dal dispositivo esterno è “NORMAL*1”. [Avanzata] Selezionare quando l’uscita dal dispositivo esterno è “ENHANCED*1”.
*1: I tioli delle impostazioni dell'uscita cambiano in base al dispositivo. Per dettagli, vedere il manuale d'uso per i dispositivi esterni.
[Logo]
Imposta la selezione del logo e il codice PIN per la selezione del logo.
1) Premere ▲▼ per selezionare [Logo].
2) Premere il pulsante .
\- Viene visualizzato il sottomenu 2.
3) Premere ▲▼ per commutare l'impostazione.
[eleziona logo]
1) Selezionare [Seleziona logo] e premere il pulsante .
2) Premere ▲▼ per commutare l'impostazione.
\- L'impostazione cambia come segue ad ogni pressionde del pulsante.

[Off] Cancella il logo dallo schermo. [Utente] Visualizza l'immagine catturata dall'utente. [Installaz. di fabbrica] Viene visualizzato il valore predefinito dell'impostazione.
[attura]
Questa funzione consente di catturare un'immagine proiettata e di utilizzarla per la schermata di avvio o per lo sfondo.
1) Selezionare [Cattura] e premere il pulsante .
\- Viene visualizzata la schermata di conferma.
1) Premere ▲▼ per selezionare [Sí].
\- L'immagine proiettata viene catturata.
\- Selezionando [Utente] in [Seleziona logo], l'immagine catturata verrà visualizzata alla seguente accensione del proiettore.
Note
- La funzione di cattura viene cancellata quando si seleziona [Sì] nella schermata [Esci?].
- Prima di catturare un'immagine, selezionare [Predefinito] nel menu [Selezione immagine] per catturare un'immagine corretta. (→ pagina 47).
- Quando si cattura un'immagine che è stata regolata con la funzione trapezio, i dati della regolazione vengono automaticamente reimpostati e il proiettore cattura l'immagine senza correzione della distorsione trapezoidale.
- Quando [Blocca codice PIN logo] è impostato su [On], non è possibile selezionare [Cattura].
- Quando si avvia la cattura di una nuova immagine, l'immagine precedentemente archiviata viene eliminata anche se si annulla la cattura.
- Quando non vi è alcuna immagine catturata oppure quando viene interrotto il processo di cattura di un'immagine, non è possibile selezionare [Utente], ma è possibile soltanto commutare tra [Installaz. di fabbrica] e [Off].
[■occa codice PIN logo]
Imposta il sistema per effettuare l'impostazione e la variazione del "logo" solo da parte dell'amministratore.
1) Selezionare [Blocca codice PIN logo] e premere il pulsante .
\- Viene visualizzata la schermata di immissione del codice PIN.
2) Premere ▲▼◀▶ o i pulsanti numerici (<0> - <9>) per immettere il proprio codice PIN.
3) Premere ▲▼◀▶ per selezionare [Conferma].
4) Premere il pulsante .
\- Se il codice PIN viene accettato, il proiettore torna al sottomenu 2.
5) Premere ▲▼ per commutare l'impostazione.
[Off] [On]
[Off] La selezione del logo può essere cambiata senza il codice PIN. [On] La selezione del logo può essere cambiata solo inserendo il codice PIN.
Nota
- Il codice PIN immesso viene visualizzato sulla schermata con dei simboli *.
- Il valore predefinito dell'impostazione per il codice PIN del logo è "4321".
- Per immettere nuovamente un numero, premere ◀▶ per selezionare la cifra da immettere nuovamente, quindi usare ▲▼ o i pulsanti numerici (<0> - <9>) per selezionare di nuovo il numero.
- Spostare il cursose a [Annulla] e premere il pulsante per tornare al sottomenu 2.
- Se [Codice PIN logo] ed il numero vengono visualizzati in rosso, si è verificato un errore. Immettere nuovamente il numero.
[■ambia codice PIN logo]
Cambia il codice PIN del logo.
1) Selezionare [Cambia codice PIN logo] e premere il pulsante .
\- Viene visualizzata la schermata di immissione del codice PIN.
2) Premere ▲▼◀▶ o i pulsanti numerici (<0> - <9>) per immettere il proprio codice PIN.
3) Premere ▲▼◀▶ per selezionare [Conferma].
4) Premere il pulsante .
\- Se il codice PIN è accettato, il nuovo codice PIN del logo viene visualizzato sullo schermo.
5) Premere ▲▼◀▶ o i pulsanti numerici (<0> - <9>) per impostare il nuovo codice PIN.
6) Premere il pulsante .
7) Selezionare [Sí] e premere il pulsante .
\- Se il codice PIN viene accettato, il proiettore torna al sottomenu 2.
Nota
● Per immettere nuovamente un numero, premere
◀▶ per selezionare la cifra da immettere
nuovamente, quindi usare ▲▼ o i pulsanti numerici (<0> - <9>) per selezionare di nuovo il numero.
- Spostare il cursose a [Annulla] e premere il pulsante per tornare al sottomenu 2.
[Controllo ventola]
Il proiettore controlla automaticamente la rotazione della ventola. È possibile aumentare l'intensità di rotazione della ventola in base alla temperatura dell'ambiente o al luogo di installazione del proiettore (ad esempio, quando viene usato a grandi altezze).
1) Premere ▲▼ per selezionare [Controllo ventola].
2) Premere il pulsante . Vengono visualizzate ▲▼ sul sottomenu 2.
3) Premere ▲▼ per commutare l'impostazione.
[Normale] [Massimo]→
[Normale] Controlla automaticamente il funzionamento della ventola. [Massimo] Forza la ventola a funzionare alla massima intensità. In tal caso il suono della ventola sarà maggiore rispetto a quando si usa [Normale].
[Telecomando]
Permette un controllo simultaneo o individuale con un singolo telecomando quando sono usati più proiettori affiancati.
1) Premere ▲▼ per selezionare [Telecomando].
2) Premere il pulsante . Vengono visualizzate ▲▼ sul sottomenu.
3) Premere ▲▼ per selezionare la voce desiderata.
● Il valore predefinito dell'impostazione è [Tutti].
[Tutti] Fa accettare al proiettore comandi da parte di un telecomando con un qualsiasi numero di ID. [Code 01] - [Code 64] Imposta i numeri ID del proiettore da 1 a 64.
4) Premere il pulsante .
5) Selezionare [Sí] e premere il pulsante .
● [Telecomando] cambia.
- Fa tornare il proiettore al sottomenu.
Nota
- Quando il numero di ID del proiettore viene cambiato, il numero di ID del telecomando deve essere cambiato per corrispondere a quello del proiettore.
- Se un proiettore viene impostato a [Tutti] durante l'uso con più proiettori, esso non può essere controllato separatamente dai proiettori con altri numeri di ID.
[Sensore telecomando]
Abilita e disabilita il sensore del telecomando sul corpo del proiettore.
1) Premere ▲▼ per selezionare [Sensore telecomando].
2) Premere il pulsante .
- Viene visualizzato il sottomenu 2.
3) Premere ▲▼ per commutare l'impostazione.
[Tutti] Abilita i sensori del telecomando in tre posizioni. [Anteriore e sopra] Abilita solo i sensori del telecomando sulla parte frontale e superiore del corpo del proiettore. [Sopra e posteriore] Abilita solo i sensori del telecomando sulla parte superiore e inferiore del corpo del proiettore. [Anteriore e posteriore] Abilita solo i sensori del telecomando sulla parte frontale e posteriore del corpo del proiettore. [Anteriore] Abilita solo il sensore del telecomando sulla parte frontale del corpo del proiettore. [Sopra] Abilita solo il sensore del telecomando sulla parte superiore del corpo del proiettore. [Posteriore] Abilita solo il sensore del telecomando sulla parte posteriore del corpo del proiettore.
Nota
\- Se il proiettore è installato in posizione verticale piuttosto che su un supporto a soffitto, la luce fluorescente potrebbe interferire con il funzionamento del telecomando quando il sensore di controllo del telecomando sul lato superiore del corpo del proiettore è abilitato. Si consiglia di disabilitare il sensore superiore del telecomando (selezionare uno qualsiasi di [Anteriore e posteriore], [Anteriore], [Posteriore]) quando il proiettore è installato in posizione verticale.
[Risparmio energetico]
1) Premere ▲▼ per selezionare [Risparmio energetico].
2) Premere il pulsante .
\- Viene visualizzato il sottomenu 2.
3) Premere ▲▼ per commutare l'impostazione.
[Off] Disabilita la funzione di gestione alimentazione. [Pronto] Spegne le lampade e avvia il raffreddamento quando è trascorso il tempo impostato usando [Timer]. Mentre la lampada viene raffreddata, l'indicatore di standbye l'indicatore di alimentazinelampeggiano e non è possibile adoperare il proiettore.Quando il raffreddamento della lampada è terminato, l'indicatore di alimentazetecontinua a lampeggiare e l'indicatore standbysi accende invece di lampeggiare, indicando che il proiettore è ora nel modo di gestione alimentazione.Da questo momento, se viene immesso un segnale o se vengono effettuate operazioni sul proiettore, le lampade si accenderanno e verrà avviata la proiezione. [Spegnere] Spegne le lampade e avvia il raffreddamento quando è trascorso il tempo impostato usando [Timer]. Durante il raffreddamento della lampada non è possibile adoperare il proiettore.Quando il raffreddamento della lampada termina, l'alimentazione viene disabilitata. [Timer] È possibile impostare tempi da 1 a 30 minuti.
Nota
- Il valore predefinito dell'impostazione è [Off].
- La funzione di gestione dell'alimentazione non può essere usata quando è usata la funzione di blocco (→ pagina 35) o la funzione di scatto (→ pagina 35).
- Quando viene avviata la funzione di gestione alimentazione, [Timer presentazione] viene reimpstato.
Questa funzione serve a commutare automaticamente l'alimentazione del proiettore quando viene collegato il cavo di alimentazione del proiettore, senza richiedere operazioni del pulsante di alimentazione sul telecomando o del pulsante di alimentazione del pannello di controllo.
1) Premere ▲▼ per selezionare [Accensione immediata].
2) Premere il pulsante . Vengono visualizzate ▲▼ sul sottomenu 2.
3) Premere ▲▼ per commutare l'impostazione.
[Off] [On]
[Off] Abilita le normali operazioni per accendere/spegnere il proiettore. [On] Permette l'accensione automatica.
Nota
- Assicurarsi di accendere/spegnere effettuando le operazioni corrette.
- La pressionde del pulsante di alimentazione sul telecomando o del pulsante di alimentazione sul proiettore non accenderà il proiettore prima che il raffreddamento della lampada non sia terminato e che le lampade siano di nuovo pronte per l'accensione.
[Sicurezza]
Blocca le operazioni del proiettore tramite il blocco dei pulsanti ed il codice PIN.
1) Premere ▲▼ per selezionare [Sicurezza].
2) Premere il pulsante .
\- Viene visualizzato il sottomenu 2.
3) Premere ▲▼ per selezionare la voce desiderata.
[occo comandi]
Blocca i pulsanti di controllo per evitare operazioni errate del proiettore.
1) Selezionare [Blocco comandi] e premere il pulsante .
● Vengono visualizzate ▲▼ sul sottomenu 2.
2) Premere ▲▼ per commutare l'impostazione.
\- L'impostazione cambia come segue ad ogni pressionde del pulsante.




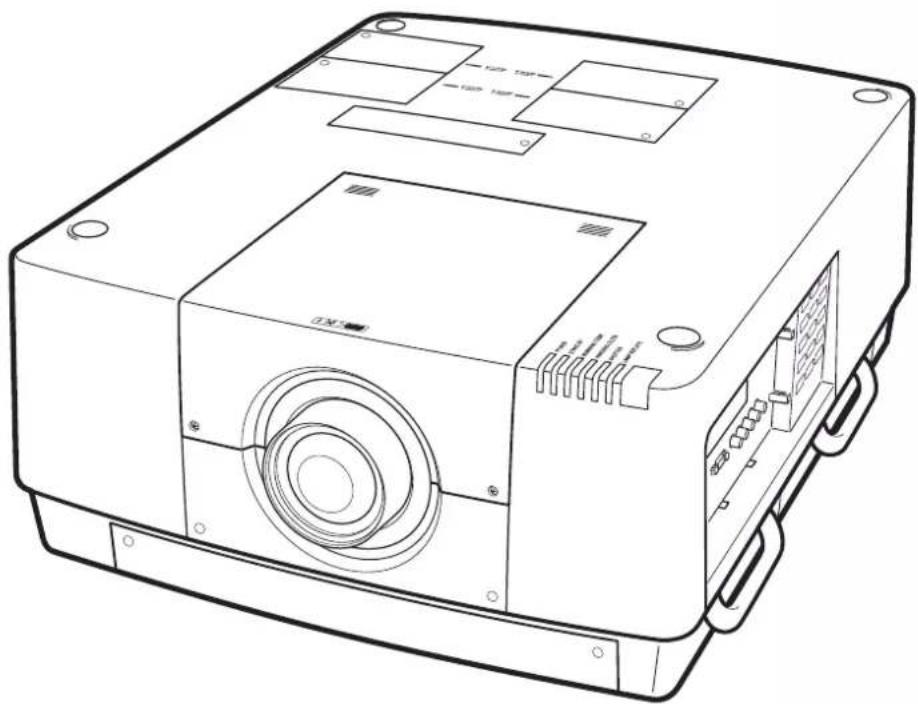


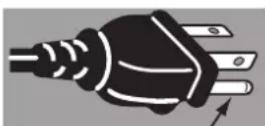
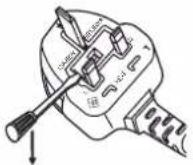
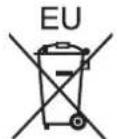
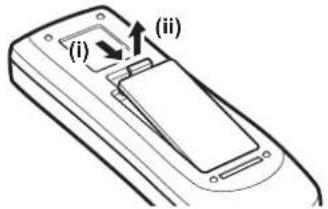
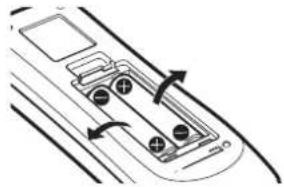
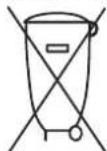
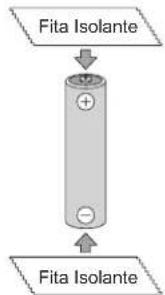
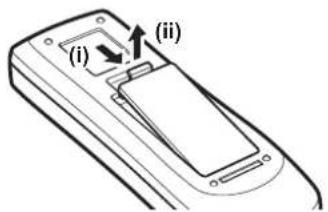
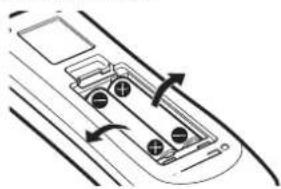





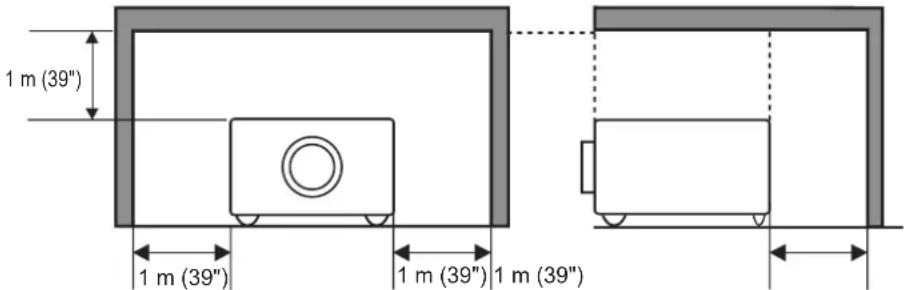


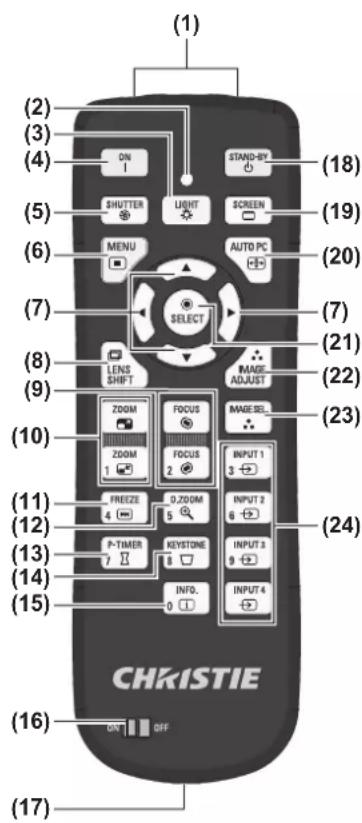
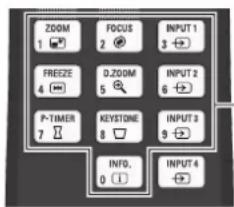
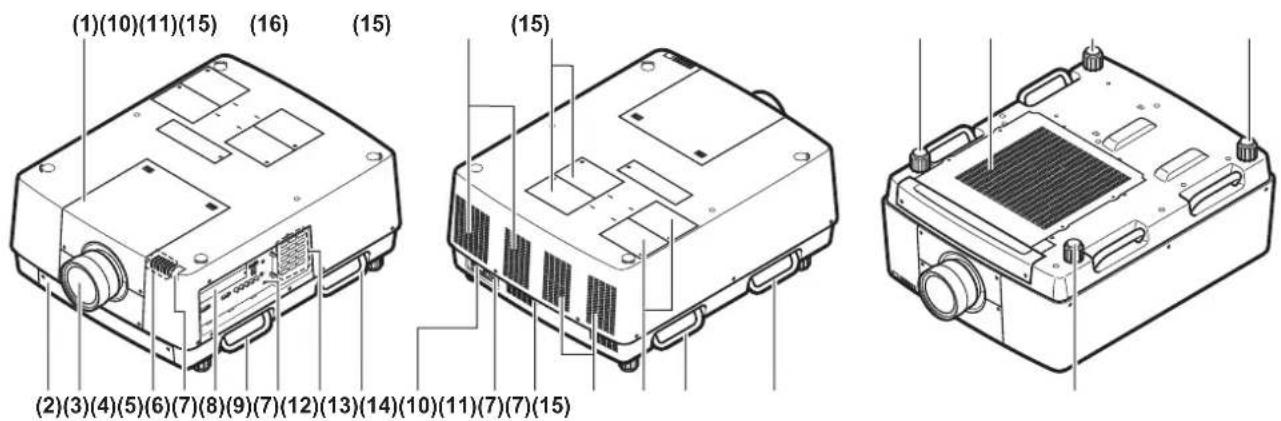
![graph TD A["ON/STAND-BY"] --> B["SHUTTER"] B --> C["LIGHT"] C --> D["(8)"] E["ZOOM"] --> F["FOCUS"] F --> G["LENS SHIFT"] G --> H["(9)"] I["MENU"] --> J["INPUT"] J --> K["(10)"] L["SELECT"] --> M[">"] M --> N["(6)"] O["AUTO PC ADJ."] --> P["INFORMATION"] P --> Q["(12)"]](/content/2026/03/531389/images/825482c68bfabc043804c6911928d71f8ec64781ea92e494a55f785f6cc1f9d4.jpg)
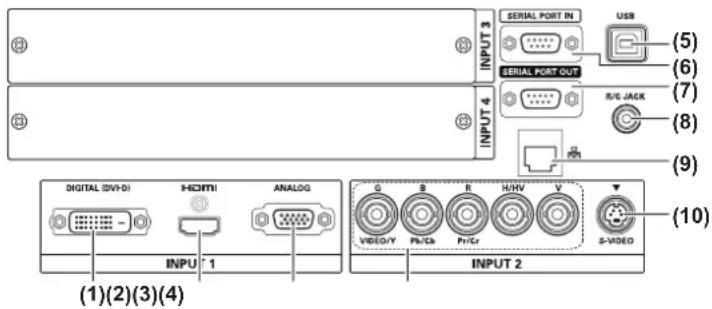
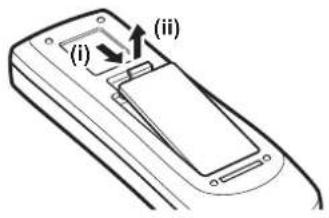

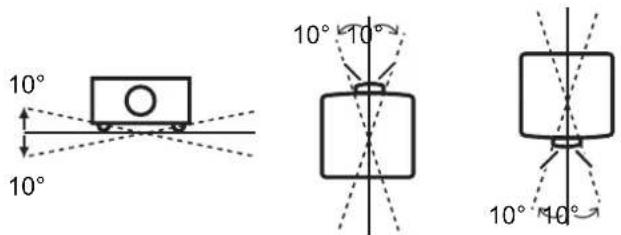

![graph TD A["Computer"] --> B["Serial cable (crossed)"] B --> C["To <SERIAL PORT IN> terminal"] B --> D["BNC cable"] D --> E["To <G,B,R,H/V,V IN> terminal"] B --> F["To monitor output"] F --> G["D-sub cable"] G --> H["To monitor output"] H --> I["To <ANALOG IN> terminal"] H --> J["DVI/HDMI cable"] J…](/content/2026/03/531389/images/391ad66bdf19edc6f56315c6c4fde3ca0e44898763f1cc1c04400ac40d3488cc.jpg)
![graph TD A["S-video cable"] -->|To <S-VIDEO IN> terminal| B["Terminal"] C["BNC cable"] -->|To <Y,Pb/Cb,Pr/Cr IN> terminal| B D["To component video output"] -->|To <VIDEO IN> terminal| B E["HDMI cable"] -->|To <HDMI IN> terminal| B F["DVI-D cable"] -->|To <DIGITAL (DVI-D) IN> terminal| B G["To compos…](/content/2026/03/531389/images/47b49e9fb98bc3b7cd07c1e8811c7c71ffa0d2b96dc64ed7cd0238d735c8cb22.jpg)
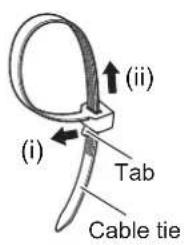
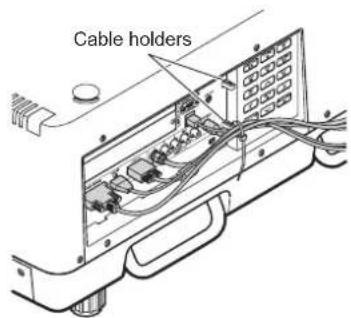
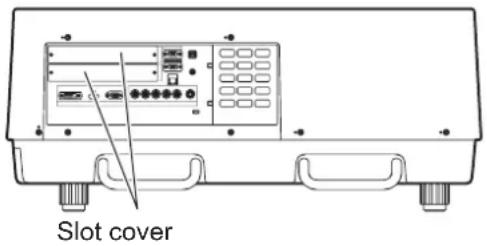
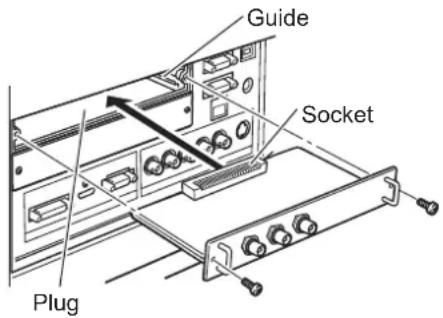
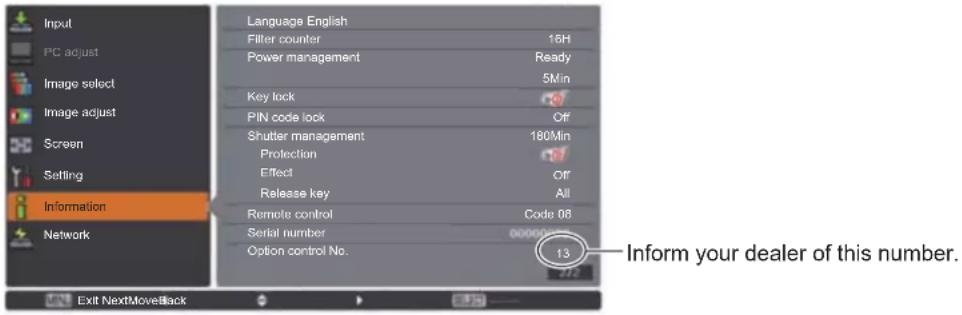
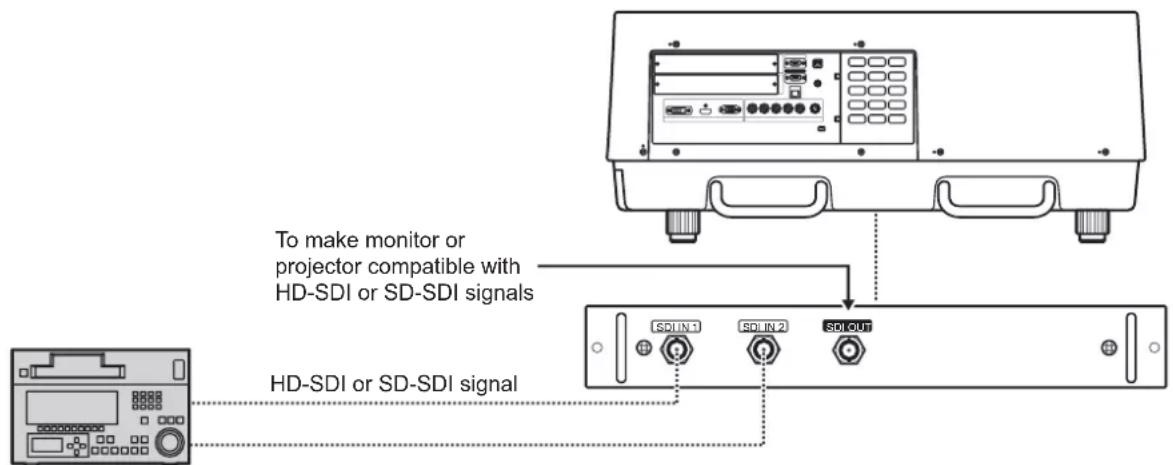
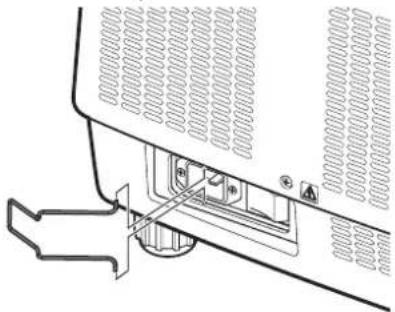
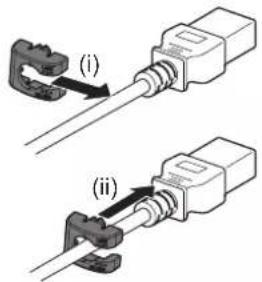
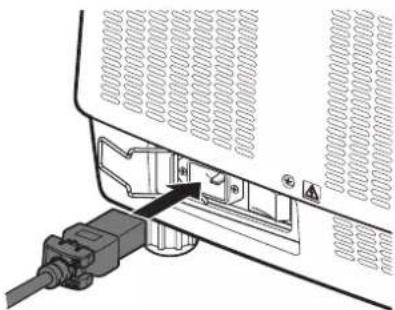
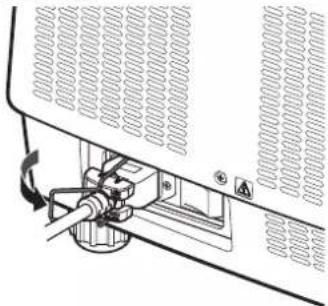
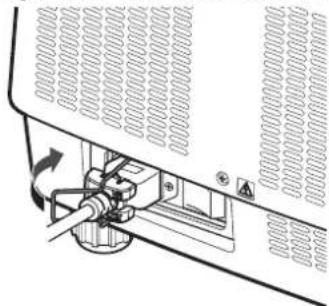
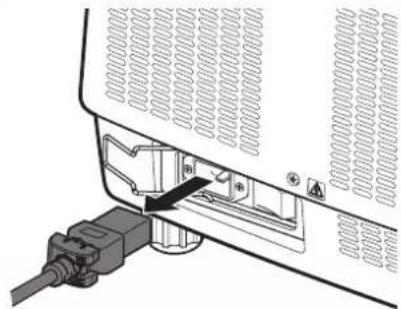
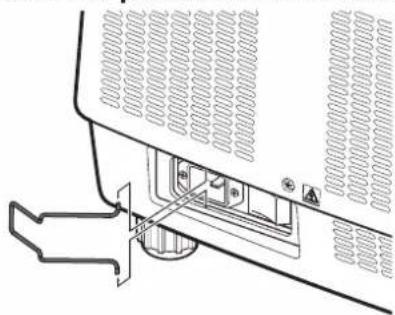
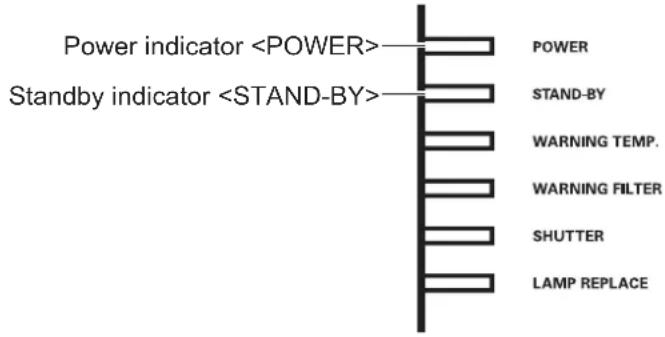
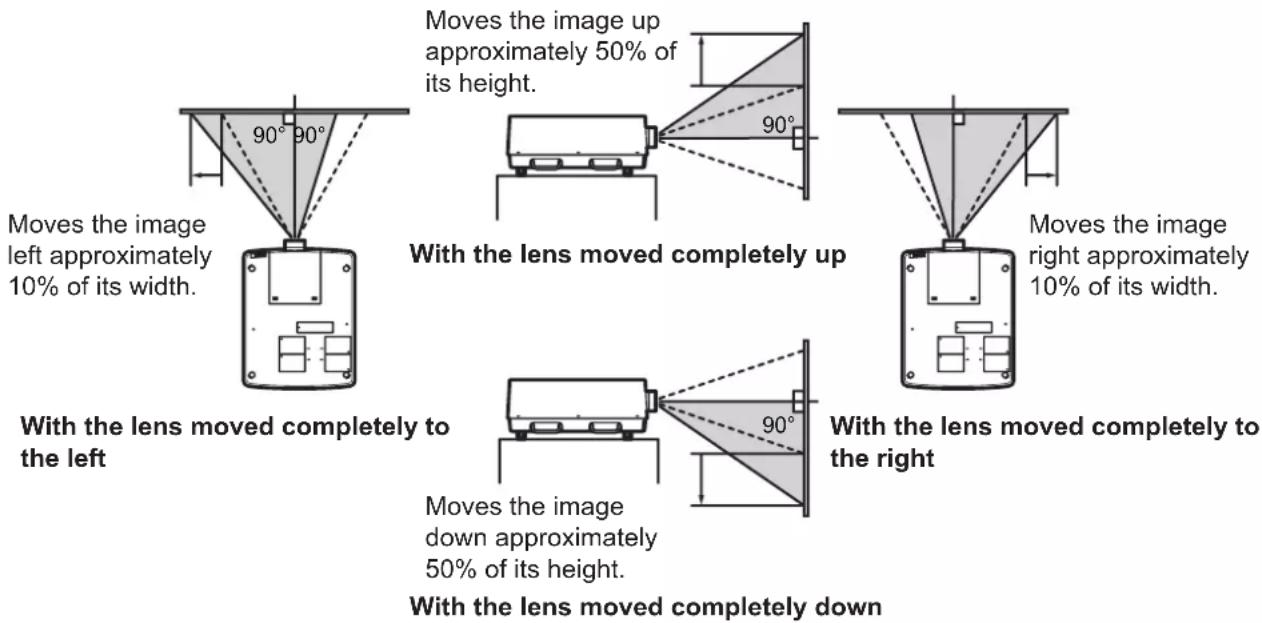
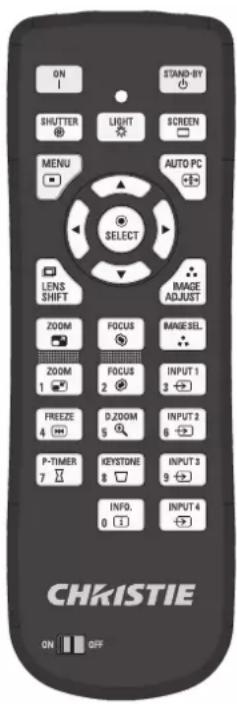


![graph TD A["[RGB(PC analog)"]] --> B["[RGB(Scart)"]] [Y,Pb/Cb,Pr/Cr] B --> C["[RGB(PC digital)"]] [Video] C --> D["[RGB(AV HDCP)"]] [S-video] D --> E["[HDMI"]] F["[RGB"]] --> G["Output"] H["[RGB"] --> I["Output"]](/content/2026/03/531389/images/95f267d58dcf74a65148806ffeb39a730948419fd7eb7dbfa875c2b7369efd14.jpg)
![graph TD A["<For computer input>"] --> B["[Standard"]] B --> C["[Real"] [Cinema]] C --> D["[Dynamic"] [Dynamic]] D --> E["[Image 1"] -["Image 10"]] F["<For video input>"] --> G["[Standard"]] G --> H[" "] H --> I["[Image 1"] -["Image 10"]] I --> J[" "] J --> K["[Dynamic"] ] K --> L["[Image 1"] -["Ima…](/content/2026/03/531389/images/b2d95b8b7434548cac220c5eef0b90e313d7b12fa2fad33a3dd0687b6282747b.jpg)

![graph TD A["<For computer input>"] --> B["[Normal"]] B --> C["[Full"] [Full]] C --> D["[Wide(16:9)"] [Wide(16:9)]] D --> E["[Zoom"] [Zoom]] E --> F["[True"] [Custom]] F --> G["[Custom"]] H["<For video input>"] --> I["[Normal"]] I --> J[" "] J --> K[" "] K --> L[" "] L --> M[" "] M --> N[" "] N --> O…](/content/2026/03/531389/images/a410111e7cebf6f2563109461a38ae1f9cfdd1aff0caacb0903f808ca74f316a.jpg)