FOIRE AUX QUESTIONS - R7060 WOOX
Comment installer le programmateur R7060 ?
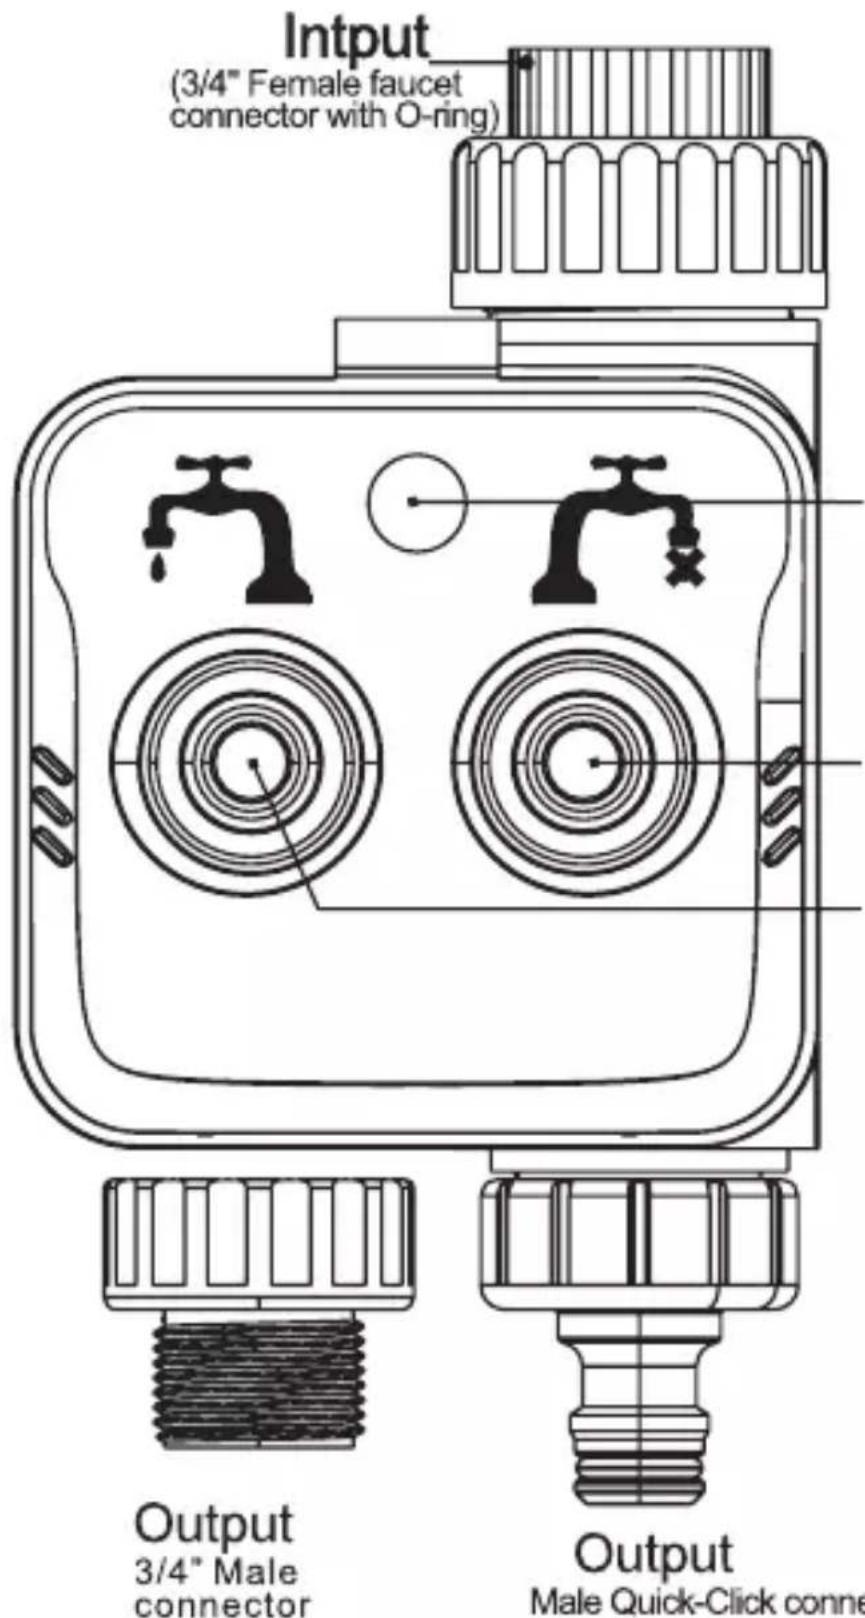
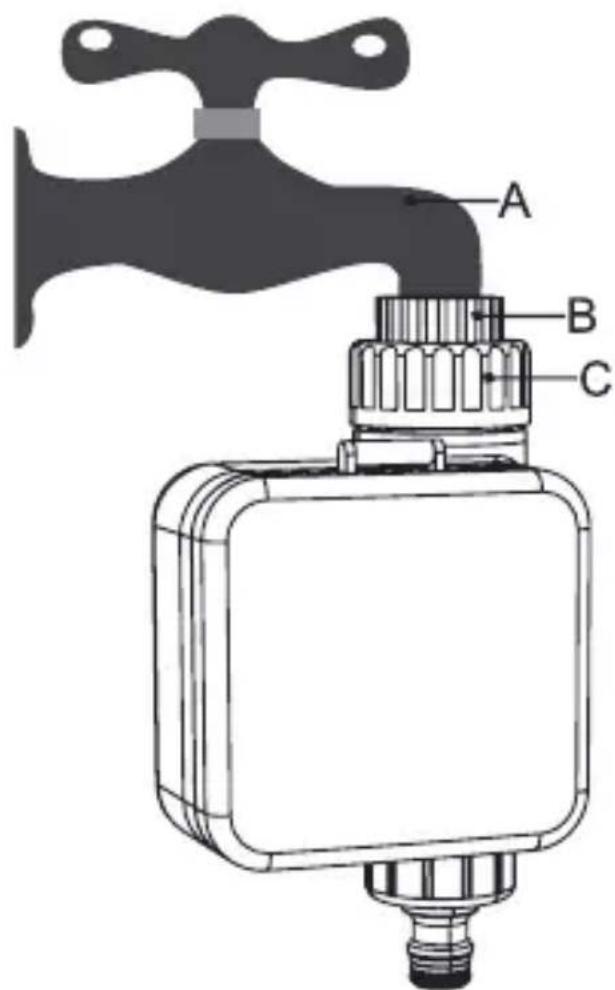
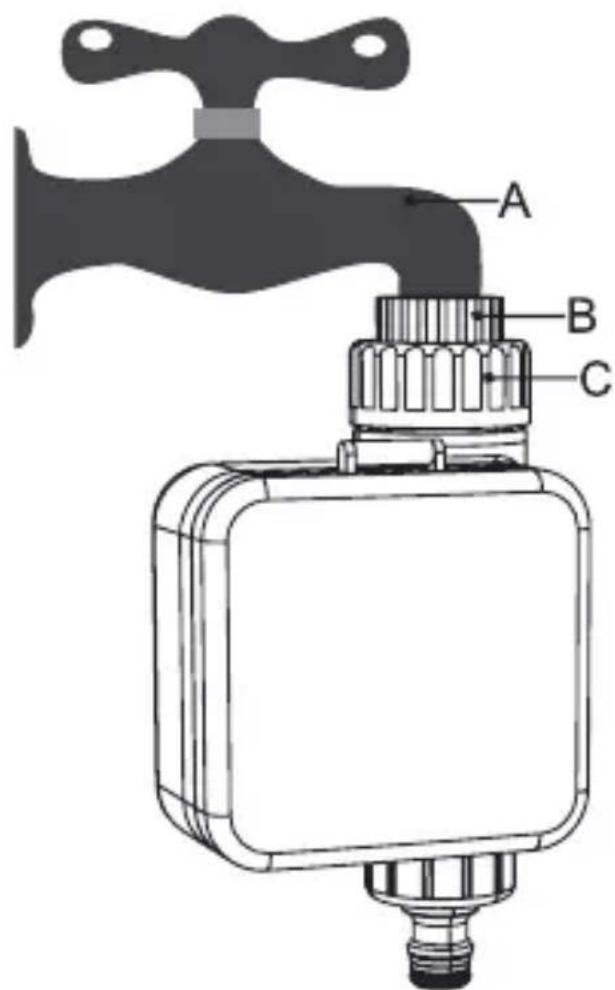
Fixez le programmateur sur un robinet extérieur en utilisant le raccord femelle 3/4" avec joint torique. Assurez-vous que le joint est bien en place pour éviter les fuites. Vissez ensuite le tuyau d'arrosage sur la sortie mâle ou Quick-Click.
Quel type de piles utiliser ?
Utilisez deux piles alcalines AA 1,5V. Ne mélangez pas piles neuves et usagées. Remplacez-les chaque saison ou en cas d'affichage faible.
Comment programmer les horaires d'arrosage ?
Appuyez sur le bouton PROGRAM pour accéder aux réglages. Utilisez les flèches pour régler l'heure de début, la durée (1 min à 3 h) et les jours de la semaine. Validez avec OK.
Que faire si le programmateur ne s'allume pas ?
Vérifiez que les piles sont correctement insérées (respectez la polarité). Si l'écran reste vide, remplacez les piles. Si le problème persiste, contactez le service après-vente.
Comment nettoyer le filtre ?
Dévissez le capuchon du filtre situé à l'entrée d'eau. Retirez le filtre et rincez-le à l'eau claire. Replacez-le et revissez fermement. Effectuez cette opération au moins une fois par mois.
Puis-je utiliser le R7060 avec un récupérateur d'eau de pluie ?
Oui, à condition que la pression d'eau soit suffisante (minimum 0,5 bar). Si la pression est trop faible, le programmateur risque de ne pas s'ouvrir correctement.
Que faire en cas de fuite au niveau des raccords ?
Vérifiez que les joints toriques sont en bon état et bien positionnés. Resserrez les raccords manuellement sans forcer. Si la fuite persiste, remplacez les joints.
Le programmateur est-il résistant au gel ?
Oui, il dispose d'une fonction antigel qui ferme automatiquement la vanne en cas de température proche de 0°C. Cependant, il est recommandé de le rentrer en hiver.
Combien de zones peut-il gérer ?
Ce modèle est conçu pour une seule zone de jardin. Pour plusieurs zones, vous aurez besoin d'un programmateur multizones ou d'un dispositif supplémentaire.
Comment réinitialiser les réglages d'usine ?
Appuyez simultanément sur les boutons PROGRAM et OK pendant 5 secondes. L'écran affichera CLR puis les réglages par défaut seront restaurés. Les piles doivent être en place.
MODE D'EMPLOI R7060 WOOX

W00X

natural_image
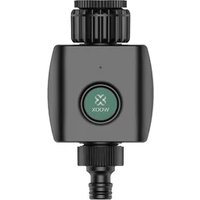
Green industrial water pump device with black fittings and a small pipe fitting (no visible text or symbols)
If necessary, you can change Male Quick-Click connector to 3/4" Male connector
English
English
English
STEP2.
natural_image
Illustration of hands assembling or adjusting a mechanical component (no text or symbols visible)
STEP3.
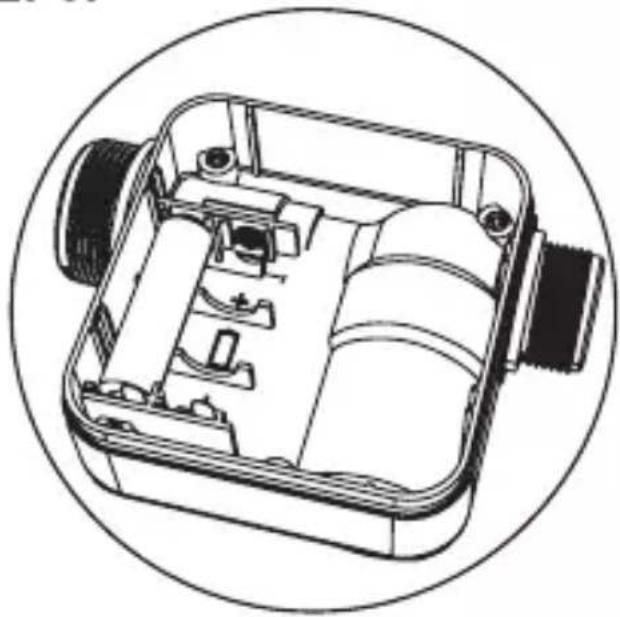
natural_image
Technical line drawing of a mechanical device with internal components, enclosed in a circular frame (no text or symbols)
English
STEP4.

natural_image
Illustration of hands assembling or adjusting a mechanical component, no text or symbols present
English
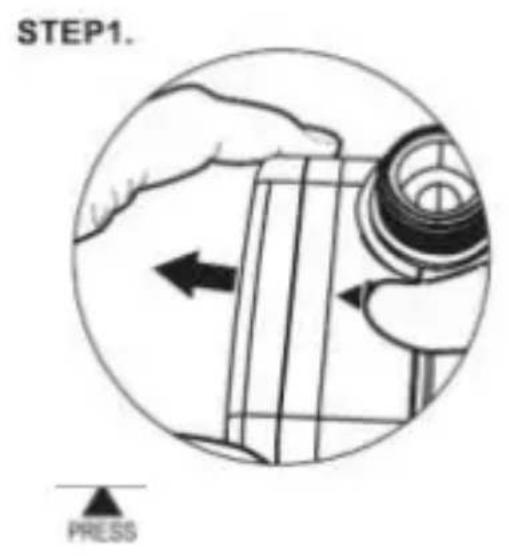
STEP1.

natural_image
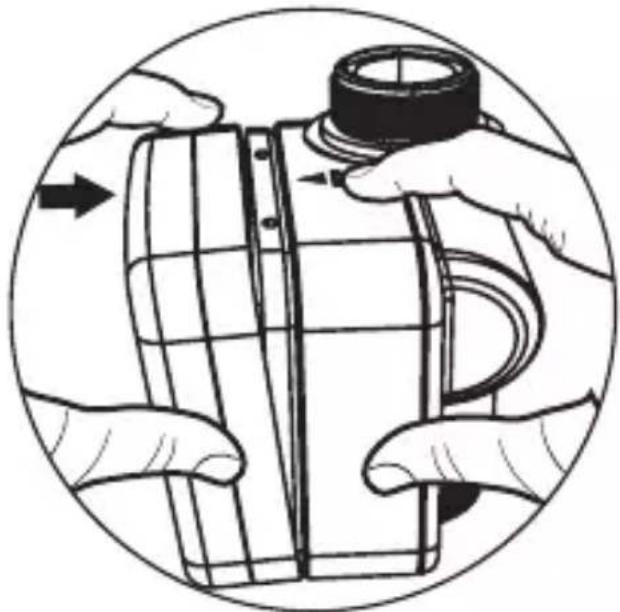
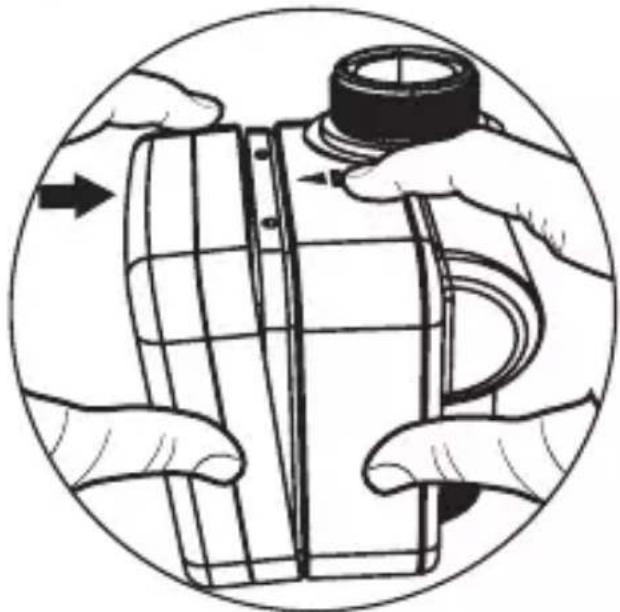
Illustration of a hand holding a mechanical component with an arrow indicating direction (no text or symbols present)

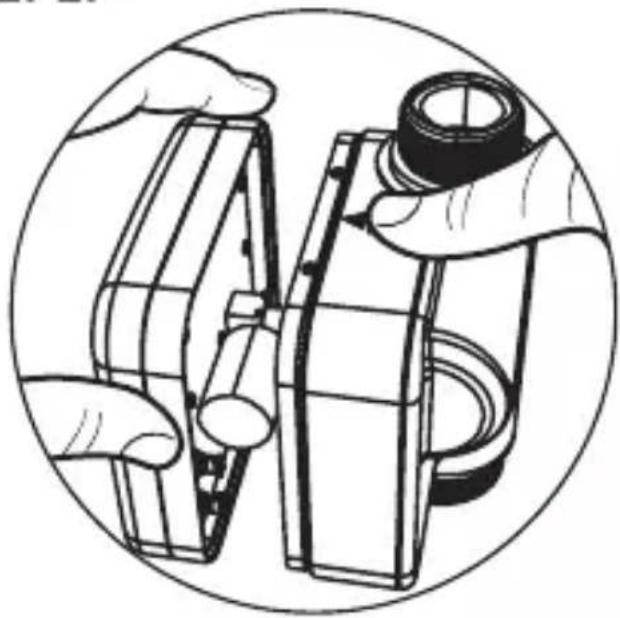
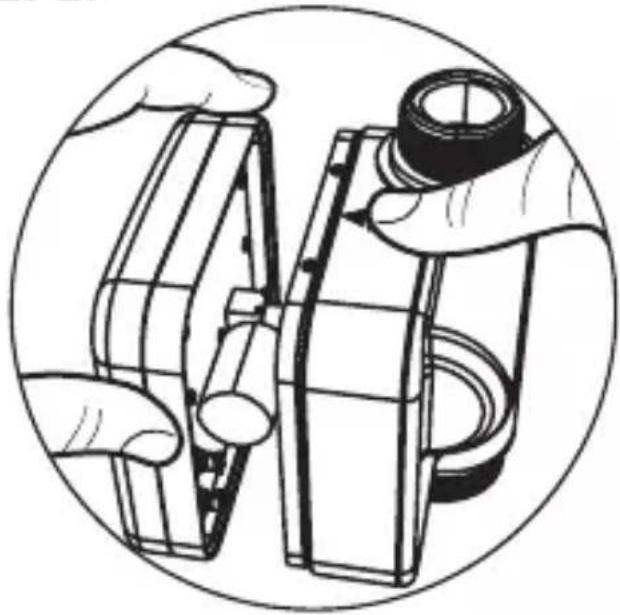
STEP2.

natural_image
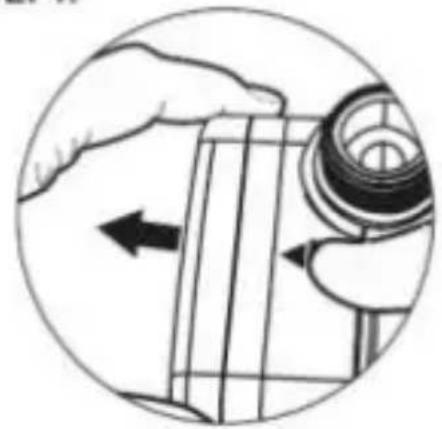
Illustration of hands assembling or adjusting a mechanical component, enclosed in a circular frame (no text or symbols)
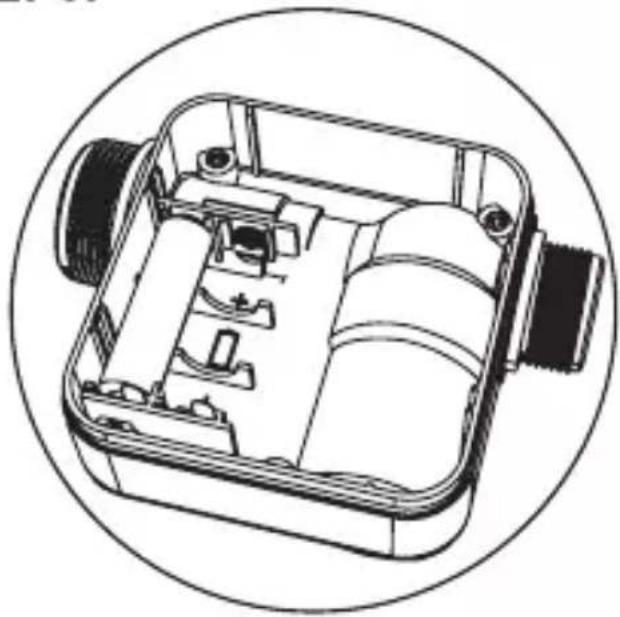
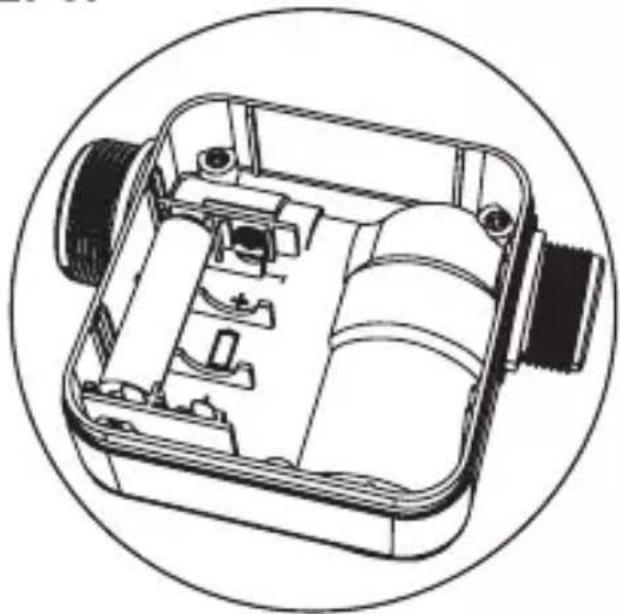
STEP3.

natural_image
Technical line drawing of a mechanical device with internal components, enclosed in a circular frame (no text or symbols)
STEP4.

natural_image
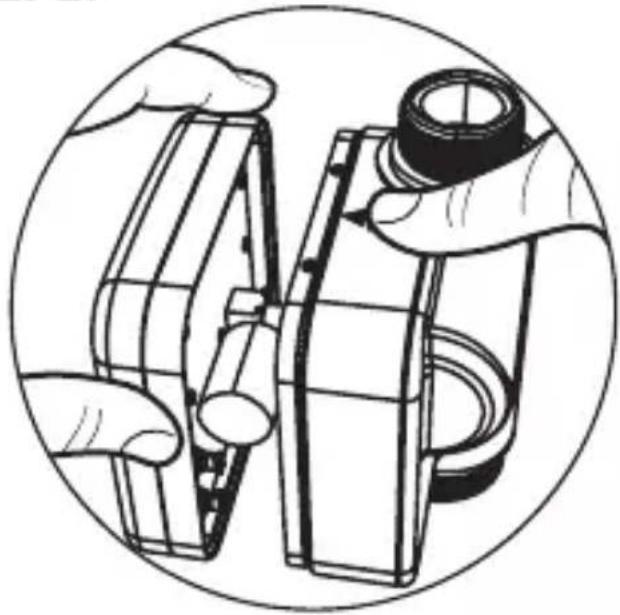
Illustration of hands assembling a cylindrical object with a cap, enclosed in a circular frame (no text or symbols)

STEP1.

natural_image
Illustration of a hand holding a mechanical component with an arrow indicating direction (no text or symbols present)

STEP2.

natural_image
Illustration of hands assembling or adjusting a mechanical component, enclosed in a circular frame (no text or symbols)
STEP3.

natural_image
Technical line drawing of a mechanical device with internal components, enclosed in a circular frame (no text or symbols)
STEP4.

natural_image
Illustration of hands assembling a cylindrical object with a cap, enclosed in a circular frame (no text or symbols)

STEP1.

natural_image
Illustration of a hand holding a mechanical component with an arrow indicating direction (no text or symbols present)

STEP2.

natural_image
Illustration of hands assembling or adjusting a mechanical component (no text or symbols visible)
STEP3.
natural_image
Technical line drawing of a mechanical device with internal components, enclosed in a circular frame (no text or symbols)
STEP4.

natural_image
Illustration of hands assembling a cylindrical object with a cap, enclosed in a circular frame (no text or symbols)

STEP1.

natural_image
Illustration of a hand holding a mechanical component with an arrow indicating direction (no text or symbols present)

STEP2.

natural_image
Illustration of hands assembling or adjusting a mechanical component, enclosed in a circular frame (no text or symbols)
STEP3.

natural_image
Technical line drawing of a mechanical device with internal components, enclosed in a circular frame (no text or symbols)
STEP4.

natural_image
Illustration of hands assembling a cylindrical object with a cap, enclosed in a circular frame (no text or symbols)
STEP1.

natural_image
Illustration of a hand holding a mechanical component with an arrow indicating direction (no text or symbols present)

STEP2.

natural_image
Illustration of hands assembling or adjusting a mechanical component, enclosed in a circular frame (no text or symbols)
STEP3.

natural_image
Technical line drawing of a mechanical device with internal components, enclosed in a circular frame (no text or symbols)
STEP4.
natural_image
Illustration of hands assembling a cylindrical object with a cap, enclosed in a circular frame (no text or symbols)

STEP1.

natural_image
Illustration of a hand holding a mechanical component with an arrow indicating direction (no text or symbols present)

STEP2.

natural_image
Illustration of hands assembling or adjusting a mechanical component, enclosed in a circular frame (no text or symbols)
STEP3.

natural_image
Technical line drawing of a mechanical device with internal components, enclosed in a circular frame (no text or symbols)
STEP4.

natural_image
Illustration of hands assembling or adjusting a mechanical component, no text or symbols present

STEP1.
natural_image
Illustration of a hand holding a mechanical component with an arrow indicating direction (no text or symbols present)

STEP2.

natural_image
Illustration of hands assembling or adjusting a mechanical component, enclosed in a circular frame (no text or symbols)
STEP3.

natural_image
Technical line drawing of a mechanical device with internal components, enclosed in a circular frame (no text or symbols)
STEP4.
natural_image
Illustration of hands assembling or adjusting a mechanical component, no text or symbols present

STEP1.

natural_image
Illustration of a hand holding a mechanical component with an arrow indicating direction (no text or symbols present)

STEP2.

natural_image
Illustration of hands assembling or adjusting a mechanical component, enclosed in a circular frame (no text or symbols)
STEP3.

natural_image
Technical line drawing of a mechanical device with internal components, enclosed in a circular frame (no text or symbols)
STEP4.

natural_image
Illustration of hands assembling a cylindrical object with a cap, enclosed in a circular frame (no text or symbols)

STEP1.

natural_image
Illustration of a hand holding a mechanical component with an arrow indicating direction (no text or symbols present)

STEP2.
natural_image
Illustration of hands assembling or adjusting a mechanical component, enclosed in a circular frame (no text or symbols)
STEP3.

natural_image
Technical line drawing of a mechanical device with internal components, enclosed in a circular frame (no text or symbols)
STEP4.

natural_image
Illustration of hands assembling a cylindrical object with a cap, enclosed in a circular frame (no text or symbols)

STEP1.

natural_image
Illustration of a hand holding a mechanical component with an arrow indicating direction (no text or symbols present)

STEP2.

natural_image
Illustration of hands assembling or adjusting a mechanical component, enclosed in a circular frame (no text or symbols)
STEP3.

natural_image
Technical line drawing of a mechanical device with internal components, enclosed in a circular frame (no text or symbols)
STEP4.

natural_image
Illustration of hands assembling a cylindrical object with a cap, enclosed in a circular frame (no text or symbols)

STEP1.

natural_image
Illustration of a hand holding a mechanical component with an arrow indicating direction (no text or symbols present)

STEP2.
natural_image
Illustration of hands assembling or adjusting a mechanical component, no text or symbols present
STEP3.

natural_image
Technical line drawing of a mechanical device with internal components, enclosed in a circular frame (no text or symbols)
STEP4.

natural_image
Illustration of hands assembling a cylindrical object with a cap, enclosed in a circular frame (no text or symbols)

STEP1.

natural_image
Illustration of a hand holding a mechanical component with an arrow indicating direction (no text or symbols present)

STEP2.

natural_image
Illustration of hands assembling or adjusting a mechanical component, enclosed in a circular frame (no text or symbols)
STEP3.

natural_image
Technical line drawing of a mechanical device with internal components, enclosed in a circular frame (no text or symbols)
STEP4.

natural_image
Illustration of hands assembling a cylindrical object with a cap, enclosed in a circular frame (no text or symbols)

STEP1.

natural_image
Illustration of a hand holding a mechanical component with an arrow indicating direction (no text or symbols present)

STEP2.

natural_image
Illustration of hands assembling or adjusting a mechanical component, enclosed in a circular frame (no text or symbols)
STEP3.
natural_image
Technical line drawing of a mechanical device with internal components, enclosed in a circular frame (no text or symbols)
STEP4.

natural_image
Illustration of hands assembling a cylindrical object with a cap, enclosed in a circular frame (no text or symbols)