M7-i - Tablet Multilaser - Free user manual and instructions
Find the device manual for free M7-i Multilaser in PDF.


| Type de produit | Tablet |
| Brand | Multilaser |
| Modèle | M7-i |
| Taille d'écran | 7 pouces |
| Résolution d'écran | 1024 x 600 pixels |
| Processeur | Quad-core 1.3 GHz |
| RAM | 1 Go |
| Stockage interne | 8 Go |
| Caméra avant | 0.3 MP |
| Caméra arrière | 2 MP |
| Connectivité | Wi-Fi 802.11 b/g/n, Bluetooth 4.0 |
| Batterie | 3000 mAh |
| Système d'exploitation | Android 8.1 Go Edition |
| Poids | 310 g |
| Dimensions (L x P x H) | 192 x 115 x 10.5 mm |
| Alimentation | 5 V, 1 A via micro USB |
| Fonctions principales | Lecture multimédia, navigation web, jeux, applications éducatives |
| Entretien et nettoyage | Essuyer avec un chiffon doux et sec. Ne pas utiliser de produits abrasifs. |
| Sécurité | Éviter les chocs, l'humidité et les températures extrêmes. |
| Pièces détachées et réparabilité | Les pièces détachées ne sont pas fournies. Contactez le service client. |
Frequently Asked Questions - M7-i Multilaser
User questions about M7-i Multilaser
0 question about this device. Answer the ones you know or ask your own.
Ask a new question about this device
Download the instructions for your Tablet in PDF format for free! Find your manual M7-i - Multilaser and take your electronic device back in hand. On this page are published all the documents necessary for the use of your device. M7-i by Multilaser.
USER MANUAL M7-i Multilaser
natural_image
Abstract geometric logo design with gradient shading, no text or symbols presentMULTILASER
MANUAL DE INSTRUÇÕES
TABLET M7-i
INDICE | PORTUGUÊS
This warranty does not cover any defect for bad use or natural wear, or even IF it is not used according to our guidelines.
This warranty does not cover any defect caused by use of non original or non compatible peripherals and third party software installation.
In case this product has a factory defect, since you can prove it, Multilaser is compromises to fix it or replace your product.
The below cases are not covered by this warranty:
. Natural use
. Damages caused by liquids, high temperature (Hot or cold)
. Oxidation or fungus
. Shocks
. Impacts
. Damages caused t LCD because of bad use, pressing, shock or humidity
This product is warranty covered for the period of 12 months and the accessories that are included in this kit are covered for 3 months from the acquisition day on.
This certified is only valid under the presentation of the purchase receipt.
1. Usage Tips
For your safety and better conservation of the product, do not let your device take rain, humidity, sunlight, excessive heat. Do not disassemble the device, it will result in loss of warranty and can also affect your safety.
2. Cleaning your product
In order to clean the screen or other parts, always use soft cloth, avoid the use of gauze or rough cloth and other rough papers, this can scratch your device.
3. Turning your Tablet
In order to power on your tablet, press the POWER button for 3 Seconds.
To turn it off, press the POWER button for 3 seconds, select OK in the screen that appears next.
4. Starting to use
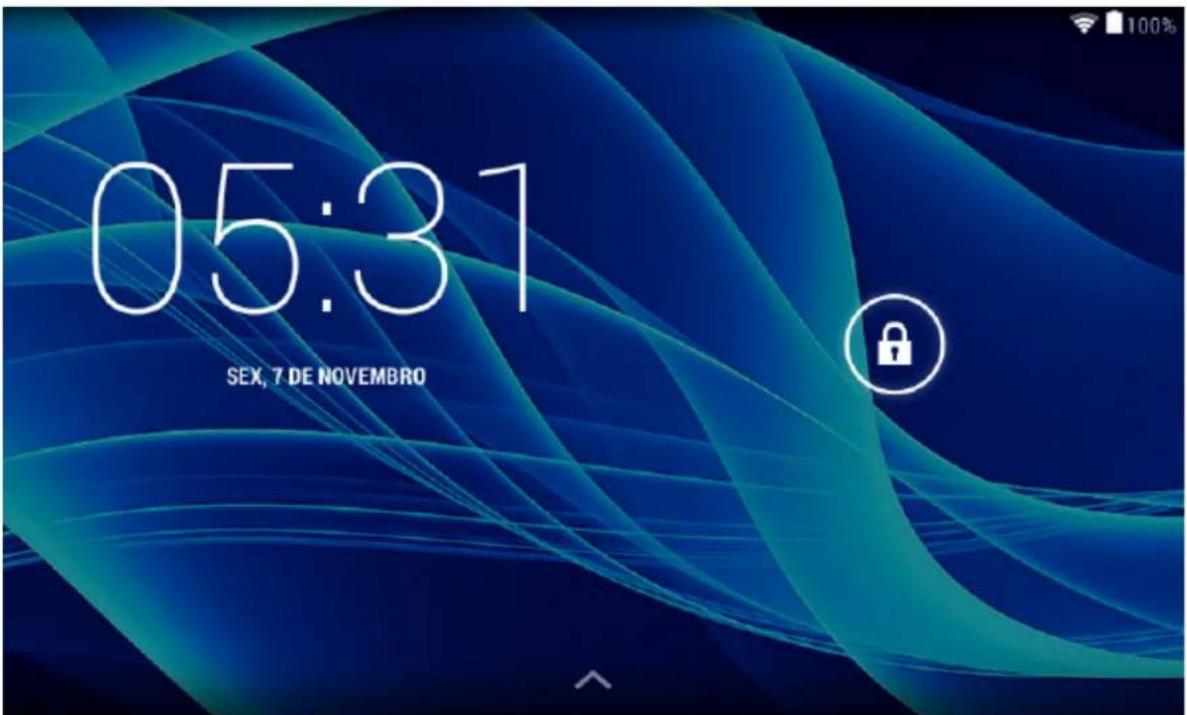
As soon as you power on the device, the screen below will be displayed. This is the home screen lock,
to unlock, tap and drag the center of the circle to the corner where the icon is 🔍, then release it, now the screen is unlocked.
5. Touch Screen
In order to select any object on the screen, tap the screen softly.
Pressing and holding the objects on screen enables them to be moved, create shortcuts and delete the desired application.
6. Data Transfer
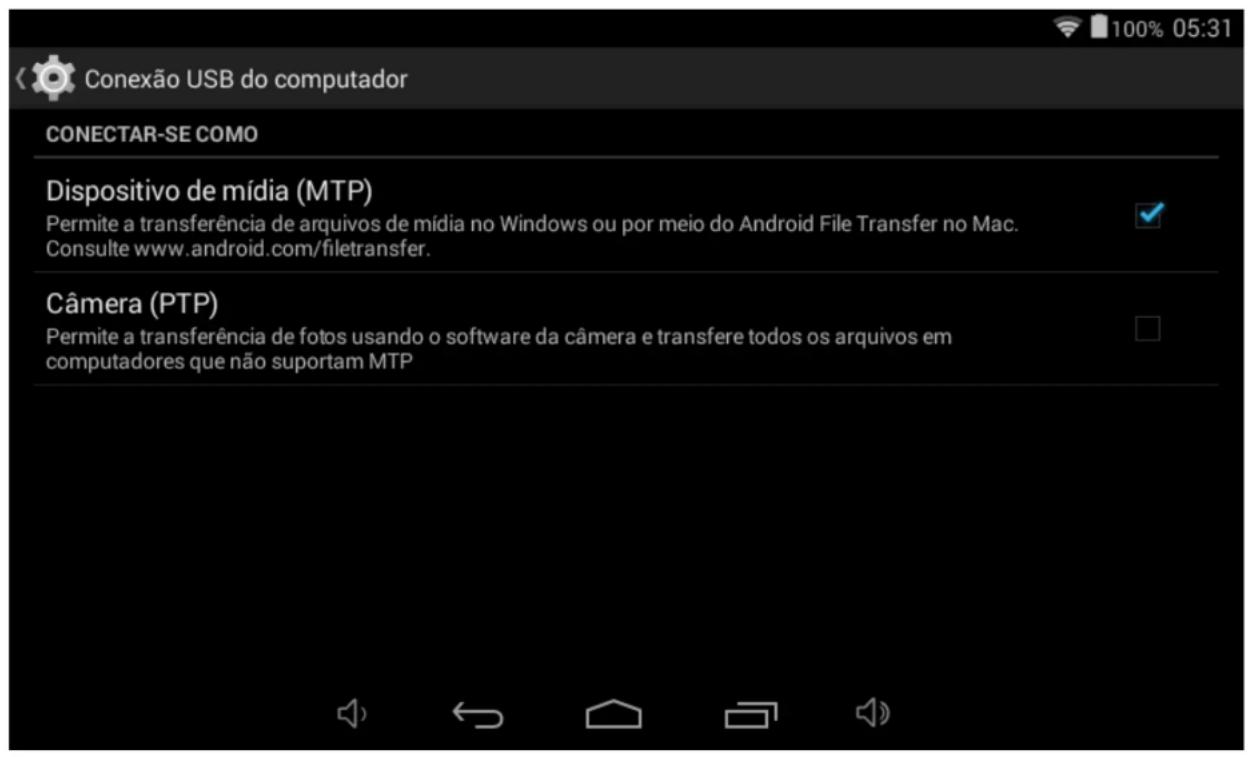
You can transfer files, music, videos, photos and applications from your PC to your tablet, or vice versa. This can be done by using an USB cable. Plug the cable into the tablet and the computer, click on the status bar at the right bottom of the screen of the tablet, click on "Turn on USB storage", as shown below, then you can navigate between folders of files.
This device is compatible with Micro SD card to store music, files, videos, photos and applications. You can use it as an extension of internal memory.
To have access to the contents in the card, insert it into the card input, identified on your tablet, go to the app menu and select the "Explorer" or "File Manager", on the next screen, select the "SD Card" option
In order to remove the SD card, tap the icon

Storage > Dismount SD card.
8. Charging battery
Battery model: BT482113
Prefer to use only the adaptor included in the kit, other adaptors voltages may be different and this can damage your tablet.
In order to charge it, connect the Adaptor and the tablet and plug it into a socket.
The icon

indicates that the battery is being recharged, and the icon

indicates that the
battery is fully charged.
To preserve the battery life, use the device at least once a week, and regularly gives a full charge to the battery. When using your device for the first time, make sure the battery is fully charged. If you need to recharge it, connect the adapter included in the kit and plug into a 110V or 220V socket. Let it recharge for about 4 hours or until the device indicates that the battery is fully charged.
If the device is not working at all, connect the charger, plug it into the socket and restart your Tablet using the RESET button.
The device can be up to 3 hours without showing any signs on the screen or even a noise, after that period, it should be ready to be powered on.
9. Wi-Fi Settings
Tap the icon

lect Wi-Fi option on the left side bar on the screen.
The available networks Will appear on the right side of the screen, Select the desired network.
In case the network has the symbol

, ,you Will need to have a network password to have access.
To return to desktop, tap the button

on the right bottom side of the screen.
10. Desktop

1 Search
2 Voice search function
3 Application menu
4 Back
5 Home
6 Running applications
11. Installing Applications
Go to the apps menu and tap the icon
7 Volume control -
8 Volume control +
9 Notification bar
10 Wi-Fi status
11 Battery status
website or even through the application.
Follow the instructions on screen to proceed. When you finish the operation, you Will have Access to all the available application for your device on Play Store, you can download free and paid applications. For the paid applications you will need to insert a credit card number on account settings.
12. Uninstalling Applications
The applications can be removed from your tablet in two different ways:
-
Touch and hold the application, then slide it and release on the "X" that Will appear on the upper central side of the screen.
-
Go to the Settings menu > Apps > Select the application > Uninstall > Ok.
13. Sound Record
Select the icon Hi-2 MP3 Rec to start recording, then tap on to stop.
The recorded files can be heard on
14. Camera
Go to the application's menu and tap the icon, you can be able to make photos and videos.
Tap on 📄 to take the photos. The photos Will appear on the upper right side of the screen, touch the photo for a preview nas then touch ← to return to camera function.
To start video recording, select the option to select the recorder mode.

The ● button starts and the □ button stop the record.

The icon is a top right corner of screen access the settings camera's menu for adjust the light's mode, brightness and storage's place.
The camera's zoom can be done with a motion of tweezers over the screen, using only two fingers for increase or decrease the zoom.
15. E-mail
In order to start, make sure that the tablet is connected to a Wi-Fi network.
Please contact your email provider to confirm if the server is compatible with (POP) and (SMTP).
Select E-mail > Enter an e-mail address and Password> Next> Manual Setup (optional): server settings can be made on the email provider (EX: gmail.com) according to your e-mail. If you need to make a review, click "manual setup" to make changes.
Click Next Step> Enter the Account name> Finish.
16. Music
Tap on 📂 in play the songs stored on your device or in a Micro SD card, reproduction can be selected by Artist, Album, Track or favorite folder.
17. Wallpaper
Go to Desktop, touch and hold the screen for few seconds until the below options appear:
You can choose one of the options
Select a wallpaper from gallery.

Select an Android preloaded wallpaper.
Select an animated wallpaper.
18. Browser
You can choose one of the browsers below to surf the internet

Android Standard Browser.

Google Chrome.
To start surfing the internet, make sure your device is connected to a Wi-Fi network or 3G, in case of 3G devices. After that, enter the address on address bar, Ex: www.xxxxx.com.br

Español
Brand : Multilaser
Model : M7-i
Category : Tablet