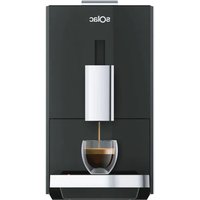
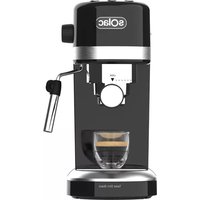
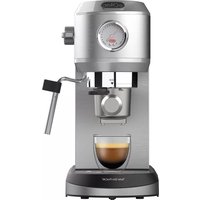
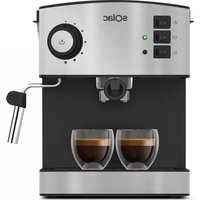
CE 4550 - QUICK INSTALLATION GUIDE - Coffee machine SOLAC - Free user manual and instructions
Find the device manual for free CE 4550 - QUICK INSTALLATION GUIDE SOLAC in PDF.

| Product type | Espresso coffee machine |
| Brand | SOLAC |
| Model | CE 4550 |
| Pump pressure | 18 bars |
| Number of cups | 1 or 2 cups simultaneously |
| Coffee type | Ground coffee or pods |
| Filter holder | Comfort Clean with position selector |
| Functions | Coffee extraction, steam |
| Depressurization system | Yes, automatic |
| Water tank | Removable from the back or direct filling |
| Cup warming tray | Yes, on top |
| Cup tray | Height adjustable |
| Indicator light | Orange when heating, green when ready |
| Included accessories | Measuring spoon, sugar container |
| Safety | Do not immerse, cord replaceable by professional, keep out of reach of children |
| Maintenance | Regular cleaning of filter holder and steam wand, annual descaling |
| Recommended descaling | Once a year with special product |
Frequently Asked Questions - CE 4550 - QUICK INSTALLATION GUIDE SOLAC
User questions about CE 4550 - QUICK INSTALLATION GUIDE SOLAC
0 question about this device. Answer the ones you know or ask your own.
Ask a new question about this device
Download the instructions for your Coffee machine in PDF format for free! Find your manual CE 4550 - QUICK INSTALLATION GUIDE - SOLAC and take your electronic device back in hand. On this page are published all the documents necessary for the use of your device. CE 4550 - QUICK INSTALLATION GUIDE by SOLAC.
USER MANUAL CE 4550 - QUICK INSTALLATION GUIDE SOLAC
Espresso coffee maker
Cafetière espresso
Espressoautomat
natural_image
Illustration of a square<|im_start|> Puerto Rico coffee maker with a brush applying material to the machine (no text or symbols visible)5-9 • ESPAÑOL
10-14 • ENGLISH
15-19 • FRANÇAIS
20-25 • DEUTSCH
26-31 • PORTUGUÊS
32-36 • ITALIANO
37-41 • NEDERLANDS
42-46 • ČESKY
47-51 • POLSKI
52-56 • SLOVENČINA
57-62 • MAGYAR
63-68 • българск
69-73 • HRVATSKA
74-79 • ROMÂNĂ

text_image
Technical diagram of a Swisska coffee maker with numbered parts and labeled partsFig. 1
text_image
Fig. 2
text_image
Fig. 3
text_image
Fig. 4 squifita PLUS B@Bic A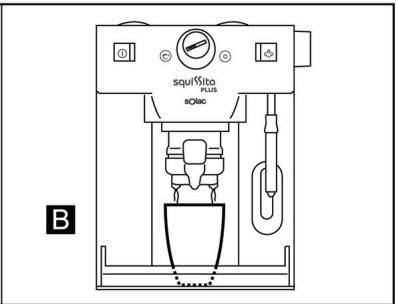
text_image
squil'sita PLUS BQ800 B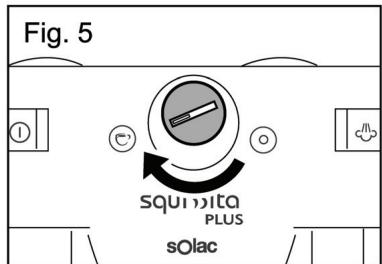
text_image
Fig. 5 SQUISITA PLUS sOLac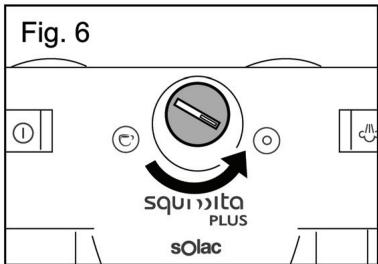
text_image
Fig. 6 squidita PLUS solac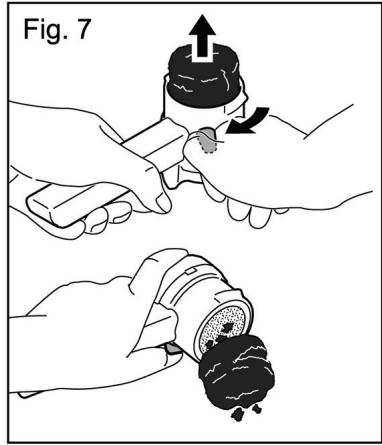
text_image
Fig. 7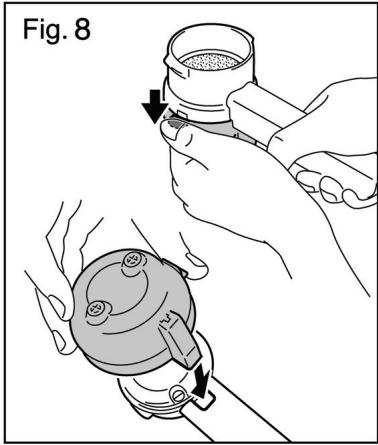
text_image
Fig. 81 ATENCION
- Please read these instructions before using the coffee maker.
- Do not switch the coffee maker on without making sure that the voltage stated on the specifications plate matches that in your home.
- Do not operate the coffee maker without water in the tank.
- Steam and water may come out of the coffee output at certain times. This is not a symptom of a fault or malfunction.
- This espresso coffee maker is a professional high-pressure model (up to 18 bar) and has a built-in electric pump to draw out the maximum flavour and aroma from the coffee. It is therefore normal for the electric pump to make a little noise and vibrate when it comes into operation.
- If the power lead is damaged, it should be replaced by the manufacturer or by an authorised after-sales service shop or similar qualified personnel to prevent possible hazards.
- VERY IMPORTANT! Do not get the appliance wet or submerge it in water.
- Keep out of the reach of children.
- Children should be supervised to ensure that they do not play with the appliance.
- This appliance is not intended for use by persons (including children) with reduced physical, sensory or mental capabilities, or lack of experience and knowledge, unless they have been given supervision or instructions concerning use of the appliance by a person responsible for their safety.

CAUTION! When you want to dispose of the appliance, NEVER throw it in the rubbish bin. Take it to your nearest CLEAN POINT or the waste collection centre closest to your home for processing. You will thus be helping to take care of the environment.
2 MAIN COMPONENTS Fig. 1
1 Switch with mains pilot light
2 Coffee extraction and de-pressurisation selector
3 Switch with steam warning light
4 Comfort Clean filter holder
5 Selector for filter position and emptying dregs
6 Filter holder flap
7 Lower plastic filter holder base
8 Water tank
9 Steam nozzle control
10 Steam nozzle
11 Steam nozzle protector
12 Water level viewer
13 Coffee outlet holes
14 Cup-heater tray
15 Cup-holder tray
16 Tank lid
17 Sugar cube container
18 Dispenser spoon
3 TIPS
- Before using the coffee machine for the first time, we recommend allowing the equivalent of 8-10 cups of water to run through the filter holder (with no coffee in the filter). This completely cleans the entire system.
- Use the dispenser spoon (18) to adjust the correct amount of coffee. One spoonful is equivalent to one cup of coffee.
- If the coffee seems to be coming out too slowly, the grind is too fine. We recommend that you avoid using extra-fine ground coffee.
4 OPERATION
A. COFFEE
A. Preparing coffee
1 Fill the water tank. To do this, remove the tank (8) from the rear of the coffee maker or open the lid (16) and pour the water in.
2 Plug the coffee maker into the mains and press the switch (1). The orange pilot light will come on and change to green once the appliance is ready to make the coffee.
3 If you want to make sure your first cup of coffee is hot, insert the filter-holder without coffee in it and let one or two cups of hot water run out in order to warm the components of the coffee-maker. We also recommend that you put the cups to be used on the cup-heater tray (14) so as to warm them up during this operation, providing creamier coffee.
This coffee maker includes a filter holder developed by Solac, the Comfort Clean (4), which does not require any accessories for making 1 or 2 cups, using ground coffee or single-dose pods.
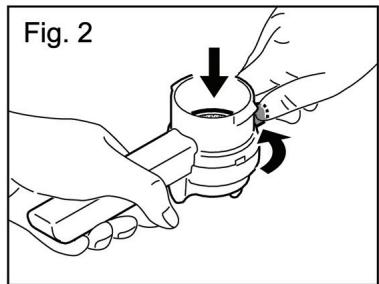
4 To make two cups of coffee, set the selector (5) to position 1 (fig 2). The filter will move downwards allowing you to add two doses of ground coffee. Use the dispenser spoon to do this, without exceeding the spoon level.
5 To make just one cup, set the selector (5) to position 2 (fig.3). The filter then moves up to the intermediate position allowing you to add one dose of ground coffee or a single-dose pod.
6 Lightly compress the ground coffee.
B. Starting the coffee maker
7 Next, place the filter holder (4) in the coffee-maker.
8 Make sure the filter holder is securely closed, pushing the handle firmly from left to right, as it may drip otherwise (Fig. 3).
9 Install the cup-holder tray (15) according to the size of the cups you are going to use (fig. 4):
A. Small cups
B. Large cups
10 Place one or two cups under the coffee outlet holes (13).
11 When the mains pilot light (1) turns green, turn the coffee extraction selector (2) to the left until the selector mark points to the cup icon (fig.5). The coffee will start to come out.
12 Once the required amount of coffee has come out, turn the selector (2) back in the opposite direction to the de-pressurisation position (fig. 6) to stop the coffee from coming out and vent the residual pressure in the filter holder.
C. Cleaning
- To remove the coffee dregs or single-dose pod, turn the selector (5) to position 3 (fig 7). The entire filter will move to the edge of the filter holder so that the dregs can easily be expelled.
- If you used a single-dose pod, remove the bag and put it in the rubbish.
B. STEAM
To heat any type of liquid using the steam nozzle (10):
1 Plug the coffee maker into the mains and press the switch (1). The orange pilot light will come on and change to green once the appliance is ready to make the coffee.
2 Next, press the steam switch (3) and wait until its pilot light comes on.
3 When the pilot light comes on, insert the steamer (10) into the liquid to be heated and gradually open the steam nozzle control (9). Always handle the steam nozzle (10) by the protective handle (11), to avoid potential burns.
4 After using, we recommend you clean any traces of dirt on the inside. To do this:
5 Place an empty container beneath it, turn on the steamer switch (9) again and let the steam out.
6 Turn off the steam switch (3).
7 If you are going to use the steamer (10) continually to heat a large amount of liquid (more than around 100 ml), proceed as follows: once the steam has lost pressure (there is no force), close the steam nozzle (9) control and turn the coffee extraction selector (2) until a little water comes out of the coffee outlet area. Then, wait until the steam switch pilot light (3) comes back on. Repeat these steps as often as you consider necessary.
8 If you want to make coffee after using the steam nozzle, it is advisable to allow two cups of water to run out through the filter holder (with no coffee in the filter) to ensure that the next cup of coffee comes out at the right temperature.
- The maximum steam draw-off time is about 1 min.
5 CLEANING AND MAINTENANCE
⚠️ Unplug the coffee maker from the mains.
Clean the tank and filter holder regularly. We recommend allowing 1-2 cups of water to run through the filter holder (with no coffee in the filter), to clean the filter holder.
Do not use alcohol, solvents or abrasive products to clean the coffee maker or tray, just a soft damp cloth.
Cleaning the filter holder
Clean the filter holder (4) thoroughly from time to time. To do so, proceed as indicated below (fig. 8):
1 Press the filter holder flap (6) downwards and remove the lower plastic base (7).
2 Clean both parts of the filter holder with water. Move the filter selector switch (5) to different positions to ensure all the coffee remains trapped in the filter holder are eliminated.
3 Replace the plastic base in the filter holder, fitting the projecting part into the opening of the filter holder handle.
Cleaning the steamer
1 If you use the steam nozzle to heat milk, clean it as soon as possible for easy cleaning. Wait for the steam nozzle to cool down and wipe it with a damp cloth.
2 Every now and again, for more thorough cleaning of the steamer, proceed as follows: wait until the steamer cools down and unscrew its cylindrical part anticlockwise. Wipe the steamer spindle with a damp cloth and soap the cylindrical part. Make sure that the small hole at the top of the steamer is clean before refitting the part.
3 Fit the steamer on its spindle, screwing it clockwise.
The appliance has an automatic de-pressurising system that channels some of the water from the dregs into the tray. It is advisable to remove the water from the cup-holder tray regularly.
Limescale Removal
We recommend de-scaling the appliance once a year using a special product for coffee machines so as to maintain the coffee maker in perfect condition. We recommend the Solac de-scaling agent.
1 Follow the instructions that come with the de-scaling product.
2 To flush out the circuits, fill the tank again with water only, switch on the coffee maker, fit the filter holder without coffee, and carry out all the steps described in the 'Operation' section twice. During this process, press the switch (3) and let steam out for 1 minute.