
FARM 40-Li A1 - Lawn mower FLORABEST - Free user manual and instructions
Find the device manual for free FARM 40-Li A1 FLORABEST in PDF.


| Product Type | Cordless Lawn Mower |
| Brand | Florabest |
| Model | FARM 40-Li A1 |
| Cutting Width | 430 mm |
| Cutting Height | 25 / 35 / 45 / 55 / 65 / 75 mm (6 positions) |
| Grass Catcher Capacity | 40 liters |
| No-load Speed (n₀) | 3700 min⁻¹ |
| Battery Type | Lithium-ion, 36 V (40 V max) |
| Battery Capacity | 2.5 Ah (90 Wh) |
| Runtime | Approximately 30 minutes (depending on use) |
| Charging Time | Approximately 60 minutes |
| Charger Voltage | 200-240 V~, 50/60 Hz |
| Guaranteed Sound Power Level (LWA) | 96 dB(A) |
| Sound Pressure Level (LpA) | 81 dB(A) |
| Hand/Arm Vibration (ah) | 2.81 m/s² (K=1.5 m/s²) |
| Weight (with accessories) | 15.5 kg |
| Dimensions (H x W x D) | (1010-1190) x 475 x (1140-1350) mm |
| Protection Class (mower) | III (very low safety voltage) |
| Protection Class (charger) | II (double insulation) |
| Mulching Function | Yes (with mulching plug included) |
| Cutting Type | Rotary blade |
| Warranty (product) | 3 years |
| Warranty (battery) | 1 year |
| Included Accessories | 2.5 Ah battery, rapid charger, grass catcher, mulching plug, safety key |
Frequently Asked Questions - FARM 40-Li A1 FLORABEST
User questions about FARM 40-Li A1 FLORABEST
0 question about this device. Answer the ones you know or ask your own.
Ask a new question about this device
Download the instructions for your Lawn mower in PDF format for free! Find your manual FARM 40-Li A1 - FLORABEST and take your electronic device back in hand. On this page are published all the documents necessary for the use of your device. FARM 40-Li A1 by FLORABEST.
USER MANUAL FARM 40-Li A1 FLORABEST
AKKU-RASENMÄHER / CORDLESS LAWNMOWER / TONDEUSE SANS FIL FARM 40-Li A1
CWM GmbH & Co. KG
3.12.49201
10/4 公告
2.2.1.4
The following table is in English.
Balance: 19/02/11
(1) (2) (3)
ОКЛАЗАНИЙНЯ
2.46.05.18.2.1 in middle course
(1) 本说明仅供参考。
(1) (2)
AUGUIGENNEER
[Unreadable]
2017年1月30日
2、网上交易系统
(四)
CORTA RELIVAS A WATER
To be a very much or great
∴ m = 3/11
•
IAN 292
17.1.2.2
∴ m = 3/11
The Ground Truth image displays a single, solid horizontal line. According to Rule 2 (UNDERSCORE & LINE RULES), this is a stylistic or background line, not a placeholder underscore. Therefore, the OCR result must ignore it. The provided OCR content is "____", which consists of four underscores. This is an incorrect interpretation of the line as a placeholder, violating the rule that stylistic lines must be ignored. The OCR has hallucinated text (underscores) where none should exist, violating the rule to ignore such lines. Hence, the OCR result is inconsistent with the Ground Truth.
-
[Non-Text]
[Non-Text]
[Non-Text]
[Non-Text]
[Non-Text]
[Non-Text]
[Non-Text]
[Non-Text]
[Non-Text]
[Non-Text]
[Non-Text]
[Non-Text]
[Non-Text]
[Non-Text]
[Non-Text]
[Non-Text]
[Non-Text]
[Non-Text]
[Non-Text]
[Non-Text]
[Non-Text]
[Non-Text]
[Non-Text]
[Non-Text]
[Non-Text]
[Non-Text]
[Non-Text]
[Non-Text]
[Non-Text]
[Non-Text]
[Non-Text]
[Non-Text]
[Non-Text]
[Non-Text]
[Non-Text]
[Non-Text]
[Non-Text]
[Non-Text]
[Non-Text]
[Non-Text]
[Non-Text]
[Non-Text]
[Non-Text]
[Non-Text]
[Non-Text]
[Non-Text]
[Non-Text]
[Non-Text]
[Non-Text]
[Non-Text]
[Non-Text]
[Non-Text]
[Non-Text]
[Non-Text]
[Non-Text]
[Non-Text]
[Non-Text]
[Non-Text]
[Non-Text]
[Non-Text]
[Non-Text]
[Non-Text]
[Non-Text]
[Non-Text]
[Non-Text]
[Non-Text]
[Non-Text]
[Non-Text]
[Non-Text]
[Non-Text]
[Non-Text]
[Non-Text]
[Non-Text]
[Non-Text]
[Non-Text]
[Non-Text]
[Non-Text]
[Non-Text]
[Non-Text]
[Non-Text]
[Non-Text]
[Non-Text]
[Non-Text]
[Non-Text]
[Non-Text]
[Non-Text]
[Non-Text]
[Non-Text]
[Non-Text]
[Non-Text]
[Non-Text]
[Non-Text]
[Non-Text]
[Non-Text]
[Non-Text]
G41/P. Geometron and Satox Jones Page 74
(3) Company's shareholding plan
The image is too blurry to recognize any text content.
-
-
∴ m = 3/11
[Non-Text]
[Non-Text]
[Non-Text]
[Non-Text]
[Non-Text]
[Non-Text]
[Non-Text]
[Non-Text]
[Non-Text]
[Non-Text]
[Non-Text]
[Non-Text]
[Non-Text]
[Non-Text]
[Non-Text]
[Non-Text]
[Non-Text]
[Non-Text]
[Non-Text]
[Non-Text]
[Non-Text]
[Non-Text]
[Non-Text]
[Non-Text]
[Non-Text]
[Non-Text]
[Non-Text]
[Non-Text]
[Non-Text]
[Non-Text]
[Non-Text]
[Non-Text]
[Non-Text]
[Non-Text]
[Non-Text]
[Non-Text]
[Non-Text]
[Non-Text]
[Non-Text]
[Non-Text]
[Non-Text]
[Non-Text]
[Non-Text]
[Non-Text]
[Non-Text]
[Non-Text]
[Non-Text]
[Non-Text]
[Non-Text]
[Non-Text]
[Non-Text]
[Non-Text]
[Non-Text]
[Non-Text]
[Non-Text]
[Non-Text]
[Non-Text]
[Non-Text]
[Non-Text]
[Non-Text]
[Non-Text]
[Non-Text]
[Non-Text]
[Non-Text]
[Non-Text]
[Non-Text]
[Non-Text]
[Non-Text]
[Non-Text]
[Non-Text]
[Non-Text]
[Non-Text]
[Non-Text]
[Non-Text]
[Non-Text]
[Non-Text]
[Non-Text]
[Non-Text]
[Non-Text]
[Non-Text]
[Non-Text]
[Non-Text]
[Non-Text]
[Non-Text]
[Non-Text]
[Non-Text]
[Non-Text]
[Non-Text]
[Non-Text]
[Non-Text]
[Non-Text]
[Non-Text]
[Non-Text]
[Non-Text]
∴ m = 3/11
-
-
-
-
-
∴ m = 3/11
[Non-Text]
[Non-Text]
[Non-Text]
[Non-Text]
[Non-Text]
[Non-Text]
[Non-Text]
[Non-Text]
[Non-Text]
[Non-Text]
[Non-Text]
[Non-Text]
[Non-Text]
[Non-Text]

Akku-Pack: FAP 40 A1
Typ: Lithium-Ionen
Intended use Page 26
Parts description......Page 26
Scope of delivery....Page 26
Technical data Page 27
Safety warnings Page 28
Safe operating practices for electrically powered lawnmowers...... Page 28
Vibration and noise reduction......Page 31
Behaviour in emergency situations......Page 31
Residual risks...... Page 31
Battery charger safety warnings....Page 31
Initial use...... Page 32
Unpacking Page 32
Accessories Page 33
Assembly......Page 33
Before use Page 33
Charging the battery pack....Page 33
Checking the battery charging level Page 34
Safety key Page 34
Attaching / removing the battery pack...... Page 34
Operation Page 34
Grass collector Page 34
Mulch plug Page 35
Adjusting the cutting height....Page 35
Switching on and off Page 36
Mowing Page 36
After use Page 36
Cleaning and care Page 36
Cleaning Page 37
Maintenance......Page 37
Repair Page 37
Storage Page 37
Transportation Page 37
Troubleshooting Page 37
Disposal Page 38
Service Page 39
Warranty Page 39
Translation of original declaration of conformity Page 40
| List of pictograms used: | |||
 | Read the instruction manual. Wear hearing protection! | ||
 | Caution / Warning Wear protective gloves! |  | |
 | Remove all packaging materials and shipping devices. |  | Wear non-skit safety shoes! |
 | Packaging materials are not toys. Beware of blades. Blades continue to rotate after the motor is switched off Remove disabling device before maintenance | ||
 | Switch the appliance off and remove the battery pack. |  | Keep bystanders away! |
 | Protect the electrical parts against moisture. D expose the product to rain or wet conditions. | ||
 | Do not operate the product with wet hands or while standing on a wet floor. Do not touch the power plug with wet hands. |  | Risk of injury from ejected objects. |
 | Protection class II Blades continue to rotate after the motor is switched off | ||
 | Alternating current |  | Grass collector full |
 | Direct current |  | Grass collector ready |
| T5A | Fuse No load speed n | [4TBH] | 0 |
 | |||
 | Protect the battery pack against heat and continuous intense sunlight. |  | Cutting width |
 | Protect the battery pack against water and moisture. |  | Lift with two persons. |
 | Guaranteed sound power level in dB |  | |
CORDLESS LAWNMOWER FARM 40-Li A1
● Introduction
We congratulate you on the purchase of your new product. You have chosen a high quality product. The instructions for use are part of the product. They contain important information concerning safety, use and disposal. Before using the product, please familiarise yourself with all of the safety information and instructions for use. Only use the product as described and for the specified applications. If you pass the product on to anyone else, please ensure that you also pass on all the documentation with it.
- Intended use
This cordless lawnmower (hereinafter "product" or "power tool") is designed for mowing domestic lawns and grass areas.
The product is to be used by adults.
Any other use or modification of the product are considered improper use and can result in hazards such as death, life-threatening injuries and damage. The manufacturer is not liable for any damages caused by improper use. The product is not intended for commercial or any other use.
- Parts description
Figure A/D/E:
1 Handle
2 Upper bar
3 Lower bar (x2)
4 Discharge cover
5 Carrying handle
6 Height adjustment lever
7 Battery compartment cover
7a Battery pack connector
7b Safety keyhole
7c Safety key
8 Wheel (x4)
9 Housing
10 Lower bar mounting set (x2)
10a Washer
10b Lever
11 Grass collector
11a Carrying handle
11b Fill indicator flap
12 Cable clip
13 Upper bar mounting set (x2)
13a Bolt
13b Washer
13c Lever
14 Control cable
15 Lock-off button
16 On / off switch
Figure B:
17 Battery pack
17a Release button
17b Battery level indication lights
17c Battery level button
Figure C:
18 Rapid battery charger
18a Power cord with plug
18b Battery pack connector
18c Charging status LED - Red
18d Charging status LED - Green
19 Mulch plug
- Scope of delivery
1 Cordless lawnmower FARM 40-Li A1
1 Battery pack FAP 40 A1
1 Rapid battery charger FLG 40 A1
1 Grass collector (pre-assembled)
1 Lower bar mounting set (pre-assembled)
1 Upper bar mounting set
1 Carrying handle for grass collector
1 Mulch plug
1 Cable clip
1 Operating instructions
● Technical data
Cordless
lawnmower: FARM 40-Li A1
Rated voltage: 40 V ---
No load speed n0 : 3700 min
Cutting width: 430 mm
Cutting heights: 25/35/45/55/65/75 mm
Grass catcher volume: 40 l
Dimensions (H x W x D): (1010 - 1190) x 475 x (1140 - 1350) mm
Weight (incl. accessories): 15.5 kg
Protection class: III /
Degree of protection: IPX1
Battery pack: FAP 40 A1
Type: Lithium ion
Rated voltage: 36 V 40 V -max.
Capacity: 2.5 Ah (90 Wh)
Number of cells: 10
Rapid battery
charger: FLG 40 A1
Input
Rated voltage: 200 - 240 V \~, 50 / 60 Hz
Power consumption: 160 W
Output
Rated voltage: 36 V ---
Charging current: 3.6 A
Charging time: approx. 60 min
Protection class: II / ☐
Noise emission value:
Noise measurement value determined in accordance with EN 60335. The A-rated noise level of the power tool is typically as follows:
Sound pressure level LpA : 81.0 dB(A)
Uncertainty KpA : 3 dB
Sound power level LWA : 94.3 dB(A)
Uncertainty KWA : 1.81 dB
Guaranteed sound power
level LWA : 96 dB(A)
(according to 2000/14/EC amended by 2005/88/EC)
WARNING!

Wear ear protection!
Vibration emission value:
Total vibration values (vector total of three directions) determined in accordance with EN 60335:
Hand/arm vibration ah : 2.81 m/s 2
Uncertainty K: 1.5 m/s2
WARNING!
The vibration level varies in accordance with the use of the power tool and may be higher than the value specified in these instructions in some cases. There is a risk of underestimation of the vibration load if the power tool is used regularly in this manner. Try to keep the vibration loads as low as possible. Measures to reduce the vibration load are, e. g. wearing gloves and limiting the working time. Wherein all states of operation must be included (e. g. times when the power tool is switched off and times where the power tool is switched on but running without load).
NOTE
The vibration level specified in these instructions has been measured in accordance with a standardised measuring procedure specified in EN 60335 and can be used to make equipment comparisons. The specified vibration emission value can also be used to make an initial exposure estimate.

Safety warnings

WARNING! RISK OF ELECTRIC SHOCK!

Protect the electrical parts against moisture. Do not immerse such parts in water or other liquids to avoid electrical shock. Never hold the appliance under running water. Pay attention to the instructions for cleaning and care.

Do not operate the appliance with wet hands or while standing on a wet floor. Do not touch the power plug with wet hands.
NOTE

Appliances with this symbol are classified as protection class II. This means the product is equipped with enhanced or double insulation between the mains supply circuit and the output voltage or the metallic casing.

Appliances with this symbol are classified as protection class III. This means the appliance is supplied from a separated / safety extra-low voltage (SELV) power source. Under normal conditions a person can safely come into contact with it without risk of electrical shock.
● Safe operating practices for electrically powered lawnmowers
IMPORTANT READ CAREFULLY BEFORE USE. KEEP FOR FUTURE REFERENCE.
-
The product shall not be used by children.
-
Children should be supervised to ensure that they do not play with the product.
- Cleaning and user maintenance shall not be made by children.
- This product can be used by persons with reduced physical, sensory or mental capabilities or lack of experience and knowledge if they have been given supervision or instruction concerning use of the product in a safe way and if they understand the hazards involved.
Training
- Read the instructions carefully. Be familiar with the controls and the correct use of the product.
- Never allow children or people unfamiliar with these instructions to use the product. Local regulations can restrict the age of the operator.
-
Never operate the product while people, especially children, or pets are nearby.
-
Keep in mind that the operator or user is responsible for accidents or hazards occurring to other people or their property.
Preparation
-
While operating the product always wear substantial footwear and long trousers. Do not operate the product when barefoot or wearing open sandals. Avoid wearing clothing that is loose fitting or that has hanging cords or ties.
-
Thoroughly inspect the area where the product is to be used and remove all objects which can be thrown by the product.
-
Before using, always visually inspect to see that the blade, blade bolt and the blade assembly are not worn or damaged. Replace worn or damaged components in sets to preserve balance. Replace damaged or unreadable labels.
Operation
- Operate the product only in daylight or in good artificial light.
- Avoid operating the product in wet grass.
- Always be sure of your footing on slopes.
- Walk, never run.
- Mow across the face of slopes, never up and down.
- Exercise extreme caution when changing direction on slopes.
- Do not mow excessively steep slopes.
- Use extreme caution when reversing or pulling the product towards you.
- Stop the blade(s) if the product has to be tilted for transportation when crossing surfaces other than grass, and when transporting the product to and from the area to be used.
-
Never operate the product with defective guards or shields, or without safety devices, for example deflectors and/or grass collector, in place.
-
Switch on the motor carefully according to instructions and with feet well away from the blade(s).
-
Do not tilt the product when switching on the motor, except if the product has to be tilted for starting. In this case, do not tilt it more than absolutely necessary and lift only the part, which is away from the operator.
-
Do not start the product when standing in front of the discharge opening.
-
Do not put hands or feet near or under rotating parts. Keep clear of the discharge opening at all times.
-
Do not transport the product while the power source is running.
-
Stop the product, and remove the disabling device. Make sure that all moving parts have come to a complete stop:
■ whenever you leave the product,
■ before clearing blockages or unclogging chute,
■ before checking, cleaning or working on the product,
■ after striking a foreign object. Inspect the product for damage and make repairs before starting and operating the product.
If the product starts to vibrate abnormally (check immediately):
■ inspect for damage,
■ replace or repair any damaged parts,
■ check for and tighten any loose parts.
Maintenance and storage
-
Keep all nuts, bolts and screws tight to be sure the product is in safe working condition.
-
Check the grass collector frequently for wear or deterioration.
-
On products with multi blade, take care as rotating one blade can cause other blades to rotate.
-
Be careful during adjustment of the product to prevent entrapment of the fingers between moving blades and fixed parts of the product.
-
Always allow the product to cool down before storing
-
When servicing the blades be aware that, even though the power source is switched off, the blades can still be moved.
- Replace worn or damaged parts for safety. Use only genuine replacement parts and accessories.
● Vibration and noise reduction
To reduce the impact of noise and vibration emission, limit the time of operation, use low-vibration and low-noise operating modes as well as wear personal protective equipment.
Take the following points into account to minimise the vibration and noise exposure risks:
■ Only use the product as intended by its design and these instructions.
■ Ensure that the product is in good condition and well maintained.
- Use correct attachments for the product and ensure they are in good condition.
- Keep tight grip on the handles / grip surfaces.
- Maintain this product in accordance with these instructions and keep it well lubricated (where appropriate).
Plan your work schedule to spread any high vibration tool use across a longer period of time.
● Behaviour in emergency situations
Familiarise yourself with the use of this product by means of this instruction manual. Memorise the safety warnings and follow them to the letter. This will help to prevent risks and hazards.
■ Always be alert when using this product, so that you can recognise and handle risks early. Fast intervention can prevent serious injury and damage to property.
- Switch the product off, remove the battery pack and disengage the safety key if there are malfunctions. Have the product checked by a qualified professional and repaired, if necessary, before you operate it again.
- Residual risks
Even if you are operating this product in accordance with all the safety requirements, potential risks of injury and damage remain. The following dangers can arise in connection with the structure and design of this product:
■ Health defects resulting from vibration emission if the product is being used over long periods of time or not adequately managed and properly maintained.
Injuries and damage to property due to broken cutting attachments or the sudden impact of hidden objects during use.
■ Danger of injury and property damage caused by flying objects.
WARNING!
This product produces an electromagnetic field during operation! This field may under some circumstances interfere with active or passive medical implants! To reduce the risk of serious or fatal injury, we recommend persons with medical implants to consult their doctor and the medical implant manufacturer before operating this product!
● Battery charger safety warnings
CAUTION! RISK OF EXPLOSION!


Never charge non-rechargeable batteries! Protect the battery pack against heat, e. g. against continuous intense sunlight, fire, water and moisture. Danger of explosion.
■ This appliance can be used by children aged from 8 years and above and persons with reduced physical, sensory or mental capabilities or lack of experience and knowledge if they have been given supervision or instruction concerning use of the appliance in a safe way and understand the hazards involved.
■ Children shall not play with the appliance.
■ Cleaning and user maintenance shall not be made by children without supervision.
- Do not charge non-rechargeable batteries. Disregarding this instruction is hazardous.
If the supply cord is damaged, it must be replaced by the manufacturer, its service agent or similarly qualified persons in order to avoid a hazard.
■ Protect the electrical parts against moisture. Do not immerse such parts in water or other liquids to avoid electrical shock. Never hold the appliance under running water. Pay attention to the instructions provided for cleaning, maintenance and repair.
■ The appliance is suitable for indoor use only.
■ This charger is only designed for charging the battery pack type: FAP 40 A1.
- Initial use
● Unpacking

CAUTION! RISK OF EXPLOSION

Packaging materials are not toys. Children should not play with the packaging materials, as they pose a risk of swallowing and suffocation!

Remove all packaging materials and shipping devices.
- Unpack all parts and lay them on a flat, stable surface.
- Remove all packing materials and shipping devices if applicable.
-
Make sure the delivery contents are complete and free of any damage. If you find that parts are missing or show damage do not use the product but contact your dealer. Do not use the product unless missing parts have been delivered in addition or defective parts have been replaced. Using an incomplete or damaged product represents a hazard to people and property.
-
Ensure that you have all the accessories and tools needed for assembly and operation. This also includes suitable personal protective equipment.
- Accessories
To operate this product safely and correctly, the following accessories, i. e. tools and attachments, are necessary:
□ Suitable personal protective equipment
Accessories and tools are available through your authorised dealer. When buying always consider the technical requirements of this product (see "Technical data").
If you are not certain, ask a qualified specialist and get advice from your trusted dealer.
NOTE
This instruction manual contains information and suggestions for several attachments and their uses. The attachments mentioned are not necessarily included in the shipment, but are meant to indicate additional possibilities for using this product.
Assembly
Attaching the lower bar
- Fold up the lower bar 3 to a convenient height and engage the gears in a secure position (see. Fig. D). Raise both lower bars 3 to the same height.
- Turn the lever 10b clockwise to tighten the connection, but to not fully tighten it.
- Tilt down the lever 10b to secure the connection. If this requires too much force or is impossible loosen the lever 10b a little by turning it anti-clockwise.
- Repeat step 1 - 3 on the other side.
Attaching the upper bar
- Align the open end of the upper bar 2 with the lower bars 3 and slide it down until the holes in both parts are congruent with each other and hold it in place (see Fig. E).
-
Fit the bolt 13a from the product centre outward through the holes and hold it in place.
-
Slide the washer 13b with the flat side facing outwards onto the bolt 13a. The recess of the washer 13b should fit the upper bar 2.
- Screw the lever 13c onto the bolt 13a .
- Turn the lever 13c clockwise to tighten the connection, but to not fully tighten it.
- Tilt down the lever 13c to secure the connection. If this requires too much force or is impossible loosen the lever 13c a little by turning it anti-clockwise.
- Repeat step 1 - 6 on the other side.
Securing the control cable
- Use the cable clip 12 and insert the control cable 14 through the open end (see Fig. F).
- Clip the cable clip 12 with the control cable 14 onto the lower bar 3.
● Before use
● Charging the battery pack
NOTE
The battery pack 7 comes partly charged. Charge the battery pack 17 prior to first use, ideally at least 60 minutes.
Always pull out the power plug of the charger 18 from the mains before removing or connecting the battery pack 17 to the charger.
▶ Never charge the battery pack when the ambient temperature is below 10 °C or above 40 °C.
Rest the charged for at least 15 minutes between successive charging sessions.
If no battery pack7 is inserted into the charger 18 and the charger is connected to mains, the charging status LED 18d flashes green.
-
Align the battery pack 17 to the rails of the charger 18 and slide it in. Ensure it clicks noticeably in place.
-
Connect the power plug 18a of the charger 18 with the mains. The charging status LED 18c lights up red. The continuously lit green charging status LED 18d indicates that the charging process is complete.
- Disconnect the power plug 18a of the charger 18 from the mains and remove the battery pack 17 from the charger.
- Attach the battery pack 17 back to the product (see "Attaching / removing the battery pack").
Charging status LEDs
| Green LED flashes without battery pack | Charger ready |
| Green LED lights up with battery pack | Battery pack fully charged |
| Red LED lights up with battery pack | Battery pack charging |
| Red and green LEDs flashing | Battery pack defect |
| Red and green LEDs continuously lit | Battery pack too cold or warm |
- Checking the battery charging level
☐ Press the battery level button 17c to check the charging level of the battery pack 17 . The charging level will be shown on the battery level indication lights 17b .
| 4 Green LEDs continuously lit | 100% battery charging level |
| 3 Green LEDs continuously lit | 75% battery charging level |
| 2 Green LEDs continuously lit | 50% battery charging level |
| 1 Green LED continuously lit | 25% battery charging level |
| 1 Green LED flashing | Low battery charging level |
☐ Charge the battery pack 17 before operation when it is at 25% or low battery charging level.
● Safety key
This product is equipped with a safety key 7c to prevent unauthorised use. In order to operate the product the safety key 7c must be engaged in the safety keyhole 7b.
Engaging the safety key
- Open the battery compartment cover 7 (see Fig. G).
- Press the button on the safety key 7c and slide it into the safety keyhole 7b. Ensure it clicks noticeably in place. It shall not be possible to remove the safety key 7c without pressing its button.
Disengaging the safety key
- Press the button on the safety key 7c and pull it out of the safety keyhole 7b.
- Attaching / removing the battery pack
Attaching the battery pack:
- Open the battery compartment cover 7 (see Fig. G).
- Align the battery pack 17 to the rails of the battery pack bay and slide it into it. Ensure it clicks noticeably in place.
Removing the battery pack:
- Open the battery compartment cover 7 (see Fig. G).
- Press the release button 17d and slide out the battery pack 17 from the battery pack bay.
Operation
- Grass collector
This product can be used with a grass collector 11 that holds the cut grass for easy disposal. If not used, the cut grass will be ejected through the rear discharge opening.
To clear the rear discharge opening the mulch plug 19 must be removed.
- Lift the discharge cover 4 with one hand and remove the mulch plug 19.
Attaching carrying handle on grass collector
- Attach front end of the carrying handle 11a to the slot of the grass collector 11 (see Fig. H).
- The hook at the front end of carrying handle 11a should snap fit into the cover of the grass collector 11. Attach the rear end to the carrying handle 11a to the end slot of the grass collector 11.
- Apply small pressure to the carrying handle 11a until the hook at the rear end of the carrying handle snap fit into the cover of the grass collector 11.
NOTE
Fabric handle is available at the back of grass collector 11.
Attaching the grass collector
- Lift the discharge cover 4 with one hand and hold it in position (see Fig. I).
- Hold the grass collector 11 with the other hand by its carrying handle 11a and hang it with its supports into the hooks on the housing 9.
- Release the discharge cover 4.
Removing the grass collector
- Lift the discharge cover 4 with one hand and hold it in position (see Fig. I).
- Hold the grass collector 11 with the other hand by its carrying handle 11q and lift it from the hooks on the housing 9.
- Release the discharge cover 4.
Emptying the grass collector
Observe the fill indicator flap 11b on top of the grass collector 11 during operation. The flap should open up by the air flow through the grass collector 11 with available capacity. A closed flap indicates a full grass collector 11 and it must be emptied before continuing operation.
- Remove the grass collector 11 (see "Removing the grass collector").
- Dispose of the cut grass through the open side of the grass collector 11 according to local regulations.
Mulch plug
This product can be used for mulching grass with the mulch plug 19. The mulch plug will block the rear discharge opening. The cut grass is chopped several times to produce tiny bits of grass. The cuttings will be left on the lawn where they will soon rot down and perform fertilizing function.
Attaching the mulch plug
- Lift the discharge cover 4 with one hand and attach the mulch plug 19.
Removing the mulch plug
- Lift the discharge cover 4 with one hand and remove the mulch plug 19.
● Adjusting the cutting height
This product has 6 settings to adjust to one of the below cutting heights.
| Setting | Cutting height (ca.) in mm |
| 75 | |
| 65 | |
| 55 | |
| 45 | |
| 35 | |
| 25 |
- Disengage the height adjustment lever 6 by pushing it sideways out of the notch for the current setting (see Fig. J).
- Move the height adjustment lever 6 back or forth towards the notch for the desired cutting height.
- Engage the height adjustment lever 6 by pushing it sideways into the notch of the desired cutting height.
● Switching on and off
Switching on:
- Operate the lock-off button 15 and hold it in position (see Fig. K).
- Pull the on / off switch 16 towards the handle 1 to switch on. Release the lock-off button 15.
Switching off:
- Release the on / off switch 16 to switch off.
Mowing
WARNING! RISK OF INJURY!
If the product strikes a foreign object stop the motor! Switch the product off, remove the battery pack, disengage the safety key and let it cool down. Inspect the product thoroughly for damage! Have any damage repaired before restarting!
▶ Extensive vibration of the product during operation is an indication of damage! Stop the motor. The product should be promptly inspected and repaired!
WARNING!
In some countries regulations define at what time of the day and on what special days products are allowed to be used and what restrictions apply! Ask your community for detailed information and observe the regulations in order to preserve a peaceful neighbourhood and avoid committing administrative offences!
☐ Make sure that the lawn is clear of stones, sticks, wire or other objects that could damage the product or its motor.
☐ Do not cut wet grass because it tends to stick to the underbody of the product, preventing the proper discharge of grass clippings, and it could also cause you to slip and fall.
□ Never cut off more than one-third of the total length of the grass for a healthy lawn. In the autumn, lawns should only be cut as long as there is growth.
□ Slowly push the product forward.
☐ Mow in slightly overlapping rows. The most effective pattern for mowing lawns is straight lines along one of the sides. This will keep the rows even and ensures that all the lawn is cut without missing any spots.
☐ Circle around flower beds. When reaching a flower bed in the middle of the lawn, cut a row or two around the circumference of the bed.
☐ Pay special attention when changing direction.
□ Empty the grass collector-11 regularly.
☐ Switch the product off immediately if you are disturbed while working by other people entering the working area. Always let the product come to complete stop before averting.
☐ Do not overwork yourself. Take regular breaks to ensure you can concentrate on the work and have full control over the product.
After use
- Switch the product off, remove the battery pack 17, disengage the safety key 7c and let it cool down.
- Check, clean and store the product (see "Cleaning and care").
● Cleaning and care
WARNING!

Always switch the product off, remove the battery pack and let the product cool down before performing inspection, maintenance and cleaning work!
CAUTION! RISK OF INJURY!

The blade(s) are sharp! Always wear protective gloves when performing inspection, maintenance and cleaning work!
- Cleaning
☐ The product must always be kept clean, dry and free from oil or grease. Remove debris from it after each use and before storage.
☐ Regular and proper cleaning will help ensure safe use and prolong the life of the product.
☐ Inspect the product before each use for worn and damaged parts. Do not operate it if you find broken and worn parts.
□ Never allow fluids to get into the product.
□ Clean the product with a dry cloth. Use a brush for areas that are hard to reach.
NOTE
Do not use chemical, alkaline, abrasive or other aggressive detergents or disinfectants to clean this product as they might be harmful to its surfaces.
● Maintenance
Before and after each use, check the product and accessories (or attachments) for wear and damage. If required, exchange them for new ones as described in this instruction manual. Observe the technical requirements (see "Technical data").
Repair
This product does not contain any parts that can be repaired by the user. Contact an authorised service centre or a similarly qualified person to have it checked and repaired.
Storage
☐ Switch the product off, remove the battery pack 17 and disengage the safety key 7c.
□ Clean the product as described (see "Cleaning").
☐ Store the product and its accessories in a dark, dry, frost-free, well-ventilated place.
□ Always store the product in a place that is inaccessible to children. The ideal storage temperature is between 10 °C and 30 °C.
☐ We recommend covering the product with a suitable cloth or enclosure to protect it against dust.
☐ Regularly check the charge level of the battery pack, if it is to be stored for an extended period. Optimum storage conditions are cool and dry. Optimal state of charge for storage is approximately 50%.
- Transportation

CAUTION! RISK OF INJURY!

Lift with two persons.
☐ Switch the product off and, remove the battery pack 17 and disengage the safety key 7c.
☐ Attach shipping devices, if applicable.
☐ When lifting is unavoidable, lift with two people. The product should only be lifted by the carrying handle 5 and front end of the product. Wear safety gloves when carrying the product to prevent accidental contact of the blade.
□ Always push the product by its handle.
□ Protect the product from any heavy impact or strong vibrations which may occur during transportation in vehicles.
☐ Secure the product to prevent it from slipping or falling over.
● Troubleshooting
WARNING!
Only perform the steps described within these instructions! All further inspection, maintenance and repair work must be performed by an authorised service centre or a similarly qualified specialist if you cannot solve the problem yourself!
Suspected malfunctions are often due to causes that the users can fix themselves. Therefore check the product using this section. In most cases the problem can be solved quickly.
 |
● Disposal
The packaging is made entirely of recyclable materials, which you may dispose of at local recycling facilities.
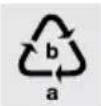
Observe the marking of the packaging materials for waste separation, which are marked with abbreviations (a) and numbers (b) with following meaning: 1 - 7: plastics / 20 - 22: paper and fibreboard / 80 - 98: composite materials

The product and packaging materials are recyclable, dispose of it separately for better waste treatment. The Triman logo is valid in France only.

Contact your local refuse disposal authority for more details of how to dispose of your worn-out product.

To help protect the environment, please dispose of the product properly when it has reached the end of its useful life and not in the household waste. Information on collection points and their opening hours can be obtained from your local authority.
Faulty or used batteries / rechargeable batteries must be recycled in accordance with Directive 2006/66/EC and its amendments. Please return the batteries / rechargeable batteries and / or the product to the available collection points.
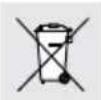
Environmental damage through incorrect disposal of the batteries / rechargeable batteries!
Remove the batteries / battery pack from the product before disposal. Batteries / rechargeable batteries may not be disposed of with the usual domestic waste. They may contain toxic heavy metals and are subject to hazardous waste treatment rules and regulations. The chemical symbols for heavy metals are as follows:
Cd = cadmium, Hg = mercury, Pb = lead. That is why you should dispose of used batteries / rechargeable batteries at a local collection point.
● Service
WARNING!
Have your product repaired at the service centre or an electrician, using only original manufacturer parts. This will maintain the safety of this product.
▶ Always have a plug or power cord of the charger replaced by the product manufacturer or its service centre. This will maintain the safety of this product.
● Warranty
The product has been manufactured to strict quality guidelines and meticulously examined before delivery. In the event of product defects you have legal rights against the retailer of this product. Your legal rights are not limited in any way by our warranty detailed below. The warranty for this product is 3 years from the date of purchase. Should this product show any fault in materials or manufacture within 3 years from the date of purchase, we will repair or replace it – at our choice – free of charge to you. The warranty period begins on the date of purchase. Please keep the original sales receipt in a safe location. This document is required as your proof of purchase. This warranty becomes void if the product has been damaged, or used or maintained improperly. The warranty applies to defects in material or manufacture. This warranty does not cover product parts subject to normal wear, thus possibly considered consumables (e.g. batteries) or for damage to fragile parts, e.g. switches, rechargeable batteries or glass parts. The warranty for this rechargeable battery pack is 1 year from the date of purchase.
Warranty claim procedure
To ensure quick processing of your case, please observe the following instructions: Please have the till receipt and the item number (e.g. IAN 123456) available as proof of purchase. You will find the item number on the type plate, an engraving on the front page of the instructions (bottom left), or as a sticker on the rear or bottom of the product. If functional or other defects occur, please contact the service department listed either by telephone or by e-mail. You can return a defective product to us free of charge to the service address that will be provided to you. Ensure that you enclose the proof of purchase (till receipt) and information about what the defect is and when it occurred.
GB Service Great Britain
Tel.: 0871 5000 720 (£ 0.10/Min.)
E-Mail: owim@lidl.co.uk
IE Service Ireland
Tel.: 1890 930 034
(0,08 EUR/Min., (peak))
(0,06 EUR/Min., (off peak))
E-Mail: owim@lidl.ie
IAN 292278
● Translation of original declaration of conformity
We, OWIM GmbH & Co. KG, Stiftsbergstraße 1, DE-74167 Neckarsulm, GERMANY, hereby declare under our sole responsibility that the product: cordless lawnmower FARM 40-Li A1, model no.: HG03586, version: 02/2018, to which this declaration refers, complies with the standards / normative documents of 2006/42/EC, 2014/35/EU, 2014/30/EU, 2011/65/EU, 2000/14/EC, 2005/88/EC.
Applied harmonised standards:
EN 60335-1: 2012/A11: 2014
EN 60335-2-77: 2010
EN 60335-2-29: 2004+A2: 2010
EN 62233: 2008
EN 55014-1: 2006/A2: 2011
EN 55014-2: 2015
EN 61000-3-2: 2014
EN 61000-3-3: 2013
EN 50581:2012
We additionally confirm the following in accordance with the 2000/14/EC emissions guideline:
Sound power level
guaranteed: 96 dB(A)
measured: 94,3 dB(A)
Compliance evaluation process carried out in accordance with Annex VI, 2000/14/EC
Name of notified body:
TÜV SÜD Industrie Service GmbH (Notified body: 0036)
Address of notified body:
Westendstraße 199, 80686 München, Germany
Serial number: IAN 292278

Tobias König
Division Manager / Responsible for documentation
The declaration of conformity can also be viewed at: www.owim.com.

The object of the declaration described above satisfies the provisions of Directive 2011/65/EU of the European Parliament and the Council of 8 June 2011 on limiting the use of certain harmful substances in electrical and electronic appliances.
Sommaire
Compliance evaluation process carried out in accordance with Annex VI, 2000/14/CE
Nominale spanning: 40 V ---
Stationair toerental n0 : 3700 min -1
Maaibreedte: 430 mm
Maaihoogte: 25/35/45/55/65/75 mm
Volume grasopvangbak: 40 l
Afmetingen (H x B x D): (1010 - 1190) x 475 x (1140 - 1350) mm
Nominale spanning: 36 V ---
Laadstroom: 3,6 A
● Gedrag in noodgevallen
⚠ WAARSCHUWING! LETSELGEVAAR!


- AKKU-PACK: FAP 40 A1
- SAFETY WARNINGS PAGE 28
- INITIAL USE...... PAGE 32
- BEFORE USE PAGE 33
- OPERATION PAGE 34
- CLEANING AND CARE PAGE 36
- TROUBLESHOOTING PAGE 37
- DISPOSAL PAGE 38
- SERVICE PAGE 39
- WARRANTY PAGE 39
- TRANSLATION OF ORIGINAL DECLARATION OF CONFORMITY PAGE 40
- CORDLESS LAWNMOWER FARM 40-LI A1
- ● INTRODUCTION
- INTENDED USE
- PARTS DESCRIPTION
- FIGURE A/D/E
- FIGURE B
- FIGURE C
- SCOPE OF DELIVERY
- ● TECHNICAL DATA
- CORDLESS
- LAWNMOWER: FARM 40-LI A1
- BATTERY PACK: FAP 40 A1
- RAPID BATTERY
- CHARGER: FLG 40 A1
- INPUT
- OUTPUT
- NOISE EMISSION VALUE
- WARNING
- VIBRATION EMISSION VALUE
- NOTE
- SAFETY WARNINGS
- WARNING! RISK OF ELECTRIC SHOCK
- ● SAFE OPERATING PRACTICES FOR ELECTRICALLY POWERED LAWNMOWERS
- IMPORTANT READ CAREFULLY BEFORE USE. KEEP FOR FUTURE REFERENCE
- TRAINING
- PREPARATION
- OPERATION
- MAINTENANCE AND STORAGE
- ● VIBRATION AND NOISE REDUCTION
- ● BEHAVIOUR IN EMERGENCY SITUATIONS
- RESIDUAL RISKS
- ● BATTERY CHARGER SAFETY WARNINGS
- CAUTION! RISK OF EXPLOSION
- INITIAL USE
- ● UNPACKING
- ACCESSORIES
- ASSEMBLY
- ATTACHING THE LOWER BAR
- ATTACHING THE UPPER BAR
- SECURING THE CONTROL CABLE
- ● BEFORE USE
- ● CHARGING THE BATTERY PACK
- CHECKING THE BATTERY CHARGING LEVEL
- ● SAFETY KEY
- ENGAGING THE SAFETY KEY
- DISENGAGING THE SAFETY KEY
- ATTACHING / REMOVING THE BATTERY PACK
- ATTACHING THE BATTERY PACK
- REMOVING THE BATTERY PACK
- GRASS COLLECTOR
- ATTACHING CARRYING HANDLE ON GRASS COLLECTOR
- ATTACHING THE GRASS COLLECTOR
- REMOVING THE GRASS COLLECTOR
- EMPTYING THE GRASS COLLECTOR
- MULCH PLUG
- ATTACHING THE MULCH PLUG
- REMOVING THE MULCH PLUG
- ● ADJUSTING THE CUTTING HEIGHT
- ● SWITCHING ON AND OFF
- SWITCHING ON
- SWITCHING OFF
- MOWING
- WARNING! RISK OF INJURY
- AFTER USE
- ● CLEANING AND CARE
- CAUTION! RISK OF INJURY
- CLEANING
- ● MAINTENANCE
- REPAIR
- STORAGE
- TRANSPORTATION
- ● TROUBLESHOOTING
- ● DISPOSAL
- ENVIRONMENTAL DAMAGE THROUGH INCORRECT DISPOSAL OF THE BATTERIES / RECHARGEABLE BATTERIES
- ● SERVICE
- ● WARRANTY
- WARRANTY CLAIM PROCEDURE
- GB SERVICE GREAT BRITAIN
- IE SERVICE IRELAND
- IAN 292278
- ● TRANSLATION OF ORIGINAL DECLARATION OF CONFORMITY
- APPLIED HARMONISED STANDARDS
- SOMMAIRE
- ● GEDRAG IN NOODGEVALLEN
- ⚠ WAARSCHUWING! LETSELGEVAAR
Brand : FLORABEST
Model : FARM 40-Li A1
Category : Lawn mower