HEMA-D20DGREY - Coffee maker Heinner - Free user manual and instructions
Find the device manual for free HEMA-D20DGREY Heinner in PDF.


| Type | Automatic espresso machine |
| Model | HEMA-D20DGREY |
| Brand | Heinner |
| Power | 1350 W |
| Water tank capacity | 1.5 L |
| Bean box capacity | 200 g |
| Grind settings | 1 (finest) to 15 (coarsest) |
| Adjustable coffee outlet height | 85 - 115 mm |
| Display | Digital with touch control |
| Beverages | Single espresso, double espresso, americano, cappuccino, latte, hot water, manual froth |
| Additional functions | Bean-emptying, manual clean, energy-saving mode, factory reset |
| Milk frother | Included, detachable |
| Brewer | Removable, washable |
| Residue container | Removable, holds coffee grounds |
| Drip tray | Removable, collects water and spills |
| Cleaning | Manual clean cycle, descaling program, removable parts dishwasher safe? (No, hand wash recommended) |
| Descaling indicator | Flashes after 500 brewing cycles |
| Safety | Auto shut-off, thermal cut-out, child safety (keep out of reach of children) |
| Spare parts | Water tank, milk reservoir, milk frother, brewer, drip tray, residue container, grind setting knob, cleaning brush |
| Repairability | User-replaceable parts; professional service required for complex issues |
| Power cord length | Approximately 1 m (estimated) |
Frequently Asked Questions - HEMA-D20DGREY Heinner
User questions about HEMA-D20DGREY Heinner
0 question about this device. Answer the ones you know or ask your own.
Ask a new question about this device
Download the instructions for your Coffee maker in PDF format for free! Find your manual HEMA-D20DGREY - Heinner and take your electronic device back in hand. On this page are published all the documents necessary for the use of your device. HEMA-D20DGREY by Heinner.
USER MANUAL HEMA-D20DGREY Heinner
natural_image
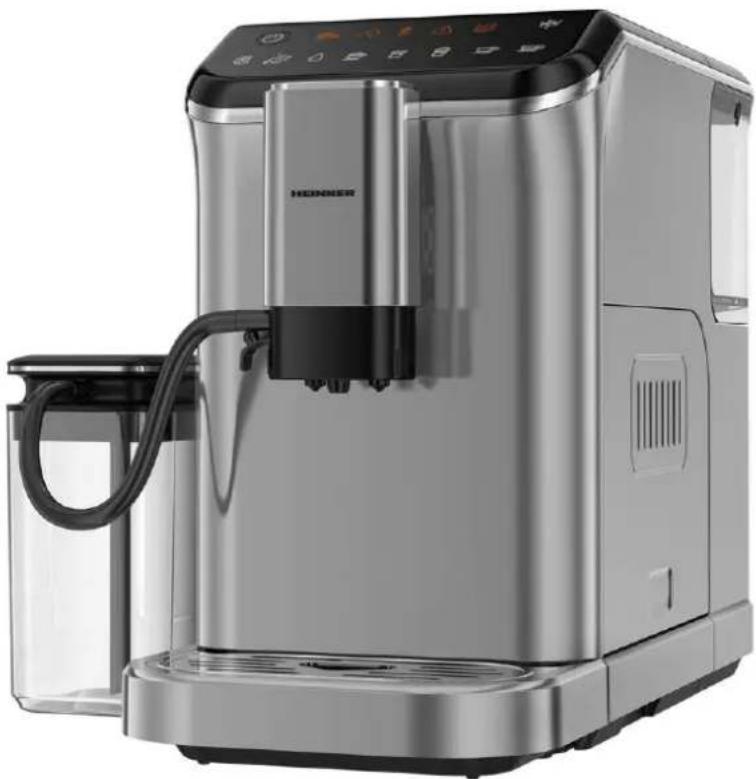
Exterior view of a modern stainless steel milk tea maker with control panel and side arm (no visible text or symbols)- Power: 1350 W
• Water tank capacity: 1.5 L
• Digital display with touch control
1. INTRODUCTION
Please read the instructions carefully and keep the manual for future information.
This manual is designed to give all necessary instructions concerning installation, use and maintenance of the unit. In order to operate the unit correctly and safely, please read this instruction manual carefully before installation and use.
2. CONTENT OF YOUR PACKAGE
→ Automatic espresso maker
→ User manual
→ Certificate of warranty
→ Declaration of conformity
3. SAFETY MEASURES
GENERAL
When using electrical appliances, basic precautions should always be followed, including the following:
- Before using check that the voltage power corresponds to the one shown on the appliance nameplate.
- If the supply cord is damaged, it must be replaced by the manufacturer, its service agent or similarly qualified persons in order to avoid a hazard.
- Appliances can be used by persons with reduced physical, sensory or mental capabilities or lack of experience and knowledge if they have been given supervision or instruction concerning use of the appliance in a safe way and they understand the hazards involved.
- Keep the appliance and its cord out of reach of children.
- This appliance shall not be used by children. Children should be supervised to ensure that they do not play with the appliance.
- Close supervision is necessary when any appliance is used by or near children.
- Cleaning and user maintenance shall not be done by children unless they are supervised.
- To disconnect, turn any control to "OFF", remove plug from wall outlet. Always hold the plug. But never pull the cord.
- Unplugged from outlet when not in use and before cleaning. Allow you to cool before putting on or taking off parts, and before cleaning the appliance.
- The use of accessories not recommended by the appliance manufacturer may result in fire, electric shock or injury to people.
- Do not use it outdoors.
- Do not use appliances for other than intended use.
- Do not let cord hang over edge of table or counter or touch hot surface.
- Do not place on or near a hot gas or electric burner, or in a heated oven.
- Do not let the coffee machine operate without water.
- To protect against fire, electric shock and injury to persons do not immerse cord, plug, or in water or other liquid.
-
Do not set a hot container on a hot or cold surface.
-
The container is designed for use with this appliance. It must never be used on a range top.
- Do not clean container with cleansers, steel wool pads, or other abrasive material.
- Be careful not to get burned by the steam during the brewing cycles.
- Some parts of appliance are hot when operated, so do not touch it with hand. Use handles or knobs only.
- The appliance must not be immersed.
- This appliance is intended to be used for household use only.
- A warning of potential injury from misuse.
- The heating element surface is subject to residual heat after use.
- The coffeemaker shall not be placed in a cabinet when in use.
- Switch off the appliance and disconnect from supply before changing accessories or approaching parts that move in use.
- CAUTION: In order to avoid a hazard due to inadvertent resetting of the thermal cut-out, this appliance must not be supplied through an external switching device, such as a timer, or connected to a circuit that is regularly switched on and off by the utility.
- Always disconnect the appliance from the supply if it is left unattended and before assembling, disassembling or cleaning.
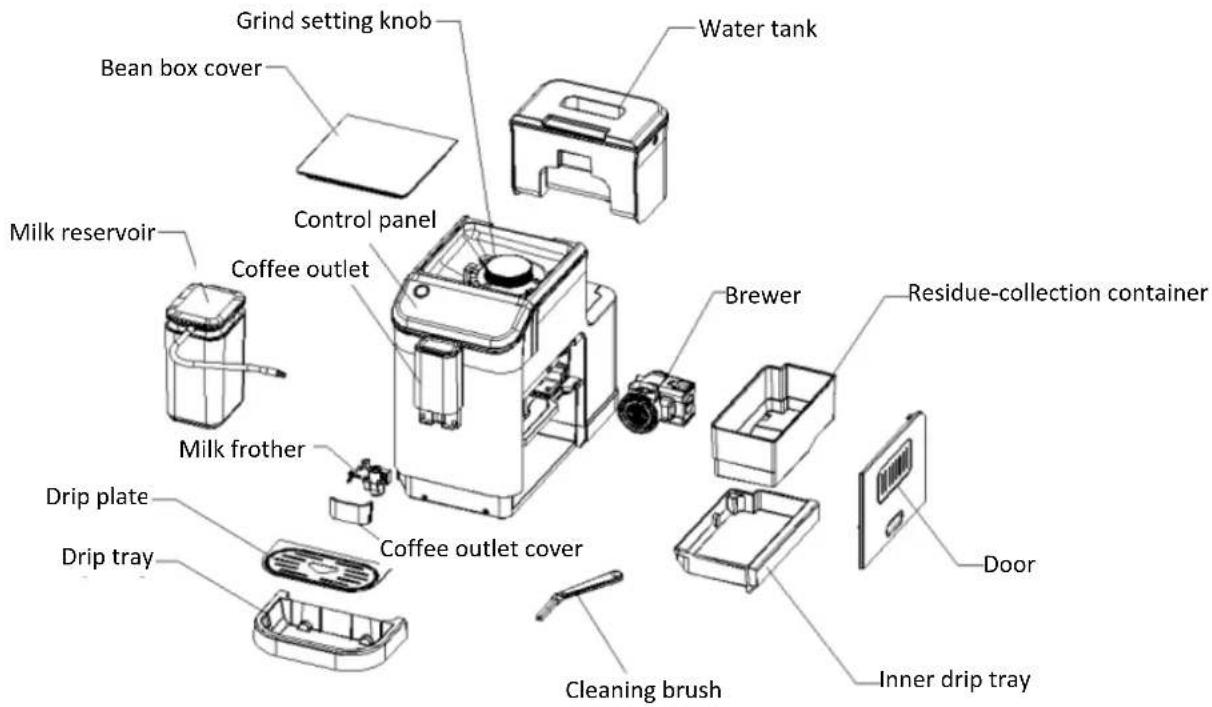
4. PRODUCT DESCRIPTION
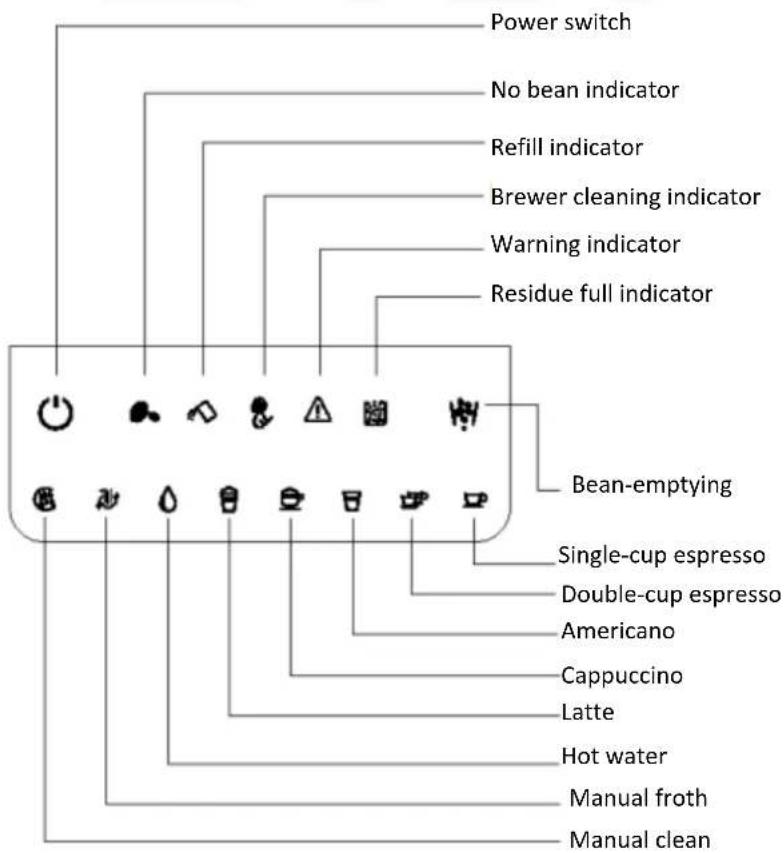
CONTROL PANEL
5. USING THE APPLIANCE
BEFORE FIRST USE
Check that all accessories are complete, and the unit is not damaged. Check and understand all the parts and their functions. It is recommended to keep the original packaging for future use. And then follow the operations as below.
- Before using for the first use, please remove the water tank, milk reservoir, brewer and milk frother and rinse them with clean water.
- Check and make sure all the removable parts are installed well in position:
(1) Water tank:
Fill the water tank with fresh water up to Max mark and then reassembly it into the unit and make sure it is properly assembled, and then close the water tank lid.
(2) Milk reservoir:
- Insert the milk tube into the hole of milk frother at the side of coffee outlet.
- Move the milk tube from the milk reservoir lid and then insert it into the milk reservoir lid.
• Install the milk reservoir and milk reservoir lid well in position.
• The milk tube can be folded, and please install it firmly by yourself if it is loose.
natural_image
Close-up of a modern stainless steel appliance with black lid and side arm (no visible text or symbols)(3) Grind setting knob
• Turn the grind setting knob bracket counterclockwise to the leftmost.
• Cover the grind setting knob according to the specified position.
- Select the grinding setting clockwise.
NOTE: When the new coffee machine is used for the first time, it is suggested that the grind setting higher than setting 8 should be selected. The adjustable grind settings range between 1(finest) and 15(coarsest), the number on the grind setting knob pointed by the arrow is the actual selected grind setting.
CAUTION: We suggest adjusting one notch at a time to avoid the damage.
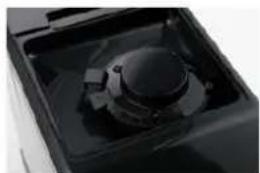
natural_image
Close-up of a black appliance with a circular button and handle, no visible text or symbols(4) Milk frother
- Open the coffee outlet cover and make sure the milk frother is installed well in position.
- If the milk frother is installed well in position, please close the coffee outlet cover and then insert the connecting tube.
- Insert the other end of the connecting tube into the milk reservoir.
(5) Adjustment for the height of coffee outlet
• The adjustable height of the coffee outlet ranges between 85 and 115 mm.
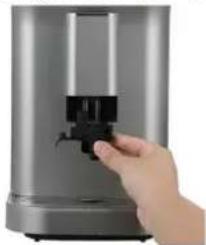
natural_image
Hand inserting a black plastic component into a silver appliance (no text or symbols visible)(6) Brewer
- Open the door and check whether the brewery is installed well in position.
(A) Check whether the arrow of the brewer is aligned with the arrow of the upper bracket.
(B) An audible click indicates that the assembling of brewer is correct.
(C) The warning indicator "⚠️" will light solidly if the brewer is not installed in place. - Close the door.
(A)The whole door and body are on the same horizontal plane.
(B) The warning indicator "W" I flash if the door is not closed properly.
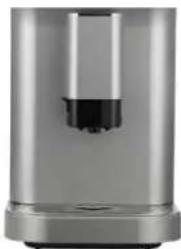
natural_image
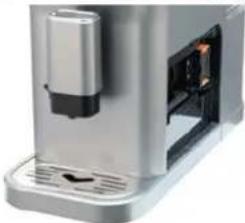
Close-up of a stainless steel water dispenser with a black vent (no visible text or symbols)(7) Inner drip tray and residue-collection container
- Open the door and check whether the drip tray is installed in place.
- Open the door and check whether the residue-collection container is installed in place.
- The inner drip tray will not be installed well in position, the warning indicator “⚠️” will flash and the machine can not work if there is foreign object at the front of the residue-collection container.
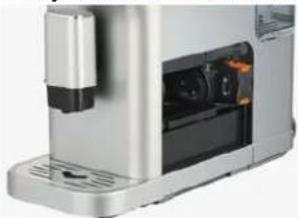
natural_image
Close-up of a silver and black industrial machine with visible internal components (no text or symbols)(8) Drip plate
- Place the drip plate on the drip tray. The drip plate must be installed well in position so that the container can be placed on it for holding coffee, milk or hot water.
- Insert the drip tray into the appliance.
NOTE: The drip tray collects the water from the dispensing spout during each rinse & self-cleaning as well as coffee that might be spilled during brewing. So clean and empty the drip tray everyday.
natural_image
Close-up of a stainless steel coffee maker with a cylindrical lid and open lid (no visible text or symbols)(9) Fill the bean box with proper amount of fresh coffee beans, 200g at most, and then close the bean box cover.
CAUTION: If the grinding blade is removed, please make sure that the grinding blade has been installed well in position before filling the bean box with coffee beans.
OPERATION
This appliance is a multifunctional coffee machine, it has the functions of "Single-cup Espresso", "Double-cup Espresso", "Americano", "Cappuccino", "Latte", "Hot water", "Manual froth", "Manual clean" and "Bean-emptying".
SPECIAL NOTE: The appliance will perform cleaning automatically to make preparation for operation when it is started each time.
NOTE: The coffee will come out drip by drip at the beginning (2-3 seconds after the brewing is started) and the end (6-8 seconds before the brewing is completed) during the brewing process, this is normal.
Power on and Preheat
natural_image
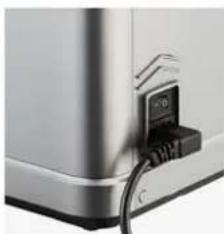
Close-up of a stainless steel kitchen appliance with a power cord and attached digital display (no visible text or symbols)- Connect the appliance with rated voltage and press the on/Off button at the back side of the appliance.
- Hold and press the Power switch “💡” for at least 0.3 second and its corresponding indicator flashes, and then the appliance enters into the self-check status.
NOTE: Please refer to the section of "TROUBLESHOOTING" to operate if there is warning occurred.
-
Place a container under the coffee outlet.
-
The Manual clean indicator “💡” illuminates solidly and the indicator of Power switch “💡” flashes, then the appliance enters into the preheating stage and the auto-clean status.
-
After the preheating of coffee boiler is completed, the indicators of Single-cup Espresso “☐”, Double-cup Espresso “☐”, Americano “☐” and Bean-emptying “☐” illuminate solidly, and the appliance can be operated normally.
-
During the preheating of steam boiler, the indicators of Cappuccino “”, Latte “”, Hot water “”, Manual froth “” and Manual clean “” floss, which means the appliance can not be operated. After the preheating of steam boiler is completed, the functional indicators will illuminate solidly and the appliance can be operated normally.
-
All the functional indicators will illuminate solidly after all the preheating stages are completed, and then the appliance will enter the standby status.
Brew Single cup Espresso
natural_image
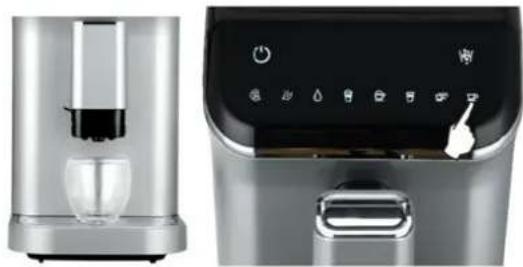
Exterior and interior views of a modern stainless steel water dispenser (no visible text or symbols)Place a coffee container under the coffee outlet.
-
Check and make sure the plug of milk frother is closed well in position.
-
Hold and press the Single-cup Espresso “☐” for at least 0.2 second and the appliance will start to brew single-cup of espresso. The indicator of Single-cup Espresso “☐” will illuminate solidly during the process of brewing single-cup of espresso.
-
After finish brewing single cup of espresso, the appliance enters into the standby mode automatically.
-
Hold and press the Single-cup Espresso “☐” for at least 0.1 second again if need to cancel the current function.
Brew Double-cup Espresso
natural_image
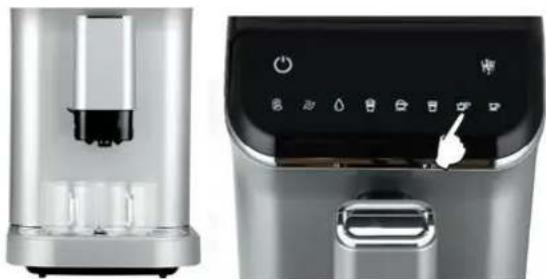
Side-by-side comparison of a modern stainless steel water dispenser and its digital kitchen control panel (no visible text or symbols)-
Place a coffee container under the coffee outlet.
-
Check and make sure the plug of milk frother is closed well in position.
-
Hold and press the Double-cup Espresso “☐” for at least 0.2 second and the appliance will start to brew double-cup of espresso. The indicator of Double-cup Espresso “☐” will illuminate solidly during the process of brewing double-cup of espresso.
NOTE: The double-cup espresso is achieved by brewing two cycles of single-cup espresso continuously, so please do not remove the coffee container during the brewing process.
-
After finish brewing double-cup espresso, the appliance enters into standby mode automatically.
-
Hold and press the Double-cup Espresso "☐" for at least 0.1 second again if need to cancel the current function.
Brew Americano
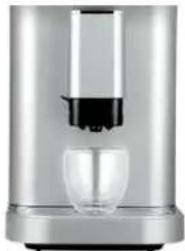
natural_image
Modern stainless steel water leveler with clear glass cup (no visible text or symbols)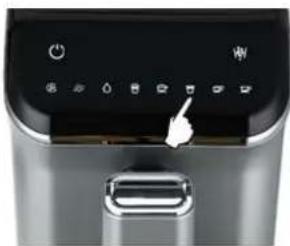
natural_image
Close-up of a stainless steel kitchen electric oven control panel with buttons and a hand pointing to the button (no visible text or symbols)- Place a coffee container under the coffee outlet.
- Check and make sure the plug of milk frother is closed well in position.
- Hold and press the Americano "☐" for at least 0.2 second and the appliance will start to brew americano.
The indicator of Americano “☐” will illuminate solidly during the process of brewing americano. - After finish brewing americano, the appliance enters into the standby mode automatically.
- Hold and press the Americano “☐” for at least 0.1 second again if need to cancel the current function.
Brew Cappuccino
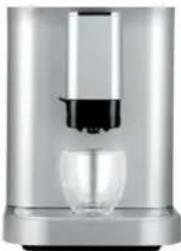
natural_image
Exterior view of a modern stainless steel coffee maker with glass cup (no text or symbols visible)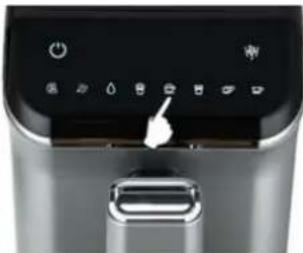
natural_image
Close-up of a stainless steel kitchen air fryer with control buttons and a pointing hand (no text or symbols visible)- Place a coffee container under the coffee outlet.
- Fill the milk reservoir with appropriate amount of cold milk. NOTE: After the “Cappuccino” function is conducted, the overheating protection mechanism for the boiler will be activated, at that time, if need to conduct the “Hot water” function the appliance should be rested for about 3-5 minutes and then the “Hot water” function can be activated.
NOTES:
(1) It is recommended that the temperature of milk should be 5-10°C, and the protein content of milk should be at least 3%.
(2) The milk filled in the milk reservoir should not exceed the "MAX" mark on the milk reservoir.
-
Insert the milk tube well in position.
-
Remove the silicone tube from the milk reservoir lid and then connect it with the milk frother and milk reservoir lid.
-
Hold and press the Cappuccino “Cappuccino” for at least 0.2 second and the appliance will start to brew cappuccino.
-
After finish brewing cappuccino, the appliance enters into the standby mode automatically.
-
Hold and press the Cappuccino “☐” for at least 0.1 second again if need to cancel the current function. NOTES:
-
After each use, if there is still milk in the milk reservoir, please store it in the refrigerator, but the silicone tube and milk frother should be cleaned in time.
-
It is recommended to use a high cup to prevent the frothed milk from splashing.
(1) Remove the silicone tube and rinse it with tap water.
(2) Remove the coffee outlet cover and rinse it with tap water.
(3) Remove the milk frother and rinse it with tap water.
(4) After finish cleaning, replace all the parts well in position.
- After each use, please repeat the above operation if there is no milk in the milk reservoir.
(1) Rinse the milk reservoir with tap water.
(2) Remove the milk reservoir and rinse it with tap water.
(3) Remove the milk tube and rinse it with tap water.
Brew Latte
- Place a coffee container under the coffee outlet.
- Fill the milk reservoir with appropriate amount of cold milk.
NOTE: After the “Latte” function is conducted, the overheating protection mechanism for the boiler will be activated, at that time, if need to conduct the “Hot water” function the appliance should be rested for about 3-5 minutes and then the “Hot water” function can be activated.
NOTES:
(1) It is recommended that the temperature of milk should be 5-10°C, and the protein content of milk should be at least 3%.
(2) The milk filled in the milk reservoir should not exceed the "MAX" mark on the milk reservoir.
-
Insert the milk tube well in position.
-
Remove the silicone tube from the milk reservoir lid and then connect it with the milk frother and milk reservoir lid.
-
Hold and press the Latte "☐" for at least 0.2 second and the appliance will start to brew latte.
-
After finish brewing latte, the appliance enters into standby mode automatically.
-
Hold and press the Latte "☐" for at least 0.1 second again if need to cancel the current function.
NOTES:
-
After each use, if there is still milk in the milk reservoir, please store it in the refrigerator, but the silicone tube and milk frother should be cleaned in time.
-
It is recommended to use a high cup to prevent the frothed milk from splashing.
(1) Remove the silicone tube and rinse it with tap water.
(2) Remove the coffee outlet cover and rinse it with tap water.
(3) Remove the milk frother and rinse it with tap water.
(4) After finish cleaning, replace all the parts well in position.
- After each use, please repeat the above operation if there is no milk in the milk reservoir.
(1) Rinse the milk reservoir with tap water.
(2) Remove the milk reservoir and rinse it with tap water.
(3) Remove the milk tube and rinse it with tap water.
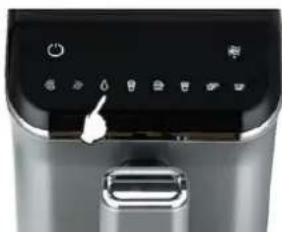
Make hot water
natural_image
Close-up of a kitchen air fryer control panel with buttons and a hand pointing to the button (no visible text or symbols)- Place a water container under the coffee outlet.
NOTE: The capacity of the water container should be more than 120ml.
-
Check and make sure the plug of milk frother is closed well in position.
-
Hold and press the Hot water “☐” for at least 0.2 second and the appliance will start to make hot water.
-
After finishing making hot water, the appliance enters into the standby mode automatically.
-
Hold and press the Hot water “☐” for at least 0.1 second again if need to cancel the current function. NOTE: Please do not touch the water container with your hands during making hot water. Please do not use the hot water to prevent it from being burnt as there will be still a little hot steam dispensed from the coffee outlet after finish making hot water.
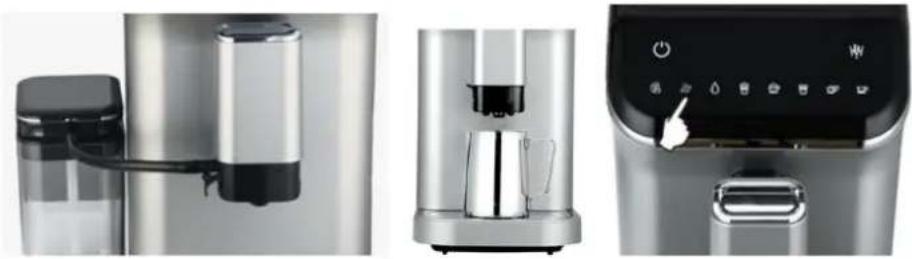
Manual froth
natural_image
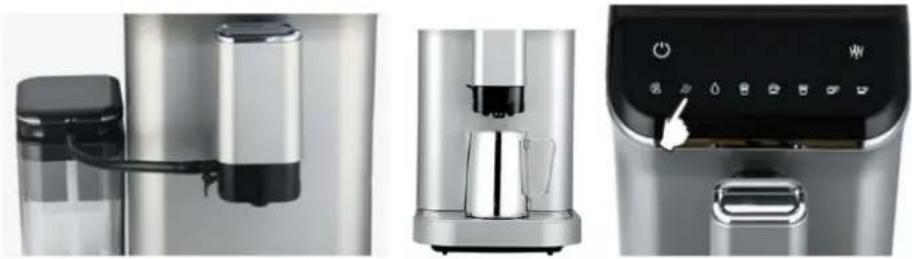
Three-panel image showing a modern stainless steel milk dispenser, a hand mixer, and a digital air fryer with control panel (no visible text or symbols)NOTE: After the “Manual froth” function is conducted, the overheating protection mechanism for the boiler will be activated, at that time, if need to conduct the “Hot water” function the appliance should be rested for about 3-5 minutes and then the “Hot water” function can be activated.
- Place a milk container under the coffee outlet. NOTE: The capacity of the milk container should be more than 160 ml.
- Fill the milk reservoir with an appropriate amount of cold milk.
NOTES:
(1) It is recommended that the temperature of milk should be 5-10°C, and the protein content of milk should be at least 3%. (2) The milk filled in the milk reservoir should not exceed the "MAX" mark on the milk reservoir.
- Hold and press the Manual froth “###” for at least 0.2 second and the appliance will start to conduct the manual froth function.
-
After finish frothing milk, the appliance enters into the standby mode automatically.
-
Hold and press the Manual froth “###” for at least 0.1 second again if need to cancel the current function. NOTES:
-
After each use, if there is still milk in the milk reservoir, please store it in the refrigerator, but the silicone tube and milk frother should be cleaned in time.
- It is recommended to use a high cup to prevent the frothed milk from splashing.
(1) Remove the silicone tube and rinse it with tap water.
(2) Remove the coffee outlet cover and rinse it with tap water.
(3) Remove the milk frother and rinse it with tap water.
(4) After finish cleaning, replace all the parts well in position. - After each use, please repeat the above operation if there is no milk in the milk reservoir.
(1) Rinse the milk reservoir with tap water.
(2) Remove the milk reservoir and rinse it with tap water.
(3) Remove the milk tube and rinse it with tap water.
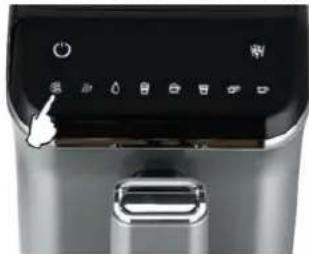
Manual clean
- Place a water container under the coffee outlet.
- Hold and press the Manual clean “☐” for at least 0.2 second and the appliance will start to conduct the manual clean function.
-
After finish cleaning, the appliance enters into the standby mode automatically.
-
Hold and press the Manual clean “☐” for at least 0.1 second again if need to cancel the current function.
natural_image
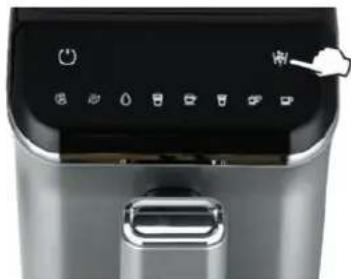
Close-up of a stainless steel kitchen electric oven with control buttons and a handle (no visible text or symbols)Empty the coffee beans left
natural_image
Close-up of a stainless steel electric food oven with control buttons and a hand pointing to the right pan (no visible text or symbols)NOTE: This function is used for emptying the beans in the bean box. Please use it carefully to avoid waste.
-
Hold and press the Bean-emptying “☐” for at least 1 second and the appliance will start to conduct the bean-emptying function. At that time, the indicator of Bean-emptying “☐” illuminates solidly while other functional indicators turn off.
-
Remove the residue-collection container and empty the ground coffee in it.
-
After finish working, the appliance enters into the standby mode automatically.
-
Hold and press the Bean-emptying "☐" for at least 0.3 second again if need to cancel the current function.
NOTE: The bean-emptying function only last for 15 seconds each time, please repeat the above operation if there are many coffee beans left in the bean box.
Energy-saving mode
natural_image
Close-up of a stainless steel kitchen air purifier with control buttons and a hand pointing to the button (no visible text or symbols)-
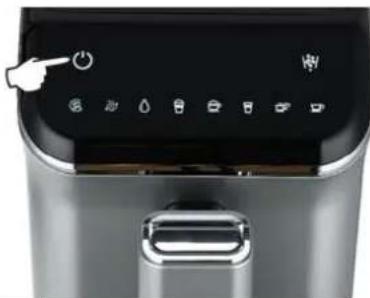
Hold and press the Power switch “💡” for at least 0.2 s to and then the appliance enters into the sleep mode. At that time, all the indicators turn off and all the functions are invalid.
-
The appliance will enter into the sleep mode if there is not any operation within 28 minutes. At that time, all the indicators turn off and all the functions are invalid.
-
During sleep mode, hold and press the Power switch “💡” for at least 0.2 second, then the appliance will conduct self-check, preheat and return to the standby mode.
NOTES:
(1) When the appliance is powered on continuously, hold and press the Power switch “💡” for at least 0.2 second to activate the appliance after more than 4 hours, and the auto-clean function of the appliance will be activated.
(2) If the appliance is powered off, the auto-clean function will be activated after hold and press the Power switch "or at least 0.2 second.
(3) Please refer to the section of "Power on and Preheat" for details.
Set the coffee-dispensing amount and milk-dispensing amount.
1. Operation for setting the coffee-dispensing amount:
After the coffee dispenses from the appliance, hold and press the selected functional key for 2 seconds, the buzzer beeps and the corresponding indicator of selected functional key flashes, at that time, the appliance enters into the mode for setting the coffee-dispensing amount. As soon as the coffee in the cup reaches the required level, release the selected functional key, then the appliance stops working and the newly-set coffee-dispensing amount is saved. And the range of coffee-dispensing amount is as below:
(1) Single-cup Espresso: 30-100 ml
(2) Double-cup Espresso: (30-100 ml)*2
(3) Americano: 110-180 ml
2. Operation for setting the milk-dispensing amount:
After the milk dispenses from the appliance, hold and press the selected functional key for 2 seconds, the buzzer beeps and the corresponding indicator of selected functional key flashes, at that time, the appliance enters into the mode for setting the milk-dispensing amount. As soon as the milk in the cup reaches the required level, release the selected functional key, the appliance stops working and the newly-set milk-dispensing amount is saved. The operation for setting the milk-dispensing amount is only applicable for the functions of "Cappuccino" and "Latte". And the range of milk-dispensing amount is as below:
(1) Cappuccino: Coffee: 30-100ml + Milk:10-40 seconds
(2) Latte: Coffee: 30-100ml + Milk: 10-40 seconds
Factory reset
natural_image
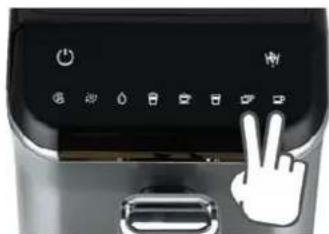
Close-up of a kitchen keyboard with a hand gesture overlay (no text or symbols visible)Hold and press the Single-cup Espresso “☐” and Double-cup Espresso “☐” for 2 seconds at the same time, then all the parameters are recovered to the factory default setting.
6. CLEANING AND MAINTENANCE
CAUTION: Be sure to unplug this appliance before cleaning and let the appliance cool down completely. To protect against electrical shock, do not immerse cord, plug or unit in water or liquid. Please unplug the appliance after each use.
- Wipe the outer surface of the product with a soft damp cloth to remove stains but avoid using abrasive cleaning tools as they will scratch the product. Do not use alcohol or solvent cleaners.
- Water droplets may build up in the area above the drip plate or countertop during brewing. To control the dripping, wipe off the area with a clean, dry cloth after each use of the product.
- The brewer, water tank, milk reservoir, drip tray, drip plate, inner drip tray, residue-collection container and door can not be put into the dishwasher for cleaning.
- The water in the drip plate and drip tray as well as the coffee grounds in the inner drip tray and residue-collection container need to be emptied and they shall be cleaned well.
- Clean the parts by following the description and operation as below.
| Detachable parts | When to clean | How to clean |
| Residue-collection container | For Single-cup Espresso, Latte and Cappuccino, conduct once every 8 brewing cycles.For Double-cup Espresso, conduct once every 4 brewing cycles.It is recommended to clean it on the same day if it is not used for a long time. | Remove the residue-collection container and empty it, add some cleaning solution and then rinse it under the tap water. |
| Brewer | For Single-cup Espresso, Latte and Cappuccino, conduct once every 8 brewing cycles.For Double-cup Espresso, conduct once every 4 brewing cycles.It is recommended to clean it on the same day if it is not used for a long time. | Remove the brewer from the coffee machine and rinse it under the tap water. |
| Water tank | Once every week | Rinse the water tank under the tap water. |
| Milk reservoir | After every use | Rinse the milk reservoir under the tap water. |
| Milk frother | After every use | Remove the milk frother from the appliance and rinse it under tap water. |
| Drip tray | Empty the drip tray every day and clean it once every week. | Remove the drip tray and add some cleaning solution and then rinse it under the tap water. |
| Grinder | Clean it once every week | 1. Remove the grind setting knob counterclockwise.2. Remove the internal grinding wheel counterclockwise.3. Clean the grinding wheel with the cleaning brush and empty the ground coffee at the gap.4. Clean the grinding chamber with the cleaning brush.5. Do not install the grinding wheel and install the grind setting knob well in position again.6. Press the button of grinder.7. Let the grinder keep running to remove the remaining powder in the grinding chamber (please repeat the operation of Step 3 and 4 if there is coffee powder left.)8. Remove the grind setting knob counterclockwise.9. Install the grinding wheel clockwise.10. Install the grind setting knob clockwise, and the cleaning is completed. |
| Non-detachable parts | When to clean | How to clean |
| Powder-dispensing channel | Check it once a week | Method 1:1. Hold and press the “Bean-emptying” key “” and “Single-cup Espresso”key “” for 2 seconds at the same time, their corresponding indicators flashand the door is opened.2. Open the door and loosen the ground coffee in the power-dispensingchannel by a toothpick, and then close the door when there is ground coffeefalls down.3. Hold and press the “Bean-emptying” key “” and “Single-cup Espresso”key “” the same time again for at least 0.3 second, then theircorresponding indicators extinguish and the door is closed.Method 2:1. If there are few coffee beans remained in the bean box, hold and press the“Bean-emptying” key “” at least one second to make the appliancekeep working until the ground coffee blocked in the power-dispensing channelare emptied, and then the appliance goes back to the normal working status.NOTE: If the ground coffee become finer obviously during the use of theappliance, or the coffee pack become smaller after finish brewing, pleasecheck the powder-dispensing channel for any powder blockage, and thepowder-dispensing channel should be cleaned once every week. |
| Brewing base | Check it once a week | Clean the coffee residue around the brewing base with a brush. |
| Brewing system bracket | Check it once a week | 1. When the appliance is powered on, hold and press Manual Clean key“”and Double-cup Espresso“” 1 second to center into the mode forcleaning the dead corner of brewer.2. After entering into the brewer-cleaning function, the brewer moves to thebottom.3. After the brewing door is opened (the appliance stays at the safe protectionstate), the dead corner of brewer can be cleaned.4. After finish cleaning, close the brewing door.5. Hold and press Manual Clean key“” and Double-cup Espresso“” for1 second to exit from the cleaning function. |
Clean the residue-collection container
- Open the door.
- Remove the residue-collection container.
- Empty the coffee puck in the residue-collection container.
- Rinse the residue-collection container under the tap water.
- Install the residual-collection container into the appliance.
- Close the door and the cleaning is completed.
Clean the brewer
- Open the door.
- Remove the brewer.
- Rinse the brewer under the tap water.
- Install the brewer into the appliance.
- Close the door and the cleaning is completed.
Clean the water tank
- Remove the water tank from the coffee machine.
- Rinse the water tank under the tap water.
Clean the milk reservoir
- Remove the connecting tube from the appliance after every use.
- Rinse the milk reservoir under the tap water.
- Store the milk reservoir well after cleaning.
Clean the milk frother
- Remove the coffee outlet cover.
- Remove the milk frother from the coffee outlet.
- Rinse the milk frother under the tap water.
- Install the milk frother well, make sure the part with plug should be kept on the left.
- Install the coffee outlet cover, and the cleaning is completed.
Clean the drip tray
- Remove the drip tray.
- Add some cleaning solution and rinse the drip tray under the tap water.
- After cleaning, install the drip tray again.
Clean the grinder
- Remove the grind setting knob counterclockwise.
- Remove the internal grinding wheel counterclockwise.
- Clean the grinding wheel with the cleaning brush and empty the ground coffee at the gap.
- Clean the grinding chamber with the cleaning brush.
- Do not install the grinding wheel and install the grind setting knob well in position again.
- Press the button of grinder.
- Let the grinder keep running to remove the remaining powder in the grinding chamber (please repeat the operation of Step 3 and 4 if there is coffee powder left.)
- Remove the grind setting knob counterclockwise.
- Install the grinding wheel clockwise.
- Install the grind setting knob clockwise, and the cleaning is completed.
Clean the brewing system bracket
- When the appliance is powered on, hold and press Manual Clean key" " and Double-cup Espresso"
for 1 second to center into the mode for cleaning the dead corner of brewer.

- After enter into the brewer-cleaning function, the brewer moves to the bottom.
- After the brewing door is opened (the appliance stays at the safe protection state), the dead corner of brewer can be cleaned.
- After finish cleaning, close the brewing door.
- Hold and press Manual Clean key “💡” and Double-cup Espresso “💡” for 1 second to exit from the cleaning function.
Clean the powder-dispensing channel
Method 1:
-
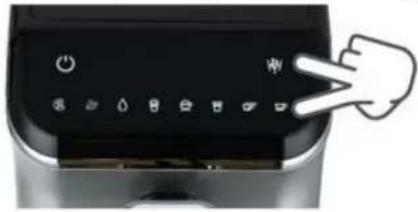
Hold and press the "Bean-emptying" key "☐" and "Single-cup Espresso" key "☐" for 0.2 seconds at the same time, their corresponding indicators flash and the door is opened.
-
Open the door and loosen the ground coffee in the power-dispensing channel by the cleaning brush, and then close the door when there is ground coffee falls down.
-
Hold and press the "Bean-emptying" key "√" and "Single-cup Espresso" key "√" at the same time again for at least 0.1 second, then their corresponding indicators extinguish and the door is closed.
natural_image
Close-up of a kitchen appliance control panel with buttons and a hand pointing to the button (no text or symbols visible)Method 2:
- If there are few coffee beans remained in the bean box, hold and press the "Bean-emptying" key "V97" for at least one second to make the appliance keep working until the ground coffee blocked in the power-dispensing channel are emptied, and then the appliance goes back to the normal working status.
NOTE: If the ground coffee become finer obviously during the use of the appliance, or the coffee pack become smaller after finish brewing, please check the powder-dispensing channel for any powder blockage, and the powder-dispensing channel should be cleaned once every week.
Clean the brewing system and frothing system manually
-
Fill the water tank with an appropriate amount of room-temperature water, which shall not exceed the MAX water level, and then close the water tank lid.
-
Install the brewer assembly into the brewing chamber of appliance and then close the door of brewing chamber.
-
Put the drip plate on the drip tray and then place a container on the drip plate.
-
Activate the "Manual clean" function to clean the brewing system and milk-frothing channel. After finish preheating, all the functional indicators illuminate solidly and the appliance enters into the standby mode.
Hold and press the Manual clean ☐ for at least 0.2 second, the appliance will enter into the manual clean process.
NOTE: If need to clean the milk-frothing channel, please install the milk reservoir and fill the milk reservoir with some clean water instead of milk. If do not need to clean the milk-frothing channel, please close the plug of milk frother well in position.
-
After finishing cleaning, the appliance enters into the standby mode automatically.
-
Open the door of brewing chamber and clean the coffee grounds in the brewing system with the cleaning brush.
Remove the mineral deposits
natural_image
Close-up of a kitchen electric oven with a hand gesture overlay (no visible text or symbols)-
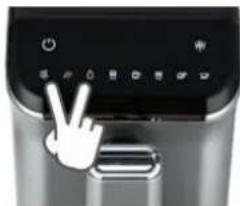
The appliance needs to be descaled when the indicators of Hot water " 🔒" and Manual clean " 🔒" will flash at the same time.
-
Fill the water tank with water and descaler to the MAX level as indicated on the water tank (the scale of water and descaler is 4:1, the detail refers to the instruction of descaler. Please use "household descaler"), you may also use the citric acid instead of the descaler (one hundred parts of water and three parts of citric acid).
-
Put a container on the drip plate.

- Hold and press Hot water "☐" and Manual clean "☐" for 1 second at the same time, and the appliance enters into the descaling procedure.
- The whole descaling procedure lasts for about 10 minutes. The eight (8) functional indicators flash slowly from left to right.
- After the descaling is completed, the indicators of Hot water "☐" and Manual clean "☐" stop flashing. NOTE: The number of coffee-brewing cycles will be zeroed and recounted after a complete descaling is finished. And the descaling prompt will occur when the appliance has brewed 500 cycles of coffee cumulatively again.
HINTS FOR GREAT-TASTING COFFEE
- A clean coffee machine is essential for making tasty coffee. It is necessary to clean the coffee machine as specified in the "CLEANING AND MAINTENANCE" section regularly. Always use fresh, room-temperature water when brewing coffee.
- Store unused ground coffee at a cool and dry place. After a new bag of ground coffee is unpacked, reseal it tightly and store it in a refrigerator to maintain its freshness.
7. TROUBLESHOOTING
| Problem | Cause | Solution |
| The Refill indicator‘ [027W] flashes. | The water tank is lack of water. | 1. Refill the water tank with water.2. Please contact the service department if the problem can not be solved. |
The Warning indicator“  ” flashes. ” flashes. | The grind setting knob, door and inner drip tray are not installed well in position. | 1. Install the grind setting knob, door and inner drip tray well in position.2. Please contact the service department if the problem can not be solved. |
| The Warning indicator“ [602Z] ” illuminates solidly. | The brewer or inner drip tray is not installed well in position. | 1. Install the brewer or inner drip tray well in position.2. Please contact the service department if the problem can not be solved. |
The No bean indicator‘  illuminates solidly. illuminates solidly. | The bean box is lack of coffee beans. | Fill the bean box with coffee beans and then run the coffee machine to brew coffee, then the no-bean warning can be canceled. |
| The Residue full indicator “ [32YW] ” illuminates solidly. | The residue-collection container needs to cleaned. | 1. Remove the residue-collection container and inner drip tray for cleaning, after 2 seconds, the “Residue full indicator” “turns off.2. Please contact the service department if the problem can not be solved. |
The Brewer cleaning indicator‘  uminates solidly. uminates solidly. | The brewer needs to be cleaned. | 1. Remove the brewer for cleaning, after 2 seconds, the “Brewer cleaning indicator” “turns off.2. Please contact the service department if the problem can not be solved. |
| The indicator of Hot water “ [O] flashes. | the overheating protection mechanism for the boiler will be activated, at that time, | 1. if need to conduct the “Hot water” function the appliance should be rested for about 3-5 minutes and then the “Hot water” function can be activated. |
The Single-cup Espresso “ and Warning indicator and Warning indicator  sh at the same time. sh at the same time. | The grinding motor does not work normally. | 1. Turn off the appliance and restart it.2. Please contact the service department if the problem can not be solved. |
The No bean indicator  and Warning indicator ” flash at the same time. and Warning indicator ” flash at the same time. | It means that the appliance has performed the bean-grinding for 16 cycles continuously, and the time for each grinding is less than 5 minutes. And then the grinding system will be forced to be cooled down for 5 minutes, at that time, all the functions are invalid. | 1. The appliance will rest for 5 minutes or turn off the appliance and restart it.2. Please contact the service department if the problem can not be solved. |
| The indicator of Hot water “” and Warning indicator “flash at the same time. | The flow meter has no signal and the water-dispensing is abnormal. | 1. Fill the water tank with water.2. Please contact the service department if the problem can not be solved. |
| The indicator of Latte “[5DBS] and Warning indicator ” flash at the same time. | The Hall element has no signal and the brewing motor does not work normally. | 1. Turn off the appliance and restart it.2. Please contact the service department if the problem can not be solved. |
| The crema is not rich. | The ground coffee is too coarse. | Turn the grind setting knob clockwise to select the proper setting. |
| The type of coffee bean used is wrong. | Use the coffee beans which are suitable for brewing espresso. | |
| Coffee comes out slowly or comes out drip by drip. | The ground coffee is too fine. | Turn the grind setting knob anticlockwise to select the proper setting. |
| Coffee does not come out of the coffee outlet. | The coffee outlet is blocked. | Clean the coffee outlet with a toothpick. |
| The machine can not be activated. | The power plug has not been connected well in position. | Connect the power plug with the main power supply of machine. |
| The power source is not connected well. | Connect the power source of the machine. | |
| The On/Off button is not turned on. | Turn on the On/Off button . | |
| The brewer can not be removed. | The machine is not turned off correctly. | Turn off the machine and then turn it on again to make the brewer be reset. Please contact the after-sales department if the problem can not be solved. |
| The brewer is blocked. | Contact the after-sales department. | |
| The milk foam is too large or sprays from the milk outlet. | The milk is not cold enough or the milk used is not suitable for being frothed. | It is recommended that the temperature of milk should be 5-10°C, and the protein content of milk should be at least 3%. |
| The milk frother is too dirty. | Clean the milk frother. | |
| Both the residue full indicator and brewer cleaning indicator illuminate. | You may empty the residue-collection container and clean the brewer when the coffee machine is turned off. | Please always empty the residue-collection container and clean the brewer when the coffee machine is turned on. And install them again after waiting for at least 3 seconds. |
| The residue-collection container is not full but the machine prompts you to | The counter is not reset after emptying the residue-collection container or cleaning the brewer. | After replacing the residue-collection container or the brewer, always wait for about 3 seconds to make the counter be reset to zero. Always empty |
| empty the residue-collection container or clean the brewer. | the residue-collection container and clean the brewer when the coffee machine is turned on. The counter will not be reset if the residue-collection container is emptied or the brewer is cleaned when the coffee machine is turned off. | |
| The coffee machine can grind coffee beans but there is no coffee come out. | Please check the deeply-roasted coffee beans for the oil on the surface. The powder-dispensing channel will be blocked if the coffee beans are dampened or there is too much oil on the surface. | 1. Hold and press the “Bean-emptying” key “  and “Single-cup Espresso” key “ 2 seconds at the same time, the door is opened, and their corresponding indicators flash.2. After the door is opened, loosen the ground coffee in the power-dispensing channel by the cleaning brush, and then close the door when there is ground coffee falls down.3. And then hold and press the “Bean-emptying” key “ and “Single-cup Espresso” key “ 2 seconds at the same time, the door is opened, and their corresponding indicators flash.2. After the door is opened, loosen the ground coffee in the power-dispensing channel by the cleaning brush, and then close the door when there is ground coffee falls down.3. And then hold and press the “Bean-emptying” key “  and “Single-cup Espresso” key “ ” and “Single-cup Espresso” key “ ”  for at least 0.3 second again, and their corresponding indicators extinguish and the door is closed. for at least 0.3 second again, and their corresponding indicators extinguish and the door is closed. |
| The coffee machine makes large noise. | It is normal that the coffee machine makes noise during operation. | If the coffee machine starts to make another kind of noise, please lubricate the brewing system and contact the after-sales department. |
CUSTOMER CARE AND SERVICE
Always use original spare parts.
When contacting our Authorised Service Centre, ensure that you have the following data available: Model and Serial Number.
The information can be found on the rating plate. Subject to change without notice.
TECHNICAL DATA
| Capacity | 1.5 L |
| Power | 1350 W |
Thank you for purchasing this product. If you need support with your product, visit our website using the links below.
Get User manuals: https://www.heinner.ro
Get Service information: https://www.heinner.ro

Environment friendly disposal
You can help protect the environment!
Please remember to respect the local regulations: hand in the non-working electrical equipment's to an appropriate waste disposal center.

HEINNER is a registered trademark of Network One Distribution SRL. Other brands and product names are trademarks or registered trademarks of their respective holders.
No part of the specifications may be reproduced in any form or by any means or used to make any derivative such as translation, transformation, or adaptation without permission from NETWORK ONE DISTRIBUTION.
Copyright © 2013 Network One Distribution. All rights reserved.
www.heinner.com, http://www.nod.ro

This product is in conformity with norms and standards of European Community.

Importer: Network One Distribution
Marcel Iancu Street, 3-5, Bucharest, Romania
Tel: +40 21 211 18 56, www.heinner.com, www.nod.ro
ESPRESSOR AUTOMAT
Model: Genesis
HEMA-D20DGREY
natural_image
Exterior view of a stainless steel HONNEER coffee maker with control panel and side arm (no visible text or symbols)- Putere: 1350 W
natural_image
Close-up of a modern stainless steel appliance with black lid and glass container (no visible text or symbols)natural_image
Close-up of a black appliance interior with a circular button and handle (no visible text or symbols)natural_image
Hand holding a black plastic device attached to a metallic appliance (no visible text or symbols)natural_image
Close-up of a metallic cylindrical device with a black internal component (no visible text or symbols)natural_image
Close-up of a stainless steel coffee maker with open lid and black buttons (no visible text or symbols)natural_image
Close-up of a silver stainless steel water heater with a black handle and ventilation grilles (no visible text or symbols)natural_image
Close-up of a stainless steel microwave oven with a power adapter inserted (no visible text or symbols)natural_image
Two modern kitchen appliances: a digital brush and a digital control panel with a hand cursor (no visible text or symbols)natural_image
Two kitchen appliances: a digital brush and a digital air fryer with control buttons (no visible text or symbols)natural_image
Close-up of a stainless steel kitchen air fryer with control buttons and a handle (no visible text or symbols)natural_image
Three-panel image showing a stainless steel milk dispenser, its internal processing unit, and its control panel with a 'OK' button (no visible text or symbols)natural_image
Close-up of a stainless steel kitchen electric oven control panel with buttons and a hand pointing to the button (no visible text or symbols)natural_image
Close-up of a stainless steel electric food fryer with control buttons and a hand pointing to the right side (no visible text or symbols)natural_image
Close-up of a stainless steel kitchen air fryer with control buttons and a handle (no visible text or symbols)OBSERVATII:
natural_image
Close-up of a kitchen electric oven with a hand gesture overlay (no visible text or symbols)natural_image
Close-up of a kitchen control panel with buttons and a hand pointing to the button (no text or symbols visible)Metoda 2:
natural_image
Close-up of a kitchen appliance with a hand gesture pointing at the button (no visible text or symbols)natural_image
Exterior view of a modern stainless steel milk tea maker with control panel and side arm (no visible text or symbols)- Мощност: 1350 W
- Обем на контейнера за вода: 1,5 л
natural_image
Close-up of a modern stainless steel appliance with a black handle and blue lid (no visible text or symbols)natural_image
Close-up of a black appliance with a circular top and handle, mounted on a dark surface (no visible text or symbols)natural_image
Hand inserting a black plastic component into a silver cylindrical device (no text or symbols visible)(6) Портафилтър
natural_image
Close-up of a stainless steel water dispenser with a black vent and metallic base (no visible text or symbols)natural_image
Close-up of a metallic industrial device with internal components and mounting base (no visible text or symbols)natural_image
Close-up of a stainless steel water dispenser with a black handle and ventilation grilles (no visible text or symbols)natural_image
Close-up of a stainless steel microwave oven with a black power adapter inserted (no visible text or symbols)natural_image
Two stainless steel kitchen appliances: a clear water dispenser and a digital control panel with buttons (no visible text or symbols)natural_image
Two kitchen appliances shown side by side: a digital water dispenser with control buttons and a digital water filter (no visible text or symbols)natural_image
Two stainless steel water levelers with digital control panels, one showing a glass beaker and the other a hand pressing a button (no visible text or symbols)natural_image
Two kitchen appliances: a digital water dispenser with a glass bowl and a digital control panel with icons (no visible text or symbols)natural_image
Close-up of a stainless steel kitchen air fryer control panel with no visible text or symbols on the device surface.natural_image
Three-panel image showing a stainless steel milk dispenser, a coffee maker, and an air fryer with control panel (no visible text or symbols)natural_image
Close-up of a stainless steel kitchen appliance front panel with control buttons and a hand pointing to the button (no visible text or symbols)natural_image
Close-up of a stainless steel electric food oven with control buttons and a hand pointing to the right pan (no visible text or symbols)natural_image
Close-up of a stainless steel kitchen appliance control panel with buttons and a hand pointing to the button (no readable text or symbols)natural_image
Close-up of a kitchen control panel with buttons and a hand gesture overlay (no readable text or symbols)natural_image
Exterior view of a modern stainless steel milk tea maker with control panel and side arm (no visible text or symbols)natural_image
Close-up of a modern stainless steel appliance with black lid and side arm (no visible text or symbols)natural_image
Close-up of a black plastic appliance with a circular button and handle (no visible text or symbols)natural_image
Hand inserting a black plastic component into a silver appliance (no text or symbols visible)(6) Szürötartály
natural_image
Close-up of a metallic cylindrical device with a black internal component (no visible text or symbols)natural_image
Close-up of a stainless steel microwave oven with visible internal components (no text or symbols)natural_image
Close-up of a silver and black industrial machine with a side panel and ventilation grilles (no visible text or symbols)natural_image
Close-up of a stainless steel kitchen grater with attached power cord (no visible text or symbols)natural_image
Exterior and interior views of a modern stainless steel water dispenser (no visible text or symbols)natural_image
Two kitchen appliances: a digital brush and a digital air conditioner with control buttons (no visible text or symbols)natural_image
Two views of a modern kitchen appliance: one with a glass cup and another with a digital control panel (no visible text or symbols)natural_image
Two kitchen appliances: a digital water dispenser and a digital control panel with icons (no visible text or symbols)natural_image
Close-up of a stainless steel kitchen air conditioner control panel with buttons and a white pointer (no visible text or symbols)Kézi habosítás
natural_image
Three-panel image showing a stainless steel milk dispenser, a hand mixer, and an air fryer with control panel (no visible text or symbols)natural_image
Close-up of a stainless steel kitchen air fryer control panel with no visible text or symbols on the device itself.natural_image
Close-up of a stainless steel electric food oven control panel with buttons and a hand pointing to the right (no visible text or symbols)natural_image
Close-up of a stainless steel kitchen appliance front panel with control buttons and a hand pointing to the button (no visible text or symbols)natural_image
Close-up of a kitchen electric oven with a hand gesture overlay (no visible text or symbols)natural_image
Close-up of a kitchen appliance control panel with buttons and a hand pointing to the button (no text or symbols visible)natural_image
Close-up of a kitchen electric oven with a white hand gesture pointing at the button (no text or symbols visible)- INTRODUCTION
- CONTENT OF YOUR PACKAGE
- SAFETY MEASURES
- GENERAL
- PRODUCT DESCRIPTION
- CONTROL PANEL
- USING THE APPLIANCE
- BEFORE FIRST USE
- Water tank:
- Milk reservoir:
- Grind setting knob
- Milk frother
- Adjustment for the height of coffee outlet
- Brewer
- OPERATION
- Power on and Preheat
- Brew Single cup Espresso
- Brew Double-cup Espresso
- Brew Americano
- Brew Cappuccino
- NOTES:
- Brew Latte
- Make hot water
- Manual froth
- Manual clean
- Set the coffee-dispensing amount and milk-dispensing amount.
- Operation for setting the coffee-dispensing amount:
- Operation for setting the milk-dispensing amount:
- Factory reset
- CLEANING AND MAINTENANCE
- Clean the residue-collection container
- Clean the brewer
- Clean the water tank
- Clean the milk reservoir
- Clean the milk frother
- Clean the drip tray
- Clean the grinder
- Clean the brewing system bracket
- Clean the powder-dispensing channel
- Method 2:
- Clean the brewing system and frothing system manually
- Remove the mineral deposits
- HINTS FOR GREAT-TASTING COFFEE
- TROUBLESHOOTING
- CUSTOMER CARE AND SERVICE
- TECHNICAL DATA
- Environment friendly disposal
- ESPRESSOR AUTOMAT
- OBSERVATII:
- Портафилтър
- Szürötartály
- Kézi habosítás
Brand : Heinner
Model : HEMA-D20DGREY
Category : Coffee maker