
IAN 275118 - Alarm clock radio AURIOL - Free user manual and instructions
Find the device manual for free IAN 275118 AURIOL in PDF.


| Product Type | Radio-controlled alarm clock |
| Brand | Auriol |
| Model | IAN 275118 |
| Colour | Black (typical) |
| Dimensions (approx.) | 15 x 8 x 5 cm (5.9 x 3.1 x 2.0 in) |
| Weight (approx.) | 300 g (10.6 oz) |
| Power Source | 3 V DC (2 x LR03/AAA batteries) |
| Battery Type | 2 x AAA (supplied) |
| Display Type | LC display with backlight |
| Alarm Function | 4-level ascending alarm, 2-minute duration |
| Snooze Function | 10-minute snooze interval |
| Radio Control | DCF 77.5 kHz, automatic daily sync |
| Temperature Display | Indoor temperature, °C or °F |
| Time Format | 12 or 24 hour selectable |
| Time Zone Setting | Manual offset from CET (-12 to +12 hours) |
| Language Options | English, German, French, Dutch, Italian, Spanish, Danish |
| Backlight Duration | Approx. 5 seconds on button press |
| Cleaning | Wipe with soft dry cloth only |
| Intended Use | Household use only, not for commercial |
| Safety Certifications | CE, WEEE, RoHS |
| Country of Origin | China (typical) |
| Battery Low Indicator | Icon displayed when batteries need replacement |
| Operating Temperature Range | 0 °C to 50 °C (32 °F to 122 °F) |
| Packaging Content | Alarm clock, batteries, instruction manual |
Frequently Asked Questions - IAN 275118 AURIOL
User questions about IAN 275118 AURIOL
0 question about this device. Answer the ones you know or ask your own.
Ask a new question about this device
Download the instructions for your Alarm clock radio in PDF format for free! Find your manual IAN 275118 - AURIOL and take your electronic device back in hand. On this page are published all the documents necessary for the use of your device. IAN 275118 by AURIOL.
USER MANUAL IAN 275118 AURIOL
Operation and Safety Notes
SE
RADIOSTYRD VÄCKARKLOCKA
GB / IE Operation and Safety Notes Page 5
Intended use...... Page 7
Parts description...... Page 8
Technical Data Page 10
Scope of delivery...... Page 10
General Safety Instructions ...... Page 10
Battery safety information......Page 11
Before Initial Use...... Page 13
Initial use...... Page 14
Automatic or manual DCF signal activation......Page 14
Changing basic settings ...... Page 16
Setting the alarm....Page 19
Turning the alarm on/off Page 20
Switching off the alarm signal...... Page 21
Using the snooze function ...... Page 21
Lighting the LC display...... Page 22
Switching the temperature display unit......Page 22
Replacing batteries ...... Page 22
Troubleshooting Page 23
Cleaning and Care...... Page 23
Disposal Page 24
Declaration of Conformity......Page 25
Radio-controlled alarm clock
Introduction
We congratulate you on the purchase of your new device. You have chosen a high quality product. The instructions for use are part of the product. They contain important information concerning safety, use and disposal. Before using the product, please familiarise yourself with all of the safety information and instructions for use. Only use the unit as described and for the specified applications. If you pass the product on to anyone else, please ensure that you also pass on all the documentation with it.
Intendeduse
This radio controlled alarm clock shows time, date and indoor temperature. The radio controlled alarm clock is intended for household use and not suitable for commercial use.
Partsdescription
The control panel (see Fig. A)
1 ALARM button: Press this button to access the alarm function. Use to activate / deactivate the alarm function and shut off the alarm.
2 MODE button: Press this button to access the general settings for the radio controlled alarm clock. Confirm settings with this button. In activate alarm mode, press this button to return to clock mode.
3 +/RCC button: Press this button to activate/deactivate DCF signal reception. In time mode press this button to select 24 or 12 hour format. In settings mode use this button to increase the values you wish to set.
4 - / °C / °F button: Press this button to select the temperature display unit (°C or °F). In settings mode use this button to decrease the values you wish to set.
5 SNOOZE/LIGHT button: When the alarm sounds press this button to snooze the alarm for 10 minutes. Otherwise press this key to activate the backlight for approx. 5 seconds.
The display (see Fig. B)
6 Time field: The time field indicates the time in 24 or 12 hour format. In 12 hour format it will also show AM (lat. „ante meridiem“ = before noon) and PM (lat. „post meridiem“ = after noon).
7 Info field: This field may show four different symbols:
8 : The DCF symbol indicates the DCF reception status.
9 DST: DST („Daylight Saving Time“) only appears during
European daylight saving time. This symbol cannot be manually activated.
10: The alarm symbol indicates the alarm is activated.
11: The Snooze symbol indicates the snooze function has been activated.
12 This symbol indicates the batteries should be replaced.
13 Temperature field: The temperature field indicates the temperature either in °C or °F.
14 Weekday field: In clock mode the weekday field indicates the day of the week under the DAY caption. When wetting the language this will indicate the selected language. In alarm activation mode and in alarm mode this will show ALM.
15 Date field: The date field shows the day of the month under DATE and the month under MONTH. You may also set it to show the year.
16 Battery compartment cover (see Fig. C)
17 Battery compartment (see Fig. D)
Technical Data
Operatingvoltage:3V
Batteries: 2 x Batteries LRO3 (type AAA, 1.5 V)
Temperature range: approx. 0-50 °C (32-122 °F)
Scope of delivery
1 Radio controlled alarm clock
2 Batteries LRO3 (inserted)
1 Set of operating instructions

General Safety Instructions
Before using the product, please familiarise yourself with all of the safety information and instructions for use! When passing this product on to others, please also include all the documents!
10 GB/IE

DANGERTORNELAND
RISK OF ACCIDENTS FOR INFANTS AND
CHILDREN! This appliance may be used by
children age 8 years and up, as well as by persons with reduced physical, sensory or mental capacities, or lacking experience and / or knowledge, so long as they are supervised or instructed in the safe use of the appliance and understand the associated risks. Children should not be allowed to play with the appliance. Cleaning and user maintenance should not be performed by children without supervision.

Battery safety information

WARNING!
DANGER TO LIFE! Batteries are not intended for children. If accidentally swallowed seek immediate medical attention.
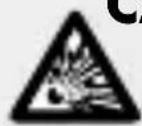
CAUTION! EXPLOSION HAZARD!
Never recharge non-rechargeable batteries, short-circuit and / or open batteries.
■ Never throw batteries into fire or water.
- Do not exert mechanical loads to batteries.
Risk of battery leakage!
In the event of a battery leak, immediately remove it from the device to prevent damage.
- Avoid contact with the skin, eyes and mucous membranes. In the event of contact with battery acid, thoroughly flush the affected area with plenty of clean water and seek immediate medical attention.
■ Only use the same type of batteries. Do not mix used and new batteries.
- Avoid extreme conditions and temperatures which may impact batteries, e.g. on radiators.
■ Remove the batteries if the appliance has not been used for a long period.
Risk of equipment damage!
■ Only use the specified battery type!
- When inserting the battery ensure the correct polarity! This is shown in the battery compartment.
If necessary, clean the batteries and device contacts before inserting batteries.
■ Promptly remove drained batteries from the product.
Before Initial Use
☐ First remove the protective film from the display of the radio controlled alarm clock.
☐ Remove the plastic strip sticking out of the battery compartment.
Note: The LC display will now perform a quick function check and starts receiving the DCF signal (for details please refer to: automatic and manual DCF signal activation). This process may take a few minutes and is indicated by the DCF symbol flashing in the info field 7.
Upon successful reception of the radio signal the DCF symbol will stop flashing.
The radio controlled alarm clock is now in clock mode and indicates the current time (CET - Central European Time). It also indicates the date, weekday in German and the temperature in °C.
Note: If you are located in a time zone other than Central European Time or wish to display the weekday in another language, it must be manually set. Please refer to chapter „Changing basic settings“.
Note: If the radio controlled alarm clock is unable to receive a signal after 7 minutes, the DCF symbol will turn off. In this case, possibly change the location of the radio controlled alarm clock and start reception of the radio signal manually. Please refer to chapter „Automatic or manual DCF signal activation”.
Note: If a signal can't be received after changing the location the time must be set manually. Please refer to chapter „Changing basic settings“.
Initialuse
• Automatic or manual DCF signal activation
automatic:
Note: The DCF signal (time signal transmitter) consists of time pulses emitted by one of the most accurate clocks in the world close to Frankfurt / Main, Germany – this varies by 1 second
in 30,000 years. Your radio-controlled alarm clock will receive the time signal under optimum conditions up to a distance of approx. 1,500 km from Frankfurt am Main, Germany. Reception of the radio signal generally takes approx. 3–10 minutes. Reception can be considerably impaired by obstacles (e.g. concrete walls) or sources of interference (e.g. other electrical devices). You may have to change the location of the radio-controlled clock (e.g. near a window) if there are problems with reception. This radio controlled alarm clock updates its time once daily via DCF signal. The reception process is indicated with an animated DCF symbol 8 in the info field 7. If reception is successful the DCF symbol will be static. If reception is unsuccessful the DCF symbol will disappear until the next successful reception.
manually:
☐ Press and hold the + / RCC 3 button for 3 seconds. The flashing DCF symbol in the info field 7 indicates the radio controlled alarm clock is attempting to receive a signal.
Note: You may cancel reception by pressing the + / RCO 3 button again. The DCF symbol will then stop flashing.
Changing basic settings
☐ Press and hold the MODE 2 button for 3 seconds to access the basic settings mode from clock mode.
During each of the following programming steps press the + / RCC 3 or - / ^ C / ^ F 4 button to make a change.
TIP: Pressing and holding the + / RCC or - / ^ C / ^ F button will quickly increase or decrease the numbers.
☐ Press the MODE 2 button to confirm a setting. You will automatically advance to the next programming step.
Note: If no changes are made for 20 seconds the radio controlled alarm clock will automatically return to clock mode.
The following settings can be adjusted one after the other:
| Programming step | Setting Standard display | Explanation |
| 1 | Setting the time zone | 0 Enter your time difference from Central Euro- pean Time. The time difference can be set ranging from +12 hours to -12 hours. |
| Programming steps 2 to 3 should only be adjusted if the DCF signal reception failed. When receiving the DCF signal any deviations from the will be corrected. | ||
| 2 | Set hour The hour display in the clock field6 flashes | |
| 3 | Set minutes The minute display in the clock field6 flashes | |
| 4 | Set year The year display in the date field 15 flashes | The year can be set up to 2099. |
| 5 | Set month The month display in the date field 15 flashes | |
| 6 | Set day The day display in the date field 15 flashes | |
| The following language setting impacts the weekday display in the weekday field 13. | |||
| 7 | Set language The acronym for the current language flashes in the weekday field 14 | Choose from the following languages: GER - GermanITA - ItalianFRE - FrenchNET - DutchESP - SpanishDAN - DanishENG - English | |
In program step press the MODE button 2 to confirm the language. The radio controlled alarm clock will return to clock mode.

Setting the alarm
☐ Press and hold the ALARM 1 button for 3 seconds to switch from clock mode to alarm mode. The weekday field 14 will display ALM. at the bottom left. This indicates the
radio controlled alarm clock is in alarm mode. At the same time the alarm symbol ( (()) ) 10 will appear in the info field 7, indicating the alarm function is now ready for use. The hour display will flash.
☐ Press the +/RCC 3 or -/°C/°F 4 button to adjust the hour display.
TIP: Press and hold the + / RCC or - / °C / °F button to quickly increase or decrease the numbers.
☐ Press the ALARM button again to confirm your entry. The minute display will now flash.
☐ Press the +/RCC 3 or -/°C/°F 4 button to adjust the minute display.
TIP: Press and hold the + / RCC or - / °C / °F button to quickly increase or decrease the numbers.
☐ Press the ALARM button again to confirm your entry. The ALM indicator will return to the weekday display. The radio controlled alarm clock will now return to clock mode.
Turning the alarm ON/OFF
Briefly press the ALARM button 1. The radio controlled alarm clock is now in alarm mode and indicates the alarm time. ALM will appear at the bottom left.
☐ Press the ALARM button again to turn the alarm on or off. The alarm symbol ( (()) ) 10 indicates the alarm has been activated.
Press the MODE button 2 again to leave alarm mode. The ALM display will disappear and the time returns to clock mode. In clock mode the alarm function being activated is also indicated by the Alarm symbol ( (()) ) 10.
- Switching off the alarm signal
Note: With the alarm activated a signal with 4 levels will sound for approx. 2 minutes at the alarm time set. The alarm symbol ( (()) ) [10] flashes.
☐ Press the ALARM 1 button to switch off the alarm. The alarm symbol stops flashing. The static alarm symbol continues to appear in the info field 7.
Note: If the alarm function is not switched off, the alarm will again sound the next day at the set time.
• Using the snooze function
☐ Press the SNOOZE/LIGHT 5 button when the alarm sounds to activate the snooze function. The alarm sound will stop and sound again 10 minutes later. During this
10 minute period the snooze symbol z^z will flash next to the alarm symbol ((())) 10 .
To actually shut the alarm off, press the ALARM 1 button. The snooze symbol z^2 will now turn off.
Lighting the LC display
☐ Press the SNOOZE/LIGHT 5 button to light the LC display for approx. 5 seconds.
Switching the temperature display unit
In clock mode press the - / °C / °F button 4 to switch the temperature unit between Celsius (display: °C) and Fahrenheit (display: °F).
●Replacingbatteries
Note: If the LC display shows ☐12, the batteries need to be changed.
□ Always replace all the batteries at the same time.
☐ Only use battery type LR03.
☐ Open the battery compartment 17 by the handle of the battery compartment cover 16.
☐ Remove the old batteries and insert new batteries. Check the polarity of the batteries. This is shown in the battery compartment.
☐ Close the battery compartment. Your radio controlled alarm clock is now again ready for use.
●Troubleshooting
The device contains delicate electronic components. For this reason it is possible that it can be disrupted by radio transmitting equipment in the immediate vicinity. Electrostatic discharges can lead to malfunctions. In the event of such malfunctions, remove the batteries briefly and reinsert them.
- Cleaning and Care
☐ The device should only be cleaned externally, using a soft, dry cloth.
●Disposal
The packaging is made of environmentally friendly materials, which may be disposed through your local recycling facilities.
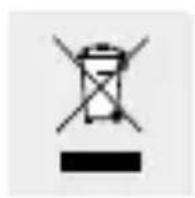
Contact your local refuse disposal authority for more details of how to dispose of your worn-out product. Please contact your local authority for information on collection points and their opening hours.
Faulty or used batteries must be recycled in accordance with Directive 2006 / 66 / EC and its amendments. Please return the batteries and / or the device to the available collection points.
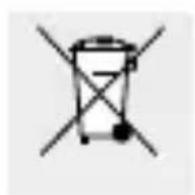
Never dispose of batteries in your household waste. They may contain toxic heavy metals and are subject to hazardous waste regulations. The chemical
symbols of the heavy metals are: Cd = cadmium, Hg = mercury, Pb = lead. Therefore dispose of used batteries through your municipal collection site.
- Declaration of Conformity
We, OWIM GmbH & Co. KG, Stiftsbergstraße 1, D-74167 Neckarsulm, hereby declare under our sole responsibility the product: Radio-controlled alarm clock, Model no.: HG00870A/HG00870B/HG00870C, Version: 03 / 2016, to which the declaration refers, complies with the standards/normative documents of 1999/5/EC.
The complete declaration of conformity can be viewed at: www.owim.com

Johdanto ....Sivu 29
Last Information Update
Tietojen tila · Informationsstatus
- RADIOSTYRD VÄCKARKLOCKA
- General Safety Instructions ...... Page 10
- Battery safety information......Page 11
- Before Initial Use...... Page 13
- Initial use...... Page 14
- Replacing batteries ...... Page 22
- Troubleshooting Page 23
- Cleaning and Care...... Page 23
- Disposal Page 24
- Declaration of Conformity......Page 25
- Radio-controlled alarm clock
- Introduction
- Intendeduse
- Partsdescription
- The control panel (see Fig. A)
- The display (see Fig. B)
- Technical Data
- Scope of delivery
- General Safety Instructions
- DANGERTORNELAND
- RISK OF ACCIDENTS FOR INFANTS AND
- Battery safety information
- WARNING!
- CAUTION! EXPLOSION HAZARD!
- Risk of battery leakage!
- Risk of equipment damage!
- Before Initial Use
- Initialuse
- • Automatic or manual DCF signal activation
- automatic:
- manually:
- Changing basic settings
- Setting the alarm
- Turning the alarm ON/OFF
- - Switching off the alarm signal
- • Using the snooze function
- Lighting the LC display
- Switching the temperature display unit
- ●Replacingbatteries
- ●Troubleshooting
- - Cleaning and Care
- ●Disposal
- - Declaration of Conformity
- Johdanto ....Sivu 29
Brand : AURIOL
Model : IAN 275118
Category : Alarm clock radio