
IAN 285685 - Fitness Equipment CRIVIT - Free user manual and instructions
Find the device manual for free IAN 285685 CRIVIT in PDF.

| Product type | Elastic resistance band |
| Brand | Crivit |
| Model | IAN 285685 |
| Use | Sports equipment for domestic use |
| Standard | DIN 32935 |
| Maximum traction length | 185 cm |
| Resistance blue band (at 120 cm) | 55 N |
| Resistance blue band (at 140 cm) | 85 N |
| Resistance blue band (at 160 cm) | 108 N |
| Resistance blue band (at 185 cm) | 129 N |
| Resistance gray band (at 120 cm) | 67 N |
| Resistance gray band (at 140 cm) | 101 N |
| Resistance gray band (at 160 cm) | 125 N |
| Resistance gray band (at 185 cm) | 153 N |
| Tolerance on force values | +/- 20 % |
| Number of exercises offered | 9 |
| Cleaning | Warm water and cloth |
| Maintenance | Coat with talcum powder to prevent sticking |
| Storage | In a dry, temperate place |
| Warranty | 3 years |
| Wear parts | Elastic band (no replaceable parts) |
| Repairability | Not repairable |
Frequently Asked Questions - IAN 285685 CRIVIT
User questions about IAN 285685 CRIVIT
0 question about this device. Answer the ones you know or ask your own.
Ask a new question about this device
Download the instructions for your Fitness Equipment in PDF format for free! Find your manual IAN 285685 - CRIVIT and take your electronic device back in hand. On this page are published all the documents necessary for the use of your device. IAN 285685 by CRIVIT.
USER MANUAL IAN 285685 CRIVIT
POWER-FITNESS-BAND / POWER RESISTANCE BAND / BANDE DE RÉSISTANCE ÉLASTIQUE
DE AT CH
POWER-FITNESS-BAND
Operation and Safety Notes
NL BE
POWERFITNESS-BAND
GB / IE Operation and Safety Notes Page 15
natural_image
Illustration of two female figures demonstrating resistance band exercises (no text or symbols)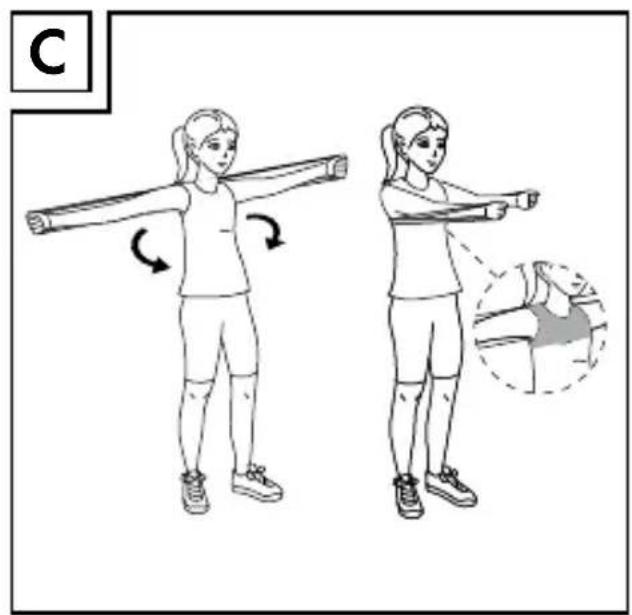
natural_image
Illustration of a woman performing a stretching exercise with arms extended, showing posture and movement (no text or symbols)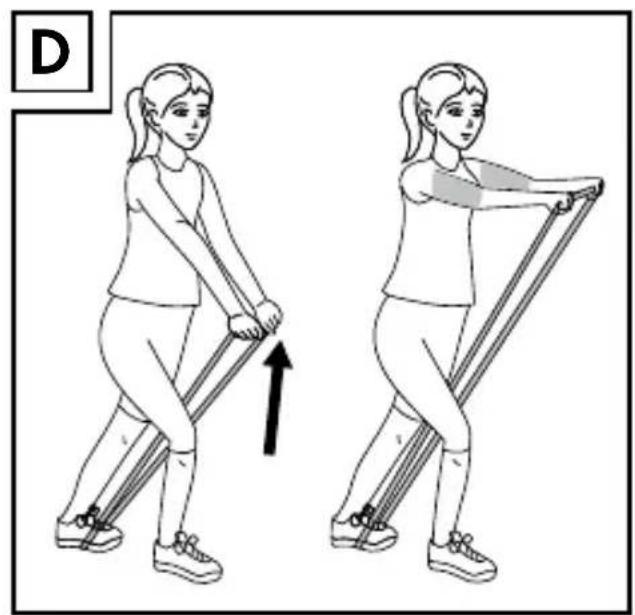
natural_image
Illustration of a woman performing a resistance band exercise, showing two sequential poses with an upward arrow (no text or symbols)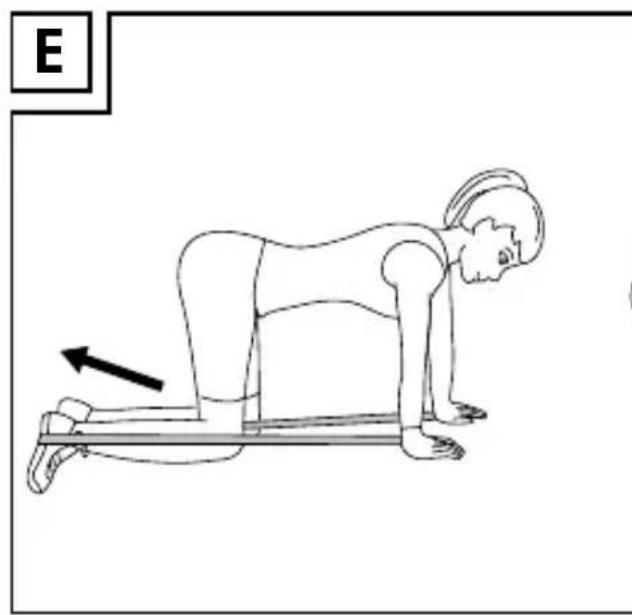
natural_image
Line drawing of a person performing a prone exercise on a bench, with an arrow indicating movement direction (no text or symbols)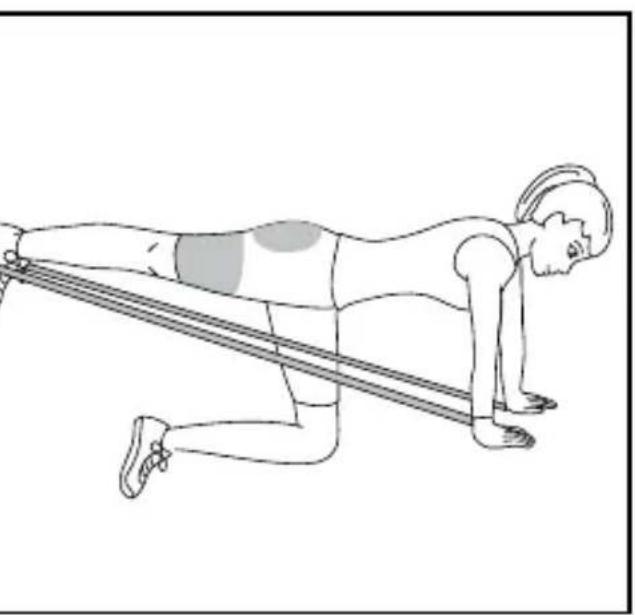
natural_image
Line drawing of a person performing a resistance band exercise (no text or symbols)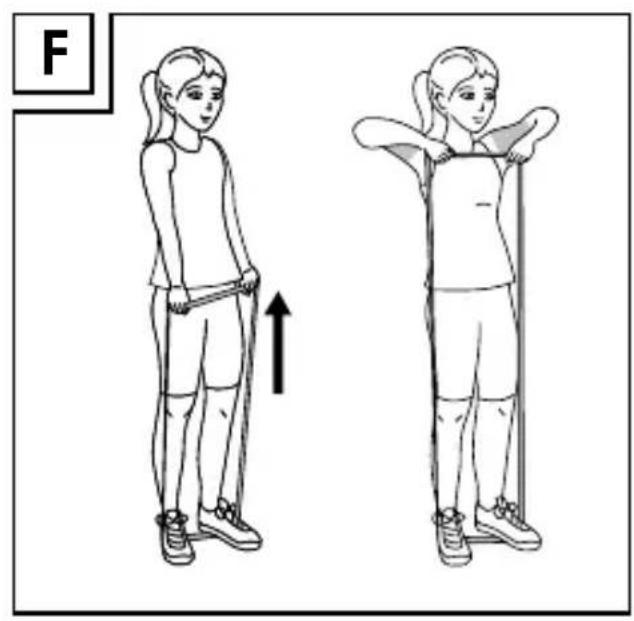
natural_image
Illustration of a woman performing a resistance band exercise, showing two sequential poses with an upward arrow (no text or symbols)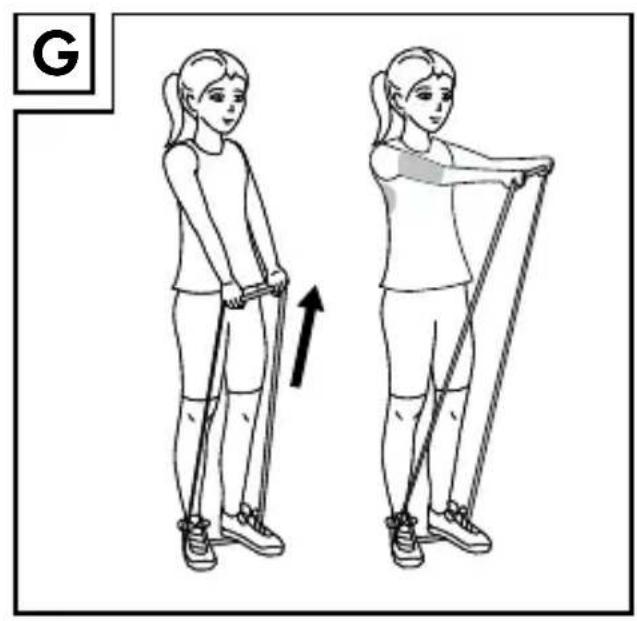
natural_image
Illustration of a woman performing two resistance band exercises (no text or symbols)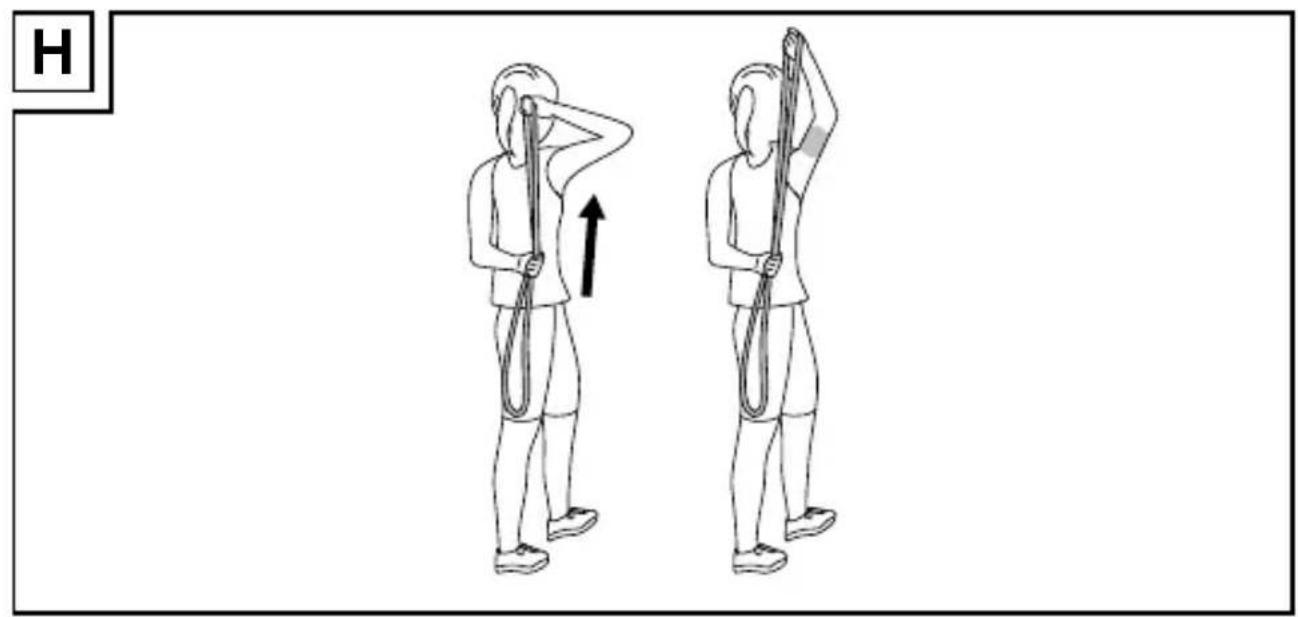
natural_image
Illustration of two people performing a resistance band exercise, showing posture and movement (no text or symbols)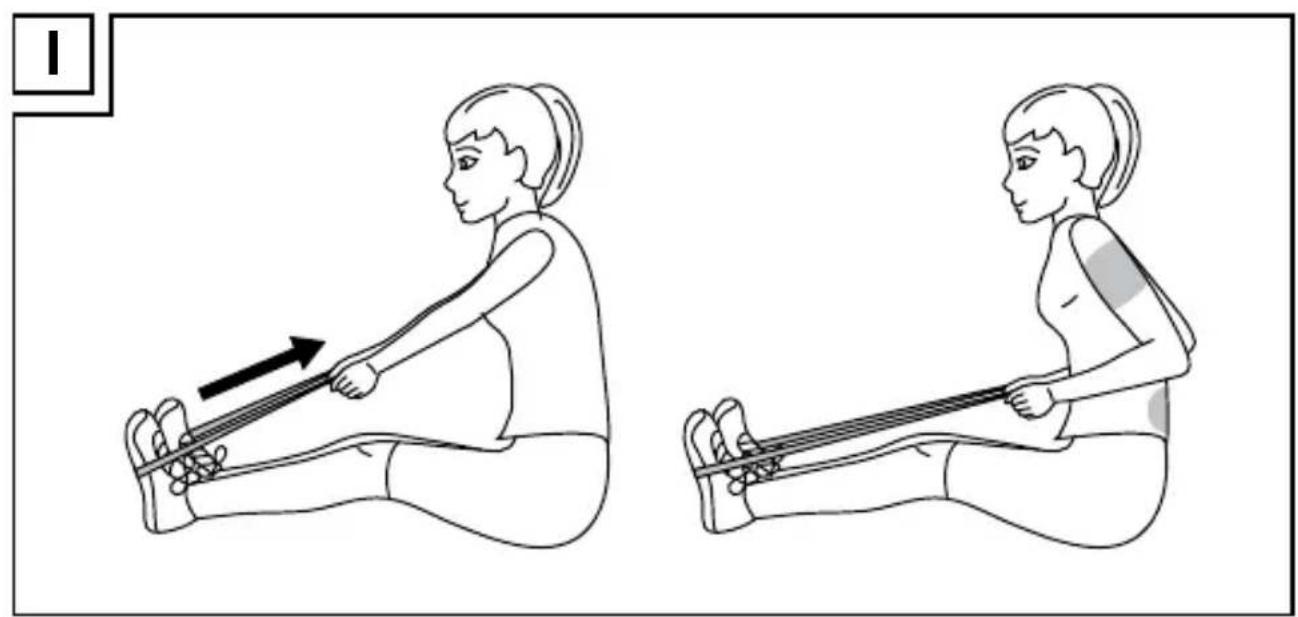
natural_image
Illustration of a person performing seated exercise with a resistance band, showing two sequential poses (no text or symbols)Intended use......Page 16
Technical data......Page 16
Safety notices......Page 17
Before use......Page 17
Exercise instructions......Page 18
Exercises Page 19
Cleaning and storage Page 22
Disposal Page 22
Warranty Page 22
Power Resistance Band
- Introduction
We congratulate you on the purchase of your new product. You have chosen a high quality product. Familiarise yourself with the product before using it for the first time. In addition, please carefully refer to the operating instructions and the safety advice below. Only use the product as instructed and only for the indicated field of application. Keep these instructions in a safe place. If you pass the product on to anyone else, please ensure that you also pass on all the documentation with it.
Intendeduse
This product is designed as a piece of sports equipment and not suitable for commercial use. This product is not suitable for therapeutic or medical treatment. It was tested according to standard DIN 32935.
●Technicaldata
| Length of band Force (N) | blue band | Force (N) grey band |
| 120 cm 55 N 67 N | ||
| 140 cm 85 N 101 N | ||
| 160 cm 108 N 125 N | ||
| 185 cm 129 N 153 N |
Tolerance of the above mentioned values: +/-20 %.

Safety notices
PLEASE READ THE INSTRUCTIONS FOR USE PRIOR TO USE! PLEASE KEEP THE INSTRUCTIONS FOR USE IN A SAFE PLACE!

CAUTION! RISK OF INJURY! Keep children and pets
away from the product! The product is only intended for use by adults.
Consult your physician before using the product if you have health problems, allergic reactions or an injury. Stop the exercises immediately if you feel sick or unwell whilst exercising or if any other complaints arise.
Check the product for damage or wear before every use. Only use this product in proper condition.
Hold the hands as a direct extension of the forearms when stretching the product and do not overextend the wrists!
Always keep the product taut and be careful not to slip!
Always return the product to the starting position slowly and whilst keeping tension.
Never attach the product to objects, e.g. table, door or stair landings.
Never extend the product beyond the maximum length of 185 cm.
Never pull the product toward the face, and never wrap it around the head, neck or chest.

CAUTION! RISK OF PROPERTY DAMAGE! Only use the product in areas where you can maintain adequate distance from persons/objects to avoid injuries and property damage.
Keep the product away from sharp, pointy or dangerous objects.
Avoid direct sunlight and heating sources.

Before use
Note: Remove all packaging materials from the product.
- Exercise instructions
The following instructions are only a sample of possible exercises. Please refer to the respective literature for information about other exercises.
□ Wear comfortable sports- or leisure clothing.
☐ Warm up before beginning the exercises.
☐ Perform the exercises at a steady pace, breathing easy. Follow the specified motion sequences and do not overestimate yourself. Breathe out when contracting the muscles, breath in when releasing them.
Each exercise should consist of the following three parts:
WarmUp
This stage helps get the blood flowing around the body and the muscles working properly. It will also reduce the risk of cramp and muscle injury. It is advisable to do a few stretching exercises. Each stretch should be held for approximately 30 seconds, do not force or jerk your muscles into a stretch - if it hurts, STOP.
TheTraining
The start of endurance or a force or muscle training is the first step in the fight against civilization infectious diseases and physical symptoms, especially with advancing age. Often the endurance training is also called cardiovascular or cardio training because of the positive effects on the cardiovascular system.
CoolDown
Just as a warm-up should be performed before each training session, a cool-down should take place after a unit. A Cool Down starts the relaxation phase; the operating temperature of the body will come back down and shows the transition of stress relaxation.
The cool-down should last at least 10 minutes (as the Warm Up) and is controlled slowly dropping down to the lowest level. The pulse rate should drop as low as possible.
Stretching
As already mentioned, you can stretch before/during the warm-up your muscles easily. After the training you should definitely stretch your muscles. A stretching afterwards returns the muscle to its original length, thus preventing muscle shortening. The more strenuous the training has been, the more important is the stretching afterwards.
Particularly important is the stretching for the exercised muscle groups.
Stretching should be noticeable for the muscle addressed, but it should never hurt. Stretching should take 20 to 30 seconds per muscle.
Start your training with about 7–8 reps per exercise set. Increase the number of repetitions according to your individual preferences slowly to 11–12 reps per set. If you notice that your muscles are tired, reduce the scope of your training. Ideally train 3–4 times a week. However, be sure that between individual exercises one day of rest is inserted so that the muscles and the body are able to recover sufficiently.
Also, perform all exercises with a stable body centre. The spine (particularly the lumbar spine) must be kept straight, so that the individual vertebrae are held in the biomechanically correct position, e.g. to protect the disc against faulty loads.
Do not train with momentum and / or jerkily. Perform all exercises in a smooth and controlled manner. Note that in case of improper or excessive training negative effects on your health are possible.
- Exercises
Stand with both feet parallel about shoulder width apart on the band as shown in the drawing. Hold the band with both hands at chest height with elbows bent.
Now, bend your knees keeping a stable upper body. Make sure that your knees do not slide forward over the toes.
☐ Straighten your legs again. Hold this position and then go back into the knee.
Biceps (s. Fig. B)
Stand with both feet parallel about shoulder width apart on the band as shown in the drawing. Hold the band with both hands (palms facing upward) in front of your body at approximately waist height with straight elbows.
Keep your elbows closely at your side throughout the exercise and bend your arms upward keeping the wrists stable.
☐ Hold this position and lower your arms again.
Stand with both feet parallel about shoulder width apart with knees slightly bent.
☐ Position the band at shoulder level behind the body and grab the two ends with your hands as shown.
Now pull your nearly straight arms together in front of your chest. Make sure that your centre is stable.
☐ Hold this position and then return to the starting position.
Diagonal core muscles (s. Fig. D)
Stand with your knees slightly bent in a walking position as shown.
Stand with the back foot on the band and hold the other end with both hands at approximately waist height in front of your body.
Move the nearly straight arms forward and upward in the direction of the front leg.
☐ Hold this position and then return to the starting position.
Switch sides!
☐ Position yourself on all fours as shown and fix the front end of the training band with one hand.
Place the other end around the foot of the other side.
Now straighten your leg with the band around the foot back and up.
Hold this position and then return to the starting position.
□ Switch sides!
Stand with both feet parallel about shoulder width apart on the band as shown in the drawing. Hold the band with both hands (palms facing downward) in front of your body at approximately waist height with straight elbows.
Now bend your elbows and pull your hands upward. Hold this position and then return to the starting position.
Stand with both feet parallel about shoulder width apart on the band as shown in the drawing. Hold the band with both hands (palms facing downward) in front of your body at approximately waist height with straight elbows.
Now lift your arms forward and up to about shoulder height as shown.
☐ Hold this position and then return to the starting position.
Triceps (s. Fig. H)
Stand as shown with knees slightly bent in a walking position.
Place the band behind the body and hold the lower end with one hand (the shorter you grab the band, the higher the resistance) behind your back.
Take the other end in the other hand with bent elbow at head height as illustrated.
☐ Now straighten the upper arm.
☐ Hold this position and then return to the starting position.
□ Switch sides!
Sit with your back straight and nearly straight legs on the floor as shown.
Place one end of the band around your feet and grab the other end with both hands with straight arms (the shorter you grab the band, the higher the resistance).
Now bend your elbows and pull your hands backwards towards your body.
☐ Hold this position and then return to the starting position.
- Cleaning and storage
Note: The talcum powder might appear on the product as protection. It is not dirt or residue.
■ Never use abrasive or caustic cleaners. Doing so would damage the product.
☐ Only clean the product with lukewarm water, then dry well with a cloth.
□ Always store the dry and clean product in a temperate room.
Carefully rubbing on talcum powder will prevent the product from sticking together.
- Disposal
The packaging is made entirely of recyclable materials, which you may dispose of at local recycling facilities.
Contact your local refuse disposal authority for more details of how to dispose of your worn-out product.
- Warranty
The product has been manufactured to strict quality guidelines and meticulously examined before delivery. In the event of product defects you have legal rights against the retailer of this product. Your legal rights are not limited in any way by our warranty detailed below.
The warranty for this product is 3 years from the date of purchase. Should this product show any fault in materials or manufacture within 3 years from the date of purchase, we will repair or replace it – at our choice – free of charge to you.
The warranty period begins on the date of purchase. Please keep the original sales receipt in a safe location. This document is required as your proof of purchase. This warranty becomes void if the product has been damaged, or used or maintained improperly.
The warranty applies to defects in material or manufacture. This warranty does not cover product parts subject to normal wear, thus possibly considered consumables (e.g. batteries) or for damage to fragile parts, e.g. switches, rechargeable batteries or glass parts.
Introduction......Page 25
- POWER-FITNESS-BAND / POWER RESISTANCE BAND / BANDE DE RÉSISTANCE ÉLASTIQUE
- Safety notices......Page 17
- Before use......Page 17
- Exercise instructions......Page 18
- Exercises Page 19
- Cleaning and storage Page 22
- Disposal Page 22
- Warranty Page 22
- Power Resistance Band
- - Introduction
- Intendeduse
- ●Technicaldata
- Safety notices
- PLEASE READ THE INSTRUCTIONS FOR USE PRIOR TO USE! PLEASE KEEP THE INSTRUCTIONS FOR USE IN A SAFE PLACE!
- CAUTION! RISK OF INJURY! Keep children and pets
- Before use
- - Exercise instructions
- Each exercise should consist of the following three parts:
- WarmUp
- TheTraining
- CoolDown
- Stretching
- - Exercises
- Biceps (s. Fig. B)
- Diagonal core muscles (s. Fig. D)
- Triceps (s. Fig. H)
- - Cleaning and storage
- - Disposal
- - Warranty
- Introduction......Page 25
Brand : CRIVIT
Model : IAN 285685
Category : Fitness Equipment