
PDT 40 C2 - Stapler PARKSIDE - Free user manual and instructions
Find the device manual for free PDT 40 C2 PARKSIDE in PDF.


| Product Type | Pneumatic Stapler |
| Brand | Parkside |
| Model | PDT 40 C2 |
| Dimensions (L x H x W) | 240 x 235 x 57 mm |
| Weight (without fasteners) | 1.255 kg |
| Power Source | Compressed air (pneumatic) |
| Maximum Permissible Pressure | 8 bar |
| Recommended Pressure Range | 4 to 7 bar |
| Air Consumption per Drive | Approx. 0.09 litres per driving process |
| Nail Lengths | 15, 20, 25, 30, 32, 35, 38, 40, 45, 50 mm |
| Staple Lengths | 10–40 mm |
| Staple Width | 5.7 mm |
| Magazine Capacity | 100 fasteners |
| Recommended Hose Diameter | 9 mm |
| Compressed Air Quality | Cleaned, oil-misted, condensate-free |
| Sound Pressure Level | 114.3 dB(A) (K=2.5 dB) |
| Sound Power Level | 125.6 dB(A) (K=2.5 dB) |
| Vibration Emission Value (a_h,w) | 15.0 m/s² (K=0.29 m/s²) |
| Safety Features | Trigger lock, safety trigger, protective goggles included |
| Maintenance | Regular lubrication with special compressed air oil; clean with dry cloth after use |
| Included Accessories | Carrying case, special compressed air oil, threaded nipple (6.35 mm), 1000 nails, 1000 staples, protective glasses, operating instructions |
| Warranty | 3 years from purchase date (subject to terms) |
| Certification | CE, compliant with Machinery Directive 2006/42/EC |
Frequently Asked Questions - PDT 40 C2 PARKSIDE
User questions about PDT 40 C2 PARKSIDE
0 question about this device. Answer the ones you know or ask your own.
Ask a new question about this device
Download the instructions for your Stapler in PDF format for free! Find your manual PDT 40 C2 - PARKSIDE and take your electronic device back in hand. On this page are published all the documents necessary for the use of your device. PDT 40 C2 by PARKSIDE.
USER MANUAL PDT 40 C2 PARKSIDE
PNEUMATIC STAPLER PDT 40 C2
GB IE
PNEUMATICSTAPLER
Operation and Safety Notes
Translation of original operation manual
SE
TRYCKLUFTSPISTOL
Before reading, unfold both pages containing illustrations and familiarise yourself with all functions of the device.
FI
GB / IE Operation and Safety Notes Page 5
natural_image
Black-and-white photo of safety goggles, a spray bottle, and stacked solar cell strips on a plain surface (no text or symbols)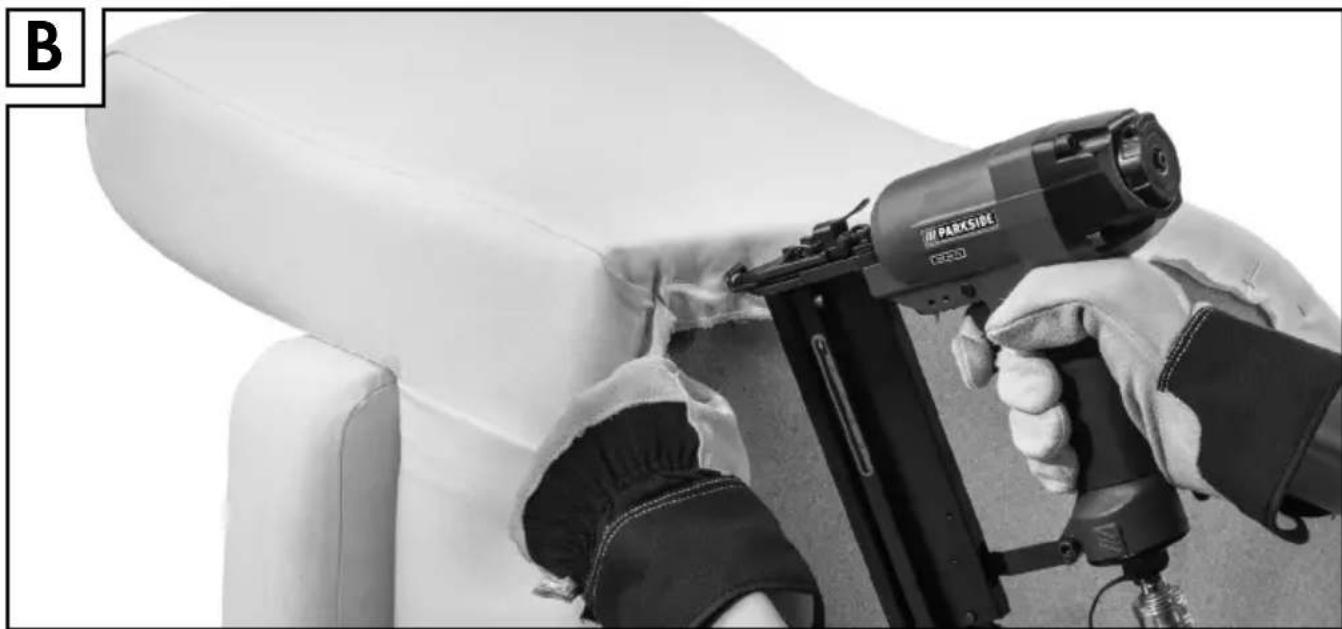
natural_image
Close-up of hands operating a parkside airship tool on a white chair (no text or symbols visible)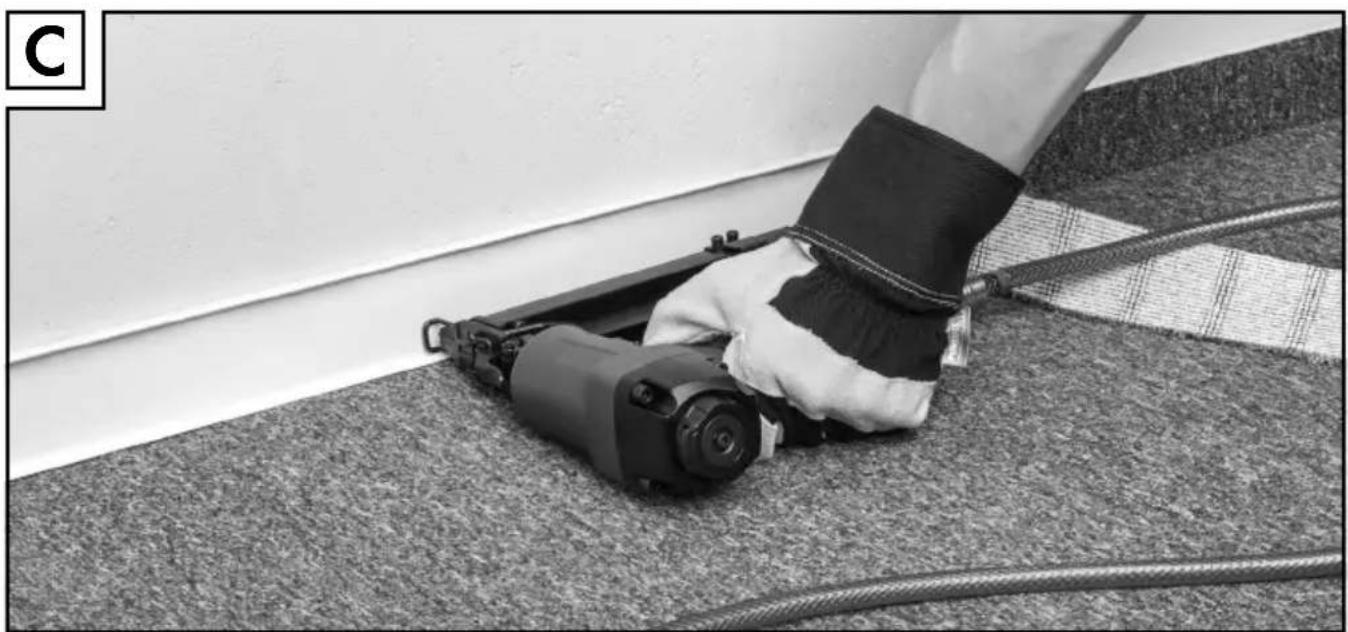
natural_image
Person using a camera on carpet with rope, no visible text or symbols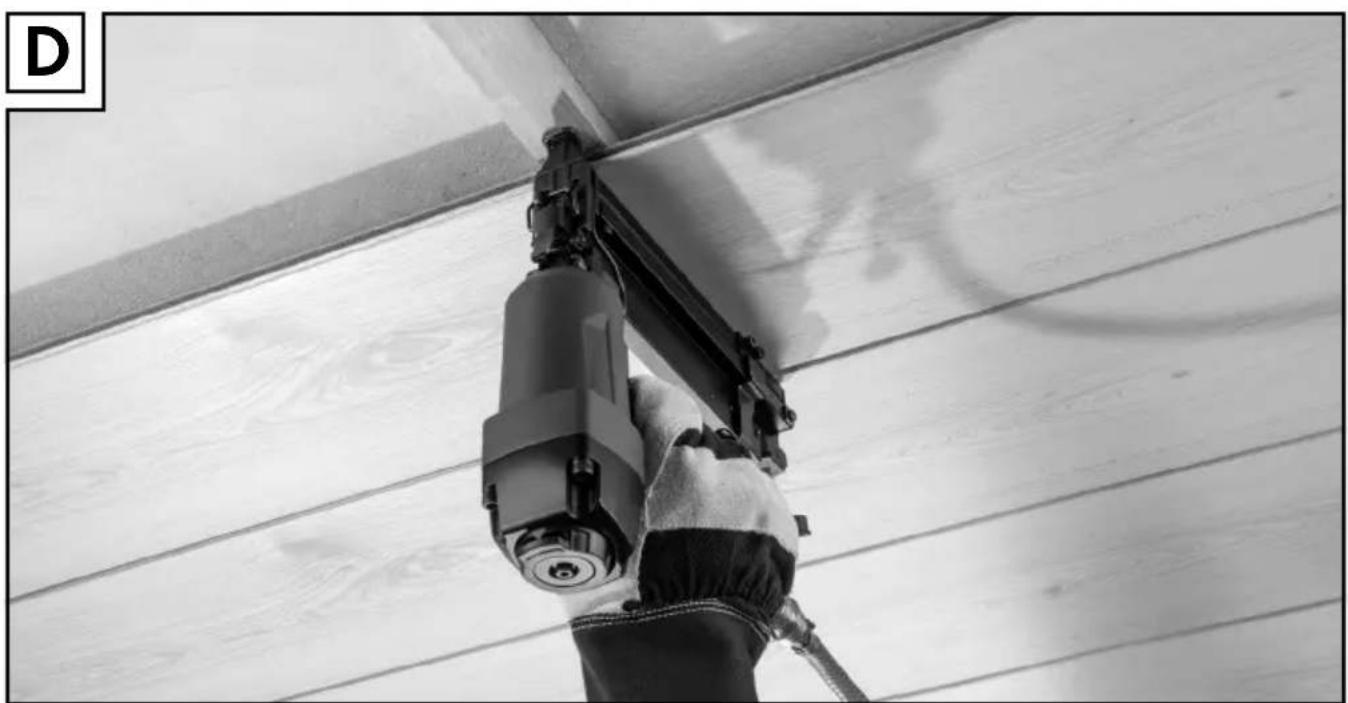
natural_image
Close-up of a hand using a high-voltage power tool on a wooden floor (no text or symbols visible)Introduction
Intended use....Page 6
Features and fittings....Page 6
Included items Page 6
Technical data......Page 6
Safety of the fastener driving tool
Work safety Page 7
Additional safety information for compressed air tackers....Page 8
Original accessories/tools Page 8
Preparing the product for use
Connecting the compressed air source Page 8
Loading the magazine....Page 9
Operation Page 9
Removing jammed fasteners......Page 10
Maintenance and cleaning
Maintenance Page 10
Cleaning Page 10
Service Page 10
Warranty Page 10
Disposal Page 11
Declaration of Conformity / Manufacturer......Page 11
Pneumatic stapler PDT 40 C2
- Introduction
We congratulate you on the purchase of your new device. You have chosen a high quality product. The operating instructions are part of the product. They contain important information concerning safety, use and disposal. Before using the product, familiarise yourself with all of the operating instructions and safety instructions. Use the product only as described and for the specified applications. If you pass the product on to anyone else, please ensure that you also pass on all the documentation with it.
Intended use
The device is suitable for assembly and repair work. Any other use or modification to the device shall be considered as improper use and could give rise to considerable dangers. We will not accept liability for loss or damage arising from improper use. The device is intended for private domestic use only.
Features and fittings
1 Exhaust air aperture (can be rotated)
2 Trigger
3 Handle
4 Threaded nipple 6.35 mm (1/4")
5 Magazine
6 Fill level indicator
7 Knurled screw
8 Trigger lock
9 Mouth
10 Face plate
11 Face plate quick clamp lever
12 Magazine lever
Included items
1 Pneumatic stapler PDT 40 C2
1 Carrying case
1 Special compressed air oil
1 Threaded nipple 6.35 mm ( 14 ) (pre-assembled)
1 Package nails, 1000 pcs.
1 Package staples, 1000 pcs.
1 Protective glasses
1 Operating instructions
- Technical data
Dimensions: 240 x 57 x 235 mm
$$ (L \times H \times W) $$
Weight
(without fasteners): 1.255 kg
Trigger type: Compressed air
Maximum permissible
pressure: 8 bar
Recommended pressure
range: 4 to 7 bar
Air consumption per
drive in process: approx. 0.09 litre per driving-in process
Recommended lubricant: Compressed air special oil
Loading capacity: 100 pcs.
Nail lengths: 15 mm, 20 mm
25 mm, 30 mm,
32 mm, 35 mm,
38 mm, 40 mm,
45 mm, 50 mm,
Staple lengths: 10-40 mm
Staple width: 5.7 mm
Recommended
Hose diameter: 9 mm
Compressed air quality: Cleaned, oil-misted and condensate-free
Noise and vibration data:
Measured values for noise are determined in accordance with EN 12549:1999, EN ISO 4871.
The A-weighted sound pressure level of the device is typically 114.3 dB(A). The sound power level of the device is 125.6 dB(A). Uncertainty K = 2.5 dB.
These values are characteristic values referenced to the device and do not reflect noise development at the work location. Noise development at the work location depends e.g. on the work environment, the workpiece, the workpiece support and the number of fastener driving processes.
In correspondence with conditions at the work location, individual noise reduction measures may need to be carried out, such as placing the workpiece on a noise-suppressing surface, clamping or covering to prevent workpiece vibration and adjusting to the minimum pressure required by the work process. In certain cases, wearing personal hearing protection is required.
Wear hearing protection!
Vibration values in accordance with ISO 8662-11:1999:
Vibration emission value a_h,w = 15.0 m/s^2
Uncertainty K = 0.29 m/s ^4
Mechanical impact (vibration)
The vibration value for the fastener driving device was determined in accordance with ISO 8662-11:1999 – Hand-held portable power tools – Measurement of vibrations at the handle – Fastener driving tools (see technical data). The value is referenced to the device and does not represent the influence on the hand-arm system when the device is used. Influence on the hand-arm system when using the device depends on e.g. gripping force, pressing force, working direction, air pressure set, the workpiece and its position.
● Safety of the fastener driving tool

WARNING! Please read all the safety information and instructions. Failure to comply with
the safety instructions and instructions can result in severe injuries and / or damage to property.
PLEASE RETAIN ALL SAFETY INFORMATION AND INSTRUCTIONS FOR FUTURE REFERENCE.
Each time before starting work, check for flawless functioning of the safety and triggering devices as well as the firm fit of all bolts and nuts.
Do not conduct any improper manipulation of the fastener driving tool.
Do not dismount or block any part of the fastener driving tool, such a trigger lock.
Do not conduct any „emergency repairs“ with unsuitable materials.
The fastener driving tool must be regularly and properly maintained as specified by the manufacturer.
- Prevent anything that would weaken or damage the device, e.g. by: - stamping or engraving,
- alterations not permitted by the manufacturer,
- guiding on templates made of hard material, e.g. steel,
- permitting to fall onto or slide across the floor,
- using as a hammer,
- every type of external force.
Work safety
■ Never point a fastener driving tool that is ready to use directly at yourself, other persons or animals.
During work, hold the fastener driving tool so that head and body can not be injured by possible kickback due to a fault in the power supply or from hard places in the workpiece.
Never trigger the fastener driving tool into empty space. Following this instruction will prevent danger due to uncontrolled flying fasteners and overloading the device.
Before transporting, disconnect the fastener driving tool from the compressed air network, particularly when using ladders or are moving with an unaccustomed body posture.
At the workplace, only carry the fastener driving tool by its grip and never with the trigger actuated.
Pay attention to workplace conditions. Fasteners may strike completely through thin workpieces or slide off corners or edges to cause a danger to persons.
■ Use suitable personal protection equipment, e.g. hearing and eye protection.
Wearing personal protective devices such as dust mask, non-slip safety shoes, safety helmet or hearing protectors, depending on the type of fastener driving tool and its application, reduces the risk of injuries.
Additional safety information for compressed air tackers
WARNING! RISK OF INJURY! Never exceed the maximum permissible operating pressure of 8 bar. Use a pressure reducer to adjust the operating pressure.
WARNING! RISK OF INJURY! Never use oxygen or other flammable gases as energy source.
- Keep your working area clean and well lit. Untidy or poorly lit working areas can lead to accidents.
- Keep children and other individuals away from the fastener driving tool during use. Distractions can cause you to lose control of the device.
Remain alert at all times, watch what you are doing and always proceed with caution when working with a fastener driving tool. Do not use any fastener driving tool if you are tired or under the influence of drugs, alcohol or medication. One moment of carelessness when using the fastener driving tool may result in serious injuries.
- Avoid placing your body in an unnatural position. Keep proper footing and balance at all times. By doing this you will be in a better position to control the fastener driving tool in unforeseen circumstances.
Before any repair and maintenance work or transport, remove the device from the compressed air source.
RISK OF INJURY! Do not use the device on scaffolds or ladders.
- Never use hydrogen, oxygen, carbon dioxide or other bottled gasses to power this tool as doing so may result in an explosion and thus may cause severe injuries.
RISK OF INJURY! Do not use the device if the trigger lock 8 is damaged or has been removed. Otherwise injuries may result.
When loosening the hose coupling, hold the hose firmly in your hand to prevent injuries caused by a rebounding hose.
- Be absolutely certain to use a 14 , threaded nipple and a quick-release coupling for the compressed air connection.
Never place your hands near the mouth when the device is ready to operate. Otherwise injuries may result.
Pay attention to damage. Check the device for damage before bringing it into use. If the device exhibits defects, it must not be operated under any circumstances.
Do not use any pointed objects. Never insert pointed and / or metal objects into the inside of the device.
• Original accessories/tools
■ Use only the accessories and attachments detailed in the operating instructions.
The use of fasteners or other accessories other than those recommended in the operating instructions could lead to you suffering an injury.
● Preparing the product for use
NOTE: always wear the protective goggles supplied before putting the tool into operation. Remove the protective film from the protective goggles before using for the first time.
- Connecting the compressed air source
NOTE: The compressed air tacker must only be operated with cleaned, oil-misted compressed air and must not exceed the maximum operating pressure of 8 bar. The compressor must be fitted with a pressure reducer in order to regulate the operating pressure.
☐ Connect the device to a suitable compressed air source.
-
To do so, press the compressed air hose quick-release coupling (not included in the scope of delivery) on the 14 " threaded nipple 4 of the compressed air tacker. Locking is automatic.
-
Connect the other end of the compressed air hose to the (filter) pressure reducer on the compressor.
- Loading the magazine
-
Press the magazine lever 12 and pull the magazine cover back to its stop position.
-
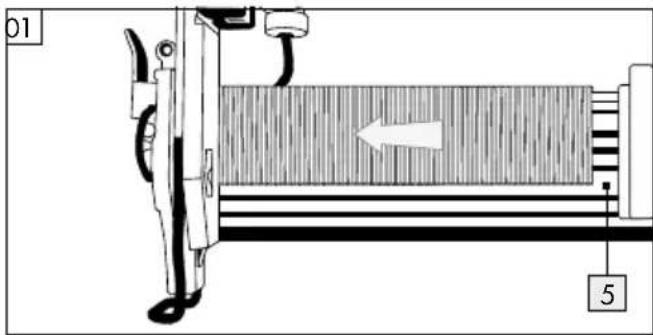
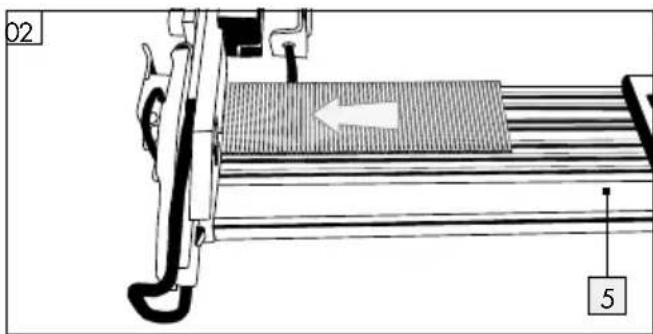
Insert the corresponding fastener (nails, see Fig. 01 or staples, see Fig. 02) into the magazine 5. The tacks must be put on the rail of the magazine 5.
natural_image
Technical diagram of a treadmill with a slide and handle, showing mechanical components and a directional arrow (no text or symbols)- Slide the magazine cover forwards until it locks.
Operation
Load the magazine of the compressed air tacker as described in the chapter "Loading the magazine".
☐ Use the pressure reducer to set the correct operating pressure.
☐ Ensure that the permissible operating pressure of 8 bar at the device is never exceeded. Operating pressure that is too high does not provide any performance increase, but only increases compressed air consumption and accelerates wear on the device.
☐ Switch on the compressor.
☐ Allow the compressor to run once long enough until maximum tank pressure is reached and the device is switched off.
Place the compressed air tacker on the workpiece and press the trigger 2.
NOTE: The compressed air tacker is equipped with a trigger lock 8. The fastener will only leave the device when the mouth of the compressed air tacker is pressed against the workpiece and the trigger 2 is actuated.
☐ Check that the fastener has been driven in corresponding to the work requirements.
- If the fastener is protruding, increase the air pressure in 0.5 bar increments.
- If the fastener is too deep, decrease the air pressure in 0.5 bar increments.
As an alternative, you can accelerate the work by keeping the trigger 2 depressed.
Set the compressed air tacker against the workpiece.
Press the device against the workpiece until the mouth 9 touches it. The fastener will leave the device.
As long as the trigger is kept depressed, each time the mouth 9 touches the workpiece one fastener will leave the device.
Another alternative is to keep the mouth pressed against the workpiece.
☐ Each time the trigger is actuated, a fastener will leave the device.
NOTE: Fine adjustment with the knurled screw 7 is possible.
Turn the knurled screw downwards in order to drive the fastener more deeply into the workpiece.
Turn the knurled screw upwards in order to drive the fastener less deeply into the workpiece.
Turn the exhaust air aperture to guide the exhaust airflow in the desired direction.
After finishing work, disconnect the device from the compressor.
- Removing jammed fasteners
☐ If a staple or nail gets jammed in the magazine slot, immediately disconnect the compressed air supply.
Open the magazine as described in the chapter "Loading the magazine".
Open the face plate 10 by pulling the face plate quick clamping lever 11 in the direction of the trigger lock 8.
Remove the jammed fastener.
☐ Close the face plate by pulling the face plate quick clamping lever 11 in the direction of the exhaust air aperture 1.
☐ Close the magazine 5 of the compressed air tacker as described in the chapter "Loading the magazine".
● Maintenance and cleaning
RISK OF INJURY! Be absolutely certain to disconnect the device from the compressed air source before cleaning or maintaining it.
Maintenance
Lubrication with oil mister
NOTE: As a treatment stage after the pressure reducer, an oil mister provides continuous and optimum lubrication of the compressed air tacker. An oil mister gives off fine drops of oil into the airflow and so guarantees regular lubrication.
Install the oil mister after the (filter) pressure reducer. To do so, insert the nipple of the oil mister into the quick-release coupling of the (filter) pressure reducer.
☐ Then connect the compressed air device to the quick-release coupling provided for it.
Manual lubrication
NOTE: If you do not have an oil mister, lubricate the device each time after driving about 5000 fasteners.
- Apply 1–2 drops of special compressed air oil into the threaded nipple 4 of the compressed air tacker.
Then press the trigger several times.
ATTENTION: Be certain not to use too much oil; otherwise oil could leave the mouth with the fastener and potentially damage the workpiece.
- Cleaning
Do not use any sharp objects to clean the device. Do not allow any liquids to enter the device. Otherwise the device could be damaged.
☐ Clean the device regularly, preferably always immediately after finishing work.
☐ Use a dry cloth to clean the housing. Under no circumstances should you use petrol, solvent or cleaners which attack plastic.
After each use, pack the compressed air tacker in the carrying case it was delivered with to protect it from dirt.
Service
A WARNING r fastener driving tool repaired only by qualified specialist personnel using original manufacturer parts only. This will ensure that your fastener driving tool remains safe to use.
Warranty
The warranty for this appliance is for 3 years from the date of purchase. The appliance has been manufactured with care and meticulously examined before delivery. Please retain your receipt as proof of purchase. In the event of a warranty claim, please make contact by telephone with our Service Department. Only in this way can a post-free despatch for your goods be assured.
The warranty covers only claims for material and manufacturing defects, but not for transport damage, for wearing parts or for damage to fragile components, e.g. buttons or batteries. This product is for private use only and is not intended for commercial use.
The warranty is void in the case of abusive and improper handling, use of force and internal tampering not carried out by our authorized service branch. Your statutory rights are not restricted in any way by this warranty.
The warranty period will not be extended by repairs made unter warranty. This applies also to replaced and repaired parts. Any damage and defects extant on purchase must be reported immediately after unpacking the appliance, at the latest, two days after the purchase date. Repairs made after the expiration of the warranty period are subject to payment.
GB
Service Great Britain
Tel.: 0871 5000 720
(0,10 GBP/Min.)
e-mail: kompernass@lidl.co.uk
IAN 89568
IE
Service Ireland
Tel: 1890 930 034
(0,08 EUR/Min. (peak)
0,06 EUR/Min. (off peak))
e-mail: kompernass@lidl.ie
IAN 89568
Contact your local refuse disposal authority for more details of how to dispose of your worn out electrical devices.
● Declaration of Conformity / Manufacturer (€)
We, KOMPERNASS GMBH, the person responsible for documents: Mr Semi Uguzlu, BURGSTR. 21, 44867 BOCHUM, GERMANY, hereby declare that this product complies with the following standards, normative documents and EU directives:
Machinery Directive
(2006 / 42 / EC)
Applicable harmonised standards:
EN 792-13/A1:2008
Type / Description of product:
Pneumatic stapler PDT 40 C2
Date of manufacture (DOM): 04-2013
Serial number: IAN 89568
Bochum, 30.04.2013
Semi Uguzlu
- Quality Manager -
●Disposal

The packaging is made entirely of recyclable materials which you can dispose of at your local recycling facilities.
Do not dispose of the product with household rubbish!
We reserve the right to make technical modifications in the course of product development.
Johdanto
natural_image
Technical diagram of a treadmill with a slide and handle, showing mechanical components and a numbered label (no readable text or symbols)
- PNEUMATIC STAPLER PDT 40 C2
- PNEUMATICSTAPLER
- TRYCKLUFTSPISTOL
- Introduction
- Safety of the fastener driving tool
- Preparing the product for use
- Maintenance and cleaning
- - Introduction
- Intended use
- Features and fittings
- Included items
- - Technical data
- Noise and vibration data:
- Wear hearing protection!
- Vibration values in accordance with ISO 8662-11:1999:
- Mechanical impact (vibration)
- ● Safety of the fastener driving tool
- Work safety
- - Loading the magazine
- Operation
- NOTE: Fine adjustment with the knurled screw 7 is possible.
- - Removing jammed fasteners
- ● Maintenance and cleaning
- Maintenance
- Lubrication with oil mister
- Manual lubrication
- - Cleaning
- Service
- Warranty
- GB
- IE
- ● Declaration of Conformity / Manufacturer (€)
- Machinery Directive
- Applicable harmonised standards:
- Type / Description of product:
- Date of manufacture (DOM): 04-2013
- Serial number: IAN 89568
- ●Disposal
- Do not dispose of the product with household rubbish!
- Johdanto
Brand : PARKSIDE
Model : PDT 40 C2
Category : Stapler