
SSE 6 C3 - Soap dispenser SILVERCREST - Free user manual and instructions
Find the device manual for free SSE 6 C3 SILVERCREST in PDF.

| Product Type | Automatic Soap Dispenser |
| Brand | SilverCrest |
| Model | SSE 6 C3 |
| Power Supply | 3 x 1.5 V (Mignon/AA/LR6 batteries) |
| Capacity | Approx. 250 ml |
| Protection Type | IPX4 (splash water protected) |
| Safety Class | III |
| Dimensions (approx.) | 10 x 10 x 20 cm (4 x 4 x 8 in) |
| Weight (approx.) | 200 g (7 oz) without batteries |
| Material | Plastic |
| Operation | Infrared sensor (front and rear) |
| Adjustable Soap Quantity | 4 levels via + and - buttons |
| Display Indicators | Soap quantity, fill level, battery status |
| LED Indicator | Yes (non-replaceable) |
| Intended Use | Liquid soaps, detergents, disinfectant gels, shampoo |
| Usage | Private households only, not commercial |
| Cleaning | Wipe with damp cloth; mild detergent if needed; clean sensors |
| Battery Replacement | Remove screw, replace with same type; observe polarity |
| Warranty | 3 years from date of purchase |
| Package Contents | Dispenser, 3 batteries (AA), operating instructions |
Frequently Asked Questions - SSE 6 C3 SILVERCREST
User questions about SSE 6 C3 SILVERCREST
0 question about this device. Answer the ones you know or ask your own.
Ask a new question about this device
Download the instructions for your Soap dispenser in PDF format for free! Find your manual SSE 6 C3 - SILVERCREST and take your electronic device back in hand. On this page are published all the documents necessary for the use of your device. SSE 6 C3 by SILVERCREST.
USER MANUAL SSE 6 C3 SILVERCREST
DISPENSADOR DE JABÓN CON SENSOR DISPENSER DI SAPONE CON SENSORE SSE 4.5 B2
ES
Operating instructions
IAN 280618
ES IT
PT
ES
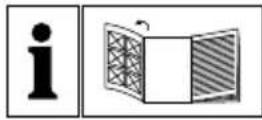
Before reading, unfold the page containing the illustrations and familiarise yourself with all functions of the device.
DE AT CH
GB / MT Operating instructions Page 31
flowchart
graph TD
    A["Start"] --> B["Step 12: Off"]
    B --> C["Step 13: Down"]
    C --> D["Step 14: Down"]
    D --> E["End"]
Índice
Introducción....2
Uso previsto 2
Volumen de suministro....2
natural_image
Simple line drawing of a mechanical component with a double-headed vertical arrow above it (no text or symbols)KOMPERNASS HANDELS GMBH
BURGSTRASSE 21
44867 BOCHUM
GERMANY
www.kompernass.com
Indice
Introduzione....12
Uso conforme ....12
natural_image
Simple line drawing of a mechanical component with an upward and downward arrow, no text or symbols present.KOMPERNASS HANDELS GMBH
BURGSTRASSE 21
44867 BOCHUM
GERMANY
www.kompernass.com
Índice
Introdução ....22
natural_image
Simple line drawing of a mechanical component with an upward arrow and a base (no text or symbols)KOMPERNASS HANDELS GMBH
BURGSTRASSE 21
44867 BOCHUM
GERMANY
www.kompernass.com
Table of contents
Introduction....32
Intended use....32
Package contents....32
Appliance description ....33
Technical data ....33
Safety information....34
Inserting / replacing the batteries .....35
Setup / First use ....36
Display indicators....36
Operation ....36
Cleaning and maintenance ....37
Storage 38
Disposal....38
Kompernass Handels GmbH warranty ....39
Service....40
Importer 40
AUTOMATIC SOAP DISPENSER
Introduction
Congratulations on the purchase of your new appliance.
You have selected a high-quality product. The operating instructions are part of this product. They contain important information about safety, usage and disposal. Before using the product, please familiarise yourself with all operating and safety instructions. Use the product only as described and for the range of applications specified. Please pass these operating instructions on to any future owner.
Intended use
This appliance is exclusively for use as a dispenser of liquid soaps/detergents/disinfectant gels/shampoo. This appliance is intended solely for use in private households. Do not use it for commercial purposes.
Package contents
Automatic soap dispenser
3 batteries (type: Mignon/AA/LR6)
Operating instructions
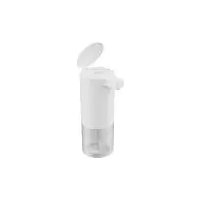
Appliance description
Figure A:
1 Plug
2 Lid
3 Battery compartment
4 LED
⑤ Rear sensor
6 Front sensor
⑦ Soap outlet
8 Display
9 "-" Button
10 "+" Button
⑪ Soap refi ll opening
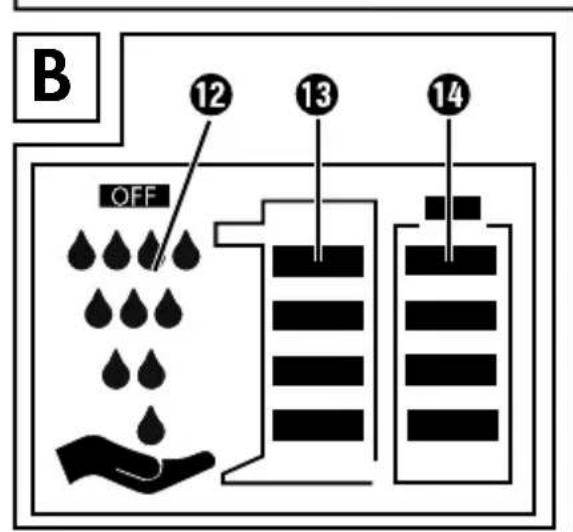
Figure B:
⑫ "Soap quantity" indicator
⑬ "Fill level" indicator
14 "Battery" indicator
Technical data
Power supply: 3 x 1.5 V
Battery type: 1.5 V, Mignon, AA, LR6
Safety class: III

Protection type: IPX4 (protected against water splashes from any direction)
Maximum capacity: approx. 250 ml
Safety information
⚠ WARNING! RISK OF INJURY!
This appliance may be used by children aged 8 and above and by persons with limited physical, sensory, or mental capabilities or lack of experience and knowledge, provided that they are under supervision or have been told how to use the appliance safely and are aware of the potential risks.
▶ Do not allow children to use the appliance as a toy.
▶ Cleaning and user maintenance tasks may not be carried out by children unless they are supervised.
WARNING!
Safety information for handling batteries:
▶ Do not throw batteries into a fire. Do not recharge batteries. There is a risk of explosion and injury!
▶ Never open batteries and never solder or weld batteries. There is a risk of explosion and injury!
▶ Check the condition of the batteries at regular intervals. Leaking batteries can cause damage to the appliance.
▶ If you do not intend to use the appliance for an extended period, remove the batteries.
WARNING!
▶ If the batteries have leaked, use protective gloves. Clean the battery compartment and the battery contacts with a dry cloth.
- Keep batteries out of the reach of children. Children might put batteries into their mouth and swallow them. If a battery is swallowed, seek medical assistance immediately.
CAUTION! APPLIANCE DAMAGE!
- Fill the appliance with liquid soap, detergent, or dis infectant gel only! Other liquids can damage the appliance!
- Fill the appliance only with mild liquid soap, not aggressive substances or substances containing solvents!
Inserting / replacing the batteries
CAUTION! APPLIANCE DAMAGE!
▶ Always observe the polarity indicated on the battery compartment ③ when inserting the batteries!
▶ Always use Mignon AA, LR6 batteries.
▶ Always use batteries of the same type.
1) Use a Philips screwdriver to remove the small screw on the battery compartment ③.
2) Remove the cover from the battery compartment ③.
3) Remove the old batteries, if present.
4) Insert new batteries according to the polarity diagram of the battery compartment ③.
5) Close the battery compartment ③ cover and use the screw to fix it in place. The display ⑧ lights up and all indicators flash five times.
If the dispenser does not contain any soap, the "Fill level" indicator ⑬ continues to flash.
Setup / First use
1) Place the appliance on a suitable, level surface.
2) Open the lid ②.
3) Pull the plug ① from the refill opening ⑪.
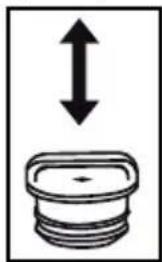
natural_image
Simple line drawing of a mechanical component with an upward and downward arrow, no text or symbols present.4) Pour liquid soap into the soap tank.
NOTE
During fi lling, note the "Max" mark that is visible, if you look into the soap tank. Never exceed the "Max" mark when fi lling with soap! Otherwise, the appliance may overflow.
Pour in at least 70 ml of soap; otherwise, the "Fill level" indicator will flash.
5) Replace the plug ① into the refill opening and close the lid ②.
6) Remove the protective film from the display 8.
The appliance is now ready for use.
Display indicators
■ The "Soap quantity" indicator ⑫ shows the amount of soap dispensed for each use.
The "Fill level" indicator ⑬ shows how much soap remains in the soap tank. The fewer bars are visible, the less soap there is in the soap tank. If only one bar remains in the fill level, the "Fill level" indicator ⑬ begins to flash. Refill the soap tank.
The "Battery" indicator 14 shows the charge level of the batteries that have been inserted. If only one bar remains in the "Battery" indicator 14, you should replace the batteries soon.
Operation
1) Set the quantity of soap you want dispensed for each use. Press the "+" button ⑩ or "-" button ⑨ repeatedly until the desired setting is displayed. You can select from four soap quantities. The more drops displayed in the "Soap quantity" indicator ⑫, the more soap is dispensed.
2) Hold your hand underneath the soap outlet ⑦. The appliance starts dispensing soap.
3) As soon as dispensing stops, you can withdraw your hand.
NOTE
The soap dispensing also stops as soon as you withdraw your hand. This is true even if the programmed quantity has not yet been dispensed.
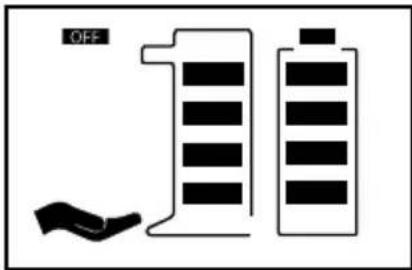
4) If you do not intend to use the appliance for long periods, press the "-" button ⑨ repeatedly until "OFF" appears in the display ⑧:
5) Press the "+" button 10 to turn the appliance back on.
NOTE
If you need to remove a large quantity of soap from the soap tank, you can let the soap dispensing run for 30 seconds: Press the "+" button ⑩ and the "-" button ⑨ simultaneously and hold them for about three seconds. The appliance begins dispensing soap and stops after 30 seconds.
NOTE
If you have not used the appliance for several days, you may have to activate the soap dispensing function several times in a row before soap is dispensed again.
Cleaning and maintenance
■ Turn off the appliance by pressing the "-" button ⑨ repeatedly until "OFF" appears in the display ⑧.
■ Wipe the appliance with a damp cloth. If required, use a mild detergent on the cloth.
If one of the sensors ⑤/⑥ is dirty, clean it carefully with a damp cloth.
■ The LED ④ cannot be replaced.
Storage
CAUTION! APPLIANCE DAMAGE!
▶ Do not turn the soap dispenser upside down for drying!
▶ If you do, water may enter the display and damage it!
◆ Always clean the appliance thoroughly before storing.
If you do not intend to use the appliance for a long period, remove any remaining soap from the soap tank. Pour some water into the soap tank and tilt the appliance carefully from side to side to remove any remaining soap residue. Press the "+" button ⑩ and the "-" button ⑨ simultaneously and hold them for about three seconds. The soapy water will flow out of the soap outlet ⑦ for 30 seconds. Repeat this process until the soap tank is empty.
Then allow the appliance to stand for a while with the plug ① removed and the lid ② open so that the soap tank can dry out.
◆ Remove the batteries.
◆ Store the appliance in a clean, dry location.
Disposal
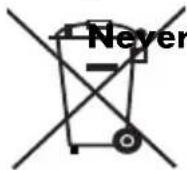
dispose of the appliance in your normal domestic waste. This product is subject to the provisions of European Directive 2012/19/EU.
Dispose of the appliance through an approved disposal facility or your municipal waste facility. Please comply with all applicable regulations. Please contact your waste disposal facility if you are in any doubt.
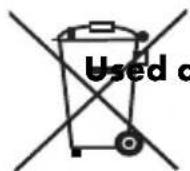
and rechargeable batteries must not be disposed of in household waste.
Consumers are legally obliged to dispose of batteries at a collection point in their community/city district or at a retail store.
The purpose of this requirement is to ensure that batteries are disposed of in an environmentally friendly manner. Return batteries or rechargeable batteries only when they are fully discharged.
The packaging is made from environmentally friendly material and can be disposed of at your local recycling plant.
This appliance has a 3-year warranty valid from the date of purchase. If this product has any faults, you, the buyer, have certain statutory rights. Your statutory rights are not restricted in any way by the warranty described below.
Warranty conditions
The validity period of the warranty starts from the date of purchase. Please keep your original receipt in a safe place. This document will be required as proof of purchase.
If any material or production fault occurs within three years of the date of purchase of the product, we will either repair or replace the product for you at our discretion. This warranty service is dependent on you presenting the defective appliance and the proof of purchase (receipt) and a short written description of the fault and its time of occurrence.
If the defect is covered by the warranty, your product will either be repaired or replaced by us. The repair or replacement of a product does not signify the beginning of a new warranty period.
Warranty period and statutory claims for defects
The warranty period is not prolonged by repairs effected under the warranty. This also applies to replaced and repaired components. Any damage and defects present at the time of purchase must be reported immediately after unpacking. Repairs carried out after expiry of the warranty period shall be subject to a fee.
Scope of the warranty
This appliance has been manufactured in accordance with strict quality guidelines and inspected meticulously prior to delivery.
The warranty covers material faults or production faults. The warranty does not extend to product parts subject to normal wear and tear or fragile parts such as switches, batteries, baking moulds or parts made of glass.
The warranty does not apply if the product has been damaged, improperly used or improperly maintained. The directions in the operating instructions for the product regarding proper use of the product are to be strictly followed. Uses and actions that are discouraged in the operating instructions or which are warned against must be avoided.
This product is intended solely for private use and not for commercial purposes. The warranty shall be deemed void in cases of misuse or improper handling, use of force and modifications / repairs which have not been carried out by one of our authorised Service centres.
Warranty claim procedure
To ensure quick processing of your case, please observe the following instructions:
■ Please have the till receipt and the item number (e.g. IAN 12345) available as proof of purchase.
■ You will find the item number on the type plate, an engraving on the front page of the instructions (bottom left), or as a sticker on the rear or bottom of the appliance.
If functional or other defects occur, please contact the service department listed either by telephone or by e-mail.
■ You can return a defective product to us free of charge to the service address that will be provided to you. Ensure that you enclose the proof of purchase (till receipt) and information about what the defect is and when it occurred.
You can download these instructions along with many other manuals, product videos and software on www.lidl-service.com.
Service

Service Great Britain
Tel.: 0871 5000 720 (£ 0.10/Min.)
E-Mail: kompernass@lidl.co.uk

Service Malta
Tel.: 80062230
E-Mail: kompernass@lidl.com.mt
IAN 280618
Importer
Please note that the following address is not the service address. Please use the service address provided in the operating instructions.
KOMPERNASS HANDELS GMBH
BURGSTRASSE 21
44867 BOCHUM
GERMANY
www.kompernass.com
Inhaltsverzeichnis
Einleitung ....42
natural_image
Simple line drawing of a mechanical component with an upward and downward arrow, no text or symbols present.KOMPERNASS HANDELS GMBH
BURGSTRASSE 21
44867 BOCHUM
GERMANY
www.kompernass.com
KOMPERNASS HANDELS GMBH
BURGSTRASSE 21
44867 BOCHUM
DEUTSCHLAND / GERMANY
www.kompernass.com
Estado de las informaciones · Versione delle informazioni · Estado das informações · Last Information Update · Stand der Informationen: 10 / 2016 · Ident.-No.: SSE4.5B2-072016-3
- DISPENSADOR DE JABÓN CON SENSOR DISPENSER DI SAPONE CON SENSORE SSE 4.5 B2
- ES
- DE AT CH
- Índice
- Indice
- Table of contents
- AUTOMATIC SOAP DISPENSER
- Introduction
- Intended use
- Package contents
- Appliance description
- Figure A:
- Figure B:
- Technical data
- Safety information
- ⚠ WARNING! RISK OF INJURY!
- WARNING!
- CAUTION! APPLIANCE DAMAGE!
- Inserting / replacing the batteries
- Setup / First use
- NOTE
- Display indicators
- Operation
- Cleaning and maintenance
- Storage
- Disposal
- dispose of the appliance in your normal domestic waste. This product is subject to the provisions of European Directive 2012/19/EU.
- and rechargeable batteries must not be disposed of in household waste.
- Warranty conditions
- Warranty period and statutory claims for defects
- Scope of the warranty
- Warranty claim procedure
- Service
- Importer
- Inhaltsverzeichnis
Brand : SILVERCREST
Model : SSE 6 C3
Category : Soap dispenser