LBCONX17E - Cooker Logik - Free user manual and instructions
Find the device manual for free LBCONX17E Logik in PDF.
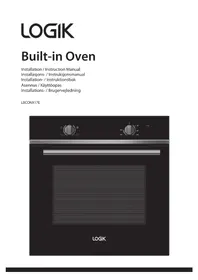


| Product Type | Domestic electric oven |
| Brand | Logik |
| Model | LBCONX17E |
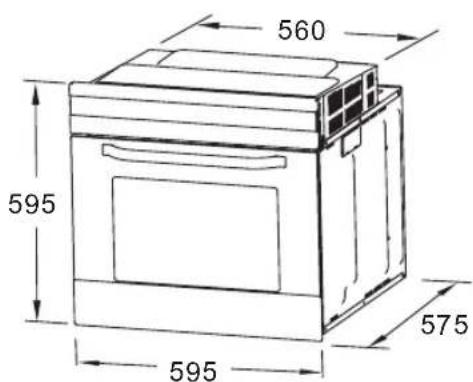
| Product Dimensions (H x W x D) | 595 x 595 x 575 mm |
| Weight | 28.6 kg |
| Rated Voltage | 220-240V~, 50 Hz |
| Maximum Power | 2100 W |
| Oven Capacity | 70 L |
| Energy Efficiency Class | A |
| Energy Consumption (Conventional Mode) | 0.89 kWh/cycle |
| Temperature Range | 50°C - 250°C |
| Cooking Functions | Top heat, Bottom heat, Top & Bottom heat, Grill, Oven light |
| Grilling Temperature | 190°C |
| Number of Shelf Positions | 5 |
| Oven Light Bulb | 220-240V, 25W, T300°C halogen lamp (replaceable only by service agent) |
| Door Removal | Yes, for easier cleaning (lift hinges) |
| Cleaning Advice | Do not use abrasive pads or steam cleaners; clean with hot soapy water |
| Safety Features | Earth connection; child supervision required; use gloves for hot items |
| Installation Requirements | At least 10mm gap from wall; do not block vents; use authorized personnel |
| Included Accessories | Deep tray, Drip pan, Grill shelf, Fixing screws with cover caps |
Frequently Asked Questions - LBCONX17E Logik
User questions about LBCONX17E Logik
0 question about this device. Answer the ones you know or ask your own.
Ask a new question about this device
Download the instructions for your Cooker in PDF format for free! Find your manual LBCONX17E - Logik and take your electronic device back in hand. On this page are published all the documents necessary for the use of your device. LBCONX17E by Logik.
USER MANUAL LBCONX17E Logik
Safety Warnings....6
Unpacking....16
Product Overview....17
Front View 17
Control Panel 17
Operation 18
First Time Use of the Oven....18
Function Control Dial....18
Thermostat Control Dial 18
Using the Oven 19
Baking Tips....19
Energy Saving....19
Cleaning and Maintenance....20
Cleaning Tips 20
Cleaning the Outside of the Oven 20
Cleaning the Oven Door Glass 20
Replacing the Oven Light 20
Removing the Door for Easier Cleaning....20
Specifications....21
Product Fiche 21
Installation 22
NO Content
Thermostat Regulator....25
- The appliance must be installed only by an authorized person in compliance with the instructions provided. Incorrect installation may cause harm to persons, animals or may damage property. • Before using the appliance, ensure that all packing materials are removed from the appliance. • In order to avoid any potential hazard, the enclosed installation instructions must be followed. • Ensure that all specified vents, openings and air spaces are not blocked. • The panels adjacent to the oven must be made of heat-resistant material.
- Cabinets must be designed for the use of built-in ovens and capable of resisting the temperatures from them without damage.
- Keep combustible materials, such as curtains, drapes, furniture, pillows, clothing, linens, bedding, paper, etc., at least 3 feet (0.9 meters) from the oven. Do not use this unit in areas where gasoline, paint or other flammable liquids or their associated vapors may be present.
- To reduce the risk of fire, do not place or install this unit in areas where the ventilation or circulation ducts may become blocked. Make sure there is at least 10mm of space between the back of your oven and the wall.
- The unit's power cord must be connected to a properly grounded and protected, 220-240V electrical outlet. Always use ground fault protection where required by the local regulations.
- Avoid the use of an extension cord, which may overheat and cause a fire.
- When transporting or storing the unit, keep it in a dry location, free from dust, excessive vibration or other factors, which may damage the unit.
- Do not operate any oven with a damaged cord or after the unit malfunctions, has been dropped or damaged in any manner. Return the oven to an authorized service facility for examination, electrical or mechanical adjustment, or repair. Only authorized personnel should carry out servicing. This appliance must be earthed.
- To maintain safe operation, it is recommended that the product be inspected every five years by an authorized service person. Use anti-cut safety gloves while performing the installation.
- To aid the installation of the oven into the cabinet, it is recommended that the door be opened and the hand be placed within the cavity, gripping the underside of the top front of the cavity.
General Warnings
- If the supply cord is damaged, it must be replaced by the manufacturer, its service agent, or similarly qualified persons in order to avoid a hazard. This product has not been designed for any uses other than those specified in this booklet. This appliance must not be used as a space heater. To avoid fire, the appliance must be kept clean and vents kept unobstructed. Do not use a steam cleaner for cleaning. Do not spray aerosols in the vicinity of the appliance during operation. Do not store flammable materials in or under the appliance, e.g., aerosols. Do not line the bottom of the oven with foil or cookware. Always use gloves when handling hot items inside the oven. Always turn the grill off immediately after use, as fat left behind may catch fire. Do not leave the oven unattended when cooking. Oils and fats may catch fire due to overheating.
• Do not put pans or other cookware on the opened door of the oven. - Do not use the oven in the event of a technical fault. Any faults must be fixed by an appropriately qualified and authorized person. - In the event of any incident caused by a technical fault, disconnect the power and report the fault to the service centre to be repaired. • The rules and provisions contained in this instruction manual should be strictly observed. • Do not allow anybody who is not familiar with the contents of this instruction manual to operate the oven. - This appliance can be used by children aged from 8 years and above and persons with reduced physical, sensory or mental capabilities or lack of experience and knowledge if they have been given supervision or instruction concerning use of the appliance in a safe way and understand the hazards involved. Children shall not play with the appliance. Cleaning and user maintenance shall not be made by children without supervision. • Children should be supervised to ensure that they do not play with the appliance. - During use this appliance becomes hot. Care should be taken to avoid touching hot surfaces, e.g. oven door, heating elements. • To avoid burns and scalds children should be kept away. • Accessible parts may become hot when in use. Children should be kept away. • Take care when handling parts with glass, knocks, chips; heavy handling and dropping could cause the glass to shatter. - The glass oven door uses toughened glass and is designed to break into many 'nugget' size pieces if it breaks. These pieces will still have sharp edges, handle broken glass with care.
Oven
• During use the appliance becomes hot. Care should be taken to avoid touching the hot surfaces inside the oven. - Switch the appliance off before removing the oven lamp cover for oven lamp replacement. - To avoid an accident, ensure that oven shelves and fittings are always inserted into the appliance in accordance with the instructions. • Do not use the door as a shelf. • Do not push down on the open oven door. - Do not use harsh abrasive cleaners or sharp metal scrapers to clean the oven door glass since they can scratch the surface, which may result in shattering of the glass.
Grill
- Do not cover the grill insert with foil, as fat left there may catch fire. • Always keep the grill pan clean as any fat there may catch fire. • Do not leave the grill on unattended.
- To avoid fire, ensure that grill trays and fittings are always inserted into the appliance in accordance with the instructions. • Do not place thick portions of food under the grill. Foods may curl, catch and ignite.
Installation
Thank you for purchasing your new product.
We recommend that you spend some time reading this instruction manual in order that you fully understand all the operational features it offers. You will also find some hints and tips to help you resolve any issues.
Read all the safety instructions carefully before use and keep this instruction manual for future reference.
Unpacking
Remove all items from the packaging. Retain the packaging. If you dispose of it, please do so according to local regulations.
The following items are included:
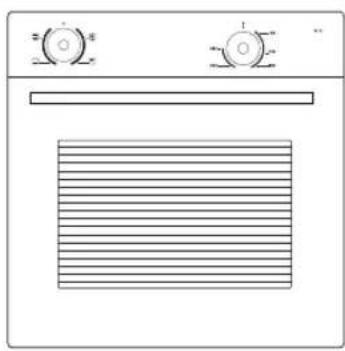
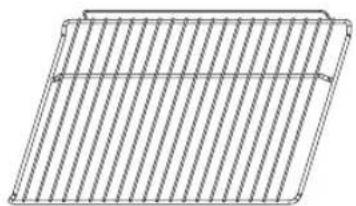
The Main Unit
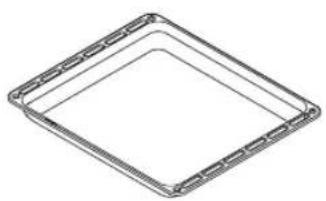
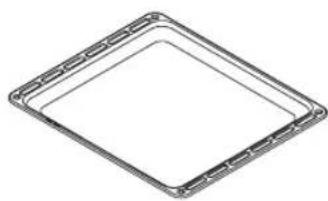
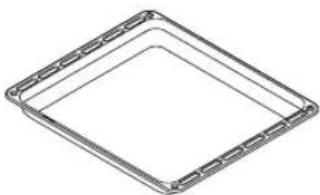
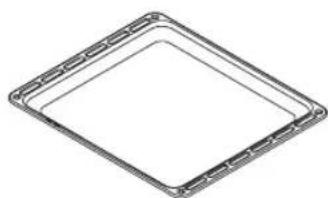
Deep Tray Drip Pan
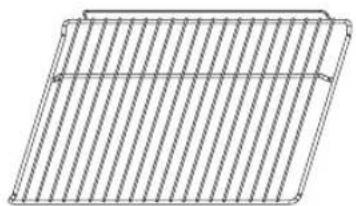
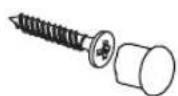
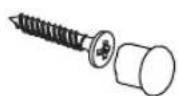
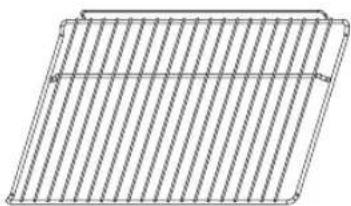
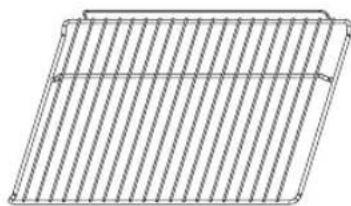
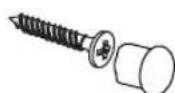
Grill Shelf Instruction / Installation Manual Fixing Screw (with Cover Cap) x 2
Front View
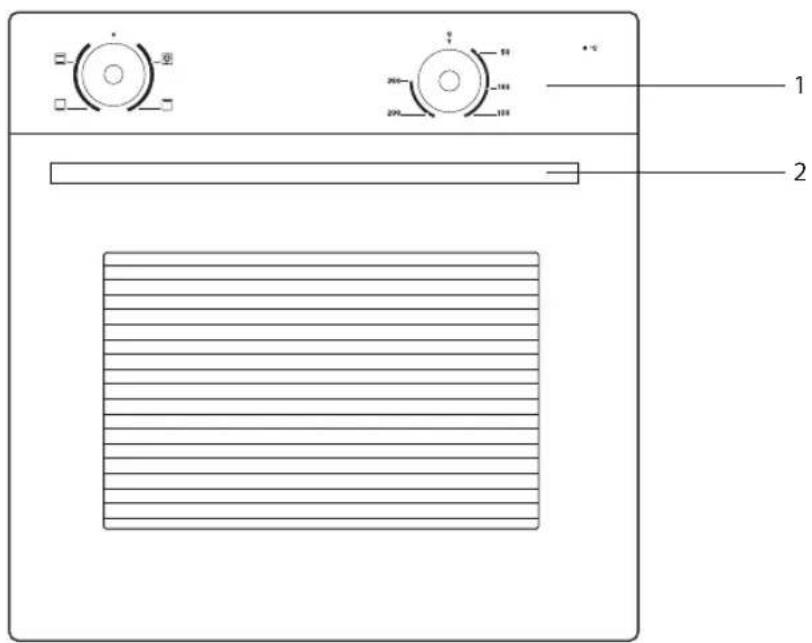
- Control Panel 2. Oven Door Handle
Control Panel
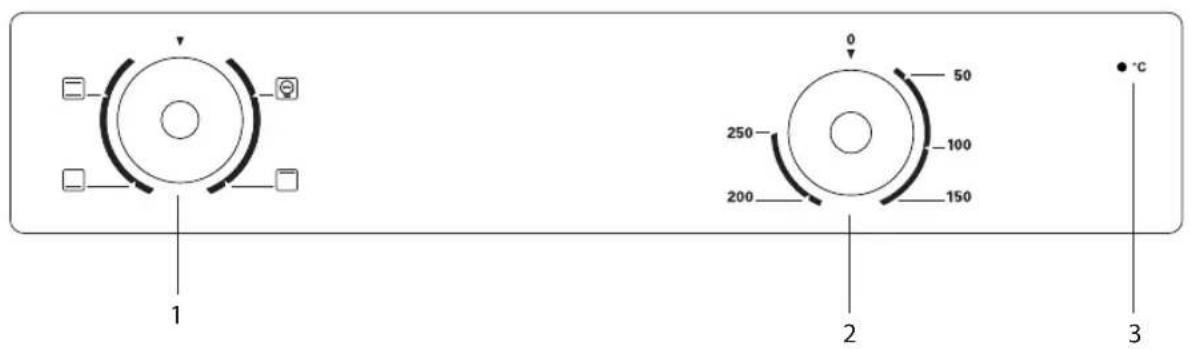
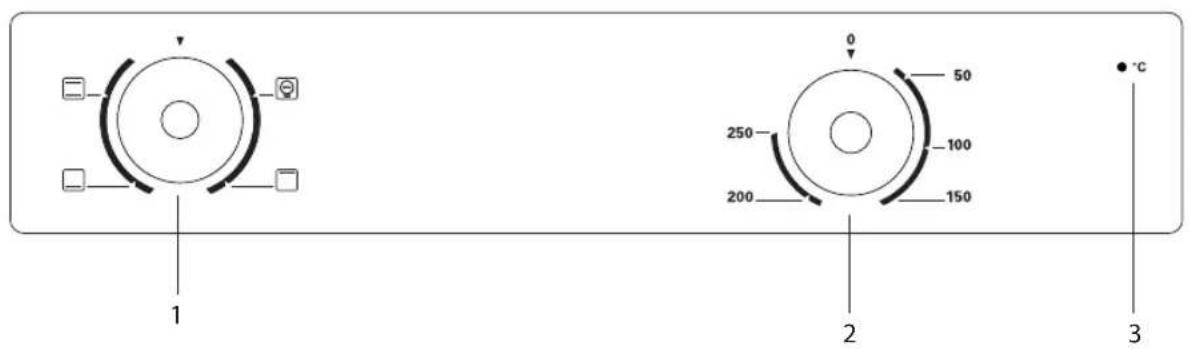
- Function Control Dial
- Thermostat Control Dial
- Thermostat Indicator
First Time Use of the Oven
Unpack the oven. Remove any insert cards or plastic bags. Use a damp cloth to carefully wipe the inner cavity wall and housing. Clean all the detachable parts in hot, soapy water before using.
Heat the oven on maximum for 45 minutes. There may be a little smoke and odour upon initial start up (for about 15 mins). This is normal. It is due to the protective substance on the heating elements which protects them from the effects of corrosion during shipping from the factory.
Function Control Dial
This control is used to select the cooking functions available, which are:
| Symbol Function description | |
| To turn on the oven light.Available for all cooking functions. | |
| To turn on the top heating element, which provides a more concentrated heat to the upper side of the food.Appropriate for frying the upper side of already cooked food. | |
| To turn on the bottom heating element, which provides a more concentrated heat to the base of the food.Ideal for slow cooking dishes such as casseroles, stews, etc. | |
| To turn on the top and bottom heating elements, which heat the food evenly.Ideal for making pastries, cakes, baked pasta, lasagne and pizza. | |
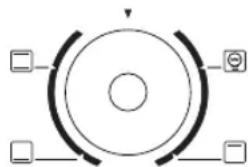
Thermostat Control Dial
The temperature can be set from 50°C to 250°C. Select the desired temperature, as follows:
| To keep food warm 50 - 100°C position |
| For traditional oven cooking 50 - 250°C position |
| For all types of grilling 190°C position |
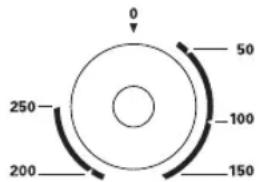
• °C
The thermostat indicator reflects whether the oven cavity temperature has reached the preset cavity temperature.
- If the indicator light is on, it means the oven cavity temperature has not yet reached the preset temperature. In this case, the heaters are on.
- If the indicator light is off, it means the oven cavity temperature has already reached the preset temperature. In this case, the heaters are off.
Using the Oven

- Under no circumstances should the oven be lined with aluminium foil as overheating may occur. Do not place dishes or baking trays directly onto the base of the oven as it becomes very hot and damage may occur.
- Bread may catch fire if the toasting time is too long. Close supervision is necessary during toasting.
- During use the appliance becomes hot. Care should be taken to avoid touching the heating elements inside the oven.
- Accessible parts may become hot during use. Young children should be kept away.
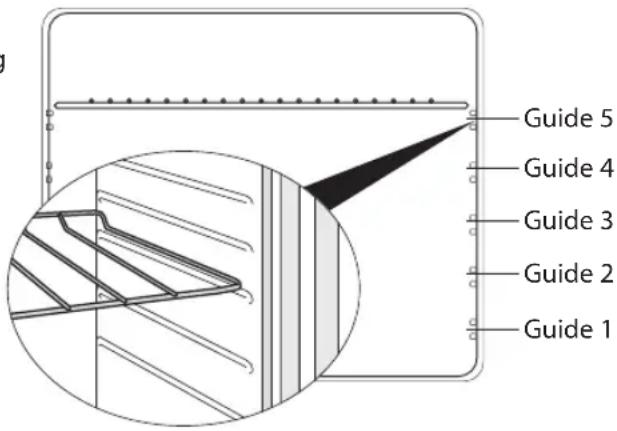
- To get the best results, the smallest distance allowed between the food and the upper heating element is 30 mm.
- On the wall of the inner cavity there are 5 different shelf/tray guide slots. You can place the shelf/tray at different heights to achieve the best cooking performance depending on the heat of the heating elements and the size of the food. If only the upper heating element is on, we suggest that you place the shelf/tray on guide 5 (make sure that there is a minimum distance of 30mm between the food and the upper heating element).
• Always monitor the food during cooking to ensure that you are not overcooking it. • For heavy food, use a pan/tray rather than the grill shelf. - Select the oven function you require. Select the temperature you require. • Before placing food in the oven you may need to pre-heat the oven for 10 minutes. • The thermostat indicator light will go out when the chosen temperature has been reached. • To switch the oven off, turn the control dials to the off position '0'.
Baking Tips
• Always place baking tins in the centre of the grill shelf. • Make sure you use bakeware that is oven proof. - Do not place bakeware too close to the rear of the oven wall. • You can influence the degree of browning by changing the temperature setting. • If a cake collapses after removing it from the oven:
• Use less liquid on your next attempt. - Consider using a longer baking time or use a slightly lower temperature setting.
Energy Saving
To save energy and to help protect the environment, we recommend these hints:
• Preheat the oven only if expressly required by the recipe or guidelines. • Dark baking tins have a higher degree of heat absorption. - In the case of longer baking times, you can switch off the oven 5–10 minutes before the full baking time and use the residual heat. This will reduce energy usage. • Use the oven efficiently, by cooking many trays of food at the same time. • Cook 2 trays of scones, small cakes or sausage rolls at the same time. - Select the correct shelf location for food being cooked. - Do not open the oven door more than necessary.
Cleaning Tips

Ensure that the appliance is switched off and isolated before cleaning the oven to avoid the possibility of electric shock.
- Allow the oven to fully cool before cleaning. Remove the pan/tray/grill shelf, wash them separately in hot soapy water and dry thoroughly.
- Wash the interior of the oven with hot soapy water and wipe down with a damp cloth. • Leave the door open until the interior has dried, before replacing the pan/tray/grill shelf.
- Clean the oven after each use, especially after roasting or grilling, this will prevent spilt or splattered food debris burning and becoming difficult to remove.
- Do not use abrasive pads to clean the interior of the oven as this may remove the enamel, which will affect the efficiency of your oven. • Steam cleaners must never be used to clean this oven.
Cleaning the Outside of the Oven
- You should regularly wipe over the control panel and oven door using a soft cloth and liquid detergent as spilt liquids may damage the finish.
- Wash enameled or chrome plated parts of the oven with hot soapy water or with non-abrasive detergents.
- Never use abrasive pads to clean enameled, chromed or stainless steel surfaces.
- When using commercially available stainless steel cleaning products, avoid cleaning any lettering or symbols, as they can become damaged.
Cleaning the Oven Door Glass
Do not use harsh abrasive cleaners or sharp metal scrapers to clean the oven door glass since they scratch the surface, which may result in shattering of the glass.
Replacing the Oven Light
It cannot be changed by the user; please contact your service agent.
Bulb specifications
220-240V, 25W, T300°C halogen lamp
Removing the Door for Easier Cleaning
- We recommend you have someone to assist you during removal of the door.
- Open the door completely.
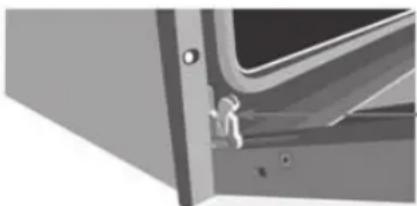
- The door hinge has a small latch. Lift the latch on both hinges.
- Lift the door slightly as if closing, and then with both hands supporting the door, pull it away from the oven.
- To replace the door, perform the above in reverse order. Open and close the door to make sure that it has been fitted correctly.
Specifications
| Rated Voltage 220-240V~, 50 Hz | |
| Power 2100 W (Max.) | |
| Product Dimensions 595 x 595 x 575 mm | |
Features and specifications are subject to change without prior notice.
Product Fiche
| Brand Logik | |
| Model LBCONX17E | |
| Type of oven Domestic electric oven | |
| Weight (kg) 28.6 | |
| Number of cavities 1 | |
| Heat source per cavity Electrical | |
| Volume of each cavity 70 L | |
| Energy consumption (electricity) required to heat a standardised load in a cavity of an electric heated oven during a cycle in conventional mode per cavity (electric final energy) | 0.89 kWh/cycle |
| Energy consumption required to heat a standardised load in a cavity of an electric heated oven during a cycle in fan-forced mode per cavity (electric final energy) | - |
| Energy efficiency index (EEIcavity ) for each cavity of the model | 94.1 |
| Energy efficiency class A | |
| Where has been awarded an “EU Ecolabel award’ under Regulation (EC) 66/2010 | - |
| Short title or reference to the measurement and calculation methods used to establish compliance with the above requirements | EN 60350-1:2013 |
| Information relevant to users in order to reduce total environmental impact (e.g. energy use) of the cooking process | - |

- All electrical work should be carried out by a suitably qualified and authorised electrician. No alterations or wilful changes in the electricity supply should be carried out.
- If the mains cable is damaged and needs to be replaced, this should be done by a qualified person using the proper tools, so as to avoid any accidents. The mains cable must not be bent or compressed. The mains cable must be checked regularly and only replaced by a qualified person.

The oven is intended for household use only.
The manufacturer reserves the right to introduce changes which do not affect the operation of the appliance.

Use anti-cut safety gloves whilst performing the installation. To aid the installation of the oven into the cabinet, it is recommended that the door is opened and the hand is placed within the cavity gripping the underside of the top front of the cavity.
This oven must be installed in compliance with local safety standards. Wiring connections must be in accordance with Local Wiring Rules and any particular conditions of the local authority. Refer to data plate for rating information. A means of disconnection with a contact separation of at least 3mm must be supplied in the fixed wiring. This appliance must be properly earthed. Do not lift the appliance by the door handles. Prepare the cupboard opening to match your appliance measurements.
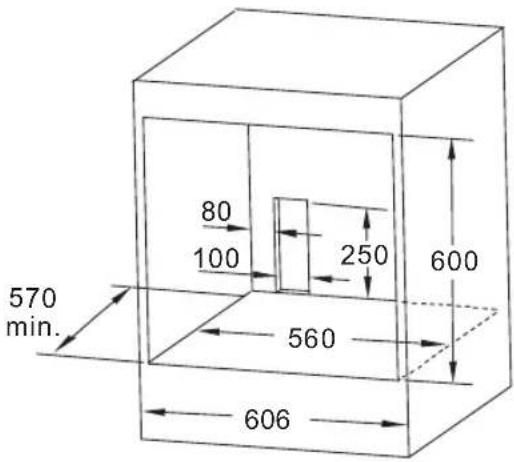
Slide appliance into the cupboard, ensuring that the supply cable (where fitted) does not kink.
To prevent tipping, secure your oven into the cupboard by fastening with the 2 screws supplied.
The cabinet must be suitable for use with built in ovens. Installation into low temperature tolerant cabinetry (e.g. Vinyl coated) may result in deterioration of the low temperature coating by discolouring or bubbling.
We cannot accept responsibility for damage caused by installation into low temperature tolerant cabinets.
After installation, test and ensure that the appliance operates correctly.
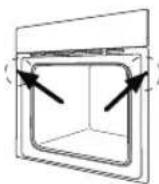

To avoid any potential hazard, you must follow our instructions when you install your appliance.
Thank you for purchasing the new product.
Main unit
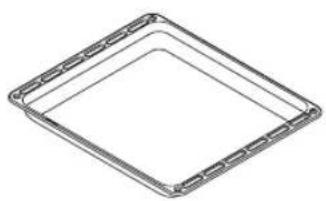
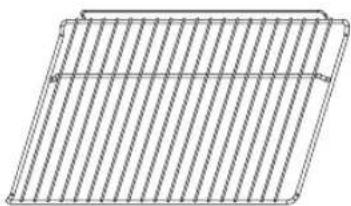
Thermostat regulator
Specification
| Klassifisert spenning 220-240V~, 50 Hz | |
| Effekt 2100 W (maks.) | |
| Produktmål 595 x 595 x 575 mm | |
Main unit
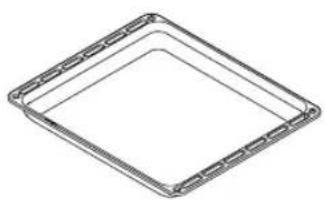
Deep tray Drip tray
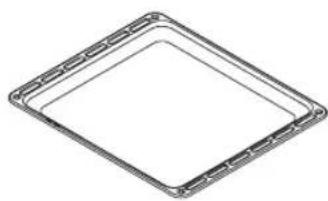
- Control panel 2. Handle for oven door
SE
Control panel
Temperature selector
Specifications
| Uppskattad spänning 220-240V~, 50 Hz | |
| Effekt 2100 W (Max.) | |
| Produktdimensioner 595 x 595 x 575 mm | |
Main unit
Technical data
| Nimellisjännite 220-240V~, 50 Hz | |
| Teho 2100 W (Maks.) | |
| Tuotteen mitat 595 x 595 x 575 mm | |
Main unit
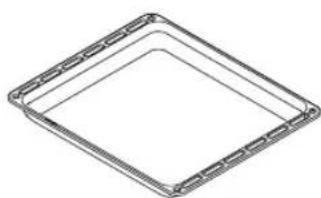
Deep plate drip tray
Thermostat knob
Specifications
| Spænding 220-240V~, 50 Hz | |
| Kraft 2100 W (maks.) | |
| Produktdimensioner 595 x 595 x 575 mm | |
The symbol on the product or its packaging indicates that this product must not be disposed of with your other household waste. Instead, it is your responsibility to dispose of your waste equipment by handing it over to a designated collection point for the recycling of waste electrical and electronic equipment. The separate collection and recycling of your waste equipment at the time of disposal will help conserve natural resources and ensure that it is recycled in a manner that protects human health and the environment.
For more information about where you can drop off your waste for recycling, please contact your local authority, or where you purchased your product.
NO
www.lefdal.com/support
SE www.elgiganten.se/support
- SAFETY WARNINGS
- UNPACKING
- PRODUCT OVERVIEW
- OPERATION
- CLEANING AND MAINTENANCE
- SPECIFICATIONS
- PRODUCT FICHE
- INSTALLATION
- NO CONTENT
- GENERAL WARNINGS
- OVEN
- GRILL
- THANK YOU FOR PURCHASING YOUR NEW PRODUCT
- FRONT VIEW
- CONTROL PANEL
- FIRST TIME USE OF THE OVEN
- FUNCTION CONTROL DIAL
- THERMOSTAT CONTROL DIAL
- USING THE OVEN
- BAKING TIPS
- ENERGY SAVING
- CLEANING TIPS
- CLEANING THE OUTSIDE OF THE OVEN
- CLEANING THE OVEN DOOR GLASS
- REPLACING THE OVEN LIGHT
- BULB SPECIFICATIONS
- REMOVING THE DOOR FOR EASIER CLEANING
- THANK YOU FOR PURCHASING THE NEW PRODUCT
- THERMOSTAT REGULATOR
- SPECIFICATION
- TEMPERATURE SELECTOR
- TECHNICAL DATA
- THERMOSTAT KNOB
- NO
Brand : Logik
Model : LBCONX17E
Category : Cooker