LHFIP2010E - Uncategorized Logik - Free user manual and instructions
Find the device manual for free LHFIP2010E Logik in PDF.


| Product Type | LED TV |
| Screen Size | 20 inches |
| Resolution | HD Ready (1366 x 768) |
| Dimensions (with stand) | 18.5 x 11.4 x 3.5 inches |
| Weight (with stand) | 4.5 kg |
| Power Supply | 220-240V, 50Hz |
| Power Consumption | 50W (typical) |
| Tuner | DVB-T/T2, DVB-C |
| Inputs | HDMI x2, USB x1, VGA x1, AV x1 |
| Outputs | Headphone jack, Coaxial audio |
| Main Functions | Digital TV reception, Media playback via USB, Sleep timer, Parental lock |
| Maintenance | Clean screen with soft dry cloth; avoid liquids |
| Safety | Do not expose to rain or moisture; ensure ventilation; unplug during storms |
| Spare Parts & Repairability | Remote control available; power cord; wall mount bracket (VESA 100x100) |
| General Information | Brand: Logik; Model: LHFIP2010E; Color: Black |
Frequently Asked Questions - LHFIP2010E Logik
User questions about LHFIP2010E Logik
0 question about this device. Answer the ones you know or ask your own.
Ask a new question about this device
Download the instructions for your Uncategorized in PDF format for free! Find your manual LHFIP2010E - Logik and take your electronic device back in hand. On this page are published all the documents necessary for the use of your device. LHFIP2010E by Logik.
USER MANUAL LHFIP2010E Logik
MICRO HI-FI WITH DOCKING for iPod
INSTRUCTION MANUAL
(iPod not included)
GB
MIKRO-HIFI MED DOKKING for iPod
BRUKSANVISNING
natural_image
Black and white photo of a portable audio workstation with speaker, microphone, and mobile phone (no visible text or symbols)
(iPod not included)
Contents
GB
Unpacking ....5
Product Overview 6
Front Panel 6
Rear View 6
Top View 6
Remote Control....7
Remove the Insulating Strip from the Remote Control .....7
Battery Installation for the Remote Control ....7
Remote Control Operation Range 8
LCD Display Window 9
Connections 10
Speaker Connections ....10
Connecting to the Mains Socket 10
For Personal Listening ....10
Compatible Disc Types ....11
Basic Operation 11
Powering ON/OFF 11
Selecting Modes 11
Adjusting the Volume 12
Clock Setting 12
Timer Setting 12
Sleep Timer Setting 13
Preset EQ....13
CD / MP3 / WMA Operation ....14
Playback ....14
To Pause Playback ....14
To Stop Playback ....14
Skipping to Another Track ....15
ID3 Operation (For MP3 / WMA Mode, Operate from
Remote Control Only) 15
Repeat Playback ....15
Random Playback 16
Intro Playback 16
Programmable Playback 17
iPod Operation ....18
Inserting the iPod and Selecting iPod Mode 18
iPod Playback 19
iPod MENU Mode 19
Charging Your iPod 20
AUX Operation....20
Radio Operation 20
Searching for a Station Manually 20
Searching for a Station Automatically ....20
Selecting Mono / Stereo 21
Presetting Stations 21
Tuning in to a Preset Station 21
For Better Reception 21
Maintenance 22
Hints and Tips 23
Specifications 24
Safety Warnings 105
Innhold
NO
Pakke ut 25
Produktoversikt 26
Frontpanel 26
Bakside 26
Ovenfra 26
Fjernkontroll 27
Congratulations on the purchase of your new Logik Micro HiFi with Docking for iPod.
We recommend that you spend some time reading this instruction manual in order that you fully understand all the operational features it offers. You will also find some hints and tips to help you resolve any issues.
Read all the safety instructions carefully before use and keep this instruction manual for future reference.
Unpacking
Remove all packaging from the unit. Retain the packaging. If you dispose of it please do so according to local regulations.
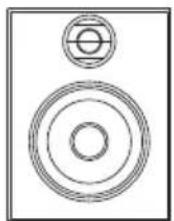
The following items are included:
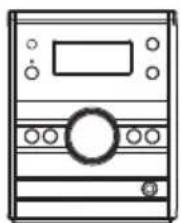
natural_image
Line drawing of a front-loading washing machine (no text or symbols)The Main Unit Speakers x 2
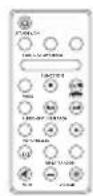
Remote Control
(P.N.: 070-0018DN-01C0)
Quick Start Guide (P.N.: 227-2275DN-123)
If items are missing or damaged, please contact Partmaster (UK only). Tel: 0844 800 3456 for assistance.
GB
Front Panel
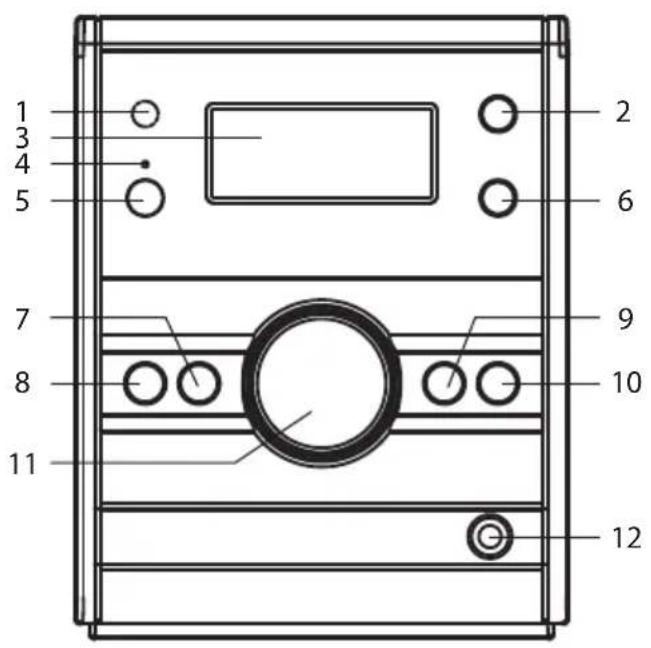
-
Remote Sensor
-
Function Button
-
LCD Display Window
-
Standby Indicator
-
STANDBY/ON Button
-
FM/MW Button
-
SKIP/TUNE SEARCH UP Button
-
SKIP/TUNE SEARCH DOWN Button
-
STOP/MENU Button
-
PLAY/PAUSE/ENTER Button
-
VOLUME Control
-
Earphones Socket
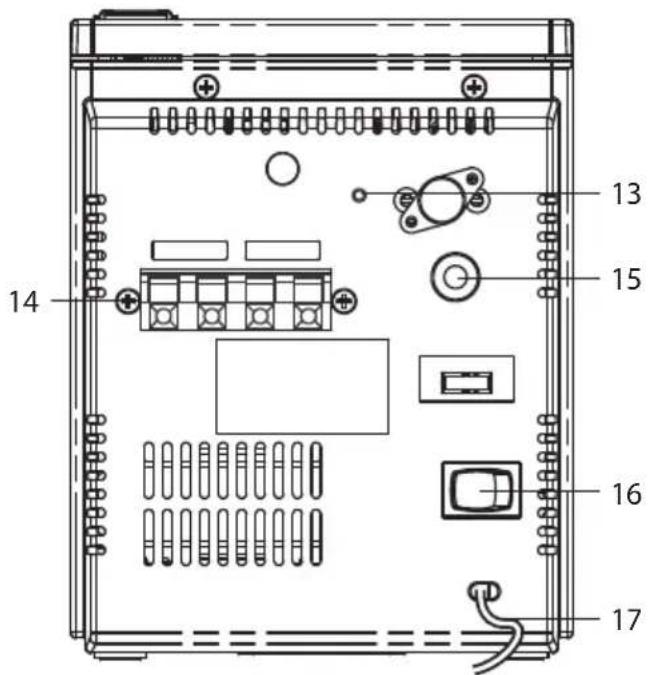
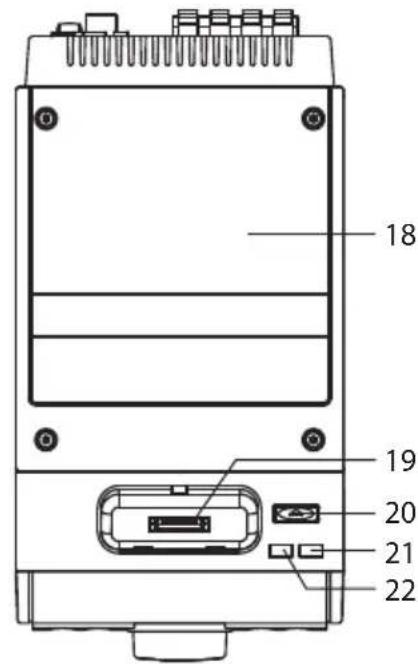
Rear View Top View
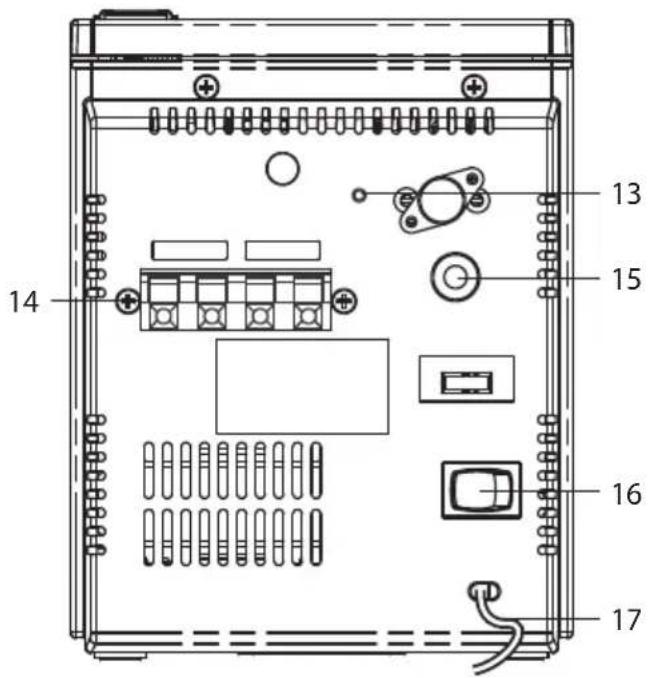
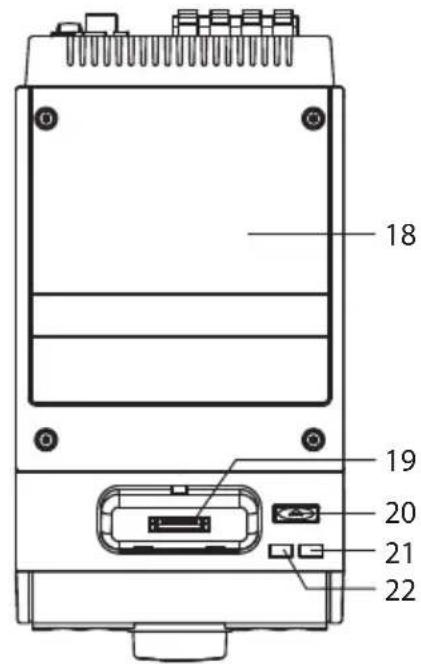
- FM Aerial
- Speaker terminals (L/R)
- AUX IN Socket
- Power ON/OFF Switch
-
Mains Cable
-
Disc Door
- iPod Dock
- Open Button
- TIMER Button
- MENU Button
Remote Control
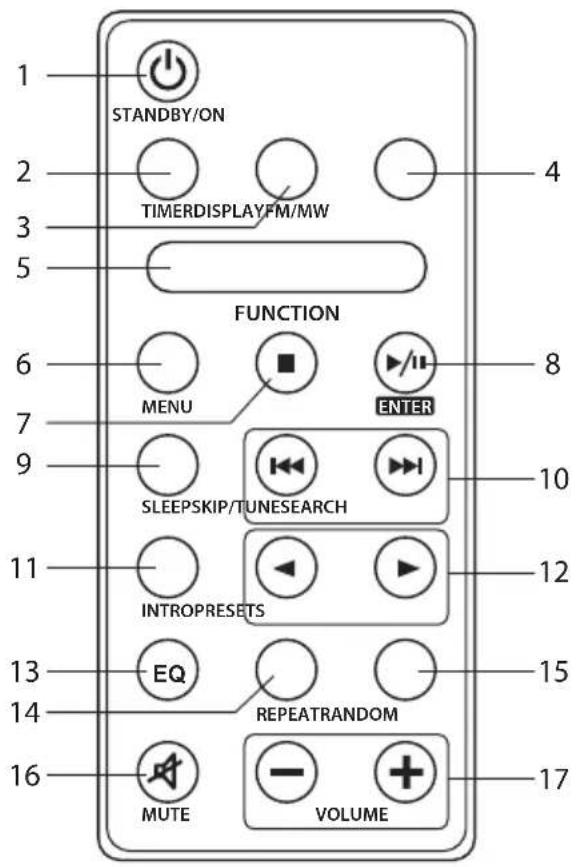
- STANDBY/ON ⏻ Button
- TIMER button
- DISPLAY Button
- FM/MW Button
- FUNCTION Button
- MENU Button
- ■ Button
- ▶/II /ENTER Button
- SLEEP Button
- SKIP/TUNE SEARCH 🔊️ Buttons
- INTRO Button
- PRESETS ▶Buttons
- EQ Button
- REPEAT Button
- RANDOM Button
- MUTE Button
- VOLUME + / - Buttons
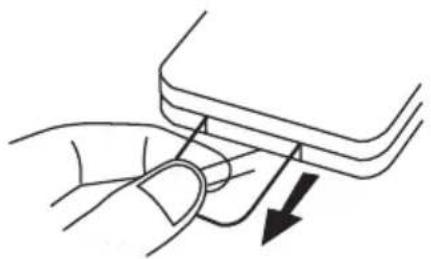
Remove the Insulating Strip from the Remote Control
Remove the insulating mylar strip from the battery if the battery is being used for the first time. It is located at the bottom back side of the remote control.
natural_image
Illustration of a finger pressing down on a curved object with an arrow indicating force (no text or symbols)Battery Installation for the Remote Control
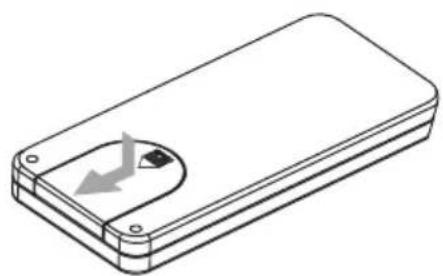
- Press and slide the back cover to open the battery compartment of the remote control.
natural_image
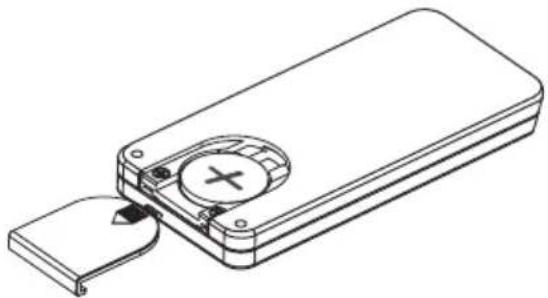
Isometric line drawing of a rectangular electronic device with a circular button and arrow indicator (no text or symbols)- Remove the old battery, and place a new battery in the holder.
natural_image
Technical line drawing of a remote control device with a circular button and handle (no text or symbols)- Close the battery compartment cover.
Handling the Battery
- Improper or incorrect use of batteries may cause corrosion or battery leakage, which could cause fire, personal injury or damage to property. - Install the battery correctly by following the polarity (+ and -) indications in the battery compartment.
- When the battery is exhausted, the remote control will not function.
• Only use the battery type indicated in this manual.
- Do not dispose of the used battery as domestic waste. Dispose of it in accordance with local regulations.
- Small button cell batteries such as the one used in the remote control are easily swallowed by young children and this is dangerous. Keep loose button cells away from young children and make sure that the battery holder tray is secure in the remote control. Seek medical advice if you believe a cell has been swallowed.
Handling the Remote Control
• Take care of your fingernails when you press and hold the battery release tab.
• Do not drop or cause impact to the remote control.
• Do not spill water or any liquid on the remote control.
• Do not place the remote control on a wet object.
- Do not place the remote control under direct sunlight or near sources of excessive heat.
- Remove the battery from the remote control when not in use for a long period of time, as it could cause corrosion or battery leakage and may result in physical injury and/or property damage including fire.
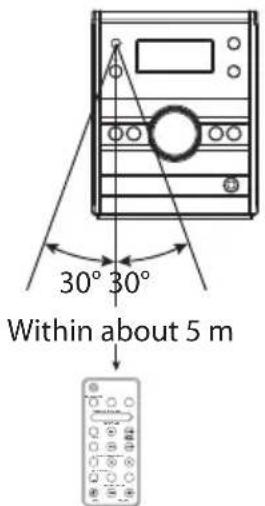
Remote Control Operation Range
Point the remote control at the unit no more than 5 metres from the remote control sensor and within 60° of the front of the unit. The operating distance may vary depending on the brightness of the room.
LCD Display Window
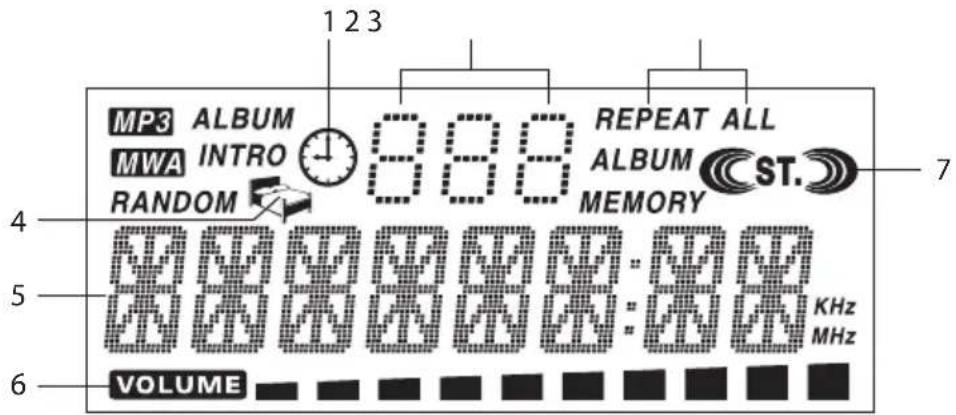
- Timer Indicator
- Repeat 1 & All Indicator
- Sleep Indicator
- Track / Number / Time Indicator
- Volume Indicator
-
Stereo Indicator
-
Album / Radio Memory Number Indicator

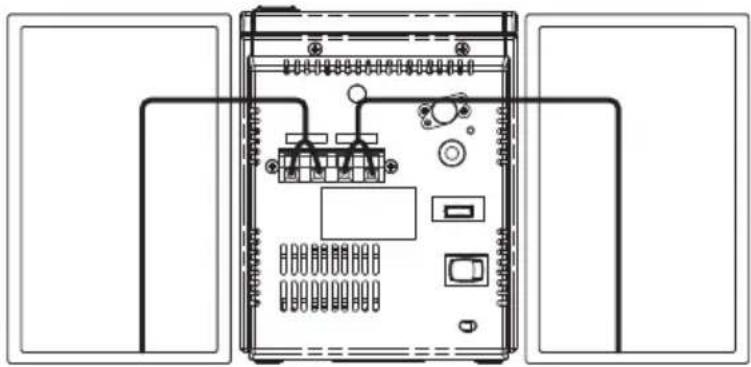
Speaker Connections
Connect the speaker cables at the back of the speakers to the speaker sockets (L/R) at the back of the unit.
natural_image
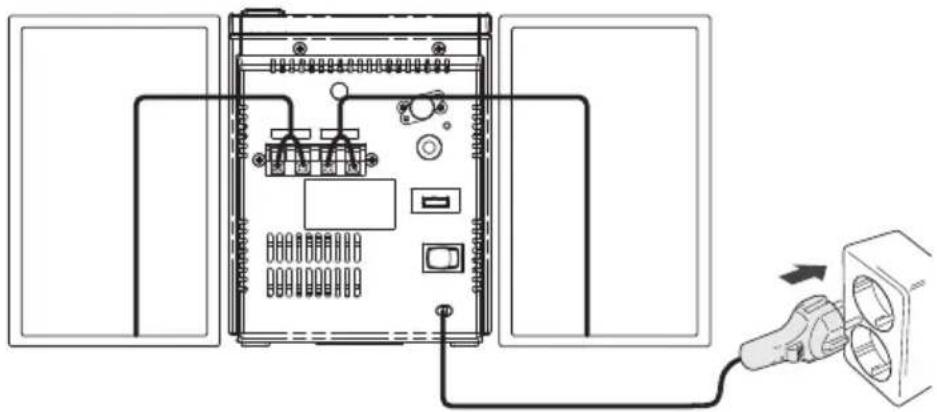
Technical line drawing of an internal electronic device with ports and connectors (no text or symbols)Connecting to the Mains Socket
Connect the mains cable at the rear of the unit to the mains socket.
natural_image
Diagram of an electronic device showing internal components connected to a cable, with no visible text or symbols.To Mains Socket
For Personal Listening
Connect headphones (∅3.5mm stereo mini plug) to the earphones socket. Adjust the volume control to obtain the desired volume level.
When the earphones are connected, the speakers will automatically mute.
Compatible Disc Types
| Disc Types Disc Logo Recorded Content | ||
| CD-R (CD Recordable - Audio/Video format or JPEG files) |  | AUDIO + VIDEO + JPEG |
| CD-RW (CD-Rewritable - Audio/Video format or JPEG files) |  | AUDIO + VIDEO + JPEG |
| AUDIO-CD (Compact Disc Digital Audio) |  | AUDIO |

Some recorded files may not be able to be played due to the type and format of disc or condition of the recording.
Basic Operation
Powering ON/OFF
When you first connect the unit to the mains socket, switch the POWER ON/OFF switch at the rear of the main unit to the "ON" position. The unit will be in STANDBY mode.
- Press the STANDBY/ON button to switch the unit on.
- Press the STANDBY/ON button again to switch the unit off.
- Disconnect the mains cable from the mains socket if you want to switch the unit off completely.
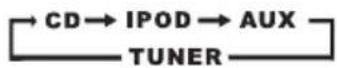
Selecting Modes
Press the FUNCTION button repeatedly to switch between modes (CD, iPod, AUX or TUNER).

- If there is no signal when the unit is in CD / iPod mode, the unit will automatically turn off in 15 minutes.
- When the unit is in the iPod mode and if there is no iPod in the iPod dock, the unit will automatically turn off in 15 minutes.
• While in STANDBY mode, press any button to illuminate the display for 10 seconds. - To save energy, turn off the unit by switching the POWER ON/OFF switch at the rear of the unit to the "OFF" position.
Adjusting the Volume
Adjust the Volume Control on the unit or press the VOL + / - buttons on the remote control to increase/decrease the volume.
Press the MUTE button on the remote control to switch the sound off. The volume level will flash and the audio output will be temporarily terminated. Press the MUTE button again to resume audio listening.
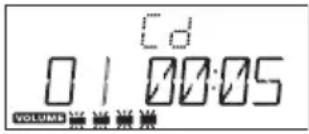
Clock Setting
Setting the clock can only be done in STANDBY mode.
When the unit is in STANDBY mode the "STANDBY" indicator illuminates.
- In STANDBY mode, press and hold the MENU button and then press the SKIP/TUNE SEARCH ◀◀▶buttons to select the 12-hour or 24-hour time format on the display.
- Press the MENU button to confirm the time format. The hour digits will flash.
- Press the SKIP/TUNE SEARCH 🔊 Buttons to adjust the hour digits and then press the MENU button to confirm. The minute digits will flash.
- Press the SKIP/TUNE SEARCH 🔊 buttons to adjust the minute digits and then press the MENU button to confirm and finish clock setting.
Timer Setting
The timer function will turn the unit on at a preset time.
-
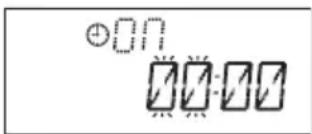
Press and hold the TIMER button on the remote control until the "ON" indicator and "00:00" show on the display and the hour digits flash.
-
Press the SKIP/TUNE SEARCH 🔊 Buttons to adjust the hour digits and then press the TIMER button to confirm. The minute digits will flash.
-
Press the SKIP/TUNE SEARCH ◀◀▶▶▶ buttons to adjust the minute digits and then press the TIMER button to confirm the TIMER ON time.
-
After adjusting "TIMER ON", "OFF" indicator will show on the display and the hour digits flash.
-
Press the SKIP/TUNE SEARCH 🔊 Buttons to adjust the hours digits and then press the TIMER button to confirm.
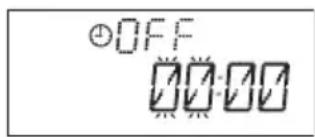
The minute digits will flash.
- Press the SKIP/TUNE SEARCH ◀◀◀▶buttons to adjust the minute digits and then press the TIMER button to confirm the TIMER OFF time.
- Now the "TUNER" indicator will flash on the display. Press the SKIP/TUNE SEARCH ▶▶▶▶▶▶▶▶▶▶▶▶▶▶▶▶▶▶▶▶▶▶▶▶▶▶▶▶▶▶▶▶▶▶▶▶▶▶▶▶▶▶▶▶▶▶▶▶▶▶▶▶▶▶▶▶▶▶▶▶▶▶▶▶▶▶▶▶▶▶▶▶▶▶▶▶▶▶▶▶▶▶▶▶▶▶▶▶▶▶▶▶▶▶▶▶▶▶▶▶▶◀
- Press the TIMER button again, the timer "VOL" indicator will flash on the display. Press the SKIP/TUNE SEARCH ◀◀▶▶▶ buttons to adjust the volume to the desired level.
-
After adjusting "TIMER ON" and "TIMER OFF", press the TIMER button to confirm. The "💡" indicator will show on the display.
-
The unit will be turned on automatically to the selected CD / iPod / AUX / TUNER mode and turn off when the timer reaches the preset time.

• Each enable state will be cleared if buttons are not pressed in 10 seconds.
• For the FM/AM tuner timer, it will turn on to the last station you tuned into.
- If the display shows "ERROR" while you set the "TIMER ON" it means both "TIMER ON" and "TIMER OFF" is the same. In this case, please go to "TIMER OFF" to set the off time first.
To cancel timer, press and hold the TIMER button on the remote control until the TIMER indicator goes out.
Sleep Timer Setting
The sleep timer automatically turns the unit off after a certain time.
- While the unit is on, press the SLEEP button and "90" will show on the display.
- Press the SLEEP button repeatedly to select the desired sleep time as below:

-
After setting a desired sleep time, the " indicator will show on the display.
-
The unit will automatically turn off once it counts down the sleep time.
To clear the preset sleep time, keep pressing the SLEEP button until normal display is shown on the display. The "💡" icon will disappear.
Preset EQ
This system supports a variety of equalizers and sound effects.
During playback, press the EQ button on the remote control to select a desired music mode. Each time the EQ button is pressed, the music mode will change to the next one as follows:

GB
Playback
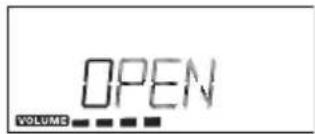
- Press the OPEN button to open the disc door. Put the disc with the label side up and then close the disc door gently.
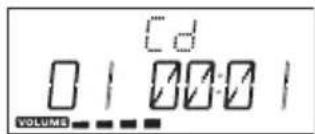
- Press the FUNCTION button repeatedly to select CD mode. The unit will start to read the CD/MP3 disc automatically.
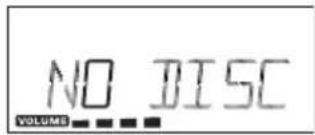
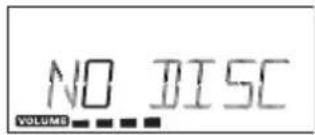
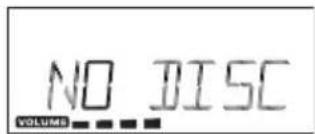
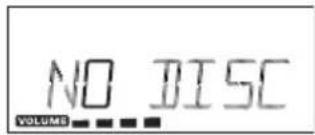
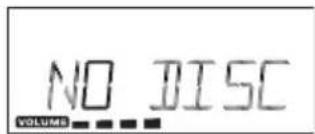
- If there is no disc or the disc can't be read, "NO DISC" will show on the display.
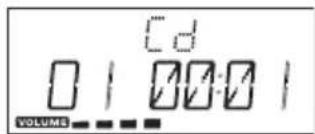
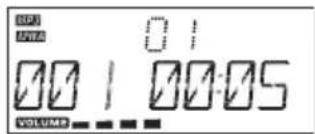
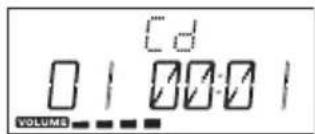
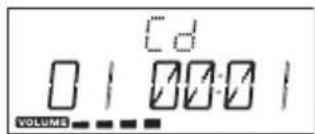
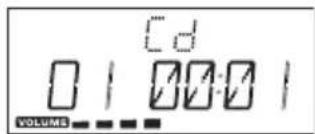
- Press the /ENTER button the unit will play the first track of the CD disc automatically.
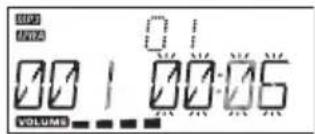
To Pause Playback
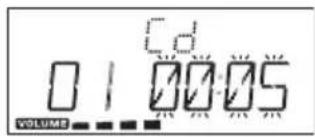
Press the ▶/ENTER button to pause the playback, the time elapsed indicator will flash.
To resume playback, press the ▶/“/ENTER button again.
To Stop Playback
Press the ■ button to stop playback.
Skipping to Another Track
- Press the SKIP/TUNE SEARCH ◀◀▶▶▶ buttons to skip to the start of the current track or to skip to the next track.
- Press and hold the SKIP/TUNE SEARCH◀◀▶buttons to skip fast forward / backward of each song.
• To resume playback, press the ▶/□/ENTER button.

For MP3 / WMA Discs
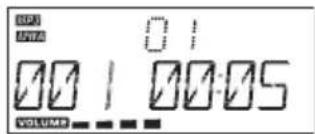
- During MP3 playback, press the PRESETS◀buttons to skip to the 1st track of the next album.
- During STOP mode, press the PRESETS◀buttons repeatedly to select your desired album to play. Press the ▶/□ /ENTER button to start playing the 1st track in that album.
ID3 Operation (For MP3 / WMA Mode, Operate from Remote Control Only)
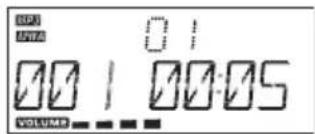
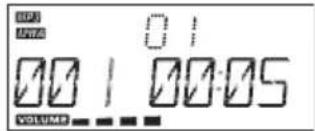
- During MP3 playback, press the DISPLAY button on the remote control to open the ID3 function. If the MP3/WMA file is written "ID3", it will automatically search the information of "TITLE NAME", "ARTIST NAME" and "ALBUM NAME" indicated on the display.

- Press the DISPLAY button again to resume the normal playback.
Repeat Playback
For CD Mode
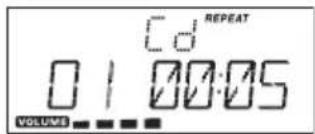
Repeat Current Track
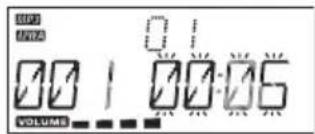
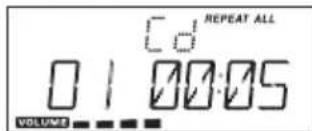
Press the REPEAT button once, "REPEAT" indicator will show on the display. The current track will be played repeatedly.
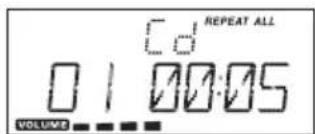
Repeat the Entire CD
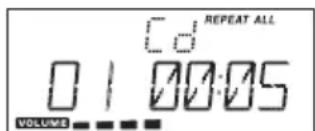
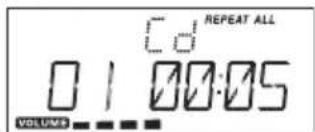
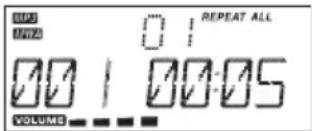
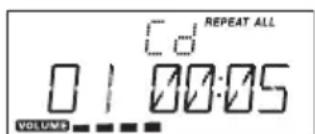
Press the REPEAT button twice, "REPEAT ALL" indicator will show on the display. All the discs tracks will be played repeatedly in a cycle.
Cancel Playback Mode
Press the REPEAT button three times to cancel the repeat function.
For MP3 / WMA Mode
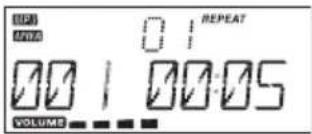
Repeat Current Track
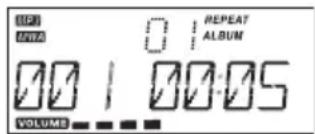
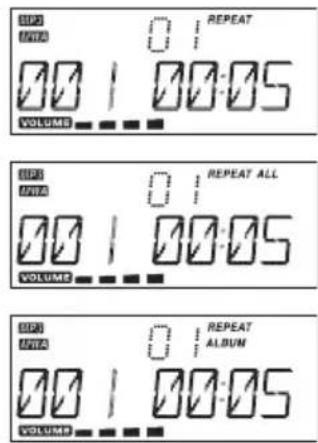
Press the REPEAT button once, "REPEAT" indicator will show on the display. The current track will be played repeatedly.
Repeat the Entire CD
Press the REPEAT button twice, "REPEAT ALL" indicator will show on the display. All the discs tracks will be played repeatedly in a cycle.
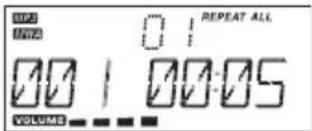
Repeat the Album
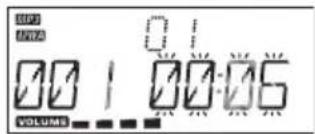
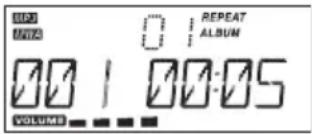
Press the REPEAT button three times, "REPEAT ALBUM" indicator will show on the display. The currently album will be played repeatedly in a cycle.
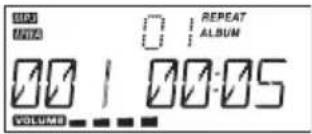
Cancel Playback Mode
Press the REPEAT button four times to cancel the repeat function.
Random Playback
All tracks on the disc can be played in a random order.
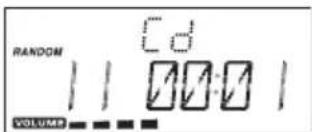
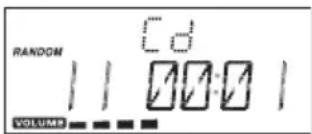
- During playback, press the RANDOM button on the remote control. The "RANDOM" indicator will show on the display. All tracks will be played randomly.
• After all the tracks have played once, the playback will stop automatically. - To cancel the random playback, press the RANDOM button on the remote control during RANDOM playback. Normal playback will resume.
Intro Playback
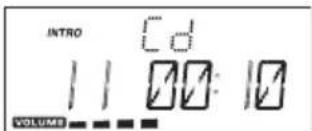
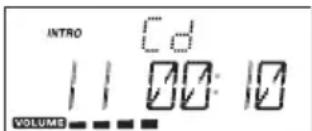
- During the playback, press the INTRO button on the remote control. The "INTRO" indicator will show on the display. The unit will play the first 10 seconds of each track.
- Press the INTRO button on the remote control again to resume the normal playback.
Programmable Playback
A program of up to 32 tracks in CD mode or 64 tracks in MP3/WMA mode can be set to play in a preset order.
For CD Mode
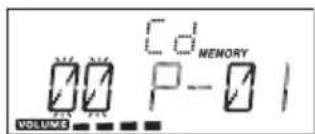
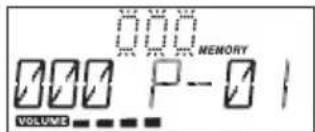
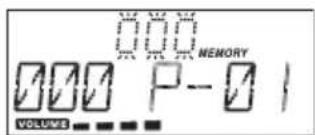
- In STOP mode, press the MENU button to shift to PROGRAM mode. "MEMORY" indicator will show on the display.
- Press the SKIP/TUNE SEARCH ◀◀◀▶Buttons to select the desired track and then press the MENU button to store the track in the memory.
- To add additional tracks, repeat step 2 (up to 32 tracks).
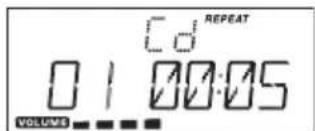
- To start playback, press the ▶/11 /ENTER button. The first track of the program will start to play. When all tracks have been played, the unit will show the number of tracks and the playing time of the CD tracks.
For MP3 / WMA Mode
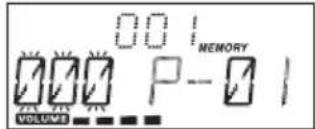
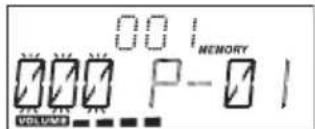
- In STOP mode, press the MENU button to shift to PROGRAM mode. "MEMORY" indicator will show and the album number will flash on the display.
- Press the PRESETS ◀ button to select the desired album number and then press the MENU button. The track number will flash on the display.
- Press the SKIP/TUNE SEARCH ◀◀▶▶I buttons to select the desired track and then press the MENU button to store the track in the memory.
- To add additional tracks, repeat step 2 (up to 64 tracks).
- To start playback, press the ▶/11 /ENTER button. It will play starting with the first track of the program. When all tracks have been played, the unit will show the number of tracks and the playing time of the CD tracks.
To Erase the Program
- In STOP mode, you can erase the contents of the memory by pressing the button or by opening the disc door.
- Setting a new program will erase the existing one.
Repeat Playback
For CD mode,
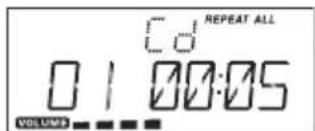
- Press the REPEAT button once, "REPEAT" indicator will show on the display. The current track will be played repeatedly.
- Press the REPEAT button twice, "REPEAT ALL" indicator will show on the display. The total number of tracks will be played repeatedly.
- Press the REPEAT button three times to cancel the repeat function.
For MP3/WMA mode,
-
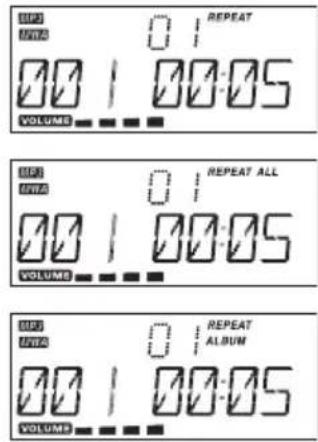
Press the REPEAT button once, "REPEAT" indicator will show on the display. The current track will be played repeatedly.
-
Press the REPEAT button twice, "REPEAT ALL" indicator will show on the display. The total number of tracks will be played repeatedly.
-
Press the REPEAT button 3 times, "REPEAT ALBUM" indicator will show on the display. The album will be played repeatedly.
-
Press the REPEAT button 4 times to cancel the repeat function.
iPod Operation
Using the iPod dock you can play music files stored on your iPod through the stereo speakers.
Inserting the iPod and Selecting iPod Mode
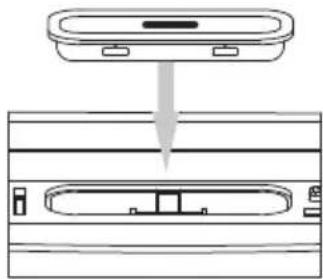
- Locate the iPod adapter that came with your iPod into the dock.
- Connect the iPod to the iPod connector inside the dock.
natural_image
Diagram showing a device with a top panel and internal compartments, no text or symbols present-
Press the STANDBY/ON button to turn on the unit.
-
Press the FUNCTION button repeatedly to select iPod mdoe.
-
Press the ▶II button to start playing.
![[PO] VOLUME](/content/2026/05/870532/images/d77408b02f97ea15b2ff88b5aa50127821f1138af12b3af3aa881775d263dda8.jpg)

- Your iPod will automatically start charging once it is docked.
- Switch off your iPod while listening to the radio to prevent signal interference.
- While your iPod is docked, you can control it from the main unit, the remote control or from the iPod directly.
iPod Playback
Press the ▶/BNTER button to start playing.
To Pause Playback
Press the▶/II /ENTER button to pause the playback. To resume playback, press the▶/II / ENTER button again.
To Stop Playback
Press the ■ button to stop playing.
Skipping to Another Track
Press the SKIP/TUNE SEARCH ◀◀▶▶I buttons to skip forward or backward from the current track.
Locating a Particular Point on a Track
Keep either the or button pressed during playback, according to the desired direction, and release at the desired point.
Repeat Playback
Press the REPEAT button on the remote control to play songs repeatedly. Some of the older iPod versions do not support this function.
Random Playback
Press the RANDOM button on the remote control to play songs randomly. Some of the older iPod versions do not support this function.
iPod MENU Mode
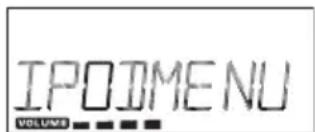
- While the unit is in iPod mode, press the MENU button to enter the iPod MENU mode. The iPod MENU indicator will show on the display.
-
Press the ■ button to return to the previous iPod menu.
-
Press the ▶/II /ENTER button to enter the desired menu folder.
-
Press the SKIP/TUNE SEARCH 🔊 buttons to navigate up and down in the iPod menu.
-
If you want to return to the previous iPod menu, press the ■ button again.
-
To resume playback, press the MENU button. The unit will return to iPod mode.
Charging Your iPod
- Your iPod has an internal non-removable battery, the battery may need to be charged if the iPod has not been used for awhile.
- You can charge the iPod through the unit automatically under the STANDBY or POWER ON mode.

- The iPod battery is 80% charged in about an hour, and fully charged in about a few hours. If you charge it while playing music, it may take longer.
- It is not recommended to charge when using the TUNER mode. It may interfere with the reception.
AUX Operation
- Before connecting to the mains socket, use the 3.5mm stereo LINE IN cable (not included) to connect your audio device through this AUX socket at the rear of the unit.
- Connect the mains cable to the mains socket. The unit will be in the STANDBY mode.
- Press the STANDBY/ON ⏻ button to switch the unit on.
- To select the AUX mode, press the FUNCTION button repeatedly to select AUX mode.
- In AUX mode, you may operate your audio device directly for playback features.
Radio Operation
- Press the FUNCTION button to the TUNER mode.
- Press the FM/MW button to select a band (MW / FM).
Searching for a Station Manually
- To tune for weak station, press the SKIP/TUNE SEARCH ◀◀▶▶▶ buttons continuously until you reach the correct frequency or the reception is at its best.
Searching for a Station Automatically
- Press and hold the SKIP/TUNE SEARCH I ◀◀▶▶I buttons until the tuner starts searching for a station. After tuning into a station, the search stops.
• The search may not stop at a station with a very weak signal.
Selecting Mono / Stereo
• You can select the MONO / STEREO in FM mode.
- Press the DISPLAY button to select FM stereo station. The "CST." indicator will show on the display.
- Press the DISPLAY button again to select MONO reception.
Presetting Stations
The unit's memory can store a total of 40 stations (10 MW, 30 FM). Presetting allows you to tune in to a station directly.
- Press the FM/MW button to select the desired band and then tune in to a desired station.
- Press the MENU button. The preset number will flash and the "MEMORY" indicator will show on the display.
- Press the PRESETS ◀buttons to select the preset number.
- Press the MENU button again to store it in the memory.
- Repeat steps 1-4 to store other stations.

- Storing a new station into a preset location will erase the previously stored station in that location.
- Power off will not erase the memory of preset stations. Perform the stations presetting procedures again to store the stations.
- To erase all preset memory, press and hold the ▶/11 /ENTER button until the standby LED and LCD flash.
Tuning in to a Preset Station
Press the FM/MW button to select the desired band then press the PRESETS ◀▶ buttons to select a preset number.
For Better Reception
FM: Fully unwind the FM aerial. Extend the FM aerial and place it in the position that sounds best.

Do not connect the FM aerial to an outside aerial.
MW: Reposition the unit to get better MW reception.

- When the reception is good, the "STEREO" indicator will show on the display.
- To prevent interference to the MW signal, please keep the mains adapter 3.17 feet (1 meter) away from the the unit.
Handling Discs
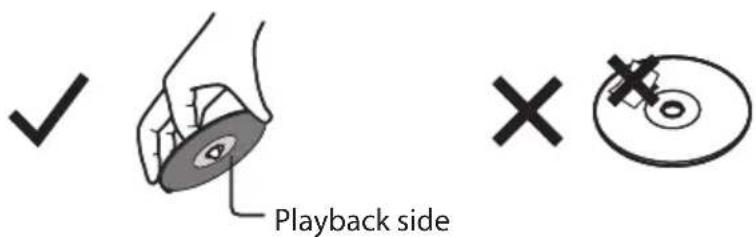
• Do not touch the playback side of the disc.
• Do not attach paper or tape to the disc.
Cleaning Discs
- Fingerprints and dust on the disc cause picture and sound deterioration. Wipe the disc from the centre outwards with a soft cloth. Always keep the disc clean.
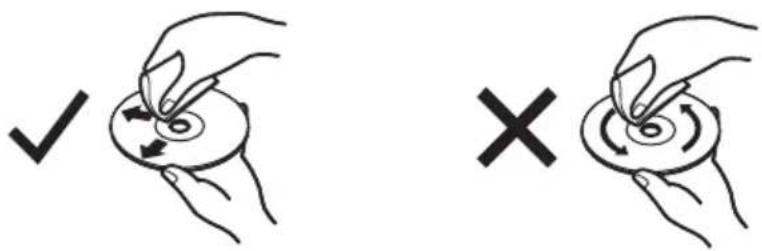
- If you cannot wipe off the dust with a soft cloth, wipe the disc lightly with a slightly moistened soft cloth and finish with a dry cloth.
- Do not use any type of solvent such as thinner, benzine, commercially available cleaners or antistatic spray. They may damage the disc.
Storing Discs
• Do not store discs in places subjected to direct sunlight or near heat sources.
- Do not store discs in places subjected to moisture and dust such as a bathroom or near a humidifier.
- Storing discs vertically in a case, stacking discs or placing objects on discs outside of their cases may cause warping.
If a problem does occur, it may often be due to something very minor. The following table contains various tips.
| Problem Cause / Solution | |
| CD | |
| The unit does not power on • Make sure the mains adapter is secure in the outlet, and the outlet has power.• Make sure you've selected CD mode. | |
| Disc in place but the unit won't play • Make sure the disc label is facing up.• Make sure the disc is clean.• PAUSE mode may be activated, deactivate it.• Disc may be damaged or dirty; check and clean the disc. | |
| Disc skips • Make sure the unit is on a secure spot.Vibrations or jarring can cause the disc to skip. | |
| RADIO | |
| Poor FM reception • Make sure the FM antenna wire is fully extended.• Electrical interference in your home can cause poor reception. Move the unit away from them (especially those with motors and transformers). | |
| Poor MW reception • Rotate the unit horizontally. | |
| iPod | |
| iPod does not respond to the speaker system. | • iPod may not be docked properly or installed properly. Remove your iPod from the dock and check for obstructions on the connectors in the dock and on your iPod.• Make sure that your iPod is working properly before docking. Please refer to your iPod manual for details. |
Specifications
GB
| Model LHFiP2010E | |
| Power Supply 230V ~50Hz | |
| Output Power 4.5Watts x 2 | |
| Unit Dimension 135 (W) x 249 (D) x 170 (H) mm | |
| Speaker Box Dimension 130 (W) x 160 (D) x 170 (H) mm | |
| N.W.: 3.75 kg | |
| Radio Section | |
| Frequency Range | FM 87.5 – 108 MhzMW 522 – 1620 kHz |
| Compact Disc Section | |
| Optical Pickup 3 - Beam Laser | |
| Frequency Response 100Hz – | 16kHz |
Specifications and external appearance are subject to change without notice.
natural_image
Line drawing of a front-loading washing machine (no text or symbols)Hurtigstartsguide (P.N.: 227-2275DN-123)
Hvis elementer mangler eller er skadet, ta kontakt med Partmaster (kun i Storbritannia) Tlf.: 0844 800 3456 for assistanse.
NO
Frontpanel
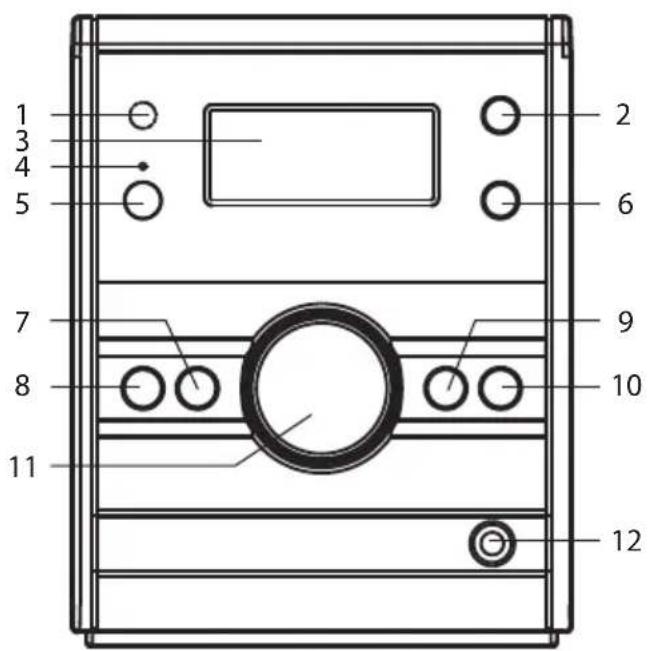
- Fjernkontrollsensor
- Funksjon-knapp
- LCD-displayvindu
- Standbyindikator
- STANDBY/PÅ-knapp
- FM/MW-knapp
- HOPP OVER/STILL INN S∅K OPP-knapp
- HOPP OVER/STILL INN S∅K NED-knapp
- STOPP/MENY-knapp
- SPILL/PAUSE/ENTER-knapp
- VOLUM-kontroll
- ∅retelefon-kontakt
Bakside Ovenfra
- STANDBY/ON ⏻ (VENTEMODUS/PÅ)-knapp
- TIMER-knapp
- DISPLAY-knapp
- FM/MW-knapp
- FUNCTION (FUNKSJON)-knapp
- MENU (MENY)-knapp
- Knapp
- ▶/■ /ENTER-knapp
- SLEEP (DVALE)-knapp
- SKIP/TUNE SEARCH ◀◀◀▶▶ (HOPP OVER/STILL INN S∅K)- knapper
- INTRO-knapp
- PRESETS ◀▶ (FORHÅNDSINNSTILLINGER)- knapper
- EQ-knapp
- REPEAT (GJENTA)-knapp
- RANDOM (TILFELDIG)-knapp
- MUTE (DEMP)-knapp
- VOLUME + / - (VOLUM)-knapper
natural_image
Line drawing of a finger pressing a button on a device (no text or symbols)Sette batterier i fjernkontrollen
natural_image
Isometric line drawing of a rectangular electronic device with a recessed top and internal slot (no text or symbols)
natural_image
Technical line drawing of a remote control device with a circular button and handle (no text or symbols)- Sett på batteridekselet.
natural_image
Technical line drawing of an internal electronic device with ports and connectors (no text or symbols)natural_image
Diagram of an electronic device showing internal components connected to a cable, with no visible text or symbols.Til stikkontakt
For personlig lytting
Koble til hodetelefoner (∅3,5 mm-stereominiplugg) til ∅retelefonkontakten. Juster volumkontrollen til ønsket lydnivå.
Klokkeinnstillinger
Pause avspillingen
Gjenta hele CD-en
Gjenta albumet
Introavspilling
Programmerbar avspilling
Slette programmet

For MP3 / WMA-modus,
natural_image
Diagram showing a device with a top panel and a bottom panel, no text or symbols present
natural_image
Line drawing of a front-loading washing machine (no text or symbols)Snabbstartguide (Art.nr.: 227-2275DN-123)
natural_image
Line drawing of a finger pressing a button on a device (no text or symbols)natural_image
Isometric line drawing of a rectangular electronic device with a circular button and arrow indicator (no text or symbols)natural_image
Technical line drawing of a remote control device with a circular button and handle (no text or symbols)- Stäng batterilocket.
natural_image
Technical line drawing of an internal electronic device with ports and connectors (no text or symbols)Klockinställning
Pausa uppspelningen
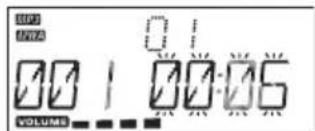
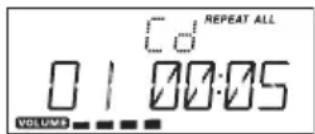
För MP3 / WMA läge,
natural_image
Diagram showing a device with a top panel and a bottom panel, no text or symbols present
natural_image
Line drawing of a front-loading washing machine (no text or symbols)Laite Kaiutin x 2
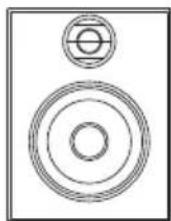
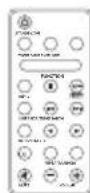
Kaukosäädin
(Tuotenro: 070-0018DN-01C0)
natural_image
Illustration of a finger pressing down on a curved object with an arrow indicating force (no text or symbols)natural_image
Isometric line drawing of a rectangular electronic device with a circular button and mounting holes (no text or symbols)natural_image
Technical line drawing of a remote control device with a circular button and handle (no text or symbols)- Sulje paristolokeron kansi.
Pariston käsittely
natural_image
Technical line drawing of an internal electronic device with ports and connectors (no text or symbols)natural_image
Diagram of an electrical enclosure with connected plug, showing internal components and wiring (no text or labels)Pistorasiaan
Kellon asetus
Ohjelmoitava toisto
MP3/WMA-tila
FI
iPod-käyttö
natural_image
Diagram showing a device with a top panel and a bottom panel, no text or symbols present
natural_image
Line drawing of a front-loading washing machine (no text or symbols)Quick-start vejledning (P.N.: 227-2275DN-123)
natural_image
Illustration of a finger pressing a button on a device (no text or symbols)natural_image
Isometric line drawing of a rectangular electronic device with a circular button and arrow indicator (no text or symbols)natural_image
Technical line drawing of a remote control device with a circular button and handle (no text or symbols)- Luk batterirummets dæksel.
natural_image
Technical line drawing of an internal electronic device with ports and connectors (no text or symbols)Indstilling af ur
Uret kan kun indstilles i STANDBY-tilstand.
Når enheden er i STANDBY-tilstand, lyser "STANDBY"-indikatoren.
- Tryk og hold ned på MENU-knappen i STANDBY-tilstand, og tryk derefter på SKIP/TUNE SEARCH (PRRING/TUN S∅G)-knapperne for at vælge 12-timers eller 24-timers format på displayet.
- Tryk på MENU-knappen for at bekræfte tidsformatet. Timetallene blinker.
- Tryk på SKIP/TUNE SEARCH ◀◀◀(SPRING/TUN S∅G)-knapperne for at justere time-cifrene, og tryk derefter på MENU-knappen for at bekræfte. Minuttallene blinker.
- Tryk på SKIP/TUNE SEARCH ◀◀◀(SPRING/TUN S∅G)-knapperne for at justere minut-cifrene, og tryk derefter på MENU-knappen for at bekræfte.
Gentag hele cd'en
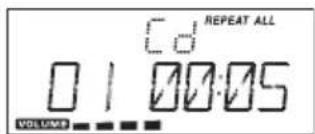
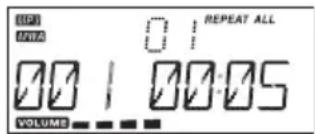
Tryk på REPEAT (GENTAG)-knappen to gange og "REPEAT ALL (GENTAG ALLE)"-indikatoren vises på displayet. Alle diskens spor afspilles gentagne gange i en cyklus.
Programmerbar afspilning
For MP3/WMA-tilstand,
-
Tryk på REPEAT (GENTAG)-knappen en gang og "REPEAT (GENTAG)"-indikatoren vises på displayet. Det aktuelle spor afspilles gentagne gange.
-
Tryk på REPEAT (GENTAG)-knappen to gange og "REPEAT ALL (GENTAG ALLE)"-indikatoren vises på displayet. Det totale antal spor afspilles gentagne gange.
-
Tryk på REPEAT (GENTAG)-knappen 3 gange og "REPEAT ALBUM (GENTAG ALBUM)"-indikatoren vises på displayet. Albummet afspilles gentagne gange.
-
Tryk på REPEAT (GENTAG) 4 gange for at annullere gentagefunktionen.
Brug af iPod
natural_image
Diagram showing a device with a top panel and a bottom panel, no text or symbols present- Read all the instructions carefully before using the unit and keep them for future reference.
- Retain the manual. If you pass the unit onto a third party make sure to include this manual.
- Check that the voltage marked on the rating label matches your mains voltage.
Damage
- Please inspect the unit for damage after unpacking.
- Do not continue to operate the unit if you are in any doubt about it working normally, or if it is damaged in any way - switch off, withdraw the mains plug and consult your dealer.
Location of Unit
• The unit must be placed on a flat stable surface and should not be subjected to vibrations.
- Do not place the unit on sloped or unstable surfaces as the unit may fall off or tip over.
• The mains socket must be located near the unit and should be easily accessible.
• This unit is designed for indoor use only.
Temperature
- Avoid extreme degrees of temperature, either hot or cold. Place the unit well away from heat sources such as radiators or gas/electric fires.
- Avoid exposure to direct sunlight and other sources of heat.
Naked Flames
- Never place any type of candle or naked flame on the top of or near the unit.
Moisture
- To reduce the risk of fire, electric shock or product damage, do not expose this unit to rain, moisture, dripping or splashing. No objects filled with liquids, such as vases, should be placed on the unit.
• If you spill any liquid into the unit, it can cause serious damage. Switch it off at the mains immediately. Withdraw the mains plug and consult your dealer.
Ventilation
• To prevent the risk of electric shock or fire hazard due to overheating, ensure that curtains and other materials do not obstruct the ventilation vents.
- Do not install or place this unit in a bookcase, built-in cabinet or in another confined space. Ensure the unit is well ventilated.
Safety
• Always disconnect the unit from the mains supply before connecting/disconnecting other devices or moving the unit.
• Unplug the unit from the mains socket during a lightning storm.
Mains Cable
• Make sure the unit or unit stand is not resting on top of the mains cable, as the weight of the unit may damage the mains cable and create a safety hazard.
- If the mains cable is damaged it must be replaced by the manufacturer, its service agent, or similarly qualified persons in order to avoid a hazard.
Earphones
- Listening to loud sounds for prolonged periods of time may permanently damage your hearing.
• Before putting on earphones, turn the volume down then put the earphones on and slowly increase the volume until you reach a comfortable listening level.
Interference
- Do not place the unit on or near appliances which may cause electromagnetic interference. If you do, it may adversely affect the operating performance of the unit, and cause a distorted picture or sound.
Standby
- The STANDBY/ON ⏻ button on the remote control does not switch off the unit completely. The unit will continue to draw electricity from the mains supply while in standby. In the interests of safety and to avoid unnecessary energy consumption, never leave the unit in standby while unattended for long periods of time, e.g. overnight, while on holiday or while out of the house. Switch it off and disconnect the mains adapter from the mains socket.
Batteries
- Batteries used in the remote control for this unit are easily swallowed by young children and this is dangerous.
- Keep loose batteries away from young children and make sure that the battery holder tray is secure in the remote control. Seek medical advice if you believe a cell has been swallowed.
- Please dispose of batteries correctly by following the guidance in this manual.
Supervision
• Children should be supervised to ensure that they do not play with the unit and the remote control.
- Never let anyone especially children push anything into the holes, slots or any other openings in the case - this could result in a fatal electric shock.
Class 1 Laser Product
- This unit utilises a laser. Use of controls, adjustments or performance of procedures other than those specified herein may result in hazardous radiation exposure.
• Before moving the unit, ensure the disc tray is empty.
• Always remove the disc when the unit is not in use.
• Failure to do so will risk severely damaging the disc and the unit. - Do not stack devices, heat from other devices may affect the performance of the unit.



The lightning flash with arrowhead symbol, within an equilateral triangle, is intended to alert the user to the presence of uninsulated "dangerous voltage" within the unit's enclosure that may be of sufficient magnitude to constitute a risk of electric shock.
The exclamation point within an equilateral triangle is intended to alert the user to the presence of important operating and maintenance (servicing) instructions in the manual accompanying the unit.
Service
• To reduce the risk of electric shock, do not remove screws. The unit does not contain any user-serviceable parts. Please leave all maintenance work to qualified personnel.
- Do not open any fixed covers as this may expose dangerous voltages.
Maintenance
- Ensure to unplug the unit from the mains socket before cleaning.
- Do not use any type of abrasive pad or abrasive cleaning solutions as these may damage the unit's surface.
• Do not use liquids to clean the unit.
Sikkerhetsadvarsler
NO
This symbol on the product or in the instructions means that your electrical and electronic equipment should be disposed at the end of its life separately from your household waste. There are separate collection systems for recycling in the EU. For more information, please contact the local authority or your retailer where you purchased the product.
NO
- Contents
- GB
- Innhold
- NO
- Unpacking
- Remote Control
- Remove the Insulating Strip from the Remote Control
- Battery Installation for the Remote Control
- Handling the Battery
- Handling the Remote Control
- Remote Control Operation Range
- LCD Display Window
- Speaker Connections
- Connecting to the Mains Socket
- For Personal Listening
- Compatible Disc Types
- Basic Operation
- Powering ON/OFF
- Selecting Modes
- Adjusting the Volume
- Clock Setting
- Timer Setting
- Sleep Timer Setting
- Preset EQ
- Playback
- To Pause Playback
- To Stop Playback
- Skipping to Another Track
- For MP3 / WMA Discs
- ID3 Operation (For MP3 / WMA Mode, Operate from Remote Control Only)
- Repeat Playback
- For CD Mode
- Repeat Current Track
- Repeat the Entire CD
- Cancel Playback Mode
- For MP3 / WMA Mode
- Repeat the Album
- Random Playback
- Intro Playback
- Programmable Playback
- To Erase the Program
- iPod Operation
- Inserting the iPod and Selecting iPod Mode
- iPod Playback
- Locating a Particular Point on a Track
- iPod MENU Mode
- Charging Your iPod
- AUX Operation
- Radio Operation
- Searching for a Station Manually
- Searching for a Station Automatically
- Selecting Mono / Stereo
- Presetting Stations
- Tuning in to a Preset Station
- For Better Reception
- Handling Discs
- Cleaning Discs
- Storing Discs
- Specifications
- Frontpanel
- Bakside Ovenfra
- Sette batterier i fjernkontrollen
- For personlig lytting
- Klokkeinnstillinger
- Pause avspillingen
- Gjenta hele CD-en
- Gjenta albumet
- Introavspilling
- Programmerbar avspilling
- Slette programmet
- Klockinställning
- Pausa uppspelningen
- Pariston käsittely
- Kellon asetus
- Ohjelmoitava toisto
- MP3/WMA-tila
- FI
- iPod-käyttö
- Indstilling af ur
- Gentag hele cd'en
- Programmerbar afspilning
- Brug af iPod
- Damage
- Location of Unit
- Temperature
- Naked Flames
- Moisture
- Ventilation
- Safety
- Mains Cable
- Earphones
- Interference
- Standby
- Batteries
- Supervision
- Class 1 Laser Product
- Service
- Maintenance
- Sikkerhetsadvarsler
Brand : Logik
Model : LHFIP2010E
Category : Uncategorized