L30SMB14E - Food processor Logik - Free user manual and instructions
Find the device manual for free L30SMB14E Logik in PDF.
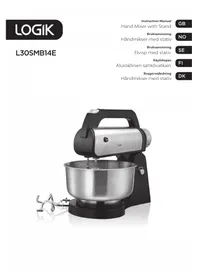


| Product Type | Hand Mixer with Stand |
| Brand | Logik |
| Model | L30SMB14E |
| Power Consumption | 300W |
| Rated Voltage | 230V |
| Rated Frequency | 50Hz |
| Number of Speeds | 12 |
| Boost Function | Yes, increases speed by 25% |
| Bowl Material | Stainless Steel |
| Accessories Included | Stainless steel bowl, 2 beaters, 2 dough hooks, rotary plate, instruction manual |
| Stand Feature | Tiltable motor head, detachable hand mixer |
| Eject Button | Yes, for releasing beaters/dough hooks |
| Maximum Mixing Time per Cycle | 5 minutes |
| Recommended Rest Time Between Cycles | 10 minutes |
| Cleaning | Wipe motor head with damp cloth; bowl, beaters, and dough hooks are dishwasher safe |
| Safety Precautions | Unplug before cleaning; do not immerse in water; keep out of reach of children |
| Intended Use | Indoor household use only |
| Dishwasher Safe Parts | Beaters, bowl, dough hooks |
| Attachment Mechanism | Washers for secure fitting; bigger washer for smaller socket |
Frequently Asked Questions - L30SMB14E Logik
User questions about L30SMB14E Logik
0 question about this device. Answer the ones you know or ask your own.
Ask a new question about this device
Download the instructions for your Food processor in PDF format for free! Find your manual L30SMB14E - Logik and take your electronic device back in hand. On this page are published all the documents necessary for the use of your device. L30SMB14E by Logik.
USER MANUAL L30SMB14E Logik
Hand Mixer with Stand
Instruction Manual
Contents
GB
Safety Warnings....5
Unpacking....10
Product Overview....11
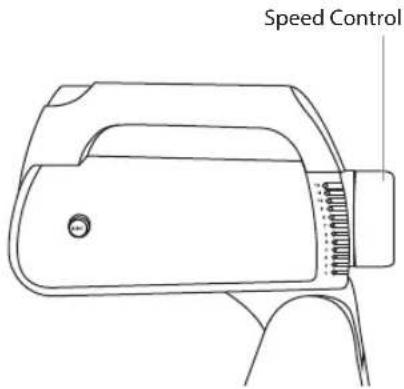
Speed Control 12
Assembling Your Hand Mixer 13
Assembling Your Stand Mixer....14
How to Use Your Mixer 16
Detaching the Hand Mixer from the Stand....17
Cleaning 18
Hints and Tips....18
Specifications....18
For your continued safety and to reduce the risk of injury or electric shock, please follow all the safety precautions listed below.
Read all the instructions carefully before using your appliance and keep them for future reference.
Unplug the appliance from the mains supply when not in use, and before removing, attaching or cleaning any part of the appliance.
This appliance is for household use only. Do not use it for professional catering.
Do not use the appliance outdoors.
Do not immerse the appliance base unit or the mains cable or plug in liquids.
Do not use the appliance near a source of heat or on an unstable surface.
Do not use your appliance in damp or wet conditions.
Never let children operate this appliance. Close supervision is necessary when this appliance is used near children.
This appliance can be used by children aged from 8 years and above and persons with reduced physical, sensory or mental capabilities or lack of experience and knowledge if they have been given supervision or instruction concerning use of the appliance in a safe way and understand the hazards involved. Children shall not play with the appliance. Cleaning and user maintenance shall not be made by children unless they are older than 8 and supervised.
Keep the appliance and its cord out of reach of children less than 8 years old.
Children should be supervised to ensure that they do not play with the appliance.
Ensure that the mains cable does not touch any hot surface and that it does not overhang the edge of your work surface.
• There are no user serviceable parts in your appliance.
- Do not operate the appliance with a damaged mains cable or mains plug or after any appliance or attachment damage. Seek qualified technicians for assistance.
- If the mains cable is damaged it must be replaced by the manufacturer, its service agent, or similarly qualified persons in order to avoid a hazard.
- Do not use attachments or accessories which are not recommended by the manufacturer. They may cause malfunction or injury.
• Store the appliance away from direct sunlight and out of the reach of children.
• Do not place your hand in the bowl.
- Never insert any hard object or implement into the bowl when it is operating. This may cause damage to the unit and personal injury.
- Do not use the mixer for any purpose not specified in this manual.
• Use only with the stand provided.
- Ensure the unit is switched off before removing it from the stand.
• This appliance is intended for indoor household use and similar applications such as:
- farm houses and by clients in hotels, motels and other residential type environment;
- bed and breakfast type environment;
- catering and similar non-retail applications.
Thank you for purchasing your new Logik Hand Mixer.
We recommend that you spend some time reading this instruction manual in order that you fully understand all the operational features it offers. You will also find some hints and tips to help you resolve any issues.
Read all the safety instructions carefully before use and keep this instruction manual for future reference.

Unpacking
Remove all items from the packaging. Retain the packaging. If you dispose of it please do so according to local regulations.
The following items are included:
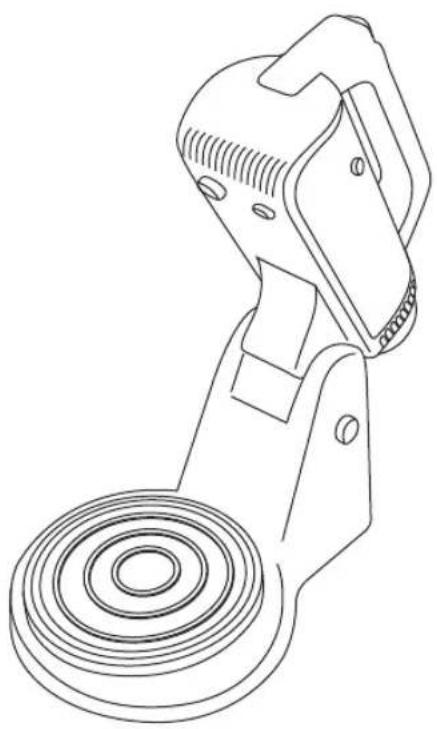
Motor Head with Support Base
Dough Hook with Washer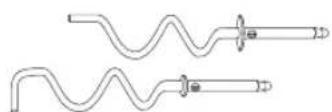
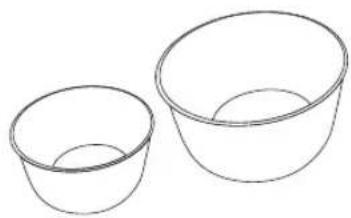
Stainless Steel Bowl
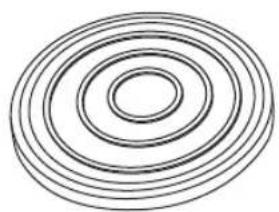
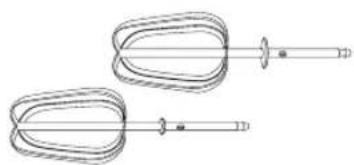
Instruction Manual, Beater with Washer, Rotary
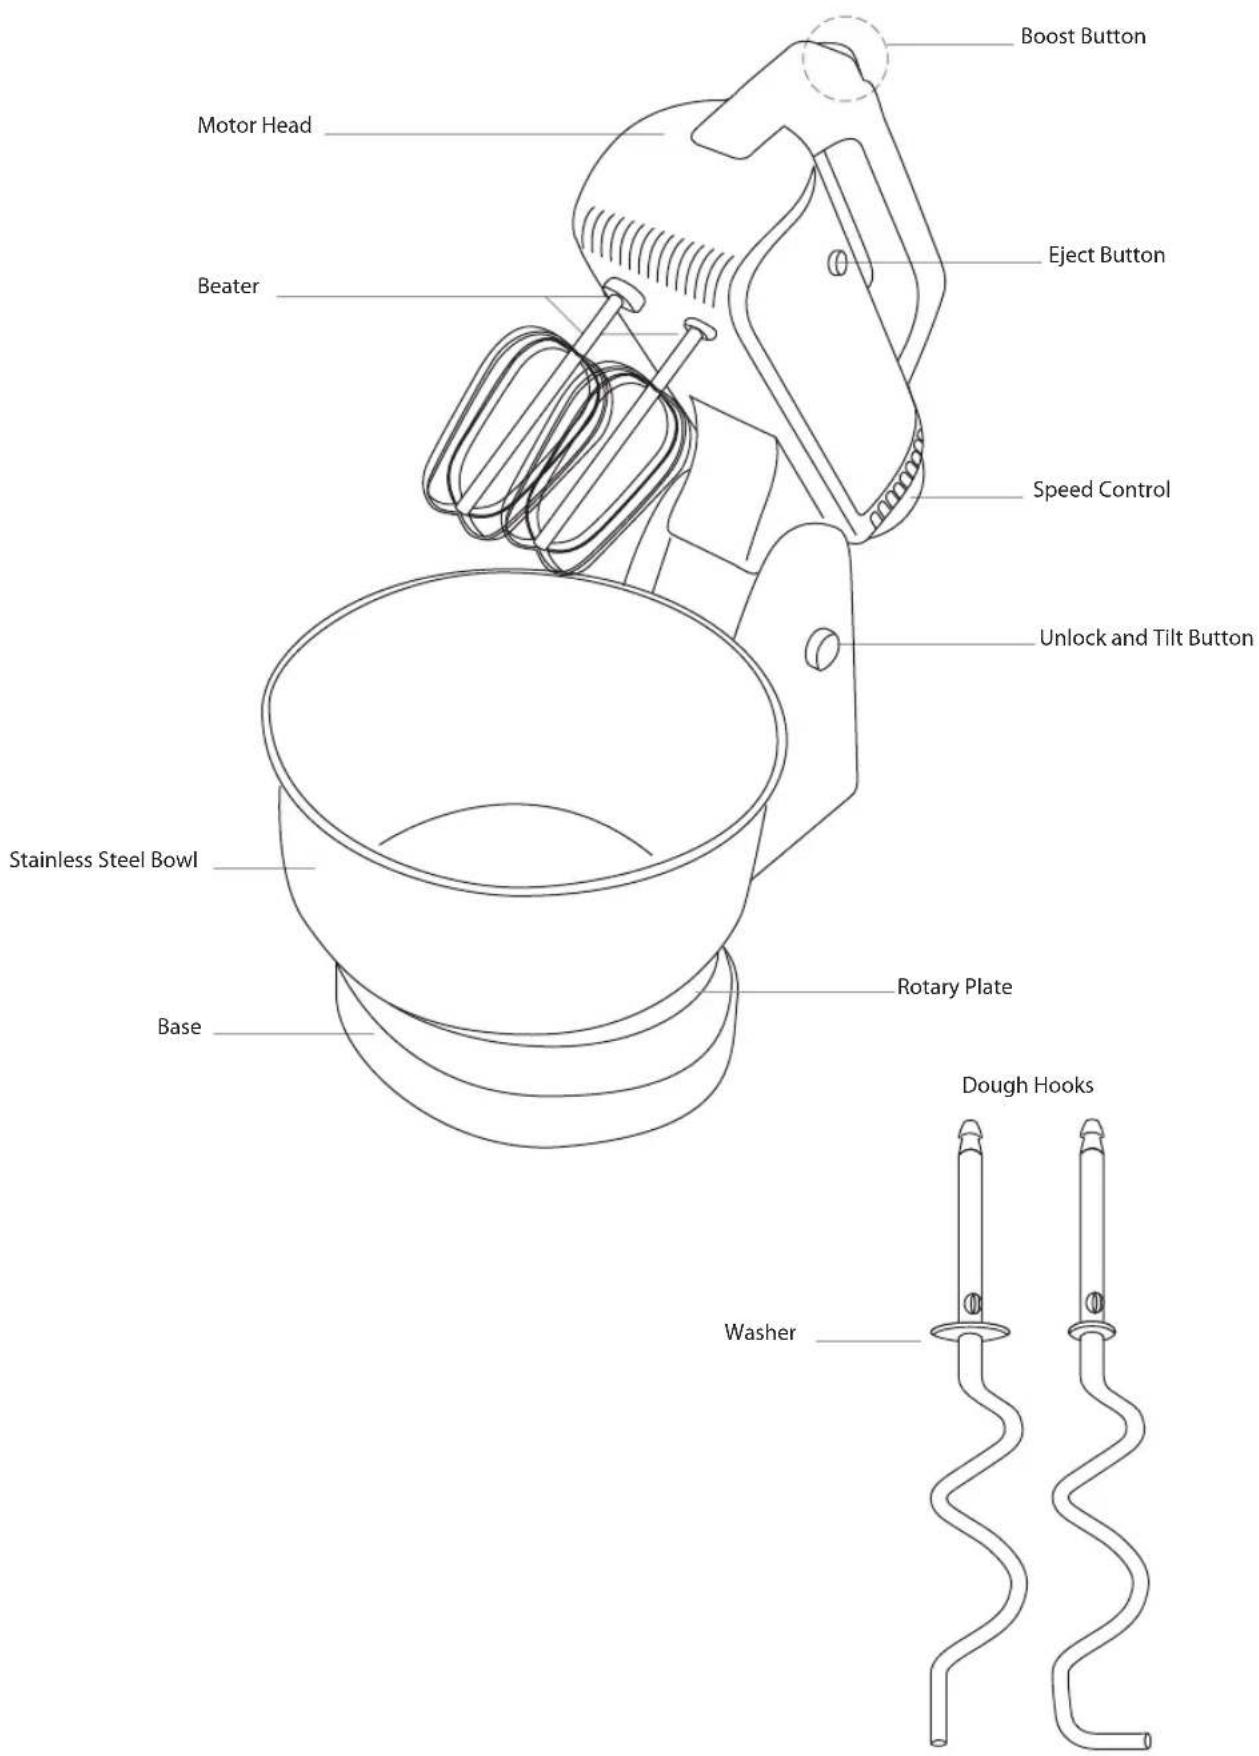
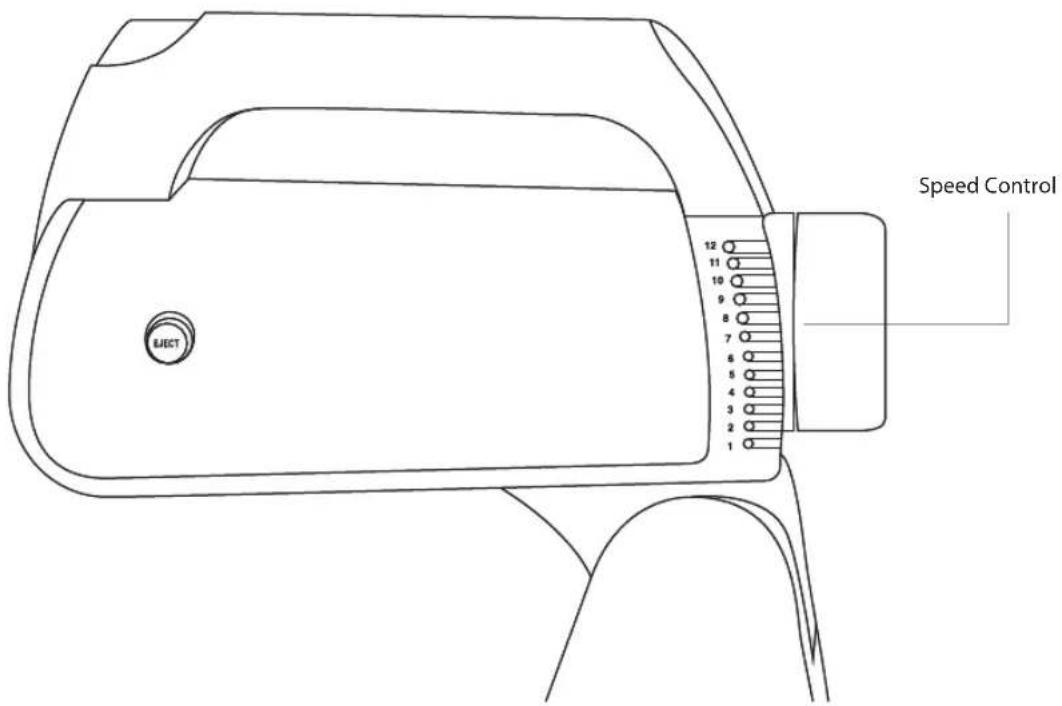
| Description Function | |
| 1 Fold-Knead Use when mixing dry ingredients or when folding 2 portions of a recipe together. Use for kneading bread. | |
| 2 Stir Use when stirring liquid ingredients or when gentle action is needed to moisten dry ingredients. | |
| 3 Blend Use when quick breads require a brisk action, just enough to blend ingredients but not enough to develop a smooth batter. | |
| 4 Mix Use when mixing dry ingredients and liquid ingredients together. | |
| 5 Combine Use for combining ingredients together. | |
| 6 Cake Mix Use when preparing packaged cake mixes. | |
| 7 Cream Use when creaming sugar and butter together. | |
| 8 Whip Use to whip mash potatoes or to develop a smooth batter. | |
| 9 Whip/Cream Use to whip whipping cream or to develop a light, fluffy texture. | |
| 10 Desserts Use to beat air into whipped desserts. | |
| 11 Frostings Use when preparing light, fluffy frostings and candies. | |
| 12 Egg Whites Use when aerating eggs and egg whites. | |

Assembling Your Hand Mixer
GB
- Before assembling the hand mixer, make sure the mains cable is unplugged from the mains outlet and no speed control is selected. Ensure that the unit is Off.
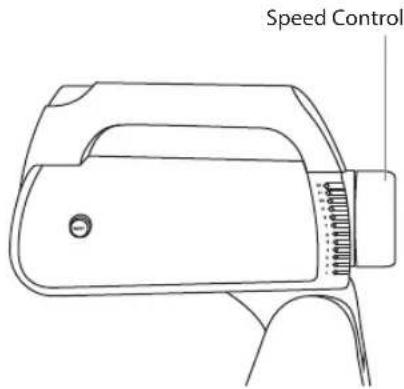
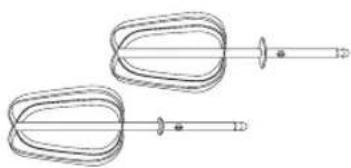
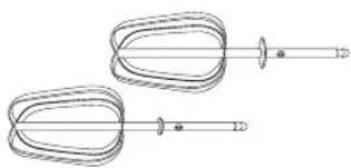
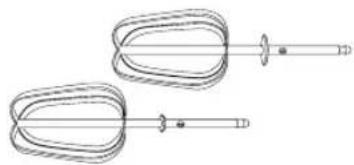
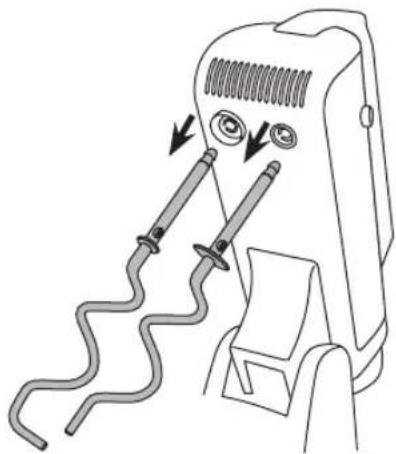
- Attach the beaters or dough hooks into the motor head.
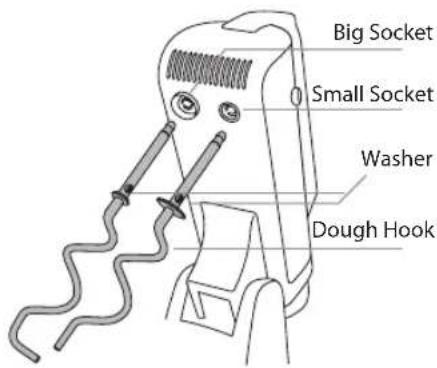

Dough hooks are only used for mixing dough and beaters are only used for beating eggs or similar food.

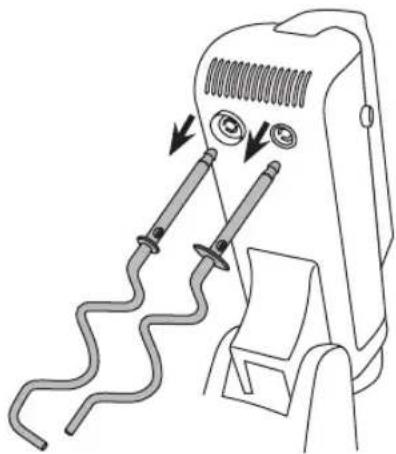
The beaters and dough hooks with bigger washer can only be inserted into the smaller socket. The smaller washer can be inserted in both sockets.
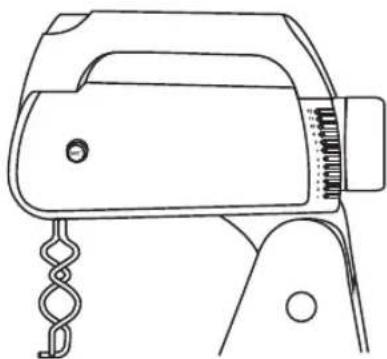
- Before assembling the stand mixer, make sure the mains cable is unplugged from the mains outlet and no speed control is selected. Ensure that the unit is Off.
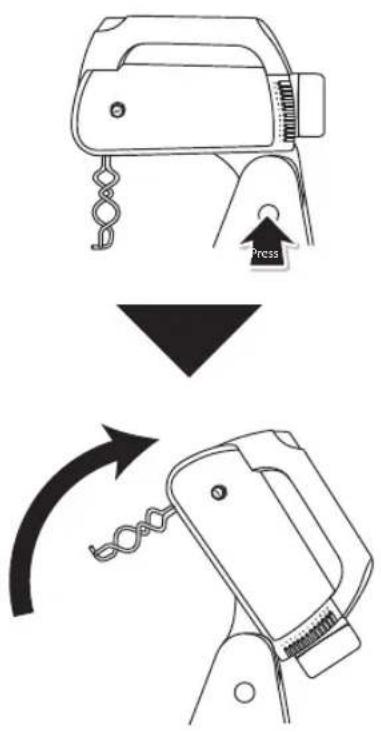
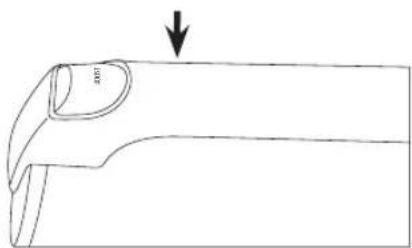
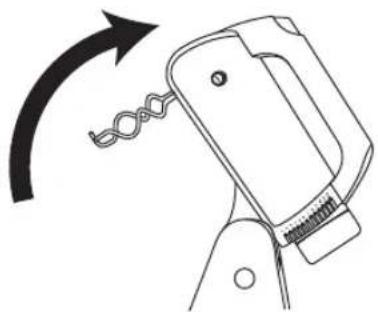
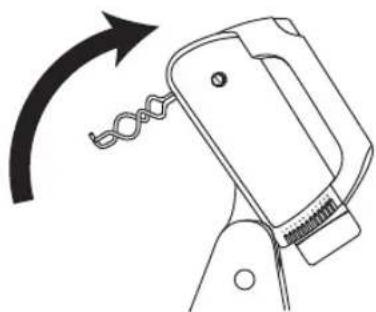
- Press the Unlock and Tilt Button to tilt the position of the motor head. A click sound will be heard when the motor head has reached the correct position.
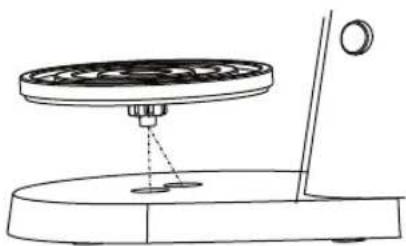
- Place the rotary plate on the base. The base has two positions. Rotary plate should be placed in off-centre position when using the large bowl while in centre position when using the small bowl.
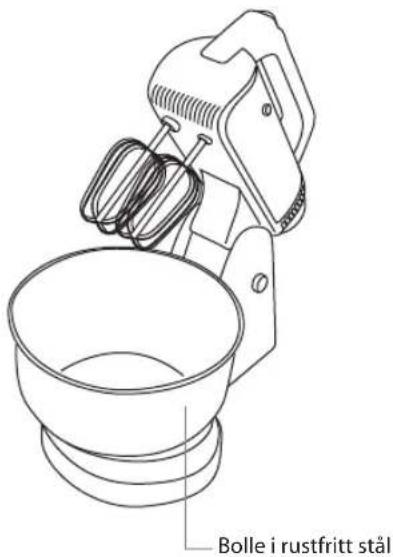
- Place the stainless steel bowl on the base.
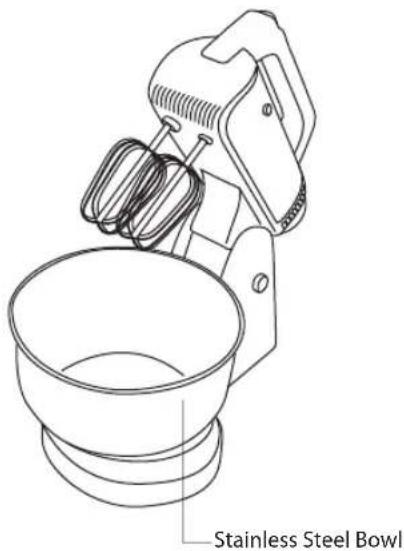
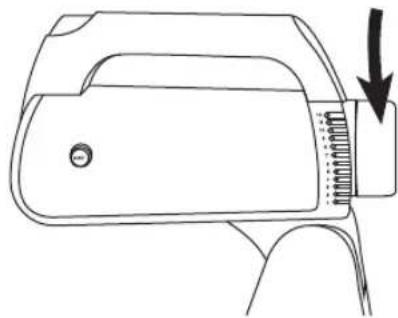
- To lower the motor head and the beaters / dough hooks into the stainless steel bowl, press the Unlock and Tilt Button while holding the motor head with the other hand and ease the motor head down. A click sound will be heard when the motor head has reached the correct position.
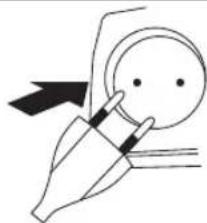
- Plug the mains power cord to the mains socket.
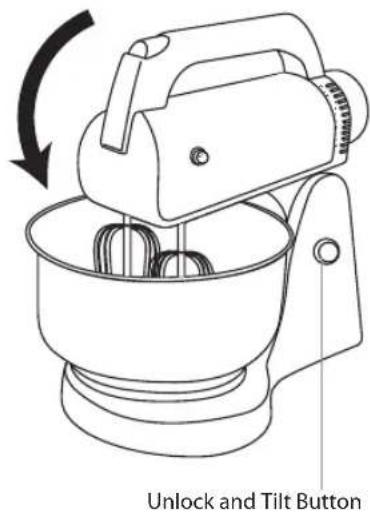
- Ensure that the unit is Off, then plug the unit into the mains socket.
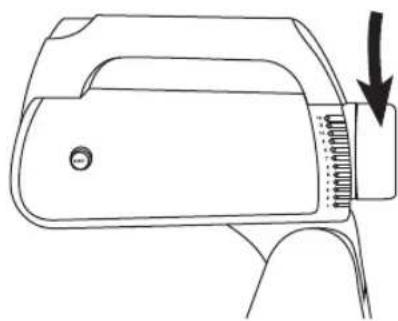
- Turn the Speed Control to your desired speed setting.
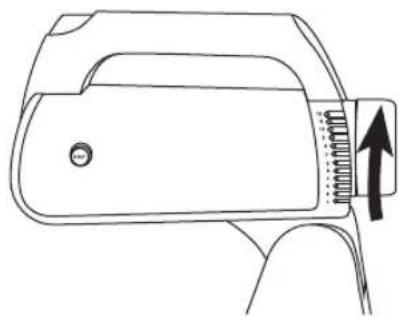
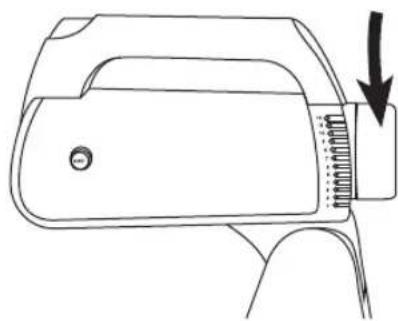
- Press the Boost Button at any time, to increase the speed by 25%.

Do not insert any spatulas or other kitchen utensils into the bowl while the unit is operating.
- The maximum operation time per mixing cycle should not exceed 5 minutes and a minimum of 10 minutes rest time must be maintained between 2 consecutive cycles. When kneading yeast dough, first use a low speed and then increase the speed for continuous kneading. The maximum speed for kneading dough is 3.
- When mixing is complete, turn the unit off and unplug the unit from the mains socket.
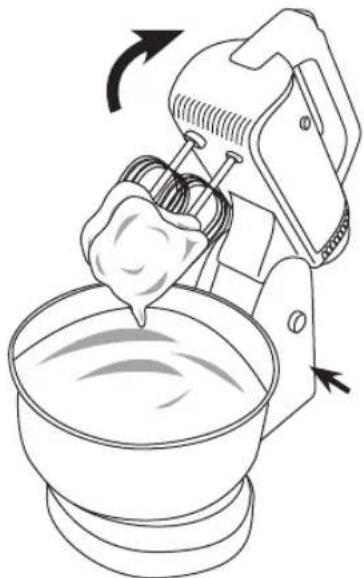
- Press the Unlock and Tilt Button to tilt the position of the motor head. A click sound will be heard when the motor head has reached the correct position.

If necessary, you can scrape excess food from the beaters or dough hooks using a rubber or wooden spatula.
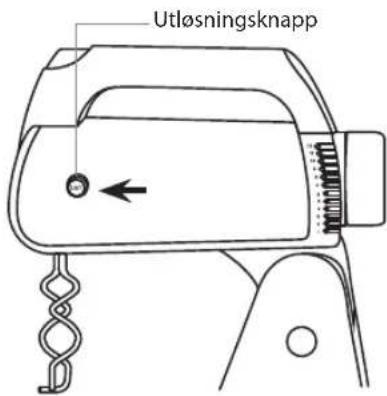
- Firmly press down and hold the Eject Button to remove the beaters / dough hooks.
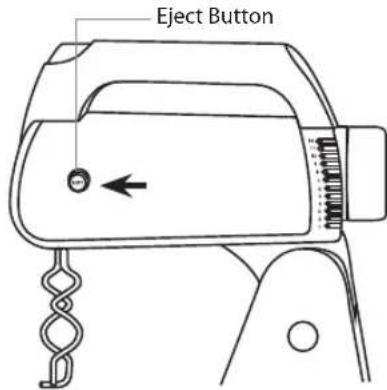

Never press the Eject Button while the unit is operating.

Detaching the Hand Mixer from the Stand
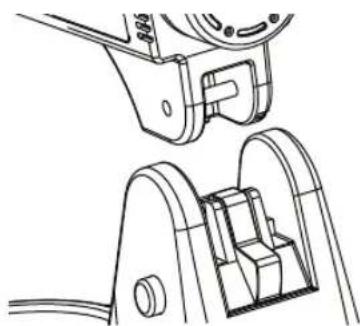
The Hand Mixer can be used separately without the Stand. Press down the Unlock Button to release the hand mixer from the stand.
- Unplug the unit and wait until it has completely cooled down before cleaning.
- Wipe over the outside surface of the motor head and base with a dampened cloth and then wipe with a soft dry cloth.
- Wipe off any excess food particles from the mains cable.
- Wash the bowl, beaters and dough hooks in warm soapy water and wipe dry. The beaters, bowl and dough hooks may be washed in a dishwasher.

• Always be sure to unplug the unit before cleaning. • Never use abrasive cleaners to clean the bowl, motor head and base.

Hints and Tips
- The unit may warm up during use. Under heavy loads with extended mixing time periods, you may not be able to comfortably touch the top of the unit. This is normal.
- The unit may emit a pungent odor, especially when new. This is common with electric motors.
- Refrigerated ingredients should be at room temperature before mixing begins. Set these ingredients out ahead of time.
- Do not over-beat. Be careful that you only mix/blend mixtures recommended in your recipe. Always start mixing at slow speeds. Gradually increase to the recommended speed as stated in the recipe.
If your unit should malfunction or fail to operate, please check the following:
Is the unit plugged in? Is the fuse in the circuit to the unit in working order? If you have a circuit breaker box, be sure the circuit is closed. Turn the unit off for 10-15 seconds, then turn it back on. If the unit still does not start, allow it to cool for 30 minutes before turning it back on.

Specifications
| Rated Voltage 230V | |
| Rated Frequency 50Hz | |
| Input Power 300W |
We continually strive to improve our products. Features and specifications may change without prior notice.
Bowl in stainless steel

Rotating plate

- Place the stainless steel bowl on the base.


Cleaning
Bowl in stainless steel
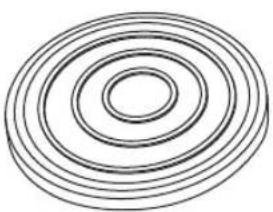
Turntable
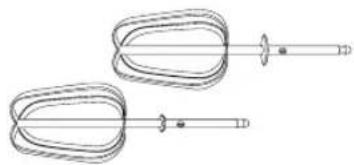
Instruction manual: Whisk with tray
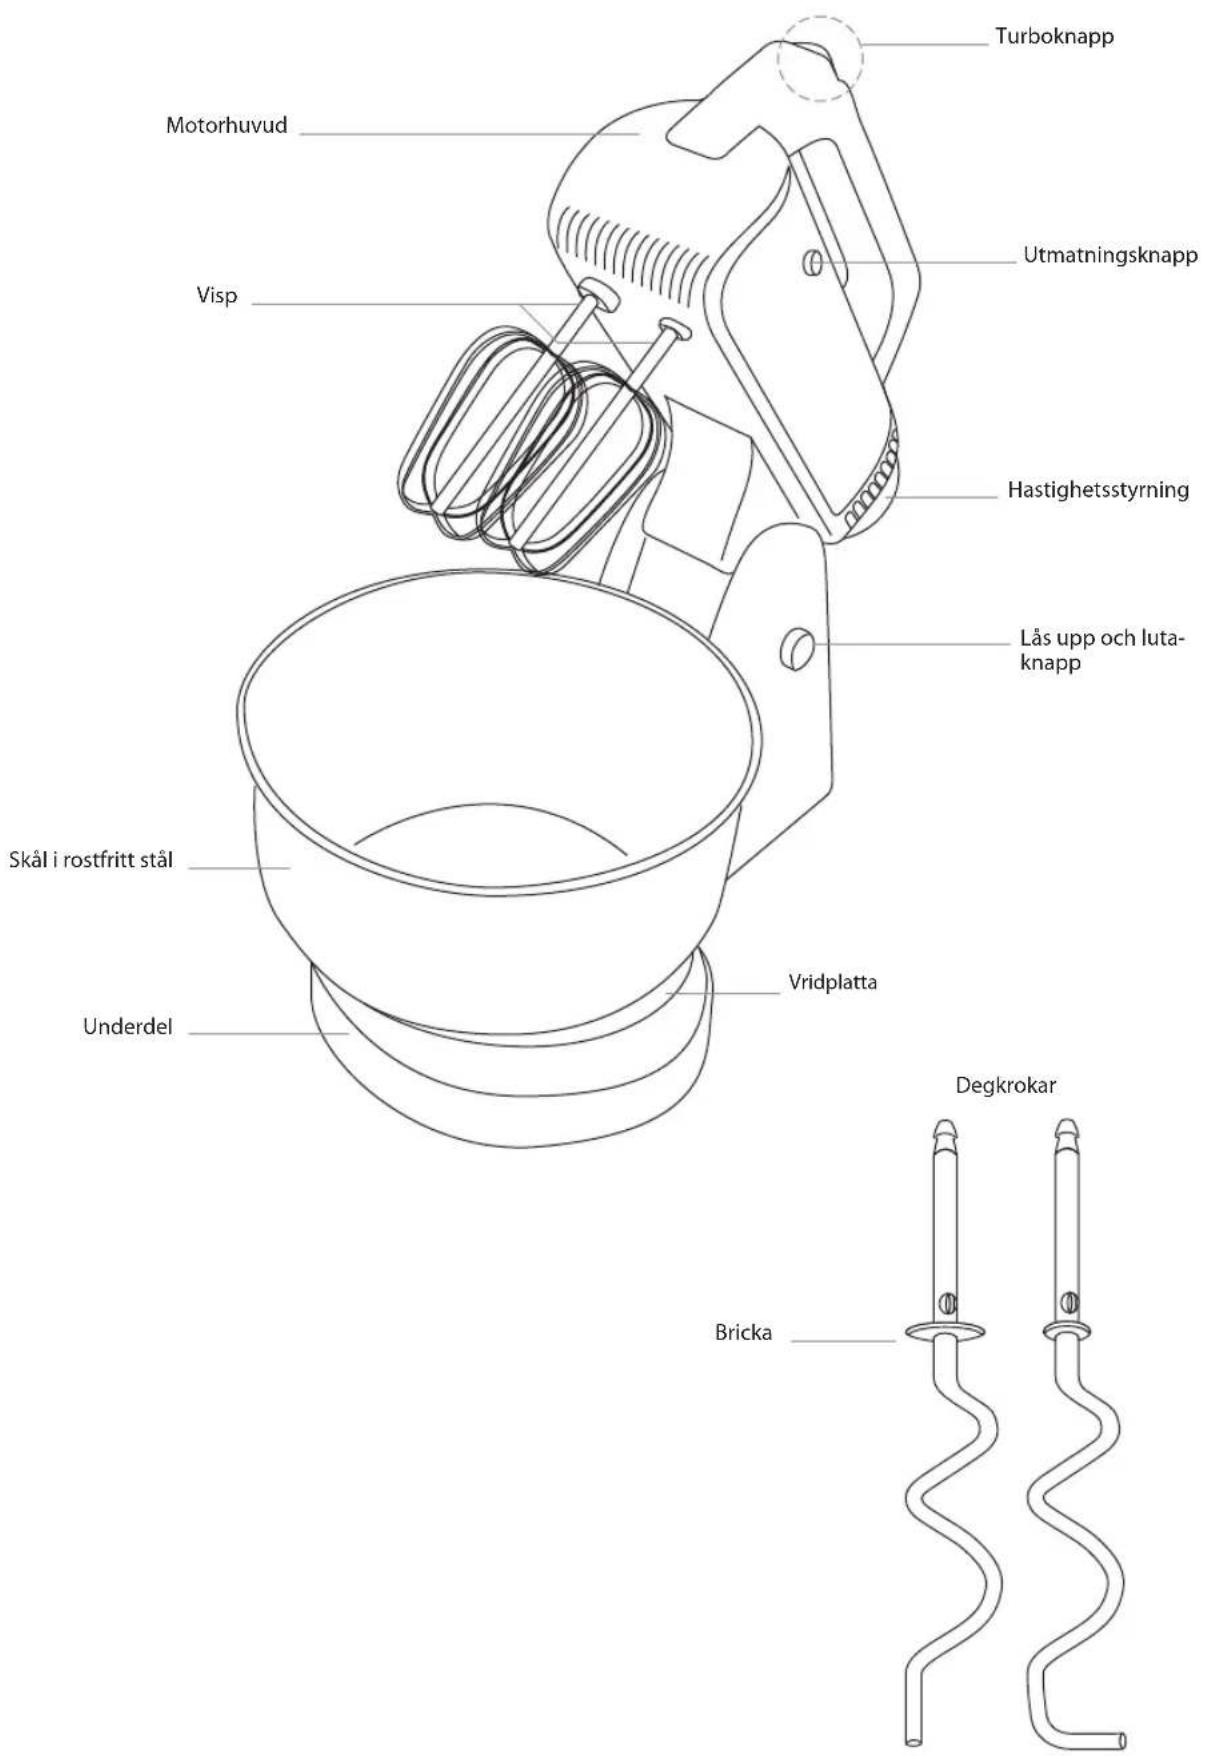

Mount your hand mixer stand
SE


SE

Cleaning
Turntable

FI


Cleaning
Turntable

DK

DK
- You can always press the Boost button to increase the speed by 25%.
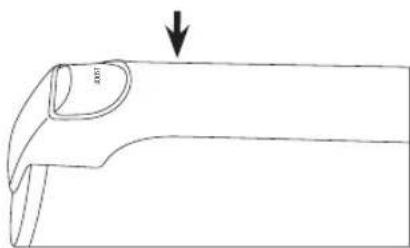

- Hold down the release button to remove the beaters/dough hooks.
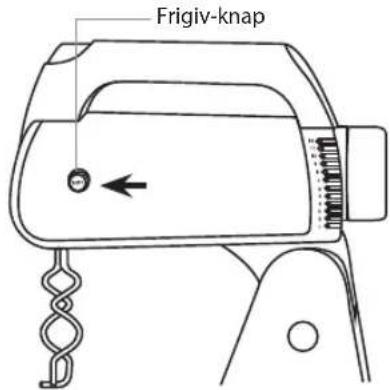

Never press the release button while the appliance is in use.


Cleaning
The symbol on the product or its packaging indicates that this product must not be disposed of with your other household waste. Instead, it is your responsibility to dispose of your waste equipment by handing it over to a designated collection point for the recycling of waste electrical and electronic equipment. The separate collection and recycling of your waste equipment at the time of disposal will help conserve natural resources and ensure that it is recycled in a manner that protects human health and the environment.
For more information about where you can drop off your waste for recycling, please contact your local authority, or where you purchased your product.
www.knowhow.com/knowledgebank
www.lefdal.com/support
SE www.elgiganten.se/support


Brand : Logik
Model : L30SMB14E
Category : Food processor