L22FPS10E - Food processor Logik - Free user manual and instructions
Find the device manual for free L22FPS10E Logik in PDF.
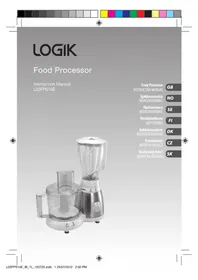


| Product Type | 22-inch LED TV |
| Brand | Logik |
| Model | L22FPS10E |
| Screen Size | 22 inches (55.9 cm) |
| Display Resolution | 1920 x 1080 (Full HD) |
| Refresh Rate | 60 Hz |
| Aspect Ratio | 16:9 |
| Connectivity | HDMI (x2), USB, VGA, AV, RF, Headphone jack |
| Speaker Output | 2 x 3W |
| Power Supply | AC 100-240V, 50/60Hz |
| Power Consumption (Typical) | 30W |
| Standby Power Consumption | <0.5W |
| TV Tuner | DVB-T/T2 (Freeview) |
| Dimensions (with stand) | 510 x 360 x 170 mm |
| Dimensions (without stand) | 510 x 320 x 40 mm |
| Weight (with stand) | 3.5 kg |
| Weight (without stand) | 3.0 kg |
| VESA Mounting | 75 x 75 mm |
| Remote Control | Included |
| Energy Efficiency Class | A+ |
| Supported Video Formats | MPEG-2, MPEG-4, H.264, H.265 |
| Cleaning Instructions | Wipe with a soft dry cloth. Do not use cleaning chemicals. |
| Safety Warning | Do not expose to rain or moisture. Unplug during storms. |
| Spare Parts Availability | Contact Logik customer service for replacement parts. |
Frequently Asked Questions - L22FPS10E Logik
User questions about L22FPS10E Logik
0 question about this device. Answer the ones you know or ask your own.
Ask a new question about this device
Download the instructions for your Food processor in PDF format for free! Find your manual L22FPS10E - Logik and take your electronic device back in hand. On this page are published all the documents necessary for the use of your device. L22FPS10E by Logik.
USER MANUAL L22FPS10E Logik
Food Processor INSTRUCTION MANUAL
Food Processor INSTRUCTION MANUAL
Food Processor INSTRUCTION MANUAL
Hints and Tips....12
Processing Quantities....13
Customer Care Notice 16
Specifications....16
Safety Warnings 89
Contents
Unpacking 17
Thank you for purchasing your new Logik Food Processor.
We recommend that you spend some time reading this instruction manual in order to fully understand all the operational features it offers.
Read all the safety instructions carefully before use and keep this instruction manual for future reference.

Unpacking
GB
Remove all packaging from the unit. Retain the packaging. If you dispose of it, please do so according to local regulations.
The following items are included:
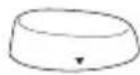
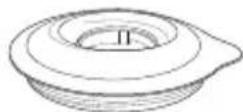
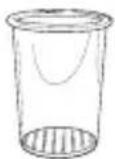

Safety Screw Cap
Lid for Blender Jar, Food Pusher, Filler-Cap
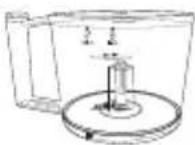
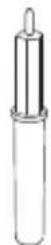
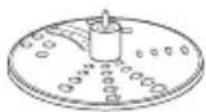
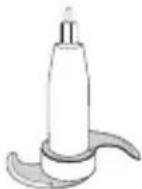
Bowl
Shaft
Slicing / Shredding Plate
Knife Blade
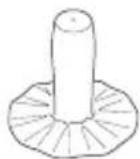
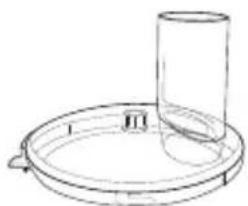
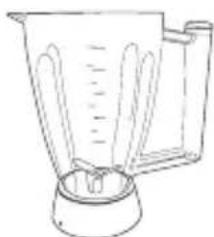
Beater
Lid
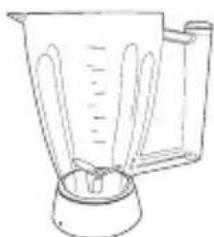
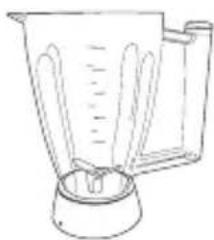
Blender Jar, Instruction Manual
First Time Use
- Remove all packaging of the product.
- Retain the packaging. If you dispose of it, please do so according to your local recycling regulations.
- Wash the parts: see Cleaning.
Product Overview
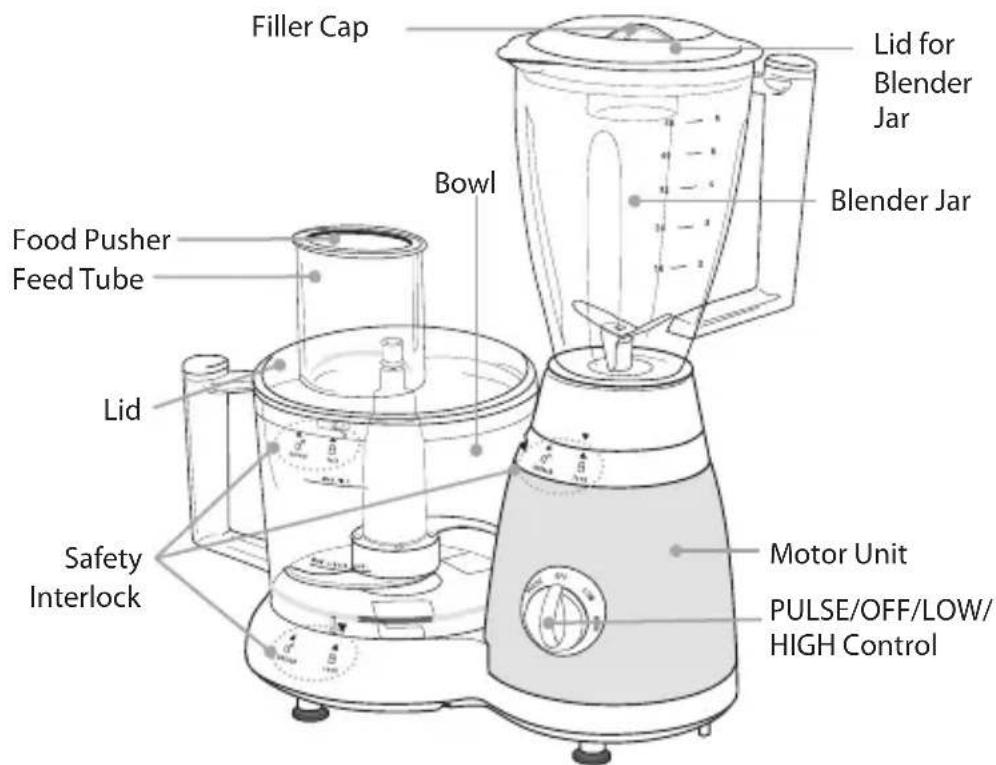
Food Processing Bowl
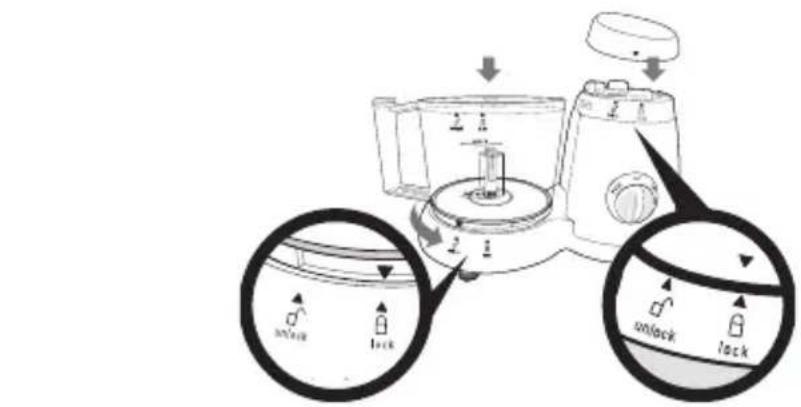
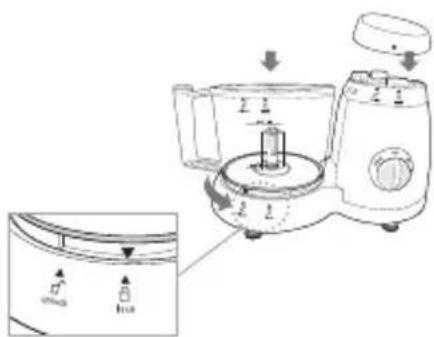
- Mount the Bowl on the food processor by turning the handle in the direction of the arrow until you hear a click. Fit the Knife Blade to the centre post.
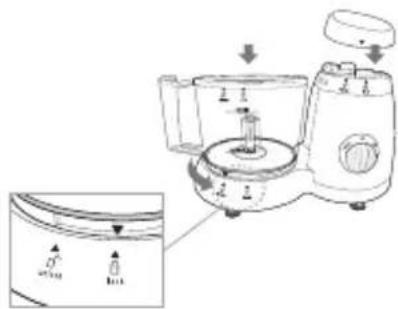
- Put the Lid on the Bowl. Turn the Lid in the direction of the arrow until you hear a click (this requires some force).
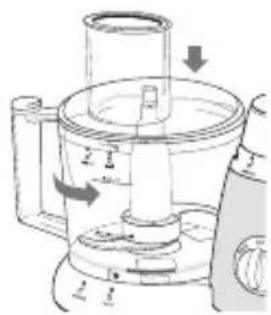
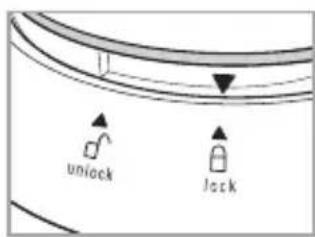
Built-in safety lock (For both Food Processor and Blender)
The Motor Unit, the Bowl and the Lid have been provided with lock and unlock marks. The appliance will only function if the lock mark on the Motor Unit is directly opposite the lock mark on the Safety Screw Cap.
Make sure that the lock mark on the Lid and the lock mark on the Bowl are directly opposite each other.

The Food Processor bowl can only be used without the blender attached to the Motor Unit. If you use the unit without the blender, the Safety Screw Cap must be fitted to the Motor Unit.
Feed Tube and Pusher
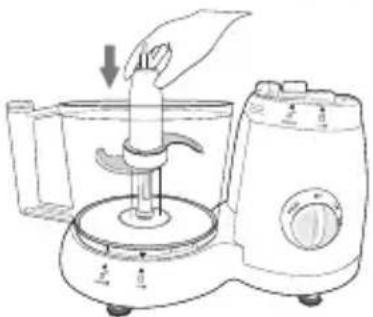
- Use the feed tube to add liquid and/or solid ingredients. Use the pusher to push solid ingredients through the feed tube.
- You can also use the pusher to close the feed tube in order to prevent ingredients from escaping through the feed tube.
Knife Blade
The Knife Blade can be used for chopping, mixing, blending and pureeing.
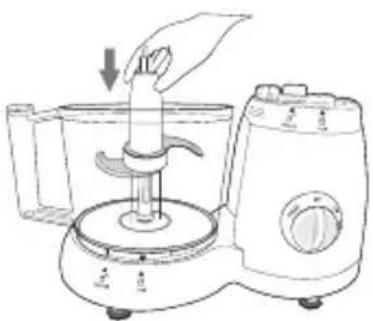
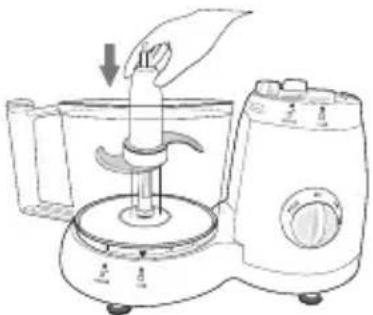
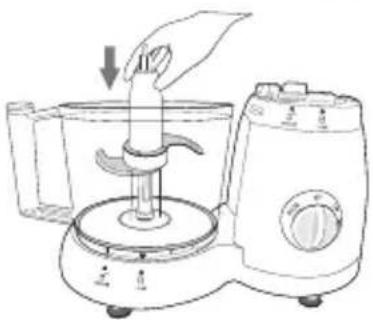
- Place the Knife Blade down onto the centre post inside the Bowl.

The cutting edges of the blade are very sharp. Avoid touching them!
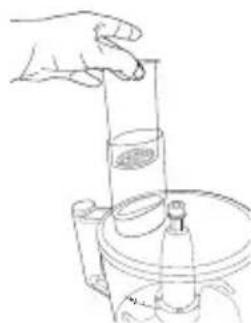
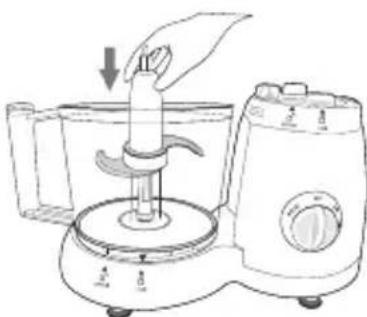

- Put the ingredients in the Bowl. Pre-cut large pieces of food into pieces of approx. 3 x 3 x 3 cm. Put the Lid on the Bowl.
- Put the pusher in the feed tube.
- Turn the control to Pulse position (HIGH or LOW for continuous operation).
Hold the Pulse position for about 2-3 seconds and check your results. Repeat for desired consistency. It is better to use several short operations rather than a single long one unless mixing ingredients that require longer processing times.
After you have finished food processing, release the Pulse position. If you were using on HIGH or LOW, turn the control to OFF position. Allow the Knife Blade to stop running.
Carefully remove the Knife Blade from the Bowl. Unlock the Bowl by turning the handle to the left, and lift the Bowl off. Empty the processed food.
Tips
• Control the chopping time to prevent the food from becoming too finely chopped. - Do not let the appliance run too long when you are chopping (hard) cheese. The cheese will become too hot, start to melt and turn lumpy. - Do not use the blade to chop very hard ingredients like coffee beans, turmeric, nutmeg and ice cubes, as this may cause the blade to get blunt.
If food sticks to the blade or to the inside of the Bowl:
• Turn the appliance off. - Remove the Lid from the Bowl. - Remove the ingredients from the blade or from the wall of the Bowl with a spatula.
Slicing / Shredding Plate

Never process hard ingredients like ice cubes. Cutting edges are very sharp. Avoid touching them!
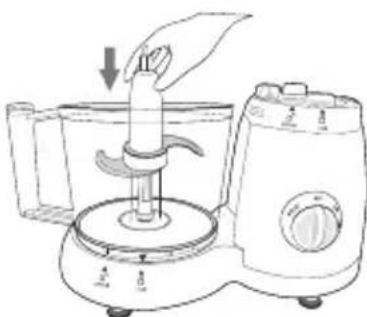
- Put the Bowl on the Motor Unit, turn the handle to lock into place and fit the Shaft onto the centre post.
- Place the Slicing / Shredding Plate onto the Shaft that stands in the Bowl.
- Put the Lid on the Bowl.
- Put the ingredients in the feed tube. Pre-cut large chunks to make them fit into the Feed Tube.
- Fill the Feed Tube evenly for the best results.

When you have to cut large amounts of food, process only small batches at a time and empty the Bowl regularly between batches.
- Select the preferred processing speed on the control.
- Press the pusher lightly onto the ingredients in the feed tube.
Beater
You can use the Beater to whisk eggs, egg whites, instant puddings and cream only.
- Put the Bowl on the Motor Unit and turn it to the left until you hear a 'click'.
- Fit the Beater onto the centre post.
- Put the ingredients into the Bowl, put the Lid on the Bowl and turn it until it's locked and you hear a click.
- Select your preferred process speed by turning the control.
Blender
The Blender is intended for:
- Blending fluids, e.g. dairy products, sauces, fruit juices, soups, mixed drinks, sweet teas and shakes.
- Mixing soft ingredients, e.g. pancake batter or mayonnaise.
• Pureeing cooked ingredients, e.g. for making baby food.
- The blender can be used with or without the food processor bowl attached to the unit.
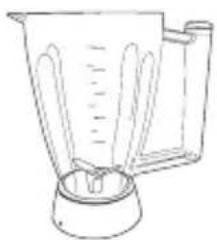
- To attach the Blender Jar, remove the Safety Screw Cap above.
- Mount the Bowl on the food processor by turning the handle in the direction of the arrow until you hear a click.
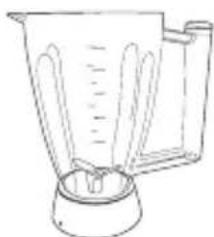
- Mount the Blender Jar onto the Motor Unit by turning it in the direction of the arrow until it is firmly fixed.

The blender cannot be used without the Food Processor attached to the Motor Unit.
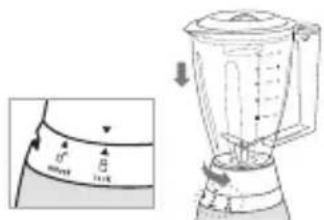
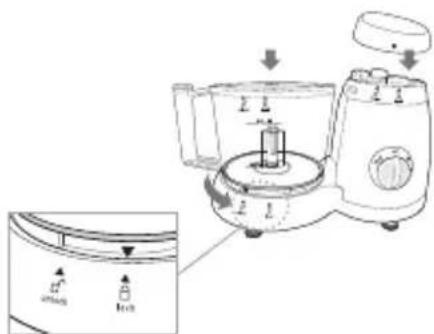
- Put the ingredients in the Blender Jar.
- Close the Blender Lid before you start processing.
- Select your preferred blending speed. The Blender will start to operate. During the blending process the speed can be adjusted by turning the control.
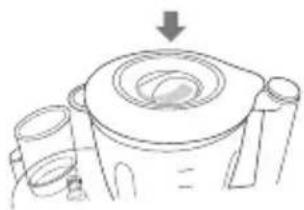
Tips
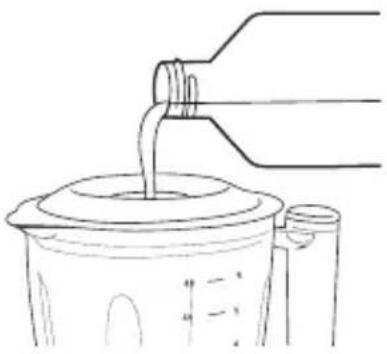
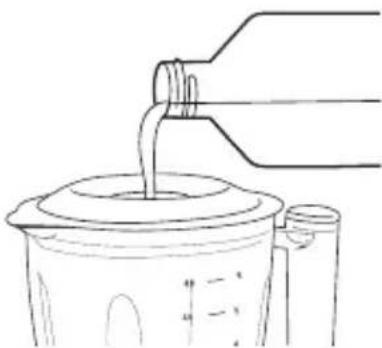
• Pour the liquid ingredients into the Blender Jar through the hole in the Lid. - Hot liquids (not boiling) and hot foods can be processed in the Bowl. - Be sure to process small amounts of liquids—2 cups or less at a time. Larger amounts may leak from the Bowl. - The longer you let the appliance run (maximum 3 minutes), the finer the blending result will be.
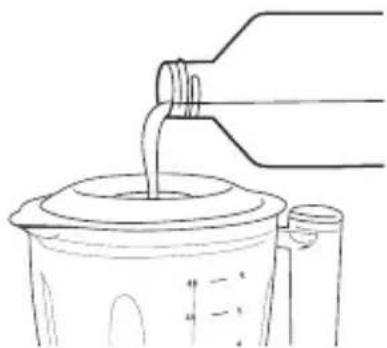
- Pre-cut solid ingredients into smaller pieces before putting them in the Blender. If you want to prepare a large quantity, process small batches instead of trying to process a large quantity at once.
- Hard ingredients, e.g., soy beans for soy bean milk, must be soaked in water before they are processed.
- Crush ice cubes by placing the ice cubes in the jar, close the Lid, and use the pulse function.
If ingredients stick to the wall of the Blender Jar:
- Switch the appliance off and unplug it.
- Open the Lid.
- Use a spatula to remove the ingredients from the wall of the jar.
- Keep the spatula at a safe distance from the blades (approx. 2 cm).

Never open the Lid while the appliance is still running. Never use your hands to reach into the blending jar.
- If you are not satisfied with the results, let the appliance run briefly a number of times by pressing the pulse button. You can also achieve a better result by stirring the ingredients with a spatula (not while the blender is running), or by pouring some of the contents out in order to process a smaller amount.
- In some cases the ingredients are easier to blend if you add some liquid, e.g., lemon juice when blending fruits.

Cleaning
Always unplug the appliance before you start cleaning the Motor Unit.
- Clean the Motor Unit with a damp cloth. Do not immerse the Motor Unit in water and do not rinse it either.
- Immediately after use, always clean the parts that have come into contact with food, using hot water and washing-up liquid.

Clean the Metal Blade, the blade unit of the Blender and the inserts very carefully. Their cutting edges are very sharp!
- To remove the Lid, open it and then pull upwards. Only remove the Lid for cleaning purposes.
Make sure that the cutting edges of the blades and the inserts do not come into contact with hard objects. This could cause them to become blunt.
Certain ingredients may cause discolourations on the surface of the accessories. This does not have a negative effect on the accessories. The discolourations usually disappear after some time.
Blender quick-clean operation
- Pour lukewarm water (not more than 0.5 litres) and some washing-up liquid into the Blender Jar.
- Close the Lid.
- Let the appliance run for a few seconds by turning the pulse control. (The appliance stops running when turn it to OFF).
- Detach the Blender Jar and rinse it with clean water.
To clean the Slicing and Shredding Plate / Knife Blade thoroughly:
The Slicing and Shredding Plate, Knife Blade can be cleaned in warm soapy water or in the dishwasher.

Hints and Tips
What is a Pulse Function?
- The pulse control is used when you need short bursts of power at the optimum speed. This is controlled by the user, which means you control how long the appliance runs for. It is a useful way of avoiding over-processing. For example, it can be used to fold fruit into a cake mixture at the end of processing.
What is the difference between a Food Processor and a Breadmaker?
- A Breadmaker is primarily for mixing dough and cake mixtures. A Food Processor can do these jobs but not with the efficiency of a Breadmaker. If you are planning on making cakes, you should consider how often you will be doing this job. If it is going to be a common occurrence, then a Breadmaker would be a better choice.
Why won't my processor or blender switch on?
- Try checking that the interlock system is correctly in place. Both Processor and Blender need to have the Bowl and the Lid on properly in order to start processing. This is a safety feature so that the blades cannot be spinning while exposed. When interlocked properly, the markings on the Bowl, Lid, and Motor Housing are aligned properly.
- Check whether the Motor Unit has the Safety Screw Cap or the Blender correctly positioned on it. The appliance will not function if neither are properly mounted onto the Motor Unit.
Can I process hot ingredients?
• Hot liquids (not boiling) and hot foods can be processed in the Bowl.
Processing Quantities
| Ingredients & results | Max. Quantity | Procedure Applications | |
| Apples, carrots, celeriac - shredding and slicing | 500g Cut the vegetables into pieces that fit into the tube. Fill the tube with the pieces and slice them while pressing the pusher lightly. | Salads, raw vegetables | |
| Batter (pancake) - whisking | 750ml Milk | First pour the milk into the blender and then add the dry ingredients. Mix the ingredients for approx. 1 minute. If necessary, repeat this procedure 2 times. Then stop for a few minutes to allow the appliance to cool down to an ambient temperature. | Pancakes, waffles |
| Bread crumbs - chopping | 100g Use dry, crispy bread. Bread- | crumbed dishes, au gratin dishes | |
| Butter cream (creme au beurre) - whisking | 300g Use soft butter for a light result. | Deserts, toppings | |
| Cheese (Parmesan) - chopping | 200g Use a piece of rindless Parmesan and cut it into approx. 3 x 3 cm pieces. | Garnishing, soups, sauces, au gratin dishes | |
| Cheese (Gouda) - shredding | 200g Cut the cheese into pieces that fit into the tube. Press carefully with the pusher. | Sauces, pizzas, au gratin dishes, fondues | |
| Chocolate - chopping | 200g Use hard, plain chocolate. Break it into 2cm pieces. | Garnishing, sauces, pastry, puddings, mousses | |
| Cooked peas, beans - pureeing | 250g Use cooked peas or beans. | Purees, soups | |

| Ingredients & results | Max. Quantity | Procedure Applications | |
| Cooked vegetables and meats - pureeing | 500g For a | coarse puree, add only a little liquid. For a fine puree, keep adding liquid until the mixture is smooth. | Baby and infant food |
| Cucumbers - slicing | 2 cucum- bers | Put the cucumber in the tube and press it down carefully. | Salads, garnishing |
| Egg whites - whisking | 4 egg white | Use egg whites at room temperature. Note: use at least 2 egg whites. | Puddings, soufflees, meringues |
| Fruit (e.g. apples, bananas, water chestnut) - blending / chopping | 500g Tip: add a little lemon juice to prevent the fruit from discolouring. When blending add some liquid to obtain a smooth puree. | Sauces, jams, puddings, baby food | |
| Garlic - chopping | 300g Peel the garlic. Press the pulse button several times to avoid chopping the garlic too fine. Use at least 150g. | Garnishing, dips | |
| Herbs (e.g. parsley) - chopping | Min. 50g Wash and dry the herbs before chopping | Sauces, soups, garnishing, herb butter | |
| Juices (e.g. made of apple carrots etc.) Juicing - blending | 500ml (Total amount) | Juice the fruits in the juicer. Fruit juices | |
| Mayonnaise - emulsifing | 3 eggs All the ingredients must be at room temperature. Note: use at least one large egg, two small eggs or two egg yolks. Put the egg and a little vinegar in the bowl and add the oil drop by drop. | Salads, garnishing and barbecue sauces | |
| Meats (lean) - mincing | 500g First remove any sinews or bones. Cut the meat into 3cm cubes. Press the pulse button to get a coarser chopping result. | Steaks tartar, hamburgers, meat balls | |
| Meats, fish, poultry (streaky) - mincing | 400g First remove any sinews or bones. Cut the meat into 3cm cubes. Press the pulse button to get a coarser chopping result. | Steaks tartar, hamburgers, meat balls | |
| Milkshakes - blending | 500ml milk | Puree the fruit (e.g. bananas, strawberries) with sugar, milk and some ice cream and mix well. | Milkshakes |
| Mixture (cake) - mixing | 4 eggs The ingredients must be at room temperature. Mix the softened butter and the sugar until the mixture is smooth and creamy. Then add milk, eggs and flour. | Various cakes. | |
| Nuts - chopping | 250g Use the pulse button for coarse chopping. Stop the process if you want a coarse result. | Salads, puddings, nut bread, almond paste | |
| Onions - chopping | 500g Peel the onions and cut them into 4 pieces. Stop the process after 2 pulses to check the result. | Salad, cooked food, stir-fries, garnishing | |
| Onions - slicing | 300g Peel the onions and cut them into pieces that fit into the tube. Note: use at least 100g. | Salad, cooked food, stir-fries, garnishing | |
| Poultry - mincing | 200g First remove any sinews or bones. Cut the meat into 3cm cubes. Use the pulse button for a coarser chopping result. | Minced meat | |
| Soups - blending | 500ml Use cooked vegetables. Soups, sauces | ||
| Whipping cream - whipping | 500ml Use cream that comes straight from the refrigerator. Note: use at least 125ml cream. The whipped cream is ready after approx. 20 seconds. | Garnishing, cream, ice-cream mixtures | |


Customer Care Notice
The food processor bowl will only operate with the safety screw cap attached to the motor unit.
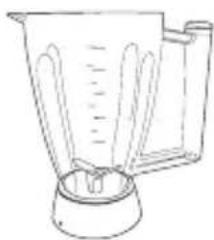
The blender will only operate with the processor bowl attached to the motor unit, see the table below.
| To Operate | 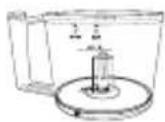 | 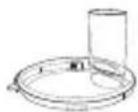 | 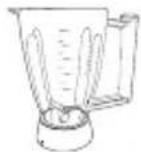 | 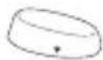 |
| Food Processor | √ | √ | √ | |
| Blender | √ | √ |

Specifications
| Model L22FPS10E | |
| Mains supply 230V | ~50Hz |
| Power consumption 500W | |
Features and specifications are subject to change without prior notice.
Lock
Food processor bowl


Tips
Never open the lid while the appliance is still running. Never use your hands to reach into the blending jar.
Specifications
| Modell L22FPS10E | |
| Nettilkopling 230V ~50Hz | |
| Strømforbruk 500W |
Whisk
Lock




Specifications





Specifications
Mixer Low Blender Glass User Manual
When Using the Food Processor for the First Time



Tips


Specifications
| Model L22FPS10E |
| Strømforsyning 230V ~50Hz |
| Strømforbrug 500W |
Lid


First Use

Nǚž


Tips

Specifications
Whisk
Lid

SK

Tips
SK

Technical parameters
| Model L22FPS10E |
| Napájanie zo siete 230 V ~ 50 Hz |
| Spotreba energie 500 W |
- The blades and plates are very sharp, handle with care. Always hold the knife blade by the finger grip at the top, away from the cutting edge, both when handling and cleaning. Always remove the knife blade before pouring contents from the Bowl.
- Keep hands and utensils out of the Processor Bowl or Blender Jar whilst connected to the mains socket. A scraper may be used but only when the Food Processor is not running.
- In order to avoid a hazardous situation, this appliance must never be connected to a timer switch.
- Excessive strain may cause the motor to overheat and stop. Please don't operate this appliance for longer than 3 minutes. Wait around 5-10 minutes for the motor to cool. A safety protector in the motor prevents overheating. If the motor stops, turn the appliance off. Do not operate this appliance in the presence of explosive and/or flammable fumes. Always switch off and unplug before fitting or removing parts, after use and before cleaning.
- For your protection, this appliance has an Interlock System so the food processor won't operate unless you remove the Blender Jar and close the fixing hole with the Safety Screw Cap. The Bowl needs to lock onto the Unit and the Cover must be correctly locked onto the Bowl. Always lock the Bowl or Blender Jar to the Motor Unit before attempting to fit the Lid. Always unlock the Lid before attempting to remove the Bowl from the Motor Unit.
- This appliance will be damaged and may cause injury if the interlock mechanism is subjected to excessive force.
- Before removing the Lid from the Bowl, switch the appliance off and wait until the attachment/blades have completely stopped.
- Place the Lid on the Bowl in the correct position. Both the Motor Unit and the Safety Screw Cap, Bowl, Bowl Cover, and Safety Screw Cap have been provided with marks. Make sure the mark on the Motor Unit is directly opposite the mark on the Safety Screw Cap, Bowl, and Bowl Cover.
- Thoroughly clean the parts that will come into contact with food before you use the appliance for the first time.
- Do not exceed the quantities and preparation times indicated in the table.
- Do not exceed the maximum content indicated on the bowl, i.e., do not fill beyond the maximum fill mark.
- Never use your fingers to push food down the Feed Tube. Always use the Pusher supplied.
- Never use any accessories or parts other than those provided with this appliance.
- Never let the Motor Unit, Mains Cable, or Plug get wet.
- Do not attempt to chop ice in this food processor; it will damage the Bowl and dull the Knife Blade. Chop ice only in the Blender Jar.
- This appliance is not intended for use by persons (including children) with reduced physical, sensory, or mental capabilities, or lack of experience and knowledge, unless they have been given supervision or instruction concerning the use of the appliance by a person responsible for their safety. Children should be supervised to ensure that they do not play with the appliance.
- Do not use the appliance if the mains cable, plug, or other parts are damaged. Do not let excess mains cable hang over the edge of a table or worktop or touch hot surfaces. Never leave the appliance on unattended.
- If the mains cable is damaged, it must be replaced by the manufacturer, an authorized service agent, or a qualified technician in order to avoid a hazard.
- Never use a damaged appliance. Get it checked or repaired by a qualified technician.
- Never misuse your appliance and only use it for its intended domestic use. Make sure your electricity supply is the same as the one shown on the underside of your appliance.
- Do not attempt to operate the appliance unless the Cover is correctly in place. Be sure the Motor Unit is on a flat, dry, clean surface before you begin processing. Always switch the appliance off by turning the control to the OFF position before detaching any accessories.
- Wait until moving parts have stopped running before you remove the lid of the appliance.
- If you are processing a liquid that is hot or tends to foam, do not put more than 1.25 litre into the Blender Jar to avoid spillage. Unplug the appliance immediately after use. For application time, see the table further on in these instructions for use. Noise level: Lc= 90 dB [A]





This symbol on the product or in the instructions means that your electrical and electronic equipment should be disposed at the end of its life separately from your household waste. There are separate collection systems for recycling in the EU. For more information, please contact the local authority or your retailer where you purchased the product.
- CONTENTS
- UNPACKING
- FIRST TIME USE
- PRODUCT OVERVIEW
- FOOD PROCESSING BOWL
- BUILT-IN SAFETY LOCK (FOR BOTH FOOD PROCESSOR AND BLENDER)
- FEED TUBE AND PUSHER
- KNIFE BLADE
- TIPS
- SLICING / SHREDDING PLATE
- BEATER
- BLENDER
- CLEANING
- BLENDER QUICK-CLEAN OPERATION
- TO CLEAN THE SLICING AND SHREDDING PLATE / KNIFE BLADE THOROUGHLY
- HINTS AND TIPS
- WHAT IS A PULSE FUNCTION
- WHAT IS THE DIFFERENCE BETWEEN A FOOD PROCESSOR AND A BREADMAKER
- WHY WON'T MY PROCESSOR OR BLENDER SWITCH ON
- CAN I PROCESS HOT INGREDIENTS
- CUSTOMER CARE NOTICE
- SPECIFICATIONS
- FOOD PROCESSOR BOWL
- WHEN USING THE FOOD PROCESSOR FOR THE FIRST TIME
- FIRST USE
- NǙŽ
- TECHNICAL PARAMETERS
Brand : Logik
Model : L22FPS10E
Category : Food processor