BC-4500A - Baby monitor Neonate - Free user manual and instructions
Find the device manual for free BC-4500A Neonate in PDF.


| Product Type | Baby Monitor |
| Brand | Neonate |
| Model | BC-4500A |
| Frequency Range | 865 MHz |
| Number of Channels | 2 selectable |
| Digital Codes | 8 selectable |
| Transmitter Power Supply | Rechargeable Ni-MH batteries (3x included) or 6V DC adapter via charger stand |
| Receiver Power Supply | Rechargeable Ni-MH batteries (3x included) or 6V DC adapter via charger stand |
| Battery Type | Ni-MH rechargeable (included) |
| Charging Method | Rapid charger stand (supplied) with intelligent charging indication |
| Charging Indication | Flashing red/green during detection, red fast charging, steady green full charge |
| Initial Charge Time | At least 4 hours before first use |
| Microphone Sensitivity | Adjustable via buttons (5 levels, 1-5 blinks) |
| Night Light | Yes, with permanent ON or VOX (voice-activated) mode |
| Visual Level Meter | LED bar on receiver indicating sound level |
| Volume Control | Up/Down buttons on receiver, can be completely muted |
| Vibration Alert | Yes, switchable on receiver |
| Out-of-Range Alert | Audible alarm and flashing LED after 2 minutes out of range |
| Low Battery Warning | Flashing LED on both units; receiver also sounds alarm |
| Included Accessories | 6V AC switching power supplies (2x), rapid chargers (2x), transmitter (1x), receiver (1x), Ni-MH batteries (6x), hand straps (2x), user manual (1x) |
| Recommended Placement | Transmitter about 1 m from crib; receiver at distance to avoid feedback |
| Operating Temperature Range | -9°C to +50°C |
| Safety Warning | Not a medical device; adult supervision required |
Frequently Asked Questions - BC-4500A Neonate
User questions about BC-4500A Neonate
0 question about this device. Answer the ones you know or ask your own.
Ask a new question about this device
Download the instructions for your Baby monitor in PDF format for free! Find your manual BC-4500A - Neonate and take your electronic device back in hand. On this page are published all the documents necessary for the use of your device. BC-4500A by Neonate.
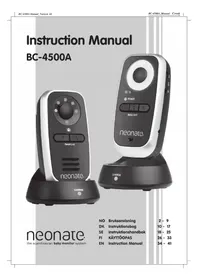
USER MANUAL BC-4500A Neonate
the scandinavian baby monitor system
NO Bruksanvisning 2 - 9
DK Instruktionsbog 10 - 17
SE Instruktionshandbok 18 - 25
FI KÄYTTÖOPAS 26 - 33
EN Instruction Manual 34 - 41
Sender & mottaker
MOTTAKER
LADESTAND


c

d

台

f

g
FEILS∅KINGSGUIDE
Sender & Modtager
MODTAGER-ENHED

OPLADER STAND

c

d

e

f

g
FEJLFINDING GUIDE
MOTTAGARE

LADDARSTÄLL

VASTAANOTIN

LATAUSALUSTA
Thank you for purchasing our BC-4500 baby monitor. Your unit has been manufactured and checked under the strictest possible quality control to ensure that each monitor leaves the factory in perfect condition. If in the unlikely event you find any defects or have any problem, please contact your dealer, our branch or service center.
Please read this manual carefully to obtain maximum performance & extended service life from the unit.
Features
- Operate in the 865MHz range with excellent reception quality.
- EIGHT selectable digital codes provide high degree of immunity from interference.
- Selectable TWO operating channels give you further protection from interference.
- Audio and visual alert for out-of-range on receiver.
- LED level meter on receiver
- Low battery warning on both transmitter and receiver.
- Adjustable microphone sensitivity on transmitter.
- Vibration alert on receiver upon receipt of signal
WARNING
The BC-4500 baby monitor should not be regarded as a medical device. Premature babies or those considered to be at risk should be under the supervision of your doctor or health personnel.
Direct supervision of your baby at a regular interval by a responsible adult is strongly recommended in addition to using the BC-4500.
SETTING OF CHANNELS AND DIGITAL CODES

Transmitter & Receiver
Press down the battery door and slide open in direction as shown.
With the help of a pointed object, select one of the two settings of the dip switch 20 (position 1), this will set the channel.
Similarly, select one of the eight settings of the three dip switches 19 (position 2, 3 and 4), this will set the digital code.
Make sure the setting and number sequence are the same in both transmitter and receiver.
Channel Setting Digital Code Setting
| CH1 | 000 | 001 |
| CH2 | 010 | 100 |
| 011 | 101 | |
| 110 | 111 |
N.B. In case you still find interference in actual operation, either change to another channel or change the settings of the three dip switches to a new combination. Always make sure to keep the same setting in both transmitter and receiver.
POWER SUPPLY
Transmitter & Receiver
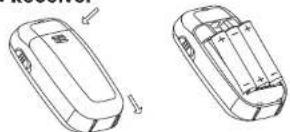
1. Operation from rechargeable battery
Press down the battery door and slide open in direction as shown. Insert the supplied Ni-mH rechargeable batteries into the compartment. Observe correct polarities indication.

- Operation from AC mains using the intelligent rapid charger
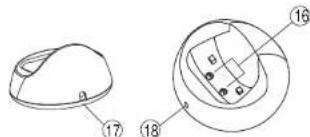
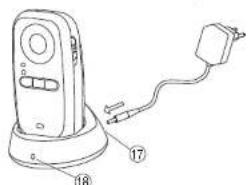
Connect the output plug of the supplied 6V switching power supply to the DC jack (17) of the rapid charger, make sure the polarity is correct. With the unit being switched off, place it into the rapid charger. The charging indicator (18) will flash green and red alternately while detecting the battery status. Adjust the position of the unit in case the charging indicator (18) does not light up. After a short while, the charging indicator (18) will flash red only, showing the battery is under fast charging. Once the battery is fully charging up, the indicator (18) turns steady green. Now the unit can be switched on for operation. Either you can take it out or keep placing it in the rapid charger will cause no damage to the battery. In the latter case, when the battery is being consumed and voltage falls to a certain level, the rapid charger will automatically start charging up the battery again.
Note: Before using the unit for the first time, charge up the NI-mH battery with the rapid charger for at least four hours. Besure to switch off the unit before charging.
CAUTION: BESURE THE BATTERY IN THE UNIT IS RECHARGEABLE TYPE BEFORE PLACING IT IN THE RAPID CHARGER, OTHERWISE EXPLOSION MAY RESULT. BESURE THE RECHARGEABLE BATTERY IS INSTALLED IN THE UNIT BEFORE PLACING IT IN THE RAPID CHARGER, OTHERWISE THE UNIT WILL NOT OPERATE NORMALLY.
CONTROLS LAYOUT

TRANSMITTER

RECEIVER

CHARGER STAND


① Night Light
② Microphone Sensitivity Adjustment Up Button
③ Transmit Indicator
Microphone
⑤ Night Light VOX control button
⑥ Power On-Off and Night Light switch
⑦ Power On/Battery low Indicator
⑤ Microphone Sensitivity Adjustment Down Button
⑨ Visual level meter/Out-of-range indicator
⑩ Volume down button
⑪ Vibration indicator
⑫ Speaker
⑬ Volume up button
⑭ Power On/Off and
vibration switch
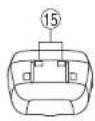
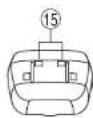
⑮ Charging Contacts
⑯ Charging Pins
⑪ DC Jack
⑱ Charging Indicator
⑲ Digital Code Dip Switches
⑳ Channel Dip Switch
OPERATION
TRANSMITTER
- Set the power ON/OFF switch 6 to ON position to turn on the unit. The power on indicator ⑦ will light up steady green.
- Place the transmitter about 1 m from the crib with the microphone ④ facing towards the baby.
- Adjust the microphone sensitivity using the sensitivity adjustment button 2
& 8 such that the unit will be set to transmit whenever the microphone
4 picks up a sound at your desirable loudness level. The transmit indicator ③ will blink every time this button is pressed, more number of blinks mean the microphone is more sensitive to sound (maximum is 5 blinks and minimum is 1 blink). Press ▲ increase and to reduce microphone sensitivity.
- Once the unit is in transmit mode, the transmit indicator 3 will light up red. The transmitter will return to standby mode a few seconds after the microphone ④ stops picking up any sound and the transmit indicator ③ will go off.
- Since this baby monitor is equipped with out of range alert function, the transmitter will transmit a signal to the receiver at regular intervals even when the microphone ④ does not pick up any sound. The transmit indicator ③ will blink correspondingly.
- The night light ① can be set permanently ON by moving the power ON/OFF switch ⑥ to position. The night light can also be set to be VOX (voice activated) by momentarily pressing the VOX control button ⑤. Under VOX mode, the night light will be switched on once the microphone ④ detects a sound and automatically goes off a few seconds after the microphone ④
stops picking up any sound. Momentarily press of the Night light VOX control button ⑤ will cause the night light to toggle between permanent ON and VOX. - The condition of the battery is shown by the power on/battery low indicator ⑦ When the battery power is being consumed, the battery low indicator ⑦ will start flashing. Recharge the battery using the rapid charger.
RECEIVER
- Set the power ON/OFF switch 14 to ON position to turn on the unit. The power on indicator ⑦ will light up steady green.
- Place the receiver at a reasonable distance away from the transmitter to avoid feedback. Too close a distance will create a screeching sound at the speaker ⑫.
- Once the unit receives a signal from the transmitter, the LEDs in the level meter ⑨ will light up. The louder the baby's voice, the more number of LED will be lighted up. This feature is useful in case the parents prefer to turn down the speaker volume to keep the environment quiet.
- The speaker volume can be adjusted using the volume Up/Down button 13 & 10. Each press of these buttons will create a beep sound which loudness corresponds to the sound volume heard from the speaker 12. By continually pressing the volume down button 10 until no beep sound can be heard, the speaker will be completely muted.
- This unit is equipped with a vibration alert. Set the power ON/OFF switch ⑭ to ⑪ position, the vibration indicator ⑪ will light up. Once the received baby's voice is loud enough, the vibrator starts functioning. This feature is useful when the parent is working under very noisy environment (e.g. Vacuum cleaning). To save battery power, it is recommended not to use the vibration alert frequently.
- Once the receiver is beyond the communication range of transmitter for over 2 minutes, an out-of-range alarm will be heard together with the LED level meter ⑨ starts flashing to alert the parents. The alarm will go off only when the receiver falls back within the communication range of transmitter.
N.B. This alarm will also be heard in case the transmitter is switched off, or its battery has run down, or its power is cut off, or the channel/digital code setting is different between the transmitter and receiver.
- The condition of the rechargeable battery is shown by the power on/battery low indicator ⑦. When the battery power is being consumed to below a destined level, the indicator ⑦ starts flashing and an alarm will be heard, reminding the parents to charge up the battery
using the rapid charger. - The transmitter and receiver unit can be carried around by installing the neck strap as shown.

PRECAUTIONS
- Use only the supplied AC adapters, use of other adapters may cause damage to the BC-4500 baby monitor
- When not using the monitor for as long period of time, remove all batteries from the transmitter and receiver to avoid damage due to battery leakage.
- Disconnect the AC adapter from the wall outlet when the monitor is not to be operated.
- The BC-4500 is best performed within a temperature range of -9°C to +50°C .
- Do not leave the monitor expose to strong sunlight for a long time or nearby any heat source, moisture and excessive dusty environment.
- Do not open the cabinet, no serviceable part inside.
STANDARD ACCESSORIES
a. 6V AC switching power supply x 2
b. Rapid charger x 2
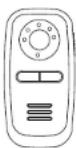
c. Transmitter unit x 1
d. Receiver unit x 1
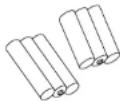
e. Rechargeable Ni-mH battery x 6
f. Hand strap x 2
g. User manual x 1


c
d
台

f

g
TROUBLE SHOOTING GUIDE
Problem
Possible Causes
Solution
Transmitter has no - Mic sensitivity is too low - Adjust mic sensitivity higher transmission using up/down button 2 & 8

- Battery has run down - Recharge battery using charger stand
Transmitter always - Mic sensitivity is too high - Adjust mic sensitivity lower using
on up/down button 2 & 8 such that transmitter become voice activated

Out-of-range alarm - Channel or digital code - Set the same channel and always on setting is different in digital code in both transmitter transmitter and receiver and receiver
- Transmitter's battery has run down
Recharge battery using charger stand
- Distance between transmitter and receiver exceeds the operating range - Move the transmitter and receiver closer together
Out-of-range alarm sometimes on - Interference from other devices - Switch to another channel operating on same channel
Always showing low battery alert - Battery has run down charger stand - Recharge battery using
- No battery inside unit back into battery comparison
- Install rechargeable battery
- Rechargeable battery is damaged - Replace with new battery
Battery life is short - Night light is permanently - Switch off night light or set to switched on VOX operate
- Vibration alert is switched on - Switch off vibration alert
Many static noise and interference - Transmitter is located near other electrical appliances
- Remove the electrical appliances or re-locate the transmitter far away from source of interference or change to another channel
Too short communication range - Many steel structures between - Re-locate transmitter or transmitter and receiver receiver
- Transmitter battery has run down - Recharge battery using charger stand
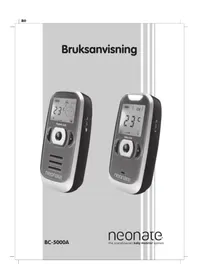
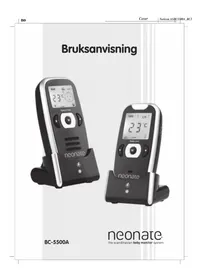
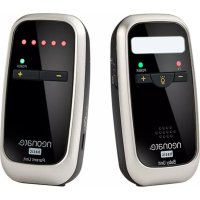

Brand : Neonate
Model : BC-4500A
Category : Baby monitor