010-069 - Orbital sander Meec Tools - Free user manual and instructions
Find the device manual for free 010-069 Meec Tools in PDF.


| Product Type | Orbital Sander |
| Model | 010-069 |
| Brand | Meec Tools |
| Power Supply | 230V AC, 50Hz |
| Power Consumption | 250W |
| Orbit Diameter | 2.5 mm |
| No-Load Speed | 13,000 OPM |
| Sanding Paper Size | 125 mm (5 in) hook-and-loop |
| Dust Extraction | Built-in dust bag (included) |
| Weight | 1.5 kg |
| Dimensions (L x W x H) | 200 x 120 x 150 mm |
| Cable Length | 2 m |
| Main Functions | Sanding, smoothing, finishing on wood, metal, plastic |
| Ergonomic Features | Soft-grip handle, low vibration |
| Maintenance | Clean dust bag and vents regularly |
| Safety | Double insulation, auto-off switch |
| Spare Parts | Sanding discs, dust bag, carbon brushes |
| Repairability Index | 7.5/10 |
| Included Accessories | 5 sanding discs (60, 120, 240 grit), dust bag, manual |
Frequently Asked Questions - 010-069 Meec Tools
User questions about 010-069 Meec Tools
0 question about this device. Answer the ones you know or ask your own.
Ask a new question about this device
Download the instructions for your Orbital sander in PDF format for free! Find your manual 010-069 - Meec Tools and take your electronic device back in hand. On this page are published all the documents necessary for the use of your device. 010-069 by Meec Tools.
USER MANUAL 010-069 Meec Tools
Operating Instructions for Orbital Sander
010-069
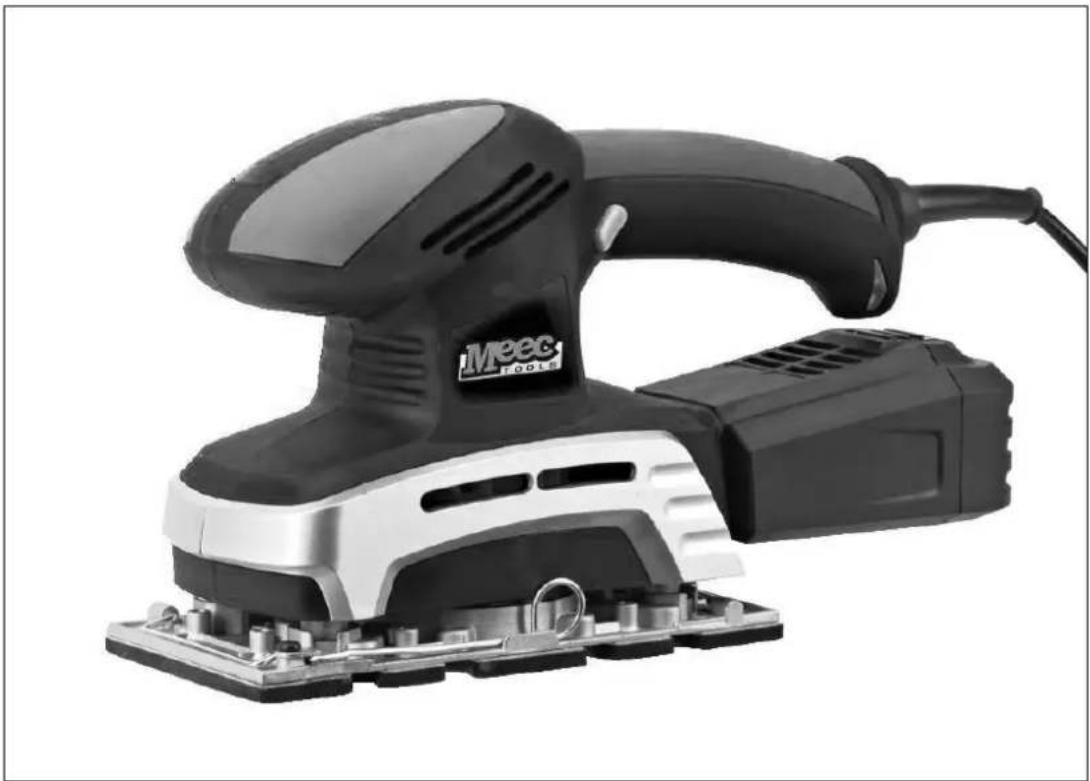
natural_image
Exterior view of a Meec Fools electric power tool (no text or symbols visible on the device body)SV Bruksanvisning i original
NO Bruksanvisning i original
EN Operating instructions in original
SÄKERHETSANVISNINGAR....4
SAFETY INSTRUCTIONS 25
General power tool safety warnings 25
Work area safety 25
Electrical safety 25
Personal safety 25
Power tool use and care 25
Service 26
Sanders and polishers safety warnings 26
Special safety instructions 26
Symbols 27
TECHNICAL DATA 27
DESCRIPTION 28
USE 28
Fitting the dust collector 28
Fitting sandpaper (fig. A, B, C) 29
Sandpaper with Velcro fastener (189 x 92 mm) 29
Universal sandpaper (240 x 92 mm)....29
Starting....29
Sanding action 30
Replacing the sanding pad 30
Handle....30
MAINTENANCE 30
SÄKERHETSANVISNINGAR
ALLMÄNNA SÄKERHETSFÖRESKRIFTER FÖR ELVERKTYG

natural_image
Close-up of a hand holding a black mechanical component, possibly a tool or device, with no visible text or symbols.natural_image
Close-up of hands holding a dark rectangular plate with multiple holes, labeled 'A' in the corner (no text or symbols on the plate itself)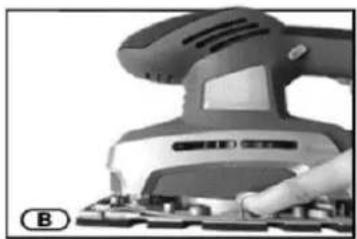
natural_image
Close-up of a hand using a power tool on a workbench, no visible text or symbols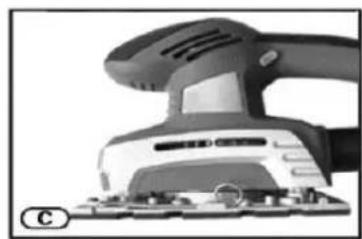
natural_image
Close-up of a power tool with a meshing device (no visible text or symbols)natural_image
Close-up of a mechanical device component with a highlighted slot and a control panel (no text or symbols visible)Sliprörelse
natural_image
Close-up of hands using a power tool on a wooden surface with a warning symbol (no text or symbols present)Byte av slipsula
natural_image
Close-up of hands operating a black mechanical device with a handle and lever (no visible text or symbols)natural_image
Close-up of hands holding a dark rectangular board with multiple holes, labeled 'A' in the corner (no other text or symbols visible)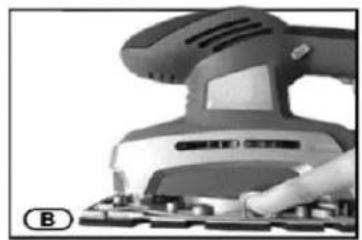
natural_image
Close-up of a hand using a power tool on a workbench (no visible text or symbols)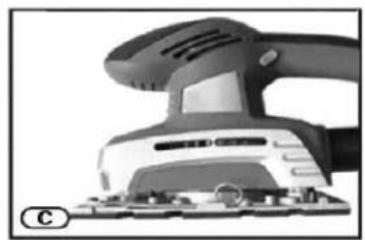
natural_image
Close-up of a mechanical power shaver with no visible text or symbolsSlipepapir med borrelåsfeste (189 x 92 mm)
natural_image
Close-up of a mechanical device with a striped component inserted, next to a control panel (no visible text or symbols)Slipebevegelse
natural_image
Close-up of hands using a power tool on a wooden surface with a warning symbol (no text or symbols present)natural_image
Close-up of a hand holding a black mechanical device with a tool, no visible text or symbolsnatural_image
Two hands holding a dark rectangular plate with eight circular holes, labeled 'A' in the corner (no text or symbols on the plate itself)
natural_image
Close-up of a hand using a power tool on a workbench, no visible text or symbols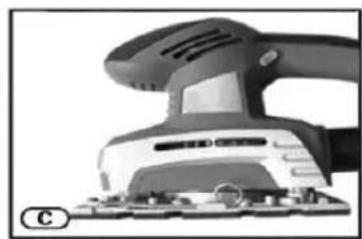
natural_image
Close-up of a power tool with a meshing device and mounting base (no visible text or symbols)natural_image
Close-up of a mechanical device with a striped component inserted, next to a control panel (no visible text or symbols)Szlifowanie
natural_image
Close-up of hands using a power tool on a wooden board with a warning symbol (no text or symbols present)Wymiana tarczy
WARNING! Read all safety warnings and all instructions. Failure to follow the warnings and instructions may result in electric shock, fire and/or serious injury. Save all warnings and instructions for future reference. The term "power tool" in the warnings refers to your mains-operated (corded) power tool or battery-operated (cordless) power tool.
Work area safety
- Keep work area clean and well lit. Cluttered or dark areas invite accidents.
- Do not operate power tools in explosive atmospheres, such as in the presence of flammable liquids, gases or dust. Power tools create sparks which may ignite the dust or fumes.
- Keep children and bystanders away while operating a power tool. Distractions can cause you to lose control.
Electrical safety
- Power tool plugs must match the outlet. Never modify the plug in any way. Do not use any adapter plugs with earthed (grounded) power tools. Unmodified plugs and matching outlets will reduce risk of electric shock.
- Avoid body contact with earthed or grounded surfaces, such as pipes, radiators, ranges and refrigerators. There is an increased risk of electric shock if your body is earthed or grounded.
- Do not expose power tools to rain or wet conditions. Water entering a power tool will increase the risk of electric shock.
- Do not abuse the cord. Never use the cord for carrying, pulling or unplugging the power tool. Keep cord away from heat, oil, sharp edges or moving parts. Damaged or entangled cords increase the risk of electric shock.
- When operating a power tool outdoors, use an extension cord suitable for outdoor use. Use of a cord suitable for outdoor use reduces the risk of electric shock.
- If operating a power tool in a damp location is unavoidable, use a residual current device (RCD) protected supply. Use of an RCD reduces the risk of electric shock.
Personal safety
- Stay alert, watch what you are doing and use common sense when operating a power tool. Do not use a power tool while you are tired or under the influence of drugs, alcohol or medication. A moment of inattention while operating power tools may result in serious personal injury.
- Use personal protective equipment. Always wear eye protection. Protective equipment such as dust mask, non-skid safety shoes, hard hat, or hearing protection used for appropriate conditions will reduce personal injuries.
- Prevent unintentional starting. Ensure the switch is in the off-position before connecting to power source and/or battery pack, picking up or carrying the tool. Carrying power tools with your finger on the switch or energising power tools that have the switch on invites accidents.
- Remove any adjusting key or wrench before turning the power tool on. A wrench or a key left attached to a rotating part of the power tool may result in personal injury.
- Do not overreach. Keep proper footing and balance at all times. This enables better control of the power tool in unexpected situations.
- Dress properly. Do not wear loose clothing or jewellery. Keep your hair, clothing and gloves away from moving parts. Loose clothes, jewellery or long hair can be caught in moving parts.
- If devices are provided for the connection of dust extraction and collection facilities, ensure these are connected and properly used. Use of dust collection can reduce dust-related hazards.
Power tool use and care
- Do not force the power tool. Use the correct power tool for your application. The correct power tool will do the job better and safer at the rate for which it was designed.
- Do not use the power tool if the switch does not turn it on and off. Any controlled with the switch is dangerous and must be repaired.
- Disconnect the plug from the power source and/or the battery pack from the power tool before making any adjustments, changing accessories, or storing power tools. Such preventive safety measures reduce the risk of starting the power tool accidentally.
- Store idle power tools out of the reach of children and do not allow persons unfamiliar with the power tool or these instructions to operate the power tool. Power tools are dangerous in the hands of untrained users.
- Maintain power tools. Check for misalignment or binding of moving parts, breakage of parts and any other condition that may affect the power tool's operation. If damaged, have the power tool repaired before use. Many accidents are caused by poorly maintained power tools.
- Keep cutting tools sharp and clean. Properly maintained cutting tools with sharp cutting edges are less likely to bind and are easier to control.
- Use the power tool, accessories and tool bits etc. in accordance with these instructions, taking into account the working conditions and the work to be performed. Use of the power tool for operations different from those intended could result in a hazardous situation.
Service
- Have your power tools serviced by a qualified repair person using only identical replacement parts. This will ensure that safety of the power tool is maintained.
Sanders and polishers safety warnings
- Hold power tool by insulated gripping surfaces, because the belt may contact its own cord.
Special safety instructions
- Only use the tool for dry sanding.
- Sanding dust can be a health hazard. Always use a dust extractor if possible. Always wear a dust filter mask.
- Wear safety glasses as protection from sparks and particles.
NOTE
- Do not throw sanding dust into an open fire – risk of explosion.
- Sparks can cause burn injuries. Do not use in the vicinity of flammable materials.
- Never work on material that contains asbestos.
- Do not use accessories with Velcro fasteners.
• The dust extraction openings in the sanding paper must match the openings in the sanding pad. - Do not press the tool too hard when working.
- A damaged cord must be replaced by an authorised service centre or qualified person to ensure safe use.
- The tool is only intended for dry sanding. With the proper accessories the tool can be used to clean, grind and polish smooth an curved surfaces on wood, metal and minerals. Only use the tool and its accessories in the way they are intended to be used. All other use is expressly prohibited.
- The tool is only intended for domestic use.
Symbols

Read these instructions carefully before use.

Wear ear protection.

Wear safety glasses and a dust mask.
TECHNICAL DATA
| Rated voltage | 230 V ~ 50 Hz |
| Nominal input power | 220 W |
| Nominal speed, no-load | 11000 rpm |
| Dimensions, sanding pad | 187 x 90 mm |
| Sound pressure level, LpA: | 83 dB (A), K = 3 dB |
| Sound power level, LwA: | 94 dB (A), K = 3 dB |
| Vibration level: | 6.7 m/s ^2 , K = 1.5 m/s ^2 |
| Safety class | II |
Always wear ear protection
The declared vibration value, which has been measured by a standardised test method, can be used to compare different tools with each other and for a preliminary assessment of exposure.
WARNING
The actual vibration level when using power tools may differ from the specified maximum value, depending on how the tool is used. It is therefore necessary to determine which safety precautions are required to protect the user, based on an estimate of exposure in actual operating conditions (taking into account all stages of the work cycle, e.g. the time when the tool is switched off and when it is idling, in addition to the start-up time).
DESCRIPTION
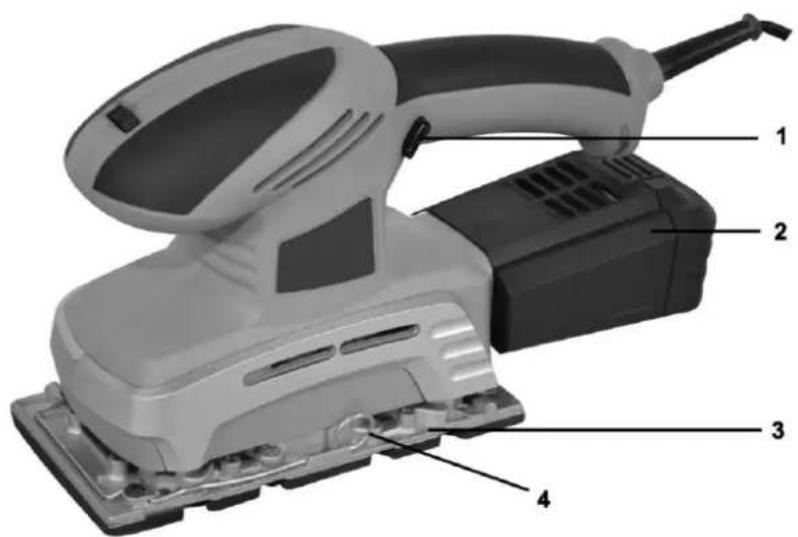
- Power switch
- Dust collection box
- Sanding pad
- Clip for sandpaper
USE
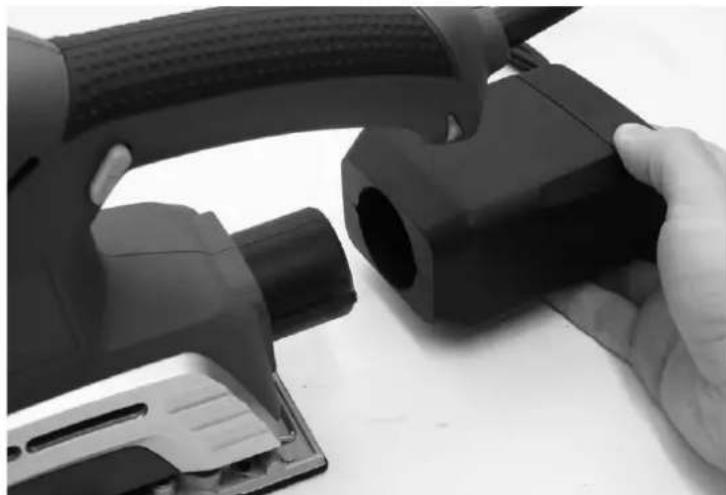
Fitting the dust collector
natural_image
Close-up of hands operating a black mechanical device with a handle and lever (no visible text or symbols)The tool is intended for dry sanding of wood, plastic, filler, and painted surfaces.
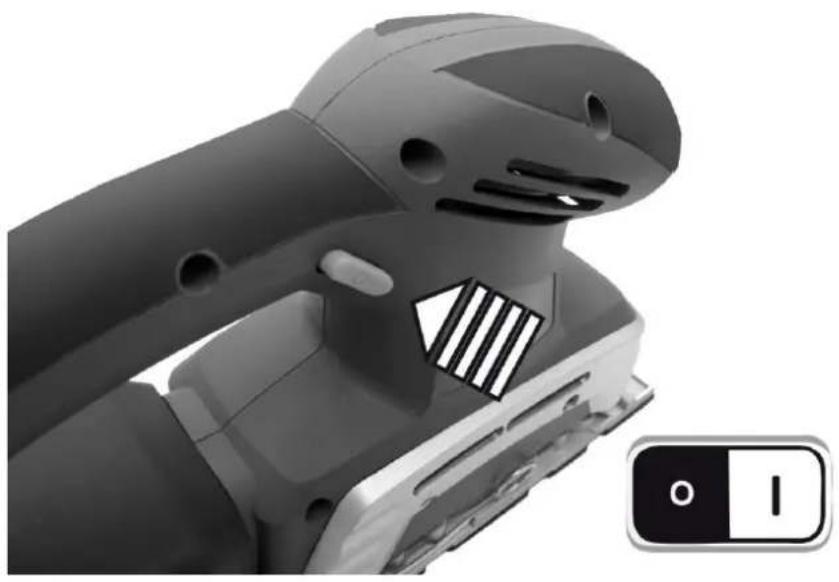
- Press the power switch to start the tool, and release to stop.
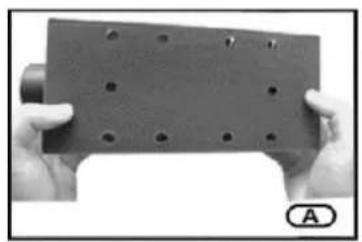
Fitting sandpaper (fig. A, B, C)
- Lift up the sandpaper clips and insert the sandpaper under them. Fold down the clips.
natural_image
Two hands holding a dark rectangular plate with eight circular holes, labeled 'A' in the corner (no text or symbols on the plate itself)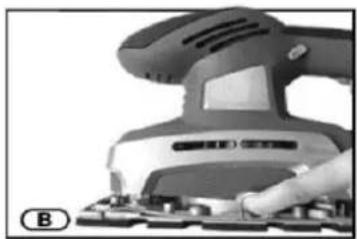
natural_image
Close-up of a hand using a power tool on a workbench, no visible text or symbols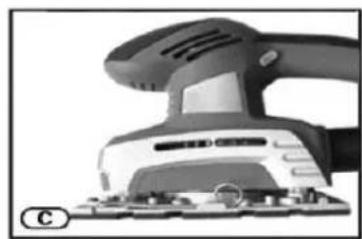
natural_image
Close-up of a power tool with a meshing device (no visible text or symbols)Sandpaper with Velcro fastener (189 x 92 mm)
The sandpaper is held in place with Velcro fasteners to simplify changing.
- Just pull off the sandpaper.
- Press the new sandpaper firmly in the middle of the sanding pad.
Universal sandpaper (240 x 92 mm)
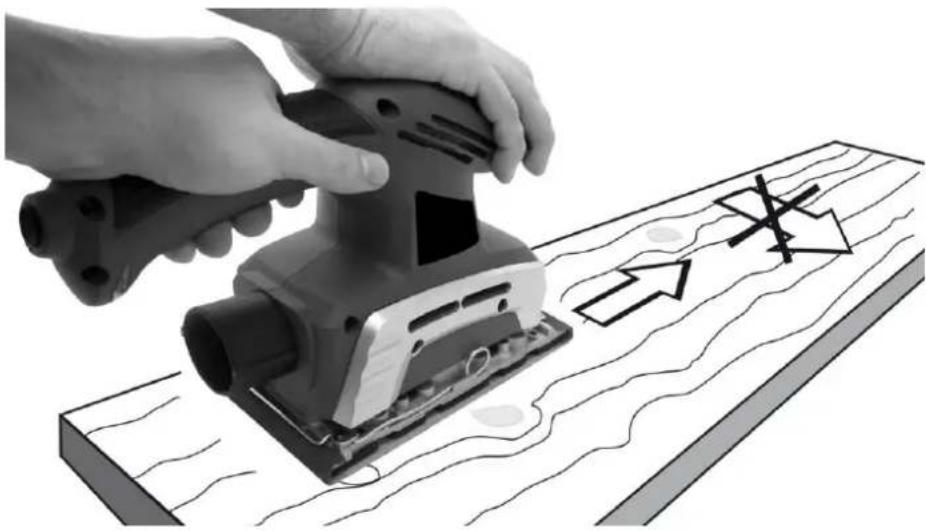
The tool has a rectangular sanding pad. The sandpaper should be stretched tight for best results.
- Fold up the sandpaper clip (4).
- Insert the sandpaper under the clip. Place the sandpaper with the dust extraction holes over the holes in the sanding pad.
- Fold down the clip.
- Repeat on the other end of the pad.
- The sandpaper should be stretched as tightly as possible.
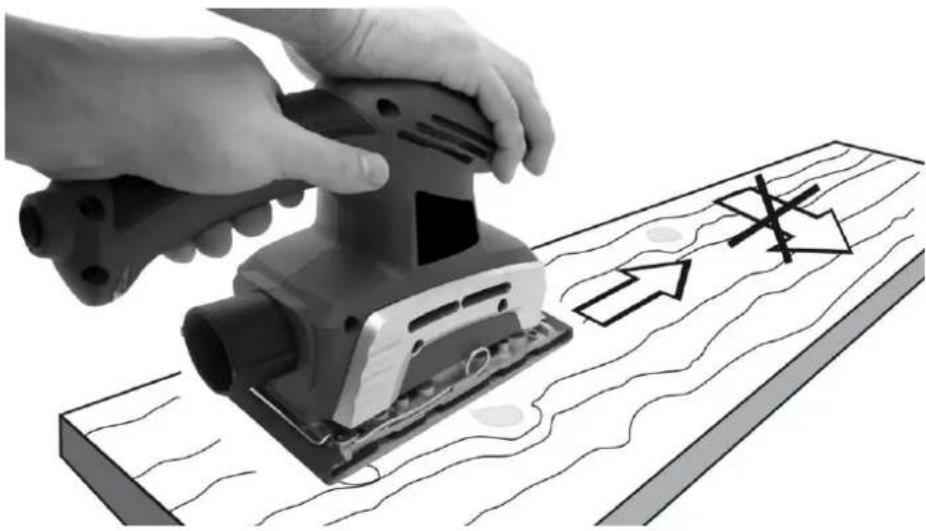
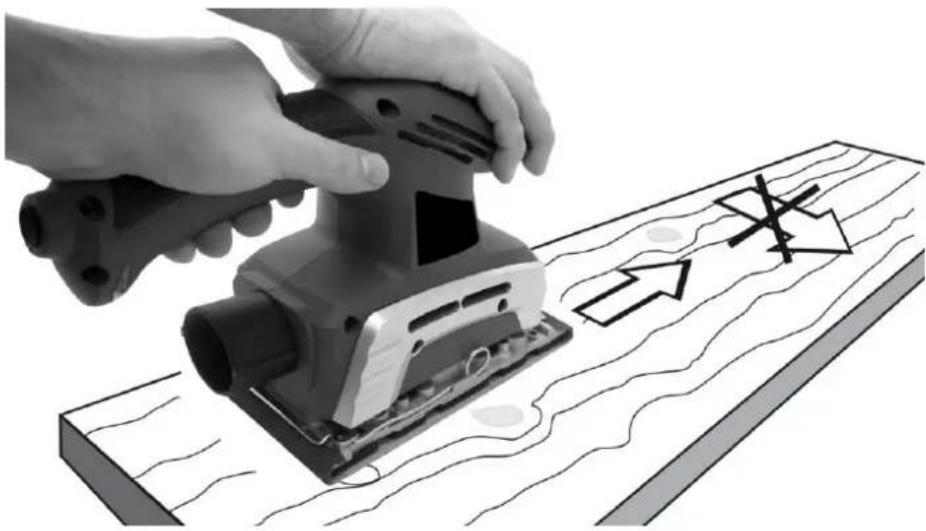
Coarse sandpaper (coarseness 50) is used for rough work, and fine sandpaper (coarseness 120) for fine finishing. It is usually best to start with coarse sandpaper and then use finer and finer sandpaper.
Starting
- Press the power switch to start.
natural_image
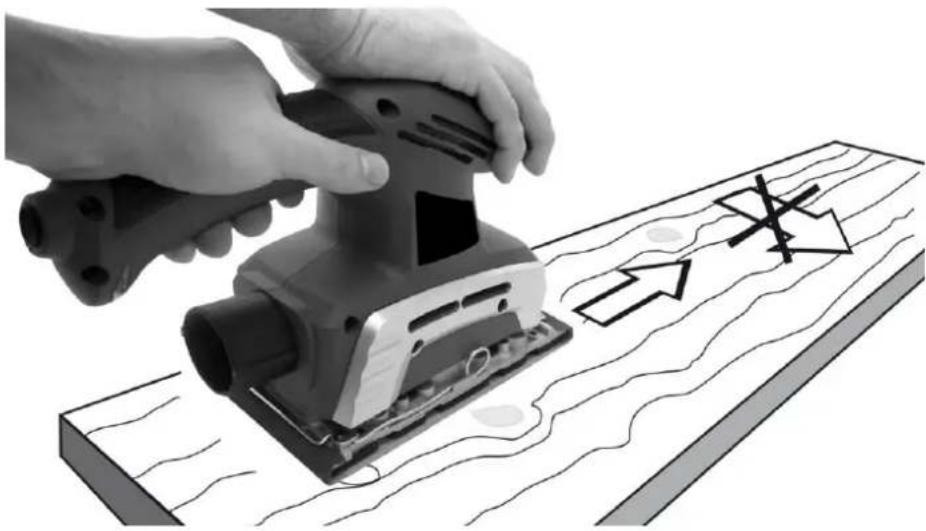
Close-up of a robotic device with a striped handle and control panel (no visible text or symbols)Sanding action
natural_image
Close-up of hands using a power tool on a wooden surface with a warning symbol (no text or symbols present)Replacing the sanding pad
The sanding pad should be replaced when the Velcro fastening is worn. Switch off the tool and unplug the power cord before replacing the sanding pad.
- Remove the sandpaper from the pad.
- Undo the screws that hold the sanding pad in place.
- Remove the pad.
• Fit the new sanding pad. - Tighten the screws.
NOTE: Do not press the tool too hard. Pressing harder will not speed up the work, but will put more strain on the tool and the sandpaper.
Handle
- The tool has two handles, one at the front and one at the back. Always use both hands to grip the handles when using the tool.
TIPS
• Work with a long, smooth action for best results.
- The coarseness of the sandpaper determines the surface fineness.
MAINTENANCE
- Keep the tool clean.
- Do not use corrosive detergents.
- Check the carbon brushes in the event of heavy sparking.
- Keep the dust extraction holes in the pad clean.
- Do not expose the tool to water or any other liquid.
- Do not sand plaster, it can damage the tool.
Jula reserves the right to make changes. In the event of problems, please contact our service department.
www.jula.com
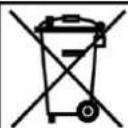

Care for the environment!
Must not be discarded with household waste!
This product contains electrical or electronic
components that should be recycled.
Leave the product for recycling at the designated
station e.g. the local authority's recycling station.
CE
EC DECLARATION OF CONFORMITY EG FÖRSÄKRAN OM ÖVERENSSTÄMMELSE EF SAMSVARSERKLÆRING DEKLARACJA ZGODNOŚCI WE

Jula AB, Box 363, SE-532 24 SKARA, SWEDEN
RoHS Directive 2011/65/EU
This product was CE marked in year -11
- Operating Instructions for Orbital Sander
- SÄKERHETSANVISNINGAR....4
- SÄKERHETSANVISNINGAR
- ALLMÄNNA SÄKERHETSFÖRESKRIFTER FÖR ELVERKTYG
- Sliprörelse
- Byte av slipsula
- Slipepapir med borrelåsfeste (189 x 92 mm)
- Slipebevegelse
- Szlifowanie
- Wymiana tarczy
- Work area safety
- Electrical safety
- Personal safety
- Power tool use and care
- Service
- Sanders and polishers safety warnings
- Special safety instructions
- NOTE
- Symbols
- Always wear ear protection
- WARNING
- DESCRIPTION
- USE
- Fitting the dust collector
- Fitting sandpaper (fig. A, B, C)
- Sandpaper with Velcro fastener (189 x 92 mm)
- Universal sandpaper (240 x 92 mm)
- Starting
- Sanding action
- Replacing the sanding pad
- Handle
- TIPS
- MAINTENANCE
- Care for the environment!
- CE
- EC DECLARATION OF CONFORMITY EG FÖRSÄKRAN OM ÖVERENSSTÄMMELSE EF SAMSVARSERKLÆRING DEKLARACJA ZGODNOŚCI WE
Brand : Meec Tools
Model : 010-069
Category : Orbital sander