
ME 3236 - Weather Station GoGen - Free user manual and instructions
Find the device manual for free ME 3236 GoGen in PDF.


| Product Type | Weather Station |
| Brand | GoGen |
| Model | ME 3236 |
| Dimensions (Main Unit) | 150 x 100 x 200 mm |
| Weight (Main Unit) | Approx. 500 g |
| Power Supply | 2 x AA batteries (not included), or USB cable |
| Display Type | Liquid Crystal Display (LCD) |
| Measuring Functions | Indoor/outdoor temperature & humidity, barometric pressure, weather forecast, time & date, alarm |
| Temperature Range (Indoor) | 0°C to 50°C (32°F to 122°F) |
| Temperature Range (Outdoor) | -20°C to 60°C (-4°F to 140°F) |
| Humidity Range | 20% to 95% |
| Barometric Pressure Range | 300 to 1100 hPa |
| Wireless Range (Outdoor Sensor) | Up to 100 m (open area) |
| Number of Outdoor Sensors Supported | Up to 3 |
| Clock | Radio-controlled DCF77 or manual setting |
| Alarm | Snooze function, programmable daily alarm |
| Backlight | Blue LED backlight with auto-off |
| Weather Forecast | Sunny, partly cloudy, cloudy, rainy, stormy |
| Data Logging | Records min/max values |
| Maintenance | Clean with a soft, dry cloth. Avoid solvents. |
| Safety | Indoor use only. Keep away from water and heat sources. |
| Spare Parts & Repairability | Replacement sensors available. Device is not user-serviceable; contact support for repairs. |
| General Information | User manual available for download in PDF. |
Frequently Asked Questions - ME 3236 GoGen
User questions about ME 3236 GoGen
0 question about this device. Answer the ones you know or ask your own.
Ask a new question about this device
Download the instructions for your Weather Station in PDF format for free! Find your manual ME 3236 - GoGen and take your electronic device back in hand. On this page are published all the documents necessary for the use of your device. ME 3236 by GoGen.
USER MANUAL ME 3236 GoGen
WARTOŚCI MAKSYMALNE I MINIMALNE
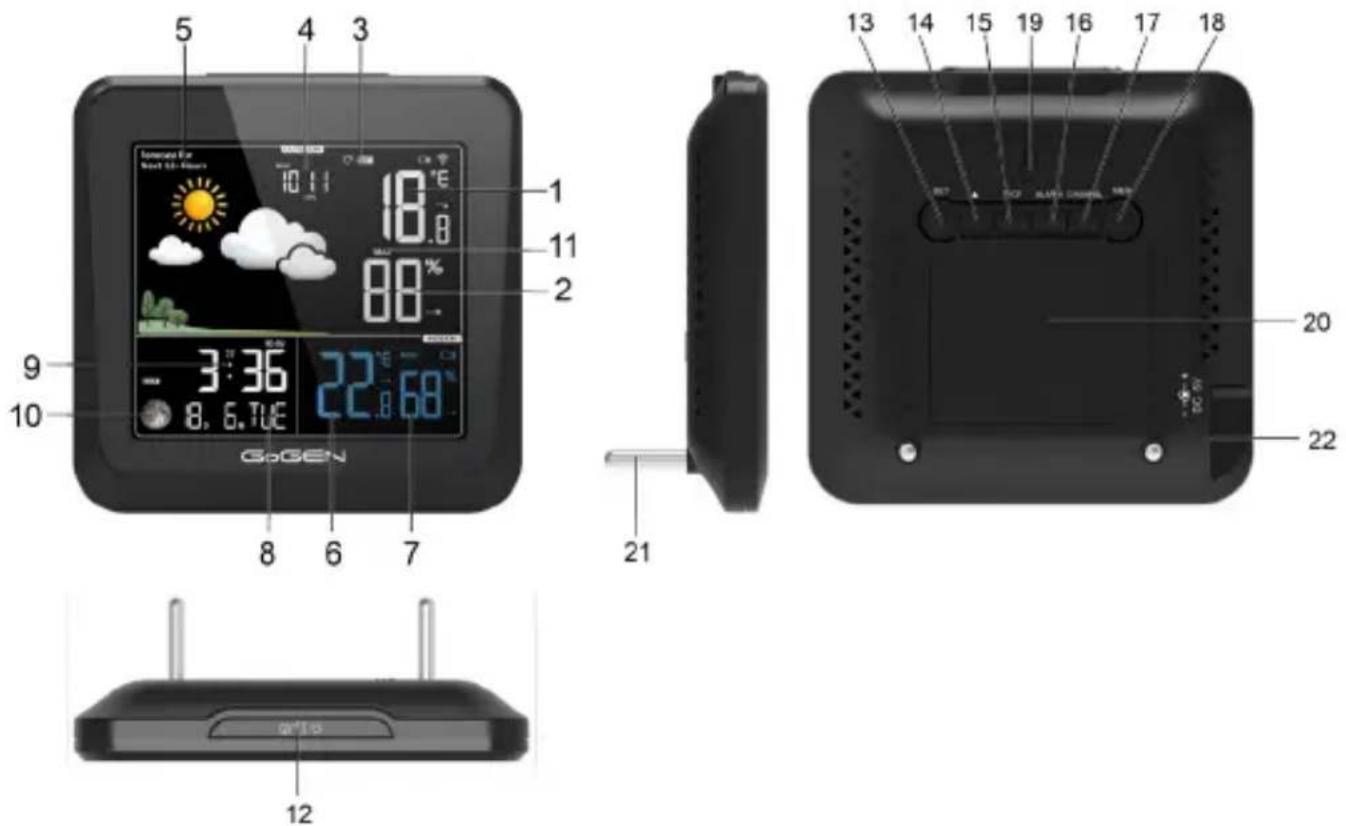
- Current outdoor temperature - Arrow icon indicates the direction temperature is trending.
- Current outdoor humidity - Arrow icon indicates the direction humidity is trending.
- Outdoor sensor channel - Switch channel from CH1--CH2--CH3
- Barometric Pressure - Barometer display in hPa or mmHg
- Weather forecast - Weather forecast for next 12-24 hours
- Current indoor temperature - Arrow icon indicates the direction temperature is trending.
- Current indoor humidity - Arrow icon indicates the direction humidity is trending.
- Calendar display - Weekdays in 5 languages
- Current time - 12/24 hour format selectable
- Moon Phase - Moon phase will change automatically with above time setting
- Max/min records for temperature and humidity - Max/min temperature & humidity records will update each 24 hour and recorded from midnight
- Backlight/Snooze button
- "SET" button - Enter into time setting
- “▲” button - Increase the data
- “▼/CF” button - Switch C/F and decrease the data
- "ALARM" button - Check alarm time, Turn on/off alarm, enter into alarm setting
- "CHANNEL" button - Switch channel
- "MEM" button - Check Max/min record
- Hanging Hole
- Battery Compartment
- Metal Stand Bracket
- DC Hole
OUTDOOR SENSOR
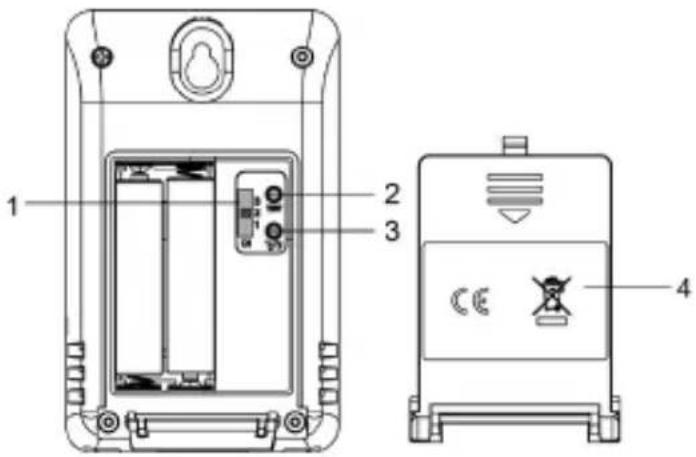
- Channel 1-2-3 switch - Main unit's channel must match the sensor's 1-2-3 switch to ensure synchronization
- Test - Press the TEST button to quickly pair with the main unit which has been powered on and still within 3 minutes' signal receiving mode
- C/F Switch - Switch between Celsius and Fahrenheit
- Battery compartment Cover
FEATURES
• Measures indoor and outdoor temperature(C/F) and humidity
- Indoor temperature range: -10^ 50^
• Outdoor temperature range: -20°C \~ 65°C
- Indoor and outdoor humidity range: 1% 99%
• Max/min record of temperature & humidity (in and out)
• Weather forecast for next 12-24 hours with barometer
• Calendar function with moon phase
• Alarm and snooze function
• Radio Controlled Time DCF77 (77,5 kHz), Time display in 12/24H
• Weekdays in 5 languages: GER (German), ENG (English), FRE (French), ITA (Italian), SPA (Spanish)
• Temperature tendency display in arrows
- RF sensor 433,92 MHz (ERP = 2,013 mW) outdoor temperature and humidity display, up to 3 outdoor sensors' receivable
- White backlight with dimmer
GETTING STARTED
We recommended high quality alkaline or lithium batteries for the best product performance.
Heavy duty or rechargeable batteries are not recommended.
SENSOR INSTALLATION
Remove the battery compartment cover. Insert 2 x AAA batteries matching the polarity (+ and -).
MAIN UNIT INSTALLATION
Powered by batteries: Remove the battery compartment cover. Insert 3 x AAA batteries matching the polarity (+ and -).
Powered by AC Adaptor: Connect the power adaptor with DC hole on back of the main unit and plug the adaptor to a powered outlet.
METAL STAND INSTALLATION
Take the metal stands out of the compartment and install them on the back of the unit.
SENSOR SETUP
Load the battery of the sensor prior to the power on of main unit. Press the C/F button to Switch between Celsius and Fahrenheit. Switch the Channel 1-2-3 of the sensor to any channel you want. For example, you can set to Channel 1 for the sensor. But please ensure the main unit are set to the same channel before synchronization. Auto synchronization: after power on both units, the receiving status will last for max 3 minutes, the receiving antenna signal will flash, if no signal received in 3 minutes, the antenna signal will disappear and stop receiving outdoor signal. Manual synchronization: after power on both units, press the TEST button to quickly pair with main unit.
MAIN UNIT SETUP
SET THE TIME&DATE
- After power on or reset, after testing temperature and humidity start receiving DCF77 signal for 3 minutes automatically.
- Press and hold “▼/CF” key for 2 seconds to enter into DCF77 receiving.
When the clock is searching signal, icon will be flashing. After signal successfully received, LCD will display completed icon When receive DST, the DST symbol DST will display on the LCD screen.
- Press and hold "SET" button to enter into time setting; the setting data will be flashing in 1Hz.
- The setting order is: Hour ^1 Minute → Year → MD/DM → Month → Date → Barometer unit → Barometer calibration → Language → 12/24H → Key tone OFF/ON → Time zone → Exit.
- Press “▼/CF” or “▲” button to adjust data; press and hold “▼/CF” or “▲” button will quickly change the data by 8 steps.
• There are 5 languages selectable for weekday display: FRE, SPA, ENG, GER, IT
| Language | German English French Italian Spanish | ||||
| GER ENG FRE ITA SPA | |||||
| Sunday | SON SUN DIM DOM DOM | ||||
| Monday | MON MON LUN LUN LUN | ||||
| Tuesday | DIE | TUE MAR | MAR | MAR | |
| Wednesday | MIT WED MER MER MIE | ||||
| Thursday | DON THU JEU | GIO | JUE | ||
| Friday | FRE | FRI | VEN VEN | VIE | |
| Saturday | SAM SAT SAM SAB SAB | ||||
- If no operation for 20 seconds, it will automatically save and exit setting.
ALARM FUNCTION
- Press and hold "ALARM" button to enter into alarm time setting mode.
- Press “▼/CF” or “▲” button to adjust data; press and hold “▼/CF” or “▲” button will quickly change the data by 8 steps.
- The setting order is: Hour → Minute → Mo-Su/Mo-Fr → Exit. (Alarm date selectable: Monday to Sunday / Monday to Friday)
- If no operation for 20 seconds, it will automatically save and exit setting.
- The alarm is default ON after setting the alarm time.
TURN ON/OFF ALARM
- When in time display mode, press "ALARM" button once to check alarm time. Press "ALARM" button second time to turn on/off alarm by the ON/OFF of symbol 📋To return to normal mode press the „SET" button. If on operation for 20 seconds, it will automatically return to current time display.
- When in alarm display mode, press the "ALARM" button to turn on/off the alarm by the ON/OFF of symbol 📋To return to normal mode, press the „SET“ button. If on operation for 20 seconds, it will automatically return to current time display.
SNOOZE FUNCTION
- When the alarm is ringing, press any other button except top button to stop the alarm. And the alarm will restart next day.
- OR When alarm is ringing, press "SNOOZE/LIGHT" button to activate snooze function. And the alarm will repeat in each 5 minutes. Press any other button except top button to exit the snooze mode and the alarm will restart next day.
- When alarm rings, the ascending "Bibi" alarm sound will last for 2 minutes if no operation.
PLACEMENT INSTRUCTION
Sensors are sensitive to surrounding environmental conditions. Proper placement of both the main unit and outdoor sensor are critical to the accuracy and performance of this product.
MAIN UNIT PLACEMENT
Place main unit in a dry area free of dirt and dust. To help ensure an accurate indoor temperature measurement, be sure to place the Main unit away from heat sources or vents.
OUTDOOR SENSOR PLACEMENT
Sensor must be placed outside to observe outdoor conditions. Sensor is water resistant for water splashes and is designed for general outdoor use, however, to extend its life place the sensor in an area protected from direct weather elements. The best location is 1,2 to 2,4 meters above the ground with permanent shade and plenty of fresh air to circulate around the sensor.
IMPORTANT PLACEMENT GUIDELINES
- The distance between main unit and transmitter should be at least 1,5 \~ 2 meters away from any interfering sources such as computer monitors or TV sets.
- To maximize wireless range, place units away from large metallic items, thick walls, metal surfaces, or other objects that may limit wireless communication
- Please do not use other electrical products such as headphones or speakers operating on the same signal frequency.
- Neighbors using electrical devices operating on the same signal frequency can also cause interference.
SETUP IS COMPLETE
The sensor will now synchronize with the main unit. It may take a few minutes for synchronization to complete.
OPERATION GUIDELINE
- Indoor temperature display range: -10^ 50^ . Outdoor temperature range: -20^ 65^ , LL.L or HH.H will display when out of range.
- Indoor and outdoor humidity range: 1% 99% , LL or HH will display when out of range.
- Accuracy: For temperature between 10^ C \~ 30^ C, the accuracy is ±1^ C if out of this range the accuracy will be ±1.5^ C; For humidity between 40 \~ 70% RH, the accuracy is ±5% RH, if out of this range, the accuracy will be ±8% RH.
Arrow indication for temperature changes:
→ will display when temperature changes less than 1^ C within one hour or compared with last reading.
will display when the reading increase by 1^ C within one hour or compared with last reading.
will display when the reading decrease by 1^ C within one hour or compared with last reading.
Arrow indication for humidity changes:
→ will display when humidity changes less than 3% RH within one hour or compared with last reading.
will display when the reading increase by 3% RH within one hour or compared with last reading.
will display when the reading decrease by 3% RH within one hour or compared with last reading.
MAX AND MIN RECORD
- Press "MEM" to have maximum temperature and humidity, the value will display for 5 seconds.
- Press “MEM” second time to have the minimum temperature and humidity, the value will display for 5 seconds.
- Press "MEM" third time will return to standard mode.
- Press and hold "MEM" will clear the max and min record and reactivate the memory.
- Normally, the Max and Min record will update every 24 hours at 0:00.
BAROMETER &WEATHER FORECAST
- The weather forecast icon will show after power on. There are 5 kinds of weather modes: Sunny, Sunny to Cloudy, Cloudy, Rainy, Stormy. The weather icon displays are based on the hourly calculation of indoor/outdoor temperature & humidity and barometer data. The forecast station uses changing atmospheric pressure to predict weather conditions for the next 12-hours with 70 \~ 75% accuracy.
- Barometer range: 800 hPa \~ 1100 hPa (600 mmHg \~ 825 mmHg).
BACKLIGHT FUNCTION
- When powered by batteries, press „SNOOZE/LIGHT“ button to turn on the backlight. The backlight will last 10 seconds.
- For continuous backlight, please connect the power adaptor.
- Press „SNOOZE/LOGHT“ button to switch backlight brightness among 100%, 50% and off.
MOON PHASE
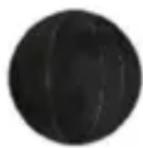
NEW
MOON
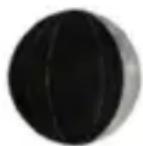
WAXING
CRESCENT
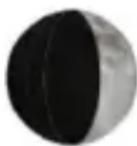
FIRST
QUARTER
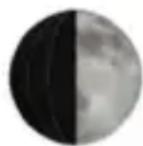
FULL
MOON

LAST
QUARTER
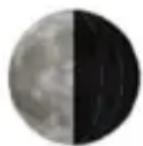
WANING
CRESCENT
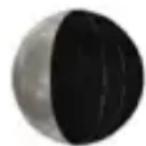
PRECAUTIONS
- Do not clean any part of the product with benzene, thinner or other solvent chemicals. When necessary, clean it with a soft cloth.
- Never immerse the product in water. This can cause electrical shock and damage the product.
- Do not subject the product to extreme force, shock, or fluctuations in temperature or humidity.
- Do not tamper with the internal components.
- Do not mix new and old batteries od different types.
- Do not mix alkaline, standard or rechargeable batteries with this product. Remove the batteries if storing this product for a long period of time.
TROUBLE SHOOTING
| Problem Possible | Solution |
| Outdoor reading is flashing or showing dashes | Flashing of the outdoor reading is generally an indication of wireless interference.Bring both the sensor and display indoors, side by side and remove batteries from each.Make sure the 1-2-3 switch on both units match.Reload batteries in outdoor sensor.Reload batteries in main unit.Let both units sit within a couple feet of each other for a few minutes to gain a strong connection before taking sensor to outdoor area. |
| No outdoor sensor reception | Reload the batteries of both outdoor sensor and main unit. Please refer to the SENSOR SETUP section.Relocate the main unit and/or the outdoor sensor. The units must be within 30 m of each other.Make sure both units are placed at least 0,9 m away from electronics that may interfere with the wireless communication (such as TVs, microwaves, computers, etc).Use standard alkaline batteries. Do not use heavy duty or rechargeable batteries. NOTE: It may take a few minutes for main unit and sensor to synchronize after batteries are reloaded. |
| Inaccurate temperature/humidity | Make sure both the main unit and sensor are placed out of direct sunlight and away from any heat sources or vents. |
| “HH/LL” display in indoor and/or outdoor temperature and humidity | If the temperature and humidity is higher than the detection range, HH will display on screen for indication; if lower than the detection range, LL will display on screen for indication. |
WE RESERVE THE RIGHT TO CHANGE TECHNICAL SPECIFICATIONS.
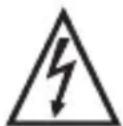
WARNING: DO NOT USE THIS PRODUCT NEAR WATER, IN WET AREAS TO AVOID FIRE OR INJURY OF ELECTRIC CURRENT. ALWAYS TURN OFF THE PRODUCT WHEN YOU DON'T USE IT OR BEFORE A REVISION. THERE AREN'T ANY PARTS IN THIS APPLIANCE WHICH ARE REPARABLE BY CONSUMER. ALWAYS APPEAL TO A QUALIFIED AUTHORIZED SERVICE. THE PRODUCT IS UNDER A DANGEROUS TENTION.


TO AVOID DANGER OF SUFFOCATION, KEEP THE PLASTIC BAG AWAY FROM BABIES AND CHILDREN. DO NOT USE THIS BAG IN CRIBS, BEDS, CARRIAGES OR PLAYPENS. THIS BAG IS NOT A TOY.
Disposal of old Electrical & Electronic Equipment (Applicable in the European Union and other European countries with separate collection systems)
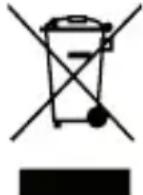
This symbol on the product or on its packaging indicates that this product shall not be treated as household waste. Instead it shall be handed over to the applicable collection point for the recycling of electrical and electronic equipment. By ensuring this product is disposed of correctly, you will help prevent potential negative consequences for the environment and human health, which could otherwise be caused by inappropriate waste handling of this product. The recycling of materials will help to conserve natural resources. For more detailed information about recycling of this product, please contact your local Civic Office, your household waste disposal service or the shop where you purchased the product.
Hereby, ETA a.s. declares that the radio equipment type ME3236 is in compliance with Directive 2014/53/EU.
The full text of the EU declaration of conformity is available at the following internet address:
http://www.gogen.cz/declaration_of_conformity
KÉSZÜLÉK LEÍRÁSA
FÖ EGYSÉG
| EN - English | ||
| Charging adapter | ||
| A | Manufacturer's name or trademark, business registration number and address | HUAXU ELECTRONICS FACTORYNo. 1 Shi Tang Bei Street 2, Shi Jie Town, Dong Guan City,523290, Guangdong, China |
| B | Model identifier HX075-0501200-AG-001 | |
| C | Input voltage 100-240 V | |
| D | Input frequency 50/60 Hz | |
| E | Output voltage 5,0 V | |
| F | Output current 1,2 A | |
| G | Output power 6,0 W | |
| H | Average efficiency in active mode 77,63 % | |
| I | Low load efficiency (10%) - | |
| J | Power consumption without load 0,067 W | |
natural_image
Abstract black and white circular logo with stylized white 'S' shape (no text or symbols)
- WARTOŚCI MAKSYMALNE I MINIMALNE
- OUTDOOR SENSOR
- FEATURES
- GETTING STARTED
- SENSOR INSTALLATION
- MAIN UNIT INSTALLATION
- METAL STAND INSTALLATION
- SENSOR SETUP
- MAIN UNIT SETUP
- SET THE TIME&DATE
- ALARM FUNCTION
- TURN ON/OFF ALARM
- SNOOZE FUNCTION
- PLACEMENT INSTRUCTION
- MAIN UNIT PLACEMENT
- OUTDOOR SENSOR PLACEMENT
- IMPORTANT PLACEMENT GUIDELINES
- SETUP IS COMPLETE
- OPERATION GUIDELINE
- MAX AND MIN RECORD
- BAROMETER &WEATHER FORECAST
- BACKLIGHT FUNCTION
- MOON PHASE
- PRECAUTIONS
- TROUBLE SHOOTING
- WE RESERVE THE RIGHT TO CHANGE TECHNICAL SPECIFICATIONS.
- KÉSZÜLÉK LEÍRÁSA
- FÖ EGYSÉG
Brand : GoGen
Model : ME 3236
Category : Weather Station