ME 3257 - Weather Station GoGen - Free user manual and instructions
Find the device manual for free ME 3257 GoGen in PDF.


| Brand | GoGen |
| Model | ME 3257 |
| Product Type | Weather Station |
| Display Type | LCD |
| Indoor Temperature Range | 0°C to 50°C (32°F to 122°F) |
| Outdoor Temperature Range | -20°C to 60°C (-4°F to 140°F) |
| Humidity Range | 20% to 95% RH |
| Barometric Pressure Range | 800 to 1100 hPa |
| Weather Forecast | Sunny, Cloudy, Rainy, Snowy |
| Wireless Sensor Range | Up to 100 meters (open space) |
| Number of Outdoor Sensors | 1 (included) |
| Power Source | 2 x AA batteries (display unit) / 2 x AA batteries (sensor) |
| Battery Life | Up to 12 months |
| Dimensions (Display Unit) | 150 x 100 x 20 mm |
| Weight (Display Unit) | 200 g |
| Dimensions (Sensor) | 60 x 45 x 20 mm |
| Weight (Sensor) | 50 g |
| Color | White / Black |
| Material | Plastic |
| Backlight | Yes |
| Clock Function | Radio-controlled or manual |
| Alarm | Yes |
| Warranty | 1 year |
| Manual Language | English, Czech, Hungarian, Polish, Slovak |
Frequently Asked Questions - ME 3257 GoGen
User questions about ME 3257 GoGen
0 question about this device. Answer the ones you know or ask your own.
Ask a new question about this device
Download the instructions for your Weather Station in PDF format for free! Find your manual ME 3257 - GoGen and take your electronic device back in hand. On this page are published all the documents necessary for the use of your device. ME 3257 by GoGen.
USER MANUAL ME 3257 GoGen
Zobrazenie najvyššej Zobrazenie najnižšej vonkajšej teploty vonkajšej teploty
• Radio Controlled Time DCF77; 77,5 kHz, 12/24 format hour time display
- Dual alarms, Snooze function (snooze interval optional from 3 minutes to 20 minutes, default: 5 minutes)
- ^ C / ^ switch over
- 6 level of weather forecast display
- Indoor temperature range: 0 \~ +50°C, tolerance: ±1°C
- Indoor humidity range: 25% \~ 95% tolerance: ± 5%
- Outdoor temperature range: -35\~60°C, tolerance: ±1°C
- Outdoor humidity range: 25% \~ 95%, tolerance: ± 5%
• Temperature alert for both highest and lowest indoor and outdoor temperature
- RF RF 433,9 MHz (ERP = 0,003 mW) outdoor temperature and humidity display, up to 3 outdoor sensors' receivable
• Built-in barometer
- Comfort level display
- Adjustable backlight (High light, mid-bright, turnoff)
- Backlight function (light on for 8 seconds when powered by batteries)
MAIN UNIT APPEARANCE
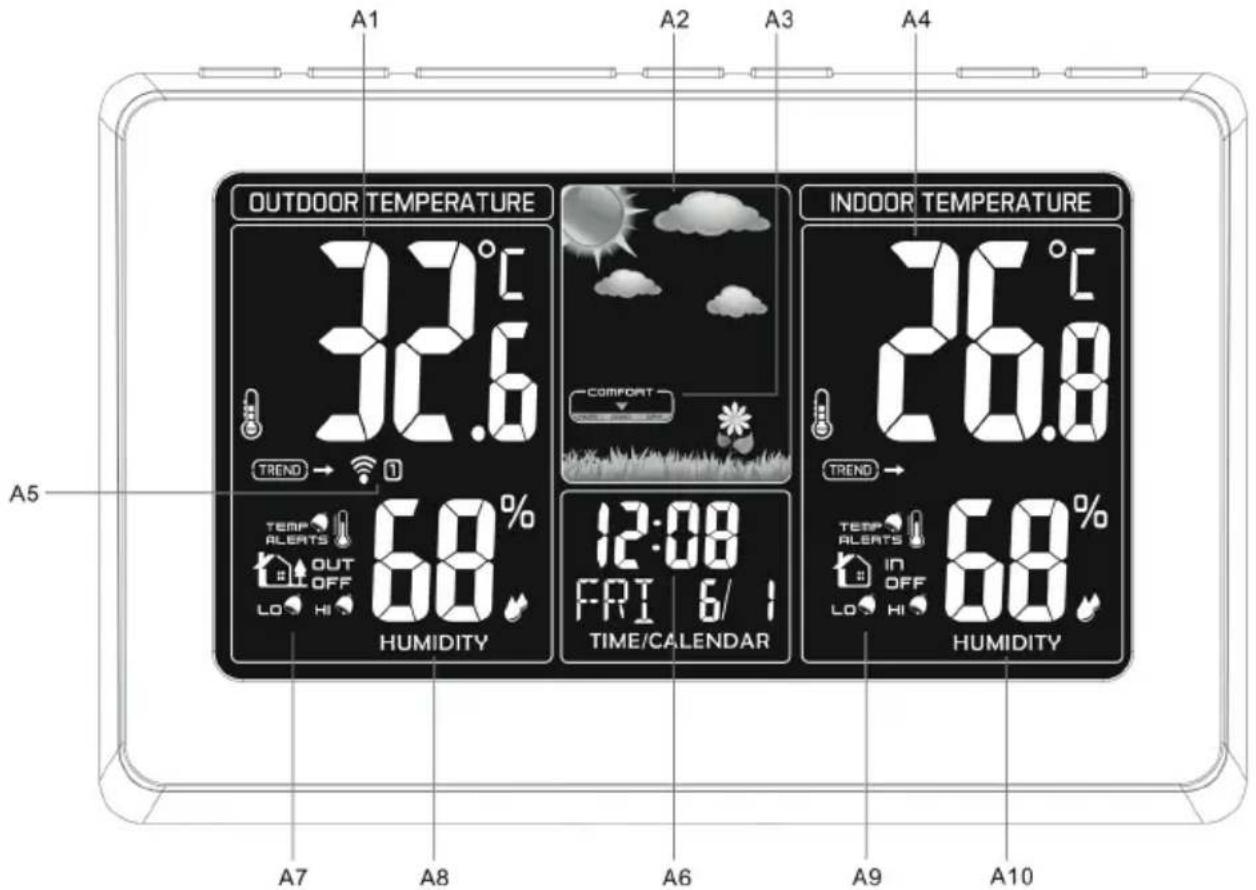
A1 Outdoor temperature A2 Weather forecast
A3 Comfort indicator A4 Indoor temperature
A5 Sensor channel A6 Date / Time
A7 Outdoor temperature alert A8 Outdoor humidity
A9 Indoor temperature alert A10 Indoor humidity
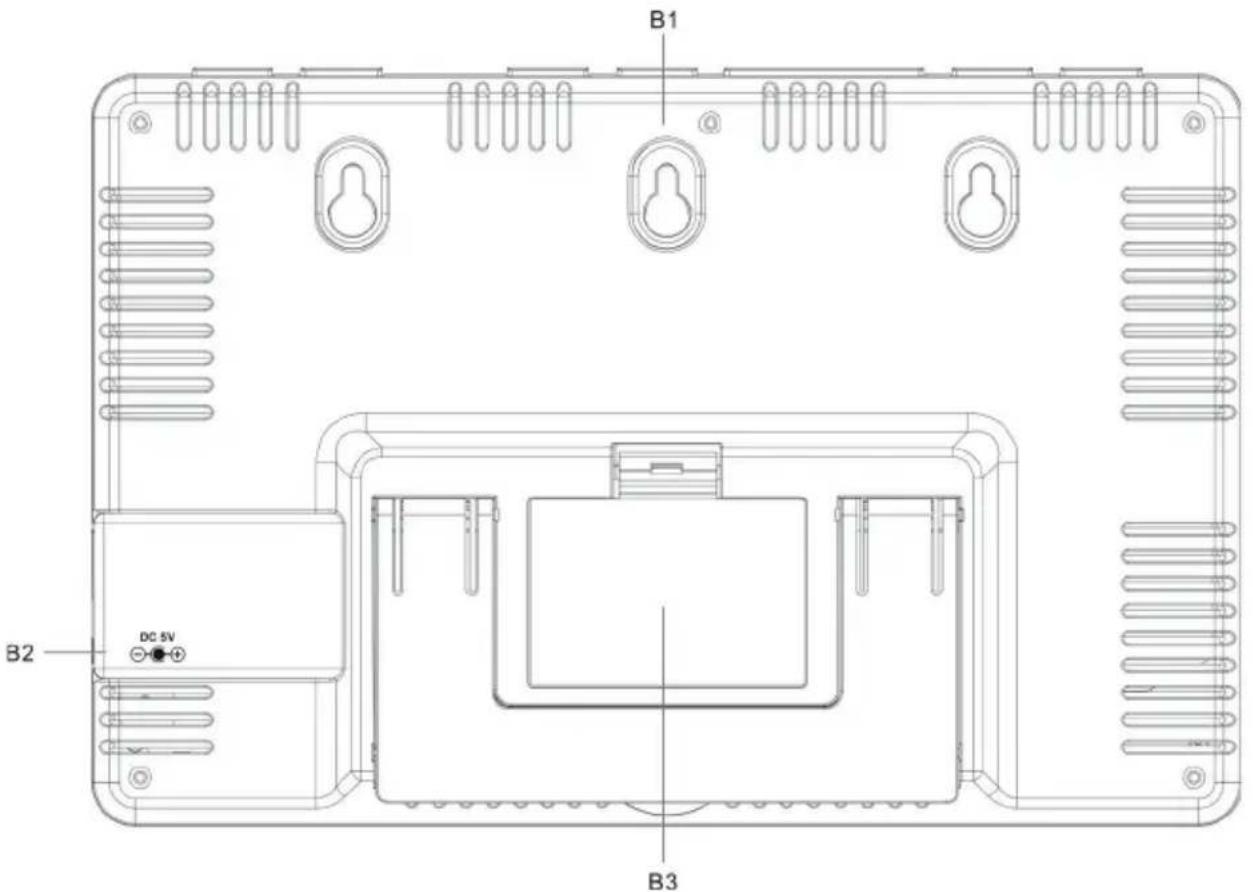
B1 Wall Mount Hole B2 Adaptor Input B3 Battery Cover
KEY FUNCTION

C1 DOWN BUTTON
Under time mode, press "DOWN" key to switch 12/24H display.
Under time, calendar, temperature alert, snooze mode, press "DOWN" key to go back one step, press and hold "DOWN" key for some seconds to go back 8 steps per second.
Under temperature alert mode, press "DOWN" Key to turn alert on/off.
Under normal mode, press "DOWN" key for some seconds to RC Receiving.
Under DCF77 receiving, press "DOWN" key to exit.
C2 MODE BUTTON
Under normal mode, Press “MODE” key to switch the current time→ AL1→ AL2 (cycle display)
Under current time mode, press and hold “MODE” key for 3 seconds to enter setting, the setting in sequence: time zone → hour → minute → year → month → day → week day language → exit
Under AL1 mode, press and hold “MODE” key for 3 seconds to enter alarm 1 setting in sequence: AL1 hour→AL1 minute →exit
Under AL2 mode, press and hold “MODE” key for 3 seconds to enter alarm 2 setting in sequence: AL2 hour→AL2 minute →exit
C3 SNOOZE/LIGHT BUTTON
Under normal mode, press "SNOOZE/LIGHT" key to adjust backlight.
Adjust in sequence when powered by adapter:
Highlight → mid-light → turn off → High light (cycle setting)
Adjust in sequence when powered by batteries:
Highlight→ mid-light → high light (cycle setting)
Under alarm mode and normal mode, press “SNOOZE/LIGHT” key for some seconds to enter snooze interval setting, default interval 5 minutes, optional setting from 3 minutes to 20 minutes. When alarm is up, press “SNOOZE/LIGHT” key to turn on snooze.
C4 CHANNEL BUTTON
Under normal mode, press "CHANNEL" key to switch CH1, CH2, CH3 or cycle channel display, press and hold "CHANNEL" key for some seconds to enter register status for outdoor temperature.
C5 UP BUTTON
Under time mode, press "UP" key to switch °C/°F display.
Under time, calendar, temperature alert, snooze mode, press "UP" key to go forward one step, press and hold "UP" key for some seconds to increase 8 steps per second. Under temperature alert mode, press "UP" key to turn alert on/off.
C6 ALERTS BUTTON
Under time mode, press “ALERTS” key to check temperature alert for both highest and lowest indoor and outdoor temperature, checking in sequence: highest outdoor temperature→lowest outdoor temperature→highest indoor temperature→lowest indoor temperature (cycle display)
Under time mode, press and hold “ALERTS” key for some seconds to enter temperature alert setting for both highest and lowest indoor and outdoor temperature, the setting in sequence: outdoor highest temperature→ outdoor lowest temperature→ indoor highest temperature→ indoor lowest temperature→ Exit
C7 ALARM BUTTON
Under time mode, Press “ALARM” to turn on/off the alarm in sequence: AL1 ON→AL2 ON→AL1 and AL2 On→AL1 and AL2 Of
GETTING STARTED
Main Unit - Remove battery compartment door and insert 3pcs AAA size battery. Or connect the power cord to the wall outlet. Before connecting the unit to power, please make sure your local voltage is the same as marked on the adaptor. Outdoor Sensor - Batteries compartment of sensor is locating behind the back cover, insert 2pcs AAA batteries observing polarity ["+" and "-" marks].
Under time mode, press and hold „MODE“ for some seconds to enter setting in sequence: Time zone → Hour → Minute → Year → Month → Day → week day language → exit
Setting item twinkling at 1HZ frequency.
After setting, press „MODE“ to exit.
No any key press for 10 seconds exit setting status, the value keep on.
Under AL1 or AL2 Mode, no any key press for 10 seconds, it will go back time display.
ALARM SETTING
Under normal mode, press „MODE“, switch to AL1 or AL2 display:
AL1 default time 6:00am, AL2 default time 0:00am
Under AL1 Mode, press and hold „MODE“ for some seconds to enter AL1 setting.
Setting in sequence: AL1 Hour→AL1 Minute →Exit
Setting item twinkling at 1HZ frequency.
After setting, press „MODE“ to confirm and exit.
No any key press for 10 seconds exit setting status, the setting saved.
AL2 Setting is the same as AL1 setting.
ALARM ON/OFF
Under time mode, press „ALARM“ to turn on/off the alarm in sequence:
AL1 ON→AL2 ON→AL1 and AL2 ON→AL1 and AL2 OFF
When alarm is turn on and when time is up, it alarms, during alarming, press
„SNOOZE/LIGHT“ key to turn on snooze, Z symbol and corresponding alarm twinkling all the time; press any other key to stop the alarm and exit the alarm.
No any key pressed, alarm stops automatically after 2 minutes.
During alarming, corresponding AL character twinkling on the display.
Under snooze mode, corresponding AL character and Snooze symbol twinkling display. Press “SNOOZE/LIGHT” to turn on backlight for 8 seconds, press any other key to stop and exit, at the same the alarm is off.
When alarm or snooze working, in case of DCF77 receiving time is out, DCF77 receiving would be put off until the alarm or snooze finished.
If alarm time is same for both AL1 and AL2, only AL1 symbol twinkling on display when time is up.
When one alarm time or snooze time is out, during alarming, it happens to meet another alarm, then the first alarm would stop and work out new alarm.
Snooze could be repeated all the time.
BUZZER for 2 minutes in alarm format
0-10 second: BI per second
10-20 second: BIBI per second
Over 20 seconds : BIBIBIBI per second
SNOOZE INTERVAL SETTING
Under normal mode, press "SNOOZE/LIGHT" key for some seconds to enter snooze interval time setting (optional from 3 minutes to 20 minutes, default:5 minutes).
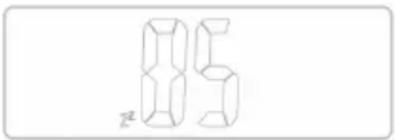
Snooze Interval Time Setting Display
Setting snooze item twinkling at 1Hz frequency
After setting, press „MODE“ to exit.
No any key press for 10 seconds exit setting status, value keep on.
TEMPERATURE AND HUMIDITY FUNCTION
Out of the indoor and outdoor temperature display, the low end displays "LL", the high end displays "HH".
Under normal mode, press “CHANEL” key to switch outdoor temperature and humidity display, switch in sequence: CH1 temperature and humidity→CH2 temperature and humidity→CH3 temperature and humidity→CH1 temperature and humidity (cycle display, symbol 🕒 appears on the LCD display)
Under normal mode, press and hold “CHANEL” key for some seconds, clear the outdoor temperature and humidity, then re-register for 3 minutes.
Under cycle display mode, no register no display, directly jump to registered channel display.
Under normal mode, press "UP" key to switch temperature unit (°C or °F)
TEMPERATURE ALERT SETTING
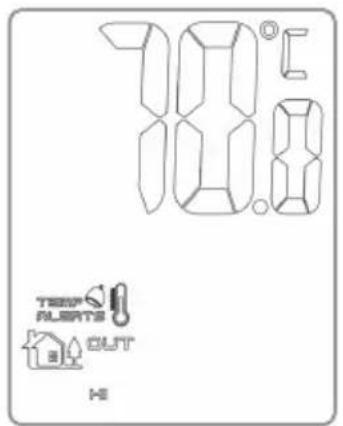
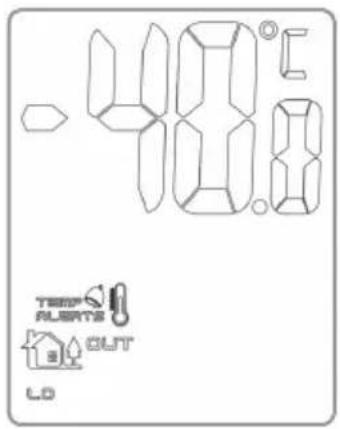
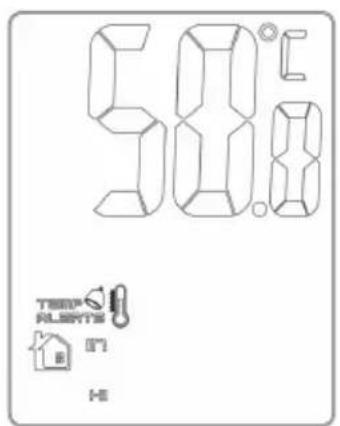
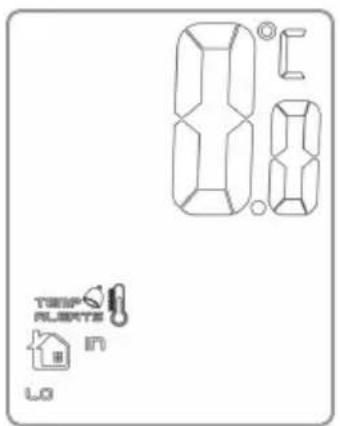
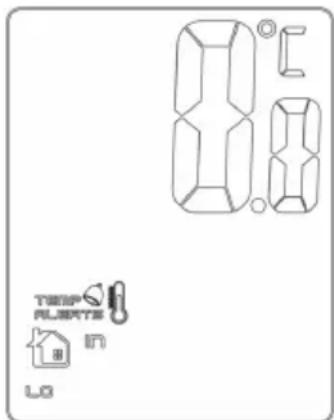
Highest Outdoor Lowest Outdoor Temperature Display Temperature Display
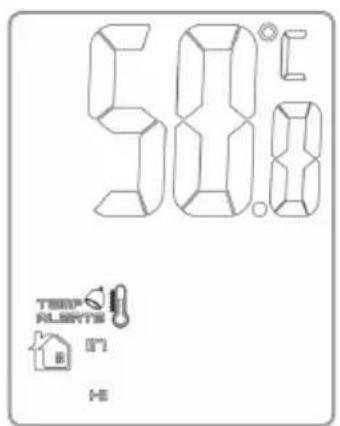
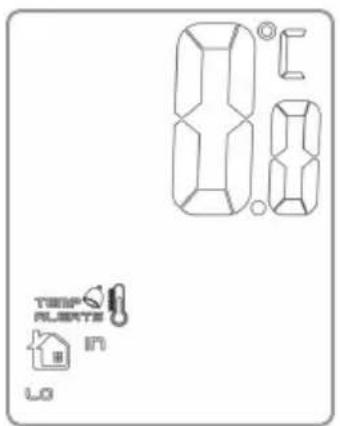
Highest Indoor Lowest Indoor Temperature Display Temperature Display
Under time mode, press “ALERTS” key to check temperature alert for both highest and lowest indoor and outdoor temperature.
Under temperature alert mode, press "UP" key or "DOWN" key to turn alarm on/off. After Alarm On, corresponding alarm symbol will display.
Under time mode, press and hold “ALERTS” key for some seconds to check temperature alert both highest and lowest outdoor and indoor temperature in sequence: highest outdoor temperature→lowest outdoor temperature→highest indoor temperature→lowest indoor temperature→exit
Indoor temperature upper limit: 50°C, low limit: 0°C.
Outdoor temperature upper limit: 70°C, low limit: -40°C.
Setting item twinkling at 1HZ frequency.
After setting, press „ALERTS“ to confirm.
No any key press for 10 seconds exit automatically setting status.
WEATHER FORECAST FUNCTION
6 levels of weather forecast display:
sunny, sunny and cloudy, cloudy, rainy, stormy and snowy.
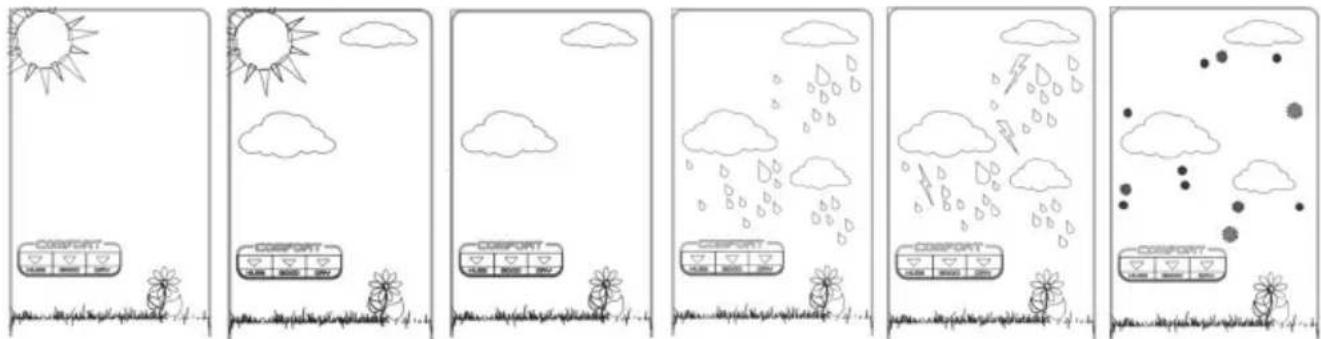
Barometer testing interval: 60 minutes
Dynamic weather forecast display
DCF77 RECEIVING FUNCTION
After power on or reset, after testing temperature and humidity start receiving RF for 3 minutes automatically.
Press and hold "DOWN" key for 2 seconds to enter into DCF77 receiving.
Daily auto receiving - DCF77 receiving automatically at 1:00AM, 2:00AM, 3:00AM everyday, if fail to receive RC until 3:00AM, then will try again at 4:00am or 5:00am.
Radio receiving signals:
Under receiving mode, DCF77 symbol ⚙ twinkling at 1HZ.
When signal received, DCF77 symbol and parabolic antenna twinkling at 1HZ, when signal received successfully, DCF77 symbol display still on the LCD display.
When the signal is weak and cannot be distinguished, DCF77 symbol twinkling at 1HZ.
When the signal received, the signal displayed and exit the receiving. During signal receiving, press „DOWN“ key to exit radio signal receiving. No effective functions if other keys pressed.
Receiving time is 1:00am of the next day in case the receiving failed.
During receiving, it will switch to alarm in case of there's any.
When DCF77 symbol displayed, if time is re-set , DCF77 symbol will shut down.
OTHER FUNCTIONS
If powered by batteries, press any key or by sound controlled, backlight on for 8 seconds.
If powered by the adapter, shut down sound controlled, press "SNOOZE/LIGHT", adjust backlight: Highlight→mid-light→Shutdown→mid light→Highlight (cycle in sequence).
If powered by the adaptor, shut down backlight, when alarm is up the backlight on at the same time, and backlight is off after alarm.
If powered by batteries, please change the batteries in case of dim display.
WE RESERVE THE RIGHT TO CHANGE TECHNICAL SPECIFICATIONS.
WARNING: Do not use this product near water, in wet areas to avoid fire or injury of electric current. Always turn off the product when you don't use it or before a revision. There aren't any parts in this appliance which are reparable by consumer. Always appeal to a qualified
authorized service. The product is under a dangerous tension.


TO AVOID DANGER OF SUFFOCATION, KEEP THE PLASTIC BAG AWAY FROM BABIES AND CHILDREN. DO NOT USE THIS BAG IN CRIBS, BEDS, CARRIAGES OR PLAYPENS. THIS BAG IS NOT A TOY.
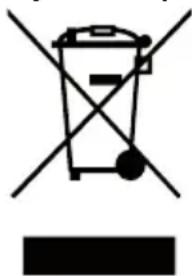
Disposal of old Electrical & Electronic Equipment (Applicable in the European Union and other European countries with separate collection systems)
natural_image
Symbol of a trash bin crossed with a diagonal line and a horizontal bar below (no text or labels)This symbol on the product or on its packaging indicates that this product shall not be treated as household waste. Instead it shall be handed over to the applicable collection point for the recycling of electrical and electronic equipment. By ensuring this product is disposed of correctly, you will help prevent potential negative consequences for the environment and human health, which could otherwise be caused by inappropriate waste handling of this
product. The recycling of materials will help to conserve natural resources. For more detailed information about recycling of this product, please contact your local Civic Office, your household waste disposal service or the shop where you purchased the product.
Hereby, ETA a.s. declares that the radio equipment type ME3257 is in compliance with Directive 2014/53/EU. The full text of the EU declaration of conformity is available at the following internet address:
http://www.gogen.cz/declaration_of_conformity
FŐ FUNKCIÓK
Barométer intervallum: 60 perc
natural_image
Symbol of a trash bin crossed with a diagonal line and a horizontal bar below (no text or labels)| EN - English | ||
| Charging adapter | ||
| A | Manufacturer's name or trademark, business registration number and address | Dongguan Shijie Hua Xu Electronics Factory91441900345342145HNo.200,Technology East Road,Shijie Town,Dongguan City,Guangdong,P.R.China |
| B | Model identifier HX075-0501200-AG-001 | |
| C | Input voltage 100-240 V | |
| D | Input frequency 50/60 Hz | |
| E | Output voltage 5,0 V | |
| F | Output current 1,2 A | |
| G | Output power 6,0 W | |
| H | Average efficiency in active mode | 76,76 % |
| I | Low load efficiency (10%) | - |
| J | Power consumption without load | 0,087 W |
natural_image
Abstract black and white circular logo with stylized white 'S' shape (no text or symbols)
- KEY FUNCTION
- C1 DOWN BUTTON
- C2 MODE BUTTON
- C3 SNOOZE/LIGHT BUTTON
- C4 CHANNEL BUTTON
- C5 UP BUTTON
- C6 ALERTS BUTTON
- C7 ALARM BUTTON
- GETTING STARTED
- ALARM SETTING
- ALARM ON/OFF
- SNOOZE INTERVAL SETTING
- TEMPERATURE AND HUMIDITY FUNCTION
- TEMPERATURE ALERT SETTING
- WEATHER FORECAST FUNCTION
- DCF77 RECEIVING FUNCTION
- OTHER FUNCTIONS
- WE RESERVE THE RIGHT TO CHANGE TECHNICAL SPECIFICATIONS.
- Disposal of old Electrical & Electronic Equipment (Applicable in the European Union and other European countries with separate collection systems)
- FŐ FUNKCIÓK
Brand : GoGen
Model : ME 3257
Category : Weather Station