
ZMG11 - Lawn Mower Accessory Eldom - Free user manual and instructions
Find the device manual for free ZMG11 Eldom in PDF.


| Product Type | Lawn Mower Accessory |
| Model | ZMG11 |
| Brand | Eldom |
| Compatibility | Designed for Eldom lawn mowers with a universal mounting system |
| Dimensions (L x W x H) | 50 cm x 35 cm x 25 cm |
| Weight | 1.5 kg |
| Material | High-density polyethylene (HDPE) |
| Capacity | 45 liters |
| Color | Black / Green |
| Assembly Required | Yes, simple snap-on installation |
| Functions | Grass collection, mulching capability |
| Maintenance | Empty after each use; wash with water and mild detergent |
| Cleaning Instructions | Do not use abrasive cleaners; dry before storage |
| Safety Warnings | Always disconnect mower from power before attaching/detaching |
| Spare Parts Availability | Replacement bags and mounting brackets available from Eldom |
| Repairability | User-replaceable parts; repair instructions in manual |
| Warranty | 2 years limited warranty |
| Package Contents | 1 x Grass catcher bag, 1 x mounting frame, 1 x instruction manual |
| Country of Origin | China |
Frequently Asked Questions - ZMG11 Eldom
User questions about ZMG11 Eldom
0 question about this device. Answer the ones you know or ask your own.
Ask a new question about this device
Download the instructions for your Lawn Mower Accessory in PDF format for free! Find your manual ZMG11 - Eldom and take your electronic device back in hand. On this page are published all the documents necessary for the use of your device. ZMG11 by Eldom.
USER MANUAL ZMG11 Eldom
natural_image
Two black-and-orange electric toothbrushes with spiked teeth, shown from different angles (no text or symbols visible)Eldom Sp. z o.o.
natural_image
Close-up of a black electronic device with orange arrows indicating internal components (no text or symbols visible)fot. 1
natural_image
Close-up of a black and blue hairbrush cutting into a textured surface, with an orange arrow indicating the blade's edge (no text or symbols visible)fot. 2
CZYSZCZENIE I KONSERWACJA
natural_image
Close-up of a black cylindrical object with a blue circular cutout, possibly a CD or DVD component (no visible text or symbols)fot. 1
natural_image
Black cylindrical object with a red arrow pointing left, no text or symbols present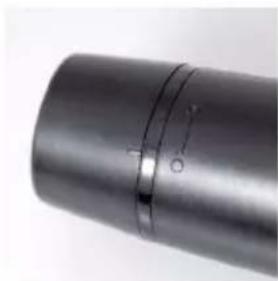
natural_image
Close-up of a metallic cylindrical pipe with a flanged end and circular opening, no visible text or symbolsfot. 2 fot. 3 fot. 4
natural_image
Close-up of a black cylindrical mechanical component with a red arrow pointing to its side (no text or symbols visible)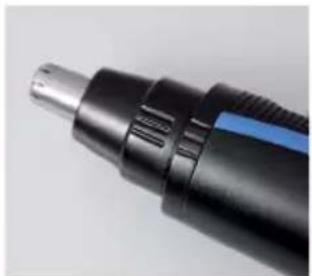
natural_image
Close-up of a black hairbrush with blue filter bands and metallic tip (no text or symbols visible)TRYMER - OPIS OGÓLNY
- Before using the appliance for the first time, please read carefully these Instructions for Use.
- The appliance should be connected to sockets compliant with current parameters given on the casing.
- The appliance should always be disconnected by pulling the plug, not the power cord.
- The device can be used by children aged 8 and older and by persons with limited physical, sensory or mental capabilities, or persons without sufficient experience and knowledge only under supervision or if previously instructed on the safe use of the appliance and the possible risks. Children shall not play with the appliance. Cleaning and maintenance that are the responsibility of the user shall not be carried out by children without supervision. Protect the appliance and the power cord against children under 8 years old.
- Do not place the appliance in the vicinity of heat sources.
- The appliance is intended for domestic use only.
- Do not immerse the cord or the appliance in water.
- The appliance must always be cleaned after use. The appliance must always be turned off before cleaning and maintenance as well as in case of malfunction and after operation.
- Do not use with a broken or otherwise damaged hairdressing head as it may lead to injury.
- Do not use the appliance for clipping animal and artificial hair.
- Do not use the appliance for clipping wet hair. It is designed for clipping dry.hair only.
- Do not use in the open air.
- Use only with the originally included accessories and feeder.
- Never use the appliance when it is wet, with wet hands or in the vicinity of showers, water in a bath, washbasin and other containers.
- When used in the bathroom, the appliance must be disconnected after use because proximity of water is dangerous even if the appliance is turned off.
- The appliance must not be immersed in or sprinkled with water.
- When in operation, do not leave the appliance unattended.
SAFETY INSTRUCTIONS
- The power cord and the whole appliance should be regularly checked for damage.
Do not turn the appliance on, if any damage has been found. - In the event the power cord is damaged, it must be replaced in the Manufacturer's Service Centre to prevent danger. A list of Service Centres can be found in the attachment and on the website www.eldom.eu.
- The appliance can be repaired only in an authorised Service Centre. Any modernisation or application of spare parts or elements other than the original ones is forbidden and dangerous for the user.
- The company Eldom Sp. z o.o. shall not be liable for any damage caused by inappropriate use of the appliance.
ENVIRONMENTAL PROTECTION
- The appliance is made of materials which can be reprocessed or recycled.
- The appliance should be disposed of only in authorised disposal centres which deal with collecting and recycling electrical and electronic appliances.
GUARANTEE
- The appliance is intended for private domestic use only.
- The appliance may not be used for professional purposes.
- The guarantee ceases to be valid in case of inappropriate handling.
Detailed guarantee conditions can be found in the attachment.
INSTRUCTIONS FOR USE

- Cutting head
- Hair length control ring
- Switch-key
- Control lamp
- Telescope styling attachment
- Slider
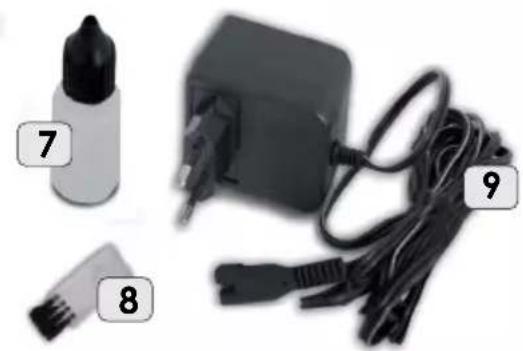
- Maintenance oil
- Cleaning brush
- Adapter
- Comb guides
TECHNICAL DATA
- supply voltage: 230 V \~ 50 Hz
- power: 3 W
- battery: 2x 600mA, Ni-Cd
- charging time: 8 hours
HOW TO USE THE APPLIANCE
The Hair Clipper can be used as an appliance powered by electricity or a battery. If the appliance is powered by electricity, it is ready to be used right away.
ELECTRIC POWER SUPPLY
- Turn off the appliance, the switch-key (3) in position "OFF".
- Plug in the adapter (9) and connect it to the hair clipper.
- Power supply is signalled by the red control lamp (4).
- To start operation, turn the switch-key (3) to position "ON".
CHARGING AND OPERATION WITH THE BATTERY
- Turn off the appliance, the switch-key (3) in position "OFF".
- Plug in the adapter (9) and connect it to the hair clipper.
- Charging is signalled by the red control lamp (4). Battery charging time: approx. 8 hours
NOTICE: The control lamp (4) does not go out after the battery has been charged.
- After the battery has been charged, disconnect the feeder, the appliance is ready for operation with the battery. To start operation, turn the switch-key (3) to position "ON".
Charging the battery for over 12 hours reduces its life span. If the appliance is not used for a longer period of time, it is recommended to charge the battery at least once every half a year. Failure to charge the battery for a period of over 6 months also reduces its life span.
HAIR CLIPPING
- Make sure the appliance is clean, correctly assembled and oiled.
- Before clipping the hair, comb it to make it more natural.
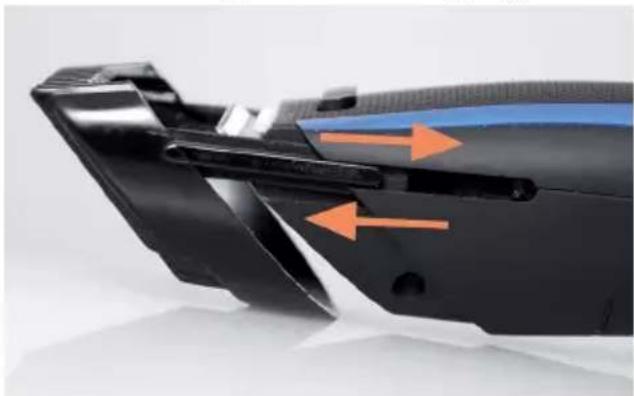
- to install the attachment (5), slide it into the locks (10), photo 1.
You can use the attachment to trim hair to the length range of 3-15 mm.
Take off the attachment to shorten the trimming length.
Use the revolving ring (2) to set up the hair trimming length..
The rotating ring (2) allows for control of hair length.
- It is recommended to start clipping with the use of the comb head for longer hair.
- Clip small areas by moving the appliance slowly through the hair.
- Start clipping from the neck upwards or from the forehead and the temple upwards.
- Hold the appliance gently under the hair, so that the comb heads are pointed upwards and lie flat on the head.
- in case of thick hair you can move the slider (9) left - this will move out a plastic cap that blocks the slipping-in of some hair under the head (1) and thus facilitate trimming. When the hair is pre-trimmed, move the slider (9) right and continue trimming.
Use the switch (3), position „ON“ to switch on the clipper. Additionally, the indicator lamp (4) will go on to indicate that the clipper is operating.
Do not use the appliance for clipping wet hair.
natural_image
Close-up of a black plastic electronic component with orange arrows indicating flow or movement (no text or symbols visible)phot. 1
natural_image
Close-up of a hairbrush with a blue mesh grille and black jaw, showing a cutaway view of the blade (no text or symbols visible)phot. 2
CLEANING AND MAINTENANCE
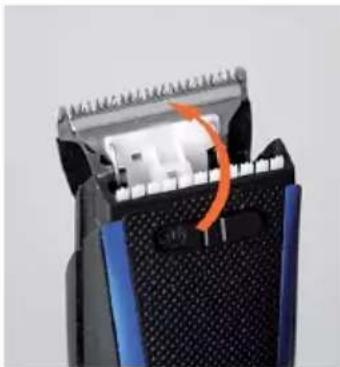
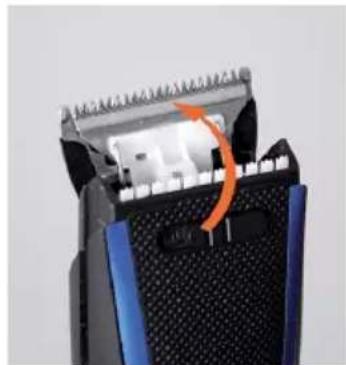
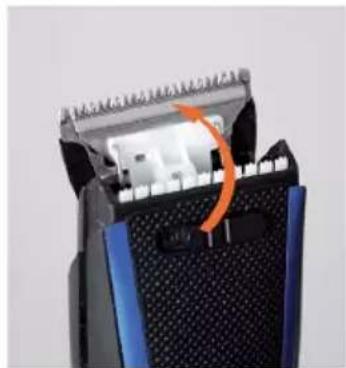
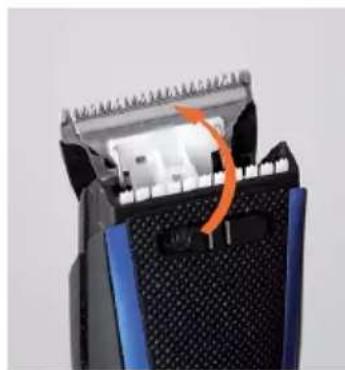
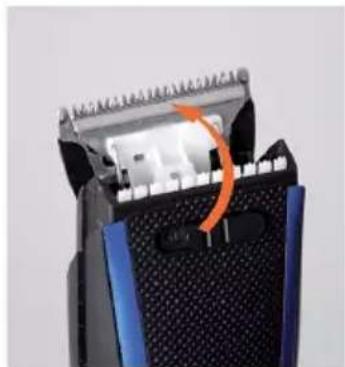
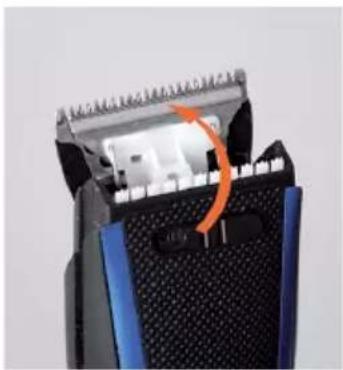
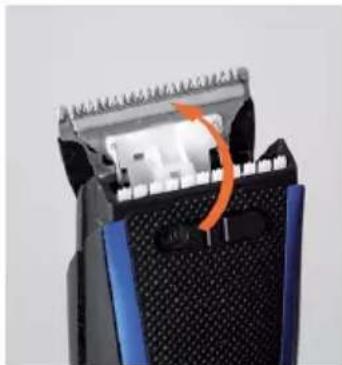
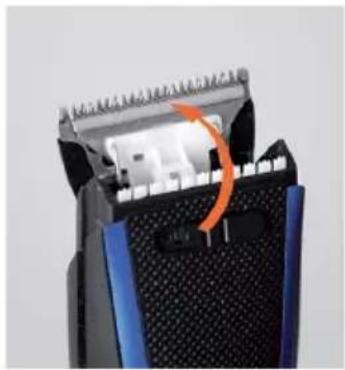
After using the appliance, the chamber of cutting knives should always be cleaned. For this purpose, open the cutting head (1) by pressing the clipper blades with your thumb in the direction shown in phot. 2. Protect the blades against falling down.
Clean the blades with the brush included in the set.
Cutting blades must be maintained on a regular basis. Put one to two drops of oil between the blades and turn the appliance on for a few seconds.
Do not use hair oils, fat, oils mixed with refined kerosene or other solvents.
Do not immerse the appliance in water. Before cleaning, unplug the appliance and turn it off.
Do not use any cleansing agents which are strong or may damage the surface.
Wipe the casing with a moist or dry cloth.
The cutting blades are wear parts and should be maintained on a regular basis. The are not covered by the guarantee.
natural_image
Close-up of a black cylindrical electronic component with a blue circular highlight (no visible text or symbols)fot. 1
natural_image
Black cylindrical object with a red arrow pointing upward (no text or symbols)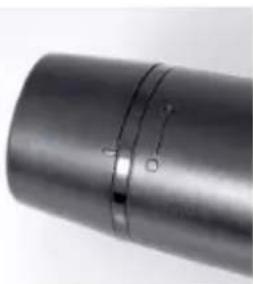
natural_image
Close-up of a metallic cylindrical pipe with a flanged end and internal markings (no text or symbols visible)fot. 2 fot. 3 fot. 4
natural_image
Close-up of a black plastic connector with a white internal component and a red arrow pointing to it (no text or symbols)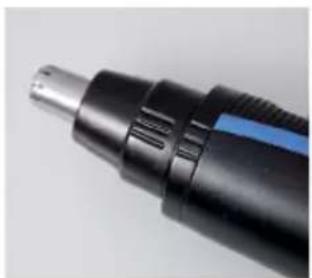
natural_image
Close-up of a black hairbrush with blue filter bands and metallic tip (no text or symbols visible)TRIMMER - GENERAL DESCRIPTION
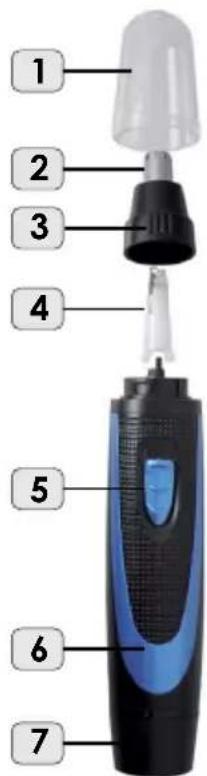
- Cutting head cover
- Cutting head
- Blade chamber
- Blade
- Switch
- Body
- Battery cover
TECHNICAL DATA
- power supply: AA battery, 1 pc.
USE
The trimmer is designed for trimming nose and ear hair.
POWER SUPPLY
The device is powered by one AA alkaline battery – not included.
How to install the battery:
- turn the device off by setting the switch (5) to "OFF"
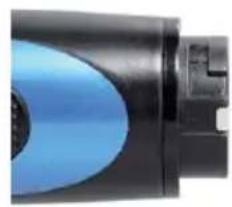
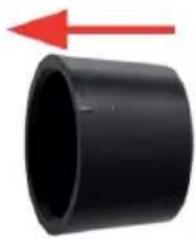
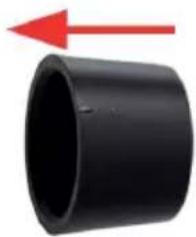
- rotate the cover (7) counter-clockwise and remove it
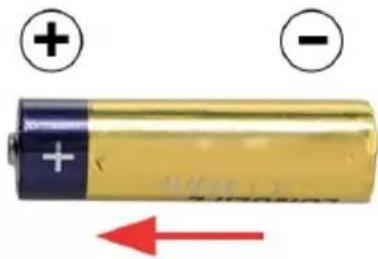
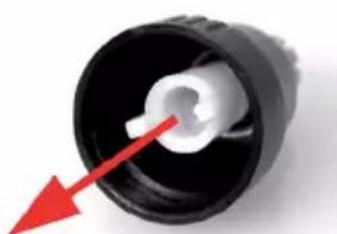
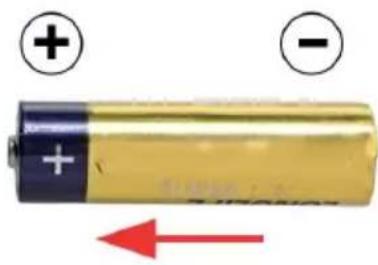
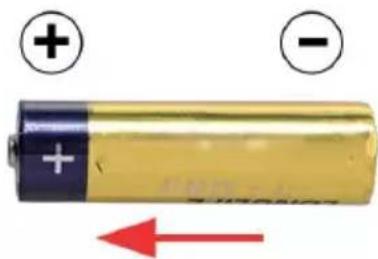
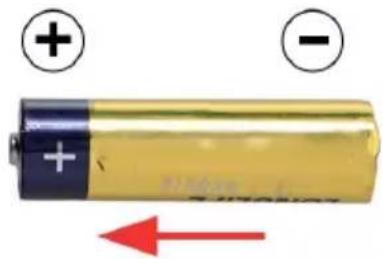
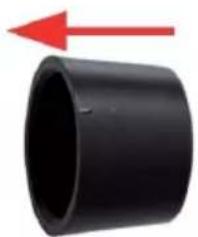
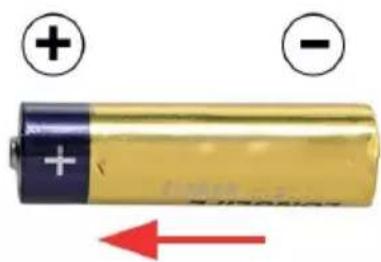
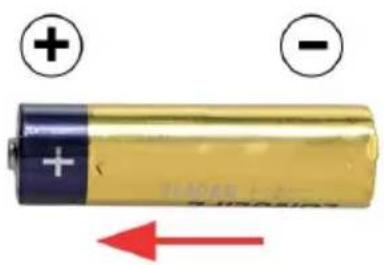
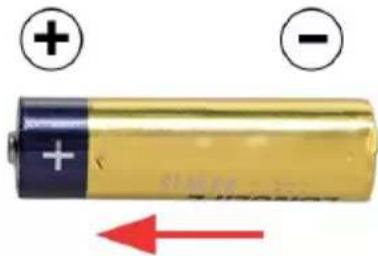
- insert the battery - pay attention to the orientation - Fig. 1.
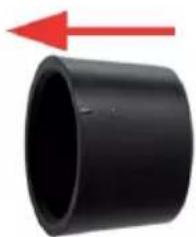
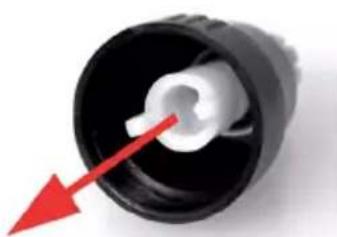
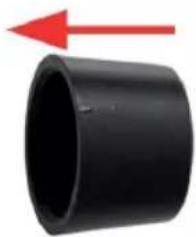
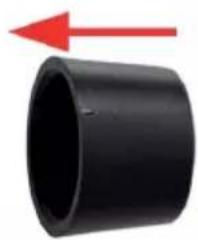
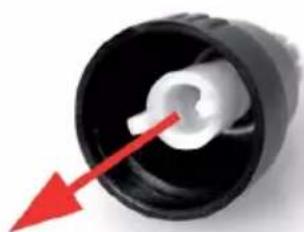
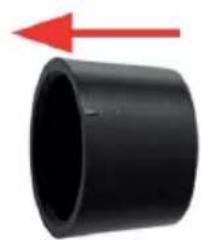
- place the cover (7) as shown - Fig. 2 and turn clockwise to lock it in place.
Dispose of used batteries in the dedicated containers.
TRIMMING
- remove the cover (1)
- turn the device on by setting the switch (5) to "ON"
- carefully put the cutting head (2) in the nose or ear and cut the hair.
- when the trimming is done, turn the device off by setting the switch (5) to "OFF" and place the cover (1)
CLEANING AND MAINTENANCE
Clean the blade (4) and the cutting head chamber (3) after each use.
- rotate the chamber (3) counter-clockwise and remove it
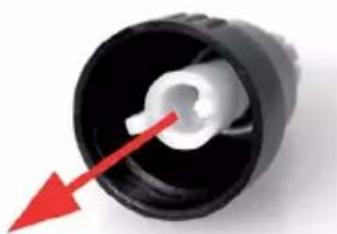
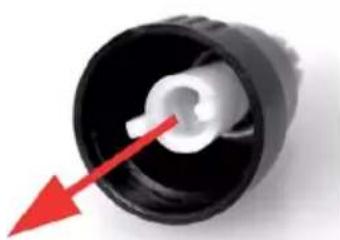
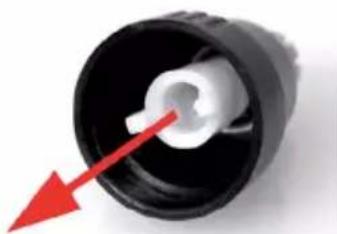
- remove the blade (4) - Fig. 3
-clean the blade (4) and the head chamber (3)
- insert the blade (4) into the head chamber (3)
- attach the chamber (3) onto the body (6) as shown, and rotate it clockwise – Fig. 4.
BEZPEČNOSTNÍ DOPORUČENÍ
natural_image
Product photo showing a battery, plug-in socket, charging cable, and power adapter (no text or symbols visible)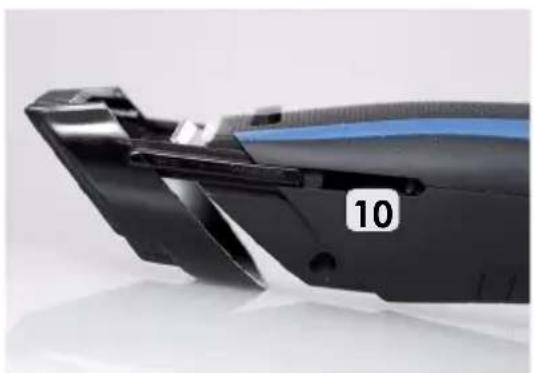
natural_image
Close-up of a black electronic device with blue leads and a numbered label '10' on its side (no readable text or symbols beyond the number)ZASTŘIHOVAČ VLASŮ - POPIS HLAVNÍCH ČÁSTÍ
natural_image
Close-up of a black electronic device with orange arrows indicating internal components (no text or symbols visible)foto 1
natural_image
Close-up of a hairbrush cutting into a black plastic grille with an orange arrow indicating the blade (no text or symbols visible)foto 2
ČIŠTĚNÍ A ÚDRŽBA
natural_image
Close-up of a black cylindrical object with a blue circular highlight, possibly a CD or DVD component (no visible text or symbols)foto 1
natural_image
Black cylindrical object with a red arrow pointing upward (no text or symbols)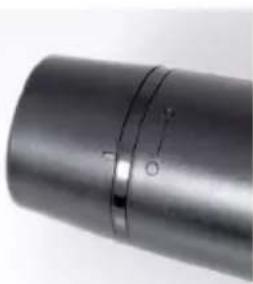
natural_image
Close-up of a metallic cylindrical pipe with a flanged edge and two circular markings (no text or symbols visible)foto 2 foto 3 foto 4
natural_image
Close-up of a black plastic connector with a white internal component and a red arrow pointing to it (no text or symbols visible)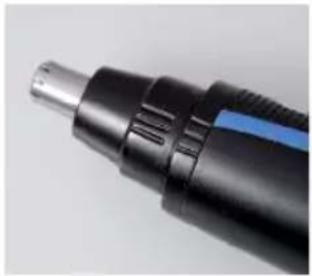
natural_image
Close-up of a black handheld electric shaver with blue and white bands (no visible text or symbols)ZASTŘIHOVAČ - OBECNÝ POPIS
natural_image
Close-up of a black electronic device with orange arrows indicating flow or movement, no visible text or symbolsFoto Nr. 1
natural_image
Close-up of a black and blue hairbrush with a white mesh grille and an orange arrow indicating a cut or edge (no text or symbols visible)Foto Nr. 2
natural_image
Close-up of a black cylindrical object with a blue circular opening, possibly a device or component (no visible text or symbols)fot. 1
natural_image
Black cylindrical object with a red arrow pointing left, no text or symbols present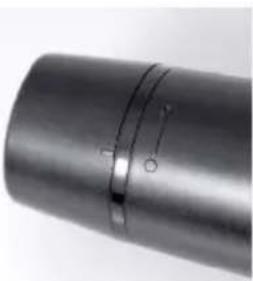
natural_image
Close-up of a metallic cylindrical pipe with a flanged end and two circular markings (no text or symbols visible)fot. 2 fot. 3 fot. 4
natural_image
Close-up of a black cylindrical mechanical component with a red arrow pointing to its side (no text or symbols visible)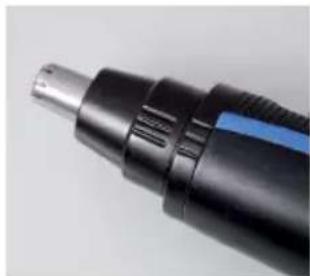
natural_image
Close-up of a black handheld electric shaver with a blue handle (no visible text or symbols)natural_image
Product photo showing a battery, plug-in connector, and cable with numbered labels (7, 8, 9) — no readable text or symbols beyond labels.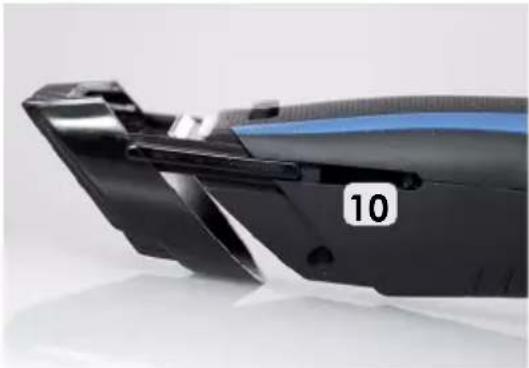
natural_image
Close-up of a black electronic device with a blue screen and a numbered label '10' on its side (no readable text or symbols beyond the number)natural_image
Close-up of a black electronic device with orange arrows indicating internal components (no text or symbols visible)фото 1
natural_image
Close-up of a black and blue electric toothbrush with a circular orange arrow indicating the blade (no text or symbols visible)фото 2
ЧИСТКА И УХОД
natural_image
Close-up of a black cylindrical electronic component with a blue circular highlight and a small connector (no visible text or symbols)fot. 1
natural_image
Black cylindrical object with a red arrow pointing upward (no text or symbols)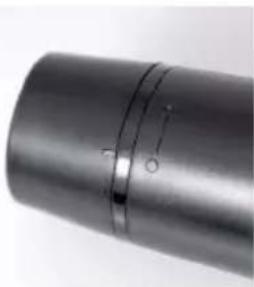
natural_image
Close-up of a metallic cylindrical pipe with visible internal markings and two small circular features (no text or symbols)fot. 2 fot. 3 fot. 4
natural_image
Close-up of a black cylindrical object with a white internal component and a red arrow pointing to it (no text or symbols visible)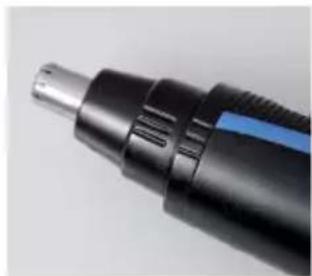
natural_image
Close-up of a black and blue handheld hairdryer tool (no visible text or symbols)natural_image
Product photo showing a battery, plug-in socket, charging cable, and connector (no text or symbols visible)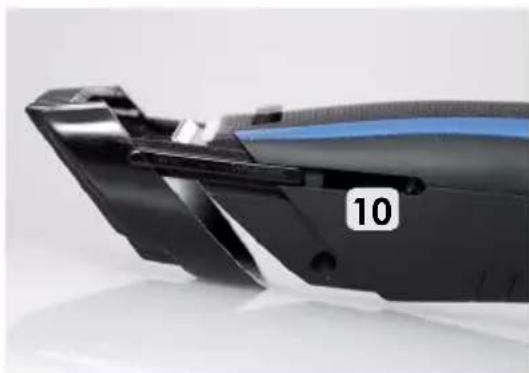
natural_image
Close-up of a black electronic device with a blue screen and a numbered label '10' on its side (no readable text or symbols beyond the number)STROJČEK NA VLASY - OPIS SÚPRAVY
natural_image
Close-up of a black electronic device with orange arrows indicating internal flow or movement (no text or symbols visible)obrázok 1
natural_image
Close-up of a black and blue hairbrush with a circular orange arrow indicating a cut or edge (no text or symbols visible)obrázok 2
ČISTENIE A KONZERVÁCIA
Po každom použití je potrebné vyčistif komoru reznej hlavice. Na tento účel je potrebné pretočit regulátor (2) maximálne vlavo, odstránit teleskopický nástavec (5) a otvorit reznú hlavicu (1) pritlačenim palca na ostrie strojčeka smerom uvedeným na obrázku 2. Je potrebné chránit ostrie pred pádom.
natural_image
Close-up of a black cylindrical object with a blue circular highlight and a small protrusion (no visible text or symbols)obrázok 1
natural_image
Black cylindrical object with a red arrow pointing left, no text or symbols present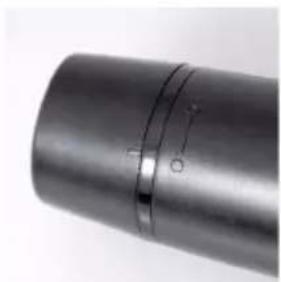
natural_image
Close-up of a metallic cylindrical pipe with a flange and circular hole, no visible text or symbols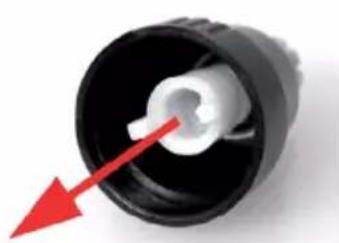
natural_image
Close-up of a black plastic connector with a white internal component and a red arrow pointing to it (no text or symbols visible)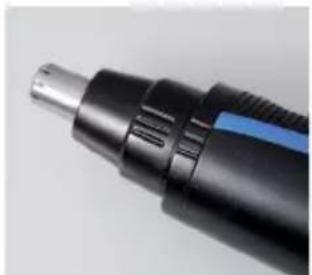
natural_image
Close-up of a black and blue hairbrush tool with a metallic tip (no visible text or symbols)natural_image
Product photo showing a battery, charging plug, and cable with numbered labels (7, 8, 9) for identification.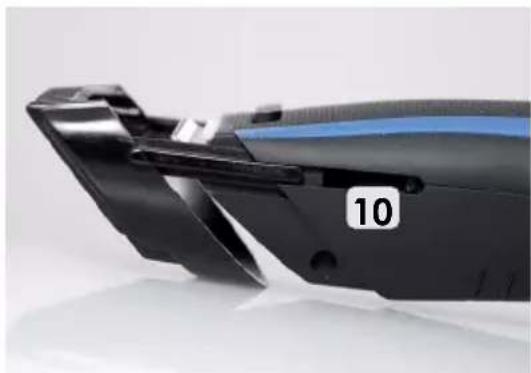
natural_image
Close-up of a black electronic device with a blue lens and numbered label '10' on the side (no readable text or symbols beyond the number)A KÉSZLET LEÍRÁSA
natural_image
Close-up of a black electronic device with orange arrows indicating internal components (no text or symbols visible)- ábra
natural_image
Close-up of a black and blue hairbrush with a circular orange arrow indicating the cutting edge (no text or symbols visible)- ábra

natural_image
Product photo showing a battery, connector, and cable assembly (no visible text or symbols)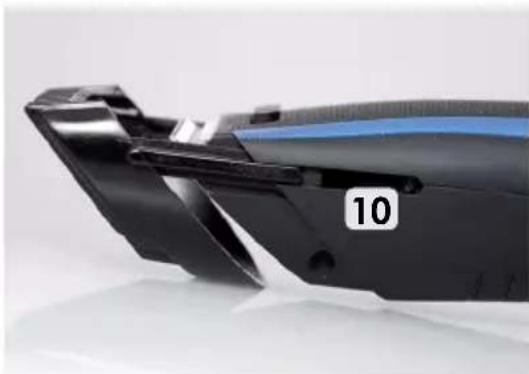
natural_image
Close-up of a black electronic device with a blue lens and a numbered label '10' on its side (no readable text or symbols beyond the number)DESCRIPCIÓN GENERAL
natural_image
Close-up of a black electronic device with orange arrows indicating internal components (no text or symbols visible)Fig. 1
natural_image
Close-up of a hairbrush cutting into a black plastic component with a blue mesh texture (no text or symbols visible)Fig. 2

LIMPIEZA Y MANTENIMIENTO
natural_image
Close-up of a black cylindrical object with a blue circular highlight and a small mechanical component attached (no visible text or symbols)fot. 1
natural_image
Black cylindrical object with a red arrow pointing upward (no text or symbols)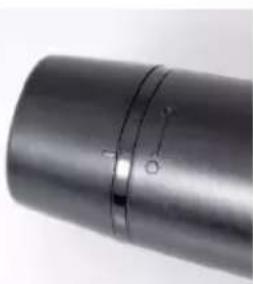
natural_image
Close-up of a metallic cylindrical object with a curved seam and two small circular marks (no text or symbols visible)fot. 2 fot. 3 fot. 4
natural_image
Close-up of a black plastic connector with a red arrow pointing to its tip (no text or symbols visible)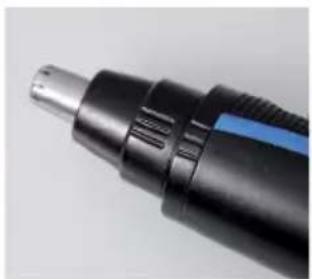
natural_image
Close-up of a black handheld electric shaver with blue and white bands (no visible text or symbols)DESCRIPCIÓN GENERAL
- CZYSZCZENIE I KONSERWACJA
- TRYMER - OPIS OGÓLNY
- SAFETY INSTRUCTIONS
- ENVIRONMENTAL PROTECTION
- GUARANTEE
- INSTRUCTIONS FOR USE
- TECHNICAL DATA
- HOW TO USE THE APPLIANCE
- ELECTRIC POWER SUPPLY
- CHARGING AND OPERATION WITH THE BATTERY
- NOTICE: The control lamp (4) does not go out after the battery has been charged.
- HAIR CLIPPING
- Do not use the appliance for clipping wet hair.
- CLEANING AND MAINTENANCE
- TRIMMER - GENERAL DESCRIPTION
- USE
- POWER SUPPLY
- TRIMMING
- BEZPEČNOSTNÍ DOPORUČENÍ
- ZASTŘIHOVAČ VLASŮ - POPIS HLAVNÍCH ČÁSTÍ
- ČIŠTĚNÍ A ÚDRŽBA
- ZASTŘIHOVAČ - OBECNÝ POPIS
- ЧИСТКА И УХОД
- STROJČEK NA VLASY - OPIS SÚPRAVY
- ČISTENIE A KONZERVÁCIA
- A KÉSZLET LEÍRÁSA
- DESCRIPCIÓN GENERAL
- LIMPIEZA Y MANTENIMIENTO
Brand : Eldom
Model : ZMG11
Category : Lawn Mower Accessory