
P5530 - Uncategorized Emos - Free user manual and instructions
Find the device manual for free P5530 Emos in PDF.


| Product Type | Wi-Fi Smart Socket (Timer & Remote Control) |
| Model | Emos G-Homa EMW302WF (also referenced as P5530) |
| Power Supply | 230 V~ / 50 Hz |
| Maximum Load | 3680 W (resistive load) |
| Wireless Connectivity | Wi-Fi 2.4 GHz, IEEE 802.11b/g/n |
| Compatible Systems | Android 3.0+ and iOS 6.0+ |
| App Control | G-Homa app (free download from Google Play or App Store) |
| Manual Control | Physical ON/OFF button on the socket |
| Timer Functions | Programmable timer (on/off schedules), countdown timer (1 min to 4 hours), maximum ON time setting |
| Group Control | Create and manage groups of up to 15 sockets, with combined on/off commands and group timers |
| Alarm Feature | Send push notifications or email alerts when the button is held for 3 seconds |
| LED Indicator | Flashing patterns for connection modes, steady ON/OFF for socket state |
| Device Reset | Press and hold button for 20 seconds to reset to factory defaults |
| Indoor Use Only | Designed for indoor use; avoid exposure to moisture |
| Safety Warnings | Do not connect to high-power devices (heaters, ovens, vacuums, etc.); insert plug with device off; allow 10 seconds between plugging devices |
| Dimensions (Approx.) | 65 x 65 x 80 mm (typical smart plug size) |
| Weight (Approx.) | 100 g |
| Accessories | User manual (multilingual), quick start guide |
Frequently Asked Questions - P5530 Emos
User questions about P5530 Emos
0 question about this device. Answer the ones you know or ask your own.
Ask a new question about this device
Download the instructions for your Uncategorized in PDF format for free! Find your manual P5530 - Emos and take your electronic device back in hand. On this page are published all the documents necessary for the use of your device. P5530 by Emos.
USER MANUAL P5530 Emos
natural_image
White G-Homa wireless power outlet with three leads and a power button (no text or symbols visible on the device body)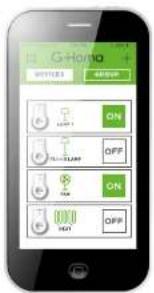




| DE | WI-FI-STECKDOSE MIT TIMER 2 | |
| GB | -FI SOCKET WITH TIMER 6 | |
| HU | -FI ALJZAT IDÖZÍTÓVEL 10 | |
| SI | FI VTIČNICA S ČASOVNO STIKALNO URO 14 | |
| RS|HR|BA | WI-FI UTIČNICA S TAJMEROM | 18 |
| UA | -FI PO3ETKA 3 TAJMEPOM 22 | |
| RO | IZA WI-FI CU TEMPORIZATOR 26 | |
| LT | FI IŠMANUSIS LIZDAS 30 | |
| LV | WI-FI VIEDA ROZETE | 34 |
| EE | WI-FI NUTIKAS ÜHENDUSPESA SMART SOCKET | 38 |
CE
www.emos.eu
- Emos G-Homa is a socket controlled via the home Wi-Fi network, which facilitates the control of all your household appliances, saves power and increases the security of your home.
- Using an application, you can turn all your home appliances on or off from your smart phone, tablet or computer. You can turn the connected devices on and off or set timed triggers for individual devices or groups anytime, anywhere. Everything can be controlled through a device with Android or iOS systems.
- The alarm feature allows the sending warnings regarding the breach of security to a registered e-mail or to the device application.
- When the application is turned on, you can check which devices are on or off.
- Whenever needed, you can turn the device on or off manually using the button on the socket, or the buttons inside the application.
- The setting of a timed trigger in the application is both comfortable and simple.
- Through the G-Homa application, you can add and control up to 15 sockets on a single WI-FI network.
Connecting - Installing the G-Homa Application
• After downloading the application from Google Play, App Store or after loading through a QR code and subsequent installation of the application to your device, you need to register and enter a valid e-mail address.
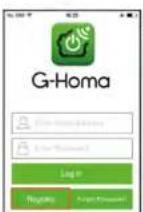
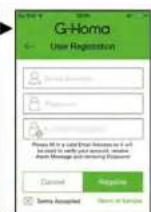
- If you need to add another socket and control other devices or groups, you can do so via the G-Homa application.
• After plugging in, you can control the socket using the G-Homa application or manually using the button.
DEVICE SETTINGS
Adding a New Device
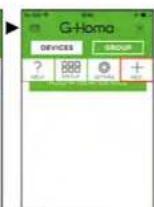
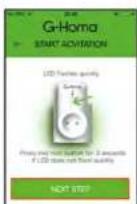
- After downloading the application and registering your account, plug the timer socket into a 230V\~ network. Activate the pairing function by pressing and holding the button on the socket. The LED indicator will begin flashing several times a second.
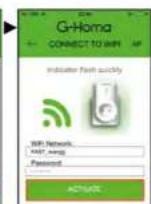
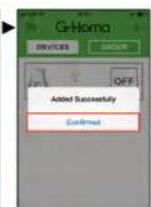
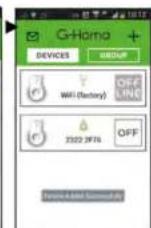
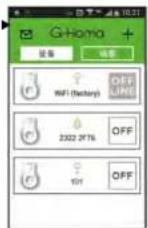
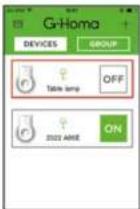
- The application on the screen of your device will show, "ADD A DEVICE", enter the name and password of the Wi-Fi network where you are connected and choose, "ACTIVATE" if authorisation is not successful on the first try, try activating again until the process completes and the device is added. After verifying the IP address, the application will notify you that the device was successfully added and the control menu will be displayed for setting and controlling the device (image of a socket to the left, icon in the middle, ON/OFF button on the right).
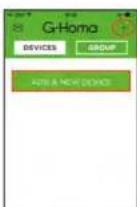

Manual Mode for Adding a Device
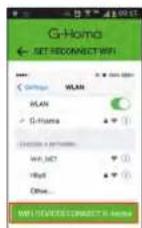
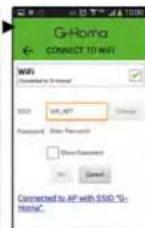
- You can add the G-Homa timer socket into the application using manual mode, which you can enter by pressing „AP“ in the top right. Enter the necessary information (see figures below) based on whether you have a device working on the Android or the iOS platform.
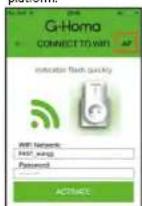
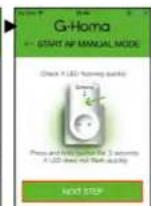
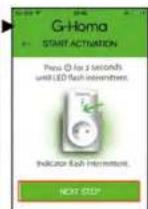
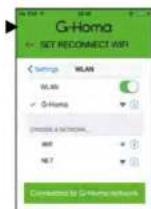
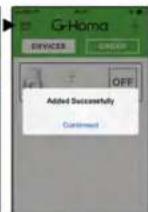
Example of the Setting Page in iOS

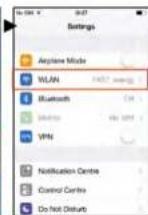
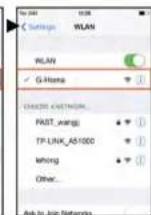
- After setting the connection in the IOS device, continue with the settings in the G-Homa application, select the WI-FI network and enter a password for activation. Once the message "Added Successfully" is displayed, confirm. The manual activation is now complete.
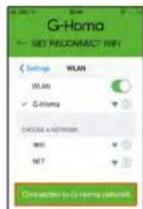
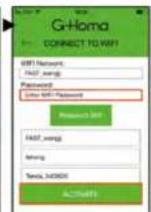
Example of the Settings Page in Android
GB
ERATING MANUAL FOR APPLICATION-CONTROLLED WI-FI SOCKET EMOS G-HOMA EMW302WF
7
MENU Settings
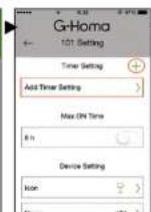
- At the top of the application, you will find timer settings and settings for the maximum
duration for which the connected device will be turned on. - In the middle are basic settings - choice of device icon and name.
- At the bottom of the application, you will find alarm settings and contact for the G-Homa technical support service.
- At the end, you can delete the added Emos G-Homa socket.
Change of Icon and Name of the Controlled Device
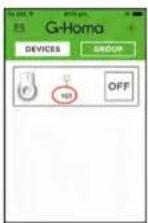
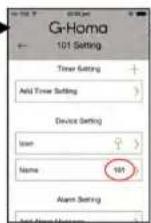
- Click the device icon in the middle; the MENU will open.
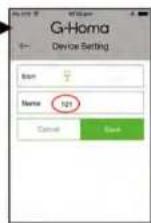
- After installing, the device name will automatically be set to 101, 102... and the icon will be changed to a lamp.
- To change the device name, click the current name (e.g. 101), enter a new name and confirm.
- To change the device icon, click the lamp icon and select an icon from the menu, then confirm.
Replacing the Timer Icon with an Image/Photo of Your Choice
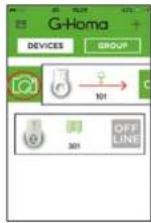
- Swipe your finger left to right over the device icon. A camera icon will be shown. Click the icon, then choose from the menu – take a photo, select a photo from the album or delete a photo. After finishing, the icon will change to the image you have chosen and assigned to the device.
Setting the Timer
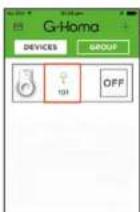
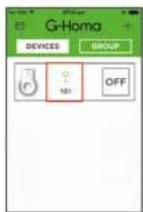
- Click the device icon in the middle; the MENU will open.
- Timer Settings - Add Timer Setting.
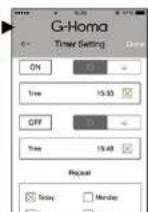
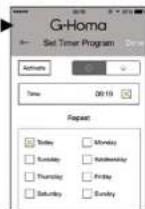
- Set the time for turning on, off, choose repeat options. Then tick the boxes and confirm the settings by pressing Done. The set timer will be shown in the Timer Settings field, where you can turn the timer on/off or adjust the settings. If you have activated the location detection function in the device where the G-Homa application is installed, the application will show you the current time of sunrise and sunset on the current day after clicking next to the clock icon.
Setting the Maximum ON Time
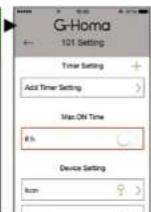
- Click the device icon in the middle; the MENU will open.
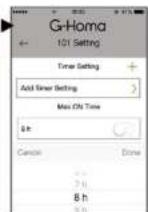
- Click the Max.ON Time field and set the maximum time for which you want the device to be on. When needed, you can turn the feature on or off using the 0 - I field.
Setting ON/OFF Countdown Timer
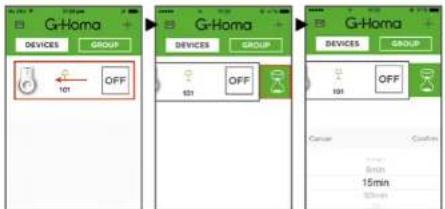
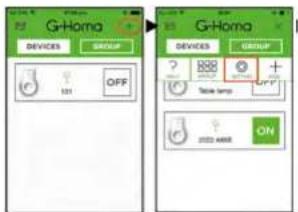
- Swipe your finger right to left over the OFF icon. An hourglass icon will be displayed. Click the icon and set from the menu the ON or OFF time to between 1 minute to 4 hours. The countdown will be activated and displayed in the middle below the icon. After the time elapses, the socket will turn on or off.
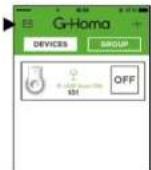
SETTING GROUP CONTROL
- Group control allows you to control multiple sockets at once using various commands; e.g. when leaving on a holiday. You can turn the connected devices on or off, or set a special control mode. For this control mode, you must first create a device group.
Adding a New Group
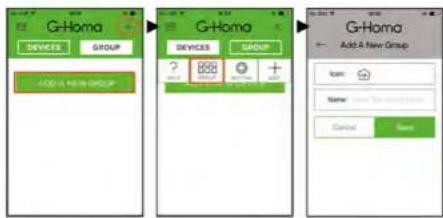
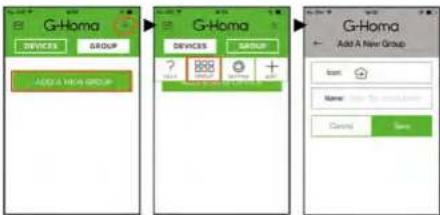
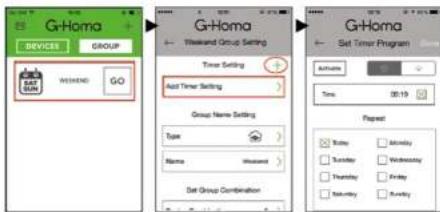
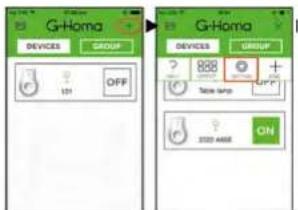
• After pressing the GROUP button, press +, and then +GROUP.
- Now choose an Icon for ease of orientation – you can choose from among Default, Weekend, Winter time, Energy saving, Vacation, Summer time. In the Name field, you can name the group. Confirm all the settings by pressing Confirm.
GB OPERATING MANUAL FOR APPLICATION-CONTROLLED WI-FI SOCKET EMOS G-HOMA EMW302WF
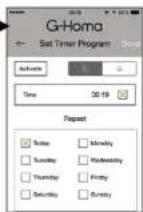
Setting Group Timer
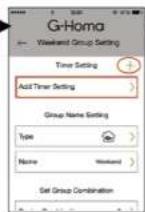
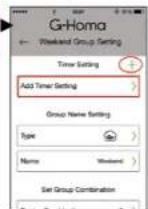
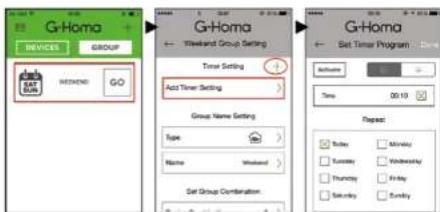
- Select a group and click on the group name at the centre of the device. You will enter the MENU for timer settings by clicking on Add Timer Setting. Set your timer and confirm by pressing Done. To delete the group, click the Delete Group Settings button.
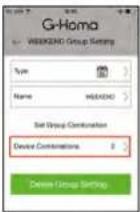
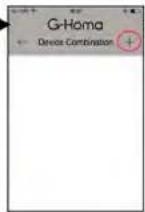
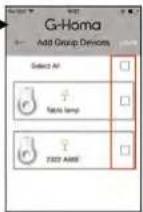
Setting a Combination of Commands for Turning One or Multiple Sockets On/Off
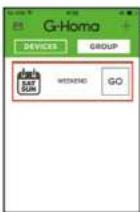
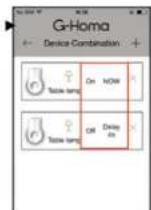
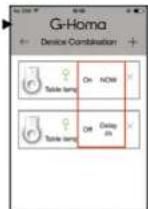
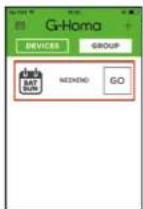
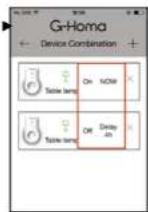
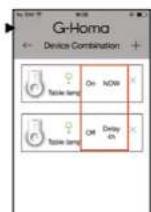
- After pressing the Device Combinations button, you can set various combinations of turning on or off one or even multiple sockets. All the processes can be activated by pressing the Go button next to the button showing the group name.
Alarm Feature
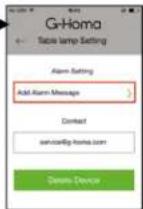
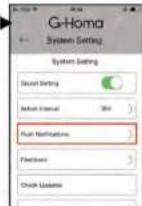
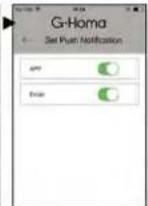
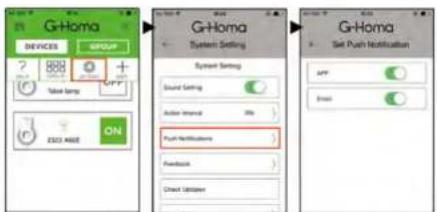
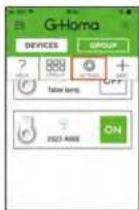
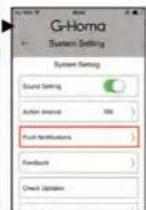
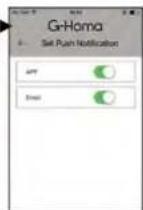
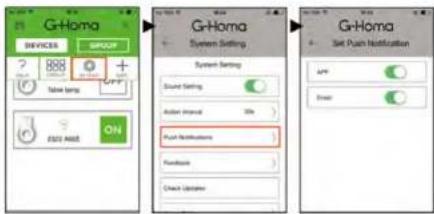
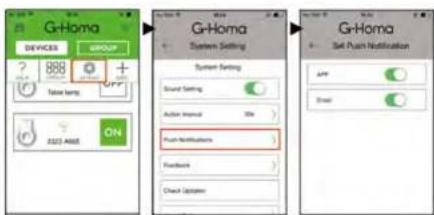
- The application and device can send a warning message to your e-mail or to the application mailbox. You can enter and modify the message by pressing the Acid Alarm Message button. When needed, if you hold the Power button for 3 seconds on the G-Homa timer socket, the socket will send the set message to the e-mail or the application mailbox. You can set the message destination in the Push Notifications,
choose I-O in the APP field (mailbox application) or the e-mail field. You will find all messages sent in the Message and Alarm field. The list will also show the time and date of when the message was sent.
Changing the Password
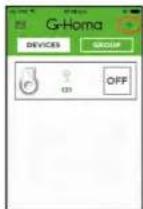
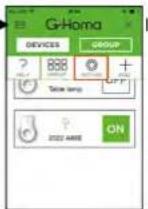
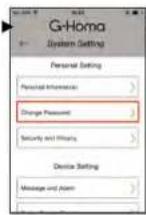
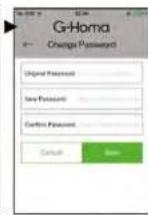
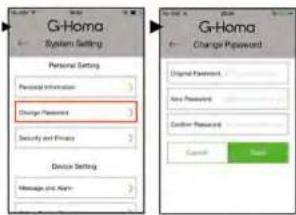
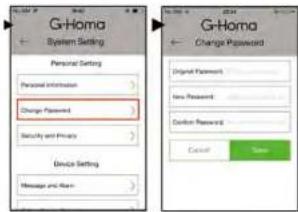
- If you need to change your password, click Change Password in settings and enter the original password, then the new password, and finally again confirm the new password.
OFFLINE
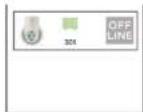
- If the application shows OFF LINE on the right Instead of OFF/ON and the LED indicator on the socket is flashing slowly (ca 1× a second) that means the socket is searching for Wi-Fi connection and the device cannot be controlled remotely. Check the Wi-Fi connection and when needed, set up the socket again using the procedure for adding a new device.
SETTING OPTIONS - SYSTEM SETTINGS
Private Settings
- account info – displays the registered e-mail and account name, which can be changed - account password change – allows the changing of the password for the account
Device Settings
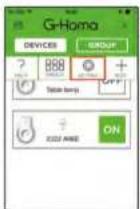
- message and alarm – displays messages received in the device application - new device (socket) registration – allows the adding of a new G-Homa socket
System Settings
- action interval – allows the setting of an interval from 0 to 60 seconds
- settings for the destination for alarm messages
- option for sending comments or questions to the manufacturer
• option for updating the software
• manufacturer information - log out; after logging out, you will be asked for your login information
Timer Reset
- Press and hold the manual on/off button on the timer for 20 seconds. All settings will be erased and the socket will switch to "add new device" mode; the LED indicator will be flashing rapidly.
LED Indicator - Options
- LED flashes slowly ca 1x a second – the socket is searching for Wi-Fi connection. Press and hold the button below the LED Indicator until the LED begins flashing several times a second and the socket switches into connection mode. Once there, follow the instructions for adding a new device.
- LED flashes quickly several times a second – the socket is in connection mode, follow
GB OPERATING MANUAL FOR APPLICATION-CONTROLLED WI-FI SOCKET EMOS G-HOMA EMW302WF
the instructions for adding a new device. After successfully completing the settings, the LED will remain on in the ON mode and off in the OFF mode.
- LED flashes quickly several times a second In 1–2 second Intervals – the socket is in manual settings mode and requires the Wi-Fi and password to be set manually. After successfully entering the settings, the LED will remain on in the ON mode and off in the OFF mode.
- LED flashes 3× - after activating the alarm mode (by holding the button for 3 seconds),
the socket will send the set message to the e-mail or the G-Homa application mailbox. - After successfully connecting/plugging the socket, the manual mode of the button will function properly; the LED will be on when the socket is ON, and off when the socket is OFF.
Note:
• Only plug devices which are off into the socket.
• The G-Homa socket is designed for indoor use only.
- If the WI-FI network settings change, the socket must be set again.
- Do not plug devices into the socket one after another without at least a 10 second delay!
Possible danger when used in connection with the following devices!
• vacuum cleaners and cleaning appliances working with water and steam
- cookers, hobs/cooktops, ovens and similar devices
• grills, toasters and similar portable cooking appliances
• medical devices
- deep fryers, electrical pans and similar devices
• food processors and kitchen appliances
• appliances for skincare and haircare
- microwave ovens and their combinations
- indoor heating – heaters
• sauna heating
• projectors and similar devices
- storage water heaters
• devices for cleaning floors and commercial areas
• electrical heating devices for animals
- portable heaters and immersion heaters
• electrical grills
• high-pressure cleaners and steam cleaners
• machines for entertainment and machines for private use
Specifications
• designed for powering from a 230 V--/50 Hz network
• maximum input power of the connected device must not exceed 3 680 W
- transmission frequency: 2.4 GHz (the device conforms to standards IEEE802.11/b/g/n)
• Wi-Fi* router
- The device is compatible with devices on platforms Android 3.0 or higher or iOS 6.0 or higher.
HU
KEZELÉSI ÚTMUTATÓ AZ EMOS G-HOMA EMW302WF WI-FI VEZÉRELT ALJZAT SMART ALKALMAZÁSÁHOZ
Lehetőségek
HU KEZELÉSI ÚTMUTATÓ AZ EMOS G-HOMA EMW302WF WI-FI VEZÉRELT ALJZAT SMART ALKALMAZÁSÁHOZ
Funkcija alarm
Spremembagesla
• V primeru potrebe po spremembil gesla kliknite v nastavitvi na Change Password in vnesite prvotno geslo, nato vnesite novo geslo in za konec novo geslo ponovno potrdite.
OFF LINE
RS|HR|BA
KORISNIČKI PRIRUČNIK ZA WI-FI UTIČNICU EMOS G-HOMA EMW302WF KOJOM SE UPRAVLJA PUTEM APLIKACIJE
Postavljanje tajmera grupe
- Odlaberite grupu i kliknite naziv grupe na sredini uređaja. Klikom na Dodaj postavku tajmera otvorit će se IZBORNIK postavki tajmera. Postavite tajmer i potvrdite pritiskom na Gotovo. Za brisanje grupe kliknite gumb izbrisi postavke grupe.
Зміна пароля
OFF LINE
LT
NAUDOJIMO INSTRUKCIJA PROGRAMA VALDOMAM WI-FI LIZDUI EMOS G-HOMA EMW302WF
Aliarmo funkcija
NEPRISIJUNGES
LV
EKSPLUATACIJAS ROKASGRAMATA AR LIETOJUMPROGRAMMU PÄRVALDAMAI WI-FI ROZETEI EMOS G-HOMA EMW302WF
lestatit grupas taimeri
- Izvėlieter grupu u pieskarieties grupas nosaukumam ieries centra. Atvėrsiet taimera iestatijumu MENU (izvėlne), pieskaroties Add Timer Setting (pievienot taimera iestatijumu). Iestatiet taimeri un apstipriniet, pieskaroties Done (gatavs). Lai dzestu grupu, pieskarieties Delete Group Settings (dzest grupas iestatijumus) pogu.
Modinātāja funkcija
Paroles maina
- Paroli var nomainit, pieskaroties Change Password (mainit paroli) iestatijumos un levadot sakotnejo paroli, pec tam jauno paroli, un velreiz jalevada jauna parole apstiprinašanai.
BEZSAISTE
Parooli muutmine
ÜHENDUS PUUDUB


- Connecting - Installing the G-Homa Application
- DEVICE SETTINGS
- Adding a New Device
- Manual Mode for Adding a Device
- Example of the Setting Page in iOS
- Example of the Settings Page in Android
- MENU Settings
- Change of Icon and Name of the Controlled Device
- Replacing the Timer Icon with an Image/Photo of Your Choice
- Setting the Timer
- Setting the Maximum ON Time
- Setting ON/OFF Countdown Timer
- SETTING GROUP CONTROL
- Adding a New Group
- GB OPERATING MANUAL FOR APPLICATION-CONTROLLED WI-FI SOCKET EMOS G-HOMA EMW302WF
- Setting Group Timer
- Setting a Combination of Commands for Turning One or Multiple Sockets On/Off
- Alarm Feature
- Changing the Password
- OFFLINE
- SETTING OPTIONS - SYSTEM SETTINGS
- Private Settings
- System Settings
- Timer Reset
- LED Indicator - Options
- Note:
- Possible danger when used in connection with the following devices!
- Specifications
- KEZELÉSI ÚTMUTATÓ AZ EMOS G-HOMA EMW302WF WI-FI VEZÉRELT ALJZAT SMART ALKALMAZÁSÁHOZ
- Lehetőségek
- HU KEZELÉSI ÚTMUTATÓ AZ EMOS G-HOMA EMW302WF WI-FI VEZÉRELT ALJZAT SMART ALKALMAZÁSÁHOZ
- Funkcija alarm
- Spremembagesla
- OFF LINE
- RS|HR|BA
- KORISNIČKI PRIRUČNIK ZA WI-FI UTIČNICU EMOS G-HOMA EMW302WF KOJOM SE UPRAVLJA PUTEM APLIKACIJE
- Postavljanje tajmera grupe
- Зміна пароля
- NAUDOJIMO INSTRUKCIJA PROGRAMA VALDOMAM WI-FI LIZDUI EMOS G-HOMA EMW302WF
- Aliarmo funkcija
- NEPRISIJUNGES
- EKSPLUATACIJAS ROKASGRAMATA AR LIETOJUMPROGRAMMU PÄRVALDAMAI WI-FI ROZETEI EMOS G-HOMA EMW302WF
- lestatit grupas taimeri
- Modinātāja funkcija
- Paroles maina
- BEZSAISTE
- Parooli muutmine
- ÜHENDUS PUUDUB
Brand : Emos
Model : P5530
Category : Uncategorized