
VK1330PWDC - Vacuum Cleaner Cotech - Free user manual and instructions
Find the device manual for free VK1330PWDC Cotech in PDF.


| Product Type | Wet and Dry Vacuum Cleaner |
| Brand | Cotech |
| Model | VK1330PWDC |
| Article Number | 40-8576 |
| Rated Voltage | 230 V, 50 Hz |
| Protection Class | IP24 |
| Motor Power | 1300 W |
| Power Tool Socket Max Load | 2380 W |
| Max Total Power | 3680 W |
| Vacuum | 180 mbar |
| Suction Capacity | 3600 l/min |
| Container Volume | 30 L |
| Hose Diameter | 35 mm |
| Hose Length | 2.5 m |
| Mains Lead Length | 5 m |
| Filters Included | Cartridge filter, Foam filter, HEPA filter, Pre-filter (dust bag) |
| Accessories Included | Suction tube, Crevice nozzle, Universal nozzle, Round brush, 2 tubes, Handle with suction setting, Step adapter |
| Auto Power Tool Socket | Yes (max 2380 W) |
| Safety Features | Float switch for wet vacuuming, Residual current device recommended |
Frequently Asked Questions - VK1330PWDC Cotech
User questions about VK1330PWDC Cotech
0 question about this device. Answer the ones you know or ask your own.
Ask a new question about this device
Download the instructions for your Vacuum Cleaner in PDF format for free! Find your manual VK1330PWDC - Cotech and take your electronic device back in hand. On this page are published all the documents necessary for the use of your device. VK1330PWDC by Cotech.
USER MANUAL VK1330PWDC Cotech
Wet And Dry Vacuum Cleaner
Read the entire instruction manual carefully and make sure that you fully understand it before you use the equipment. Keep the manual for future reference.
Viktig information:
ART.NO 40-8576
MODEL VK1330PWDC
Ver. 20140516
Original instructions
Bruksanvisning i original
Wet And Dry Vacuum Cleaner
ART.NO 40-8576 MODEL VK1330PWDC
Please read the entire instruction manual before using the product and then save it for future reference. We cannot be held responsible for any errors in the text or images or changes to technical data. If you experience any technical problems or have any other questions, please contact our Customer Services (for address details, please see back page).
1. Safety instructions
- Make sure that the power supply at the electrical socket is 230 V AC.
- Do not use the wet and dry vacuum cleaner for vacuuming flammable substances/liquids, hot coals, ashes or other hot substances. Fire hazard!
- Do not use the wet and dry vacuum cleaner for vacuuming large items or metal objects as these could damage the vacuum.
- Do not run the wheels over the mains lead.
- Do not use the wet and dry vacuum cleaner if the mains lead is damaged.
- Do not let children play with the wet and dry vacuum cleaner, it is not a toy.
- Keep hair, fingers and loose clothing away from the openings and moving parts of the wet and dry vacuum cleaner.
- Never use the wet and dry vacuum cleaner without a filter.
- Do not use the wet and dry vacuum cleaner if the nozzle is blocked or if any part is deformed.
- Do not use the wet and dry vacuum cleaner close to cookers, ovens or other sources of heat.
- Carry the wet and dry vacuum cleaner using the handle. Do not drag it around by its hose or mains lead.
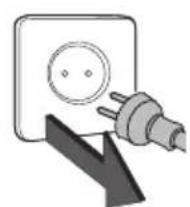
- Unplug the wet and dry vacuum cleaner when it is not in use.
- Do not expose the electrical components of the wet and dry vacuum cleaner to rain or moisture.
- Store the wet and dry vacuum cleaner indoors in a dry area when it is not in use.
- If the mains lead is damaged and needs changing it must be sent to the manufacturer, an authorised service facility or qualified person to be properly repaired.
- The wet and dry vacuum cleaner may be used by children of eight years and above and by persons with reduced physical, sensory or mental capability or lack of experience and knowledge provided they have been given supervision or instruction concerning use of the appliance in a safe way and understand the hazards involved.
- Never let children play with the wet and dry vacuum cleaner.
- Cleaning and maintenance may be carried out by children but only under adult supervision.
- Warning! Electrical appliances used close to water should be connected to the power supply via a residual current device (tripping current 30 mA in not more than 30 ms).
2. Package contents

A) Wet and dry vacuum cleaner
B) Suction tube
C) Crevice nozzle for corners and confined spaces
D) Universal nozzle for floors and carpets
E) Round brush
F) Tubes (2×)
G) Cartridge filter
H) Filter lid
l) Dust bag
J) Foam filter for wet vacuuming
3. Description
- Wheels
- Over-centre catch
- Power switch
- HEPA filter
- Hanging hook for cables or accessories
- Storage compartment
- Handle
- Motor unit/top
- Power tool socket
- Vacuum port
- Container
- Drain cap
- Castor
K) Handle with suction setting
L) Step adapter
M) Pre-filter (filter back)
N) Wheel (2×)
O) Hub cap (2×)
P) R-pin (2×)
Q) Washer (4×)
R) Castor (2×)
S) Wheel axle
T) User manual

4. Assembly
1

2
3

5

6

7

8

- Warning! Always make sure the plug is disconnected before servicing or adjusting.
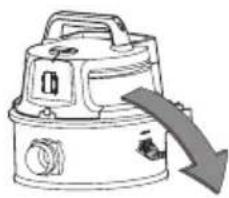
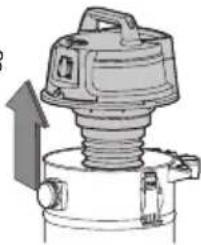
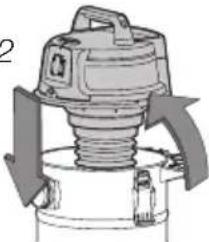
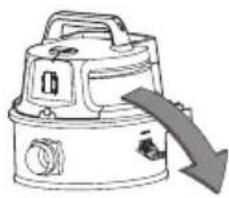
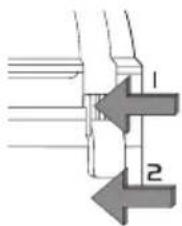
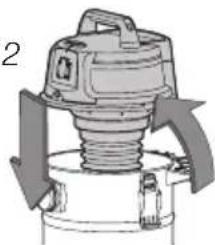
- Open the over-centre catch.
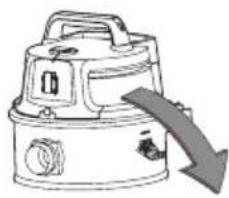
- Lift the motor unit/top.
- Remove the accessories from the container. Check that all the parts are intact and that nothing is missing.
- Turn the container upside down and press the castors securely into the brackets on the bottom.
-
Attach the castors.
-
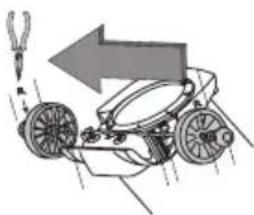
Press the wheel axle (S) through both brackets on the bottom of the container.
- Attach a washer (Q) on each side of the wheel axle outside the brackets.
- Attach a wheel on each side of the wheel axle outside the washers.
- Place a washer outside the wheel and press an R-pin (P) into the hole in the wheel axle outside the bracket.
-
Fit both the hub caps (O) onto the wheels.
-
Note! Different parts need to be attached for dry vacuuming and wet vacuuming respectively. See 5.1 and 5.2. The wet and dry vacuum cleaner is usually delivered ready for dry vacuuming with the cartridge filter (G) and filter lid (H) already attached.
-
In other cases: press the foam cartridge filter carefully and securely onto the filter basket.
9

10

11

12

13

14

15

16

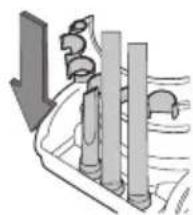
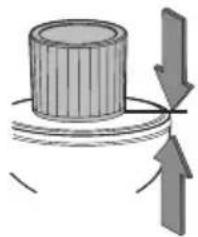
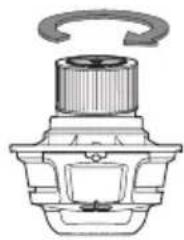
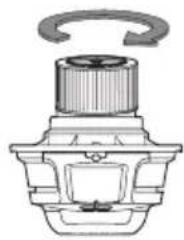
- Fasten the filter cover by turning the locking knob on the filter cover to the locked position.
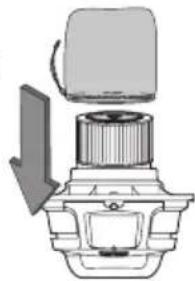
- Slide on the pre-filter (the filter bag) (M) outside the cartridge filter and pull the string.
- Use the dust bag (I) when necessary to achieve the best possible filtering results. Press it securely onto the inlet inside the container.
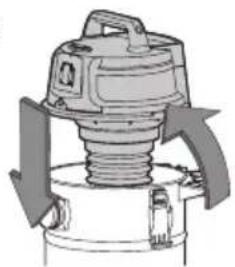
- Replace the motor unit/top on the container.
- Secure the top section onto the container with the over-centre catch.
- Secure the accessories.
- Attach the suction hose to the container's hose connection (10). Press in and turn it clockwise until it is securely fastened.
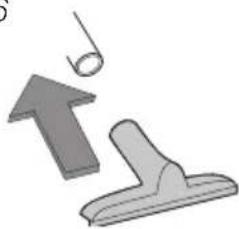
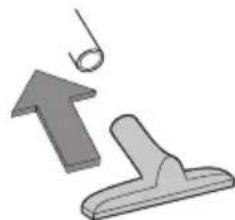
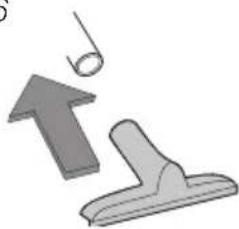
- Attach the required accessories to the hose.
5. Use
- Warning! Read the warning text before use.
- Warning! Always make sure the plug is disconnected before servicing or adjusting.
- Note: The cartridge filter (G) is for vacuuming dry dust. The foam filter (J) must only be used for vacuuming water.
- When vacuuming very fine-particled substances, both the dust filter and pre-filter must be used in addition to any dust bag.
- The warranty will be void if the wrong type of dust bag has been used.
5.1 Dry vacuuming
1

2
3

4
5

6
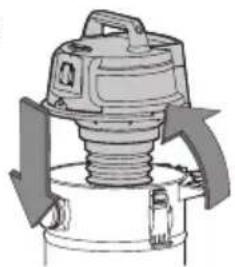
7
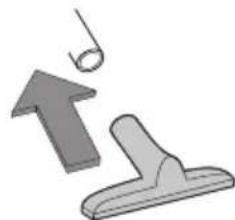
8

9
- Warning! Always make sure the plug is disconnected before servicing or adjusting.
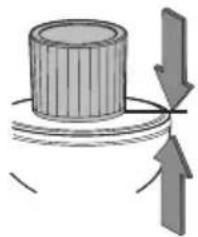
- Press the cartridge filter carefully onto the filter basket.
- Fasten the filter cover by turning the locking knob on the filter cover to the locked position.
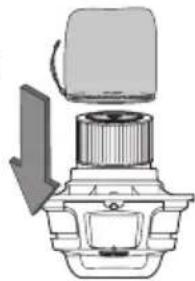
- Slide on the pre-filter (the filter bag) (M) outside the cartridge filter and pull the string.
- Use the dust bag (I) when necessary to achieve the best possible filtering results. Press it securely onto the inlet inside the container.
- Replace the motor unit/top on the container. Secure the top section onto the container using the over-centre catch.
- Attach the required accessories to the hose.
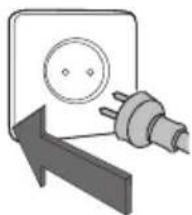
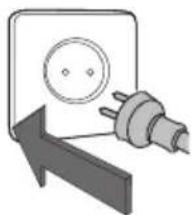
- Plug the mains lead into a wall socket.
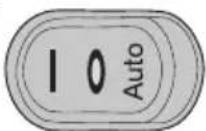
- Start using the power switch.
5.2 Wet vacuuming

Warning: Do not use the wet and dry vacuum cleaner to vacuum toxic, hazardous or flammable substances/liquids.
Note: Do NOT use the cartridge filter or dust bag when wet vacuuming.
- Warning! Always make sure the plug is disconnected before servicing or adjusting.
- Attach the foam filter (J) before wet vacuuming. Slide the foam filter carefully onto the filter basket making sure it covers the entire filter basket.
- Attach the required accessories to the hose.
- Plug the mains lead into a wall socket.
- Switch the vacuum on using the power switch.
- Remember to empty the container once it is full.
Things to consider when wet vacuuming!
- Only use the foam filter when wet vacuuming.
- Make sure that the foam filter is clean and dry and secure it onto the filter basket before starting to wet vacuum.
- The safety cut-out float switch stops the suction when the water level in the container reaches a certain level, thus preventing water from entering the motor. The motor will race when the suction function has been stopped by the float. Switch the motor off and empty the container.
- Empty the container before it becomes totally full and clean it after use.
- Clean the foam filter as and when required. Remove the filter and wash it by hand in water with a mild detergent, let it air-dry.
- Do not submerge the entire nozzle under the surface. Leave some space so that air can also pass through when vacuuming a large amount of liquid.
- Remember to reattach the filter before using the vacuum again. NEVER use the wet and dry vacuum without a filter.
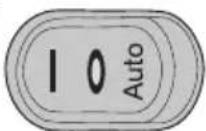
6. Power switch
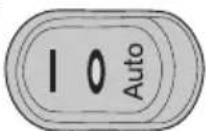
The power switch (3) has three settings:
• I On
• 0 Off
- Auto Power tool socket – The wet and dry vacuum cleaner starts and stops automatically when the machine connected to the machine socket is turned on and off.
7. Power tool socket
The product has a power tool socket (9) which is designed to start the wet and dry vacuum cleaner automatically.
- Connect the plug from a circular saw or similar machine to the power tool socket. Then connect the suction hose (B) between the wet and dry vacuum cleaner and the dust extractor port of the circular saw (or whatever machine is connected). Set the power switch to the Auto position.
- The ON and OFF control of the wet and dry vacuum cleaner will now be controlled by the connected power tool. The wet and dry vacuum cleaner will switch on as soon as the connected power tool has started and switch off about five seconds after the connected power tool has been switched off.
Note: The power tool socket must not be loaded over 2380 W.
8. Repair and maintenance
- Warning! Always make sure the plug is disconnected before servicing or adjusting.
- Remove the suction hose.
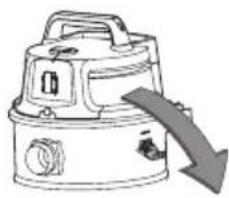
- Open the over-centre catch and remove the motor/top from the container.
- Clean the container and hose and make sure that they are dry before putting the product away for storage.
Replace or clean the filters whenever needed. Make sure that the hose, filter, couplings and mains lead are undamaged. If the mains lead is damaged, have it replaced by a professional.
8.1 Fitting and cleaning the cartridge filter Assembly
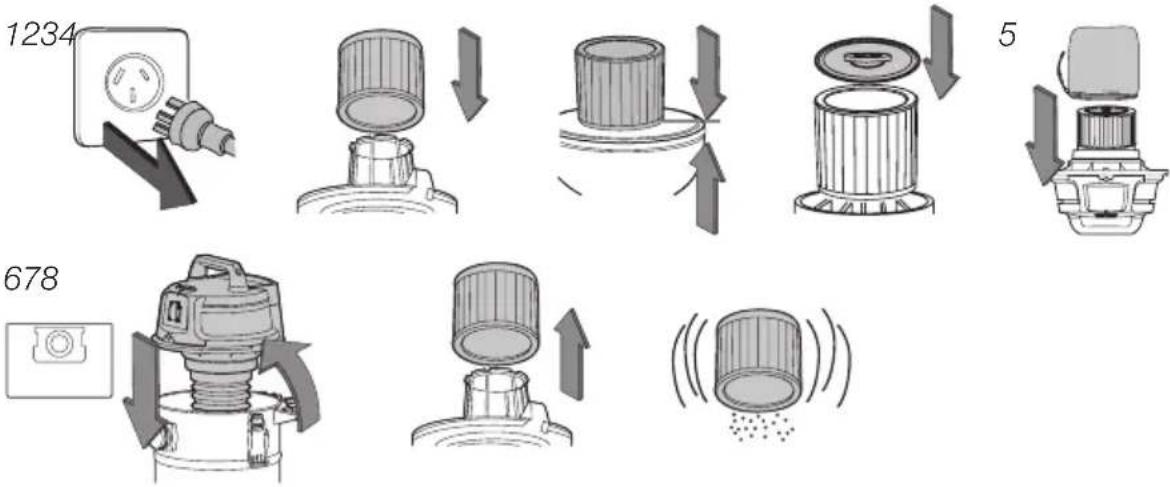
- Warning! Always make sure the plug is disconnected before servicing or adjusting. Remove the motor unit/top and place it upside down.
- Attach the cartridge filter to the filter basket*, being careful not to damage the filter.
- Make sure that the filter covers the entire filter basket.
- Fasten the filter cover (H) by turning the locking knob on the filter cover to the locked position.
- Slide on the pre-filter (M) and pull the friction lock.
- Fit the dust bag (I) for extra efficient filtering. Replace the motor unit/top (8) onto the container (11) and fasten it with the over-centre catch (2).
*Note! The cartridge filter fits best if the side with a high edge on the inside is placed against the motor unit/top.
Cleaning the cartridge filter
- Carefully remove the cartridge filter (G).
- Brush or shake the filter free from debris (remember to do this outdoors). Wash the filter by hand using a mild detergent and then rinse with clean water. Let it air-dry for about 24 hours. Replace the filter only when it is completely dry.
8.2 Fitting and cleaning the foam filter
Assembly

-
Warning! Always make sure the plug is disconnected before servicing or adjusting. Remove the motor unit/top and place it upside down. Remove the cartridge filter (G) from the filter basket, being careful not to damage the filter.
-
Carefully slide the foam filter (J) onto the filter basket.
-
Make sure that the filter covers the entire filter basket.
Cleaning the foam filter
-
Carefully remove the foam filter.
-
Wash the filter by hand using a mild detergent and the rinse with clean water. Let it air-dry and replace the filter.
8.3 Cleaning the HEPA filter
1
2

3

4

5a

5b

6

7

8

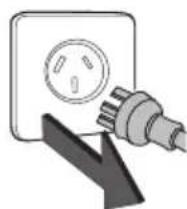
- Make sure that the plug is disconnected.
- Push up the catch in the grille cover against the hanging hook (5).
- Remove the cover over the HEPA filter.
- Remove the filter.
-
Clean the HEPA filter following option A or B. Change the HEPA filter if it is not possible to clean it.
-
A. Carefully blow the HEPA filter clean using compressed air from the outside in. Or use a soft brush to help.
-
B. Wash the filter by hand using a mild detergent and then rinse using clean water. Let it air-dry and replace the filter.
-
Replace the HEPA filter and cover.
- Secure the top of the cover first.
- Secure the cover and fasten using the catch.
9. Troubleshooting
| Problem Source of error Action | ||
| Motor does not start. | No power supply to the wall socket. | Check. |
| Fault in the power switch, lead or motor. | Get a qualified professional to repair the defective part. | |
| Dust comes out of the motor. | The dust bag/filter is missing or broken. | Change/insert a dust bag/filter. |
| Poor suction and high motor speed or vibrations. | The dust bag is full/filter clogged. | Change dust bag/filter. |
| Nozzle, hose or coupling clogged. | Check if something has blocked the airflow. | |
| Container is full. Empty the container. | container. | |
10. Care and maintenance
Unplug the device before cleaning it.
Wipe the product with a moist, soft cloth. Use a mild detergent – never use a solvent or strong, abrasive detergent, as this may damage the product.
11. Waste disposal
This product should be disposed of in accordance with local regulations. If you are unsure what to do, contact your local authority.
12. Specifications
Rated voltage 230 V, 50 Hz
Protection class IP24
Power, motor 1300 W
Power tool socket, max 2380 W
Max power total 3680 W
Vacuum 180 mbar
Suction capacity 3600 l/min
Container volume 30
Hose ∅ 35 mm, length: 2.5 m
Mains lead, length 5 m
Torr- och våtsugare
ART.NR 40-8576 MODELL VK1330PWDC
4. Montering
1

2

3


5

6

7

8

11

12
13

14
15

16

2
3
4
5

6

7

8

9
A) Tørr- og våtsuger
B) Sugeslange
C) Fugemunnstykke for hjørner og fuger
D) Universalmunnstykke for gulv og tepper
E) Rund børste
F) Sugerør (2×)
G) Belgfilter
H) Filterlokk
l) Støvpose
J) Skumplastfilter til våtsuging
K) Håndtak med innstilling av sugeeffekt
L) Adapter
M) Forfilter (filterpose)
N) Hjul (2×)
O) Navkapsel (2×)
P) R-splint (2×)
Q) Skive (4×)
R) Lenkehjul (2×)
S) Hjulaksel
T) Bruksanvisning
3. Beskrivelse
4. Montering
1

2
3


5

6
7

8

11

12

13

14

15

16
2

3

4

5

6
7
8
9
4. Asennus
1
2
3

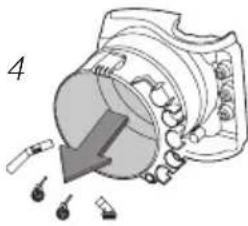
5

6
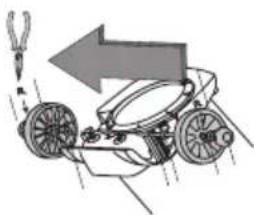
7
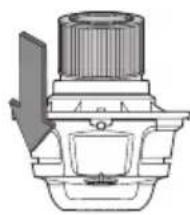
8

11
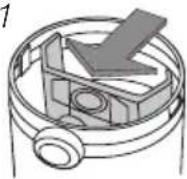
12

13
14

15

16
2

3

4

5

6

7

8
9

4. Montage
1

2
3


5

6

7

8

11

12
13

14

15

16

2

3
4

5

6

7
8

9

Declaration of Conformity
Declares that this product complies with the requirements of the following directives and standards
POSTAL 10 – 13 Market Place
Kingston Upon Thames
Surrey
KT1 1JZ
DEUTSCHLAND


- WET AND DRY VACUUM CLEANER
- VIKTIG INFORMATION
- SAFETY INSTRUCTIONS
- PACKAGE CONTENTS
- DESCRIPTION
- ASSEMBLY
- USE
- 5.1 DRY VACUUMING
- 5.2 WET VACUUMING
- NOTE: DO NOT USE THE CARTRIDGE FILTER OR DUST BAG WHEN WET VACUUMING
- THINGS TO CONSIDER WHEN WET VACUUMING
- POWER SWITCH
- POWER TOOL SOCKET
- REPAIR AND MAINTENANCE
- 8.1 FITTING AND CLEANING THE CARTRIDGE FILTER ASSEMBLY
- CLEANING THE CARTRIDGE FILTER
- 8.2 FITTING AND CLEANING THE FOAM FILTER
- CLEANING THE FOAM FILTER
- 8.3 CLEANING THE HEPA FILTER
- TROUBLESHOOTING
- CARE AND MAINTENANCE
- WASTE DISPOSAL
- SPECIFICATIONS
- TORR- OCH VÅTSUGARE
- ART.NR 40-8576 MODELL VK1330PWDC
- MONTERING
- BESKRIVELSE
- ASENNUS
- MONTAGE
- DECLARATION OF CONFORMITY
- DEUTSCHLAND
Brand : Cotech
Model : VK1330PWDC
Category : Vacuum Cleaner