
UVirus Killer - Air purifier BLAUPUNKT - Free user manual and instructions
Find the device manual for free UVirus Killer BLAUPUNKT in PDF.
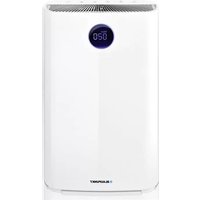


| Product Type | Air Purifier |
| Model | BAP-IT-H3148-U31W |
| Brand | Blaupunkt |
| Power Supply | 220-240V ~ 50Hz |
| Rated Power | 35W |
| CADR (Particulate) | 310 m³/h |
| Noise Level | 20-60 dB(A) |
| Coverage Area | 29-48 m² |
| Filtration Stages | 5-stage (Pre-filter, HEPA, Activated Carbon, Photocatalyst, UV) + Ionizer |
| HEPA Filter Efficiency | Up to 95% of particles 0.3 µm |
| UV Lamp | Yes, kills bacteria and viruses |
| Ionizer | Negative ion concentration 8,000,000 pcs/cm³, ozone output <0.03 PPM |
| Fan Speeds | Low, Medium, High |
| Auto Mode | Yes, with air quality sensor |
| Sleep Mode | Yes, with light sensor |
| Timer | 1h, 4h, 8h |
| Wi-Fi Connectivity | Yes, Tuya Smart App |
| Air Quality Indicator | Blue (Perfect), Green (Good), Purple (Normal), Red (Bad) based on PM2.5 |
| Pre-filter Cleaning | Every 2 months, washable |
| Filter Replacement Indicator | After 1600 hours of operation |
Frequently Asked Questions - UVirus Killer BLAUPUNKT
User questions about UVirus Killer BLAUPUNKT
0 question about this device. Answer the ones you know or ask your own.
Ask a new question about this device
Download the instructions for your Air purifier in PDF format for free! Find your manual UVirus Killer - BLAUPUNKT and take your electronic device back in hand. On this page are published all the documents necessary for the use of your device. UVirus Killer by BLAUPUNKT.
USER MANUAL UVirus Killer BLAUPUNKT
Enjoy it.
BAP-IT-H3148-U31W
CONTENT
IMPORTANT SAFEGUARDS....4
PRODUCT INTRODUCTION....6
BEFORE USE 8
HOW TO USE....14
CLEANING AND MAINTENANCE....16
TROUBLESHOOTING....22
ADDITIONAL INFORMATION....23
WI-FI USAGE GUIDE....24
WARRANTY CARD 25
MODEL CODE MEANING....26
INHALT
To avoid causing harm to yourself or others, or financial damages, please be sure to follow these safety precautions.
If the machine's power cord is damaged, it must be replaced by the manufacturer, a maintenance service centre or by a qualified technician.

Warning

Do not touch with wet hands!
Do not touch the power plug with wet hands.
Otherwise it may cause electric shock.

Unplug from wall socket!
Make sure to disconnect the power from the wall socket before cleaning the appliance.
Otherwise, the air purifier may turn on unexpectedly and pose a risk of electric shock.

Prohibited!
Do not use power supply that is beyond the specified voltage. Only 220-240V AC power should be used.
Using a multi socket adaptor or exceeding the specified voltage of the equipment may lead to overheating or fire.

Before starting the air purifier, please insert the plug completely into the socket.
Failure to fully insert the plug into the socket may lead to electric shock, overheating or fire.
- Do not use a damaged plug or loose power socket.

Prohibited!
Do not use if power cord or socket is damaged.
Do not tangle the cord when using the machine. Using a damaged cord may lead to electric shock, short circuiting or fire.
- Do not cut, modify, distort excessively, contort, pull, or apply weight on the cord or plug.

Please clean the power plug regularly.
Accumulation of dust and moisture on the power plug can damage its insulation and result in a fire.
- Pull out the power plug, then wipe it with a dry cloth (do not use a wet cloth!).
- Remember to pull out the power plug if not using device for an extended period of time.
Do not disassemble
Disassembling and modifying the air purifier without authorization is prohibited.
Otherwise it may lead to electric shock, failure or fire.

Prohibited!
Do not insert metal objects into the outlets or inlets.
Otherwise it may affect the internal components and cause electric shock or damage.

Attention
Please turn off the power of the machine in any of the following circumstances.
A button is not working.
A circuit breaker has tripped or fuse has blown.
The power cord or plug is unusually hot.
There is a smell of burning or there are abnormal sounds or vibration.
Any other anomalies or failure.
Prohibited!
Attention
Do not use solvents such as benzene or thinner to clean the air purifier, and avoid contact with insecticide sprays.
Otherwise the air purifier may be damaged or even short circuited, leading to electric shock or fire.
Prohibited!
Do not use this air purifier in areas with oil fumes.
Using in a kitchen may reduce the service life of the air purifier filter.
- The air purifier should not be used for ventilation or as an extraction equipment.
Prohibited!
Do not use the air purifier indoors with fumigation type pesticides.
Chemical residues may accumulate inside the machine, which are then released into the air, harming health.
After using pesticides, allow the room to ventilate thoroughly before using the air purifier.
Keep away from moisture.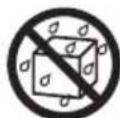
Do not wet the air purifier!
Otherwise, it may lead to electric shock or fire due to short circuiting.

Hold the plug instead of pulling on the cord when unplugging.
Otherwise, it may lead to short circuiting, fire, electric shock, or injury.

Do not use this air purifier in high temperature, damp, or wet environments, such as the bathroom.
Keep away from moisture.
The air purifier may leak, causing electric shock or a fire.
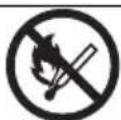
Do not put volatile or combustible materials, such as tobacco or matches, into the machine.
Keep away from fire!
Keep away from fire! Otherwise, it may cause a fire.

This appliance can be used by children aged 8 and above and by persons with reduced physical, sensory, or mental capabilities, or persons who lack experience and knowledge, if they are under supervision or have been instructed on how to use the appliance in a safe way while understanding the hazards involved.
Do not allow children to play with the appliance. Cleaning and user maintenance shall not be performed by children without supervision.
PRODUCT INTRODUCTION

Control Panel
Other Contents
Air quality indicator

Blue (PM2.5 = 0 \~ 50) Perfect

Green (PM2.5 = 50-100) Good

Purple (PM2.5 = 100-150) Normal

Red (PM2.5 = 150\~) Bad
Note: Press the UV button if you want to turn off the air quality indicator light.
(The PM2.5 digital display is used just for reference)
BEFORE USE
Recording the Beginning Use Date
To replace the filter on time, record the date at the bottom of the nameplate before using the air purifier. This helps to enable the best performance.


Tips
Once the plastic packaging for the filters have been removed, the efficient HEPA filter and activated carbon filter must be replaced once a year.
Air Quality Indicator
The air quality indicator shows the air quality conditions, temperature in the surrounding area, and air humidity. Please refer to pages 6 and 14 for more information.

Dismounting and Installing the Air Inlet Panel
1. Removing the air inlet panel.
Hold on to the grooves on both sides of the air inlet panel, then gently pull it out.

1

2
2. Installing the air inlet panel.
To reinstall the air inlet panel, align and insert the panel into the fixed grooves, then gently push it in.
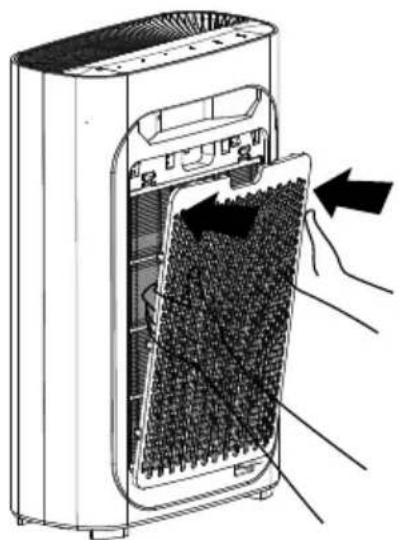
Air Purifier Placement
To ensure the best ventilation in your room, ensure that the gap between the air inlet and the wall is at least 50 cm, and the gap between the air outlet and the wall is at least 10 cm.
Please keep the appliance at least 1 metre away from any televisions, radios, etc.
Do not power the air purifier from the same socket that powers a television set, radio, or other electrical equipment, as it may cause screen jitters and may generate noise.
- Operating the air purifier in the same spot for an extended period of time may cause the walls to become dirty.
- To ensure adequate ventilation and maximum efficiency, do not interfere with the air outlet and air inlet.

Filter Installation
Information
Please remove all the filter packaging before using the air purifier, and follow the instructions below.

Attention
● Make sure that power has been disconnected from the socket before installation, maintenance or transportation. - Do not operate the air purifier without filters. - Remove the packaging of each filter before using.

Tips
You can put the air purifier against the wall for better stability when removing or installing filters.
Steps
Before using the air purifier for the first time, please install the filters correctly by following the instructions below.
- Remove all packaging and place the purifier on a dry, stable, and horizontal surface on the ground.

- Hold the grooves on both sides of the air inlet panel, then gently pull it out.
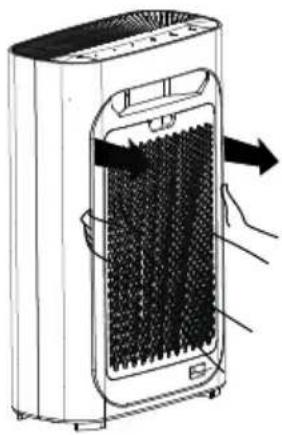
1

2
- Take out all the filters from the air purifier.

- Remove all filters packaging.

- Install all the filters in order.

- Re-install the air inlet panel. Align and insert it into the fixed grooves, then push it gently.
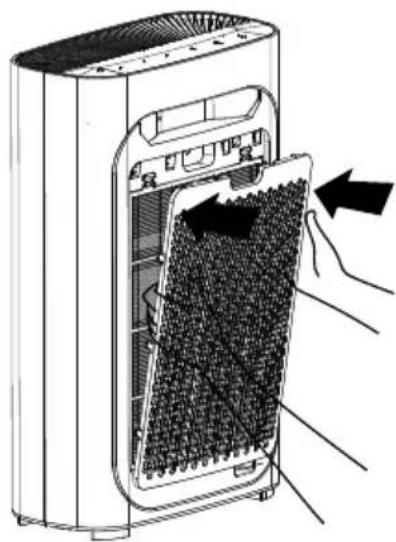
- Install the pre-filter by following the instructions.


Tips
Please be careful when installing the front panel.
Filters and Function

Activated carbon filter + photocatalyst filter Pre-filter HEPA filter
The 5-stage air purification system effectively purifies air and enables healthier life.
One: Pre-filter
Two: Efficient HEPA filter
Three: Activated carbon filter
Four: Photocatalyst filter
Five: UV lamp
Six - Ionizer
One: Pre-filter
The micron mesh filter effectively blocks 2.5mm fibrous particulate matter; Blocking rate > 99.9%. It can be easily cleaned tens of thousands times.
This filter catches larger particles such as pet fur, dander, and coarse dust and helps to increase the life of the subsequent filters.
Two: Efficient HEPA filter
This filter removes up to 95% of particles as small as 0.3 micron from the air flow. It prevents the spread of allergens and bacteria, such as pollen, smog and viruses, in the air.
Three: Activated carbon filter
This filter removes volatile organic compounds such as second-hand smoke and various types of polluting gases.
Four: Photocatalyst filter
Nano TIO2 is used which has a photocatalytic function. Strong catalytic degradation is achieved under UV light.
This filter effectively degrades formaldehyde, toluene, xylene, ammonia, TVOC and other pollutants.
Five: UV lamp
The UV light kills a variety of common bacteria and viruses effectively and inhibits their production
Six: Ionizer
Negative ion concentration: 8000000 pcs/cm³
Ozone output: <0.03 PPM
The air purifier generates a continuous stream of millions of negative ions circulating through the air. The ions charge particles (such as dust, dander, or bacteria), causing them to clump together, which makes them bigger and easier to be pulled by the home air purifier filter or to be vacuumed up.
Produces large amounts of negative ions, physically adsorbs, eliminates odors, and has strong adsorption. Negative ions cause bacteria to lose their activity, making them harmless. The biggest advantage of negative ions is that they freshen the air we breathe.
![graph LR A["Input: Solar Panel with leaves, leaves, and waste"] --> B["Process Step 1: Material input, processing, and waste disposal"] B --> C["Process Step 2: Material processing, processing, and waste disposal"] C --> D["Output: Final product with waste disposal"]](/content/2026/05/833710/images/55b9c9308f1f555d0d5231cf265366d4251461561d6716bafde92e391c6ad9e6.jpg)

Bacteria


Allergens
Coarse dust
Hair
Harmful particles
Dander


Dust, pollen
Pet
D
U
HOW TO USE
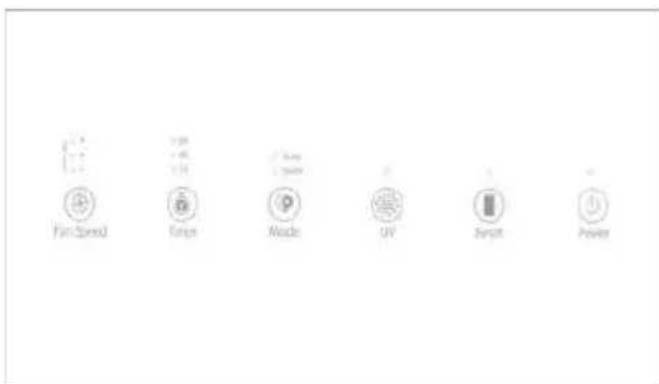
Control Panel

Plug into Wall Socket
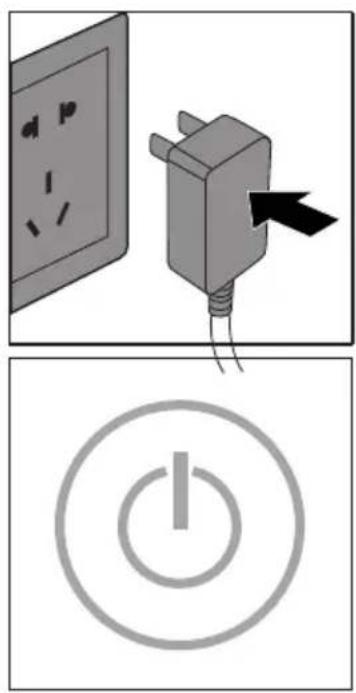
Plug into a wall socket, music will start to play and all the lights will flash 3 times, then all the lights will turn off leaving only the power indicator light in red. The air purifier will now be in standby mode.
Starting the Air Purifier
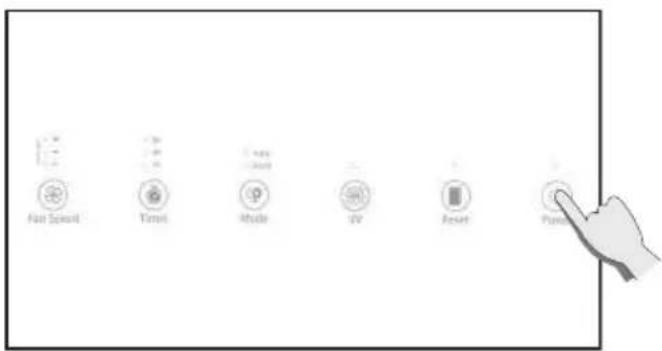
Press the power button, the lights will turn on and the air purifier starts up in auto mode.
The air quality indicator light will flash slowly when the machine starts and it will begin to detect air quality after preheating for 5s.
The air quality will be detected automatically when starting in auto mode.
Air quality indicator

Blue (PM2.5 = 0 \~ 50) Perfect

Green (PM2.5 = 50 \~ 100) Good

Purple (PM2.5 = 100 \~ 150) Normal

Red (PM2.5 = 150\~) Bad
Note: Press the reset button to turn off the air quality sensor light.
Auto Mode

When you turn the power on, the air purifier will detect air quality automatically. Auto mode will give you the most appropriate fan speed.
Sleep Mode
Sleep mode uses a built-in sensor which detects light intensity. If the light intensity is low, all lights on the machine will be dimmed and the machine automatically switches to silent mode so as to not disturb your rest at night.
Fan Speed Adjustment

Fan speed can be set to low, medium, or high.
Timer Function

Tap this button to set the timer to 1h, 4h, or 8h.
Wi-Fi Function
Press and hold the MODE button for 5 seconds within 5 seconds after turning on the machine to turn on the Wi-Fi function.
UV and Negative-ion Functions

Press the UV button to turn on the UV lamp. Press and hold for 5 seconds to turn the ionizer function on/off. (The ionizer function is automatically enabled when the machine is powered on.)
Reset
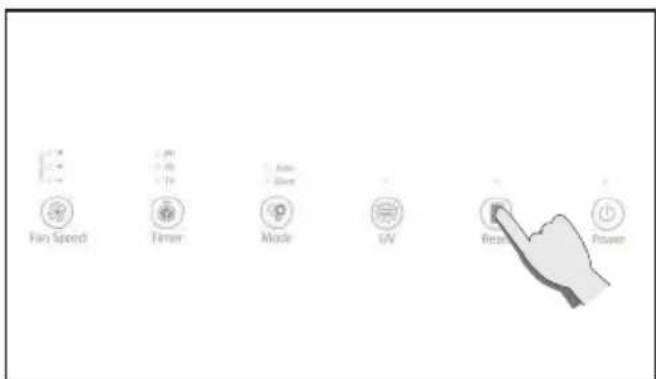
Press and hold for at least 5 seconds to reset the machine. (This function is only available when there is a filter replacement notification.)
Air Quality Indicator
Press the UV light button to enable/disable the air quality color indicator.
CLEANING AND MAINTENANCE
Be sure to pull out the plug before cleaning.
Do not immerse the product in water or any other liquid. Do not use corrosive or flammable substances (e.g., bleach or alcohol) to clean any part of the product.
Only the pre-filter can be cleaned with water; other filters cannot.

Cleaning the Air Purifier
Clean the outer casing regularly to prevent dust accumulation.
- Use a soft dry cloth to wipe off the dust.
- Use a soft dry cloth to clean the inlets and outlets.
Cleaning the Air Quality Sensor
Clean the air quality sensor every two months to ensure the air purifier operates at its best. If the air purifier is used in a dusty environment, clean it more frequently.

Attention
When indoor humidity is very high, condensation may form on the air quality sensor. Therefore, even if the air quality is good, the air quality indicator may indicate poor air quality. If this occurs, clean the air quality sensor or use manual fan speed settings.
- Use a soft brush to clean the inlet and outlet of the air quality sensor.

- Remove the protective cover for the air quality sensor.

- Clean the air quality sensor, inlet, and outlet gently with wet cotton swabs.

- Dry them with dry cotton swabs.
- Remount the protective cover for the air quality sensor.
Cleaning the Pre-filter
Information
For the best performance, clean and maintain the pre-filter every two months (about 480 hours) from the beginning of use.
This figure is based on using the machine for an average of 8 hours a day, 7 days a week.
External maintenance: use a wet cloth (mild detergent optional) to wipe the surface to prevent the accumulation of dust.
Turn off the air purifier and pull out the plug before cleaning and maintenance.
Only the pre-filter can be cleaned, other filters can't.

Attention
Please use a low power vacuum cleaner to prevent damaging the filter.

Tips
Before putting filters into the machine, remove the plastic packaging and ensure that the labels on the filters are facing outwards.
Operation Steps
- Turn off the power to stop the air purifier.
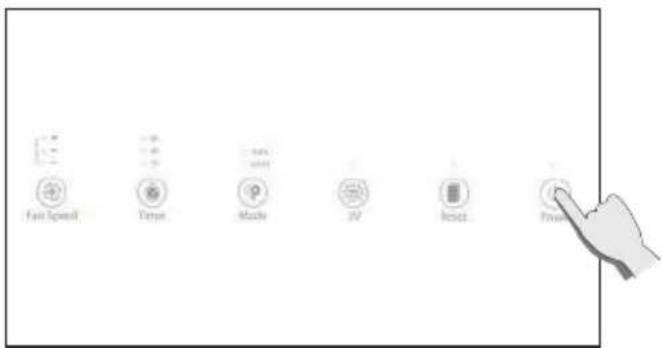
- Pull out the power plug.

- Hold the grooves on both sides of the air inlet panel and pull it out.

- Remove the protruding part of the filter before cleaning it.

- Use a soft brush or a vacuum cleaner to remove particles. Use water or soap water to clean the filter.
Reinstall it back into the machine when it is completely dry.

- Put the pre-filter back into the air purifier.

- Reinstall the air inlet panel by aligning and inserting it into the fixed grooves, then push it in.

- Plug into power socket.

- Turn on the power and start the air purifier.

Replacing Filters
Information

A filter replacement reminder arises when the machine has been operating for more than 1600 hours, and the power lights flash slowly (flash in red when in standby mode and flash in blue when operating).
The machine can still be used after the filter replacement indicator shows.

Attention
Turn off the power and pull out the power plug before replacing the filter.

Tips
Remove all the plastic packaging of each filter before installing into machine and ensure the filter labels are facing outwards.
Operation
- Filter replacement reminder.

- Turn off the power, then pull out the power plug.

- Hold the grooves of both sides of the air inlet panel, then gently pull it out.
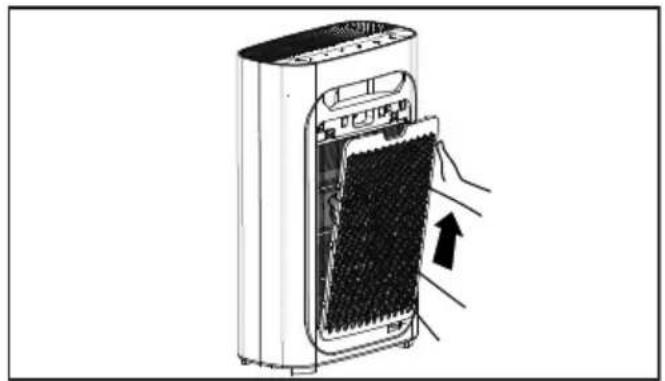
- Take out all the filters inside.

- Remove all the plastic packaging of the filters, and put the filters back into the purifier.

- Put the pre-filter back into the purifier.

- Reinstall the air inlet panel by aligning and inserting it into the fixed grooves, then push it in.

- After replacing the filters, plug into power socket and hold the reset button for 5 seconds to reset the machine.


Not Using for an Extended Period of Time
Pull out the power plug. (Although not used, power is still consumed when plugged in).
Dry the inside thoroughly. (Otherwise it may lead to issues).
Store the machine in a dry and ventilated place. (Laying it flat or upside down may cause issues).
Filter Replacement Reference Time
When the total machine operation time reaches 1600 hours, the machine will notify you to change the filters and the power indicator will flash continuously (once per second). Red light means the machine is in standby, and the blue light indicates the machine is operating. The machine can still operate when it gets the filter replacement notification.

Tips
- In consideration of your family's and your own health, please change the filters when required.
- The filter should be replaced every six months even if the air purifier isn't used often.

Attention
Please turn off and pull out the plug, before changing the filters.
TROUBLESHOOTING
This section lists the possible issues that may arise when using this product. If you can't solve the problems based on the below information, please contact our customer centre or your dealer.
| Condition Possible reasons Possible solutions | ||
| Machine doesn't turn on | The front panel may not be installed. Remove the front panel then install it again. | |
| Power plug is not inserted into the wall socket. | Pull out the power plug, then reinsert into the wall socket. | |
| The power plug or cord is damaged. Contact our customer centre or your dealer. | ||
| The fan doesn't work | The device is not turned on. | Connect to power and turn the machine on again. |
| The fan is damaged. Contact our customer centre or your dealer. | ||
| The machine is on an uneven surface. Move the device to a flat surface. | ||
| There are loose or foreign objects inside the machine. | Contact our customer centre or your dealer. | |
| The motor is faulty. Contact our customer centre or your dealer. | ||
| The filter plastic packaging has not been removed. | Remove the plastic packaging of each filter. | |
| Poor performance | Washable mesh filter is dirty. Please clean the mesh filter. | |
| Filters have not been replaced. Replace with a set of new filters. | ||
| Inlets or outlets are blocked. Contact our customer centre or your dealer. | ||
| The filter plastic packaging has not been removed. | Remove the plastic packaging of each filter. | |
| There isn't enough space around the machine. | Ensure the machine has at least 50cm of clearance on both sides of the air inlet and the outlet at the back of the machine has at least 10cm. | |
| Filter missing or incorrect filter sequence | Ensure that all the filters have been installed in the correct sequence | |
| The area is too big Make sure to use the machine in a suitable area | ||
Warranty and Service
If you need to learn more or have any questions, you can also contact our customer service centre or your dealer.
Any changes to the product specifications will be carried out without further notice. The Company reserves the right to make changes to the products at any time, without notice, and without any obligation to provide adjustments to earlier products.
Ordering Parts or Accessories
If you need to replace parts or need to purchase additional parts, please contact our customer service centre or your dealer.
Accessories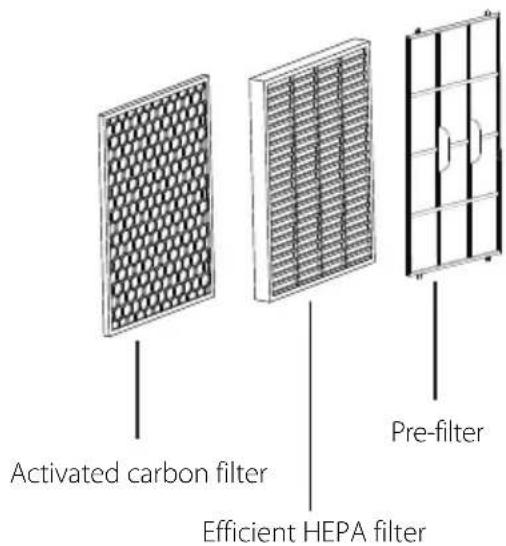
ADDITIONAL INFORMATION
Recycling

Please recycle the product and do not dispose as general waste. Please check the local regulations regarding the collection of electronic and electrical products.
The proper treatment of old products helps to mitigate the potential negative effects on the environment and on human health.
Technical Parameters
Rated frequency: 50Hz
Rated Power: 35W
CADR (Particle): 310m³/h
Noise: 20-60dB(A)
WI-FI USAGE GUIDE

- Scan the QR code above to download and install the Tuya smart app.
- Open the Tuya smart app and create a new account or log in directly.
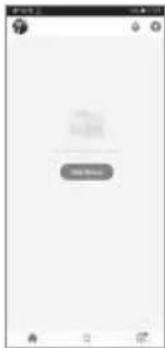
- Tap the "+" sign in the upper right corner to add the device.

- Select "Small Home Appliance - Air Purifier". Turn on the air purifier, and press "MODE" within 5 seconds of powering on to enter the distribution network mode. The Wi-Fi indicator on the front panel should flash.

- Enter the Wi-Fi password and click OK.
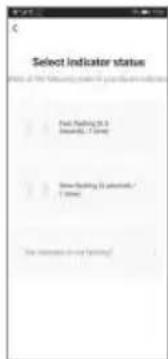
- Tap "Fast flashing". Note: Please ensure that the mobile phone and air purifier are connected to the same Wi-Fi network.
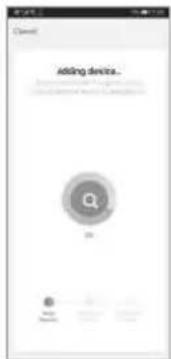
- Wait for device connection to complete.
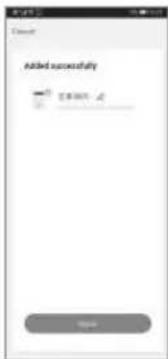
- "Added successfully" appears to indicate that the device connection was successful.

- Tap "Finish" to enter the control interface to control the machine.
WARRANTY CARD
| Product name/Item No. | Model number | ||
| Purchase Date | Shop name | Phone number | Dealer stamp |
| Name | |||
| Address | |||
| Mobile Phone | |||
| Zip Code | |||
Maintenance record
MODEL CODE MEANING
BAP-IT-H3148-U31W
| BAP | I | T | H | 31 | 48 | U | 31 |
BAP – Blaupunkt Air Purifier
| - loniser
T – Combined Photocatalist Filter + Activated Carbon Filter
H - HEPA Filter
31 - 310 m²/h CADR parameter
48 - 29-48 m² Coverage Area
U - UV light
31 - Manufacturer code
W - Tuya Wi-Fi
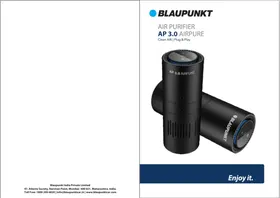
Air purifier
UVirus Killer
BAP-IT-H3148-U31W
User manual
BLAUPUNKT
Mateko Sp. z o.o.
ul. Przyleśna 17A
User manual
Air quality

Blue (PM2.5 = 0 - 50) Perfect

Green (PM2.5 = 50 - 100) Good

Purple (PM2.5 = 100 - 150) Normal

Red (PM2.5 = 150 -) Bad
1

2

1

2

Tips
- Bacteria

Replace filter
Notes


1

2
1

2

Tips

Bacteria


Yeast
Fungal spores
Viruses
Powdery mildew


Mold
Bacteria

Allergens


Dust, hair
Harmful particles
Dandruff


Pollen, dust, flower
Filter replacement
Information

ADDITIONAL INFORMATION
Recycling


- CONTENT
- INHALT
- WARNING
- ATTENTION
- PLEASE TURN OFF THE POWER OF THE MACHINE IN ANY OF THE FOLLOWING CIRCUMSTANCES
- BEFORE USE
- RECORDING THE BEGINNING USE DATE
- TIPS
- AIR QUALITY INDICATOR
- DISMOUNTING AND INSTALLING THE AIR INLET PANEL
- REMOVING THE AIR INLET PANEL
- INSTALLING THE AIR INLET PANEL
- AIR PURIFIER PLACEMENT
- FILTER INSTALLATION
- INFORMATION
- STEPS
- FILTERS AND FUNCTION
- ONE: PRE-FILTER
- TWO: EFFICIENT HEPA FILTER
- THREE: ACTIVATED CARBON FILTER
- FOUR: PHOTOCATALYST FILTER
- FIVE: UV LAMP
- SIX: IONIZER
- BACTERIA
- ALLERGENS
- HOW TO USE
- CONTROL PANEL
- PLUG INTO WALL SOCKET
- STARTING THE AIR PURIFIER
- AUTO MODE
- SLEEP MODE
- FAN SPEED ADJUSTMENT
- TIMER FUNCTION
- WI-FI FUNCTION
- UV AND NEGATIVE-ION FUNCTIONS
- RESET
- CLEANING AND MAINTENANCE
- CLEANING THE AIR PURIFIER
- CLEANING THE AIR QUALITY SENSOR
- CLEANING THE PRE-FILTER
- OPERATION STEPS
- REPLACING FILTERS
- OPERATION
- NOT USING FOR AN EXTENDED PERIOD OF TIME
- FILTER REPLACEMENT REFERENCE TIME
- TROUBLESHOOTING
- WARRANTY AND SERVICE
- ORDERING PARTS OR ACCESSORIES
- ADDITIONAL INFORMATION
- RECYCLING
- TECHNICAL PARAMETERS
- WI-FI USAGE GUIDE
- MODEL CODE MEANING
- AIR PURIFIER
- BLAUPUNKT
- AIR QUALITY
- REPLACE FILTER
- NOTES
- FILTER REPLACEMENT
Brand : BLAUPUNKT
Model : UVirus Killer
Category : Air purifier