
Lavender 2041 - Air purifier BLAUPUNKT - Free user manual and instructions
Find the device manual for free Lavender 2041 BLAUPUNKT in PDF.
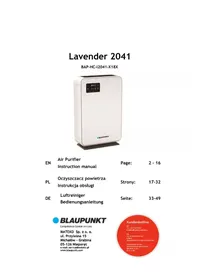


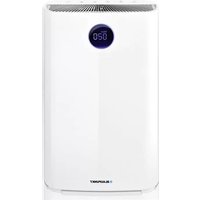
| Product Type | Air Purifier |
| Brand | Blaupunkt |
| Model | Lavender 2041 |
| Filter System | 4-stage: Pre-filter, Charcoal, Activated Carbon, HEPA |
| Number of Filters | 4 |
| Fan Speeds | 3 (Low, Medium, High) |
| Timer Settings | 2H / 4H / 8H |
| Auto Mode | Yes (adjusts speed based on air quality) |
| Sleep Mode | Yes (quiet operation, lights dim) |
| Anion Generator | Yes (6 million ions/second) |
| Air Quality Indicator | Color-coded: Blue (good), Yellow (fair), Red (bad) |
| Key Lock | Yes (child lock, press and hold 3s) |
| Filter Replacement Indicator | Individual lights for each filter (1-4) |
| Pre-filter Maintenance | Washable every 30 days |
| Charcoal Filter Replacement | Every 3 months |
| Activated Carbon Filter Replacement | Every 6 months |
| HEPA Filter Replacement | Every 6 months |
| Air Quality Sensor Cleaning | Every 2 months or when condensation appears |
| Cord Storage | Yes (wraps around base) |
| Handle | Yes (at back for moving) |
Frequently Asked Questions - Lavender 2041 BLAUPUNKT
User questions about Lavender 2041 BLAUPUNKT
0 question about this device. Answer the ones you know or ask your own.
Ask a new question about this device
Download the instructions for your Air purifier in PDF format for free! Find your manual Lavender 2041 - BLAUPUNKT and take your electronic device back in hand. On this page are published all the documents necessary for the use of your device. Lavender 2041 by BLAUPUNKT.
USER MANUAL Lavender 2041 BLAUPUNKT
EN Air Purifier Instruction manual Page: 2 - 16
Competence Center Aircons
MATEKO Sp. z o. o.
ul. Przyleśna 15
Michałów - Grabina
05-126 Nieporet
e-mail: service@mateko.pl
www.blaupunkt.com

IMPORTANT SAFETY INFORMATION....2
PRODUCT STRUCTURE 4
BEFORE FIRST USE 5
USING THE APPLIANCE 7
CLEANING....9
FILTER REPLACEMENT 12
STORAGE....14
ENVIRONMENT.... 14
TROUBLESHOOTING 15
TABLE OF CONTENTS
SAFETY PRECAUTIONS.... 18
PRODUCT STRUCTURE 20
BEFORE FIRST USE 21
OPERATION 23
CLEANING 25
FILTER REPLACEMENT 28
STORAGE 30
ENVIRONMENT 30
TROUBLESHOOTING 31
TABLE OF CONTENTS
IMPORTANT SAFETY INFORMATION
Read this user manual carefully before you use the appliance and save it for future reference.

Danger
- Do not let water or any other liquid or flammable detergent enter the appliance to avoid electric shock and/or a fire hazard.
- Do not clean the appliance with water or any other liquid or a (flammable) detergent to avoid electric shock and/or a fire hazard.

Warning
- Check if the voltage indicated on the bottom of the appliance corresponds to the local mains voltage before you connect the appliance.
- If the mains cord is damaged, you must have it replaced by distributor, or a service centre authorised by distributor or similarly qualified persons in order to avoid a hazard.
- Do not use the appliance if the plug, the mains cord or the appliance itself is damaged.
- This appliance is not intended for use by persons (including children) with reduced physical, sensory or mental capabilities, or lack of experience and knowledge, unless they have been given supervision or instruction concerning use of the appliance by a person responsible for their safety. Children should be supervised to ensure that they do not play with the appliance.
- Do not block the air inlet and outlet, e.g. by placing items on the air outlet or in front of the air inlet.

Caution
- This appliance is not a substitute for proper ventilation, regular vacuum cleaning or use of an extractor hood or fan while cooking.
- If the wall socket used to power the appliance has poor connections, the plug of the appliance becomes hot. Make sure you plug the appliance into a properly connected wall socket. Always place and use the appliance on a dry, stable, level and horizontal surface.
- Leave at least 40cm free space behind and on both sides of the appliance and leave at least 40cm free space above the appliance.
- Do not place anything on top of the appliance and do not sit on the appliance.
- Do not place the appliance directly below an air conditioner to prevent condensation from dripping onto the appliance.
- Make sure all filters are properly installed before you switch on the appliance.
- Only use the original filters specially intended for this appliance. Do not use any other filters.
- Avoid knocking against the appliance (the air inlet and outlet in particular) with hard objects. Always lift or move the appliance by the handle at the back of the appliance.
- Do not insert your fingers or objects into the air outlet.
- Do not use this appliance when you have used indoor smoke-type insect repellents or in places with oily residues, burning incense or chemical fumes.
- Do not use the appliance near gas appliances, heating devices or fireplaces. Always unplug the appliance after use and before you clean it.
- Do not use the appliance in a room with major temperature changes, as this may cause condensation inside the appliance.
- The appliance is only intended for household use under normal operating conditions.
- Do not use the appliance in wet surroundings or in surroundings with high ambient temperatures, such as the bathroom, toilet or kitchen.
- The appliance does not remove carbon monoxide (CO) or radon (Rn). It cannot be used as a safety device in case of accidents with combustion processes and hazardous chemicals.
- To prevent interference, keep at least 2 meters distance between the product and devices that use radio waves.
PRODUCT STRUCTURE
Welcome to using our company air purifier. Before using, please read this manual.


A. Air outlet B. Filter 4: HEPA filter C. Filter 3: Activated carbon filter D. Filter 2: Charcoal filter E. Filter 1: Pre-filter F. Back cover G. Motor H. Control panel I. Odor sensor and Dust sensor J. Front cover K. Base
BEFORE FIRST USE
Placing the filters
The appliance comes with all filters fitted inside, but you have to remove the packaging of the filters before you can use the appliance. Remove all filters, unpack them and place them back into the appliance as described below.
Tip: Place the appliance against a wall for more stability when you remove or insert filters.
Note: Make sure you insert the filters in the correct position.
- Place your fingers in the recesses of the side cover and gently pull the top part of the back cover towards you. Then lift the hooks at the bottom of the cover out of the bottom of the appliance.
- Remove all the filters from the appliance.
- Remove all packaging material from the filters.


- Put filter 4 (HEPA filter), filter 3 (Activated carbon filter), filter 2 (Charcoal filter), filter 1 (Pre-filter) back into the appliance. Specific operation see Chapter 6 "Filter replacement".
Note: Make sure that the side with the tag is pointing towards you (Filter 4, 3, 2).

- To reattach the back cover, insert the bottom hooks into the bottom of the appliance first. Then push the back cover against the body of the appliance.

USING THE APPLIANCE
1. Put the plug in the wall socket
All lights go on once and you hear a beep. Then all lights go out again.
2. Press the on/off button to switch on the appliance.
The power ⏻ light and FAN SPEED 1 (lowest) light on the control panel.
3. AQ (Air Quality)
Built-in air quality sensor can detect air quality. After switching on the appliance, pressing the 🔒 button to turn on the AQ indicator, the AQ indicator will flash once, then show the quality of the air. Please see the following information.
| AQ indiacator color | Air quality level |
| Blue | Good |
| Yellow | Fair |
| Red | Bad |
To switch off the AQ indicator, just press the
AQ button.

4. Filter replacement lights
There are total 4 filters as follows:
1) Pre-filter, we suggest you clean it every month. 2) Charcoal filter, we suggest you replace it every 3 months. 3) Activated carbon filter, we suggest you replace it every 6 months. 4) HEPA filter, we suggest you replace it every 6 months.

Note: The filters' lifetime is based on your house air quality and using time. The above suggested period is just for your reference. Using the appliance in a humid environment will reduce the lifetime of activated carbon filter and HEPA filter.
When 1 flashes, you have to clean the Pre-filter. When 2, 3, or 4 icon flashes, you have to replace these filters.
5. Fan speed adjustment
The fan speed light indicates at which fan speed the appliance is operating. Press the Speed button ⚙ to adjust the fan speed level. There are three levels, 1~3, which refer to Low, Medium, and High.
Tip: When the appliance is switched on, the fan speed is at the low level.
6. Setting the timer
When the appliance is switched on, press the ⚙️ button to start the timer function. You can set the working time to 2H, 4H, or 8H by pressing the ⚙️ button. After this time, your appliance will switch off automatically. To cancel the timer function, just press the ⚙️ button repeatedly until the light turns off.
7. Auto mode
When the appliance is switched on, the built-in air quality sensor automatically measures the ambient air quality. When the auto mode is activated, the appliance selects the most appropriate fan speed for the measured air quality.
8. Anion mode
When the appliance is switched on, press the 📋 button to start Anion mode. The appliance will release 6 million anions per second to make the air fresh. Press the 📋 button again to switch off.
9. Sleep mode
When you use the appliance in Sleep mode, it works very quietly. Press the 📊 button to activate sleep mode. Only the ⏻ and ⏻ buttons light up; all other buttons' lights turn off. Press the ⏻ button again or any other button to exit sleep mode.
10. Keylock mode
1) Press the 🔒 button to activate Keylock mode. All buttons are locked in this mode. If your house has young children, we suggest using this mode. 2) To cancel the keylock mode, just press and hold the 🔒 button for 3 seconds.
CLEANING
• Always unplug the appliance before you clean it. - Never immerse the appliance in water or any other liquid. - Never use aggressive or flammable cleaning agents such as bleach or alcohol to clean any part of the appliance. - Only the pre-filter is washable. All other filters are NOT washable.
1. Body of the appliance
Regularly clean the inside and outside of the body to prevent dust from collecting on the inside and outside.
1) Wipe away dust with a soft dry cloth from the body of the appliance. 2) Clean the air inlet and the air outlet with a soft dry cloth.
2. Air quality sensor
Clean the air quality sensor every 2 months for optimal functioning of the appliance. Clean it more frequently if you use the appliance in a dusty environment.
Note: When the humidity level in the room is very high, it is possible that condensation develops on the air quality sensor. As a result, the Air Quality light on the control panel and the air quality indicator may show that the air quality is bad even though the air quality is good. In this case you have to clean the air quality sensor or use one of the manual speed settings.
1) Clean the air quality sensor inlet and outlet with a soft brush.
2) Remove the air quality sensor cover.


3) Clean the air quality sensor, the dust inlet and the dust outlet with a lightly moistened cotton swab. 4) Dry them with a dry cotton swab.
5) Reattach the air quality sensor cover.


3. Pre-filter
Note: Only the pre-filter is washable; Clean the Pre-filter 30 days once, ensure your air purifier running at optimal performance.
Clean the pre-filter when the first filter replacement light flashes to ensure optimal functioning of the appliance.
1) Switch off the appliance and unplug it. (a)
2) Place your fingers in the recesses of the side cover and gently pull the top part of the back cover towards you. Then lift the hooks at the bottom of the cover out of the bottom of the appliance. (b)
(a)
(b)
3) To remove the pre-filter, grab the two projections at the top and pull the filter towards you. (c) 4) Wash the pre-filter under a running tap. If the pre-filter is very dirty, use a soft brush to brush away the dust. (d)
Tip: Alternatively, you can clean the pre-filter by removing the dust with a vacuum cleaner.
5) Air-dry the pre-filter.
Note: Make sure that the pre-filter is completely dry. If it is still wet, bacteria may multiply in it and shorten the lifetime of the pre-filter.
6) Put the pre-filter back into the appliance. Attach all hooks properly to the appliance. (e)
Note: Make sure that the side with the two projections is pointing towards you. You can also find the word “Front” towards you.
7) To reattach the back cover, insert the bottom hooks into the bottom of the appliance first. Then push the back cover against the body of the appliance. (f)
(c)
(d)
(e)
(f)
FILTER REPLACEMENT
When one of the filters is almost full and has to be cleaned or replaced, the appropriate filter replacement light starts to flash. Filter replacement light 1 flashes: filter 1 (the pre-filter) has to be cleaned, see chapter “Cleaning” 5.3 for further instructions. Filter replacement light 2 flashes: filter 2 (charcoal filter) has to be replaced. Filter replacement light 3 flashes: filter 3 (activated carbon filter) has to be replaced.
1. How to replace filter 2, filter 3, and filter 4?
Tip: Place the appliance against a wall for more stability when you remove or insert filters.
1) Switch off the appliance and unplug it. (a)
2) Place your fingers in the recesses of the side cover and gently pull the top part of the back cover towards you. Then lift the hooks at the bottom of the cover out of the bottom of the appliance. (b)
3) To remove filter 1 (pre-filter), grab the two projections at the top and pull the filter towards you. (c)
4) To remove filter 2 (charcoal filter) which is fixed by velcro with filter 3, just tear it off and replace the new charcoal filter. (d)


5) To remove filter 3 (activated carbon filter), grab its tag and pull it towards you, then replace the new activated carbon filter. (e) 6) To remove filter 4 (HEPA filter), grab its tag and pull it towards you, then replace the new HEPA filter. (f)
Note: The sequencing to put filters back into the appliance, please refer to the drawing on page 4 -- "product structure".
7) To reattach the back panel, insert the bottom hooks into the bottom of the appliance first, then push the panel against the body of the appliance. (g) 8) Put the plug in the wall socket and switch on the appliance again. (h)
2. Reset Filter's lifetime.
Even if you replace the new filters, when you switch on the appliance, the light of filter 📋 icon still flashes, you need to reset the filter’s lifetime, so that the appliance can cycle to calculate the filters’ working time.
Press the 📋 button, the light still turns on but does not flash, it means you choose this filter No. to reset, press and
hold the button for 3 seconds, the light of filter turns off, the reset is finished.


3. Filter replacement force mode
Suppose you use the appliance under air pollution environment, you can replace these filters even if the light ☐ does not flash, the filters replacing method is the same, please see chapter: Filter replacement.
To force reset the filter's lifetime:
1) Switch on the appliance at the standby mode (not pressing the ⏻ button), press and hold the 📋 button for 5 seconds, the filters light 🌐 will flash.
Note: Press the ⏻ button or without any operation for 60 seconds, the appliance will exit the Filter replacement force mode.
2) Press the ☐ button repeatedly to choose the filter, the chosen filter light will stop flashing, press and hold the ☐ button for 3 seconds, this filter light turns off and the reset is finished.
3) You can repeat step 2 operation to turn off the other filters light and finish all filters reset.
STORAGE
To store the mains cord, remove the back cover, wind it round the cord storage facility at the bottom of the appliance, then reattach the back cover.
ENVIRONMENT
Do not throw away the appliance with the normal household waste at the end of its life, but hand it in at an official collection point for recycling. By doing this, you help to preserve the environment.
TROUBLESHOOTING
This chapter summarises the most common problems you could encounter with the appliance. If you are unable to solve the problem with the information below, contact the Consumer Care Centre in your country.
| PROBLEM | POSSIBLE CAUSE | POSSIBLE SOLUTION |
| The appliance doesn't work | Back cover can not be fastened in place. | Removing the back cover and reinstall it. |
| Power plug is not connected to a power supply. | Unplug and then plug the power again. | |
| The machine is not turned on. | Plug in the power and turn on the machine again . | |
| Outlet airflow significantly reduced than before | Filter's plastic packaging haven't been removed. | Filter's plastic packaging haven't been removed. before use. |
| Air quality is good ,and the Auto mode has been activated . | At the Auto mode ,the machine will automatically adjust the fan speed in the order to achieve energy saving. | |
| Sleep mode automatically start , the LED indicator turns off. Meanwhile the fan speed and the noise i also reduced. | Press the button and choose the favourable fan speed. | |
| The Pre-filter is too dirty. | Please clean up the Pre-filter. | |
| The filter haven't be replaced. | Replace a new filter. | |
| No suitable clearance and space for ventilation in the surroundings . | Make sure all the rear and up sides each has 40cm space left. | |
| Fan speed can't adjust automatic | Air quality sensor become damp, the indoor temperature is too high, which make the sensor surface from a condensate . | Keep the air quality sensor clean and dry . |
| Poor performance or don’t have good purification capacity | The room coverage has exceed applicable area. | Use the air purifier in a room with applicable area. |
| Air inlet or outlet of the machine is blocked . | Please remove the objects inlet and outlet. | |
| Too noisy | Filter’s plastic packaging haven’t been removed. | Filter’s plastic packaging haven ’t been removed. before use. |
| Air quality index color unchanged | The air quality sensor is dirty . | Clean the air quality sensor . |
| Indoor air ventilation is poor . | Open the window and improve air ventilation | |
| After replacing filter the filter replacement indicator still flashing | Not reset the filter’s life time correctly . | Check the manual "Reset Filter's lifetime". |
Air Purifier
Lavender 2041
BAP-HC-I2041-X18X
Instruction Manual

BLAUPUNKT
Competence Center Aircons
MATEKO Sp. z o. o.
ul. Przyleśna 15
Michałów - Grabina
05-126 Nieporet
e-mail: service@mateko.pl
www.blaupunkt.com
SAFETY PRECAUTIONS
A. Air outlet
B. Filter 4: HEPA filter


OPERATION


3. Pre-filter
(d)


(f)
(g)
(h)
Competence Center Aircons
MATEKO Sp. z o. o.
ul. Przyleśna 15
Michałów - Grabina
05-126 Nieporet
e-mail: service@mateko.pl
www.blaupunkt.com
SAFETY INSTRUCTIONS
A. Air outlet B. Filter 4: HEPA filter C. Filter 3: Activated carbon filter D. Filter 2: Carbon filter E. Filter 1: Pre-filter F. Rear cover G. Motor H. Control panel
START-UP


3. Pre-filter
(b)

(d)
(e)
(f)
FILTER CHANGE
(f)

(g)

(h)
| B | AP | HC | I | 20 | 41 | X | 18 | X |
| Blaupunkt | Air | Filters | Feature | CADR Max | Air delivery | Additional | Internal | Design |
| Purifier | H: True Hepa | I: | multiplied | multiplied | feature | number | X: | |
| C: | lonizer | by 10(CFM) | by 10 | Universal | ||||
| Activated-Carbon |

- TABLE OF CONTENTS
- IMPORTANT SAFETY INFORMATION
- DANGER
- WARNING
- CAUTION
- PRODUCT STRUCTURE
- BEFORE FIRST USE
- PLACING THE FILTERS
- USING THE APPLIANCE
- PUT THE PLUG IN THE WALL SOCKET
- PRESS THE ON/OFF BUTTON TO SWITCH ON THE APPLIANCE
- AQ (AIR QUALITY)
- FILTER REPLACEMENT LIGHTS
- FAN SPEED ADJUSTMENT
- SETTING THE TIMER
- AUTO MODE
- ANION MODE
- SLEEP MODE
- KEYLOCK MODE
- CLEANING
- BODY OF THE APPLIANCE
- AIR QUALITY SENSOR
- PRE-FILTER
- FILTER REPLACEMENT
- HOW TO REPLACE FILTER 2, FILTER 3, AND FILTER
- RESET FILTER'S LIFETIME
- FILTER REPLACEMENT FORCE MODE
- STORAGE
- ENVIRONMENT
- TROUBLESHOOTING
- AIR PURIFIER
- LAVENDER
- BAP-HC-I2041-X18X
- INSTRUCTION MANUAL
- BLAUPUNKT
- SAFETY PRECAUTIONS
- OPERATION
- SAFETY INSTRUCTIONS
- START-UP
- FILTER CHANGE
Brand : BLAUPUNKT
Model : Lavender 2041
Category : Air purifier