
MVC800 - Video Conferencing System Yealink - Free user manual and instructions
Find the device manual for free MVC800 Yealink in PDF.


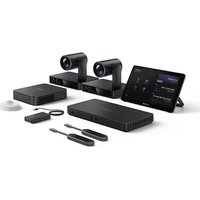
| Product Type | Video Conferencing System for Microsoft Teams Rooms |
| Brand | Yealink |
| Model | MVC800 |
| Camera Model | UVC80 (1080p, 12x optical zoom, 72° FOV) |
| Camera Dimensions (HxWxD) | Approx. 5.5 x 8.7 x 6.7 in (14 x 22 x 17 cm) |
| Camera Weight | Approx. 2.2 lb (1.0 kg) |
| Mini-PC Dimensions (HxWxD) | Approx. 1.7 x 7.7 x 7.7 in (4.3 x 19.5 x 19.5 cm) |
| Mini-PC Weight | Approx. 2.2 lb (1.0 kg) |
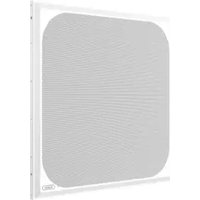
| MSpeaker Soundbar Dimensions (HxWxD) | Approx. 2.5 x 31.5 x 3.5 in (6.5 x 80 x 9 cm) |
| MSpeaker Weight | Approx. 6.6 lb (3.0 kg) |
| Camera Power Supply | 48V DC, 0.7A (included adapter) |
| Mini-PC Power Supply | 12V DC (included adapter, typical) |
| Operating Temperature | 32°F to 104°F (0°C to 40°C) |
| Storage Temperature | -22°F to 160°F (-30°C to 70°C) |
| Humidity | 5% to 90% (non-condensing) |
| Connectivity | HDMI, USB 2.0/3.0, Ethernet, 3.5mm audio, Mini-DP |
| Microphone Options | Up to 2 VCM34 wired microphones or CPW90 wireless mic |
| Content Sharing | MShare (wired) or WPP20 (wireless, optional) |
| Auto-Framing | Yes, enabled via camera control page |
| Touch Console | MTouch (10.1-inch touchscreen) |
| Maintenance | Disconnect power; clean with soft dry cloth |
| Safety Compliance | FCC Part 15, IC RSS, RoHS, WEEE |
| Warranty | Limited to unit only, excludes damages |
| Spare Parts / Repairs | Contact dealer or authorized service center |
Frequently Asked Questions - MVC800 Yealink
User questions about MVC800 Yealink
0 question about this device. Answer the ones you know or ask your own.
Ask a new question about this device
Download the instructions for your Video Conferencing System in PDF format for free! Find your manual MVC800 - Yealink and take your electronic device back in hand. On this page are published all the documents necessary for the use of your device. MVC800 by Yealink.
USER MANUAL MVC800 Yealink
Yealink Network Technology CO., LTD
Yealink MVC Series for Microsoft Teams Rooms System
Quick Start Guide(V1.6)
English | 简体中文
Package Contents
- MVC900 Package

Camera-Hub

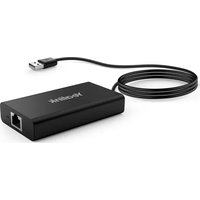
USB3.0 to Ethernet Adapter

7.5m
Ethernet Cable

Power Adapter

Cable Tie×5

3m RCA to 3.5mm Audio Cable

Camera-Hub
Quick Start Guide
Camera-Hub Package

UVC80

2.5m
USB Cable
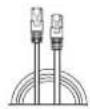
7.5m Ethernet Cable

Power Adapter 48V/0.7A

VESA Accessory

VCR20 Remote Control

Camera Lens Privacy cover

Velcro×2
(One Velcro is on the bracket)

Cable Tie×5
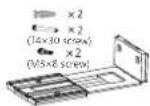
Mounting Bracket and Accessories

UVC80
Quick Start Guide
UVC80 Package (Camera)×2
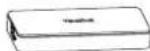
MShare

7m USB Cable

1.2m HDMI Cable and 1.2m Mini-DP Cable (for content sharing)

3M
Cable Tie Mounting Base×2
Cable Ties×2

Velcro×2

MShare
Quick Start Guide
MShare Package (Screen Sharing)


Machine Screw×27m USB Cable MTough Quick Start Guide
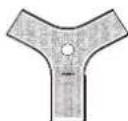
VCM34

3m
Ethernet Cable

Silicone Pad

VCM34
Quick Start Guide
VCM34 Package×4 (Microphone)
MTouch Package (Touch Console)

Mini-PC
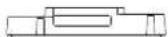
Mini-PC Upper Cover Bracket
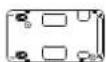

Velcro×2

MSpeaker

Expansion screws and Self-tapping screws
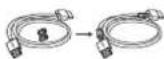
1.8M
HDMI Cable×2

Expansion screws and Self-tapping screws

Machine Screw×6

Power Cable

2m AUX Cable

MSpeaker
Quick Start Guide
Mini-PC Package (Mini-PC and Mini-PC Box)
MSpeaker Package (Soundbar)
- MVC800 Package

UVC80

2.5m USB Cable

7.5m Ethernet Cable

Power Adapter 48V/0.7A

VESA Accessory

VCR20 Remote Control

Camera Lens Privacy cover

Velcro×2
(One Velcro is on the bracket)

Cable Tie×5
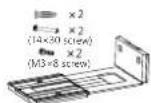
Mounting Bracket and Accessories

UVC80
Quick Start Guide
UVC80 Package (Camera)

MShare

7m
USB Cable

1.2m HDMI Cable and 1.2m Mini-DP Cable (for content sharing)

3M
Cable Tie Mounting Base×2

Cable Ties×2

Velcro×2

MShare
Quick Start Guide
MShare Package (Screen Sharing)


Machine Screw×27m USB Cable MTouch Quick Start Guide

VCM34

3m
Ethernet Cable

Silicone Pad

VCM34
Quick Start Guide
MTouch Package (Touch Console)
VCM34 Package×2 (Microphone)

Mini-PC

Mini-PC Upper Cover Bracket


Velcro×2
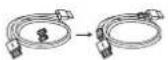
1.8M
HDMI Cable×2

Expansion screws and Self-tapping screws

Machine Screw×6

MSpeaker

Expansion screws and Self-tapping screws

Power Cable

2m AUX Cable

MSpeaker
Quick Start Guide
Mini-PC Package (Mini-PC and Mini-PC Box)
MSpeaker Package (Soundbar)
- MVC500 Package

UVC50 Package (Camera)

MShare Package (Screen Sharing)

MTouch Package (Touch Console)
Mini-PC Package (Mini-PC and Mini-PC Box)
CPW90 Package (Microphone)

MSpeaker Package (Soundbar)
- MVC300 Package

UVC30 Room

Camera Lens Privacy Cover

UVC30 Room
Quick Start Guide
CP900
Carrying Case
USB Extension Cable

CP900
Quick Start Guide
CP900 Package (Microphone)
UVC30 Room Package (Camera)
MShare

7m
USB Cable

1.2m HDMI Cable and 1.2m Mini-DP Cable (for content sharing)
cm×4

Cable Tie Mounting Base×2

Cable Ties×2

Velcro×2

Quick Start Guide
MShare Package (Screen Sharing)
Mini-PC

Mini-PC Upper Cover
Bracket

Velcro×2

1.8M
HDMI Cable×2

Expansion screws and Self-tapping screws

Machine Screw×6


Machine Screw×2

MTouch
Quick Start Guide
MTouch Package (Touch Console)
Mini-PC Package (Mini-PC and Mini-PC Box)

We recommend that you use the accessories provided or approved by Yealink. The use of unapproved third-party accessories may result in poor performance.
MVC900 & MVC800 & MVC500 & MVC300 Connection
MVC900 Connection
![graph TD PC["PC"] -->|1.2m Mini-DP Cable, 0.5mA HDMI Cable| MShare["MShare"] MShare -->|USB2.0| MTouch["MTouch"] MTouch -->|USB2.0| TheBack["The Back of Mini-PC"] MShare -->|USB2.0| TheBack MShare -->|USB2.0| TheBack MShare -->|USB2.0| TheBack UVC80["UVC80"] --> CAT5c["CAT5c"] UVC80 --> CAT5e["CAT5e…](/content/2026/05/830334/images/5b7da764ee35aec378cddf4b3886311415fb25fee4e63e658f36d1f32d5df543.jpg)

Do not connect the switch to the Internet, otherwise it will cause network abnormalities.

The switch and Ethernet cables should be purchased separately.

When starting up the system for the first time, you need a USB hub to connect a mouse to complete the initial configuration.
We recommend using the wireless mouse and keyboard kit.

For more information about the installation and deployment of accessories (for example, the installation of mini-PC package or the camera-hub), refer to the Quick Start Guide of corresponding accessory.
MVC800 & MVC500 Connection
The connection of MVC500 is almost the same as that of MVC800.
The following is an example of connecting MVC800.
![graph TD A["MSpeaker"] -->|3.5mm| B["UVC80"] B --> C["Display"] C --> D["HDMI"] D --> E["The Back of Mini-PC The Front of Mini-PC"] E --> F["HDMI HDMI"] E --> G["Ethernet Cable"] E --> H["USB2.0"] E --> I["USB2.0"] E --> J["MTouch"] J --> K["VCM34"] K --> L["VCM34"] M["PC"] --> N["MShare"] N --> O["…](/content/2026/05/830334/images/6d356d1817d6cabb64e73fb2fbd47b65ce3fbcb84459880f8125b1a3f0abfbc2.jpg)

You can use VCM34 or CPW90 as microphone.

When starting up the system for the first time, you need to connect a mouse to complete the initial configuration. We recommend using the wireless mouse and keyboard kit.

For more information about the installation and deployment of accessories (for example, the installation of mini-PC package or the UVC80 camera), refer to the Quick Start Guide of corresponding accessory.
MVC300 Connection
![graph TD A["UVC30 Room"] -->|USB2.0| B["Display"] B --> C["The Back of Mini-PC"] C --> D["CP900"] D --> E["MTouch"] C --> F["The Front of Mini-PC"] F --> G["Display"] G --> H["USB2.0"] H --> I["USB2.0"] I --> J["1.2 Min-DP"]](/content/2026/05/830334/images/ac9b43900d36381174d07ce88ba368515e15f75e1dc497d8b0f18a34e7737022.jpg)
When starting up the system for the first time, you need a USB hub to connect a mouse to complete the initial configuration.
We recommend using the wireless mouse and keyboard kit.
For more information about the installation and deployment of accessories (for example, the installation of the mini-PC package or the UVC30 Room camera), refer to the Quick Start Guide of corresponding accessory.
Wireless Sharing
You can use Yealink WPP20 wireless presentation pod for wireless content sharing. WPP20 needs to be purchased separately.
Make sure the MShare is connected to the mini-PC.
Procedure
- Connect the WPP20 to the USB port of the MShare.
- Wait for about 3 seconds, the WPP20 LED indicator glows solid green.
The WPP20 is paired with the MShare successfully. - Connect the WPP20 to the PC.

Upgrading System Software through Windows Update
The system software(including the Windows, the Camera-Hub/UVC80/UVC50/UVC30 Room, the MTouch and the MShare) can be automatically upgraded via windows update by default. Otherwise, you can enable automatically windows update or upgrade the devices manually.
Enabling Automatically Windows Update Procedure
- On the display screen, navigate to More->Settings.
- Enter the administrator password (default: sfb) to access Setup screen.
- Navigate to Windows Settings->Go to Admin Sign-in.
- Select Administrator from the bottom-left corner and then enter the administrator password (default: sfb).
- Tap the Start button, and then go to Settings->Upgrade & Security->Windows Update, and select Advanced options.
- Enable Automatically download updates, even over metered data connections (charge may apply).
Manually Windows Update Procedure
- On the display screen, navigate to More->Settings.
- Enter the administrator password (default: sfb) to access Setup screen.
- Navigate to Windows Settings->Go to Admin Sign-in.
-
Select Administrator from the bottom-left corner and then enter the administrator password (default: sfb).
-
Do one of the following:
-
Long tap the Start button, and then select Device Manager.
Select the desired device and then long tap the device to select Update driver.
Select a desired way to update. -
Tap the Start button, and then navigate to Settings->Upgrade & Security->Windows Update, and select Check for updates.
Select the desired device and then complete the installation.
The software upgrade is only supported by the operating system of 64-bit Windows 10.
Enabling/Disabling Auto-framing
Procedure
- Tap More-> 🌐 to enter the Camera Control page.
- Select
- Enable/Disable Auto-framing.
Controlling UVC80/UVC50/UVC30 Room Camera Position
Procedure
- Tap More-> 🚫 to enter the Camera Control page.
- Tap 🔒 or 🔒 to zoom camera in/out.
- Tap / / / > to pan/tilt the camera.
If the auto-framing feature is enabled, you can not control the UVC30 Room camera.
Resetting UVC80/UVC50/UVC30 Room Camera to Home Position
Procedure
- Tap More-> to enter the Camera Control page.
- Tap Reset.
包装清单
- MVC900 产品包
Camera-Hub主机

USB3.0转RJ45适配器

7.5m 网线

电源适配器

束线带x5
Operating Ambient Temperatures
- Operating temperature: +32 to 104°F (0 to 40°C)
● Relative humidity: 5% to 90%, noncondensing
● Storage temperature: -22 to +160°F (-30 to +70°C)
Warranty
Our product warranty is limited only to the unit itself, when used normally in accordance with the operating instructions and the system environment. We are not liable for damage or loss resulting from the use of this product, or for any claim from a third party. We are not liable for problems with Yealink device arising from the use of this product; we are not liable for financial damages, lost profits, claims from third parties, etc., arising from the use of this product.
Explanation of the symbols
- DC symbol
is the DC voltage symbol.
• WEEE Warning symbol
To avoid the potential effects on the environment and human health as a result of the presence of hazardous substances in electrical and electronic equipment, end users of electrical and electronic
equipment should understand the meaning of the crossed-out wheeled bin symbol. Do not dispose of WEEE as unsorted municipal waste and have to collect such WEEE separately.
Restriction of Hazardous Substances Directive (RoHS)
This device complies with the requirements of the EU RoHS Directive. Statements of compliance can be obtained by contacting support@yealink.com.
Safety Instructions
Save these instructions. Read these safety instructions before use!
General Requirements
- Before you install and use the device, read the safety instructions carefully and observe the situation during operation.
- During the process of storage, transportation, and operation, please always keep the device dry and clean, avoid collision and crash.
- Please attempt not to dismantle the device by yourself. In case of any discrepancy, please contact the appointed maintenance center for repair.
- Please refer to the relevant laws and statutes while using the device. Legal rights of others should be respected as well.
Environmental Requirements
- Place the device at a well-ventilated place. Do not expose the device under direct sunlight.
- Keep the device dry and free of dusts.
- Do not place the device on or near any inflammable or fire-vulnerable object, such as rubber-made materials.
- Keep the device away from any heat source or bare fire, such as a candle or an electric heater.
⚠️ Operating Requirements
- Do not let a child operate the device without guidance.
- Do not let a child play with the device or any accessory in case of accidental swallowing.
- Please use the accessories provided or authorized by the manufacturer only.
- The power supply of the device shall meet the requirements of the input voltage of the device. Please use the provided surge protection power socket only.
- Before plugging or unplugging any cable, make sure that your hands are completely dry.
-
Do not spill liquid of any kind on the product or use the equipment near water, for example, near a bathtub, washbowl, kitchen sink, wet basement or near a swimming pool.
-
During a thunderstorm, stop using the device and disconnect it from the power supply. Unplug the power plug and the Asymmetric Digital Subscriber Line (ADSL) twisted pair (the radio frequency cable) to avoid lightning strike.
- If the device is left unused for a rather long time, disconnect it from the power supply and unplug the power plug.
- When there is smoke emitted from the device, or some abnormal noise or smell, disconnect the device from the power supply, and unplug the power plug immediately.
- Contact the specified maintenance center for repair.
- Do not insert any object into equipment slots that is not part of the product or auxiliary product.
- Before connecting a cable, connect the grounding cable of the device first. Do not disconnect the grounding cable until you disconnect all other cables.
⚠ Cleaning Requirements
● Before cleaning the device, disconnect it from the power supply.
- Use a piece of soft, dry and anti-static cloth to clean the device.
- Keep the power plug clean and dry.
Troubleshooting
The unit cannot supply power to device other than Yealink device.
There is a bad connection with the plug.
-
Clean the plug with a dry cloth.
-
Connect it to another wall outlet.
The usage environment is out of operating temperature range.
- Use in the operating temperature range.
The cable between the unit and the Yealink device is connected incorrectly.
- Connect the cable correctly.
You cannot connect the cable properly.
-
You may have connected a wrong Yealink device.
-
Use the correct power supply.
Some dust, etc., may be in the port.
- Clean the port.
Contact your dealer or authorized service facility for any further questions.
FCC Statement
This device complies with part 15 of the FCC Rules. Operation is subject to the following
two conditions: (1) this device may not cause harmful interference, and (2) this device must accept any interference received, including interference that may cause undesired operation.
Any Changes or modifications not expressly approved by the party responsible for compliance could void the user's authority to operate the equipment.
IC Statement
This device complies with Industry Canada's licence-exempt RSSs. Operation is subject to the following two conditions:
(1) this device may not cause interference; and
(2) this device must accept any interference, including interference that may cause undesired operation of the device. CAN ICES-3(B)
309, 3rd Floor, No.16, Yun Ding North Road, Huli District, Xiamen City, Fujian, P.R.C
YEALINK (EUROPE) NETWORK TECHNOLOGY B.V.
Strawinskylaan 3127, Atrium Building, 8th floor, 1077ZX Amsterdam, The Netherlands YEALINK (USA) NETWORK TECHNOLOGY CO., LTD.
999 Peachtree Street Suite 2300, Fulton, Atlanta, GA, 30309, USA
Made in China
About Yealink
Yealink is a global leading provider of enterprise communication and collaboration solutions, offering video conferencing service to worldwide enterprises. Focusing on research and development, Yealink also insists on innovation and creation. With the outstanding technical patents of cloud computing, audio, video and image processing technology, Yealink has built up a panoramic collaboration solution of audio and video conferencing by merging its cloud services with a series of endpoints products. As one of the best providers in more than 140 countries and regions including the US, the UK and Australia, Yealink ranks No.1 in the global market share of SIP phones shipments.
Technical Support
Visit Yealink WIKI (http://support.yealink.com/) for the latest firmware, guides, FAQ, Product documents, and more. For better service, we sincerely recommend you to use Yealink Ticketing system (https://ticket.yealink.com) to submit all your technical issues.

MVC Series- EN+CN
Copyright©2020 YEALINK(XIAMEN) NETWORK TECHNOLOGY CO.,LTD.All rights reserved.

- PACKAGE CONTENTS
- MVC900 PACKAGE
- MVC800 PACKAGE
- UVC80 PACKAGE (CAMERA)
- MSHARE PACKAGE (SCREEN SHARING)
- MTOUCH PACKAGE (TOUCH CONSOLE)
- VCM34 PACKAGE×2 (MICROPHONE)
- MVC300 PACKAGE
- MVC900 & MVC800 & MVC500 & MVC300 CONNECTION
- MVC900 CONNECTION
- MVC800 & MVC500 CONNECTION
- MVC300 CONNECTION
- WIRELESS SHARING
- PROCEDURE
- UPGRADING SYSTEM SOFTWARE THROUGH WINDOWS UPDATE
- ENABLING AUTOMATICALLY WINDOWS UPDATE PROCEDURE
- MANUALLY WINDOWS UPDATE PROCEDURE
- ENABLING/DISABLING AUTO-FRAMING
- CONTROLLING UVC80/UVC50/UVC30 ROOM CAMERA POSITION
- RESETTING UVC80/UVC50/UVC30 ROOM CAMERA TO HOME POSITION
- 包装清单
- MVC900 产品包
- OPERATING AMBIENT TEMPERATURES
- WARRANTY
- EXPLANATION OF THE SYMBOLS
- WEEE WARNING SYMBOL
- RESTRICTION OF HAZARDOUS SUBSTANCES DIRECTIVE (ROHS)
- SAFETY INSTRUCTIONS
- GENERAL REQUIREMENTS
- ENVIRONMENTAL REQUIREMENTS
- ⚠️ OPERATING REQUIREMENTS
- ⚠ CLEANING REQUIREMENTS
- TROUBLESHOOTING
- FCC STATEMENT
- IC STATEMENT
- ABOUT YEALINK
- TECHNICAL SUPPORT
Brand : Yealink
Model : MVC800
Category : Video Conferencing System