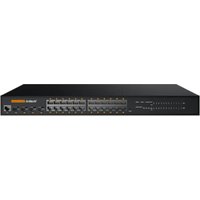
RCH240 - Video Conferencing System Yealink - Free user manual and instructions
Find the device manual for free RCH240 Yealink in PDF.


| Product Type | Video Conferencing System |
| Brand | Yealink |
| Model | RCH240 |
| Dimensions (W x D x H) | 500 mm x 120 mm x 80 mm |
| Weight | 1.5 kg |
| Power Supply | 48V DC, 0.5A (PoE+ compatible) |
| Video Resolution | 4K Ultra HD (3840 x 2160) |
| Field of View | 120° diagonal |
| Audio Technology | Yealink Noise Proof Technology, Acoustic Echo Cancellation |
| Microphone Array | 8 MEMS microphones, pickup range up to 8m |
| Speaker | Built-in full-range speaker, 15W |
| Connectivity | 1 x HDMI out, 1 x HDMI in, 1 x USB-C, 1 x RJ45 (PoE+), Bluetooth |
| Supported Platforms | Zoom, Microsoft Teams, Skype for Business, Cisco Webex |
| Control | Remote control via Bluetooth or Yealink CTP25 touch panel (optional) |
| Mounting Options | Desktop stand, wall mount, TV mount (VESA compatible) |
| Operating Temperature | 0°C to 40°C |
| Storage Temperature | -20°C to 60°C |
| Cleaning and Maintenance | Wipe with a soft dry cloth; avoid liquids and abrasives |
| Safety Precautions | Use only the supplied power adapter; do not expose to water or high humidity |
| Spare Parts / Accessories | Remote control, USB-C cable, power adapter, mounting brackets (sold separately) |
| Repairability | Contact Yealink authorized service centers for repairs; no user-serviceable parts inside |
| Warranty | 2 years limited hardware warranty |
Frequently Asked Questions - RCH240 Yealink
User questions about RCH240 Yealink
0 question about this device. Answer the ones you know or ask your own.
Ask a new question about this device
Download the instructions for your Video Conferencing System in PDF format for free! Find your manual RCH240 - Yealink and take your electronic device back in hand. On this page are published all the documents necessary for the use of your device. RCH240 by Yealink.
USER MANUAL RCH240 Yealink
Access the Switch Web Interface
Introduction
To set up your Pro AV system, a switch with multicast capability and audio and video management functions is required. The switch must be compatible with the Yealink AVONE solution. Yealink RCH80/RCH240 is the recommended option.
- Network: Multicast-capable AV-managed switch compatible with Yealink AV One audio/video solution, enabling plug-and-play deployment for basic scenarios.
• Transmission rate: Supports at least Gigabit (1Gbps) speed. -
Features:
-
Supports PoE power delivery (Energy-Efficient Ethernet/EEE disabled by default).
- Multicast configuration: IGMP snooping, IGMP querier, and IGMP query interval.
- Supports unknown multicast discard and fast leave functions.
This chapter introduces the configuration of the network environment in the Pro AV system, using RCH240 as an example. The configuration method for RCH80 is the same.
Connect
- Connect your computer's Ethernet port to any port on the switch using a network cable.
Configure the IP Address of PC
- Open Network Settings on your PC and manually configure the USB network adapter/IP address:
- IP Address: 192.168.0.100 (must be in the same subnet as the switch's management IP)
- Subnet Mask: 255.255.255.0
- Default Gateway: only required for cross-subnet management.
Access the Web User Interface
Open a browser (Chrome/Firefox recommended) and enter the switch's default 1.
management IP address (http://192.168.0.1).
Change the login password upon first login, then log in again using the new password (The 2. default username and password are admin).
Cascaded Setup
Introduction
After factory default or a factory reset, the switch's default IP address is 192.168.0.1 and IGMP Auto Query is enabled by default. However, in a cascaded network, identical switch IPs can prevent logging into the target switch. Also, multiple simultaneous queries can cause multicast anomalies on devices, leading them to leave groups. Therefore, when cascading RCH80 and RCH240, you must change the switches' IP addresses and disable duplicate IGMP Auto Query functionality.
1. Disable the Auto Query on Cascaded Switches
In a cascaded topology, IGMP Auto Query should only be enabled on the primary/master switch to avoid conflicts.
In a multicast network, IGMP querying performs these key functions:
- Sends query packets to identify devices that need to receive multicast streams
- Maintains correct multicast membership state
-
Ensures efficient delivery of multicast streams
Open the switch web user interface.1. -
Go to L2 Configuration > IGMP Snooping, and set Enable Auto Query to Disable.

2. Resolve IP Address Conflicts
If multiple switches are cascaded, change each switch's management IP to avoid address conflicts.
- All switches use the default IP 192.168.0.1.
- Change the second switch to 192.168.0.2; for additional RCH80 or RCH240, use 192.168.0.3
RCH240 User Guide_Switch Configuration
through 192.168.0.255.
- Keep the subnet mask as 255.255.0.0.
| Switch Number Recommended Management IP Subnet Mask | |
| Switch #1 192.168.0.1 255.255.0.0 | |
| Switch #2 192.168.0.2 255.255.0.0 | |
| Switch #3 192.168.0.3 255.255.0.0 | |
| ...... 192.168.0.x (x ≤ 25) 255.255.0.0 |
- Go to L3 Configuration > VLAN Interfaces and IP Addresses, then click Edit.

- Edit the IP address details, then click Save All when finished; otherwise the device will revert to the last saved configuration after reboot.

After saving, open back into the switch web user interface using the new IP address.3.
3. Connect Cascade Switches
Once the switch configurations above are complete, you can cascade-connect the switches with Ethernet cables. We recommend using a daisy-chain topology, as shown below. We do not recommend a star-chain topology, as it may cause communication issues.

In a cascaded switch network:
- High-bandwidth video devices (e.g., EN300/DE300/AVHUB) must be connected to the same switch;
- Audio devices (e.g., AP08/CM50/CS10-D) should be connected to the same switch whenever possible; if not feasible, connect them to a switch adjacent to the one hosting the AP08 to reduce inter-switch latency.
Example: AVONE divisible room switch connections
- All EN300/DE300/AVHUB connect to the same switch;
- AP08/CM50/CS10-D devices are primarily deployed on switch #3; due to limited switch power, some CS10-Ds need to connect to the next switch, #4;
![graph TD subgraph Yadant A["EN100 #1"] --> B["DE500 #5"] C["EN200 #2"] --> D["DE300 #6"] E["EN300 #3"] --> F["DE300 #7"] G["EN400 #4"] --> H["DE300 #8"] I["EN500 #5"] --> J["DE300 #9"] K["EN600 #6"] --> L["DE300 #10"] M["EN700 #7"] --> N["DE300 #11"] end subgraph Yeadink O["SVBD#1"] --> P["SVBD#2"]…](/content/2026/07/1453317/images/44817317adc9191b231c5e1933cdf21b7c98e7d6c408ee0ec298af3cb1d3d5dd.jpg)
FAQ
Why Disable the Auto Query?
Is it Necessary to Disable Redundant Queriers?
Why Recommend Manual Configuration?

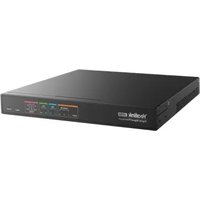
Brand : Yealink
Model : RCH240
Category : Video Conferencing System