
IAN 78346 - Alarm clock radio AURIOL - Free user manual and instructions
Find the device manual for free IAN 78346 AURIOL in PDF.


| Product Type | Radio-Controlled Projection Alarm Clock |
| Brand | Auriol |
| Model Number | IAN 78346 (also Z31311, Z30951B, Z31312) |
| Dimensions (W x H x D) | Approx. 17.8 x 9.4 x 7 cm |
| Power Source | 3 x 1.5 V AAA batteries |
| Display Type | LC display with time, date, temperature, week, and radio symbol |
| Time Reception | DCF radio signal (automatic and manual) |
| Time Zones | Adjustable ±12 hours from CET |
| Alarms | Two independent alarms (Alarm 1 and Alarm 2) |
| Snooze Function | Yes, 5 minutes (SNOOZE/LIGHT key) |
| Projection | Projection of time onto ceiling/wall, adjustable sharpness, angle, and direction (180° rotation) |
| Display Illumination | Activated by key press, noise, or touch (5 seconds) |
| Temperature Display | Indoor temperature, switchable between °C and °F |
| Day of Week Languages | English, German, French, Italian, Dutch, Spanish, Danish, Portuguese |
| 12/24 Hour Format | Selectable |
| Resetting | Reset key to restore factory settings |
| Cleaning | Clean externally with a soft, dry cloth only |
| Safety Features | Battery polarity protection, no recharging of batteries, keep away from children |
| Color Options | Blue (Z31311), Grey (Z30951B), Red (Z31312) |
| Scope of Delivery | 1 projection alarm clock, 3 AAA batteries, operating instructions |
Frequently Asked Questions - IAN 78346 AURIOL
User questions about IAN 78346 AURIOL
0 question about this device. Answer the ones you know or ask your own.
Ask a new question about this device
Download the instructions for your Alarm clock radio in PDF format for free! Find your manual IAN 78346 - AURIOL and take your electronic device back in hand. On this page are published all the documents necessary for the use of your device. IAN 78346 by AURIOL.
USER MANUAL IAN 78346 AURIOL
Operation and Safety Notes
SE
PROJEKTIONSKLOCKRADIO
Model No.: Z31311, Z30951B, Z31312
Verison: 09/2012
SE
SI
Z31311
SE
Z30951B
SI
Z31312
SILVER CREST®
GB Operation and Safety Notes Page 6
Description of parts ......Page 7
Technical data Page 8
Supply scope Page 8
Safety
General safety information ......Page 9
Safety advice concerning batteries .....Page 10
Before use
Inserting / replacing the batteries......Page 1
Receiving the DCF radio signal ......Page 12
Operation
Setting the 12 / 24 hour display ......Page 13
Setting the alarm Page 14
Activating/deactivating the alarm.....Page 15
Switching off the alarm Page 15
Activating the slumber function ......Page 15
Activating/deactivating the display illumination and projection .....Page 16
Adjusting the projection sharpness, angle and direction ......Page 16
Display temperature in °C / °F ......Page 17
Setting the time zones ......Page 17
Displaying summer time ......Page 17
Reset Page 18
Troubleshooting Page 18
Cleaning and Maintenance ... Page 18
Disposal Page 19
Information
Declaration of Conformity ......Page 20
Radio-Controlled Projection Alarm Clock
- Proper use
The projection alarm clock is not intended for commercial use. The projection alarm clock is intended for use indoors only.
• Description of parts
1 Time display
2 PM symbol (afternoon)
3 AM symbol (morning)
4 Radio symbol
5 Summer time symbol
6 Time zones symbol
7 Alarm 1 symbol
8 Alarm 2 symbol
9 Year symbol
10 Temperature scale
11 Temperature symbol (°C / °F)
12 - 14 Date display
15 Week display
16 Weekday display
17 SNOOZE/LIGHT key (slumber/light function)
18 Projection objective
19 Sharpness control wheel
20 Projection direction key
21 SET key
22 ALARM key
23 + / 12 / 24 key
24 -/C/F/RCC key
25 S / C switch (acoustic / contact sensor, ON / OFF)
26 Reset key
27 Projection switch (projection ON / OFF)
28 Battery compartment cover
29 Adjustment wheel
- Technical data
Measurable
temperature range: 0-50 °C (32-122 °F)
Battery type: 1.5 V = / AAA
Dimensions: approx. 17,8 x 9,4 x 7 cm
(W × H × D)
Colour: Z31311: blue
Z30951B: grey
Z31312: red
• Supply scope
1 projection radio-controlled alarm clock
3 AAA batteries (1.5 V---)
1 operating instructions

Safety
KEEP ALL THE SAFETY ADVICE AND INSTRUCTIONS IN A SAFE PLACE FOR FUTURE REFERENCE!

General safety information
This device is not intended to be used by persons (including children) with restricted physical, sensory or mental abilities or with insufficient experience and / or knowledge, unless they are supervised by a person who is responsible for their safety or they have received instruction on how to use the device from such a responsible person. Children should be supervised in order to ensure that they do not play with the device.
WARNING! RISK OF FATAL INJURY!
Batteries can be swallowed, which is potentially life threatening. If a battery is swallowed, medical help must be sought immediately.
8 GB 9 GB
Do not use the device if it is damaged. Damaged devices represent a risk to life from electric shock!
WARNING! Do not use the device in hospitals or medical facilities. In these environments this can lead to malfunctions of life saving equipment.
Please note that damage arising from improper handling, non-observance of the operating instructions or interference with the inside of the device by unauthorised persons is excluded from the warranty.
■ Never take the device apart. Unsatisfactory repairs can lead to considerable danger for the user. Only have repairs carried out by a suitably qualified or experienced specialist.

Safety advice concerning batteries
■ Remove the batteries from the device if they have not been used for a long period.
CAUTION! DANGER OF

EXPLOSION! Never recharge batteries!
■ CAUTION! DANGER OF
■ CAUTION! DANGER OF

EXPLOSION! Always insert batteries of the specified type. Otherwise there
is danger of explosion.
■ Make sure you insert the batteries with the correct polarity! The correct polarity is shown inside the battery compartment.
If necessary clean the contacts on the batteries and on the device before inserting them.
■ Remove spent batteries from the device immediately. There is an increased risk of leakage!
If you disregard the above instructions and advice, your batteries may discharge beyond their minimum voltage, thus increasing the chance of leakage. If the batteries in your device have leaked, remove them immediately to prevent damage to the device!
■ Batteries do not belong in household refuse!
- Keep batteries away from children. Do not throw batteries into a fire. Never short-circuit them or take them apart.
Do not let the fluid from a leaking battery come into contact with your skin, eyes or mucous membranes. In the event of contact with fluid leaking from a battery, thoroughly flush the affected area with water and / or seek the advice of a doctor!
■ Dispose the batteries according to the disposal instructions.
- Before use
- Inserting / replacing the batteries
□ See Fig. D.
Note: change the batteries when the LC display is dark, the displays or the background illumination grow weak or the displays flicker. In such cases, the batteries must be changed immediately.
● Receiving the DCF radio signal
After the batteries have been inserted, the projection radio-controlled alarm clock automatically starts a search for the DCF radio signal. The blinking of the radio symbols 4 indicates the search.
Note: Do not change the location of the projection radio-controlled alarm clock during reception. Otherwise it can lead to reception interference.
Note: Within buildings of reinforced concrete, the signal reception may be strongly influenced.
The reception of the DCF radio signal can also be started manually.
☐ Press the -/C/F/RCC key 24 and hold for approx. 3 seconds. The projection radio-controlled alarm clock starts the search for the DCF radio signal. This process requires several minutes and is indicated in the LC display by the blinking of the radio symbol 4.
Note: If the projection radio-controlled alarm clock cannot receive the DCF radio signal due to defects, too much distance to the transmitter etc., it is possible to set the time manually. As soon as the DCF radio signal has been successfully received, the manually set values will be overwritten. The automatic search for a signal runs from midnight to 5:00 AM. If this search for a signal fails, the next search takes place at 1:00 PM the next day. During the search process, the keys are out of operation. Only the SNOOZE /LIGHT key 17 can be operated. In the event the alarm goes off, the search for a signal will be ended. As soon as the signal is found, the radio symbol 4 goes out.
Operation
- Setting the 12 / 24 hour display
Note: No settings are possible during reception of the DCF radio signal. Therefore, press the - / C / F / RCC key 24 for about 3 seconds to interrupt reception of the DCF radio signal.
-
Press the -/C/F/RCC key 24 for about 2 seconds until the radio symbol 4 blinks.
-
Press the -/C/F/RCC key 24 once again for about 2 seconds to manually deactivate reception of the DCF radio signal.
-
Hold the SET key 21 pressed down for about 2 seconds. The time display 1 blinks.
-
Press the + / 12 / 24 key 23 or the - / C / F / RCC key 24 to specify the desired time setting (12 / 24 hours).
Tip: Hold the +/12/24-key 23 or the -/C/F/RCC-key 24 pressed down. This will accelerate the setting of the values. This fast setting can also be used for the additional setting processes. If you do not press any key within 20 seconds, the LC display automatically returns to the standard display.
-
Press the SET key 21 to confirm your entry.
-
Repeat steps 3 to 5 to set the values for minute, hour, date / month or month / date, day, year12-14 and language.
12 GB 13 GB
Note: The AM symbol 3 stands for the morning hours in 12 hour mode. The PM symbol 2 stands for the afternoon hours in 12 hour mode.
Note: You may select display of the weekdays 15 in different languages. The default setting is German. The following languages are available:
ENG = English
GER = German
FRE = French
ITA = Italian
DUT = Dutch
SPA = Spanish
DAN = Danish
POR = Portuguese
- Setting the alarm
Alarm 1 7:
-
Briefly press the ALARM key 22 once. The time set for the alarm will be displayed in the LC display.
-
Press the ALARM key[22] and hold for about 2 seconds. The hour display blinks.
-
Press the + / 12 / 24 key23 or the -/C/F/RCC key 24 to set the desired value. Press the ALARM key 22 to confirm your entry.
-
The minute display blinks. Repeat step 3 to set the value for the minutes.
Alarm 2 8:
-
If the projection radio-controlled alarm clock is in time display mode, briefly press the ALARM key 22 twice.
-
Press the ALARM key 22 and hold for about 2 seconds. The hour display blinks.
-
Press the +/12/24 key 23 or the -/C/F/RCC key 24 to set the desired value. Press the ALARM key 22 to confirm your entry.
-
The minute display blinks. Repeat step 3 to set the value for the minutes.
● Activating / deactivating the alarm
Briefly press the ALARM key22 once or twice to reach Alarm 1 or Alarm 2 mode.
☐ Press the +/12/24 key 23 until the Alarm 1 symbol 7 or the Alarm 2 symbol 8 appears on the LC display. The alarm is activated.
☐ Press the +/12/24 key 23 until the Alarm 1 symbol 7 or the Alarm 2 symbol 8 on the LC display goes out. The alarm is deactivated.
- Switching off the alarm
During the alarm, press any key except the SNOOZE/LIGHT key 17 to stop the alarm. It is not necessary to reactivate the alarm. It automatically switches itself on in the set weekly rhythm.
Note: The alarm switches itself off after one minute.
● Activating the slumber function
During the alarm, press the SNOOZE/LIGHT key 17 to stop the alarm. The alarm automatically switches back on after 5 minutes.
14 GB 15GB
● Activating/deactivating the display illumination and projection
You can activate the display illumination and the projection by pressing a key, generating a noise (e.g. a hand clap) or touching the device at any place (acoustic and contact function).
☐ Slide the S / C switch 25 to the ON position.
□ Activate the display illumination by pressing a key, generating a noise or touching the device at any place. The display illumination switches on for 5 seconds and then automatically switches off.
☐ In addition, slide the projection switch 27 to the ON position.
□ Activate the projection by pressing a key, generating a noise or touching the device at any place. The projection switches on for 20 seconds and then automatically switches off.
☐ Deactivate the projection by sliding the projection switch 27 to the OFF position.
☐ Deactivate the acoustic and contact function by sliding the S / C switch ^25 to the OFF position.
- Adjusting the projection sharpness, angle and direction
☐ Rotate the projection objective 18 to the desired projection direction (forwards / backwards) by using the adjustment wheel 29 (see Fig. E).
☐ Rotate the sharpness control wheel 19 to adjust the projection sharpness.
☐ Press the projection direction button 20 to turn the projection direction through 180°.
● Display temperature in °C / °F
The current interior temperature will be displayed in the LC display.
☐ Press the -/C/F/RCC key 24 to switch back and forth between the Celsius and Fahrenheit temperature scale settings 11.
- Setting the time zones
During stays in countries in which a DCF radio signal can be received but are located in other time zones, the corresponding time tone can be established. For example, in a country in which the local time is one hour behind Central European Time (CET), you may set the 2nd time zone to -01. The clock time continues to be controlled through the DCF radio signal, but indicates an hour earlier.
☐ Press the + / 12 / 24 key 23 until the symbol F for the 2nd time zone appears on the LC display.
☐ Press the SET key 21 and hold for about 2 seconds. The "00" hour display flashes.
☐ Press the + / 12 / 24 key 23 or the - / C / F / RCC key 24 to set the desired value.
☐ Press the SET key 21 to confirm your entry.
☐ To return from the 2nd time zone to the normal time display 1, press the + / 12 / 24 key 23 and hold for about 2 seconds. The F symbol goes out.
- Displaying summer time
The summer time is automatically displayed in the LC display by the summer time symbol 5.
The projection radio-controlled alarm clock determines whether or not it is summer time through the DCF radio signal.
Note: Within buildings of steel reinforced concrete, the signal reception may be strongly influenced.
Reset
If the device displays faulty or unusual values, press the reset key 26 to return to the factory settings.
- Troubleshooting
☐ The device contains delicate electronic components. For this reason it is possible that it can be disrupted by radio transmitting equipment in the immediate vicinity. For example, this can be mobile phones, two-way radios, CB radios, radio control systems / other remote controls and microwave equipment. If erroneous indications occur in the display, remove such equipment from the vicinity of the device.
Electrostatic discharges can lead to malfunctions. In the case of such malfunctions remove the batteries briefly and then insert them again.
● Cleaning and maintenance
■ Under no circumstances should you use liquids or detergents, as these will damage the device.
☐ The device should only be cleaned on the outside with a soft dry cloth.
- Disposal

The packaging is made entirely of recyclable materials, which you may dispose of at local recycling facilities.
Contact your local refuse disposal authority for more details of how to dispose of your worn-out product.

To help protect the environment, please dispose of the product properly when it has reached the end of its useful life and not in the household waste. Information on collection points and their opening hours can be obtained from your local authority.
Faulty or used batteries must be recycled in accordance with Directive 2006 / 66 / EC. Please return the batteries and / or the device to the available collection points.
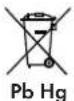
Environmental damage through incorrect disposal of the batteries!
Batteries may not be disposed of with the usual domestic waste. They may contain toxic heavy metals and are subject to hazardous waste treatment rules and regulations. The chemical symbols for heavy metals are as follows: Cd = cadmium, Hg = mercury, Pb = lead. That is why you should dispose of used batteries at a local collection point.
- Information
● Declaration of conformity
We, OWIM GmbH & Co. KG, Stiftsbergstraße 1, D-74167 Neckarsulm, hereby declare under our sole responsibility that the product: Radio-Controlled Projection Alarm Clock, Model No.: Z31311, Z30951B, Z31312, Version: 09/2012, to which this declaration refers, complies with the standards / normative documents of 1999 / 5 / EC.

The complete declaration of conformity can be viewed at: www.owim.com
EMC CE
Inledning
- Safety
- Before use
- Operation
- Cleaning and Maintenance ... Page 18
- Disposal Page 19
- Information
- Radio-Controlled Projection Alarm Clock
- - Proper use
- • Description of parts
- - Technical data
- • Supply scope
- WARNING! RISK OF FATAL INJURY!
- Safety advice concerning batteries
- - Before use
- - Inserting / replacing the batteries
- - Setting the alarm
- Alarm 1 7:
- Alarm 2 8:
- ● Activating / deactivating the alarm
- - Switching off the alarm
- ● Activating the slumber function
- ● Activating/deactivating the display illumination and projection
- - Adjusting the projection sharpness, angle and direction
- ● Display temperature in °C / °F
- - Setting the time zones
- - Displaying summer time
- Reset
- - Troubleshooting
- ● Cleaning and maintenance
- - Disposal
- Environmental damage through incorrect disposal of the batteries!
- - Information
- ● Declaration of conformity
- EMC CE
- Inledning
Brand : AURIOL
Model : IAN 78346
Category : Alarm clock radio