
C417L - Microphone AKG - Free user manual and instructions
Find the device manual for free C417L AKG in PDF.


| Product Type | Miniature omnidirectional electrostatic lavalier microphone |
| Brand | AKG |
| Model | C417L |
| Polar pattern | Omnidirectional |
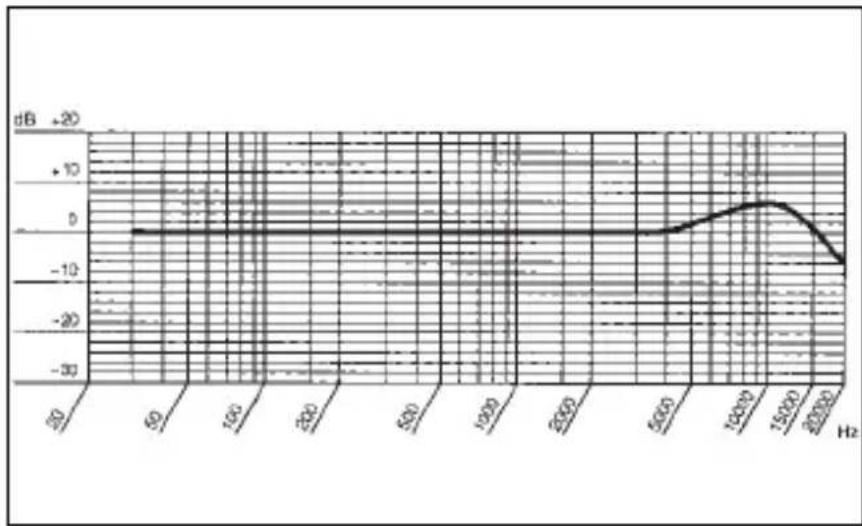
| Frequency response | 20 ... 20 000 Hz |
| Sensitivity | 10 mV/Pa (-40 dBV rel. 1 V/Pa) |
| Electrical impedance (1 kHz) | 200 ohms |
| Max. sound pressure level (1% distortion) | 118 dB SPL |
| Equivalent noise level | 34 dB(A) (IEC 60268-4) |
| Power supply | B 29 L battery power supply, MPA III L phantom adapter or AKG WMS pocket transmitter |
| Current consumption | Approx. 2.2 mA |
| Connector | 3-pin mini-XLR (1.5 m cable) |
| Color | Pink (L version) |
| Dimensions (body) | 7.5 x 15 mm |
| Net weight | 8 g |
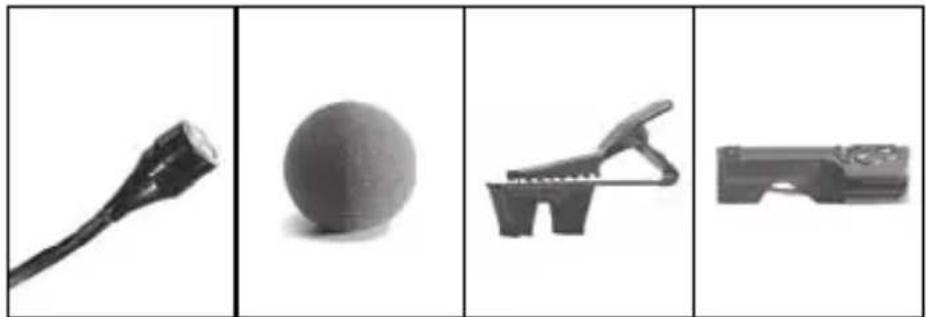
| Included accessories | H40/1 clip, H41 pin, windscreen, 1.5 m microphone cable |
| Optional accessories | B 29 L battery power supply, MPA III L phantom adapter, MK 9/10 XLR cable, N 62 E, N 66 E, B 18, B 15 phantom power supplies |
| Recommended uses | Lavalier microphone for theater, lectures, violin, vocals (makeup integration) |
| Care and cleaning | Clean the housing with a slightly damp cloth (clean water) |
| Safety | Check the grounding of the connected device; use only power supplies recommended by AKG |
| Compliance | Compliant with CE standards (declaration available at akg.com) |
Frequently Asked Questions - C417L AKG
User questions about C417L AKG
0 question about this device. Answer the ones you know or ask your own.
Ask a new question about this device
Download the instructions for your Microphone in PDF format for free! Find your manual C417L - AKG and take your electronic device back in hand. On this page are published all the documents necessary for the use of your device. C417L by AKG.
USER MANUAL C417L AKG
Please read the manual before using the equipment!
MODE D'EMPLOI p. 24
natural_image
Four grayscale images showing different types of objects: a probe, a sphere, a tool, and a mechanical bracket (no text or symbols)1 C 417 III 1 W 407 1 H 40/1 1 H 41
• Phantomspeiseadapter MPA III L
natural_image
Diagram showing a mechanical or biological structure with arrows indicating direction, no visible text or symbols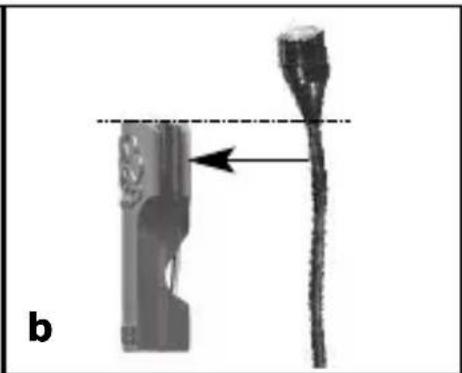
natural_image
Diagram showing a device with a pointed tip and an arrow pointing to it, labeled 'b' (no text or symbols on the diagram itself)natural_image
Line drawing of a person with spiky hair and raised hand, no text or symbols presentnatural_image
Line drawing of a violinist playing a violin (no text or symbols)1 Precaution/Description

Please make sure that the piece of equipment your microphone will be connected to fulfills the safety regulations in force in your country and is fitted with a ground lead.
1.1 Precaution
natural_image
Four grayscale images showing different objects: a tool, a sphere, a chair-like device, and a mechanical device (no text or symbols)1 C 417 ^III 1 W 407 1 H 40/1 1 H 41
1.2 Unpacking
Check that the packaging contains all of the components listed above. Should anything be missing, please contact your AKG dealer.
- MK 9/10 microphone cable: 10-m (30-ft.) 2-conductor shielded cable w/male and female XLR connectors
1.3 Optional Accessories
• MPA III L phantom power adapter
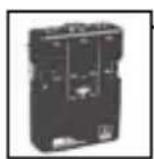
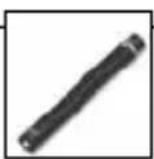
• B 29 L, B 15 battery power supplies
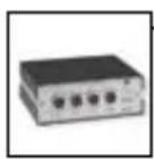
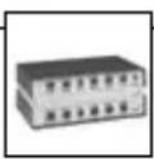
N 62 E, N 66 E, B 18 phantom power supplies
1.4 Features
• Professional miniature clip-on microphone.
- Omnidirectional condenser transducer for natural sound.
- Extended frequency response for clear reproduction of speech, vocals, violin.

1 Description
1.5 Brief Description
- Fastens on clothing or directly on the user's head.
The C 417 ^III is a professional miniature condenser clip-on microphone with an omnidirectional polar pattern. With its wide frequency range extending from 20 Hz to 20 kHz, low distortion at high sound pressure levels, small size, and useful accessories, the C 417 ^III is an ideal choice for use in any situation requiring an inconspicuous microphone and maximum mobility for the user.
The microphone is available in two different colors and will almost disappear when blended in with an actor's or singer's makeup.
An external windscreen supplied with the microphone reduces wind noise when using the microphone on an open-air stage.
1.6 Versions C 417 ^III PP:
C 417 ^III L:
The C 417 ^III is available in three versions:
- With 3-pin XLR connector with integrated adapter for 9 to 52 V universal phantom power.
- With locking mini XLR connector for use with the B 29 L battery power supply, MPA III L phantom power adapter, or AKG bodypack transmitters.
C 417 ^III PL:
- Identical to the C 417 ^III L, except with flesh-color cable and microphone body.
The C 417 ^III is a condenser microphone and therefore needs a power supply.
2.1 Introduction
Using any power supply other than those recommended by AKG may damage your microphone and will void the warranty.
Important!
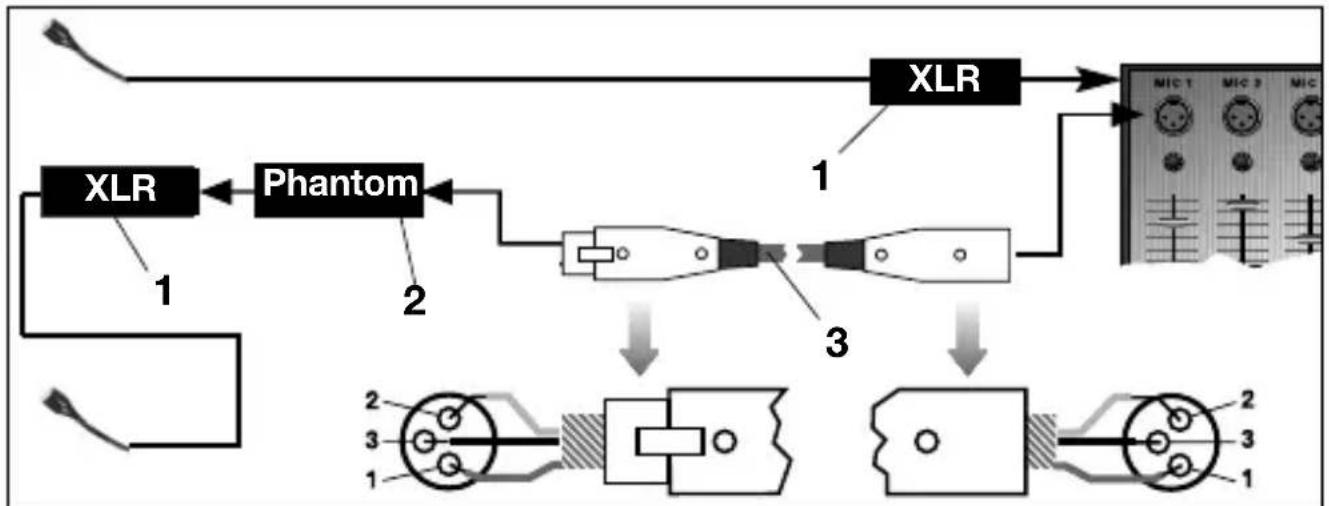
- Connect the phantom power adapter (1) on the microphone cable to a balanced XLR microphone input with phantom power.
- Switch the phantom power on. (Refer to the instruction manual of the unit to which you connected your microphone.)
2.2 C 417 ^III PP 2.2.1 Connecting to Balanced Inputs
Refer to fig. 1.
flowchart
graph TD
    A["XLR"] --> B["Phantom"]
    B --> C["1"]
    C --> D["2"]
    D --> E["3"]
    E --> F["4"]
    F --> G["5"]
    G --> H["6"]
    H --> I["7"]
    I --> J["8"]
    J --> K["9"]
    K --> L["10"]
    L --> M["11"]
    M --> N["12"]
    N --> O["13"]
    O --> P["14"]
    P --> Q["15"]
    Q --> R["16"]
    R --> S["17"]
    S --> T["18"]
    T --> U["19"]
    U --> V["20"]
    V --> W["21"]
    W --> X["22"]
    X --> Y["23"]
    Y --> Z["24"]
Fig. 1: Connecting to a balanced input.
- If your mixer provides no phantom power:
Connect the phantom power adapter (1) to an optional AKG phantom power supply (2) (N 62 E, N 66 E, B 18, B 15) and use an XLR cable (3) (e.g., an optional MK 9/10 from AKG) to connect the phantom power supply to the desired balanced input.
Refer to fig. 1.
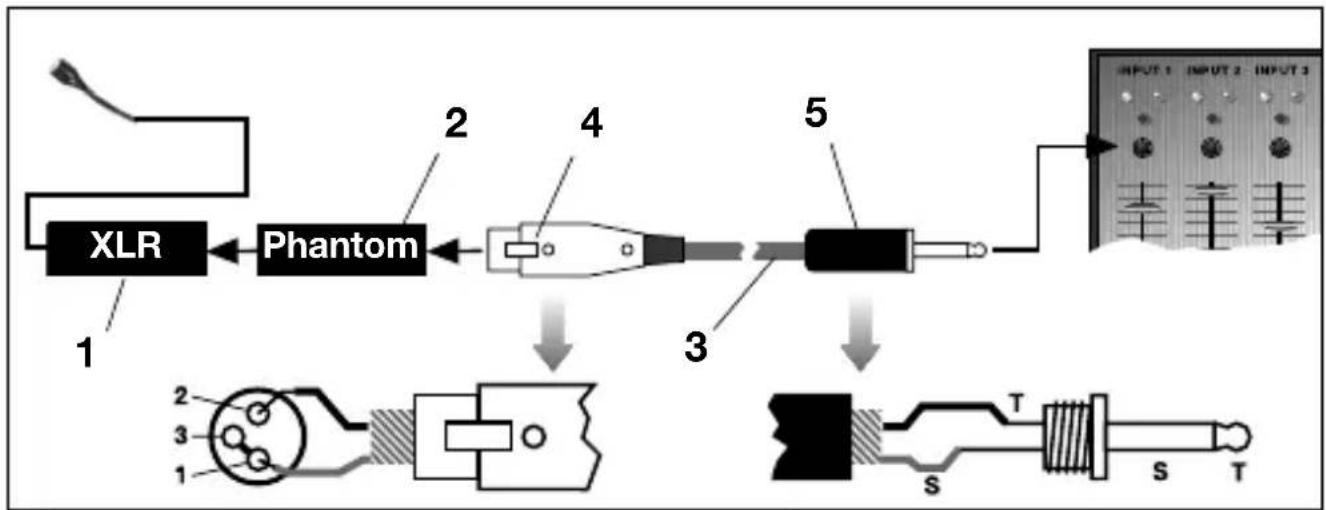
You may connect any AKG phantom power supply (2) to an unbalanced input, too. Use a cable (3) with a female XLR connector and TS jack plug:
2.2.2 Connecting to Unbalanced Inputs
Refer to fig. 2.
flowchart
graph LR
    A["XLR"] --> B["Phantom"]
    B --> C["4"]
    C --> D["3"]
    D --> E["5"]
    E --> F["OUTPUT 1 INPUT 2 INPUT 3"]
    subgraph Input
        G["2"] --> H["3"]
        I["3"] --> J["S"]
        K["T"] --> L["S"]
        M["T"] --> N["T"]
    end
Fig. 2: Connecting to an unbalanced input.
- On the XLR connector (4), add a wire bridge to connect pin 1 to pin 3 and the cable shield.
- Connect the inside wire of the cable to pin 2 on the XLR connector (4) and the tip contact of the jack plug (5).
Note:
Unbalanced cables may pick up interference from stray magnetic fields near power or lighting cables, electric motors, etc. like an antenna. This may introduce hum or similar noise when you use a cable that is longer than 16 feet (5 m).
2.3 C 417 ^III L/PL
2.3.1 Using the
Optional B 29 L
Refer to fig. 3.
Connecting the cable:
The optional B 29 L battery supply allows you to connect the microphone to balanced or un - balanced inputs with no phantom power.
- Push the mini XLR connector (1) on the microphone cable into one of the two mini XLR sockets on the B 29 L (2) to the stop. The connector will lock automatically.
Disconnecting the cable:
To disconnect the cable, press the unlocking button on the mini XLR connector (1) and pull the connector (1) out of the socket.
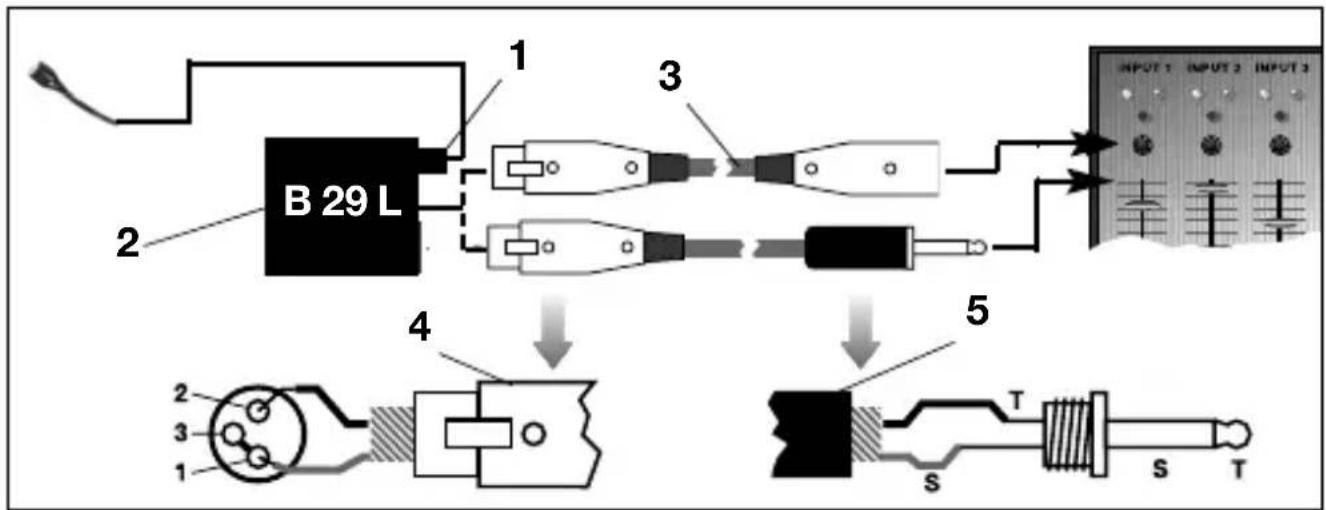
Fig. 3: Using the B 29 L to power the microphone.
To avoid damaging the cable, never try to pull out the cable itself!
Important!
-
Connect the B 29 L (2) to the desired input.
-
Use a commercial XLR cable (3) to connect the B 29 L (2) to a balanced input.
• Refer to section 2.2.2 above. -
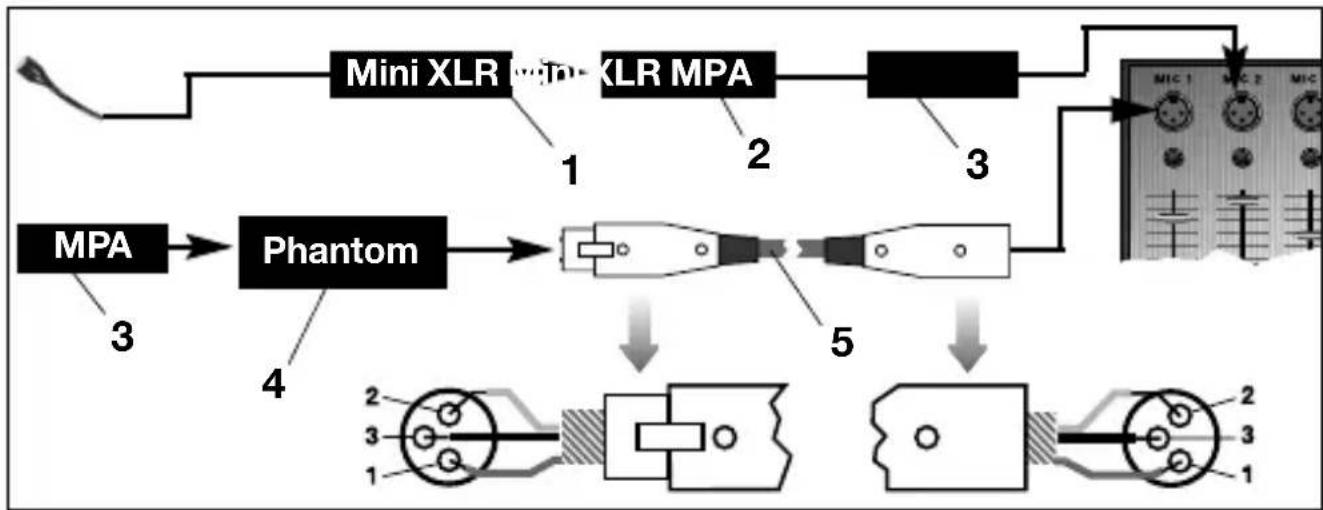
Push the mini XLR connector (1) on the microphone cable into the mini XLR socket (2) on the cable of the MPA III L (3) to the stop. The connector will lock automatically.
Refer to section 2.3.1 above.
Refer to fig. 3.
Balanced input:
Unbalanced input:
2.3.2 Using the MPA III L
Refer to fig. 4.
Disconnecting the cable:
- Connect the MPA III L (3) to a balanced XLR microphone input with phantom power.
- Switch the phantom power on. (Refer to the instruction manual of the unit to which you connected your microphone.)
2 Interfacing
flowchart
graph TD
    A["Input"] --> B["Mini XLR"]
    B --> C["Min XLR MPA"]
    C --> D["Phantom"]
    D --> E["Electrical Components 1-5"]
    E --> F["Output to MIC 1-MIC 2-MIC"]
    style A fill:#f9f,stroke:#333
    style B fill:#ccf,stroke:#333
    style C fill:#ccf,stroke:#333
    style D fill:#cfc,stroke:#333
    style E fill:#fcc,stroke:#333
    style F fill:#ffc,stroke:#333
Fig. 4: Connection diagram with MPA III L.
Refer to fig. 4.
4. If your mixer provides no phantom power:
Connect the MPA III L (3) to an optional AKG phantom power supply (4) (N 62 E, N 66 E, B 18, B 15) and use an XLR cable (5) (e.g., an optional MK 9/10 from AKG) to connect the phantom power supply (4) to the desired balanc ed input.
2.3.3 Connecting to a Bodypack Transmitter
Refer to the manual of your bodypack transmitter.
3 Using Your Microphone
The principal benefit of a microphone attached to the user's clothes or integrated in their makeup is that the microphone will maintain a constant working distance independently of the user's move ments and thus ensure a constant output level. Also, a clip-on microphone allows the user to move about freely and keeps their hands free.
3.1 Introduction
natural_image
Diagram showing a mechanical or biological assembly with arrows indicating direction (no text or symbols present)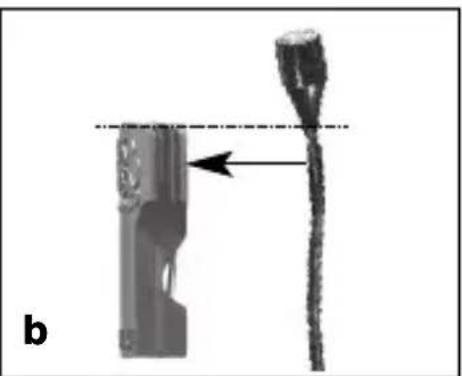
natural_image
Diagram showing a device with a pointed tip and an arrow pointing to it, labeled 'b' (no text or symbols on the diagram itself)3.2 Lavalier Miking
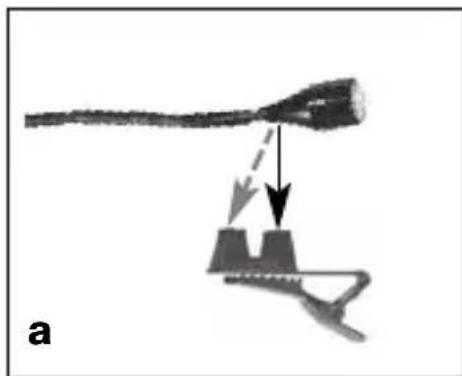
Fig. 5: Fixing the microphone on the clip (a) or tie pin (b).
- Insert the cable into one of the fixing grooves on the supplied H 40/1 clip (se fig. 5a) or on the supplied H 41 tie pin (see fig. 5b), at a point immediately behind the microphone body.
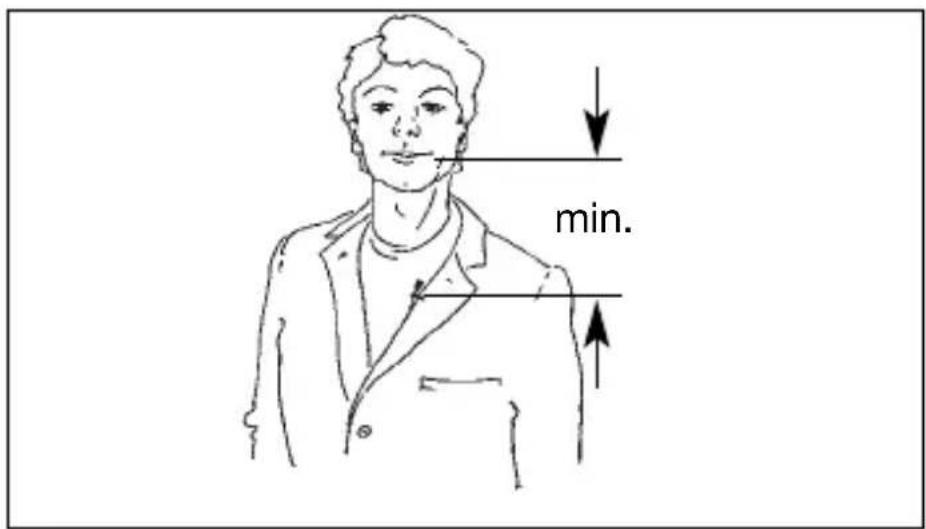
Fig. 6: Attaching the microphone near the user's mouth.
- Attach the microphone to the talker's clothes, e.g., on the lapel, placing it as close as possible to the talker's mouth.
3 Using Your Microphone
Note:
The smaller the distance between the microphone and the sound source, the higher the usable gain before feedback.
3.3 Live Recording and Spot Miking
- Insert the cable into one of the fixing grooves on the supplied H 40/1 clip (se fig. 5a) or on the supplied H 41 tie pin (see fig. 5b).
- Fix the microphone on a suitable part of the stage decoration such as a flat, backdrop, curtain, etc.
3.4 Theater, Musical, Opera
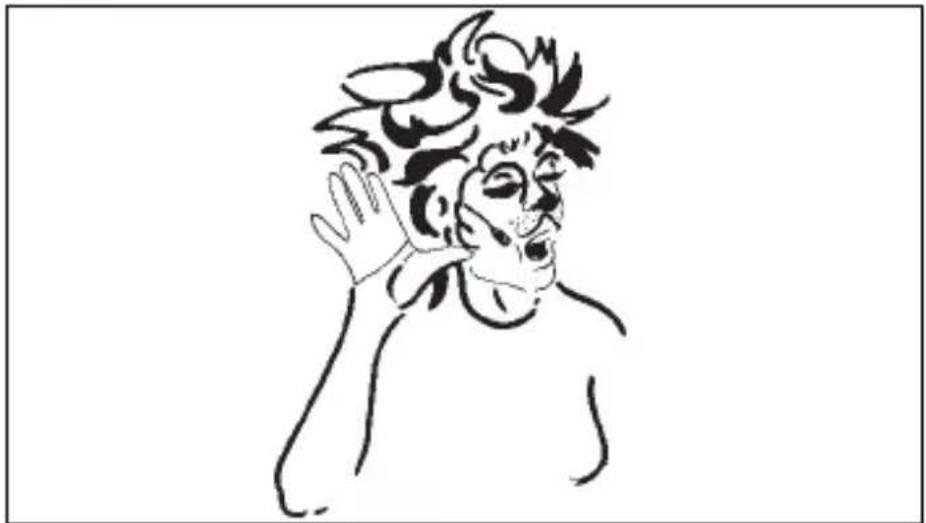
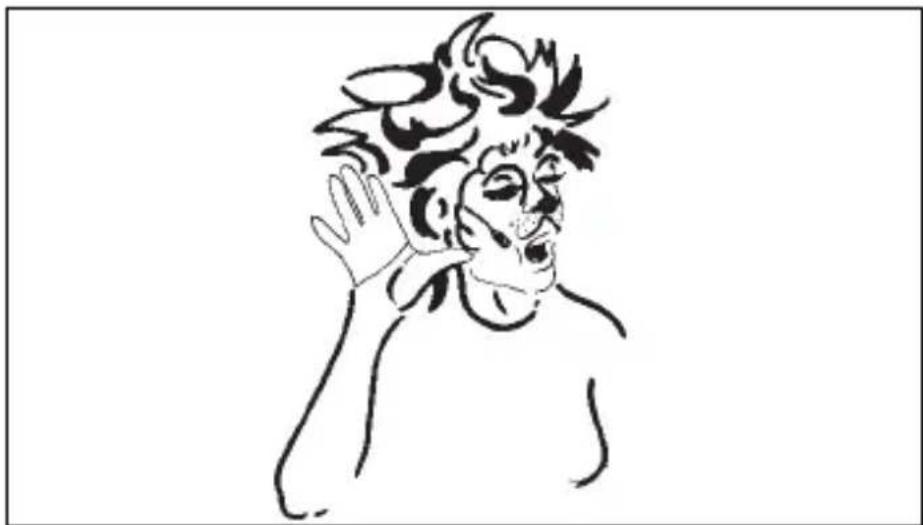
Fig. 7: Microphone integrated in performer's makeup.
natural_image
Line drawing of a person with spiky hair and raised hand, no text or symbols presentFix the microphone on the user's head, as close as possible to the mouth, and blend it in with the makeup.
Many engineers place the microphone as shown in fig. 7.
Depending on the requirements of the production at hand, you may also attach the microphone in different places, e.g., on the performer's forehead.
natural_image
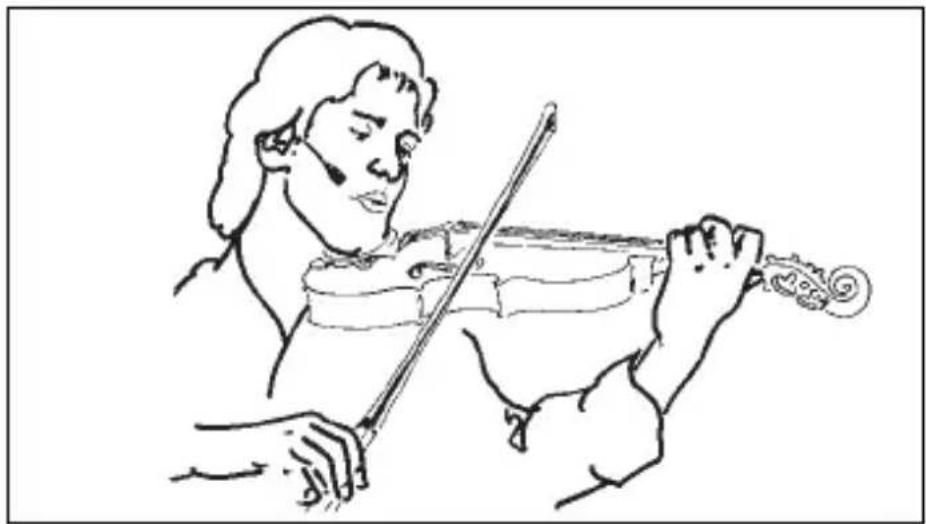
Line drawing of a violinist playing a violin (no text or symbols present)3.5 Violin
Fig. 8: Miking up a violin.
If the production concept does not allow for microphones mounted on the the violin itself, you can attach the microphone with mastic to the violin ist's cheek.
Refer to fig. 8.
This method provides the following benefits:
- Since the microphone is not mounted on the violin itself, it will not affect the sound of the instrument.
- There will be no risk of damaging the violin with adhesive tape or similar mounting materials.
- There will be no cable that gets in the way.
4 Cleaning

To clean the microphone case, use a soft cloth moistened with water.
| Problem | Possible Cause | Remedy |
| No sound: | Power to mixer and/or amplifier is off.Channel or master fader on mixer, or volume control on amplifier is at zero.Microphone is not connected to mix -er or amplifier.Cable connectors are seated loosely.Cable is defective.No supply voltage. | Switch power to mixer or amplifier on.Set channel or master fader on mixer or volume control on amplifier to desired level.Connect micro-phone to mixer or amplifier.Check cable connectors for secure seat.Check cable and replace if damaged.Switch phantom power on.Phantom power supply: connect to power outlet or insert battery (batteries).Check cable and replace if necessary. |
| Distortion: | Gain control on the mixer set too high.Mixer input sensitivity too high. | Turn gain control down CCW.Connect a 10-dB preattenuation pad between microphone cable and input. |
Type: pre-polarized condenser microphone
Polar pattern: omnidirectional
Frequency range: 20 Hz to 20,000 Hz
Sensitivity at 1 kHz: 10 mV/Pa (-40 dBV re 1 V/Pa)
Impedance: 200
Recommended load impedance: 2000
Max. SPL for 1%/3% THD: 118/126 dB SPL
Equivalent noise level: 34 dB (A) (to IEC 60268-4)
| Power requirement: | C 417III PP: 9 to 52 V universal phantom power |
| C 417III L/PL: B 29 L battery power supply, MPA III L phantom adapter, or AKG WMS bodypack transmitters |
Current consumption: approx. 2.2 mA
Cable length/Connector: C 417
^III PP: 3 m (10 ft.) / 3-pin male XLR C 417 ^III L/PL: 1.5 m (5 ft.) / 3-pin mini XLR
Finish: matte black (PP, L) or flesh-color (PL)
Size: 7.5 x 15 mm (0.3 x 0.6 in.)
Net/shipping weight: C 417 ^III PP: 8 g (0.3 oz.) / 220 g (7.8 oz.) C 417 ^III L/PL: 8 g (0.3 oz.) / 160 g (5.6 oz.)
This product conforms to the standards listed in the Declaration of Conformity. To order a free copy of the Declaration of Conformity, visit http://www.akg.com or contact sales@akg.com.
Frequency Response
line
| Frequency (Hz) | Value (dB) | | -------------- | ---------- | | 50 | -5 | | 100 | -5 | | 150 | -5 | | 200 | -5 | | 500 | -5 | | 1000 | -5 | | 2000 | -5 | | 5000 | -5 | | 10000 | 5 | | 15000 | 10 | | 20000 | -10 |Polar Diagram
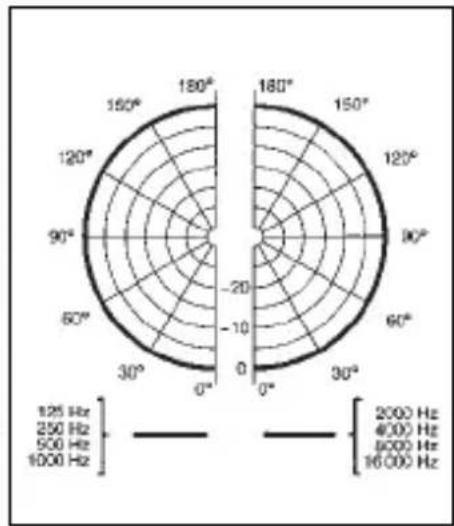
radar
| Angle | Frequency | |-------|---------| | 0° | 125 Hz | | 30° | 250 Hz | | 60° | 500 Hz | | 90° | 1000 Hz | | 120° | 2000 Hz | | 150° | 4000 Hz | | 180° | 6000 Hz | | 210° | 16000 Hz |
natural_image
Four grayscale product photos: a tool, a sphere, a saw, and a mechanical bracket (no text or symbols)1 C 417 ^III 1 W 407 1 H 40/1 1 H 41
flowchart
graph TD
    A["Input"] --> B["Mini XLR min-KLR MPA"]
    B --> C["Phantom"]
    C --> D["Electronic Components 1-5"]
    D --> E["Output to MIC 1/MIC 2/MIC 3/4/1"]
natural_image
Diagram showing a mechanical or biological process with arrows indicating direction, no visible text or symbols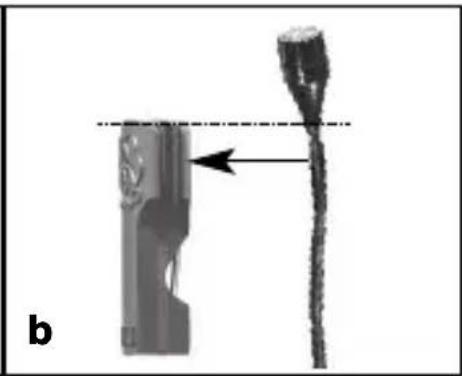
natural_image
Diagram showing a connector with a pointed tip and an arrow indicating direction, labeled 'b' (no text or symbols on the diagram itself)natural_image
Line drawing of a person with spiky hair and raised hand, no text or symbols presentRemarque :
natural_image
Line drawing of a violinist playing a violin (no text or symbols)natural_image
Four grayscale images showing different objects: a tool, a sphere, a chair-like device, and a mechanical device (no text or symbols)1 C 417 ^III 1 W 407 1 H 40/1 1 H 41
1.2 In dotazione
natural_image
Diagram of a biological or mechanical structure with arrows indicating direction, no visible text or symbols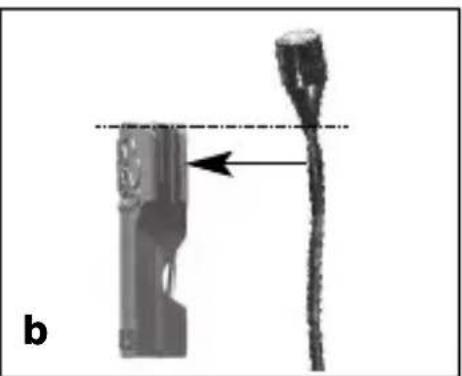
natural_image
Diagram showing a device with a pointed tip and an arrow pointing to it, labeled 'b' (no text or symbols on the diagram itself)3.4 Teatro, musical, opera
natural_image
Line drawing of a person with spiky hair and raised hand, no text or symbols presentnatural_image
Line drawing of a violinist playing a violin (no text or symbols present)3.5 Violino
natural_image
Four grayscale product images: a tool, a sphere, a saw, and a mechanical part (no text or symbols)1 C 417 III 1 W 407 1 H 40/1 1 H 41
natural_image
Diagram showing a mechanical or biological assembly with arrows indicating direction (no text or symbols present)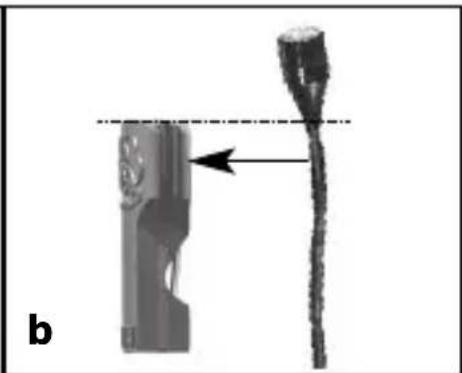
natural_image
Diagram showing a device with a pointed tip and an arrow pointing to it, labeled 'b' (no text or symbols on the diagram itself)natural_image
Line drawing of a person with spiky hair and expressive face, hand raised (no text or symbols)3.4 Teatro, musical, ópera
natural_image
Line drawing of a violinist playing a violin (no text or symbols)natural_image
Four grayscale product photos: a tool, a sphere, a mechanical clamp, and a plastic bracket (no text or symbols)1 C 417 ^III 1 W 407 1 H 40/1 1 H 41
1.2 Volume de fornecimento
flowchart
graph TD
    A["Input"] --> B["Mini XLR"]
    B --> C["MPA"]
    C --> D["Phantom"]
    D --> E["Output"]
    subgraph Signal Path
        F["1: Mini XLR"] --> G["2: Phantom"]
        H["3: Mini XLR"] --> I["5: Phantom"]
        J["4: Phantom"] --> K["2: Radiocell"]
        L["5: Radiocell"] --> M["3: Radiocell"]
        N["6: Radiocell"] --> O["2: Radiocell"]
        P["7: Radiocell"] --> Q["3: Radiocell"]
        R["8: Radiocell"] --> S["2: Radiocell"]
        T["9: Radiocell"] --> U["3: Radiocell"]
        V["10: Radiocell"] --> W["2: Radiocell"]
        X["11: Radiocell"] --> Y["3: Radiocell"]
        Z["12: Radiocell"] --> AA["2: Radiocell"]
        AB["13: Radiocell"] --> AC["3: Radiocell"]
        AD["14: Radiocell"] --> AE["2: Radiocell"]
        AF["15: Radiocell"] --> AG["3: Radiocell"]
        AH["16: Radiocell"] --> AI["2: Radiocell"]
        AJ["17: Radiocell"] --> AK["3: Radiocell"]
        AL["18: Radiocell"] --> AM["2: Radiocell"]
        AN["19: Radiocell"] --> AO["3: Radiocell"]
        AP["20: Radiocell"] --> AQ["2: Radiocell"]
natural_image
Diagram of a mechanical or biological structure with arrows indicating direction, no visible text or symbols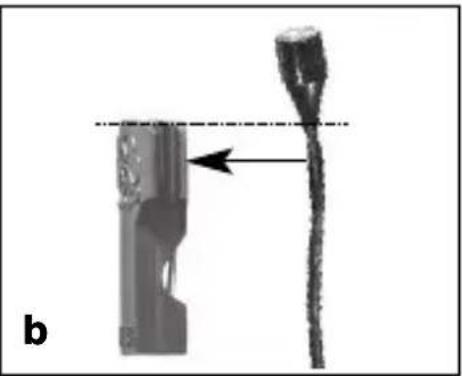
natural_image
Diagram showing a device with a pointed tip and an arrow pointing to it, labeled 'b' (no text or symbols on the diagram itself)natural_image
Line drawing of a person with spiky hair and raised hand, no text or symbols presentnatural_image
Line drawing of a violinist playing a violin (no text or symbols)3.5 Violino
Veja fig. 8.
For other products and distributors worldwide visit www.akg.com




ROHS OK
H A Harman International Company
Technische Änderungen vorbehalten. Specifications subject to change without notice. Ces caractéristiques sont susceptibles de modifications. Ci riserviamo il diritto di effettuare modifiche tecniche. Nos reservamos el derecho de introducir modificaciones técnicas. Especificações sujeitas a mudanças sem aviso prévio.
Printed in China (P.R.C.) /09/9100 U 10360

- Precaution/Description
- Precaution
- Unpacking
- Optional Accessories
- Features
- Description
- Brief Description
- Versions C 417 III PP:
- Introduction
- Using any power supply other than those recommended by AKG may damage your microphone and will void the warranty.
- Important!
- Connecting to Unbalanced Inputs
- Note:
- C 417 III L/PL
- Using the
- Optional B 29 L
- Connecting the cable:
- Disconnecting the cable:
- To avoid damaging the cable, never try to pull out the cable itself!
- Balanced input:
- Unbalanced input:
- Using the MPA III L
- Interfacing
- Refer to fig. 4.
- If your mixer provides no phantom power:
- Connecting to a Bodypack Transmitter
- Using Your Microphone
- Introduction
- Lavalier Miking
- Live Recording and Spot Miking
- Theater, Musical, Opera
- Cleaning
- Remarque :
- In dotazione
- Teatro, musical, opera
- Violino
- H A Harman International Company
Brand : AKG
Model : C417L
Category : Microphone