
PMD-750T - Microphone MARANTZ - Free user manual and instructions
Find the device manual for free PMD-750T MARANTZ in PDF.


| Product Type | Wireless lavalier microphone system (pocket transmitter with lavalier microphone) |
| Brand | Marantz |
| Model | PMD-750T |
| Power Supply | 2 AA batteries (alkaline recommended) or USB adapter (sold separately) |
| Box Contents | PMD-750T transmitter, condenser lavalier microphone, foam windscreen, furry windscreen, user guide, safety instructions and warranty |
| Main Features | Wireless transmission, Mono and Stereo modes, RF level adjustment (-1 to 20 dBm), automatic or manual pairing, mute function |
| Connectivity | Mini-XLR microphone input, micro-USB port (power), audio output to receiver |
| Indicators | Display screen, pairing LED (red/blue), battery level indicator |
| Safety | Hearing protection against high sound levels (per OSHA recommendations) |
| Maintenance and Cleaning | Clean with a dry, soft cloth. Do not expose to moisture. |
| Spare Parts and Repairability | Visit marantzpro.com/support for spare parts and repairs. |
| General Information | Use with compatible Marantz receiver. See full manual for configuration details. |
Frequently Asked Questions - PMD-750T MARANTZ
User questions about PMD-750T MARANTZ
0 question about this device. Answer the ones you know or ask your own.
Ask a new question about this device
Download the instructions for your Microphone in PDF format for free! Find your manual PMD-750T - MARANTZ and take your electronic device back in hand. On this page are published all the documents necessary for the use of your device. PMD-750T by MARANTZ.
USER MANUAL PMD-750T MARANTZ
User Guide (English)
Introduction
Box Contents
PMD-750T Transmitter
Lavalier Condenser Mic
Foam Windscreen
Synthetic Fur Windscreen
User Guide
Safety & Warranty Manual
Support
For the latest information about this product (documentation, technical specifications, system requirements, compatibility information, etc.) and product registration, visit marantzpro.com.
For additional product support, visit marantzpro.com/support.
Important Safety Precautions
Please note: Marantz Professional and inMusic are not responsible for the use of its products or the misuse of this information for any purpose. Marantz and inMusic are not responsible for the misuse of its products caused by avoiding compliance with inspection and maintenance procedures. Please also refer to the included safety and warranty manual for more information.
Sound Level
Permanent hearing loss may be caused by exposure to extremely high noise levels. The U.S. Occupational Safety and Health Administration (OSHA) has specified permissible exposures to certain noise levels. According to OSHA, exposure to high sound pressure levels (SPL) in excess of these limits may result in hearing loss. When using equipment capable of generating high SPL, use hearing protection while such equipment is under operation.
| Hours per day | SPL (dB) | Example |
| 8 | 90 | Small gig |
| 6 | 92 | Train |
| 4 | 95 | Subway train |
| 3 97 High level | desktop monitors | |
| 2 | 100 | Classical music |
| 1.5 | 102 | Riveting machine |
| 1 | 105 | Machine factory |
| 0.50 | 110 | Airport |
| 0.25 or less 115 | Rock concert |
Features
Transmitter
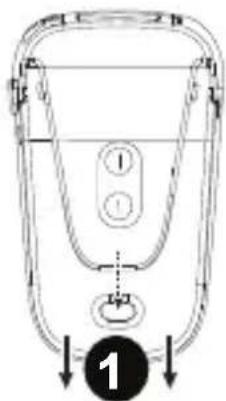
Bottom Panel
- Battery Compartment: Insert (2) AA batteries here (not included). Alkaline batteries are recommended; always replace both batteries. Do not mix battery types.
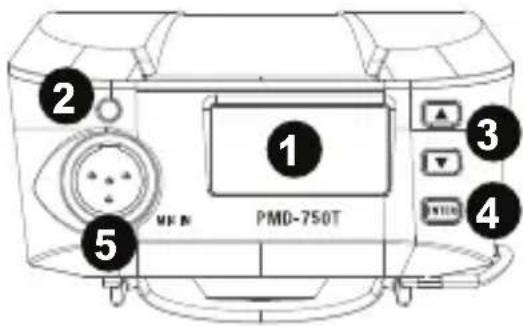
Front Panel
-
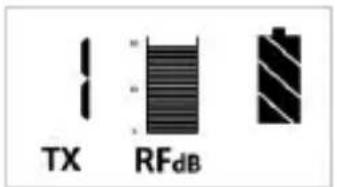
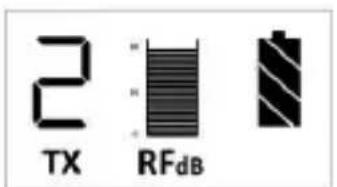
Display: The display will show the channel that the unit is communicating on, pairing status, and battery level meter.
-
Pair LED: The LED will blink red when the transmitter is muted. The LED will blink blue when it is searching to pair to the receiver. The LED will be lit solid blue when it is paired to the receiver.
-
Navigation Buttons: Press these buttons to change which sections of the display are highlighted.
-
Enter Button: Press this button to navigate to a menu/submenu selection or confirm a specific function.
-
Mic Input: Connect the included mini-XLR lavalier condenser microphone here.
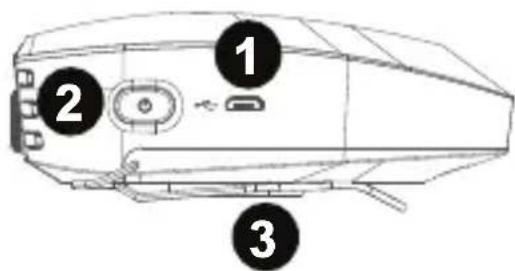
Side Panel
-
Micro USB Port: Connect a USB power adapter (sold separately) here to power the unit if not using 2 AA batteries.
-
Power On/Off: Press and hold this button to power the unit on/off.
-
Belt Clip: Attach this clip to secure to a belt loop or pocket.
Setup
Items not listed under Introduction > Box Contents are sold separately.
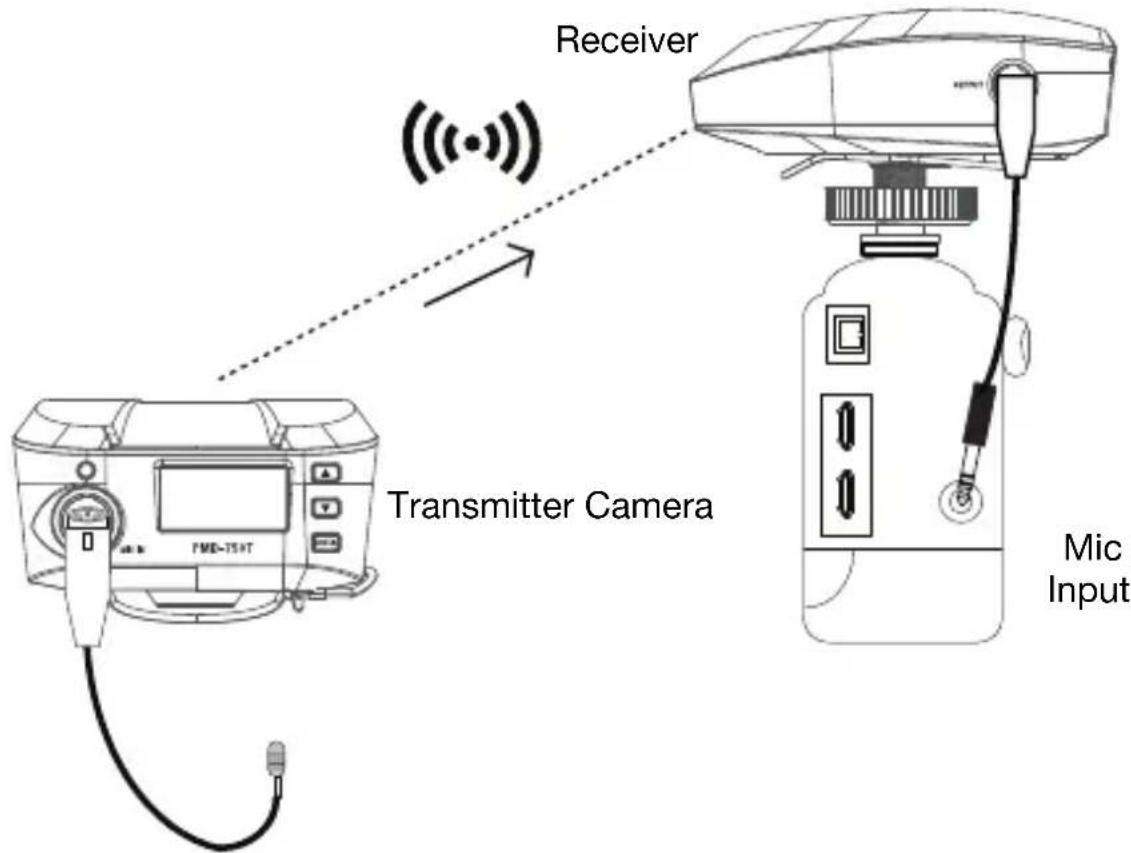
Example 1 – Mono Operation
To send a mono signal from a single transmitter to the receiver:
- Connect your microphone to the mic input on the transmitter, and connect the receiver's audio output to your camera's external mic input. Keep the volume controls on the camera at its minimum settings.
- If necessary, adjust the RF dB level on the transmitter to get a strong signal for better operating range and noise resistance.
- Turn on your camera, adjust the RX output level on the receiver and the input level of the camera's external mic input to hear the audio signal (or view the level on the input level of the camera).
- In the audio recording settings on your camera, make sure it is set to Manual rather than Auto. Check the input level meter, and adjust the level so that the loudest sounds peak around -12 dB. Make sure the sound does not exceed 0 dB, which will cause the signal to distort.
Example 2 – Stereo Operation
To send a stereo signal from 2 transmitters to the receiver:
- Connect your microphones to the mic inputs on the transmitters, and connect the receiver's audio output to your camera's external mic input. Keep the volume controls on the camera at its minimum settings.
- If necessary, adjust the RF dB level on the transmitter to get a strong signal for better operating range and noise resistance.
- Turn on your camera, adjust the RX output level on the receiver, and the input level of the camera's external mic input to hear the audio signal (or view the level on the input level of the camera).
- In the audio recording settings on your camera, make sure it is set to Manual rather than Auto. Check the input level meter, and adjust the level so that the loudest sounds peak around -12 dB. Make sure the sound does not exceed 0 dB, which will cause the signal to distort.
- Set the receiver's Output menu to Stereo and adjust the output level to get a strong signal without clipping.
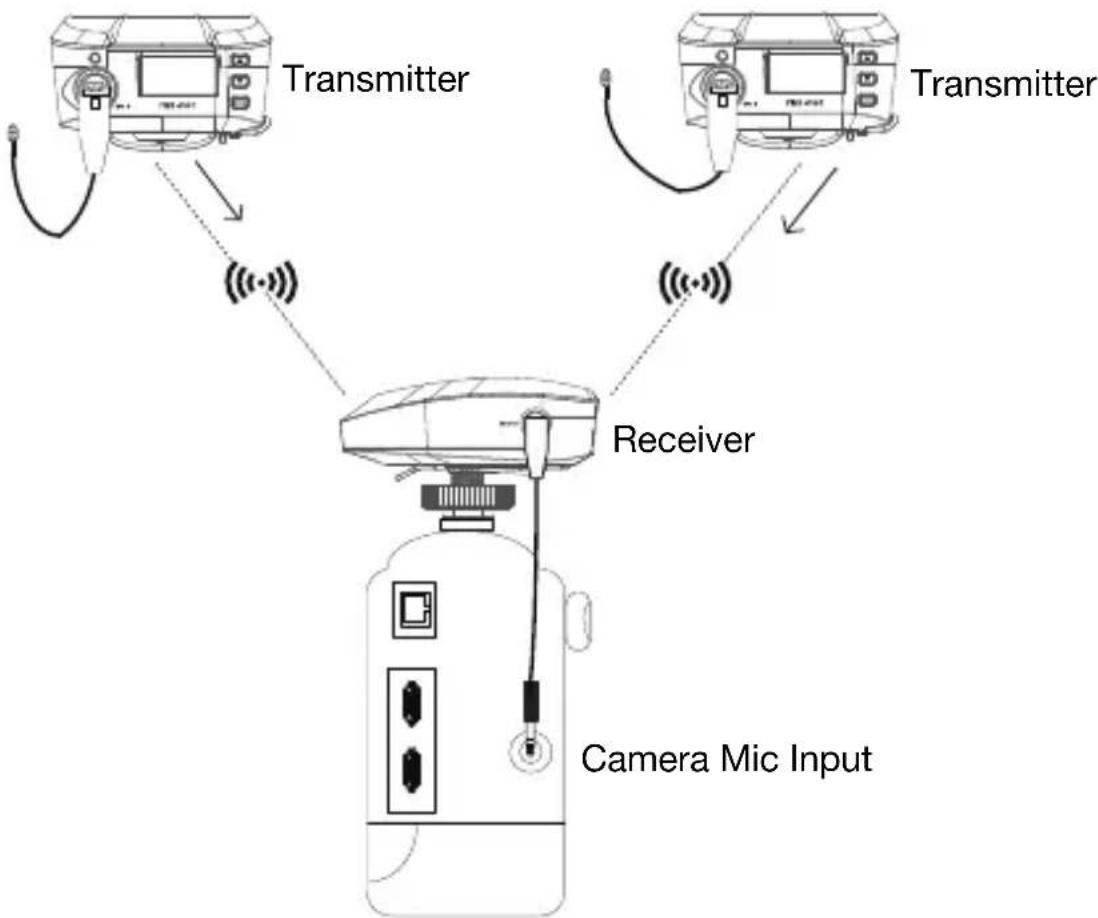
flowchart
graph TD
    A["Transmitter"] -->|Wireless Signal| B["Receiver"]
    C["Transmitter"] -->|Wireless Signal| B["Receiver"]
    D["Camera Mic Input"] --> B["Receiver"]
Operation
To set up and use your PMD-750T, follow the steps in the Pairing the Transmitter and Receiver chapter in order. If you are setting up a system using two transmitters, set up each transmitter one at a time, and keep each transmitter powered on as you set up the additional unit.
Transmitter Menu
Display:
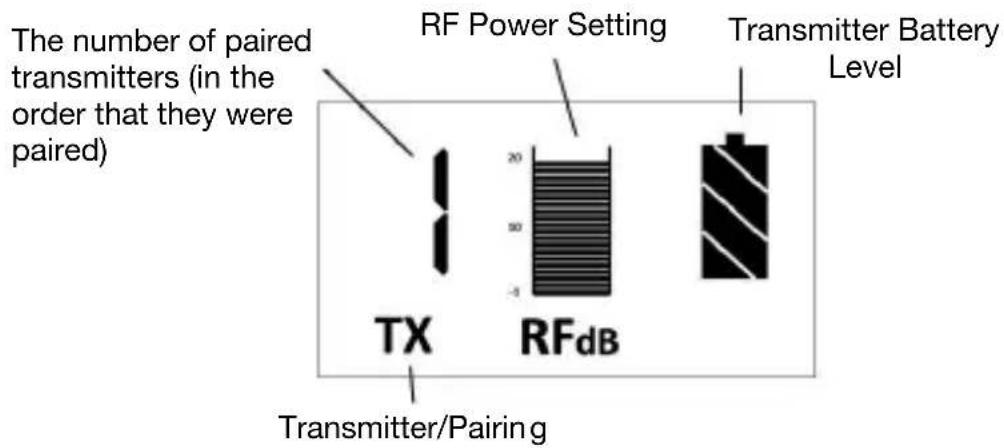
Main Menu:
- Mute/unmute the transmitter by quickly pressing and releasing the Power button.
Pairing Mode:
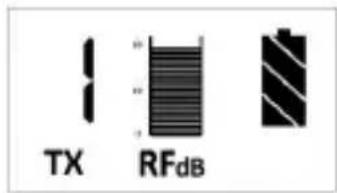
- Press the navigation buttons to move the cursor to the TX icon. Once TX is highlighted, the icon will display PAIR. Press Enter to go into pairing mode and the icon will flash to wait for the receiver to pair. Once paired, the icon will be lit solid.
RF Level:
- Press and release the Enter button on the receiver to highlight the meter and use the navigation buttons to adjust the RF power. The default setting is 10 dBm. You can set this to: -1, 3, 5, 8, 10, 12, 14, 16, 20 dBm.
Pairing the Transmitter and Receiver
Pairing 1 transmitter with the receiver (automatic):
- Turn on the receiver and it will enter pairing mode.
- Turn on the transmitter and it will automatically pair with the receiver.
Pairing 2 transmitters with the receiver (automatic):
- Turn on the receiver and it will enter pairing mode.
- Turn on the transmitters and they will enter pairing mode. The first transmitter will automatically pair with the receiver.
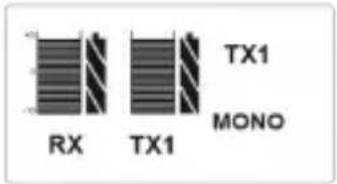
- Once Transmitter 1 is paired, Transmitter 2 will pair to the receiver. When Transmitter 2 is paired to the receiver, the transmitter display will show "2 TX".
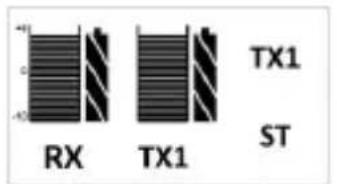
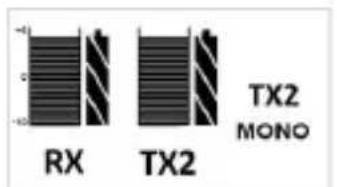
- The receiver display will show "Mono" or "Stereo". Press Enter to select it and use the navigation buttons to switch between "Mono" and "Stereo". Press Enter to confirm the choice.
Pairing 1 or 2 transmitters to the receiver (manual):
- Turn on the receiver and transmitter(s).
- Press the navigation buttons to move the cursor to the TX icon. Once TX is highlighted, the icon will display PAIR. On the transmitter(s), press Enter to go into pairing mode and the icon will flash to wait for the receiver to pair. Once paired, the icon will be lit solid.
- The receiver display will show "Mono" or "Stereo". Press Enter to select it and use the navigation buttons to switch between "Mono" and "Stereo". Press Enter to confirm the choice.
Note: The Output mode is automatically set to "Mono" when only one transmitter is paired.
Panel frontal
Instalación
Assistance technique
Panneau avant
Installation
Pannello anteriore
Configurazione
Vorderseite
Setup
Technical Specifications
| Audio Performance Frequency Spectrum: 2.400 – 2.4835 GHzDynamic Range: >100 dBTHD: 0.2%, typicalLatency: 4.5 msOperating Range: Up to 100 ft. / 30.5 m | |
| Battery Life* Receiver: up to 7 hours (1CH), up to 6 hours (1CH+2CH)Transmitter: up to 10 hours | |
| Transmitter | Frequency Response: 50 Hz – 18 kHzMaximum Input Level: -20 dBBias Voltage: 3 VInput Impedance: >10 MΩRadio-frequency Power: 9.77 dBmPower: 2 AA alkaline batteriesOperating Temperature: 14° – 131° F / -10° – 55° CDimensions (width x depth x height):2.6” x 4.0” x 1.6” / 65 mm x 102 mm x 40 mmWeight: 82g |
| Lavalier Microphone | Frequency Response: 20 Hz – 20 kHzOutput Impedance: 1.5 KΩPolar Pattern: OmnidirectionalType: Electret CondenserSensitivity: -38 dB, ± 3 dBEquivalent Noise Level: 25 dBAMaximum SPL: 130 dBDimensions (Length): 41.3”; 1050 mmWeight: 16g |
*Use high-quality alkaline batteries. Non-alkaline or rechargeable batteries will give dramatically different results.
Specifications are subject to change without notice.
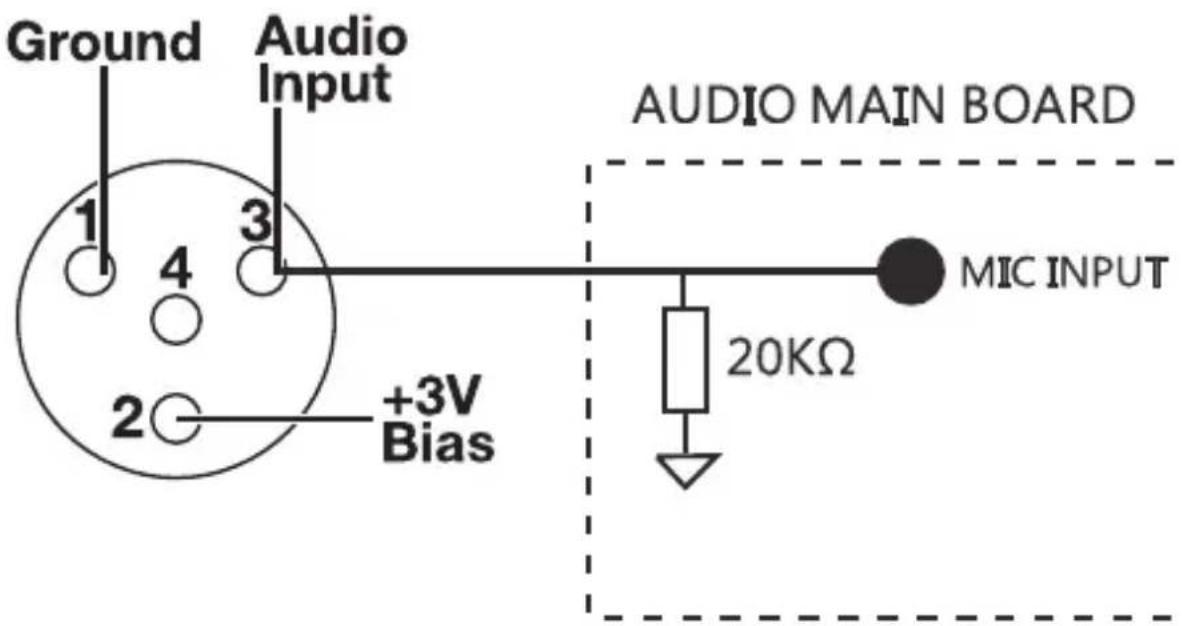
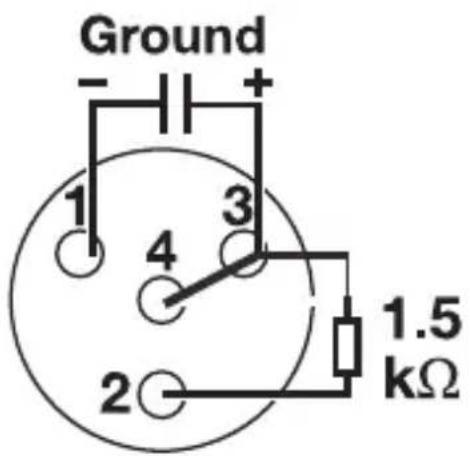
Mini-XLR Pinout
Male:
Female:
Trademarks & Licenses
Marantz is a trademark of D&M Holdings Inc., registered in the U.S. and other countries. Marantz Professional products are produced by inMusic Brands, Inc., Cumberland, RI 02864, USA.
All other product names, company names, trademarks, or trade names are those of their respective owners.
marantzpro.com


- User Guide (English)
- Introduction
- Box Contents
- Support
- Important Safety Precautions
- Sound Level
- Features
- Transmitter
- Bottom Panel
- Front Panel
- Side Panel
- Setup
- Example 1 – Mono Operation
- Example 2 – Stereo Operation
- Operation
- Transmitter Menu
- Display:
- Main Menu:
- Pairing Mode:
- RF Level:
- Pairing the Transmitter and Receiver
- Pairing 1 transmitter with the receiver (automatic):
- Pairing 2 transmitters with the receiver (automatic):
- Pairing 1 or 2 transmitters to the receiver (manual):
- Panel frontal
- Instalación
- Assistance technique
- Panneau avant
- Installation
- Pannello anteriore
- Configurazione
- Vorderseite
- Mini-XLR Pinout
- Trademarks & Licenses
- marantzpro.com
Brand : MARANTZ
Model : PMD-750T
Category : Microphone