
IAN 282514 - Lighting Livarno Lux - Free user manual and instructions
Find the device manual for free IAN 282514 Livarno Lux in PDF.


| Product type | Solar LED spotlight with motion detector |
| Brand | Livarno Lux |
| Model | IAN 282514 |
| Power supply | Ni-MH rechargeable batteries 3.6 V (3 × 1.2 V, 600 mAh, AA) |
| Operating voltage | 3.6 V (DC) |
| Solar cell | Amorphous, 8 × 8 cm, max. 5.4 V, max. 70 mA |
| Bulbs | 10 LEDs (0.06 W each, non-replaceable) |
| Protection type | IP44 (protected against splashing water) |
| Motion detector range | 5 to 12 m |
| Detection angle | Approx. 90° horizontal and vertical |
| Charging time (summer, regular sunlight) | 2 to 4 days for full charge (first charge: at least 1 day) |
| Lighting duration (PIR position) | Approx. 2 hours at full power |
| Lighting duration (AUTO position) | Approx. 8 hours in economy mode (20% power) |
| Operating temperature | Down to -21 °C |
| Solar connection cable length | Approx. 2.5 m |
| Housing material | Not specified, weather-resistant (IP44) |
| Maintenance | Clean the detector and solar cell regularly with a damp cloth and mild detergent |
| Safety | Do not open the housing, use only batteries of the same type, observe polarity |
| Spare parts / Repairability | Replaceable rechargeable batteries (3 × AA Ni-MH); LEDs non-replaceable |
| Warranty | 3 years (excluding batteries and damage due to improper use) |
Frequently Asked Questions - IAN 282514 Livarno Lux
User questions about IAN 282514 Livarno Lux
0 question about this device. Answer the ones you know or ask your own.
Ask a new question about this device
Download the instructions for your Lighting in PDF format for free! Find your manual IAN 282514 - Livarno Lux and take your electronic device back in hand. On this page are published all the documents necessary for the use of your device. IAN 282514 by Livarno Lux.
USER MANUAL IAN 282514 Livarno Lux
LED-SOLAR-STRAHLER / LED SOLAR SPOTLIGHT / PROJECTEUR SOLAIRE À LED
DE AT CH
LED-SOLAR-STRAHLER
Assembly, operating and safety instructions
NL BE
LED-SOLAR-SCHIJNWERPER
GB / IE Assembly, operating and safety instructions Page 19
Intended use......Page 20
Parts description......Page 21
Technical Data Page 21
Scope of delivery....Page 21
General safety instructions......Page 22
Safety instructions for batteries/rechargeable batteries ...... Page 23
Function......Page 24
Before use......Page 24
Charging the rechargeable batteries......Page 24
Assembly Page 25
Mounting the main unit......Page 25
Mounting the solar cell....Page 26
Connecting the solar cell to the main unit ...... Page 26
Start-up Page 26
Maintenance/ changing rechargeable batteries......Page 28
Winter-time use......Page 28
Cleaning and Care......Page 29
Troubleshooting Page 29
Disposal Page 30
Warranty Page 31
| List of pictograms used | |
 | Direct current (Type of current and voltage) |
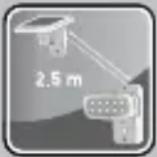 | 2.5 m connection cable between solar cell and LED spotlight |
 | Detection angle of motion detector: 90° |
 | Motion detector detection range: 5–12 m |
LED solar spotlight
- Introduction
We congratulate you on the purchase of your new product. You have chosen a high quality product. The instructions for use are part of the product. They contain important information concerning safety, use and disposal. Before using the product, please familiarise yourself with all of the safety information and instructions for use. Only use the product as described and for the specified applications. If you pass the product on to anyone else, please ensure that you also pass on all the documentation with it.
- Intended use
The product is intended to illuminate outdoor areas without electrical connection, e.g. garden sheds, garages, etc. The product is intended for private use only and is not suitable for commercial use or for use in other applications.
Not suitable for ordinary lighting in household room illumination.
This product is suitable for extreme temperature up to -21°C.
- Partsdescription
1 Main unit
2 LED spotlight
3 Motion detector
4 Electrical connector
5 Solar cell with built-in twilight sensor
6 Switch (OFF/AUTO/PIR)
7 Screw (4×30 mm)
8 Wall plug (ø 6 mm)
9 Bracket (solar cell)
10 Rechargeable battery compartment
11 Locking screws
- Technical Data
Operating voltage: 3.6 V ---
Rechargeable battery: 3 x Ni-MH battery 1.2 V ---, 600 mAh, AA
Light bulb: 10 LEDs, 0.06 W each (LEDs not replaceable)
Solar cell: amorphous, 8 x 8 cm, max. 5.4 V, max. 70 mA
Motion detector: range: approx. 5–12 m, detection angle: approx. 90° horizontal, 90° vertical
Protection type: IP44 (splash-proof)
- Scope of delivery
Check immediately after unpacking that the parts are complete and that the product is in proper condition.
1 Main unit (consisting of LED spotlight with 10 LEDs, motion detector, rechargeable battery compartment with built-in batteries and built-in control)
1 Solar cell (8 cm x 8 cm) (incl. approx. 2.5 m connection cable)
4 Screws (4 x 30 mm)
4 Wall plugs (ø 6 mm)
1 Instructions for assembly and use

General safety instructions
Before using the product, please familiarise yourself with all of the safety information and instructions for use! When passing this product on to others, please also include all the documents!
This product can be used by children aged from 8 years and above and persons with reduced physical, sensory or mental capabilities or lack of experience and knowledge if they have been given supervision or instruction concerning use of the product in a safe way and understand the hazards involved. Children shall not play with the product. Cleaning and user maintenance shall not be made by children without supervision.
- Never leave children unsupervised with the packaging material. The packaging material represents a danger of suffocation. Children frequently underestimate the dangers.
- Keep children out of the area you are working in. A large number of screws and other small parts are included with delivery. These may prove life-threatening if swallowed or inhaled.
- Do not use this product if you notice any damage!

Safety instructions for batteries / rechargeable batteries
■ DANGER TO LIFE! Keep batteries/rechargeable batteries out of reach of children. If accidentally swallowed seek immediate medical attention.
DANGER OF EXPLOSION! Never recharge non-re-
chargeable batteries. Do not short-circuit batteries/re-chargeable batteries and/or open them. Overheating, fire or bursting can be the result.
Never throw batteries/rechargeable batteries into fire or water.
Do not exert mechanical loads to batteries/rechargeable batteries.
Risk of batteries/rechargeable batteries leakage
- Avoid extreme environmental conditions and temperatures, which could affect batteries/rechargeable batteries, e.g. radiators/direct sunlight.
Avoid contact with the skin, eyes and mucous membranes. In the event of contact with battery acid, thoroughly flush the affected area with plenty of clean water and seek immediate medical attention.
WEAR PROTECTIVE GLOVES! Leaked or damaged batteries/rechargeable batteries can cause burns on contact with the skin. Wear suitable protective gloves at all times if such an event occurs.
In the event of a battery leak, immediately remove it from the product to prevent damage.
Only use the same type of batteries/rechargeable batteries. Do not mix used and new batteries/rechargeable batteries.
■ Remove the batteries/rechargeable batteries if the product will not be used for a longer period.
Risk of damage of the product
Only use the specified type of battery/rechargeable battery!
When inserting ensure the correct polarity! This is shown inside the battery compartment!
- Clean the contacts on the battery and in the battery compartment before inserting!
■ Remove exhausted batteries/rechargeable batteries from the product immediately.
Function
The solar cell 5 converts energy from sunlight into electricity. This recharges the rechargeable batteries inside the rechargeable battery compartment 10 via the connection cable.
These rechargeable batteries store the electricity fed by the solar cell. Fully charged rechargeable batteries will provide about 2 hours of light on the „PIR“ setting, and about 8 hours on „AUTO“.
In summer completely drained rechargeable batteries take about 2 to 4 days to fully recharge in constant sunlight. The rechargeable batteries must be charged prior to initial use (see „Charging rechargeable batteries“).
- Before use
● Charging the rechargeable batteries
Note: The rechargeable batteries inside the main unit 1 are fully charged at delivery. However, they may already have lost charge during transport from the manufacturer to the retail location. Therefore charge the rechargeable batteries prior to use. During summer, initial charging will take at least one day in constant sunlight.
Set the switch 6 to the „OFF" position.
Note: In constant sunlight (depending on the season) drained rechargeable batteries should take two to ten days to charge.
Note: the built-in charging controller of the product prevents the rechargeable batteries from overcharging.
Replace the rechargeable batteries if the light output does not improve after charging (Fig. E).
Assembly
Note: Before mounting, decide where you want to mount the solar cell 5 and the main unit 1. Please remember the connection cable between the solar cell and the main unit is approx. 2.5 m long.
- Mounting the main unit
Please remember when selecting the location for mounting the main unit 1
- The connection between the LED spotlight 2 and the main unit is flexible and should be able to illuminate the selected area. Please remember to slightly loosen the swivel screw before moving the LED spotlight. Tighten the swivel screw afterwards (see Fig. F).
- Depending on the mounting height (ideally between 1.80 m - 2.00 m) the motion detector 3 has a detection range of max. 12 m with a detection angle of 90° horizontally and 90° vertically.
- Be sure the motion detector is not illuminated by street lighting at night. This can influence its functioning.
☐ Secure the main unit 1 using two of the enclosed wall plugs 8 (ø 6 mm) and two of the enclosed screws 7 (4 x 30 mm) (see Fig. B). Note: The enclosed mounting material is suitable for ordinary masonry construction. Other wall substrates may require other fastening materials. Seek specialist advice when in doubt.
After mounting, check that the main unit is fitted securely.
- Mounting the solar cell
The solar cell 5 requires direct sunlight when possible. Ideally, the solar cell surface will be directed to the south. The enclosed bracket 9 will ensure the solar cell is mounted horizontally.
☐ Mount the bracket 9 of the solar cell 5 to a vertical wall using the enclosed screws 7 (4 x 30 mm) and the enclosed wall plugs 8 ( 6 mm) (see Fig. C).
Note: The enclosed mounting material is suitable for ordinary masonry construction. Other wall substrates may require other fastening materials. Seek specialist advice when in doubt.
After mounting, verify the solar cell 5 is fitted securely by the bracket 9.
☐ Then attach the solar cell as shown in Fig. C.
□ Next adjust the solar cell to face south.
- Connecting the solar cell to the main unit
After mounting the two operating units (main unit 1 and solar cell 5) run the connection cable so it is not subjected to mechanical stress. Use typical installation material such as cable clamps or conduit to fasten the connection cable, to prevent damage to the insulation.
☐ Connect the plug connector 4 from the main unit connection cable and the solar cell (see Fig. D).
- Start-up
Note:
☐ Connect the main station 1 to the solar cell 5 before using for the first time. The solar cell 5 also works as a twilight sensor, while the motion detector 3 only responds to movement.
☐ When selecting the setup location for the solar cell 5 be sure the solar cell, just as the twilight sensor, are not affected by other light sources, e.g. street lighting.
The switch 6 on the main unit 1 (Fig. A) features the following functions:
Position „OFF“: Motion detector 3 and LED spotlight 2 are off. In direct sunlight the rechargeable batteries are charged by the solar cell 5. Use this setting to charge drained rechargeable batteries (see „Charging the rechargeable batteries”).
Position „AUTO“: The solar cell charges the rechargeable batteries in sunlight. The product automatically switches on or off once the solar cell 5 detects dusk or dawn. To ensure a long life the LEDs will not be fully powered in this setting, but only provide approx. 20 % of their full light power (eco mode). When fully charged, the rechargeable batteries will provide approx. 8 hours of light in this setting.
Position „PIR“: The solar cell charges the rechargeable batteries in sunlight. The solar cell 5 automatically switches the product on in twilight or the dark when the motion detector 3 detects movement. The light ON time is preset to approx. 1.5 minutes. If additional movement is detected during these 1.5 minutes, the light ON time will reset. In this setting the LEDs will be fully powered. With the rechargeable batteries fully charged the charge on this setting will provide light for a total of approx. 2 hours.
● Maintenance / changing rechargeable batteries
To ensure good solar cell 5 performance the solar cell must be cleaned regularly (see „Cleaning and care“).
Change the rechargeable batteries as follows:
☐ Remove the main unit 1 from the wall.
☐ Slide the switch 6 to the „OFF” position.
☐ Loosen the cover screws 11 the back of the main unit 1 using a cross-tip screwdriver (see Fig. E).
☐ Remove the back of the main unit. Use a flat-head screwdriver to help if necessary.
☐ Remove the rechargeable batteries from the rechargeable battery compartment 10 and replace with new rechargeable batteries with the same technical data. Be sure to insert the rechargeable batteries in the correct direction. The correct polarity is shown inside the rechargeable battery compartment.
☐ Close the back of the main unit with the arrow facing upward and secure the cover screws (see Fig. E).
- Winter-time use
The low amount of sunlight may reduce the light ON time at night depending on the on-time. Due to the low position of the sun please also verify the solar cell 5 is out of shade throughout the day in winter and remove ice and snow as necessary.
If the light ON time is inadequate due to the weather, recharge or replace the rechargeable batteries (see „Charging the rechargeable batteries“ or „changing rechargeable batteries“).
- Cleaning and Care
☐ Switch off the product before cleaning.
Use a slightly dampened, lint-free cloth and mild cleaning agent to clean.
☐ Regular check the motion detector 3 and solar cell 5 particularly for dirt.
☐ Regularly clean the motion detector and solar cell to ensure proper functionality.
Especially keep the solar cell free of snow and ice in winter.
- Troubleshooting
● = Problem
= Cause
O = Solution
- Product doesn't come on.
Switch 6 set to "OFF" position.
○ Set switch to "AUTO" / "PIR" position.
● Dirty motion detector 3.
○ Clean motion detector.
- Rechargeable batteries are drained.
Charge rechargeable batteries (see „Charging the rechargeable batteries“).
● Product is flickering.
- Rechargeable batteries are almost drained.
Charge rechargeable batteries (see „Charging the rechargeable batteries“).
● Rechargeable batteries quickly lose their charge.
The solar cell is dirty.
○ Clean the solar cell.
- Solar cell is positioned incorrectly.
○ Reposition solar cell (see „Mounting the solar cell“).
Poor weather conditions.
See „Winter-time use“.
- Defective rechargeable batteries.
○ Replace rechargeable batteries (see „Maintenance/changing rechargeable batteries“).
The product contains delicate electronic components. This means that if it is placed near an object that transmits radio signals, it could cause interference. If malfunction happens to the motion detector, move such objects away from it.
Electrostatic discharges can lead to malfunctions. In cases of the product failing to work, remove the rechargeable batteries for a short while and then replace them.
●Disposal

The packaging is made entirely of recyclable materials, which you may dispose of at local recycling facilities. The Green Dot is not valid for Germany.

Observe the marking of the packaging materials for waste separation, which are marked with abbreviations (a) and numbers (b) with following meaning: 1–7: plastics / 20–22: paper and fibreboard / 80–98: composite materials.

The product and packaging materials are recyclable, dispose of it separately for better waste treatment. The Triman logo is valid in France only.

Contact your local refuse disposal authority for more details of how to dispose of your worn-out product.
To help protect the environment, please dispose of the product properly when it has reached the end of its useful life and not in the household waste. Information on collection points and their opening hours can be obtained from your local authority.
Defective or exhausted rechargeable batteries must be recycled in accordance with Directive 2006/66/EC and its amendments. Return rechargeable batteries and / or the product using the recycling facilities provided.
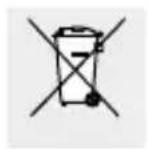
Environmental damage through incorrect disposal of the rechargeable batteries!
Rechargeable batteries may not be disposed of with the usual domestic waste. Therefore dispose of used rechargeable batteries through your municipal collection site.
- Warranty
The product has been manufactured to strict quality guidelines and meticulously examined before delivery. In the event of product defects you have legal rights against the retailer of this product. Your legal rights are not limited in any way by our warranty detailed below.
The warranty for this product is 3 years from the date of purchase. Should this product show any fault in materials or manufacture within 3 years from the date of purchase, we will repair or replace it – at our choice – free of charge to you.
The warranty period begins on the date of purchase. Please keep the original sales receipt in a safe location. This document is required as your proof of purchase. This warranty becomes void if the product has been damaged, or used or maintained improperly.
The warranty applies to defects in material or manufacture. This warranty does not cover product parts subject to normal wear, thus possibly considered consumables (e.g. batteries) or for damage to fragile parts, e.g. switches, rechargeable batteries or glass parts.
- LED-SOLAR-STRAHLER / LED SOLAR SPOTLIGHT / PROJECTEUR SOLAIRE À LED
- LED-SOLAR-STRAHLER
- LED-SOLAR-SCHIJNWERPER
- General safety instructions......Page 22
- Function......Page 24
- Before use......Page 24
- Assembly Page 25
- Start-up Page 26
- Maintenance/ changing rechargeable batteries......Page 28
- Winter-time use......Page 28
- Cleaning and Care......Page 29
- Troubleshooting Page 29
- Disposal Page 30
- Warranty Page 31
- LED solar spotlight
- - Introduction
- - Intended use
- - Partsdescription
- - Technical Data
- - Scope of delivery
- General safety instructions
- Safety instructions for batteries / rechargeable batteries
- Risk of batteries/rechargeable batteries leakage
- Risk of damage of the product
- Function
- - Before use
- ● Charging the rechargeable batteries
- Assembly
- - Mounting the main unit
- - Mounting the solar cell
- - Connecting the solar cell to the main unit
- - Start-up
- Note:
- ● Maintenance / changing rechargeable batteries
- - Winter-time use
- - Cleaning and Care
- - Troubleshooting
- ●Disposal
- Environmental damage through incorrect disposal of the rechargeable batteries!
- - Warranty
Brand : Livarno Lux
Model : IAN 282514
Category : Lighting