
EL-99T - Calculator SHARP - Free user manual and instructions
Find the device manual for free EL-99T SHARP in PDF.
| Product Type | Scientific graphing calculator with overhead projection (OHP) system |
| Brand | SHARP |
| Model | EL-99T |
| Main power supply | 6 V DC (4 AAA batteries) |
| Backup memory battery | 3 V DC (CR2032 lithium battery) |
| Main battery life | Approximately 150 hours (at 20°C) |
| Backup battery life | Approximately 5 years |
| Automatic power off | After approximately 10 minutes |
| Power consumption | 0.23 W |
| Operating temperature | 0 °C to 30 °C |
| Controller dimensions (W × D × H) | 86 mm × 183 mm × 39 mm (without hard cover) |
| Controller weight | Approximately 265 g (with batteries, without hard cover) |
| Projection panel display | LCD matrix 132 × 64 dots |
| Connection cable length | Approximately 2.8 m |
| Included accessories | 4 AA batteries, 4 AAA batteries, lithium battery (installed), communication cable, carrying case, instruction manual, AC adapter EA-63A (USA/Canada) |
| Main functions | Scientific calculations, graphing, overhead projector display |
| Cleaning | Dry cloth only, avoid solvents and volatile products |
| Safety | Do not drop, avoid shocks, do not expose to moisture or liquids |
| Maintenance | Replace backup battery every 5 years |
| Repairability | Reset possible via RESET button or battery cover |
Frequently Asked Questions - EL-99T SHARP
User questions about EL-99T SHARP
0 question about this device. Answer the ones you know or ask your own.
Ask a new question about this device
Download the instructions for your Calculator in PDF format for free! Find your manual EL-99T - SHARP and take your electronic device back in hand. On this page are published all the documents necessary for the use of your device. EL-99T by SHARP.
USER MANUAL EL-99T SHARP
Declaration of Conformity
Overhead Projection System: EL-99T
This device complies with Part 15 of the FCC Rules. Operation is subject to the following two conditions: (1) This device may not cause harmful interference, and (2) this device must accept any interference received, including interference that may cause undesired operation.
Responsible Party:
SHARP ELECTRONICS CORPORATION
Sharp Plaza, Mahwah, New Jersey 07430-2135
TEL: 1-800-BE-SHARP
Tested To Comply With FCC Standards
FOR HOME OR OFFICE USE

WARNING — FCC Regulations state that any unauthorized changes or modifications to this equipment not expressly approved by the manufacturer could void the user's authority to operate this equipment.
Note: This equipment has been tested and found to comply with the limits for a Class B digital device, pursuant to Part 15 of the FCC Rules.
These limits are designed to provide reasonable protection against harmful interference in a residential installation. This equipment generates, uses, and can radiate radio frequency energy and, if not installed and used in accordance with the instructions, may cause harmful interference to radio communications.
However, there is no guarantee that interference will not occur in a particular installation. If this equipment does cause harmful interference to radio or television reception, which can be determined by turning the equipment off and on, the user is encouraged to try to correct the interference by one or more of the following measures:
— Reorient or relocate the receiving antenna.
— Increase the separation between the equipment and receiver.
— Connect the equipment into an outlet on a circuit different from that to which the receiver is connected.
— Consult the dealer or an experienced radio/TV technician for help.
Note: A shielded interface cable is required to ensure compliance with FCC regulations for Class B certification.
FOR YOUR RECORDS...
For your assistance in reporting this product in case of loss or theft, please record the model number and serial number which are located on the bottom of the unit.
Please retain this information.
Model Number
Serial Number
Date of Purchase
Place of Purchase
< INTRODUCTION >
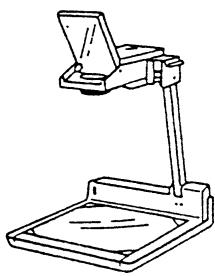
Thank you for your purchase. The OHP system is a system to display an image on the screen by attaching it to an overhead projector. Please read and follow this operation manual carefully. In addition, please read your overhead projector's manual.
< Caution to save memory contents >
- The memory contents run the risk of being changed or cleared due to misuse of this product by you or a third party, influences of powerful static electricity and electric noise, malfunction, maintenance, or replacement of batteries.
- Be sure to write down any important information stored in memory.
- Replace the memory backup battery at least every 5 years.
- Do not remove both the operating and memory backup batteries at the same time.
< CAUTION >
- The manufacturer is not responsible and provides no warranty for the malfunction, problems, or other damages caused by misuse of this product and its accessories by you or other third party.
- This product, including its accessories, are subject to change without notice for product improvement.
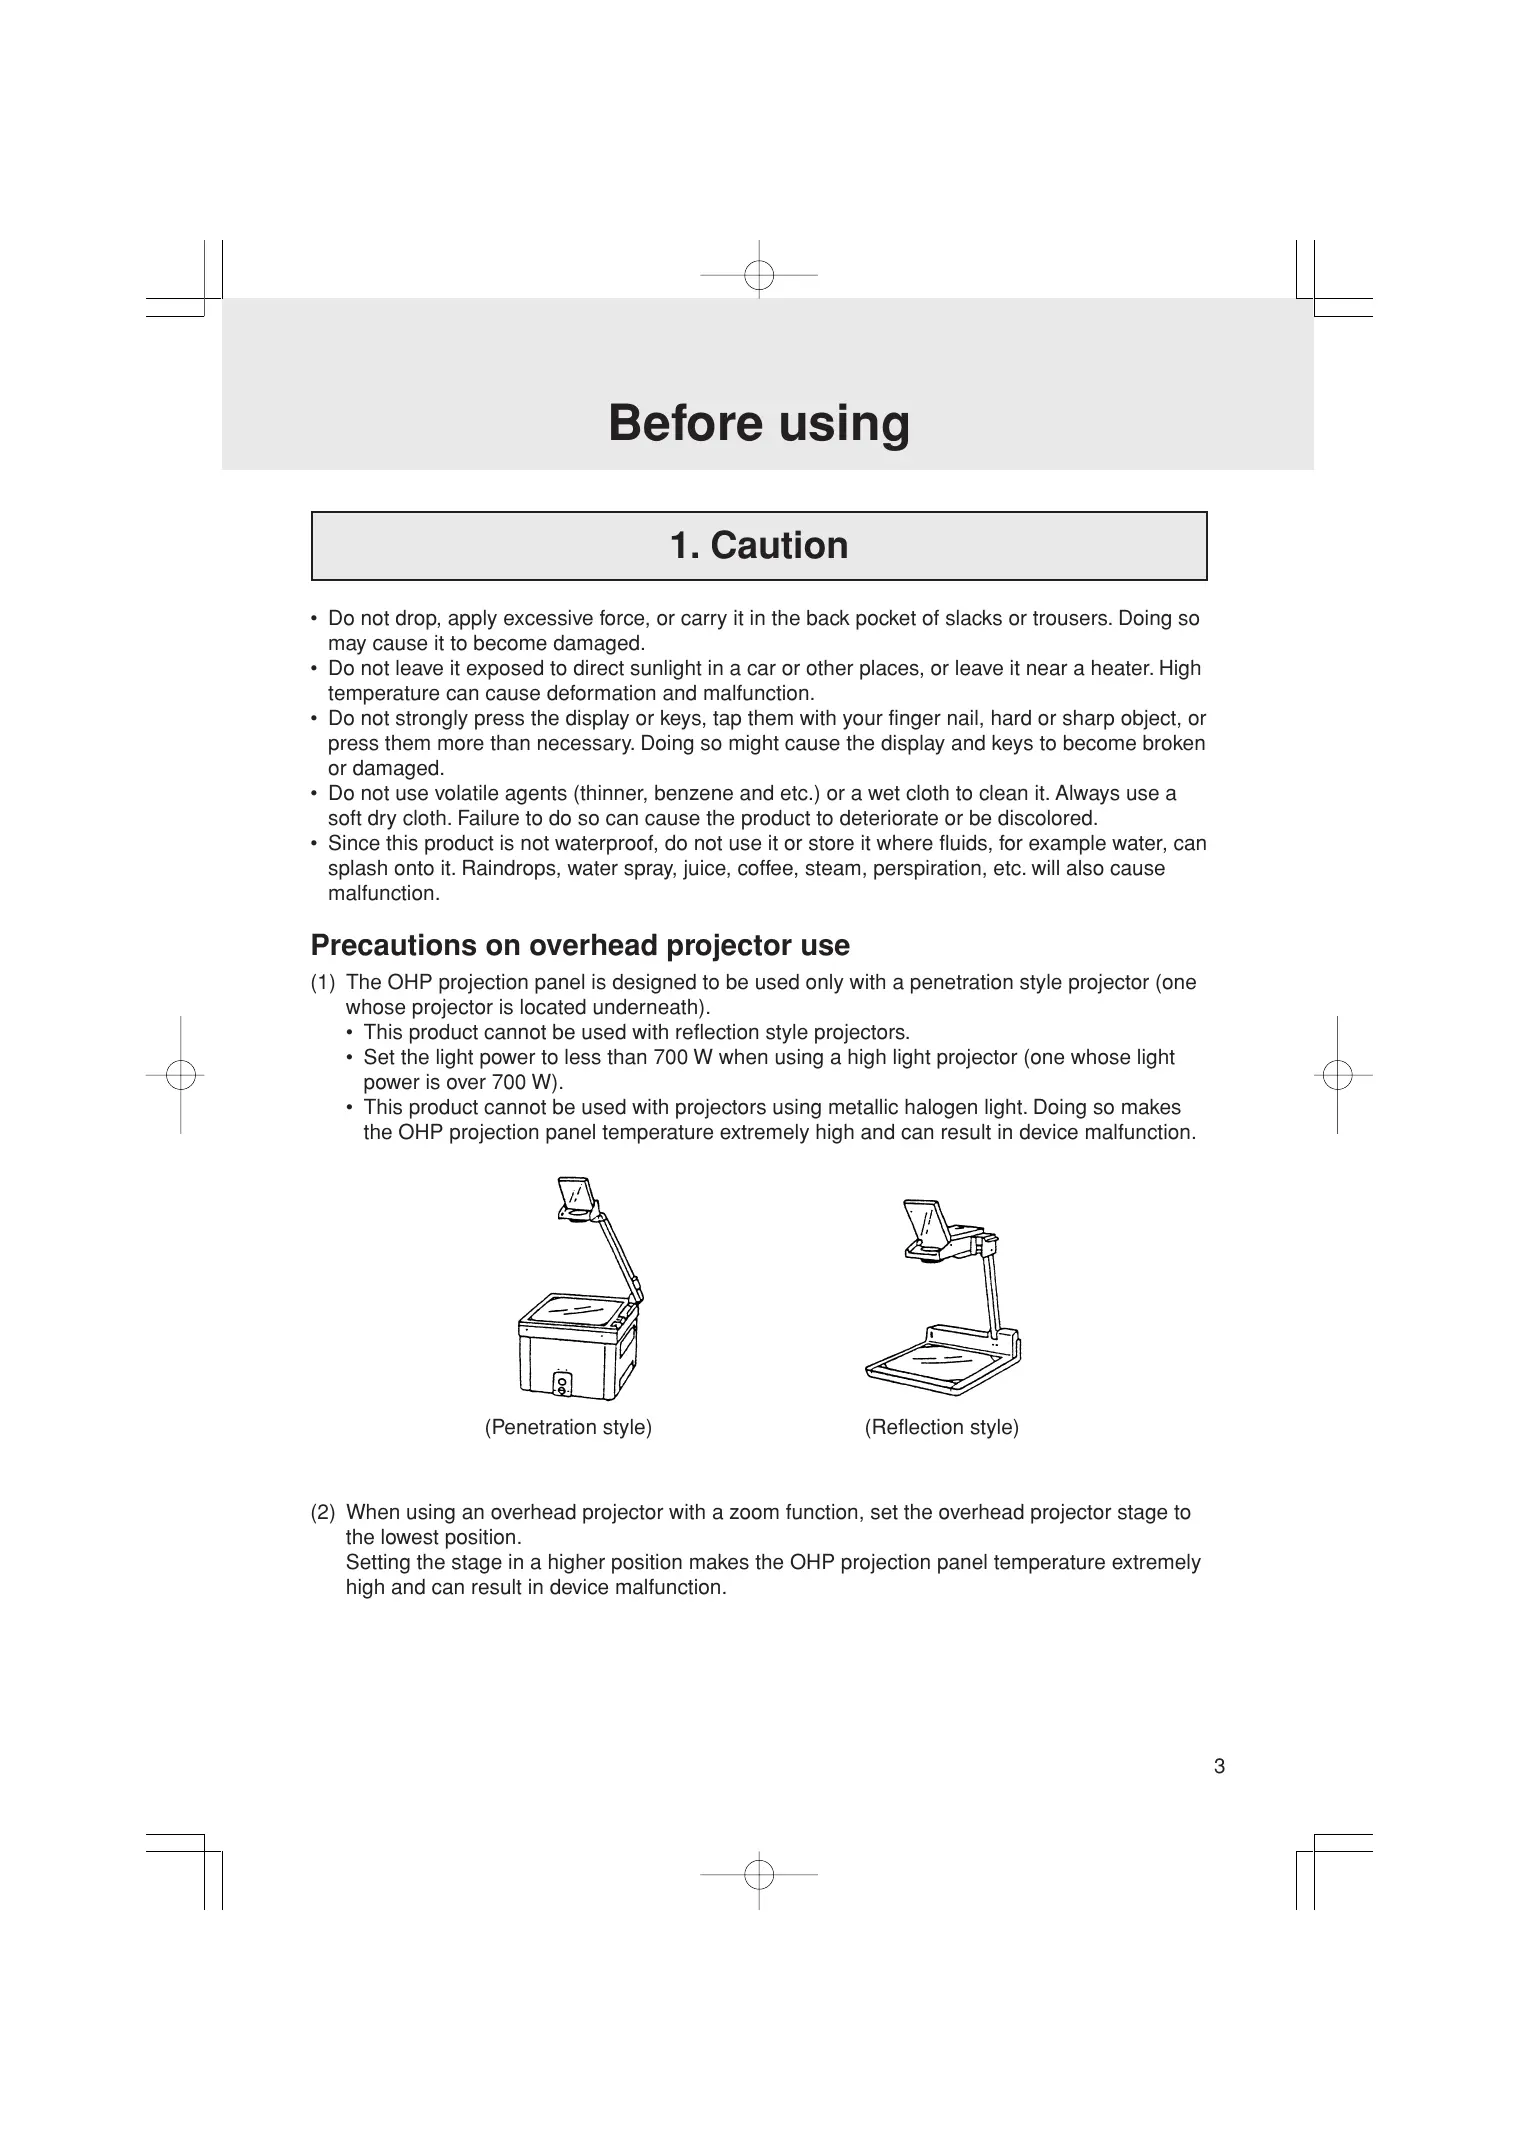
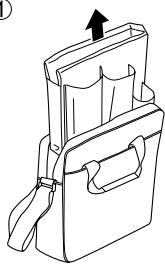
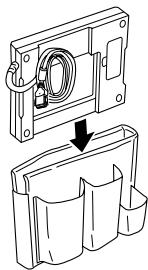
When not using the overhead projection system or when carrying it, place it in its carrying case as illustrated. It should be noted that the shape of your AC adaptor might differ from the one shown in the illustration.
- Do not put it in the carrying case with hard or sharp objects. Doing so may cause damage to the product. Moreover, make sure to put the hard cover on the OHP projection panel controller.
- Do not drop, bump, or apply an excessive shock to the carrying case. Doing so may apply an excessive force on the stored equipment and cause the equipment to break.
①
natural_image
Line drawing of a backpack with an arrow indicating upward motion (no text or symbols)②


natural_image
Technical illustration of a mechanical assembly with a cable and housing, showing a downward arrow indicating assembly (no text or symbols present)④

natural_image
Line drawing of a closed book with a bag and a stacker, no text or symbols present③

- The AC adaptor in the figures is included in products for the U.S.A. and Canada, and optional for other areas.
CONTENTS
Page
Before using 3
- Caution 3
- About the power supply 5
- Checking the accessories 6
◆ Using the OHP System 7
- Controlling the OHP projection panel 7
- Detaching the OHP projection panel and the OHP projection panel controller 8
- Using the OHP projection panel controller separately 8
◆ Appendix ...... 9
- About the AC Adaptor 9
- Specifications 10
- How to proceed in the event of abnormal conditions .... 11
Note: Illustrations in this manual may differ from the actual ones.
Before using
1. Caution
- Do not drop, apply excessive force, or carry it in the back pocket of slacks or trousers. Doing so may cause it to become damaged.
- Do not leave it exposed to direct sunlight in a car or other places, or leave it near a heater. High temperature can cause deformation and malfunction.
- Do not strongly press the display or keys, tap them with your finger nail, hard or sharp object, or press them more than necessary. Doing so might cause the display and keys to become broken or damaged.
- Do not use volatile agents (thinner, benzene and etc.) or a wet cloth to clean it. Always use a soft dry cloth. Failure to do so can cause the product to deteriorate or be discolored.
- Since this product is not waterproof, do not use it or store it where fluids, for example water, can splash onto it. Raindrops, water spray, juice, coffee, steam, perspiration, etc. will also cause malfunction.
Precautions on overhead projector use
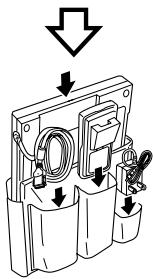
(1) The OHP projection panel is designed to be used only with a penetration style projector (one whose projector is located underneath).
- This product cannot be used with reflection style projectors.
- Set the light power to less than 700 W when using a high light projector (one whose light power is over 700 W).
- This product cannot be used with projectors using metallic halogen light. Doing so makes the OHP projection panel temperature extremely high and can result in device malfunction.
natural_image
Line drawing of a desk lamp illuminating an open book (no text or symbols)(Penetration style)
natural_image
Line drawing of a desktop computer with a stand and monitor (no text or symbols)(Reflection style)
(2) When using an overhead projector with a zoom function, set the overhead projector stage to the lowest position.
Setting the stage in a higher position makes the OHP projection panel temperature extremely high and can result in device malfunction.
Precautions on temperature
(1) Do not leave the OHP projection panel on a projector stage for prolonged periods of time. Doing so may cause the display to darken or the unit itself to be deformed due to high temperatures. Because of this, the projector power should be turned off when not displaying an image.
(The darkened display will return to normal once it cools down after moving the OHP projection panel away from the projector.)
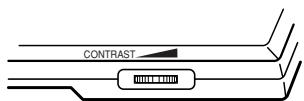
(2) When using the OHP projection panel for prolonged periods of time, its display may darken due to high temperatures. In this case, slide the contrast adjustor lever left in order to make it lighter.
(3) Be careful when handling the OHP projection panel. Its surface temperature will become high during use.
(4) Use this product at room temperatures between 0^ C and 30^ C ( 32^ F to 86^ F).
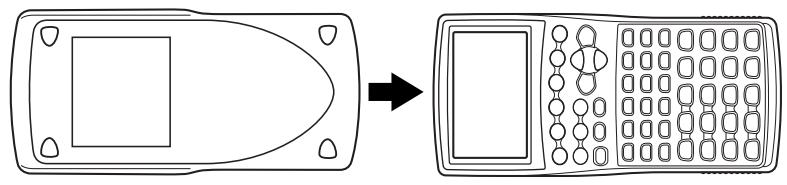
Using the hard cover
The hard cover protects the OHP projection panel controller from shock. Place the hard cover on the controller when not in use, or when carrying it in its carrying case.
(1) When using the OHP projection panel controller
natural_image
Line drawing of hands inserting a card into a mobile phone (no text or symbols)(2) When not using the OHP projection panel controller
natural_image
Diagram showing a mobile phone connected to a screen with keypad (no text or symbols)2. About the power supply
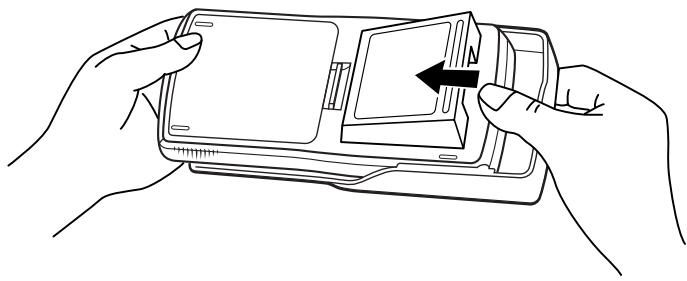
The OHP projection panel requires the operation batteries. Install all four included batteries one by one before the first usage. The OHP projection panel controller also requires two kinds of batteries, one for its operation and the other for its memory backup. Install all four included batteries one by one before the first usage. As for the OHP projection panel controller, refer to the EL-9900 operation manual to find out how to install the operation batteries. Note that the memory backup battery has been installed at the factory at the time of shipment.
Inserting the batteries for the OHP projection panel
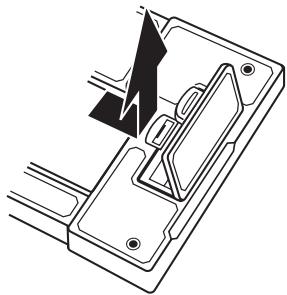
(1) Open the battery cover located on the back of the OHP projection panel.
Pull down the notch, then lift up and remove the battery cover.
(2) Insert the batteries as illustrated.
Make sure that the batteries are inserted in the correct directions.
(3) Place the battery cover back until the notch is snapped on.
When the batteries need to be replaced
OHP projection panel
- The following occasions indicate the operation batteries are depleted.
- When the Battery Caution LED lights, or
- When nothing is displayed on the OHP projection panel during operation.
Replace the batteries immediately if any one of the above occurs.
(1) Open the battery cover located in the back of the OHP projection panel.
Pull down the notch, then lift up and remove the battery cover.
(2) Replace all the four AA batteries as illustrated in "Inserting the batteries for the OHP projection panel", described above.
(3) Place the battery cover back until the notch is snapped on.
OHP projection panel controller
- The following conditions indicate the main batteries are depleted.
- Nothing is displayed even if the ON key is pressed.
- The power suddenly goes off in the middle of operation.
- The batteries replacement message is displayed.
Replace the batteries immediately if any one of these conditions occurs.
natural_image
Technical line drawing of a mechanical component with a lightning bolt symbol (no text or labels)
natural_image
Technical line drawing of a mechanical component with no visible text or symbols
- Replace the memory backup battery at least once every 5 years. Record the date the memory backup battery was replaced to estimate the next replacement date.
When nothing is displayed even though the ON key is pressed or if the operating batteries replacement message is displayed, the main batteries may be depleted. In that case, replace the main batteries first.
If the memory backup battery is replaced while the main batteries are depleted, the memory contents of the OHP projection panel controller may be lost.
- Please refer to the EL-9900 operation manual to find out how to replace the operation batteries and memory backup batteries.
Precautions on battery use
Battery Handling Notes
Batteries, if misused, can explode or cause electrolyte leakage. Pay special attention to the following points:
(1) Be sure to replace all four dry batteries at the same time.
(2) Do not use new batteries with used batteries in the same unit.
(3) Replacement batteries should be of the same type as those to be replaced.
Some types of batteries are rechargeable, while other types are not. Carefully read the type description on the battery and choose the unrechargeable type.
(4) Insert the batteries in the correct orientations as indicated in the battery compartments.
Caution:
- Fluid from a leaking battery accidentally entering an eye could result in serious injury. Should this occur, wash with clean water and immediately consult a doctor.
- Should fluid from a leaking battery come into contact with your skin or clothes, immediately wash with clean water.
- If the product is not to be used for some time, to avoid damage to the unit from leaking batteries, remove them and store in a safe place.
- Do not leave exhausted batteries inside the product.
- Do not fit partially used batteries, and be sure not to mix different batteries types.
- Keep batteries out of the reach of children.
- Remove used batteries from the compartment. Otherwise, the computer may be damaged from electrolyte leakage.
- Do not throw batteries into a fire as this may result in an explore.
- The original batteries were installed at the factory at the time of shipment and may be depleted before satisfying the full operating time indicated in the specifications.
3. Checking the accessories
Please check that all the following accessories are included upon purchase.
• OHP projection panel main unit
• OHP projection panel controller main unit
- AA dry cell battery × 4 for the OHP projection panel main unit
- AAA dry cell battery × 4 for the OHP projection panel controller main unit
• Lithium battery (installed in the OHP projection panel controller)
- Communication cable
- Carrying case
- Operation manual
• AC adapter EA-63A (included in products for the U.S.A. and Canada)
Using the OHP System
Caution:
The cable connector of the OHP projection panel should only be connected to or disconnected from the OHP projection panel controller after turning off the power. Doing so while the power is on can cause the loss of function of all the keys of the controller. In the event that such a situation occurs, reset the controller. Please refer to page 11 for reset operation details.
1. Controlling the OHP projection panel
(1) Place the OHP projection panel on the overhead projector stage.
(2) In order to prevent the OHP projection panel from falling off, tie the cable to the overhead projector pole using the fastening band.
(3) Press 2ndF OFF of the OHP projection panel controller to turn the power off.
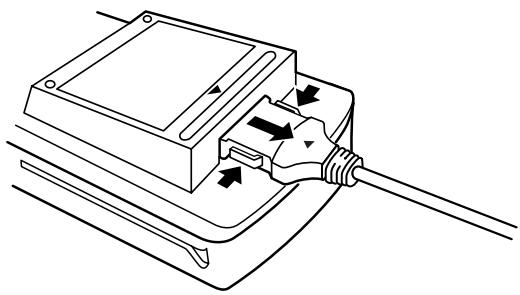
(4) Plug in the cable connector of the OHP projection panel straight into the connection terminal of the OHP projection panel controller. Verify the connector's side with the matching ▲ symbol.
- Ensure that it won't detach by slightly pulling the connector.

Caution:
Do not plug in the connector upside down. Plugging it in by force can damage the connector and the OHP projection panel controller.
(5) Press ON of the controller to turn the power on.
Then, press the SCREEN RESET button on the OHP projection panel.
(6) Turn on the power of the overhead projector.
(7) Adjust the contrast of the OHP projection panel screen using the OHP projection panel contrast adjustor if necessary.
Slide the contrast adjustor lever left to make the contrast lighter and right to make it darker.
Finally, adjust the OHP projection panel position in order to fit the entire image on the screen.
2. Detaching the OHP projection panel and the OHP projection panel controller
(1) Press 2ndF OFF of the OHP projection panel controller to turn the power off.
(2) Unplug the cable connector from the controller. Pull straight while pressing the buttons on both sides of the connector when you unplug the connector from the controller. The OHP projection panel will automatically turn off.
natural_image
Diagram of a mechanical device with directional arrows indicating movement or force (no text or symbols present)(3) Remove the cable band from the overhead projector pole.
3. Using the OHP projection panel controller separately
The OHP projection panel controller can be used separately as a regular graphic scientific calculator.
Please refer to the EL-9900 operation manual on how to use the graphic scientific calculator.
1. About the AC Adaptor
AC adaptor EA-63A (included in products for the U.S.A. and Canada), or EA-28A (optional for other areas) can be used with the OHP projection panel.
- Connect the AC adaptor after turning off the power of the controller. (Connect to the terminal on the right side of the OHP projection panel.)

Precautions on AC adaptor use
If the following precautions are not observed, fire or electric shock may occur.
- Only use the EA-63A/28A AC adapter. Not doing so may cause damage.
- Do not use the AC adapter EA-63A/28A for other equipment. The equipment may be destroyed.
- Do not use voltages beyond the indicated power supply voltage range.
- Turn off the power to the OHP projection panel controller before unplugging the AC adaptor from the AC adaptor connector.
- When not in use, disconnect the AC Adapter from the power outlet and from the AC adapter connector for safety.
- Do not perform modifications, disassembly, or repair.
- Do not connect or disconnect the AC adapter with wet hands.
- Do not use the AC adapter under the following conditions below. When one of the following abnormalities occurs, immediately disconnect the AC adapter from the power outlet and the AC adapter connector.
– In case of damage.
- When there is smoke or a strange smell.
- When an abnormal sound is heard.
- The AC plug must be appropriate for the AC outlet configuration.
- Only use the AC adapter indoors.
- Do not keep the AC adapter in places that are very dusty.
- Do not place heavy objects on the AC adapter (or AC power cord) and do not put it in places where they can fall from a high level.
2. Specifications
OVERHEAD PROJECTION SYSTEM
OHP projection panel controller section:
| EL-99T OHP projection panel controller | |
| Power source | Main operation: 6V ⋯ (DC): (AAA) dry cell battery × 4Memory backup: 3V ⋯ (DC): Lithium battery (CR2032) × 1 |
| Operating time | Operating batteries: Approx. 150 hours (at 20°C (68°F) when usually each hour is 5 minutes of continuous operation and 55 minutes of display)• Memory backup battery: Approx. 5 years (if operating batteries are replaced promptly when depleted.)• There may be slight differences due to the types of batteries and usage. |
| Power consumption | 0.23 W |
| Auto-power off | Approx. 10 minutes |
| Operating temperature | 0°C to 30°C (32°F to 86°F) |
| External dimensions | 86 mm (W) × 183 mm (D) × 39 mm (H)3-3/8” (W) × 7-7/32” (D) × 1-17/32” (H)(excluding hard cover) |
| Weight | Approx. 265 g (0.59 lb)(including batteries and excluding hard cover) |
OHP projection panel section:
| Display | 132 × 64 dot matrix LCD |
| Power source | 6 V ·s (DC): (AA) dry cell battery × 4Local voltage: with AC adapter EA-63A/28A |
| Operation time | Approx. 80 hours (at 20°C (68°F) operating conditions of 5 minutes of continuous operation and 55 minutes display)There may be slight differences due to the type of batteries and use conditions. |
| Power consumption | 0.2 W |
| Operating temperature | 0°C to 30°C (32°F to 86°F) |
| External dimensions | 297 mm (W) × 210 mm (D) × 28 mm (H)11-11/16” (W) × 8-9/32” (D) × 1-3/32” (H) (excluding cable) |
| Length of cable | Approx. 2.8 m (9'2-1/4") |
| Weight | Approx. 860 g (1.90 lb) (including cable and batteries) |
Accessories:
Four AA and four AAA dry cell batteries, Lithium battery (Installed in the OHP projection panel controller), Communication cable, Carrying case, Operation manual, AC adaptor EA-63A (included in products for the U.S.A. and Canada, optional AC adaptor EA-28A for other areas)
3. How to proceed in the event of abnormal conditions
If this product is exposed to a powerful external electric field or shock during use, an abnormal condition may seldom occur in which all of the keys, including the ON key, do not function. In the event of such a situation reset it as follows.
How to reset
Reset the OHP projection panel controller only in the following cases.
- When an abnormal condition occurs and all the keys are inoperative.
• To clear all memory contents.
(1) Pull down the notch to open the battery cover located on the back of the OHP projection panel.
(2) Place the battery cover back until the notch is snapped on.
(3) Press ON.
The verification window will appear on the screen.
![PRESS [CL] KEY TO CLEAR ALL DATA PRESS [ON] KEY TO CANCEL](/content/2019/11/79208/images/fb7ecd66d9198946b45eb0ac39bb90f40564b6c3373033d391126eccab8985e3.jpg)
(4) To reset while retaining the memory contents:
Press ON. The display will return to the initial display.
To reset with clearing all the memory contents:
Press CL. All memory contents will be cleared and the display will become as follows.

Press any key to return to the calculation screen.
Note:
- If the above verification window does not appear, remove the battery cover and gently push the RESET switch with the tip of a ball-point pen or similar object.
DO NOT use a tip of a pencil or mechanical pencil; a broken lead may cause a damage to the switch mechanism. - If the OHP projection panel does not display the screen, press the SCREEN RESET button on the panel.
< EINFÜHRUNG >
natural_image
Line drawing of a desk lamp illuminating an open book (no text or symbols)natural_image
Line drawing of a desktop computer with a stand and screen (no text or symbols)natural_image
Line drawing of two hands inserting a device into a mobile phone case (no text or symbols)natural_image
Diagram showing a mobile phone transforming from an open to a grid-patterned device (no text or symbols)natural_image
Technical line drawing of a mechanical component with a lightning bolt symbol (no text or labels)
natural_image
Technical line drawing of a mechanical component with no visible text or symbolsnatural_image
Technical line drawing of a mechanical clamp or connector assembly with directional arrows indicating movement (no text or symbols)natural_image
Line drawing of a desk lamp illuminating an open book (no text or symbols)natural_image
Line drawing of a desktop computer with a stand and screen (no text or symbols)(Type à réflexion)
natural_image
Line drawing of two hands inserting a smartphone into a device (no text or symbols)natural_image
Diagram showing a mobile phone connected to a grid-based device, with an arrow indicating transformation (no text or symbols present)natural_image
Technical line drawing of a mechanical component with no visible text or symbols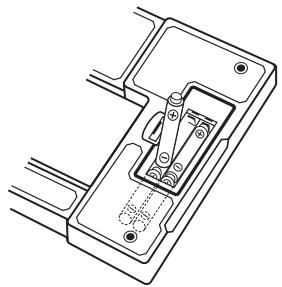
natural_image
Technical line drawing of a mechanical component with mounting holes and internal channels (no text or symbols)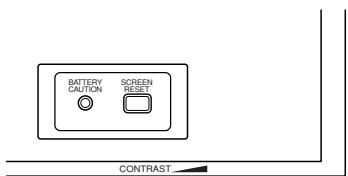
natural_image
Technical line drawing of a mechanical component with arrows indicating motion or force direction (no text or symbols)natural_image
Line drawing of a backpack with an arrow indicating upward motion (no text or symbols)②

natural_image
Technical illustration of a mechanical assembly with a cable and housing, showing a downward arrow indicating assembly (no text or symbols present)④

natural_image
Line drawing of a closed book with a bag and a stacker, no text or symbols present③


natural_image
Line drawing of a desk lamp illuminating an open box (no text or symbols)natural_image
Line drawing of a desktop computer with a stand and screen (no text or symbols)natural_image
Line drawing of hands inserting a device into a smartphone (no text or symbols)natural_image
Diagram showing a mobile phone connected to a keypad, with no text or symbols present.2. Pilas
natural_image
Technical line drawing of a mechanical component with a lightning bolt symbol (no text or labels)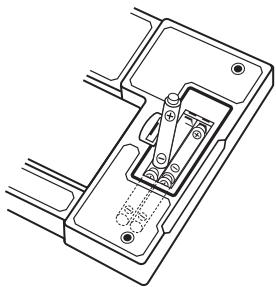
natural_image
Technical line drawing of a mechanical component with no visible text or symbols
natural_image
Technical line drawing of a mechanical component with arrows indicating internal flow or movement (no text or symbols)natural_image
Line drawing of an overhead desk lamp with a small screen and control panel (no text or symbols)(Tipo penetrazione)

natural_image
Line drawing of a desktop computer with a stand and screen (no text or symbols)(Tipo riflessione)
natural_image
Line drawing of two hands inserting a card into a mobile phone (no text or symbols)natural_image
Diagram showing a mobile phone with an arrow pointing to its front panel (no text or symbols present)natural_image
Technical line drawing of a mechanical component with a triangular cutout and mounting bracket (no text or symbols)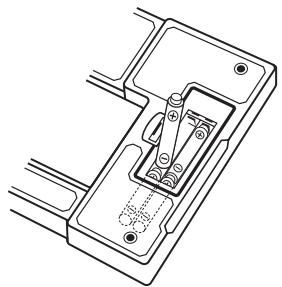
natural_image
Technical line drawing of a mechanical component with no visible text or symbolsnatural_image
Diagram of a mechanical device with directional arrows indicating movement or force (no text or symbols present)This equipment complies with the requirements of Directive 89/336/EEC as amended by 93/68/EEC.
This Class B digital apparatus complies with Canadian ICES-003.