SP-HT-2507-TS - Exercise bike SportPlus - Free user manual and instructions
Find the device manual for free SP-HT-2507-TS SportPlus in PDF.


User questions about SP-HT-2507-TS SportPlus
0 question about this device. Answer the ones you know or ask your own.
Ask a new question about this device
Download the instructions for your Exercise bike in PDF format for free! Find your manual SP-HT-2507-TS - SportPlus and take your electronic device back in hand. On this page are published all the documents necessary for the use of your device. SP-HT-2507-TS by SportPlus.
USER MANUAL SP-HT-2507-TS SportPlus
natural_image
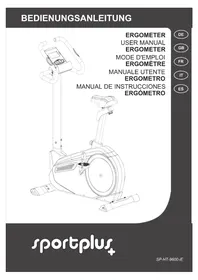
Exterior view of a modern exercise bike with adjustable arms and body (no text or symbols visible)SportPlus
SP-HT-2507-TS
Dear Customer,
Congratulations for choosing a SportPlus product. We have every expectation that you will be fully satisfied with your new purchase.
To guarantee optimal function of this product, please adhere to the following instructions:
• Before using this product, please read the manual carefully.
- The product has been designed with safety in mind. Nevertheless, please read the safety instructions carefully and use the equipment only as described in the manual. Taking these precautions will prevent hazardous situations and personal injury.
- Please retain this manual for future reference.
- Should you pass on this product, ensure to include the corresponding instruction manual.
CONTENTS
-
TECHNICAL DATA ...... 3
-
⚠️ SAFETY INSTRUCTIONS ...... 3
-
ASSEMBLY DIAGRAM 6
-
PARTS LIST ....7
-
ASSEMBLY INSTRUCTIONS 9
-
EXERCISE COMPUTER OPERATION MANUAL ....13
-
TRAINING TIPS ....18
⚠️ IMPORTANT ADVICE FOR TRAINING 19
WARM-UP / STRETCHING / COOL-DOWN 20
-
MAINTENANCE & CLEANING 21
-
ADVICE FOR THE DISPOSAL OF PACKAGING 21
-
COMPLAINTS & WARRANTY 22
CUSTOMER SERVICE 22
WARRANTY CONDITIONS 23
1. TECHNICAL DATA
2. ⚠️ SAFETY INSTRUCTIONS
TECHNICAL DATA
Specifications of the product
• Dimensions (L x B x H): 80 x 51 x 137 cm
• Total Weight: 25 kg
- Brake system: speed-dependent
- Movement pattern: dependent
• Class: H.C
• Max. Weight of User: 100 kg
Specifications of the computer
• Number of batteries: 2
- Battery type: R03 AAA Micro / 1.5V
SAFETY INSTRUCTIONS
PURPOSE
- The product is intended for domestic use only and is not suitable for professional or medical use.
• The maximum weight of a person using this product is 100 kg. - If used regularly, this home trainer can help you to develop your cardiovascular function, as well as leg and hip muscles. In combination with a suitable nutrition it can also help you to reduce weight.
DANGER FOR CHILDREN
- Parents and other supervisory persons should be aware of their responsibility for children using this equipment. Because of the natural play instinct of children and their eagerness to experiment; those persons have to anticipate usage and situations for which this product is not intended.
- Children may be unaware of the potential hazards posed by this product. Ensure that unsupervised children are kept clear from the equipment at all times; this is not a toy. Equipment should be stored safely away from children and pets.
- Do not let unsupervised children near this equipment. A responsible adult should make the suitable equipment settings and supervise activity at all times.
- Beware! The packaging material is not suitable for children. There is a danger of suffocation!
ATTENTION – RISK OF INJURIES
- Do not use the product if it is damaged or defective. In the case of which, please consult a qualified technician or our service centre.
- Check the product on every occasion prior to its use. Defective parts may impair the use of the machine; these should be repaired or replaced
immediately.
• This equipment is to be used by only one person at any one time.
- Use the product only on even and non-slipping surfaces. Do not use it near water and always allow sufficient surrounding space to ensure safety.
- This equipment has many moving parts; keep your fingers and other limbs clear of these parts. Failure to do so could cause injury. Do not insert any implements into openings in the equipment.
ATTENTION - PRODUCT DAMAGE
- Please do not attempt to alter or modify the product in any way. Only use original spare parts. Repairs should only be carried out by qualified technicians – unauthorized repairs could put the user at risk. Use this product only as described in this manual.
- Protect the product from splashes, humidity, high temperature and direct sunlight.
ADVICE FOR BATTERY HANDLING
- Batteries can be extremely dangerous if swallowed. Therefore, keep batteries away from children. If a battery has been swallowed, seek medical help immediately.
- Remove batteries when they are out of charge or if the device should not be used for a longer period of time, in order to avoid accidents due to battery leaking.
- Do not recharge, disassemble ou throw batteries into the fire. RISK OF EXPLOSION.
- Pay attention to the polarity marks (+) and (-). Always replace all batteries, do not mix used batteries with new ones, or with batteries of a different type!
- The use of alcaline batteries is preferable, because they have a longer life than zinc coal batteries.
- It is necessary to replace the batteries when the display becomes weaker or completely blank.
ADVICE FOR THE ASSEMBLY
- The product should be carefully assembled by a responsible adult. If in any doubt, please refer to a technically qualified person.
- Before commencing with assembly, read the safety and assembly instructions carefully.
- Choose a clear, flat surface to begin your assembly. If possible, use an underlay to protect the assembly space from dirt and scratches. Remove all packaging materials and lay out all the parts. This will help you visualize your finished product and simplify the procedure.
- Using the ‘Parts List’ ensure that no parts are missing. Dispose of all the packaging materials when the assembly is completed.
-
Assemble the product carefully. There is always a risk of injury when using tools for technical work.
-
During assembly, maintain a safe working environment. Keep tools and packaging materials clear of your workspace. Foils and plastic bags are potentially hazardous to children (danger of suffocation)!
- When the assembly is complete, ensure that all nuts, bolts and fasteners are correctly engaged and tightened.
- If required, use an underlay to protect the floor (not included). The rubber feet of the product could mark or damage some surfaces.
text_image
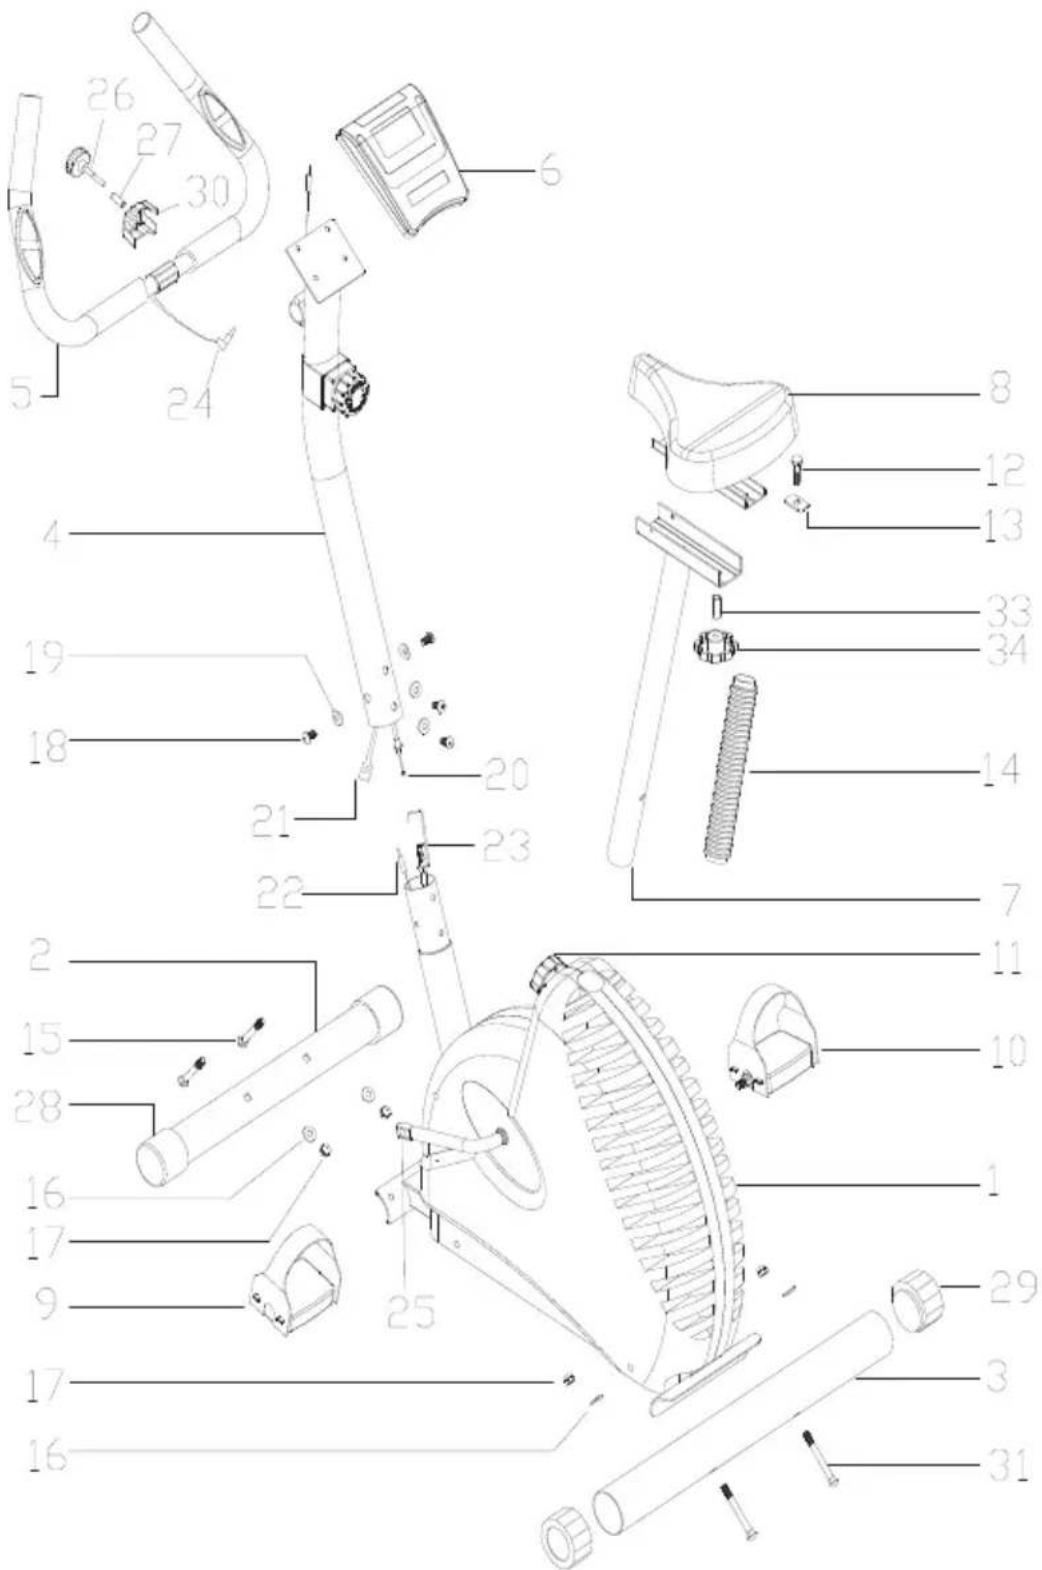
Exploded view diagram of a mobility device with numbered parts for identification| NO | DESCRIPTION Q'TY | |
| 1 | Main Frame 1 PC | |
| 2 Front Stabilizer 1 PC | ||
| 3 Rear Stabilizer 1 PC | ||
| 4 Front Post 1 PC | ||
| 5 Handlebar W/GripW/Grip 1 PC | ||
| 6 Computer 1 PC | ||
| 7 Seat Post | 1 PC | |
| 8 Seat | 1 PC | |
| 9 Left Pedal | 1 PC | |
| 10 | Right Pedal | 1 PC |
| 11 | Quick Release Adjustment Knob | 1 PC |
| 12 | Carriage Bolt M8*60 | 1PCS |
| 13 | Flat Washer | 1PCS |
| 14 | Seat Support Sleeve | 1PCS |
| 15 | M10x50mm Carriage Bolt | 2 PCS |
| 16 | ∅25 Curve Washer | 4 PCS |
| 17 | M10 Domed Nut | 4 PCS |
| 18 | M8*15mm Allen Bolt | 3 PCS |
| 19 | ∅22 Curve Washer | 3 PCS |
| 20 | Tension Knob + Upper Tension Cable | 1 PC |
| 21 | Middle Computer Wire | 1 PC |
| 22 | Lower Computer Wire | 1 PC |
| 23 | Lower Tension Cable | 1 PC |
| 24 | Hand Pulse Wire | 1 PC |
| 25 | Crank Arm | 1 PC |
| 26 | T Knob | 1 PC |
| 27 | Allen Bolt M8*20 | 1 PC |
| 28 | Front Stabilizer End Cap | 2 PCS |
| 29 | Rear Stabilizer End Cap | 2 PCS |
| 30 | Clamp | 1 PC |
| 31 | M10x75mm Carriage Bolt | 2 PCS |
| 32 | Upper Computer Wire | 1 PCS |
| 33 | Bushing | 1PCS |
| 34 | Adjusted Knob | 1PCS |
HARDWARE PARTS LIST
| Key# | Description Quantity | |
| #15. | Carriage Bolt M10*50 |  2 2 |
| #16. | Curve Washer ∅10.5*∅25*T1.5∅10.5 | *∅25*T1.510.5*∅25*T1.5∅25*T1.525*T1.5 4 4 |
| #17. | Domed Nut M10 | 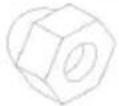 4 4 |
| #18. | Alley Bolt M8*15 | 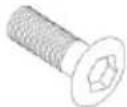 3 3 |
| #19. | Curve Washer ∅10.5*∅25*T1.2∅10.5 | *∅25*T1.210.5*∅25*T1.2∅25*T1.225*T1.2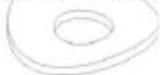 3 3 |
| #31. | Carriage Bolt M10*75 | 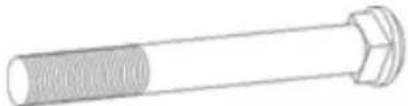 2 2 |
| Box Wrench 13/17 | 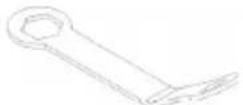 1 1 | |
| Spanner 15 | 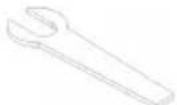 1 1 |
STEP 1
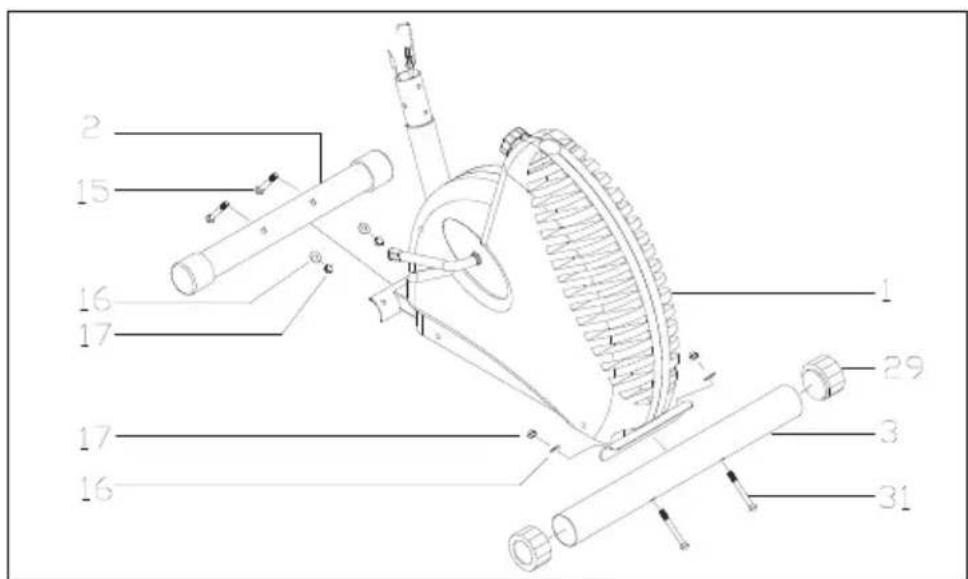
Attach the Front Stabilizers (2) to the Main Frame (1),tighten 2 sets of M10*50mm Carriage Bolt (15) Φ25 Curve Washer (16) and M10 Domed Nut (17).
Then, attach the Rear Stabilizer (3) to the Main Frame (1), tighten 2 sets of M10*75mm Carriage Bolt (31) Φ25 Curve Washer (16) and M10 Domed Nut (17).
text_image
Technical diagram of a mechanical device with numbered components and labeled partsSTEP 2
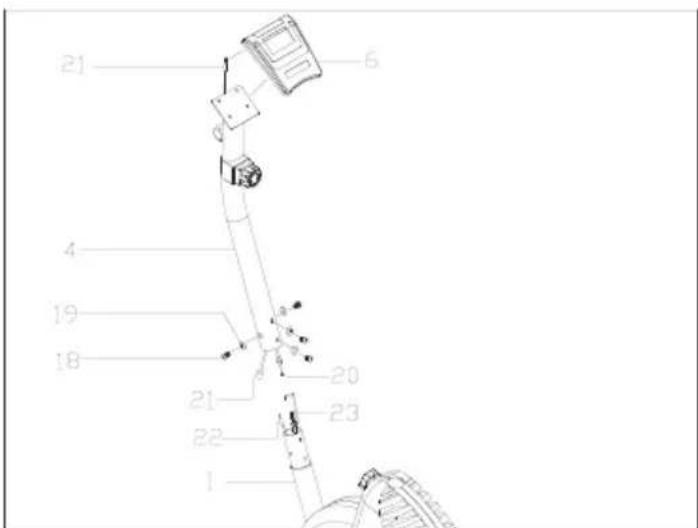
Take the Front Post (4) and join the Middle Computer Wire (21) with Lower Computer Wire (22). Release the Tension Knob + Upper Tension Cable (20) from the Front Post (4) and connect the Lower Tension Cable (23). Tighten with 3 sets of M8*15Hex Bolt (18) and Φ22 Curve Washer (19).
Attention to let the Middle Compute Wire(21) comes out from the rear gap, then connect the Upper Computer Wire (32). Then Slide the Computer (6) onto the computer holder of Front Post (4).
text_image
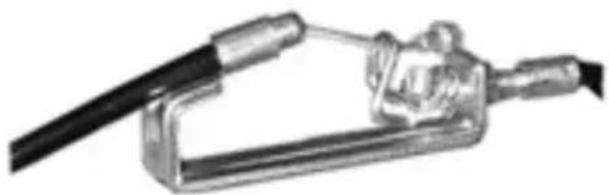
21 4 19 18 20 23 21 22 1HOW TO CONNECT TENSION CONNECTOR
natural_image
Illustration of a mechanical fuel nozzle with attached cable (no text or symbols)Slide the Cable wire from the Upper Tension Connector in between the opening on the wire holder on the Lower Tension Connector.
natural_image
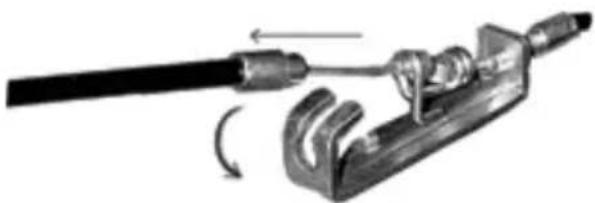
Mechanical tool diagram showing a spring-loaded clamp or hook assembly with directional arrows indicating motion (no text or symbols)Pull the Upper Tension Connector backward and slide the wire through the slot on the bracket.
natural_image
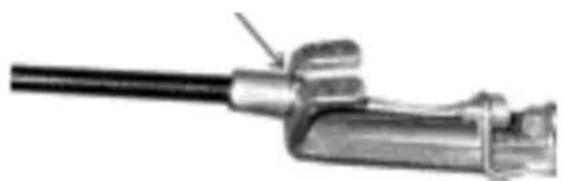
Mechanical component with a black rod and metallic connector (no visible text or symbols)Drop down the Connector so the fitting sits firmly on top of the bracket.
NOTE: In able to hold the Computer Post while connecting the cables and wires, extra help may be needed.
STEP 3
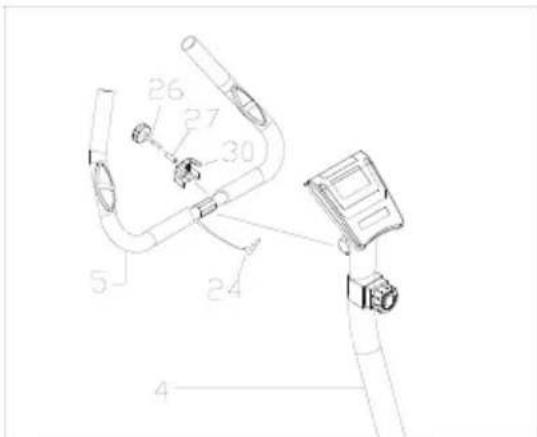
Fix the Handlebar (5) to the Front Post (4) and tighten with 1 set of Hex Bolt M8*20 (27) on Clamp (30), then T Knob(26). Plug Hands Pulse Wire (24) to the computer "pulse" hole.
text_image
Technical diagram of a mobility device with numbered components for identificationSTEP 4
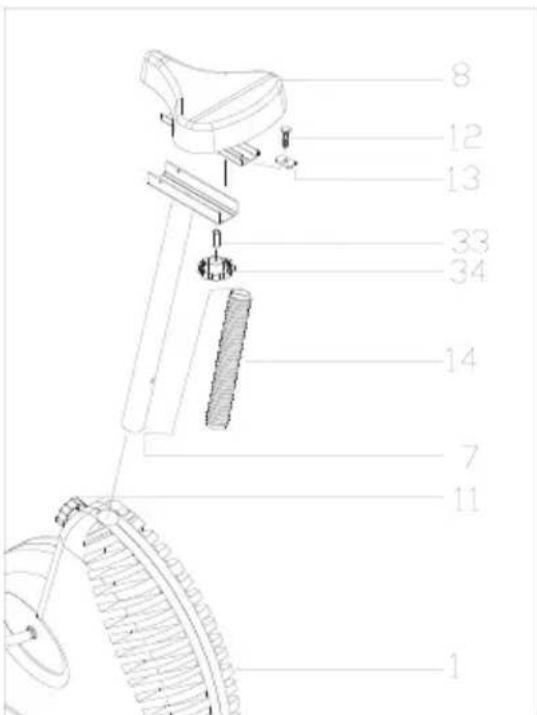
Fix the Seat (8) to the Seat Post (7) using 3 setsΦ16 Flat Washer (12), Spring Washer (13) and M8 Nylon Lock Nut (14), then insert into the Main Frame (1). Line up the holes and secure the seat in position with the Adjustment Knob (11). The Correct height for the seat can be adjusted after the bike is fully assembled.
text_image
8 12 13 33 34 14 7 11 1STEP 5
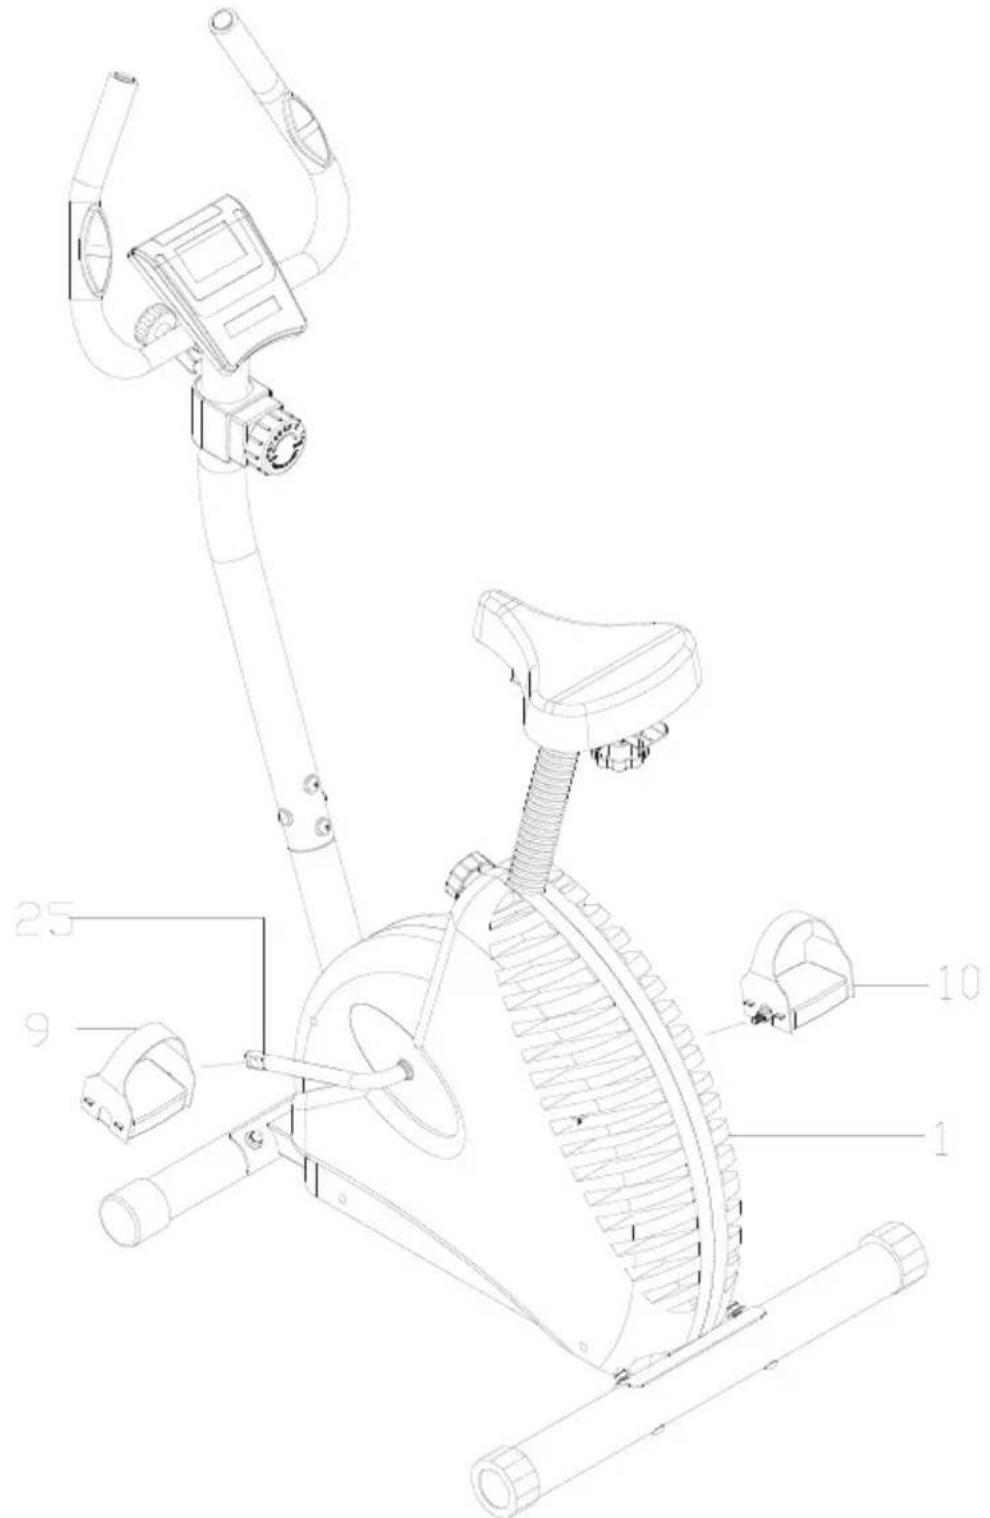
The Left and Right Pedal (9) &(10) are marked "L" and "R".
Connect them to their appropriate Crank Arm (25). The right pedal is on the right hand side of the cycle as you sit on it. Note that the right pedal should be threaded on clockwise and the left pedal on counter-clockwise.
text_image
Technical line drawing of a stationary exercise bike with numbered components labeled 1, 9, and 25.Recheck all bolts and nuts are tightened securely before use the machine.
- Illustrations
text_image
21 ↑ HEIGHT WEIGHT AGE 8:00 + TIME SPEED DISTANCE CALORIE PULSE TIME SPEED DISTANCE CALORIE PULSE MODE SET RECO- MEA- VERY SURE 9 8 7 6
text_image
22 0:59 • TIME 0:59 100 100▼ TIME SPEED DISTANCE CALORIE PULSE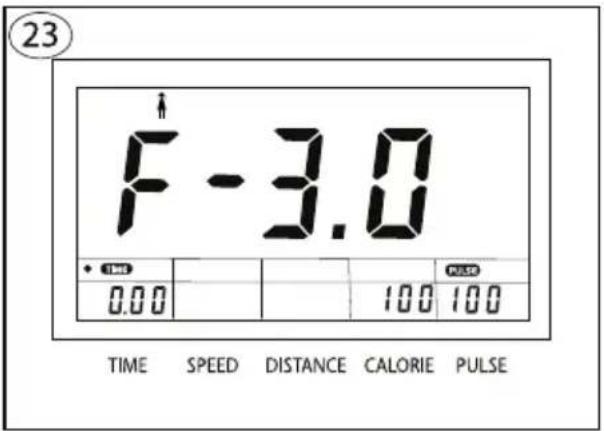
text_image
23 F - 3.0 • TIME 0.00 PULSE 100 100 TIME SPEED DISTANCE CALORIE PULSE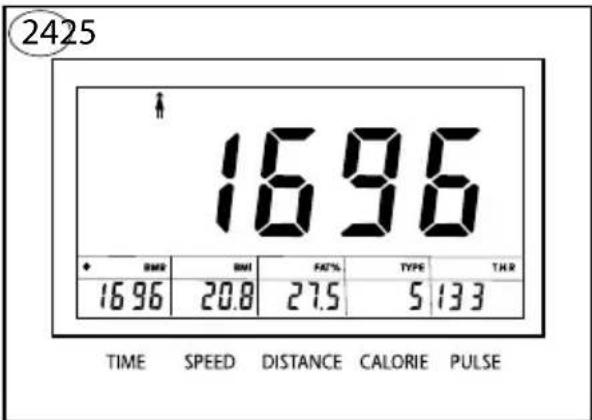
text_image
2425 1696 + RMS RMI FAD% TYPE THR 16.96 20.8 27.5 5 13.3 TIME SPEED DISTANCE CALORIE PULSE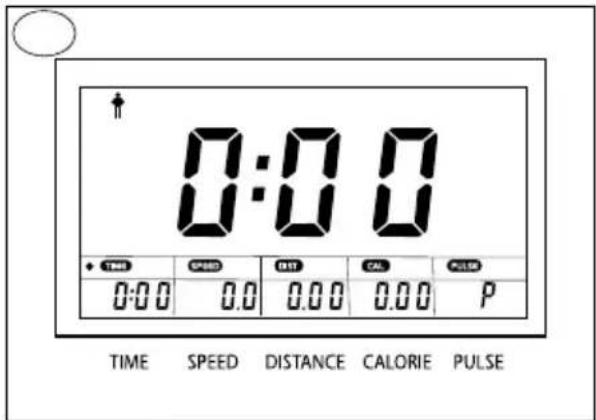
text_image
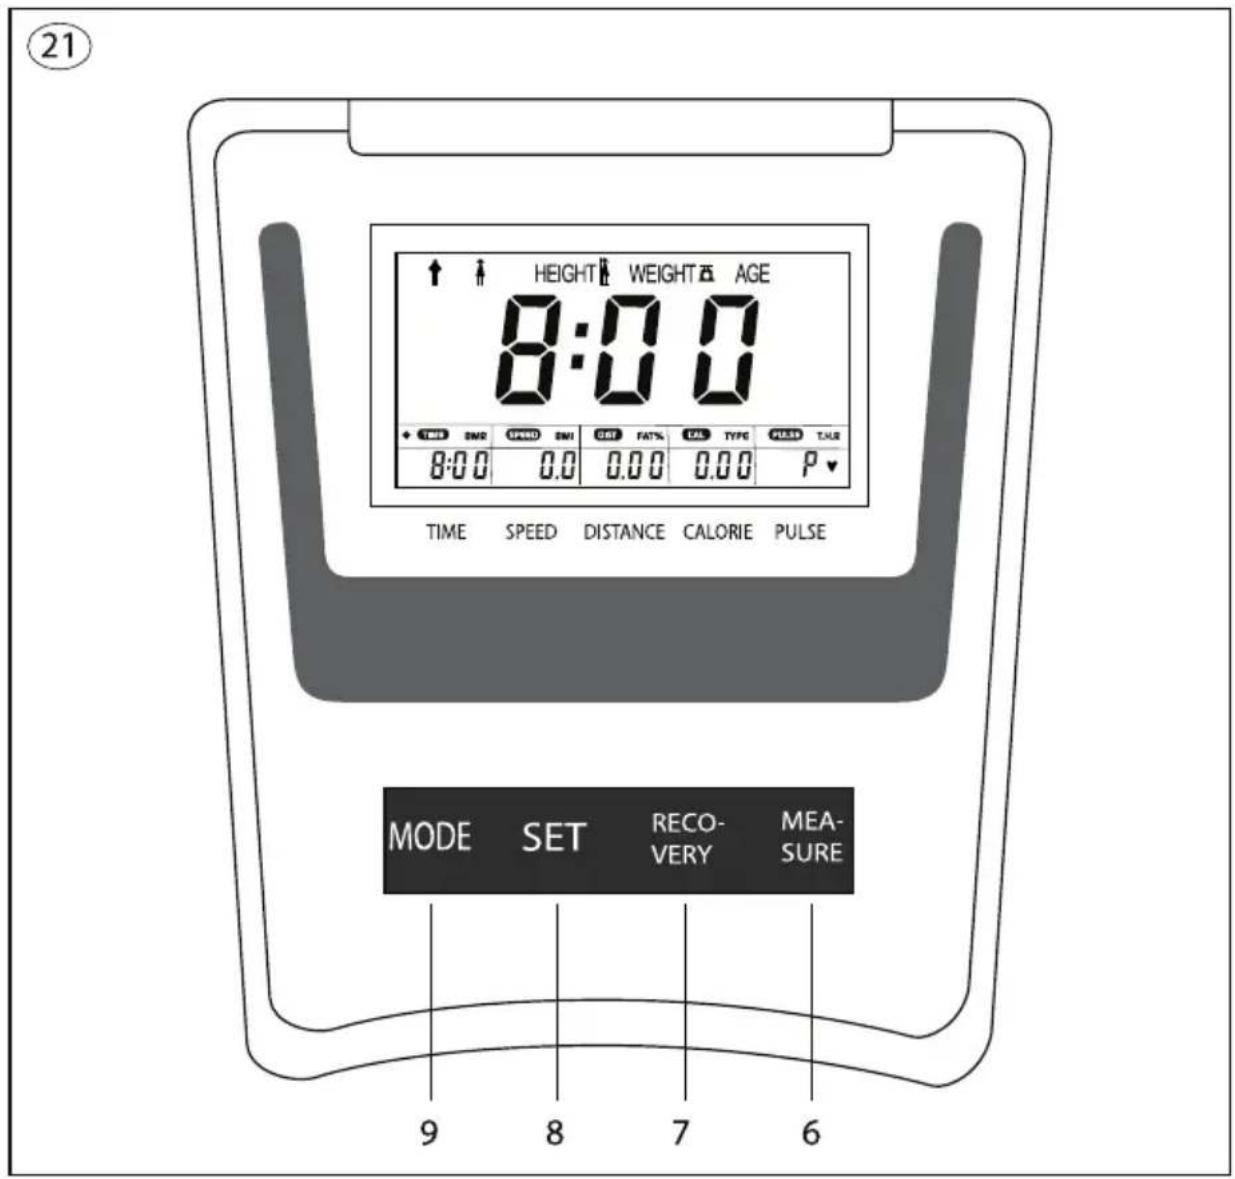
0:00 + TIME SPEED DIST CAL PULSE 0:00 0.0 0.00 0.00 P TIME SPEED DISTANCE CALORIE PULSEYour fitness equipment comes equipped with a programmable computer, which enables you to monitor the training progress and motivates the user to set and achieve training goals. Prior to starting the training session, the user can preset a target value for several functions, i.e. training time, distance or desired number of burnt calories per session.
Switch On: Press one button or move the pedals
Switch Off: Automatically after 4 minutes.
| BUTTON FUNCTION | |
| MEASURE (6) • Select Body-Fat Mode | |
| RECOVERY (7) • Select Recovery Pulse Mode | |
| SET (8) • Adjustment | |
| MODE (9) | • Confirm |
| • Select Function | |
| • Reset value :Hold the button for longer than 2 minutes | |
| • Preset data/Enter value: Hold the button for 5 seconds | |
Display of Time, Speed, Distance, Calories
| Time | Press MODE(9) | Indicates the training time in HH:MM:SS |
| Speed Indicates the current $ speed in km/h | ||
| Distance indicates the distance in km | ||
| Calories Indicates the number of burnt calories | ||
Prior to starting the training session the user can preset target values for time, distance or desired number of burnt calories. The computer will sound a beep when you reached the target value for the parameter you have set. In case you did not set any target parameter value, the exercise computer will count up the values, so that at the end of the exercising the screen will display the total value for the training session.
- Press the MODE button (9), until the corresponding function for time/ distance/ calories will flash on the display and set the desired value for the particular function by pressing the SET button (8).
- Start exercising. The countdown from with the preset target value will start.
- You will hear a beep signal, when you reached the set target value. Press any button to stop the signal.
Quick Overview
- Press the MODE button (9) until a dot will start blinking next to the TIME display on the lower half of the screen.
- The screen (5) will consecutively show every 5 seconds the values for the following functions:
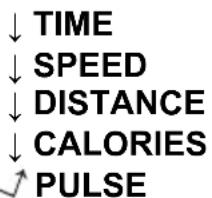
text_image
↓ TIME ↓ SPEED ↓ DISTANCE ↓ CALORIES ↑ PULSE- Press the SET button (8) in order to end the quick overview function.
Heart Rate – Measuring the current pulse value
- Press the MODE button (9) until the PULSE light starts flashing.
- Firmly grip the pulse sensors located on the handle bar with the inner side of your palms.
- The current heart rate will be immediately shown on the display (5). Next to the value, a heart symbol will start blinking. The correct measurement of the heart rate will take 20 seconds.
Pulse - Setting of a target heart rate (THR)
( Notes for exercising)
- Press the MODE button (9) until a dot will start flashing next to the THR display.
- Enter the target value by using the SET button (8). You can choose any rate between 60 - 220 beats/minute.
- Should you exceed during exercising your preset target rate, the heart rate symbol will start flashing on the LCD-screen (5).
- The symbol will stop flashing as soon as the heart rate returns to a level underneath the preset target heart rate.
- When the contact with the pulse sensors is interrupted for longer than 5 seconds the screen (5) will display the symbol "P" and the energy saving mode will be activated. Press the SET button (8), to restart the heart rate (pulse) function.
Measuring the recovery pulse rate
The recovery pulse rate shows how quickly the heart rate recovers after exercising. The results are shown in a scale from 0 (very good) to 6.0 (bad). The speed of recovery increases through regular training, as you get fitter.
- When finishing your training session step away from your fitness equipment. Press the RECOVERY button (7) and hold the pulse sensors with both hands tightly.
- A 1 min. countdown will begin (see picture 22).
- At the end of the count down the result will be shown on the screen (5) (see 23).
- Press again the RECOVERY button (7), in order to end the mode.
Body Fat Mode
The body fat percentage indicates the percentage of fat your body contains.
- Press the MODE button (9) for as long as 5 seconds until you hear a beep noise.
- Enter the data required for the calculation of your body fat percentage, as shown below:
| Press the SET button (8). | Enter gender: | (male) or(female) | Confirm data by pressing MODE(9) button. |
| Height (cm) | 10,0 – 240 m | ||
| Weight | 10,0 - 99,8 kg | ||
| Age | 10 - 99 years |
- Your data will be stored. The starting screen (see 24) will be shown after 10 seconds.
- Press the MEASURE button (6).
-
Firmly grip the pulse sensors with both hands until you hear a beep signal.
-
The results will be shown as follows: BMR BMI → fAT% → TYPE → T.H.R in sequence for 5 seconds (see 25).
- The screen (5) will switch to start (see. 24).
- Press the MODE button (9), in order to end the Body Fat Mode.
| Definitions to the indications on the display (5) | |||
| BMR Basal | Metabolic Rate – is the minimum caloric requirement needed by your resting body in order to sustain the normal body functions. | ||
| BMI Body | Mass Index – is a measure that takes into account a person's height and weight.Formula: Body weight (kg)Height (m) x Height (m)The optimum value shall be between 19 - 24 . | ||
| fAT% indicates the percentage of fat in the body calculated on the basis of the entered data. | |||
| TYPE | According to the calculated fat percentage of your body, you will be :classified, as follows: | ||
| 1. Super athlete | 4. Athlete | 7. Overweight | |
| 2. Ideal athlete | 5. Healthy | 8. Fat | |
| 3. Super slim | 6. Normal | 9. Extremely fat | |
| T.H.R. | Target Heart Rate – shows the entered or measured target heart rate in beats per minute | ||
⚠️ IMPORTANT ADVICE FOR TRAINING
- Before training, always consult your doctor and ask him to recommend a suitable training programme. Inappropriate or excessive training can cause health problems.
- Avoid over training. Do not train if you are tired or feeling faint. If you are not used to physical activity, begin training slowly.
- If you overstress your body or train in a wrong posture, this might harm your health.
- Stop exercising immediately if you feel pain or discomfort.
- Do not eat 30 minutes before or 30 minutes after training.
• Pay attention to your breathing during training. - To avoid injury, begin training with an extensive warm up and finish with a cool-down phase. Use the exercises described in this manual. You can also refer to exercises described in other sports guides.
- Ensure that sufficient fluids are consumed whilst exercising. Be aware that the recommended daily in take of water (2 liters) may increase during exercise. Drink fluids at room temperature.
- When using the equipment, wear sports clothes and suitable shoes. These should have non-slip soles. Avoid wearing baggy clothes, potentially; these could be caught in the moving parts of the equipment.
- Check your pulse regularly. Determine your personal training frequency to achieve an optimum training effect. Take into consideration your age and condition. The following table gives you an overview for an optimal training pulse.
| Age Heart frequency area 50-75% (Beats per Minute) - best training pulse - | Max. heart rate 100% (220 Beats– Life age) | |
| 20 Years 100-150 200 | ||
| 25 Years 98-146 | 195 | |
| 30 Years 95-142 | 190 | |
| 35 Years 93-138 | 185 | |
| 40 Years 90-135 | 180 | |
| 45 Years 88-131 | 175 | |
| 50 Years 85-127 | 170 | |
| 55 Years 83-123 | 165 | |
| 60 Years 80-120 | 160 | |
| 65 Years | 78-116 | 155 |
| 70 Years | 75-113 | 150 |
WARM-UP / STRETCHING / COOL-DOWN
A successful exercise session begins with warming up exercises and ends with exercises for cooling down and relaxing. These warming up exercises prepare your body for the subsequent demands made upon it. The cooling down / relaxation period after the exercise session ensures that you do not experience any muscular problems. In the following, you will find stretching exercise instructions for warming up and cooling down. Please pay attention to the following points:
- Carefully warm up every muscle group you will be using in the exercise session for about 5 to 10 minutes. The stretching exercises are carried out correctly if you feel a comfortable tension in the corresponding muscle.
- Speed does not play a role during the stretching exercises. Fast and jerky movements must be avoided.
natural_image
Line drawing of a stylized human figure with no text or symbolsNECK EXERCISES
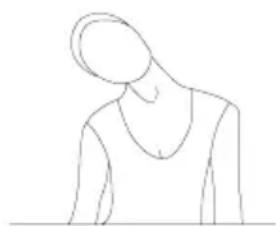
Tilt your head to the right and feel the tension in your neck. Slowly drop your head down to your chest in a semi-circle and then turn your head to the left. You will feel a comfortable tension in your neck again.
You can repeat this exercise alternately several times.
natural_image
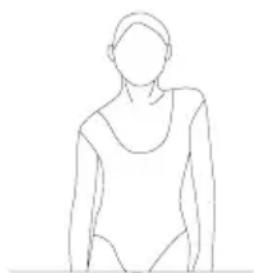
Simple line drawing of a human figure in a relaxed pose (no text or symbols)EXERCISES FOR THE SHOULDER AREA
Lift the left and right shoulders alternately, or lift both shoulders simultaneously.
natural_image
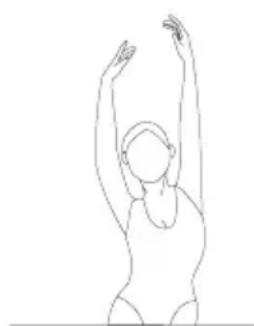
Line drawing of a person performing a stretching exercise with arms raised (no text or symbols)ARM STRETCHING EXERCISES
Stretch the left and right arms alternately towards the ceiling. Feel the tension in the left and right sides of your body. Repeat this exercise several times.
natural_image
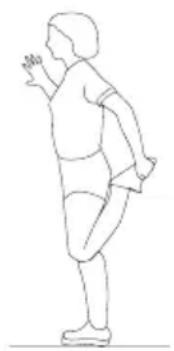
Line drawing of a person in motion, possibly dancing or stretching (no text or symbols)EXERCISES FOR THE UPPER THIGH
Support yourself by placing your hand on the wall, then reach down behind you and lift up your right or left foot as close to your buttocks as possible. Feel a comfortable tension in your front upper thigh. Maintain this position for 30 seconds if possible and repeat this exercise 2 times for each leg.
natural_image
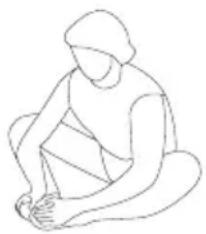
Simple line drawing of a seated human figure in profile (no text or symbols)INSIDE UPPER THIGH
Sit on the floor and place your feet in such a way that your knees are facing outwards. Pull your feet as close as possible to your groin. Now press your knees carefully downwards. Maintain this position for 30-40 seconds if possible.
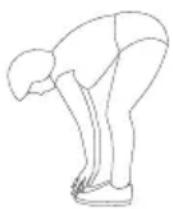
TOUCH TOES
Bend your trunk slowly forwards and try to touch your feet with your hands. Reach down as far as possible to your toes. Maintain this position for 20-30 seconds if possible.
natural_image
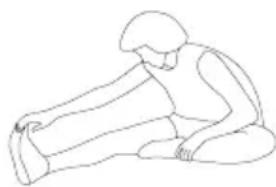
Line drawing of a person performing a seated stretch or exercise (no text or symbols)EXERCISES FOR THE KNEES
Sit on the floor and stretch out your right leg. Bend your left leg and place your foot on your right upper thigh. Now try to reach your right foot with your right arm. Maintain this position for 30-40 seconds if possible.
natural_image
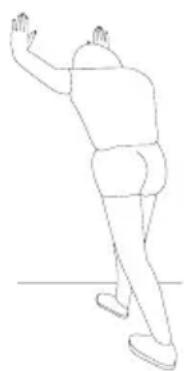
Line drawing of a human figure in motion, possibly dancing or gesturing (no text or symbols)EXERCISES FOR THE CALVES/ACHILLES TENDON
Place both hands on the wall and support your full body weight. Then move your left and right leg alternately backwards. This stretches the back part of the leg. Maintain this position for 30-40 seconds if possible.
8. MAINTENANCE & CLEANING
9. ADVICE FOR THE DISPOSAL OF PACKAGING
MAINTENANCE & CLEANING
- Assess the equipment regularly for damage or abrasion. In the case of which, refer the equipment to an authorized dealer. If damage occurs prior to the expiry date of the warrantee, please present your purchase receipt to the dealership.
- Do not use any abrasive cleansers for cleaning. Use a soft, damp cloth to eliminate dirt and dust.
- The safety of this product can be guaranteed only, if all parts are checked for wear or damage regularly. Pay special attention to parts subject to wear.
ADVICE FOR THE DISPOSAL OF PACKAGING

With reference to environmental protection:
Packing materials are raw materials and can be used again.
Keep packing materials separate. For more information about recycling contact your local administration.
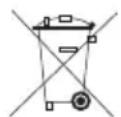
Old devices should not be disposed of domestically!
Dispose of old devices responsibly, and contribute to environmental protection.
Your local administration will inform you about collecting points and opening times.
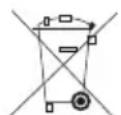
Old batteries do not belong to household garbage!
Dispose of old devices responsibly, and contribute to environmental protection.
Your local administration will inform you about collecting points and opening times.
In the case of a defective product please return it directly from the dealer from which it was purchased. It is recommended that you retain the sales receipt for proof of purchase.
Our service team is available to assist you with further questions regarding the assembly or use of your SportPlus product.
CUSTOMER SERVICE
For any further questions about our products or spare parts, our service team is available to you:
Service time: Monday to Friday, 9.00 a.m. to 6 p.m.
Toll free hotline: 0049 (0)700 - 77 67 87 587
E-Mail: Service-UK@SportPlus.org
URL: http://www.SportPlus.org
Please ensure that you have the following information at hand.
- Operating instructions
• Model number (located on the cover sheet of these instructions)
• Description of accessories - Accessory number
• Proof of purchase with purchase date
Important notice:
Please do not send the product to our firm without being requested to do so by our service team. The costs of unsolicited shipments will be borne by the sender. We reserve the right to reject unsolicited shipments or to send them back to the sender, at his or her expense.
WARRANTY CONDITIONS
SportPlus assures that the product to which the warranty form applies is manufactured from the highest quality material and has been checked with the utmost care. If, however, under normal conditions of use and maintenance, defects should occur within the warranty period mentioned hereafter, we shall assess the fault and make good the defects free of charge.
All products include an implied warranty for two years. The warranty starts on the date of purchase. If your purchased product is defective, please consult our customer service team within 24 months (starting with the date of the purchase). The implied warranty does not apply if:
• Defects arise due to external raw acts of violence.
- The product is adapted, repaired or altered in any way by unauthorized or untrained personnel.
• The instructions mentioned in the user instructions are not followed.
• The warranty conditions above are not being fulfilled.
• Defects arise due to incorrect use, maintenance, neglect or accidents.
• Also, the warranty does not apply to wear and consumable items.
The product is intended only for domestic use. The warranty does not extend to equipment that has been used in a professional environment.