
IP1202 - Security Camera ACME - Free user manual and instructions
Find the device manual for free IP1202 ACME in PDF.


| Product Type | Security Camera (Indoor/Outdoor, Indoor use only) |
| Dimensions (L x H x D) | 65 mm x 84 mm x 55 mm |
| Weight | 96 g (without cable) |
| Power Supply | AC/DC USB adapter; DC 5V, 1A |
| Video Resolution | 1,920 x 1,080 (Full HD) at 15 fps |
| Video Format | MP4 (H.264) with mono sound |
| Sensor Resolution | 2 MP |
| Lens | Focal length 1.45 mm, aperture f/2.0, 180° angle, fixed focus |
| Connectivity | Wi-Fi 2.4 GHz, b/g/n (5 GHz not supported) |
| Expandable Memory | Micro SD card up to 32 GB (Class 10 required) |
| Recording Capacity | Up to 110 hours on 32 GB card |
| Mobile App | GuardVR (Android 4.4+ / iOS 8.0+) |
| Motion Detection Range | Up to 8 meters |
| Infrared Night Vision Range | Up to 8 meters |
| Mounting | Magnetic base, foam pad for non-magnetic surfaces, metal mount with screws |
| Box Contents | Camera, base, metal mount, foam pad, 5V USB adapter, micro USB cable, reset pin, screws (x2), anchors (x2) |
| Safety Features | Do not disassemble, keep away from water and heat |
| Warranty | Period indicated on package; valid with original purchase document and warranty sheet |
| WEEE Symbol | Do not dispose as household waste; recycle properly |
| Declaration of Conformity | Compliant with RED 2014/53/EC and RoHS 2011/65/EU; available at http://www.acme.eu/en-us/declarations-conformity |
Frequently Asked Questions - IP1202 ACME
User questions about IP1202 ACME
0 question about this device. Answer the ones you know or ask your own.
Ask a new question about this device
Download the instructions for your Security Camera in PDF format for free! Find your manual IP1202 - ACME and take your electronic device back in hand. On this page are published all the documents necessary for the use of your device. IP1202 by ACME.
USER MANUAL IP1202 ACME
natural_image
Line drawing of a cylindrical electronic device with concentric rings and a base (no text or symbols)4 GB User's manual
10 LT Vartotojo gidas
16 LV Lietošanas instrukcija
22 EE Kasutusjuhend
28 PL Instrukcja obsługi
34 RU Инструкция пользователя
40 DE Bedienungsanleitung
46 UA Інструкція
52 BG Ръководство за употреба
58 RO Manual de utilizare
64 HU Használati utasítás
70 HR Korisnički priručnik
76 SI Uporabniški priročnik
82 ES Manual de usuario
88 EU Declarations
91 Warranty card
Specifications
Video: MP4 (H.264) 1,920 x 1,080, 15 fps with mono sound
Sensor resolution: 2MP
Optics: Focal length - 1.45 mm; aperture - f2.0; 180° lens angle, fixed focus
Power: AC/DC USB power adapter; DC 5 V, 1 A
Connections: Wi-Fi, 2.4 GHz, b/g/n
Expandable memory: Micro SD card up to 32 GB (Class 10 speed required)
Video recordings capacity: up to 110 hours
Application: GuardVR for Android 4.4 or higher; iOS 8.0 or higher
Other features: Motion detection: up to 8 meters; infrared night vision: up to 8 meters
Dimensions: 65 (L) x 84 (H) x 55 (D) mm
Weight: 96 g (without cable)
Box contents
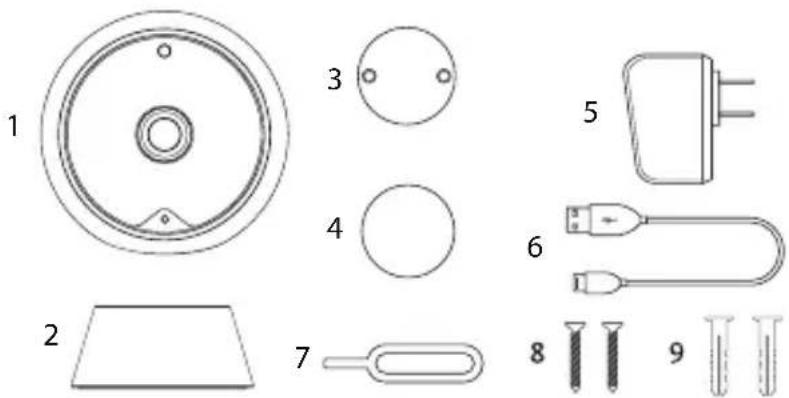
- Camera
- Camera base
- Metal mount
- 2-sided foam pad
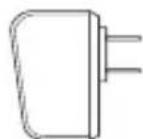
-
5V USB adapter
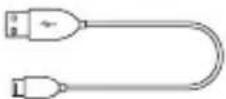
-
Micro USB cable
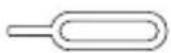
- Reset pin
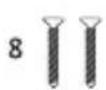
- Screws (x2)
- Anchors (x2)
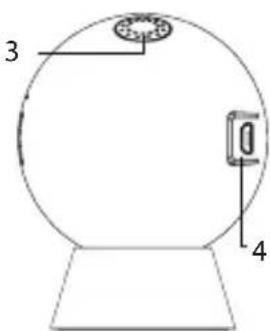
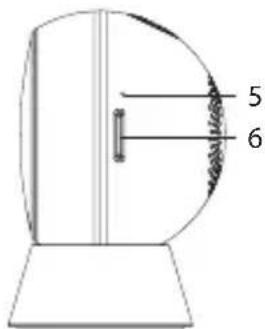
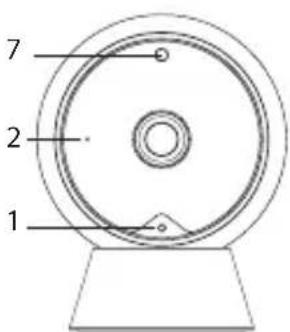
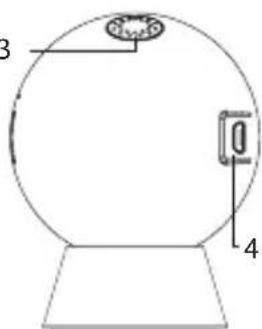
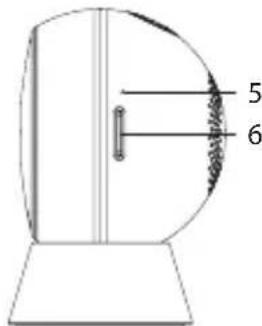
Camera overview
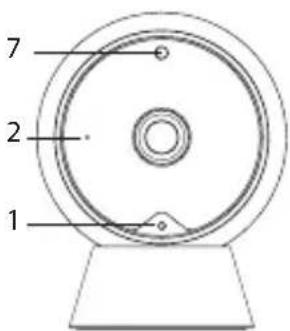
- LED indicator
- Microphone
- Speaker
- Micro USB charging port
- Reset button
- Micro SD card slot *
- Night vision sensor
*This camera supports up to 32 GB capacity micro SD cards. The camera must be unplugged when inserting or ejecting the micro SD cards.
Resetting the camera
The camera must be reset when pairing for the first time, changing a user account or a Wi-Fi network.
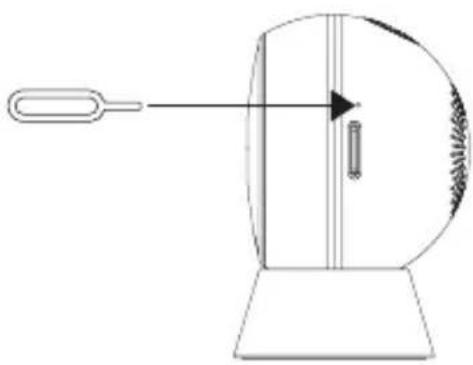
- Insert the reset pin into the reset button hole.
- Press and hold the pin for at least 5 seconds until the indicating voice is heard.
- Wait for the camera to reboot and for the blue LED indicator on the front to start rapidly blinking – the voice from the camera will indicate that the camera is ready to be paired.
natural_image
Simple line drawing of a mechanical device with a handle and internal components (no text or symbols)Setting up the camera
- Plug the micro USB cable to the micro USB port on the back of the camera.
- Plug the supplied power adapter into a wall outlet.
- Reset the camera (if required).
- Wait about 30 seconds for the camera to boot up.
- The camera is ready to be paired.
Setting up the application and pairing
- Open App Store (for iOS) or Google Play Store (for Android) on your mobile device. Search for GuardVR, then download and install it to your device. Please accept all security requests when installing and launching the application, otherwise the application may not work properly.
QR codes for quick download:

For iOS devices For Android devices

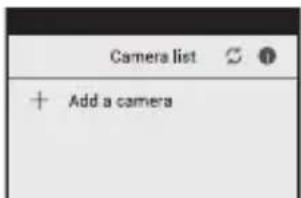
- Make sure that the mobile device is connected to the Wi-Fi network, launch the application and tap "Add a camera".
3.1
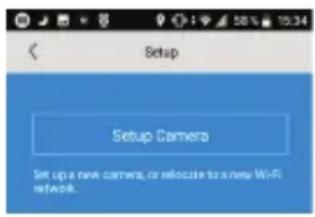
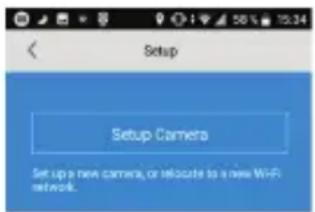
A. Click "Setup camera" if you are setting the camera for the first time.
B. Make sure that the camera is ready to be paired and the blue LED indicator is rapidly flashing, otherwise perform a reset operation.
C. The name of the current Wi-Fi network will be shown. Enter the Wi-Fi password or leave it blank if there is none, then tap „Next“.
D. Your mobile device will start to emit a sound signal for the pairing procedure. Adjust the volume to a medium level and keep the mobile device near the camera as it is connecting to the Wi-Fi network.
E. If your camera fails to connect to the Wi-Fi network, reset the camera and repeat all the steps.
F. After successful connection, you will be prompted to create a name and a password for your camera and select the direction of the camera lens. The password must have at least 8 characters and include an uppercase letter, a lower case letter and a number.
3.2
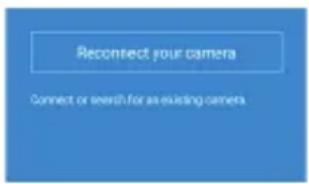
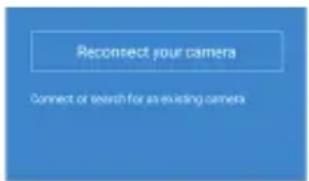
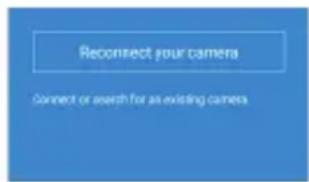
A. Tap "Reconnect" to connect the camera that has already been set up. (Make sure that the camera is connected to the Wi-Fi network – the LED is solid blue.)
B. Scan the QR code on the Wi-Fi cam or search for it via Wi-Fi.
C. Enter the password that was created during the first setup of the camera.
Requirements for the Wi-Fi network
• Make sure that your device is connected to a 2.4 GHz Wi-Fi network. A 5 GHz Wi-Fi network is not supported.
- Make sure that the camera is within the range of the Wi-Fi network and has a strong signal.
- Make sure that your wireless router/access point or the network provider is not blocking P2P (peer to peer) networking.
Overview of the application
Main screen
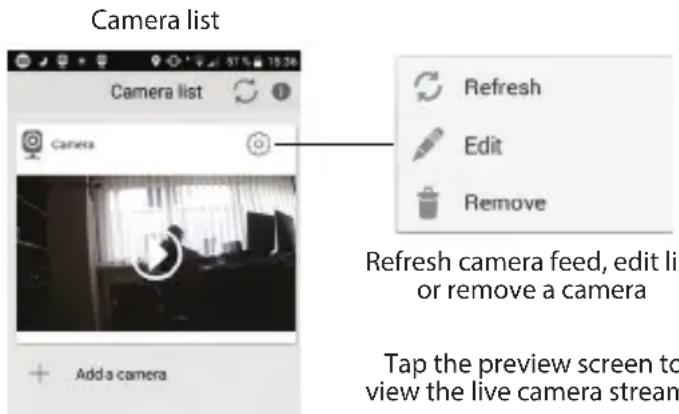

For iOS users: swipe left to remove the camera and swipe down to refresh the video stream.
Live camera stream
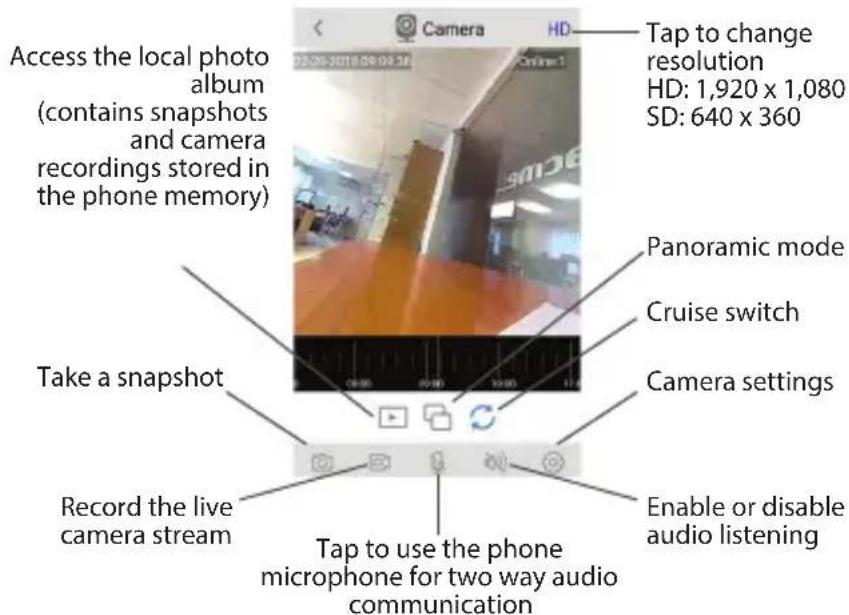
Recording history
This camera has two video recording modes (videos will be saved to the micro SD card):
A. Video recording on motion detection – recording will start when the camera senses the movement.
B. Full time video recording – the camera will record the video continuously until the memory is full. When the memory is full, the oldest recordings will be overwritten with new video files.

Video will be written to the micro SD card even when Wi-Fi connection is lost.

Video recordings from the camera can be transferred by using the smartphone and GuardVR application or removing the micro SD card from the camera and using a computer with a micro SD card reader.
natural_image
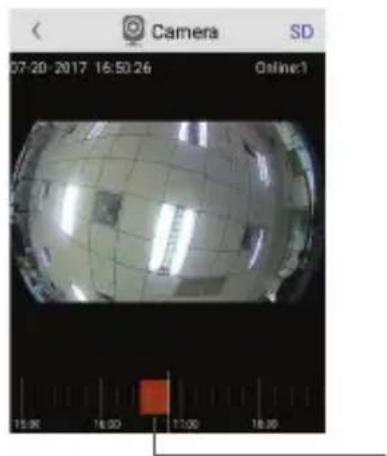
Camera screenshot showing a spherical object with grid pattern and red scale bar at bottom (no readable text or symbols)Swipe the timeline bar left or right to see the recordings history
When the camera has done recording, the video will appear in a section of the recording timeline, highlighted orange.
Notifications
When motion detection is triggered, you will be notified through the app on your mobile device.
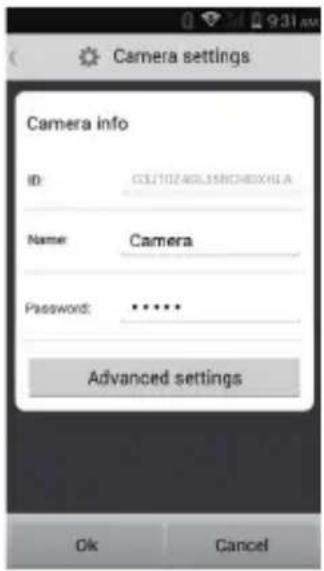
To enable motion detection and alerts, go to "Advanced settings" menu and turn these functions on.
(You may need to enable notifications in app security settings on your mobile device to receive notifications from the application.)
Other settings under "Advanced settings" menu
• Change camera password
- Recording settings
• Camera lens position
• Motion detection settings
- Video settings
- Time settings
• Camera firmware update
• QR code sharing: for adding camera broadcast to other devices
• Device information
Camera mounting scheme
• The camera base is magnetic.
- The 2-sided sticky foam pad is for attaching the camera to non-magnetic surfaces.
- The metal mounting pad can be installed to a non-magnetic surface, allowing the camera base to stick to that.
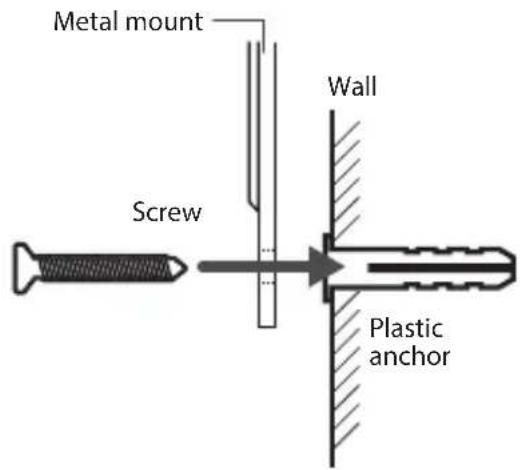
Stick to the base

flowchart
graph TD
    A["Two sided foam pad"] --> B["Magnetic pad"]
    B --> C["Mount screws"]
    C --> D["Metal mount"]
    D --> E["Plastic anchors"]
    E --> F["Stick to the base"]
    style A fill:#f9f,stroke:#333
    style F fill:#ccf,stroke:#333
Safety instructions
- Do not disassemble the product or remove any parts.
- Do not put the product into water or any liquid.
- Do not put the product close to heat source, or expose it to high temperature.
Waste Electrical and Electronic Equipment (WEEE) Symbol
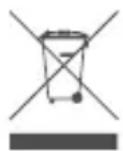
The use of the WEEE symbol indicates that this product may not be treated as household waste. By ensuring this product is disposed of correctly, you will help protect the environment. For more detailed information about the recycling of this product, please contact your local authority, your household waste disposal service provider or the shop where you purchased the product.
natural_image
Diagram of a mechanical device with a handle and internal component, no text or symbols present
„iOS“ jrenginiams „Android“ jrenginiams
3.1
3.2
natural_image
Camera screenshot showing a spherical object with grid pattern and red square marker, displayed in an image editing interface (no readable text or symbols on the object itself)natural_image
Diagram of a mechanical device with a thermometer inserted into a circular housing (no text or symbols)Kameras iestatīšana
-
Pieslédziet micro USB kabeli pie micro USB pieslégvietas, kas atrodas kameras aizmugurë.
-
Pieslēdziet komplektā esošo strāvas adapteri elektrības tikla rozetei.
-
Atiestatiet kameru (ja nepieciešams).
-
Pagaidiet aptuveni 30 sekundes, kamër kamera ieslëgsies.
-
Kamera ir gatava savienošanai pārī.

iOS iericēm Android iericēm
3.1
3.2
natural_image
Camera screenshot showing a spherical object with grid pattern and red scale bar at bottom (no readable text or symbols)natural_image
Simple line drawing of a circular mechanical component with a central hole and two mounting holes (no text or symbols)3

4
2
7
6
5
9

- Kaamera
- Kaamera alus
- Metallist seinakinnitusplaat
- Kahepoolne vahtpadi
-
5V USB adapter
-
Micro USB-kaabel
- Lähtestusnöel
- Kruvid (× 2)
- Tüüblid (× 2)
Kaamera ülevaade
7
3
natural_image
Diagram of a mechanical device with a thermometer and directional arrow (no text or symbols)Kaamera seadistamine
iOS-seadmetele

Android-seadmetele
3.1
3.2
natural_image
Camera screenshot showing a 3D rendered dome with grid pattern and measurement scale (no readable text or symbols)natural_image
Technical line drawing of a mechanical component with a handle and internal structure (no text or symbols)Konfiguracja kamery

3.1
3.2
natural_image
Camera screenshot showing a spherical object with grid pattern and a red square marker at 17:00 (no readable text or symbols)natural_image
Diagram of a mechanical device with a handle and internal components, no text or symbols presentНастройка камеры

3.1
3.2
natural_image
Camera screenshot showing a 3D rendered sphere with grid pattern and measurement scale (no readable text or symbols)Anschlüsse: WLAN, 2,4 GHz, b/g/n
natural_image
Diagram of a thermometer measuring a spherical object with a pointer (no text or symbols)
3.1
3.2
natural_image
Camera fisheye view of a spherical object with grid pattern, shown in an outdoor setting (no readable text or symbols)natural_image
Diagram of a mechanical device with a thermometer and directional arrow (no text or symbols)Налаштування камери

3.1
natural_image
Fisheye lens image of a spherical object with grid pattern, displayed within an eyefinder (no readable text or symbols)natural_image
Diagram of a mechanical device with a handle and internal components, no text or symbols present
3.1
3.2
natural_image
Camera screenshot showing a 3D rendered sphere with grid overlay and red scale bar at bottom (no readable text or symbols)Conectare: Wi-Fi, 2.4 GHz, b/g/n
natural_image
Diagram of a mechanical device with a thermometer inserted into a housing (no text or symbols)Configurarea camerei de luat vederi

Pentru dispositive iOS Pentru dispositive Android
3.1
natural_image
Camera screenshot showing a spherical object with grid pattern and measurement scale (no readable text or symbols)Schema de montare a camerei
natural_image
Diagram of a mechanical device with a handle and internal components, no text or symbols presentA kamera beállítása

3.1
3.2
natural_image
Camera screenshot showing a spherical object with grid pattern and a red square marker at 17:00 (no readable text or symbols)natural_image
Diagram of a mechanical device with a thermometer and directional arrow, no text or symbols presentPostavljanje kamere
- Priključite micro USB kabel na mikro USB priključak na stražnjoj strani kamere.
- Priključite mrežni adapter u zidnu utičnicu.
- Ponovno pokrenite kameru (ako je potrebno).
- Pričekajte oko 30 sekundi da se kamera pokrene.
- Kamera je spremna za uparivanje.
Postavljanje aplikacije i uparivanje
- Otvorite App Store (za iOS) ili Google Play Store (za Android) na svojem mobilnom uređaju. Potražite GuardVR, a zatim ga preuzmite i instalirajte na uređaj. Prihvatite sve sigurnosne zahtjeve prilikom instalacije i pokretanja aplikacije, inače aplikacija možda neće ispravno raditi.
QR kodovi za brzo preuzimanje:


3.1
A. Pritisnite „Setup camera“ ako po prvi put postavljate kameru.
B. Provjerite je li kamera spremna za uparivanje i treperi li plavo LED indikacijsko svjetlo, u suprotnom izvršite postupak ponovnog pokretanja.
C. Prikazat će se naziv trenutne Wi-Fi mreže. Unesite Wi-Fi lozinku ili ostavite prazno ako je nema, a zatim dodirnite „Next“.
D. Vaš će mobilni uređaj početi emitirati zvučni signal za postupak uparivanja. Podesite glasnoću na srednju razinu i držite mobilni uređaj blizu kamere dok se spaja na Wi-Fi mrežu.
E. Ako se kamera ne uspije povezati s Wi-Fi mrežom, ponovno pokrenite kameru i ponovite sve korake.
F. Nakon uspješnog spajanja, tražit će se da stvorite naziv i lozinku za kameru i odaberete smjer leće kamere. Lozinka mora imati najmanje 8 znakova i sadržavati veliko slovo, malo slovo i broj.
3.2
Zahtjevi za Wi-Fi mrežu
- Provjerite je li uređaj povezan s Wi-Fi mrežom od 2,4 GHz. Wi-Fi mreža od 5 GHz nije podržana.
- Postavite kameru unutar dosega Wi-Fi mreže i provjerite ima li jak signal.
- Pazite da vaš bežični usmjerivač / pristupna točka ili mrežni pružatelj usluga ne blokiraju P2P (peer to peer) umrežavanje.
Pregled aplikacije
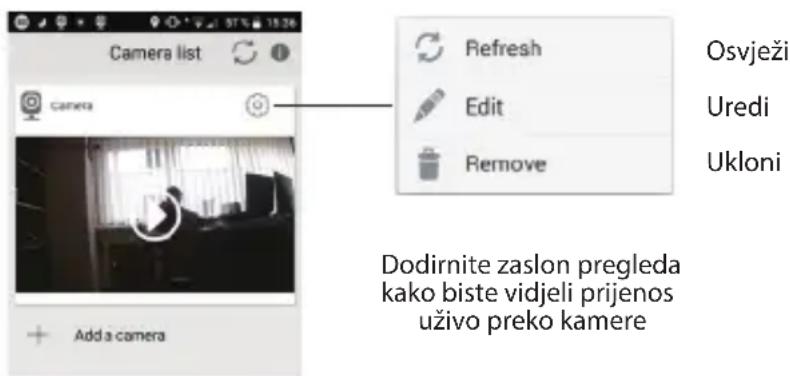
Glavni zaslon
Popis kamera
natural_image
Camera screenshot showing a spherical object with grid pattern and red scale bar at bottom (no readable text or symbols)Shema postavljanja kamere
natural_image
Diagram of a mechanical device with a handle and internal component, no text or symbols presentNastavitev kamere

Za naprave iOS Za Android naprave
3.1
3.2
natural_image
Camera screenshot showing a spherical object with grid pattern and red scale bar at bottom (no readable text or symbols)Za ogled zgodovine posnetkov podrsajte vrstico s časovnico levo ali desno
Shema za montažo kamere
natural_image
Diagram of a mechanical device with a handle and internal components, no text or symbols present
Para dispositivos iOS Para dispositivos Android
3.1


natural_image
Camera screenshot showing a spherical object with grid pattern and red scale bar at bottom (no readable text or symbols)ACME Europe hereby declares that this equipment is in compliance with the essential requirements and other relevant provisions of:
"RED 2014/53/EC" Directive;
"RoHS 2011/65/EU" Directive.
The declaration of conformity can be accessed at:
http://www.acme.eu/en-us/declarations-conformity
LT ES atitikties deklaracija
| Product Product model | |
| Product purchase date Seller name, address | |
| Failures (date, description, position of the person who accepts the product, first name, last name and signature) | |
1. Warranty period
Warranty enters into force starting with the day when the buyer acquires the product from the seller. Warranty period is indicated on the package of the product.
2. Warranty conditions
The warranty is valid only by providing an original document of the product acquisition and this warranty sheet, which includes name of the product model, product purchase date, name and address of the seller.
If it is noticed during the warranty period that the product has faults and these faults where not caused by any of the reasons when the warranty is not applied as indicated in the paragraphs below, manufacturer undertakes to replace the product.
The warranty is not applied to regular testing, maintenance and repair or replacement of the parts which are worn out naturally.
The warranty is not applied if damage or failures occurred due to the following reasons:
- Inappropriate installation of the product, inappropriate usage and/or operating the product without following the manual, technical requirements and safety standards as provided by the manufacturer, and additionally, inappropriate warehousing, falling from heights as well as hard strikes.
• Corrosion, mud, water and sand. - Repair works, modifications or cleaning, which were performed by a service not authorised by the manufacturer.
• Usage of the spare parts, software or consumptive materials which do not apply to the product. - Accidents or events or any other reasons which do not depend on the manufacturer, which includes lightning, water, fire, magnetic field and inappropriate ventilation.
- If the product does not meet standards and specifications of a particular country, in which it was not bought. Any attempt to adjust the product in order to meet technical and safety requirements such as those in the other countries withdraws all the rights to the warranty service.
If no failures are detected in the product, all the expenses in relation to the service are covered by the buyer.
- Specifications
- Box contents
- Camera overview
- Resetting the camera
- Setting up the camera
- Setting up the application and pairing
- 3.1
- 3.2
- Requirements for the Wi-Fi network
- Overview of the application
- Live camera stream
- Recording history
- Notifications
- Other settings under "Advanced settings" menu
- Camera mounting scheme
- Stick to the base
- Safety instructions
- Waste Electrical and Electronic Equipment (WEEE) Symbol
- Kameras iestatīšana
- Kaamera ülevaade
- Kaamera seadistamine
- Konfiguracja kamery
- Настройка камеры
- Налаштування камери
- Configurarea camerei de luat vederi
- Schema de montare a camerei
- A kamera beállítása
- Postavljanje kamere
- Postavljanje aplikacije i uparivanje
- Zahtjevi za Wi-Fi mrežu
- Pregled aplikacije
- Glavni zaslon
- Shema postavljanja kamere
- Nastavitev kamere
- Shema za montažo kamere
- LT ES atitikties deklaracija
- Warranty period
- Warranty conditions
Brand : ACME
Model : IP1202
Category : Security Camera