
IAN 282693 - Alarm Clock AURIOL - Free user manual and instructions
Find the device manual for free IAN 282693 AURIOL in PDF.


| Product Type | Alarm Clock Radio |
| Brand | Auriol |
| Model | IAN 282693 |
| Dimensions (approx.) | 4.5 x 3.2 x 2.8 inches (11.4 x 8.1 x 7.1 cm) |
| Weight (approx.) | 0.55 lbs (250 g) |
| Power Source | AC adapter (included) or 2 x AAA batteries (backup) |
| Display Type | LED digital display with adjustable brightness |
| Radio Bands | FM (frequency range: 87.5–108 MHz) |
| Alarm Features | Dual alarms, wake to radio or buzzer, snooze (9 min) |
| Additional Functions | Sleep timer, temperature display, USB charging port |
| Controls | Rotary dial for tuning and volume, button for mode/set |
| Battery Backup | Retains time and alarm settings during power outage |
| Cleaning Instructions | Wipe with a soft, dry cloth; do not use liquids or abrasives |
| Safety Information | Do not expose to water or extreme temperatures; use only included adapter |
| Spare Parts / Repairability | Contact Auriel support for replacement adapter or battery compartment cover |
| Warranty | 2 years (subject to terms) |
Frequently Asked Questions - IAN 282693 AURIOL
User questions about IAN 282693 AURIOL
0 question about this device. Answer the ones you know or ask your own.
Ask a new question about this device
Download the instructions for your Alarm Clock in PDF format for free! Find your manual IAN 282693 - AURIOL and take your electronic device back in hand. On this page are published all the documents necessary for the use of your device. IAN 282693 by AURIOL.
USER MANUAL IAN 282693 AURIOL
Operation and Safety Notes
DE AT CH
LCD-FUNKWECKER
natural_image
Color palette bar with grayscale shades and a black crosshair symbol at bottom (no text or labels)

GB / MT Operation and Safety Notes Page 65
natural_image
Two horizontal color swatches: grayscale bars on the left and solid-colored squares on the right, no text or symbols present.

natural_image
Two horizontal color swatches: gray and yellow squares with black, white, and blue hues (no text or symbols)
B
Z31054A/Z31054B

natural_image
Two horizontal color swatches: gray and yellow squares with black, white, and blue hues (no text or symbols)
Z31054C/Z31054D

natural_image
Two horizontal color swatches: gray and yellow squares with black, white, and blue hues (no text or symbols)
Índice
Introducción
Z31054D: involucro grigio largo
Intended use Page 66
Description of parts ...... Page 67
Technical information Page 68
Included items Page 69
Safety
General safety information ...... Page 69
Battery safety instructions ...... Page 71
Operation......Page 72
Setting the radio-controlled alarm clock into operation ...... Page 73
Using the 12 / 24 hour display ...... Page 75
Display temperature in °C /°F Page 75
Setting the time, time zone and weekday manually ....Page 76
Setting the alarm Page 77
Activating / Deactivating the alarm......Page 78
Using SNOOZE/LIGHT button....Page 78
Changing the batteries Page 79
Troubleshooting...... Page 79
Cleaning and care......Page 80
Disposal Page80
Information
Declaration of conformity.... Page 82
Introduction
LCD radio-controlled alarm clock
- Introduction

Keep this manual in a safe place. If you pass the product on to anyone else, please ensure that you also pass on all the documentation.
Intended use
The clock shows the time in 12 / 24-hour mode (in hours, minutes and seconds), the day of the week, the date and the room temperature. The clock is also equipped with two different alarm times. The clock is only suitable for operation in enclosed spaces at normal room temperature. Any other use or modification of the clock constitute improper use and may result in injury and / or damage to the clock. The manufacturer is not liable for damage caused by improper use. The clock is not intended for commercial use.
Introduction
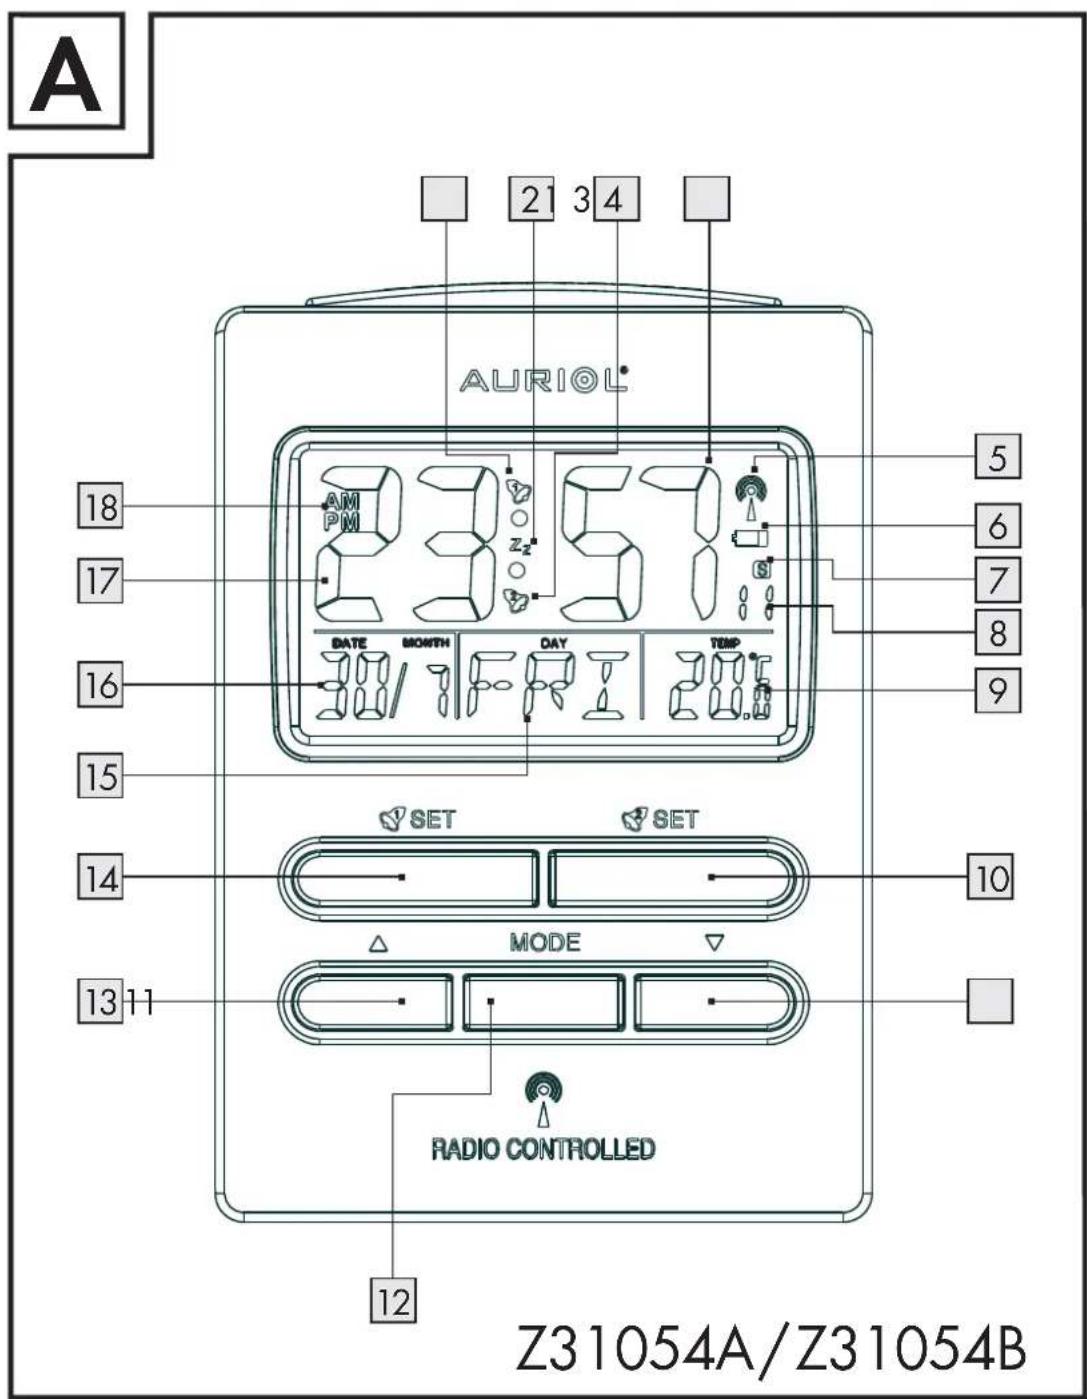
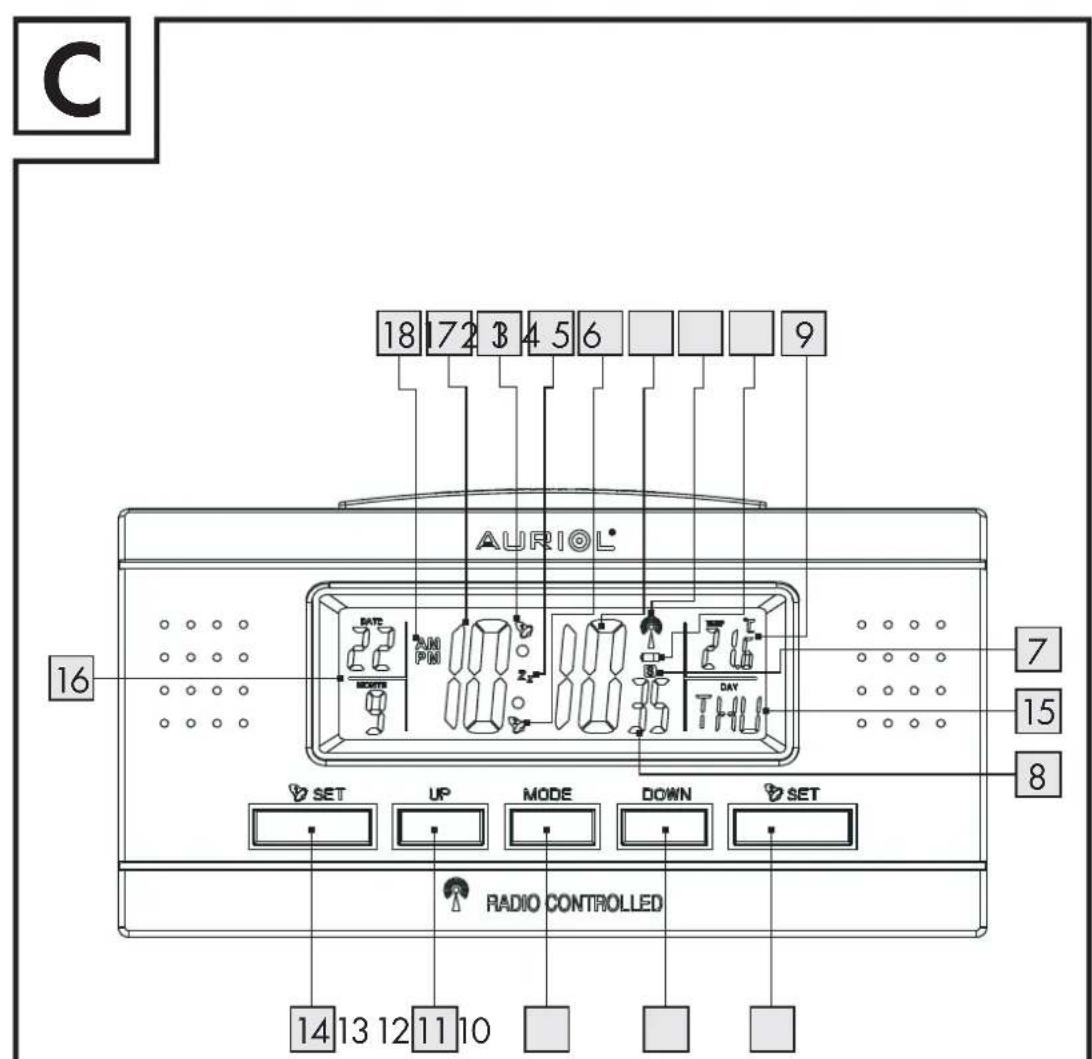
• Description of parts
1 Alarm 1
2 Z_z symbol (SNOOZE)
3 Alarm 2
4 Minute display
5 Radio symbol
6 Battery symbol
7 Summer time symbol S
8 Second display
9 Inside temperature
10 SET button (Alarm 2)
11 DOWN button ("downwards")
12 MODE button ("set")
13 UP button ("upwards")
14 SET button (Alarm 1)
15 Weekday display
16 Date display
17 Hour display
18 AM / PM symbol (12-hour format)
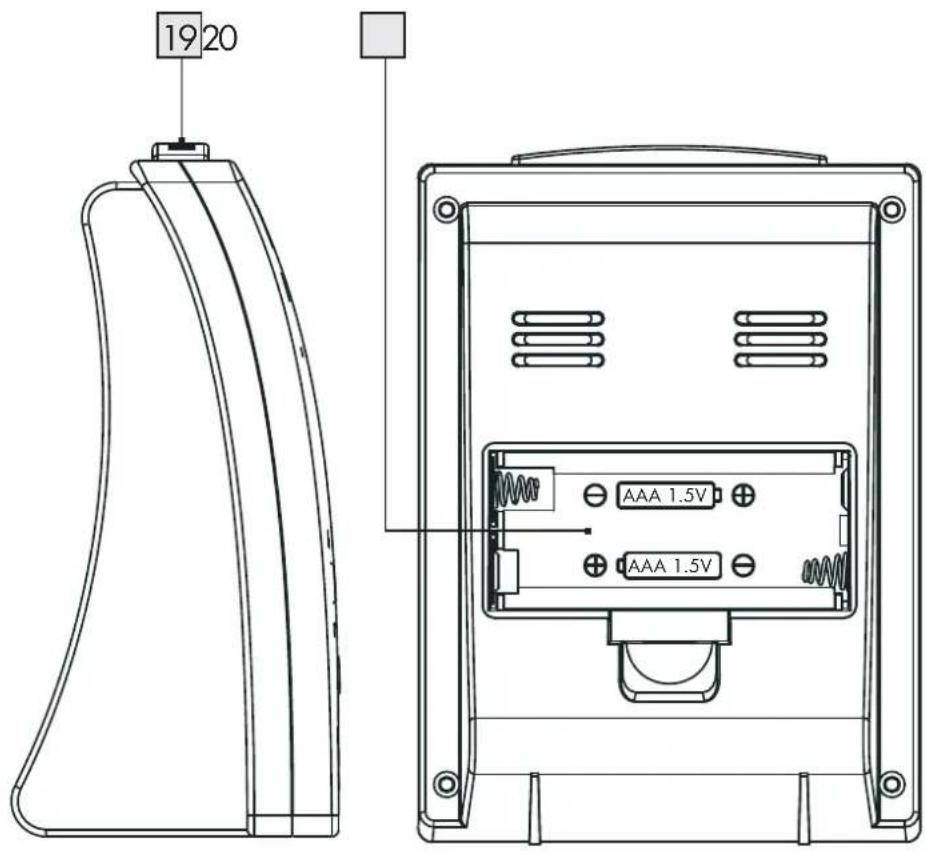
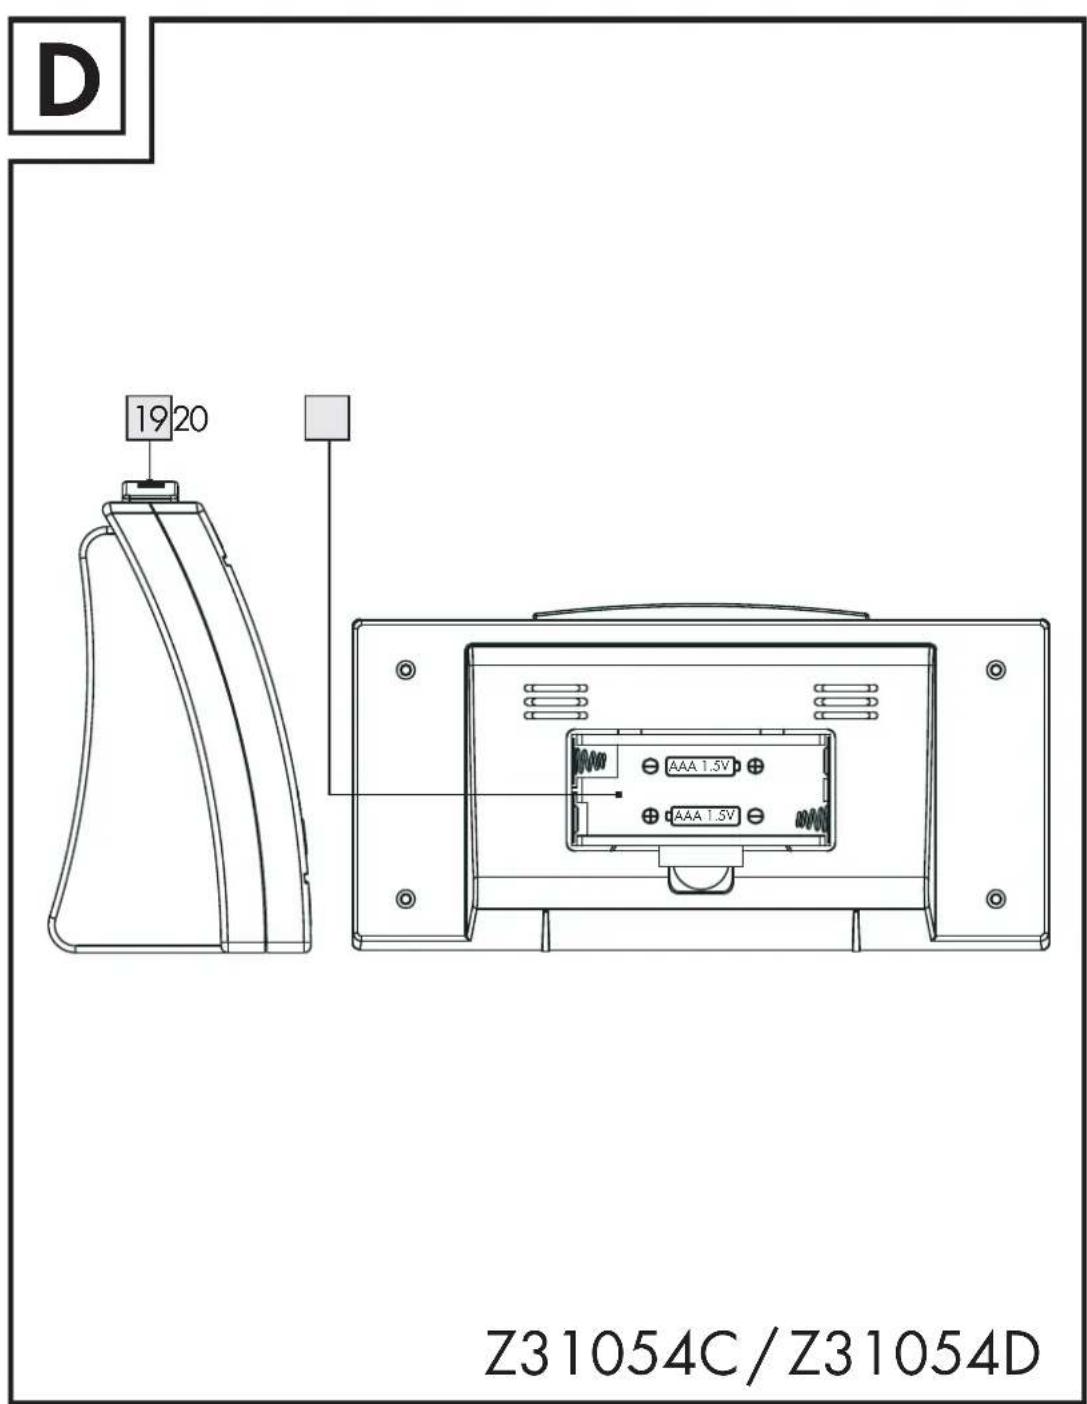
19 SNOOZE/LIGHT button
20 Battery compartment
Introduction
Technical information
Battery type: 2 x 1.5 V AAA --- 1
Temperature 2
measurement range: -9.9^ C - + 49.9^ C
$$ 1 4. 2 ^ {\circ} \mathrm{F-+121.8} ^ {\circ} \mathrm{F} $$
Note: If the temperature measured is more than +49.9 °C, "HH" will appear in the display.
If the temperature measured is less than -9.9^ , "LL" will appear in the display.
Colour:
Z31054A: tall with black housing
Z31054B: tall with silver housing
Z31054C: wide with black housing
Z31054D: wide with silver housing
Introduction / Safety
Included items
1 radio-controlled alarm clock
2 1.5 V--- AAA batteries
1 operating instructions

Safety
WARNING! Please read all safety information and instructions. Failure to comply with the safety information and instructions may result in, fire and / or severe injuries.

KEEP ALL THE SAFETY ADVICE AND INSTRUCTIONS IN A SAFE PLACE FOR FUTURE REFERENCE!

General safety information
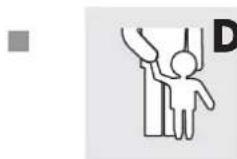
DAI WORNOSS!
OF LIFE OR ACCIDENT TO INFANTS AND CHILDREN! Never leave children
69 GB/MT
Safety
unsupervised with the packaging material. The packaging material represents a danger of suffocation.
Children frequently underestimate the dangers. Always keep children away from the device. Do not allow the device to be used as a toy.
This device is not intended to be used by persons (including children) with restricted physical, sensory or mental abilities or with insufficient experience and/or knowledge, unless they are supervised by a person who is responsible for their safety or they have received instruction on how to use the device from such a responsible person. Children should be supervised in order to ensure that they do not play with the device.
WARNING! DANGER TO LIFE! Batteries can be swallowed, which may represent a danger to life. If a battery has been swallowed, medical help is required immediately.
- Do not operate the device if it is damaged. Damaged devices could put your life at risk.
- Please note that damage arising from improper handling, non-observance of the operating instructions or interference with the inside of the device by unauthorised persons is excluded from the warranty.
Safety
■ Never take the device apart. Improper repairs may place the user in considerable danger. Repairs should only be carried out by specialist personnel.

Battery safety instructions
s
)

■ Remove the batteries from the device if they have not been used for a long period.
■
CAUTION! DANGER OF EXPLOSION!

The batteries must never be recharged!

■ Make sure you insert the batteries with the correct polarity! This is indicated in the battery compartment.
If necessary clean the contacts on the batteries and on the device before inserting them.
■ Only use batteries of the specified type. Otherwise there is danger of explosion.
■ Remove exhausted batteries from the device immediately. There is an increased danger of leaks!
If you disregard the above instructions and advice, your batteries may discharge beyond their minimum
Safety / Operation
voltage, thus increasing the chance of leakage. If the batteries in your device have leaked, remove them immediately to prevent damage to the device!
■ Batteries do not belong in household refuse!
■ Every consumer is obliged to dispose of batteries properly in accordance with the regulations!
- Keep batteries away from children. Do not throw batteries into a fire. Never short-circuit them or take them apart.
- Do not let the fluid from a leaking battery come into contact with your skin, eyes or mucous membranes. Any parts of the body coming into contact with battery acid should be rinsed off with copious amounts of water and / or a doctor contacted if necessary!
Operation
☐ Make sure that the device is standing safely on a stable surface.
☐ Do not place the device near to sources of interference such as televisions, computers, thick walls, etc. These may disrupt reception of the radio signal.
72 GB/MT
Operation
☐ Do not use the clock in reinforced concrete buildings, e.g. airports, high-rises, factories or basements. This can seriously disrupt reception of the radio signal.
☐ Do not start radio reception in a moving vehicle, e. g. car or train. Reception of the radio signal by the device can disrupt the vehicle electronics.
☐ Do not expose the clock to temperatures below -20^ for any length of time.
- Setting the radio-controlled alarm clock into operation
□ Remove the protective foil before first use.
☐ Open the battery compartment 20 on the back of the clock.
☐ Insert two AAA batteries.
Note: Make sure that the polarity is correct when you insert the batteries. This is indicated in the battery compartment.
☐ Close the battery compartment.
Operation
As soon as the batteries are inserted, automatic reception of the radio signal begins. The correct time and the date are displayed after 3–10 minutes. During reception, all buttons are deactivated except the DOWN button 11 and the SNOOZE/LIGHT button 19. You can stop the reception of the radio signal by pressing the DOWN button. To restart the reception, press and hold down the DOWN button.
Note: Do not change the location of the projection radio-controlled alarm clock during reception. This may disrupt reception.
F
(
€
C
C

C

Radio Signal (DCF):
The DCF signal (time signal transmitter) consists of time impulses, which are transmitted from one of the most accurate clocks in the world, in the proximity of Frankfurt / Main, Germany – it varies by 1 seconds in 1 million years.

Your radio-controlled alarm clock will receive the time signal under optimum conditions up to a distance of approx. 1,500 km from Frankfurt am Main, Germany. Reception of the radio signal generally takes approx. 3–10 minutes.

T
C
Operation
Reception can be considerably impaired by obstacles (e.g. concrete walls) or sources of interference (e.g. other electrical devices). You may have to change the location of the radio-controlled clock (e.g. near a window) if there are problems with reception.
● Using the 12 / 24 hour display
☐ Press the UP button 13 to switch between the 12-hour and the 24-hour format.
Note: AM stand for mornings, PM for afternoons in the 12-hour format.

- Display temperature in °C /°F
The current inside temperature 9 is indicated on the LCD.
☐ Press the DOWN button 11 to switch between the Celsius and Fahrenheit temperature scales.
Operation
- Setting the time, time zone and weekday manually
☐ Press and hold down the MODE button 12 for approx. 3 seconds. The minute display 4 flashes.
☐ Press the UP or DOWN button 11, 13 to set the desired time zone (-12 hours to +12 hours).
Note: Should you be in a country in which the DCF signal can be received but the time is different to your current local time, you can use the time zone setting to have the clock display your current local time. For example, if you are in a country where the local time is one hour behind Central European Time (CET), then you should set the time zone to +01. The time continues to be controlled by DCF but the clock shows one hour more.
Press the MODE button to confirm your setting.
☐ Set the hours, minutes, the year, the day and the language of the weekday in the same manner.
Note: The following languages are available:
$$ \mathrm{GER} = \text { German } $$
$$ E N G = E n g l i s h $$
$$ D A N = D a n i s h $$
Operation
ESP = Spanish
NET = Dutch
ITA = Italian
FRA = French
- Setting the alarm
☐ The radio-controlled alarm clock is equipped with two alarm functions. Press and hold down the ⚙ SET button 14 or the ⚗ SET button 10 to set Alarm 1 or Alarm 2. The hour indicator 17 of the alarm time flashes in the display.
☐ Press the UP or DOWN button 11, 13 to set the hours. Press the MODE button 12 to confirm your setting. The minute indicator 4 flashes in the display.
☐ Press the UP or DOWN button to set the minutes. Press the MODE button to confirm your setting.

Operation
● Activating/Deactivating the alarm
Press the SET button or the SET button 10 to activate the relevant alarm.
☐ The alarm symbol or appears in the LC display.
Press the SET button of the SET button to deactivate the alarm.
● Using SNOOZE/LIGHT button
☐ Press the SNOOZE /LIGHT button 19 while the alarm signal is sounding to activate the snooze function.
☐ The alarm signal is silenced and the displays and Zz flash. The alarm signal sounds again after approx. 5 minutes.
☐ Press any button apart from the SNOOZE- / LIGHT button 19 to deactivate the snooze function.
Note: Press any button apart from the SNOOZE-/LIGHT button to stop the alarm signal.
Note: The backlight illuminates when you press the SNOOZE/LIGHT button.
Operation / Troubleshooting
- Changing the batteries
The battery symbol ☐ 6 appears on the LCD when the batteries are low. Make sure that you replace the batteries in good time.
☐ Open the battery compartment 20 on the back of the clock.
□ Remove the used batteries.
☐ Insert two AAA batteries.
Note: Make sure that the polarity is correct when you insert the batteries. The correct polarity is shown inside the battery compartment.

☐ Close the battery compartment.
Note: When replacing the battery, the saved data will be lost.
● Troubleshooting
☐ The device contains delicate electronic components. This means that if it is placed near an object that transmits radio signals, it could cause interference.
79 GB/MT
Troubleshooting / Cleaning and .../ Disposal
For example, this can be mobile phones, two-way radios, CB radios, radio control systems / other remote controls and microwave devices. If the display indicates a problem, move such objects away from it.
☐ Electrostatic discharges can lead to malfunctions. In the case of such malfunctions remove the batteries briefly and then insert them again.
- Cleaning and care
■ Never use liquids or cleaning agents, as they may damage the device.
□ Clean the outside of the device only with a soft, dry cloth.
- Disposal

The packaging is made entirely of recyclable materials, which you may dispose of at local recycling facilities.
C
E v s l f
Disposal
Contact your local refuse disposal authority for more details of how to dispose of your worn-out product.
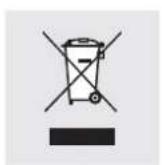
In the interest of the environment, do not throw out your product with your household refuse.
Take it to a suitable centre where it can be disposed of properly. Information on collection points and their opening hours can be obtained from your local authority.
Defective or used batteries must be recycled in accordance with Directive 2006/66/EC. Return batteries and/or the device via the recycling facilities provided.

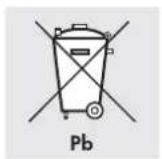
Improper disposal of rechargeable batteries can damage the environment!
Batteries may not be disposed of with the usual domestic waste. They may contain toxic heavy metals and are subject to hazardous waste treatment rules and regulations. The chemical symbols for heavy metals are as follows: Cd = cadmium, Hg = mercury, Pb = lead. That is
Disposal / Information
why you should dispose of used batteries at a local collection point.
Information
- Declaration of conformity
We, Milomex Ltd., c / o Milomex Services, Hilltop Cottage, Barton Road, Pulloxhill, Bedfordshire, MK45 5HP, UK, hereby declare under our sole responsibility that the product: LCD Radio-Controlled Alarm Clock, Model No.: Z31054A / Z31054B / Z31054C / Z31054D, Version: 11/2011, to which this declaration refers, complies with the standards / normative documents of 1999/5/EC.
Heavenerstirling
The complete declaration of conformity can be viewed at: www.milomex.com
EMC CE
82 GB/MT
Inhaltsverzeichnis
Einleitung
c/o Milomex Services
Hilltop Cottage
Barton Road
Pulloxhill
Bedfordshire
MK45 5HP
UK
Model no.: Z31054A/Z31054B/
Z31054C/Z31054D
Version: 11/2011
© by ORFGEN Marketing



- LCD-FUNKWECKER
- Índice
- Introducción
- Safety
- Information
- Introduction
- LCD radio-controlled alarm clock
- - Introduction
- Intended use
- • Description of parts
- Technical information
- Colour:
- Introduction / Safety
- Included items
- General safety information
- DAI WORNOSS!
- Battery safety instructions
- CAUTION! DANGER OF EXPLOSION!
- Safety / Operation
- Operation
- - Setting the radio-controlled alarm clock into operation
- Radio Signal (DCF):
- ● Using the 12 / 24 hour display
- - Display temperature in °C /°F
- - Setting the time, time zone and weekday manually
- - Setting the alarm
- ● Activating/Deactivating the alarm
- ● Using SNOOZE/LIGHT button
- Operation / Troubleshooting
- - Changing the batteries
- ● Troubleshooting
- Troubleshooting / Cleaning and .../ Disposal
- - Cleaning and care
- - Disposal
- Disposal
- Improper disposal of rechargeable batteries can damage the environment!
- Disposal / Information
- - Declaration of conformity
- Heavenerstirling
- EMC CE
- Inhaltsverzeichnis
- Einleitung
Brand : AURIOL
Model : IAN 282693
Category : Alarm Clock