
Ergo - Blender Eta - Free user manual and instructions
Find the device manual for free Ergo Eta in PDF.


| Type de produit | Blender |
| Marque | Eta |
| Modele | Ergo |
| Categorie | Mixeur |
| Dimensions (L x P x H) | 20 x 18 x 40 cm |
| Poids | 2.5 kg |
| Alimentation | 220-240 V, 50/60 Hz |
| Puissance | 600 W |
| Capacite du bol | 1.5 L |
| Materiau du bol | Verre |
| Lames | Acier inoxydable, 4 lames |
| Vitesses | 2 vitesses + Pulse |
| Fonctions | Mixage, puree, glace pilee, smoothies |
| Securite | Protection contre surchauffe, pieds antidérapants |
| Entretien et nettoyage | Bol et couvercle lavables au lave-vaisselle |
| Pieces detachees | Disponibles (bol, lame, joint, couvercle) |
| Reparabilite | Indice de reparation 8.5/10 |
| Couleur | Blanc et gris |
| Garantie | 2 ans |
| Informations generales | Mode d'emploi inclus, service client Eta |
Frequently Asked Questions - Ergo Eta
User questions about Ergo Eta
0 question about this device. Answer the ones you know or ask your own.
Ask a new question about this device
Download the instructions for your Blender in PDF format for free! Find your manual Ergo - Eta and take your electronic device back in hand. On this page are published all the documents necessary for the use of your device. Ergo by Eta.
USER MANUAL Ergo Eta
Robot vacuum cleaner 2 in 1 with smart application • USER MANUAL EN 36-51
natural_image
Black robotic vacuum cleaner with a smartphone displaying 'eta SMART' logo (no text on device or background)
CZ – ROBOTICKÝ VYSAVAČ 2 V 1 SE SMART APLIKACÍ
- BEZPEČNOSTNÍ POKYNY 4
- POUŽITÍ....7
- SOUČÁSTI VÝROBKU....8
- PŘÍPRAVA K POUŽITÍ....11
- POUŽÍVÁNÍ VYSAVAČE 12
- APLIKACE ETA SMART 15
- ÚDRŽBA VYSAVAČE 15
- ŘEŠENÍ PROBLÉMŮ 17
- TECHNICKÁ SPECIFIKACE 17
- EKOLOGIE....19
SK – ROBOTICKÝ VYSÁVAČ 2 V 1 SO SMART APLIKÁCIOU
- BEZPEČNOSTNÉ POKYNY 20
- POUŽITIE 23
- SÚČASTI VÝROBKU 24
- PRÍPRAVA NA POUŽITIE....27
- POUŽÍVANIE VYSÁVAČA....28
- APLIKÁCIA ETA SMART 31
- ÚDRŽBA VYSÁVAČA 31
- RIEŠENIE PROBLÉMOV 33
- TECHNICKÁ ŠPECIFIKÁCIA 33
- EKOLÓGIA....35
EN – ROBOT VACUUM CLEANER 2 IN 1 WITH SMART APPLICATION
- GENERAL SAFETY INSTRUCTIONS....36
- APPLICABILITY 39
- PRODUCT COMPONENTS 40
- PREPARATION FOR USE....43
- VACCUM CLEANER USE 44
- APPLICATION ETA SMART 47
- VACUUM CLEANER MAINTENANCE 48
- PROBLEMS SOLUTIONS 49
- TECHNICAL SPECIFICATION 49
- ENVIRONMENTAL PROTECTION....51
HU – ROBOT PORSZÍVÓ 2 AZ 1-BEN INTELLIGENS ALKALMAZÁSSAL
- BIZTONSÁGI ELŐÍRÁSOK....52
- ALKAMAZHATÓSÁG 55
- A TERMÉK ALKOTÓRÉSZEI 56
- HASZNÁLATI ELŐKÉSZÍTÉS 59
- A PORSZÍVÓ HASZNÁLATA. 60
- ETA SMART ALKALMAZÁS 63
- A PORSZÍVÓ KARBANTARTÁSA 63
- PROBLÉMA-MEGOLDÁS 65
- MÜSZAKI SPECIFIKÁCIÓ....65
- ÖKOLÓGIA 66
PL - ODKURZACZ AUTOMATYCZNY 2 W 1 Z APLIKACJA SMART
- WSKAZÓWKI BEZPIECZEŃSTWA....68
- ZASTOSOWANIA....71
- CZĘŚCI WYROBU....72
- PRZYGOTOWANIE DO UŻYCIA 75
- UŻYWANIE ODKURZACZA 76
- APLIKACJA ETA SMART 79
- UTRZYMANIE ODKURZACZA....79
- ROZWIAZYWANIE PROBLEMÓW 81
- SPECYFIKACJA TECHNICZNA....81
- EKOLOGIA....83
DE - STAUBSAUGERROBOTER 2 IN 1 MIT SMART-APP
natural_image
Simple diagram of a coiled tube with a circular component, no text or symbols presentLokální úklid
flowchart
graph TD
    A[" "] --> B[" "]
    B --> C[" "]
    C --> D[" "]
    D --> E[" "]
    E --> F[" "]
    F --> G[" "]
    G --> H[" "]
    H --> I[" "]
    I --> J[" "]
    J --> K[" "]
    K --> L[" "]
    L --> M[" "]
    M --> N[" "]
    N --> O[" "]
    O --> P[" "]
    P --> Q[" "]
    Q --> R[" "]
    R --> S[" "]
    S --> T[" "]
    T --> U[" "]
    U --> V[" "]
    V --> W[" "]
    W --> X[" "]
    X --> Y[" "]
    Y --> Z[" "]
    Z --> A
    style A fill:#fff,stroke:#000
    style B fill:#fff,stroke:#000
    style C fill:#fff,stroke:#000
    style D fill:#fff,stroke:#000
    style E fill:#fff,stroke:#000
    style F fill:#fff,stroke:#000
    style G fill:#fff,stroke:#000
    style H fill:#fff,stroke:#000
    style I fill:#fff,stroke:#000
    style J fill:#fff,stroke:#000
    style K fill:#fff,stroke:#000
    style L fill:#fff,stroke:#000
    style M fill:#fff,stroke:#000
    style N fill:#fff,stroke:#000
    style O fill:#fff,stroke:#000
    style P fill:#fff,stroke:#000
    style Q fill:#fff,stroke:#000
    style R fill:#fff,stroke:#000
    style S fill:#fff,stroke:#000
    style T fill:#fff,stroke:#000
    style U fill:#fff,stroke:#000
    style V fill:#fff,stroke:#000
    style W fill:#fff,stroke:#000
    style X fill:#fff,stroke:#000
    style Y fill:#fff,stroke:#000
Úklid podél stěn
natural_image
Simple line drawing of a pendulum with a circular head and horizontal arm (no text or symbols)6. APLIKACE ETA SMART
Poznámky
natural_image
Illustration of a sun bending process with hand placing a component into a curved device (no text or symbols)7.3 ČIŠTĚNÍ POSTRANNÍCH KARTÁČKŮ
8. ŘEŠENÍ PROBLÉMŮ
KEEP OUT OF REACH OF CHILDREN.
natural_image
Simple diagram of a coiled tube with a circular component, no text or symbols presentLokálne upratovanie
natural_image
Simple line drawing of a pendulum with a circular head and horizontal arm (no text or symbols)vysávači z cesty nežiaduce predmety (napr. stoličky a pod.). Tým zamedzíte tomu, aby sa vysávač zasekával na jednom mieste. Pre zapnutie vysávača v tomto režime stlačte tlačidlo E5 na dialkovom ovládači.
Poznámky
natural_image
Line drawings of a sunlit outdoor device with open lid, showing exterior and interior views (no text or symbols)7.3 ČISTENIE POSTRANNÝCH KIEF
8. RIEŠENIE PROBLÉMOV
KEEP OUT OF REACH OF CHILDREN.
EN - Robot vacuum cleaner 2 in 1 with smart application
eta
2218
Ergo
INSTRUCTIONS FOR USE
Dear customer, thank you for purchasing our product. Keep these instructions, the receipt and, if possible, the box with the internal packing.
1. GENERAL SAFETY INSTRUCTIONS

- Consider the instructions for use as a part of the appliance and pass them on to any other user of the appliance.
- Check whether the data on the type label correspond with the voltage in electric socket.
- Never use the appliance if its power cord of adaptor is damaged, if it does not work properly, if it fell down and was damaged. In this case take the appliance to a special service to check its safety and proper function.
- The product is intended for home use and similar (in shops, offices and similar workplaces, in hotels, motels and other residential environments, in facilities providing accommodation with breakfast). It is not intended for commercial use!
- This appliance can be used by children aged from 8 years and above and persons with reduced physical, sensory or mental capabilities or lack of experience and knowledge if they have been given supervision or instruction concerning use of the appliance in a safe way and understand the hazards involved. Children shall not play with the appliance. Cleaning and user maintenance shall not be made by children without supervision.
- Before replacing accessories or accessible parts, which move during operation, before assembly and disassembly, before cleaning or maintenance, turn off the appliance!
- If the power cord of the adaptor is corrupted, it has to be replaced by the manufacturer, its service technician or a similarly qualified person so as to prevent dangerous situations.
- Never use the appliance if its adaptor or plug is damaged, if it does not work properly, if it fell down and was damaged or if it fell to water. In this case take the appliance to a special service to check its safety and proper function.
- In order to ensure safety and proper function of the appliance, use only original spare parts and accessories approved by the manufacturer.
-
If the adaptor of the appliance is corrupted, it has to be replaced by the manufacturer, its service technician or a similarly qualified person so as to prevent dangerous situations.
-
WARNING: To charge the battery, use only the network adapter supplied with this appliance.
- To power the appliance, only apply safe small voltage in accordance with the type plate.
- Don't put hands close to rotating part.
- Never immerse the vacuum cleaner into water (even its parts)!
- Never vacuum without a properly inserted filtration system and micro-filters.
- Do not vacuum sharp objects (e.g. glass, shatter), hot, flammable, explosive items (e.g. ash, hot cigarette butts, gasoline, thinners and aerosol vapours) or greases (e.g. fats, oils), caustic agents (e.g. acids, solvents). Vacuuming these objects may lead to damage of the dust filters, or the vacuum cleaner.
- Pores of the filters may be clogged when vacuum cleaning very fine dust (e.g. fine sand, cement dust, plaster). Thus, air permeability will be reduced and the suction performance will drop. In this case, clean the filters even though the dust container is not full yet.
- Always switch off the vacuum cleaner first and disconnect the power cord from power supply and only then empty the dust container, clean/replace micro-filters, clean the vacuum cleaner or its accessories.
- Never leave the vacuum cleaner exposed to weather conditions (rain, frost, direct sun radiation, etc.).
- Never use the appliance for any other purpose than for the intended purpose described in these instructions for use!
- Disconnect the appliance from the mains when not in use for a long period. Switch off the vacuum cleaner and slide it out of the contacts of the charging station.
- Secure please gaps on the floor (eg. Threshold Strip) to avoid damaging the rotating brushes. These joints may also limit the vacuum cleaner jams bristle of brush into the gaps.
- This device can not be used on a carpet whose pile length is over 1 cm. At the same time, the vacuum cleaner may not function properly on some types of dark carpets which surface „deceives" the sensors an can cause chaotic movements of the vacuum cleaner or its failure to reach some parts of the floor. Robot vacuum cleaner can cross floor transition strips of approx. 2 cm in height.
-
Make precautions to solve the problem which may make the cleaning in trouble, such as:
-
Keep the easily knock over objects in a safe place.
- Permian the edge of the carpet.
- The hanging table cloth and curtain should not touch the ground.
- The flammable object should be cut from the fire source.
- Sort out the tangled power cord on the floor.
-
Pick up the newspaper, book, magazine and large piece of paper scattered on the floor.
-
Check whether the main brush is correctly fixed inside the robot before cleaning.
- Examine if the dustbin is empty and insure it is fixed before it works.
• See if up-ground height sensor are wiped clean. - If you only need to clean one room, please close the door.
- If the room which needs to be cleaned wants a partition, you can place the virtual wall, at the same time, check the facing opening width.
- Please be aware that device needs 8 cm of clearance underneath furniture so that it will not become trapped.
-
Do NOT drop the Robot, should this happen, run the Robot to see that everything is okay before letting it operate by itself without you being present.
-
If the battery is leaking, remove it immediately; it can damage the vacuum cleaner.
- Keep batteries out of reach of children and incapacitated people. A person, who would swallow the batteries, must seek medical help immediately.
- Dispose of a discharged battery in a suitable way.
- Never use the appliance for any other purpose than for the intended one described in these instructions for use! This appliance is not intended for outdoor use.
- The manufacturer is not responsible for damage caused by improper use of the appliance and the accessories and its guarantee for the appliance does not apply in situations when the safety warnings above are not complied with. Failure to replace or maintain all filters regularly and also using non-original filters, the properties of which resulted in failure or damage of the vacuum cleaner is also understood to be improper use of the appliance.
Wireless connection and compatibility
- The ETA company cannot be liable in any way for any incidental, indirect or consequential damages, or for any loss of data or loss due to information leakage during wireless communication.
- Successful wireless communication cannot be guaranteed 100% on all Smart devices and Wifi networks (routers). Due to the variety of devices on the market, there may be cases where the character or specification of a given smart device or Wifi network (router) makes connection impossible or is in some way disturbed. In addition, several factors, including hardware and software configuration, also affect the success of wireless communication over a Wifi network. The connection between the robot and your Wifi network can also be adversely affected by the surrounding Wifi networks that they can be tuned to the same channel and disrupt connections (e.g. in housing estates, apartment buildings, etc.). These facts are not a reason to claim the appliance.
The application is owned and operated by a third party (hereinafter the “Subject”) different from HP TRONIC Zlín, Ltd. (hereinafter the „Seller“). No personal information is transmitted between the Subject and the Seller. When registering for the application, the customer transfers the personal data directly to the Subject, which becomes the personal data controller. The Application and the associated privacy policy are governed by the Rules of the Subject.
| No one else can disassemble maintain or. Transform the product except the maintenance technicians designated by our company or it may cause fire electric shock or personal injury. |  | Don’t use other charger but the equipped one of the Robot, or it may cause product damage, electric shock or fire due to high voltage. | |
| Don’t touch high-voltage power cord of the electric appliance with your wet hand, or it may cause electric shock. |  | Don’t bend the power cord overly or place weight on it, or it may cause po- wer cord damage, fire or electric shock. | |
| Don’t use the Cleaner outdoors, or it may cause the product damage. |  | Don’t approach cigarette, lighter, match and other heat objects or combustible materials such as the gasoline cleaner. | |
 | Don’t use the Cleaner in commercial places, or the Cleaner may be damaged by excessive use. |  | Insert the power cord of the charger well or it may cause electric shock, short circuit, smoking or fire. |
 | Check whether the adapter and connector are connected well, or it may cause charging failure or even fire. |  | Remove all easily damaged objects (including luminous objects, fabrics, glass bottles, etc.) before using, or it may cause damage to these objects or affect the using of the cleaner. |
 | Please use the Cleaner cautiously in the presence of the children to avoid frightening or harming them. |  | Don’t stand or sit on the Cleaner, or it may cause damage to the Cleaner or personal injury. |
 | Don’t make the Cleaner take in water and other liquors for fear of the product damage. |  | Don’t use the Cleaner on small tables and chairs or other small space, otherwise the Cleaner may be damaged. |
2. APPLICABILITY
The product, mainly applicable to home, hotel rooms and small office, is good for cleaning to various short-haired carpet, wood floor, hard floor, ceramic tile, etc.
Since the vacuum cleaner moves freely in the space of your home, it is necessary to adapt the environment to this fact. Before use, remove all unwanted objects (stretched cables, scattered clothes, papers, bags, etc.) from the floor that could impede the movement of the vacuum cleaner or, conversely, fragile objects (e.g. glass and ceramic vases) that could be damaged by the vacuum cleaner.
If you use the device in an apartment with several storeys, it is necessary to carry the charging station along with the device from one storey to another.
3. PRODUCT COMPONENTS
3.1 PACKAGE CONTENTS
| Item Description Designation Quantity Order code | ||||
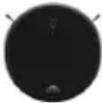 | Robotic vacuum cleaner A 1 - | |||
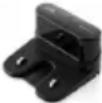 | Charger station C 1 ETA221800290 | |||
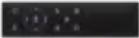 | Remote control E 1 ETA221800350 | |||
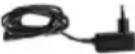 | Power adapter D 1 ETA221800320 | |||
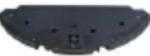 | Mop extension F 1 ETA221800190 | |||
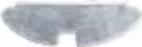 | Mop F1 2 ETA221800300 | |||
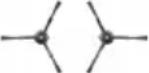 | Side brushes (2 installed in the vacuum cleaner) | A7 | 2+2 | ETA221800130 |
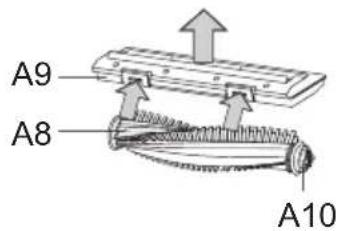
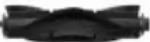 | Main brush | A8 | 1 ETA221800180 | |
 | Main brush cover | A9 | 1 ETA221800210 | |
 | Magnetic tape | G | 1 ETA221800340 | |
 | Dirt tray 2in1 | B 1 ETA221800160 | ||
 | HEPA filter (1 installed in the vacuum cleaner) | B4 | 1+1 | ETA221800310 |
 | Foam filter (1 installed in the vacuum cleaner) | B5 | 1+1 | |
| Batteries AAA | I | 2 - | ||
| Battery | - | 1 ETA221800240 | ||
 | Cleaning brush H 1 ETA221800330 | |||
3.2 ROBOTIC VACUUM CLEANER
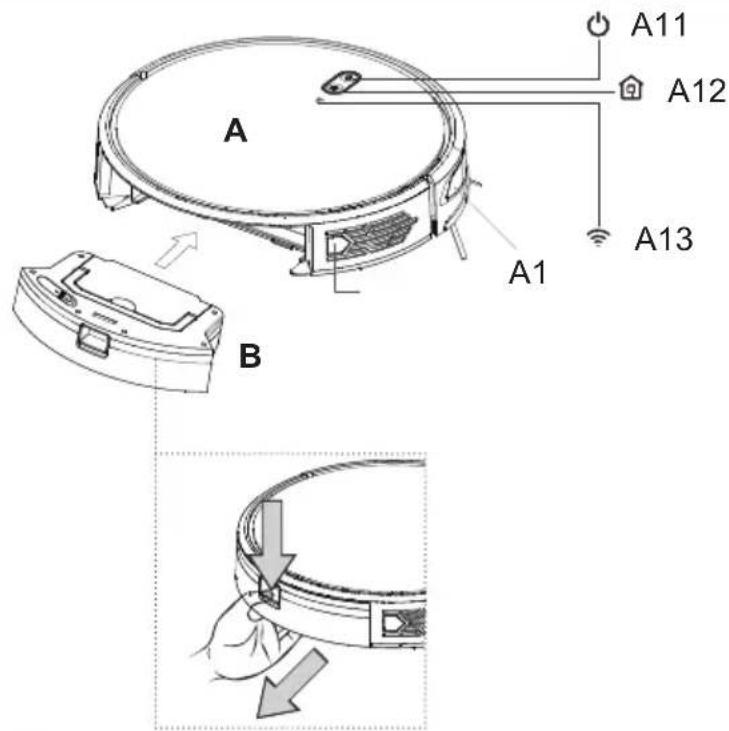
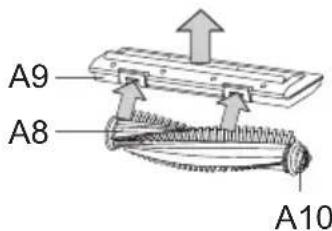
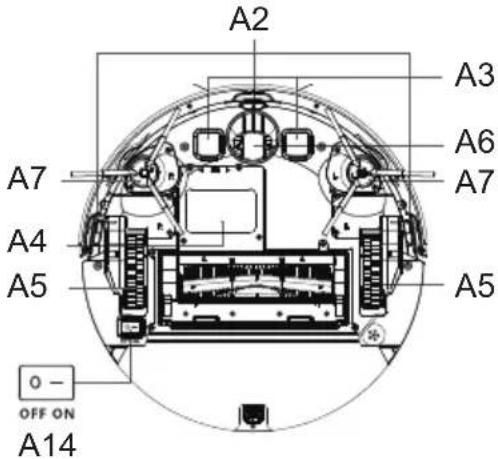
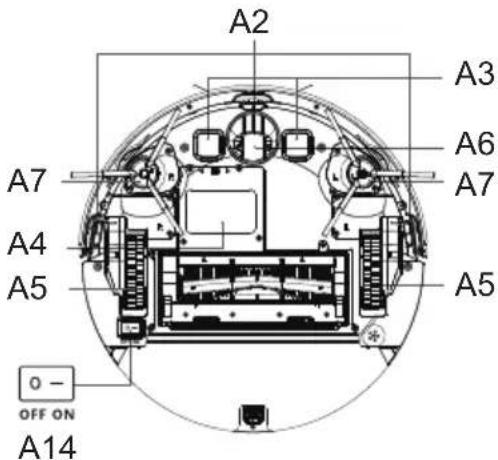
A – Robotic vacuum cleaner
A1 – Front bumper
A2 – Sensors against falling downstairs
A3 – Charging contacts
A4 – Storage battery compartment cover
A5 – Drive Wheels (Left / Right)
A6 - Front wheel
A7 – Side brushes
A8 – Main brush
A9 – Main brush cover
A10 – Bearing
A11 - ON/OFF /AUTO/STOP (PAUSE)
A12 – CHARGE/STOP (PAUSE) button / LOCAL cleaning
A13 – Wi-fi indicator light
A14 – Main switch
B – Dust bin 2in1
3.3 DUSTBIN 2IN1
B
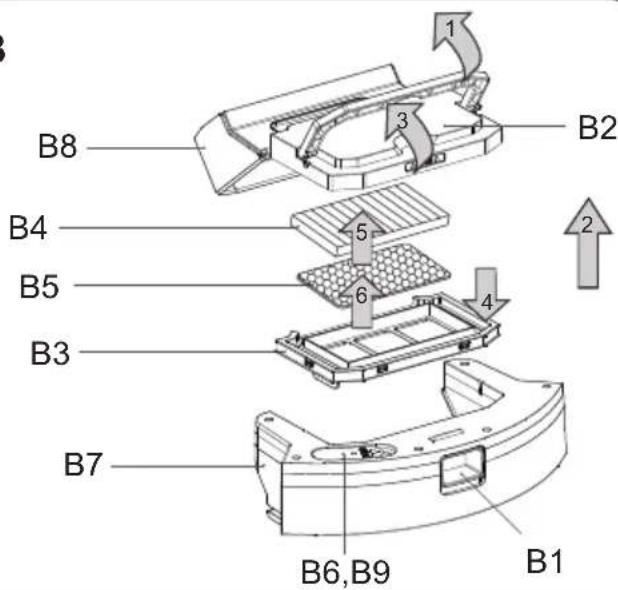
B – Dust bin 2in1
B1 – Release button
B2 – Lid of dust bin
B3 – Filter cover
B4 – HEPA filter
B5 – Foam filter
B6 – Filling opening
B7 – Water tank
B8 – Dry dirt container
B9 – Pouring hole plug
3.4 CHARGER STATION
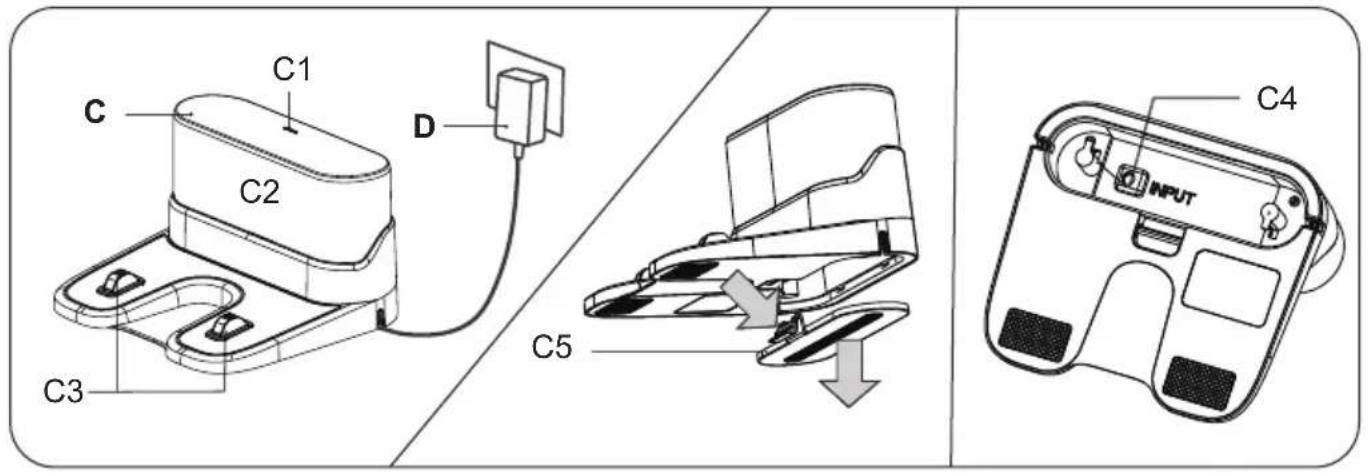
C - Charger station
C1 – Operation indicator
C2 – Signalisation area
C3 – Charging contacts
C4 - Adapter connection port
C5 - cover
D – Power adapter
3.5 REMOTE CONTROL
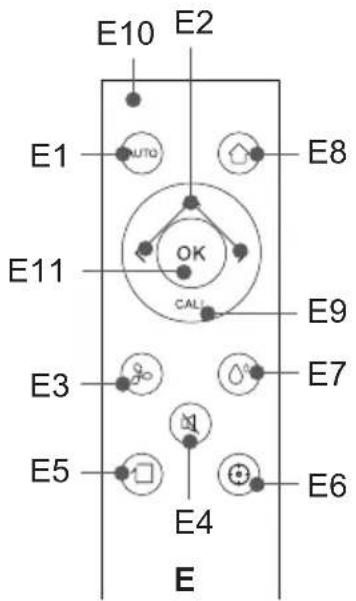
E - Remote control
E1 - ON /OFF/AUTO (automatic cleaning) / STOP (PAUSE) button
E2 – Directional buttons for manual control (FORWARD / RIGHT/ LEFT)
E3 – Button for setting the suction power level
E4 – Voice message on/off button
E5 – Button for cleaning along the walls
E6 – Local cleaning button
E7 – Dampening intensity button
E8 – Button for return to charging station
E9 – Robot position announcement button
E10 – Pressed Button indicator lamp
E11 – OK pause/resume button
Remote control notes
- Do not combine various types of batteries. Do not even combine used and new batteries together.
- Batteries not intended for this purpose must not be charged.
– Rechargeable batteries must be removed from the appliance before charging.
- Remove the batteries if you will not be using the appliance for a long time.
- The supply terminals must not be short-circuited.
Charging
Battery type: 2x AAA
Inserting / replacing batteries
Remove the cover on the back of the controller and insert the batteries. Pay attention to the correct polarity. Replace the cover in the opposite way.
3.6 MOP EXTENSION
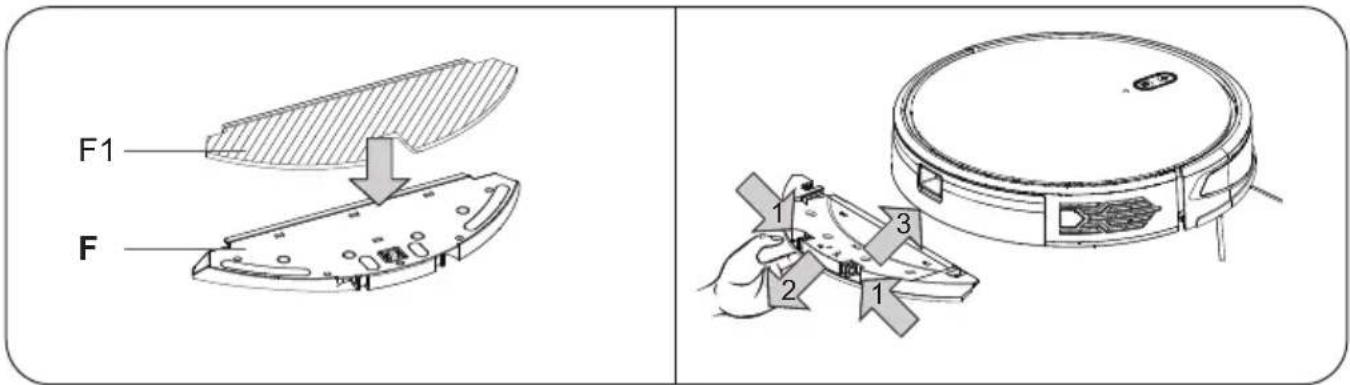
F – Watter tank
F1 - Mop
4. PREPARATION FOR USE
Remove all packing material, remove vacuum cleaner and accessories. Remove any adhesive, stickers, or paper from the vacuum cleaner.
4.1 VACUUM CLEANER PREPARATION
Install side brushes
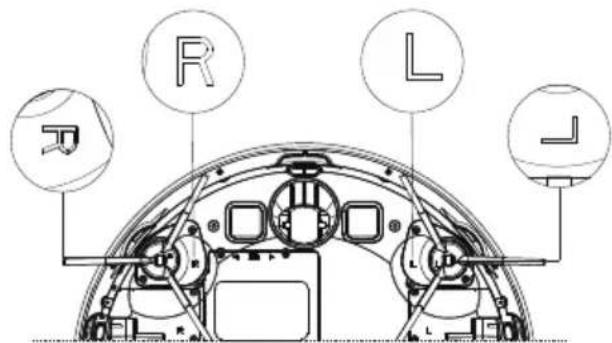
4.2 CHARGER STATION INSTALLATION
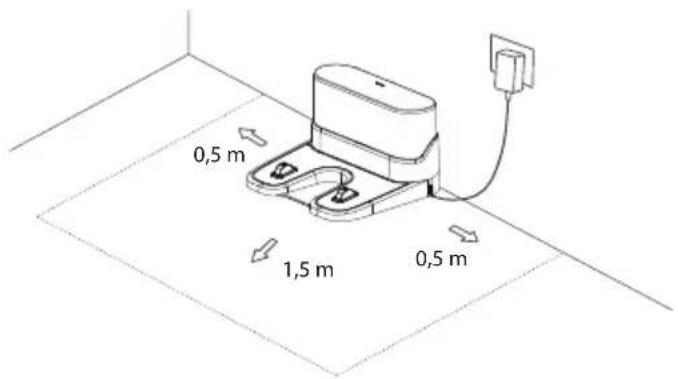
- Place the charging station on the floor. Make sure there is enough space on the sides of the base (at least 0.5 m) and in front of the base (at least 1.5 m). Don't expose the charging dock to sunshine.
- Connect the adapter to the charging station and then to the wall outlet. (the indicator lights up C1).
Insert the battery into the remote control, observe correct polarity (2 pieces, battery type AAA).
5.1 SWITCHING ON THE VACUUM CLEANER
- Switch the robot on with the A14 button to the ON (I) position.
- First, an audible signal sounds and the backlight of the A11 button lights up.
Note
- Until the vacuum cleaner is not switched on, it cannot be controlled by remote control.
- You can switch off the vacuum cleaner by pressing the A11 button for a longer time. To wake up the vacuum cleaner from this switched-off state, briefly press the A11 button. When not in use for a longer period of time, switch off the robot by pressing button A14.
5.2 BATTERY CHARGING
- Check that the charging station is properly connected to the mains. (light C1 must be on).
- Position the device near the charging dock and press A12 button on the device or E8 on the remote control. If the battery is too low, place directly and correctly the vacuum cleaner on the charging station.
Notes
- Standard charging time is approx. 4-5,5 hours. Fully charged battery will work for up to 145 minutes, depending on set functions.
- The operating time is based on ETA's internal testing and is only valid for a new and fully charged battery and low suction intensity. Depending on the age and wear of the battery, the operating time decreases.
• After cleaning, the vacuum cleaner will automatically search for the charging station.
WARNING
- If the robot vacuum will not be used for more than 2 days, we recommend full charging of the device and its switching off. To do this, remove the vacuum cleaner from the docking station (to disconnect the charging contacts) and switch the vacuum cleaner completely off using the A14 button to the OFF (O) position. Then you can disconnect the charging station from the mains. Do not return the robot vacuum back to the docking station! In this way, you prevent the battery of the device from being deeply discharged and avoid serious problems with putting the robot vacuum into operation in future and also unnecessary complaints.
5.3 START / STANDBY MODE / SLEEP MODE
Start (Cleaning)
Press A11 on the control panel or E1/E5/E6 buttons to start the device.
Standby mode (Pause)
Press the A11/A12 button on the control panel or the E1/E11 button on the remote control to interrupt the ongoing cleaning and put the vacuum cleaner in standby mode.
Sleep mode
If the vacuum cleaner is paused outside the charging station, it will go into sleep mode after 10 minutes of inactivity - exit by pressing one of the function buttons.
Note
The robot vacuum should start cleaning from the charging dock. Put the charging dock on a suitable place in accordance with the instructions.
5.4 CLEANING MODES AND DEVICE FUNCTIONS WITHOUT USING THE APP
Manual operation
You can operate the device manually using E2 direction buttons and clean only the areas where cleaning is necessary. Repeatedly press the E2 button to move the vacuum cleaner.
Automatic cleaning
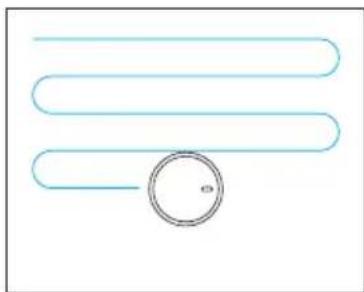
Press the A11 button on the control panel or the E1 button on the remote control. During cleaning, the vacuum cleaner moves gradually and systematically in the space. It divides the space into individual segments. Systematic movement is combined with various passes of the vacuum cleaner in the cleaned area, depending on the frequency of obstacles. As soon as the vacuum cleaner cleans the entire available space, it automatically searches for the charging station.
natural_image
Simple diagram of a coiled tube with a circular component at the bottom (no text or symbols)Local cleaning
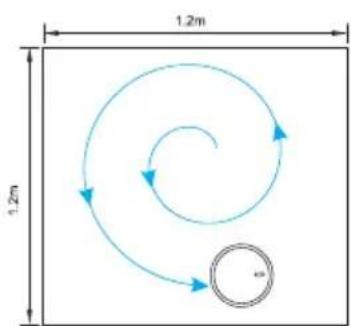
Press the E6 button on the remote control (or long press the A12 button). When cleaning, the vacuum cleaner moves in the space according to the programmed route. When cleaning has been completed, the device will return to the charging dock automatically. This cleaning mode is suitable for cleaning a small soiled area.
Edge mode
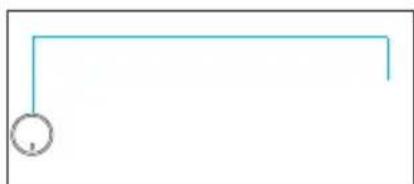
This mode is good for cleaning the edges and corners of a room. In edge cleaning mode, robot runs along a border (e.g. wall). Under this mode, the robot will go back to the charging base once cleaning finished. In order for the cleaning along the walls to proceed properly, remove unwanted objects (e.g.
natural_image
Simple line drawing of a pendulum with a circular head and horizontal line (no text or symbols)chairs, etc.) from the path of the vacuum cleaner. This will prevent the vacuum cleaner from getting stuck in one place.
Click the button E5 on remote control to start Edge mode.
Return to the charging station
The vacuum cleaner has the function of automatically returning to the charging station after cleaning. You can also send the device to the charging dock by pressing A12 on the control panel or E8 on the remote control.
Notes
- The app control allows you to activate another cleaning option - simple cleaning, where the robot does not move systematically.
- You can use the included magnetic tape G to limit the robot's movement. By placing it on the floor or under the carpet, for example, you create a virtual wall that the robot will not cross. This way you can demarcate individual rooms or sensitive areas of the home.
5.5 USING THE MOPING ATTACHMENT
- Attach the mop F1 correctly to the bottom of the mop attachment F. Wet and wring out the mop before use.
- Unscrew the rubber stopper on the opening B6 and fill the water tank B7 with water.
- Place the mop attachment F in place in the robot by sliding the attachment from the underside of the robot. Push the attachment slightly until it clicks into place. To remove the attachment, first press the release mechanism in the middle of the attachment and remove it in the opposite direction using moderate force.
- Switch on the device and select the required cleaning mode.
Notes
- Mopping, including wetting intensity adjustment, is activated by inserting the mopping attachment F.
- When mopping, we recommend cleaning the individual rooms.
- Do not use/pour any detergent in the mop water tank.
- When mopping, check the vacuum cleaner and add water to the container B7, if necessary, or rinse the mop.
- Do not use the mop attachment on carpets and prevent the vacuum cleaner from hitting the carpet.
- Remove and clean the moping attachment after use. Do not leave it installed on the vacuum cleaner while charging.
- Do not use remote mopping unless you are controlling the robot!
5.6 OVERVIEW OF LIGHT SIGNALS
| Light indicators | Display Status | |
| A11 button backlight | lit (white) standby / cleaning / charging complete | |
| slowly flashing (white) | charging | |
| lit (red) in pause mode / missing tray B or attachment F | ||
| flashing (red) occurrence of an error | ||
| A12 button backlight | flashing (red) search for charging station | |
| Indicator light A13 | lit Vacuum cleaner is connected to Wi-fi | |
| not lit Vacuum cleaner not connected to Wi-fi | ||
| flashing Vacuum cleaner is in Wi-fi connection mode | ||
6. APPLICATION ETA SMART
The vacuum cleaner can be operated in simplified mode using the buttons A11 and A12 or the remote control E (see above). Vacuum cleaner can be also controlled via app.
All other information, operating instructions of the app, instructions and hints for successful pairing with home network can be found at:
www.etasince1943.com/robot
The app is available from Apple Store or Google Play database (or use the following QR code for easy installation:

If QR code is not active, find the app manually (by its name).
7. VACUUM CLEANER MAINTENANCE
Carry out maintenance and cleaning regularly, depending on the frequency of use and the amount of cleaning. In a more polluted environment (a pet household), more frequent maintenance will be required. Failure to carry out maintenance may damage the vacuum cleaner and its components!
7.1 CHARGING CONTACTS CLEANING
Switch off the vacuum cleaner and disconnect the charging station from the power supply! Clean the charging contacts (A3, C3) on the vacuum cleaner and on the station with a soft dry cloth. Clean at least once a month. Do not use aggressive cleaning agents or oils to clean the contacts.
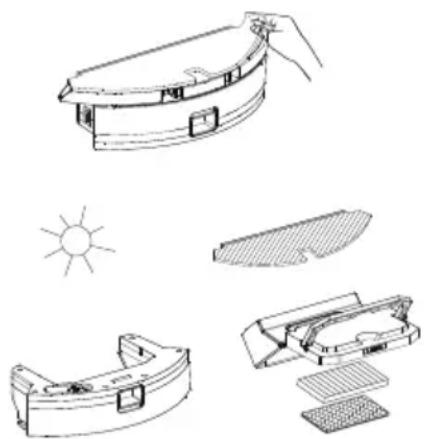
7.2 DIRT TANK AND FILTERS CLEANING
- Remove the entire dirt tray B from the vacuum cleaner. Then remove tray B8 from tray B7 and empty the dirt from it. Dispose of the dirt together with normal municipal waste.
- Clean the B7/B8 trays with a damp cloth.
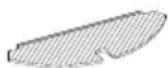
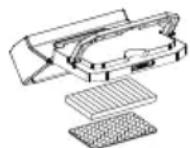
- Remove the filters from the B8 dirt tray. Gently blow or tap out the HEPA filter B4. Rinse the B5 foam filter under running water.
NOTICE
- For filters cleaning do not use aggressive detergents or cleaning agents or hot water.
- Dry cleaning is recommended to maintain HEPA filter parameters.
- If you choose to wash the HEPA filter with water, its filtering ability will be reduced.
- The maximum number of filter washes is 3x. Then it is necessary to buy a new one.
- It is recommended to change the HEPA filter at least twice a year.
- The filters are not intended for use in a dishwasher.
-
Cleaning failure and possibly filters replacing can lead to malfunction of the vacuum cleaner!
-
After maintenance and proper drying, fold up the dirt tray including the filters and put it back into the vacuum cleaner or store it in a suitable safe place.
natural_image
Illustration of a sunlit outdoor device with open lid, showing internal components and exterior view (no text or symbols)7.3 SIDE BRUSHES CLEANING
- Remove the two side brushes, clean them and remove the twisted hair / pet's hair).
- Observe side marks (L - left, P - right).
7.4 WHEELS CLEANING
Clean the front, left and right wheels.
NOTICE
Some hair / pet's hair may be wrapped around the wheel axes and other dirt may stick. Inspect and clean the wheels regularly.
7.5 SENSORS CLEANING
After completing each cleaning, clean the sensors with the included H-brush or a damp cloth.
7.6 MOP EXTENSION CLEANING
- Remove mop unit F from the device.
- Remove mop F1 from the mop unit. Drain excessive water from the tank B7. Rinse the tank with water. Rinse mop F1 in flowing water.
More extensive maintenance or maintenance requiring intervention in the inner parts of the appliance must be carried out by professional service! Failure to comply with the instructions of the manufacturer will lead to expiration of the right to repair!
The information regarding warranty and product repairs you can find on the website www.eta.cz/servis-eu.

8. PROBLEMS SOLUTIONS
A large part of the various problems can be solved or prevented by proper operation in accordance with the instructions in the manual. Above all, pay attention to proper maintenance and visual inspection of the vacuum cleaner. Always restart the entire vacuum cleaner to be sure and check the correct connection of the station to the electricity.
If some kind of error event occurs, the bot will notify you. Use the bot with an application that will make the error more specific in other languages as well.
9. TECHNICAL SPECIFICATION
| Robotic vacuum cleaner | |
| Appliance protection class III. | |
| Accumulator Li-Ion | |
| Battery savings 3200 mAh | |
| Charging time 4-5,5 hours | |
| Weight 2,7 kg | |
| Dimensions ∅ 325 mm x 75 mm | |
| Frequency range 2.4 GHz | |
| Output power (EIRP) 18,5 dBm | |
| Wireless technology | Wifi |
| Declared acoustic level is 60 dB(A) re 1pW. | |
Compatibility:
Smart device operational system - Android 6.0 and higher
- IOS 11.0 and higher
Wlfl network - 2.4 Ghz
- WPA1 and WPA2 security (recommended WPA2)
NOTICE
The device cannot be operated on IEEE 802.1X-secured Wifi networks (usually corporate Wifi networks).
| Charging adapter | |
| Device manufacturer's name or trademark,business registration number and address | ETA |
| AC adapter model identifier NLB060190W1U5S35 | |
| Input voltage 100-240 V (AC) | |
| Input frequency 50/60 Hz | |
| Output voltage 19 V (DC) | |
| Output current 0,6 A | |
| Output power 11,4 W | |
| Average efficiency in active mode ≥ 82.95 % | |
| Low load efficiency (10%) ≥ 70,83 % | |
| Power consumption without load 0,08 W | |
| Appliance protection class | II. |
| Charging station | |
| Appliance protection class | III. |
| Input voltage | 19 V (DC) |
Hereby, ETA a.s. declares that the radio equipment type ETA2218 is in compliance with Directive 2014/53/EU. The full text of the EU declaration of conformity is available at the ETA internet address.
The manufacturer reserves the right to change the technical specifications for the respective model. The manufacturer reserves the right to change/update the ETA SMART application without prior notice. Due to the character of such changes/updates, some information or procedures in this manual might become obsolete or might be missing.
The capacity of the product battery decreases over time. Decreasing of battery capacity occurs during normal use of the appliance and is considered usual wear and tear of the appliance. Decreasing battery capacity is not a defect of the appliance.
10. ENVIRONMENTAL PROTECTION
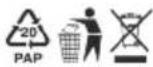
If the dimensions allow, there are labels of materials used for production of packing, components and accessories as well as their recycling on all parts. The symbols specified on the product or in the accompanying documentation mean that the used electrical or electronic products must not be disposed of together with municipal waste. For proper disposal of the product, hand it over at special collection places where it will be received free of charge. Suitable disposal of the product can help to maintain valuable natural resources and to prevent possible negative impacts on the environment and human health, which could be the possible consequences of improper waste disposal. Fines can be imposed for improper disposal of this type of waste in agreement with the national regulations. The appliance is equipped with the Li-lon battery with long life. For environmental protection it is necessary to remove the battery from the appliance after its service life and the battery and the appliance must be disposed of safely using special collection networks. Ask for more details at the local authority or at the local waste collection site. For environmental protection it is necessary to remove the battery from the appliance after its service life and the battery and the appliance must be disposed of safely using special collection networks. Ask for more details at the local authority or at the local waste collection site.
Battery removing
Remove the 4 battery compartment cover screws at the bottom of the vacuum cleaner. Remove the battery and unplug the connector. Remove the battery and unplug the connector. For unplugging the connector use more force for advantage of overcoming the safety fuse against spontaneous disconnection.
WARNINGS AND SYMBOLS USED ON THE APPLIANCE, PACKAGING OR IN THE INSTRUCTIONS MANUAL:
| HOUSEHOLD USE ONLY. DO NOT IMMERSE IN WATER OR OTHER LIQUIDS. | |
| KEEP OUT OF REACH OF CHILDREN. | |
 | TO AVOID DANGER OF SUFFOCATION, KEEP THIS PLASTIC BAG AWAY FROM BABIES AND CHILDREN. DO NOT USE THIS BAG IN CRIBS, BEDS, ARRIAGES OR PLAYPENS. THIS BAG IS NOT A TOY. |
 | |
 | Please read the instructions manual |
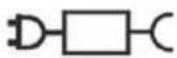 | Removable power supply unit |
| [WYYS] | WARNING |
natural_image
Simple diagram of a coiled tube with a circular component at the bottom (no text or symbols)Helyi tisztítás
natural_image
Simple line drawing of a pendulum with a circular head and horizontal line (no text or symbols)Megjegyzések
natural_image
Illustration of a sunlit outdoor device with open lid, showing exterior view and internal components (no text or symbols)8. PROBLÉMA-MEGOLDÁS
natural_image
Simple diagram of a coiled tube with a circular component, no text or symbols presentLokalne sprzątanie
natural_image
Simple line drawing of a circle connected by a horizontal line (no text or symbols)6. APLIKACJA ETA SMART
Uwagi
natural_image
Line drawings of a sunlit outdoor device with open case, shield, and grid panels (no text or symbols)7.3 CZYSZCZENIE SZCZOTEK BOCZNYCH
8. ROZWIAZYWANIE PROBLEMÓW
KEEP OUT OF REACH OF CHILDREN.
natural_image
Simple line drawing of a coiled tube with a circular component (no text or symbols)Lokale Reinigung
natural_image
Simple line drawing of a pendulum with a circular head and horizontal line (no text or symbols)natural_image
Line drawing of a hand holding a curved object with a small inset showing a rectangular component (no text or symbols)
7.4REINIGEN VON RÄDERN
8. PROBLEMELÖSEN
KEEP OUT OF REACH OF CHILDREN.


- CZ – ROBOTICKÝ VYSAVAČ 2 V 1 SE SMART APLIKACÍ
- SK – ROBOTICKÝ VYSÁVAČ 2 V 1 SO SMART APLIKÁCIOU
- EN – ROBOT VACUUM CLEANER 2 IN 1 WITH SMART APPLICATION
- HU – ROBOT PORSZÍVÓ 2 AZ 1-BEN INTELLIGENS ALKALMAZÁSSAL
- PL - ODKURZACZ AUTOMATYCZNY 2 W 1 Z APLIKACJA SMART
- DE - STAUBSAUGERROBOTER 2 IN 1 MIT SMART-APP
- Lokální úklid
- Úklid podél stěn
- APLIKACE ETA SMART
- Poznámky
- ČIŠTĚNÍ POSTRANNÍCH KARTÁČKŮ
- ŘEŠENÍ PROBLÉMŮ
- Lokálne upratovanie
- ČISTENIE POSTRANNÝCH KIEF
- RIEŠENIE PROBLÉMOV
- eta
- 2218
- Ergo
- INSTRUCTIONS FOR USE
- GENERAL SAFETY INSTRUCTIONS
- Wireless connection and compatibility
- APPLICABILITY
- PRODUCT COMPONENTS
- PACKAGE CONTENTS
- ROBOTIC VACUUM CLEANER
- A – Robotic vacuum cleaner
- B – Dust bin 2in1
- DUSTBIN 2IN1
- CHARGER STATION
- C - Charger station
- REMOTE CONTROL
- E - Remote control
- Remote control notes
- Charging
- Inserting / replacing batteries
- MOP EXTENSION
- F – Watter tank
- PREPARATION FOR USE
- VACUUM CLEANER PREPARATION
- CHARGER STATION INSTALLATION
- SWITCHING ON THE VACUUM CLEANER
- Note
- BATTERY CHARGING
- Notes
- WARNING
- START / STANDBY MODE / SLEEP MODE
- Start (Cleaning)
- Standby mode (Pause)
- Sleep mode
- CLEANING MODES AND DEVICE FUNCTIONS WITHOUT USING THE APP
- Manual operation
- Automatic cleaning
- Local cleaning
- Edge mode
- Return to the charging station
- USING THE MOPING ATTACHMENT
- OVERVIEW OF LIGHT SIGNALS
- APPLICATION ETA SMART
- www.etasince1943.com/robot
- VACUUM CLEANER MAINTENANCE
- CHARGING CONTACTS CLEANING
- DIRT TANK AND FILTERS CLEANING
- NOTICE
- SIDE BRUSHES CLEANING
- WHEELS CLEANING
- SENSORS CLEANING
- MOP EXTENSION CLEANING
- PROBLEMS SOLUTIONS
- TECHNICAL SPECIFICATION
- Compatibility:
- ENVIRONMENTAL PROTECTION
- Battery removing
- Helyi tisztítás
- PROBLÉMA-MEGOLDÁS
- Lokalne sprzątanie
- APLIKACJA ETA SMART
- CZYSZCZENIE SZCZOTEK BOCZNYCH
- ROZWIAZYWANIE PROBLEMÓW
- Lokale Reinigung
- 7.4REINIGEN VON RÄDERN
- PROBLEMELÖSEN
Brand : Eta
Model : Ergo
Category : Blender