
Myon - Electric bike SEGWAY - Free user manual and instructions
Find the device manual for free Myon SEGWAY in PDF.

| Brand | Segway |
| Model | Myon (Ninebot Myon) |
| Product Type | Electric bike (E-bike), Class 2 |
| Dimensions (L × W × H) | 1880 × 680 × 1160 mm |
| Net Weight | 33 kg |
| Frame | Aluminum alloy, low step-through |
| Motor | Hub motor, nominal power 500 W |
| Battery | Lithium, 46.8 V, 722 Wh, 15.42 Ah |
| Charger | Model NBW54D601D3D01, 100-240 V, 50-60 Hz |
| Charging Time | Approximately 5 hours |
| Maximum Speed | 32 km/h (legal limit) |
| Range | Up to 127 km (20% assist) / 71 km (100% assist) |
| Tires | 27.5 × 2.0 inches or 27.5 × 1.95 inches, pneumatic |
| Brakes | Front and rear hydraulic disc brakes |
| Transmission | 9 speeds (electronic shifter), chain |
| Display | TFT laminated glass, color |
| Connectivity | Bluetooth, Apple Find My, Segway Mobility app |
| Smart Features | AirLock, Sentinel mode, gesture detection, radar (optional) |
| Lighting | Headlight (DRL), taillight, turn signals |
| Maximum Load | Rider: 120 kg; total vehicle: 135 kg |
| Recommended Age and Height | 18-60 years; height 160-195 cm |
| Operating Temperature | 0°C to 40°C |
| Protection | IPX5 |
| Maintenance | Check tire pressure, brakes, chain and lubrication regularly |
| Warranty | Limited warranty (details online) |
Frequently Asked Questions - Myon SEGWAY
User questions about Myon SEGWAY
0 question about this device. Answer the ones you know or ask your own.
Ask a new question about this device
Download the instructions for your Electric bike in PDF format for free! Find your manual Myon - SEGWAY and take your electronic device back in hand. On this page are published all the documents necessary for the use of your device. Myon by SEGWAY.
USER MANUAL Myon SEGWAY
EN Please scan the QR code below or visit: https://service(segway.com/us-en/ to access versions of additional languages (available in English, Spanish, Chinese, Russian, Yiddish, Bangla, Korean, Haitian Creole, Italian, Arabic, Polish, French and Urdu) about important safety information related to battery charging, storage, maintenance, and more.
EN The pictures shown are for illustration purposes only. The actual product or app interface may vary.
Installation Instructions
Operating Instructions
Mode d'emploi
Mode d'emploi
HCTpykuaI NO 3KcNlyatauIN
操作說明
26
How to Charge
Comment charger
como@cargar
KaK BbIIOHЯTb 3apAdky
充電方法
28
How to Ride
Comment rouler
Cómo conducir
Ezda Ha cAmokate
骑行方法
37
Intelligent Functions
Warnings (Risk of Injury and/or Accidents)
User Maintenance Instructions
Recommended Maintenance Schedule
Screw Specifications and Torque Value
Trademark and Certifications
Marque et certifications
Marcas commerciales y certifications
ToBapHbIe 3HaKn I cepTuΦuKaTbI
商標與認證
135
Welcome / Bienvenue / Le dangos la bienvenida / Добpo по Каловать / 歉迎
EN Thank you for choosing Segway E-bike Ninebot Myon. This product is an eBike which is a two wheeled electrical/mechanical device provided with functional pedals that includes one motor to either assist the rider when pedaling (EPAC versions) or provide motive power to the wheels directly by pressing throttle when the rider is not pedaling.
Segway E-bike Ninebot Myon is easy to operate, safe and comfortable to ride.
EN Limited Warranty and Arbitration Agreement
(Available online for the details and access, please read Important Information)
Page: [04-05])
EN Product App: The App contains additional and/or supplemental warnings, safety information, and product/functions/ features instructions and warnings. App will provide firmware/the like update information. App may provide notice about product and safety. Information in App may be updated from time to time, please always check latest information for your safety and enjoyment of product.
More safety and product information online. Please visit https://service.segway.com/us-en/ for more information about services, maintenance, self-repair, safety & warnings and other important product related information. (how to find information for your product: visit the website, select the icon for your product's model series, and then choose your specific product model, this will open a dedicated page where you can access product and safety related information applicable to your product.). Information online may be updated / revised from time to time, please always check latest information for your safety and enjoyment of product
If you have any question about your product and/or safety, or you cannot find any document / information available online, please contact our customer service team.
| NO. Name Specifications Qty. | |
| ① | 5# Allen Wrench 3/16" (5.0 mm) 1 |
| ② | 4# Allen Wrench 5/32" (4.0 mm) 1 |
| ③ | 3# Allen Wrench 1/8" (3.0 mm) 1 |
| ④ | 2.5# Allen Wrench 3/32" (2.5 mm) 1 |
| ⑤ | Torx Key Wrench T25 |
| ⑥ | Cross Driver Ph1 |
| ⑦ | 6# Allen Wrench 1/4" (6.0 mm) 1 |
| ⑧ | 8# Allen Socket Wrench 5/16" (8.0 mm) 1 |
EN Pedal Wrench × 1
| NO. | Specifications |
| ⑨ | 0.56" (14.0 mm) |
| ⑩ | 0.6" (15.0 mm) |
| ⑪ | 0.87" (22.0 mm) |
| N° | Caracteristiques techniques |
| 9 | 14,0 mm (0.56") |
| 10 | 15,0 mm (0.6") |
| 11 | 22,0 mm (0.87") |
| Canti-dad |
| 1 |
| 1 |
| 1 |
| 1 |
| 1 |
| 1 |
ES Llave de pedal × 1
EN DRL (Daytime Running Lamp)
EN Battery Compartment Keyhole
FR Trou de serrure du compartment
de la batterie
EN Battery Compartment
| NO. Items | Basic Operation and Function | |
| ① | Horn Button Press to use horn. | |
| ② | Power Button At a complete stop | p, press and hold to power on/off E-Bike. |
| ③ | Multi-media Button | Press left or right button to switch display pages. Press up or down button to read or select the information of the pages. Press mid button to confirm the selection. |
| ④ | Radar Indicator (Radar is sold separately) | After enabling radar function via Segway Mobility App, the indicators will light up when the radar detects that any vehicle has entered blind spot and may collide with your E-bike. |
| ⑤ | Turn Signal Button Press once to | turn on the turn signal and press again to turn off it. |
| ⑥ | Display Display basic info of E-Bike | ke, Music Play Center, Control Center, etc. |
| ⑦ | Accessory Button | The default function is Push Assist button: At a complete stop, press and hold for 1 second to enter Push Assist mode, in which the max. speed is 3.7 mph (6 km/h). Press the button again to exit Push Assist mode. You can customize the function of the button via Segway Mobility App. (OTA) |
| ⑧ | Headlight Button | The headlight enters Auto mode every time the E-bike is powered on and it will be turned on/off according to environmental brightness, then press the button once to enter On mode, and press it again to enter Off mode. Press and hold the button for 500 ms to enter Auto mode. |
| NO. Items | Basic Operation and Function | |
| ⑨ | E-Shifter Button | When riding, toggle the button upward once to shift to a harder gear and toggle the button downward once to shift to an easier gear. (Totally 9 gears available) |
| ⑩ | Assisting-power Button | When riding, press "+" and "-" button to adjust assisting power. The adjustment mode of assist power can be set via Segway Mobility App. |
| ⑪ | Throttle Press throttle to speed up. | |
| ⑫ | Bell Press bell button to speed up. | |
FR
EN Please scan the QR Code to see detailed installation video of the E-bike.
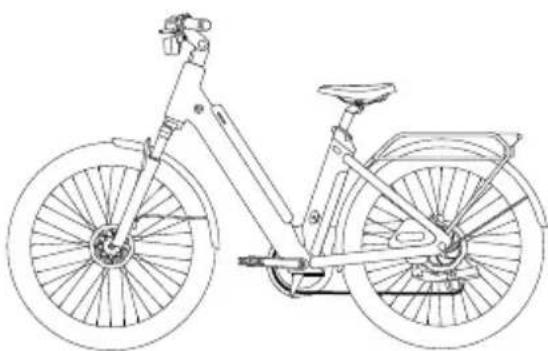
Segway E-bike Ninebot Myon is an ebike with a Step-Thru frame. Therefore, standover height measurement is no longer applicable. The limiting dimension is determined by the saddle height range. You must be able to adjust your saddle position as described in "Adjust the Saddle Height" without exceeding the minimum insertion marking on the seatpost.
EN Charge your E-bike for 3 seconds to wake up the vehicle, then press and hold the power button to power it on.
EN Scan the QR code displayed on the screen by Segway Mobility App after powering on, and complete the activation in accordance with the instructions.
EN *Set a 4-digit unlocking code during the activation, and AirLock will be turned on automatically after completing the code setting. AirLock can be turned off separately via Segway Mobility App.
EN Insert a key into the keyhole on the left side of the frame, and twist counterclockwise to open and remove the battery compartment cover.
EN Take out the battery by pulling the handle.
EN Open the rubber charging port cover of the battery, and connect it to charger.
EN *The charger indicator is red and the charging status will be shown on the display when charging is in progress. The indicator is green when charging is completed.
EN *Low battery level notification will be displayed on the dashboard when the battery level is lower than 10% and 5%.
E-bike's driving power will be reduced apparently when the battery level is low. Please charge the vehicle in time when you see the low battery level notification.
If battery level runs out when E-bike is powered on: E-bike will lose all driving power with the dashboard lit up for a while. E-bike will not be locked.
If battery level runs out when E-bike is powered off: E-bike can not be powered on, and it will be locked until it is charged and powered on.
EN DO NOT charge if the charging port or the charging plug is wet.
IMPORTANT SAFETY INSTRUCTIONS
WARNING-When using this product, basic precautions should always be followed, including the following:
1) Before using the product, read all the instructions (including the information in the App and online) and please pay special attention to safety related information.
2) To reduce the risk of injury, close supervision is necessary when the product is used near children.
3) Do not put fingers or hands into the product.
4) Do not use this product if the flexible power cord or output cable is frayed, has broken insulation, or any other signs of damage.
5) This equipment is not intended to be used at ambient temperatures less than 32^ (0^) or above ambient temperatures of 104^ (40^) .
6) The battery is intended to be charged when the ambient temperature is between 32^ (0^) and 104^ (40^) . Never charge the battery when ambient temperatures are outside this range.
7) Do not charge the battery, and immediately stop charging or using the product if any of the following occurs: 1) the battery becomes overheated or abnormally hot; 2) the battery leaks; and/or 3) there is a strange odor or noise associated with the battery. Please contact Segway customer service for assistance. DO NOT attempt to resolve the issue by yourself.
8) You must stop riding and contact after-sales service at once whenever you find any battery abnormality, including but not limited to overheats, leaks, strange odor, abnormal noise, a change in shape or color.
9) Before every use, please ensure product safety by verifying all major functions—such as brakes, throttle, and acceleration—are operating correctly. Check that all connections and fasteners are securely tightened or locked. Confirm there are no loose, shaking parts or any other product abnormalities. Please always check brakes before use.
10) To reduce risk related to product failure, please maintain and repair the product as necessary.
11) If you have any question about the product and/or safety, please immediately stop using the product, and seek for professional help or services or contact Segway.
SAVE THESE INSTRUCTIONS
FR
* INSTRUCTIONS DE SECURITE IMPORTANTSECONSERVEZ CES INSTRUCTIONS
CONSIGNES DE SECURITE IMPORTANTES
I PEPENPPEKDEHNE. Prn nCnoB3OBaHN 3TOrO n3deJna o6aTeNbHO c6bIaTe OCHOBhBe MepbI IpeoCTOPOXHOCTN, B TOM uNcNe CLeDyUOuNE:
1)IpeenncnoB3oBaHnem npOyKta npOuyTe Bce IHCTpyKuIN (BKJIOUa HhOpMaunio B npInoxeHN INHTepHete ) nO6paTnte oc06oe BHMAmHe Na HhOpMaunio, CBraAHHyC 6e3OnaChocTBIO .
2)YTo6bI CHN3NTb PNCK NOLyHeHn TpaBM, Heo6xoJIMo CO6JIaTb OcO6yIO OCTOpXHOCTb npi NCNoB3OBAHm n3deHn pRdOM C DeTBM.
3) 3anpeaetcnoMeaTaB naIbUbl nyuB n3deJIne.
4) 3anpeaetcnaonb3oBaTb n3deHne,ecn r6kni shHyp nHTaHnI bixOJHO Ka6eJIb n3HOWeH , IMeET nobpeKd eHHyIO
I3OJIaIIO IIN dpyrne npn3HaKn NOBpeKdEHHa.
5) 3To 6opuydoBaHne He nppeHa3NaueHo IJn IcnoIb3OBAHn npu TeMnpaTypax OkpykaIoJe cpebl Hxke 0^ (32^) nII Bblwe 40^ (104^) .
6) BaTapeo cIeNyET 3apJxKaTb npi TempeaType okpykaiouei cpebl ot 0^ (32^) do 40^ (104^) . 3anpeaetc 3a pJxKaTb bataeIO, ecln TempeaTypa okpykaiouei cpebl BbIXOInT 3a npeJeBt OTO daNaanaOHa.
7) He 3apjkaTe 6bapeo u HemeJeHNO ppeKpTaTe 3apjky u nn nCnoB3ObaHne u3dEynr, ecn npou3oJet NIO6oe u3 cNe dyUoIeero : 1) 6bapea neperepeBaetc u nn CTaHOBUTc aHOMaJIbHO rOpraey ; 2) 6bapea npoteKaet ; u /nnu 3) noR BnaTcR cTpaHHb3 zanax u nn wum co cToPOhbl 6bapeu . CBxNtEcB co cnXkBo nOndepkKn Segway drr noIyueHn P OMOu . HE nbTaTecb peuHb npo6JeMy camocToTeJIbHo .
8) CneIyET HemeIeHNO ppeKpATnTB noe3dky u CBa3aTbC C OTJeLOm nocIeNPOdaJxHOrO 6cbNyJXuBaHn, ecIn o6hApnyKeIIO6yU aHOMaJIINo B 6aTaapee, BkJIIOUcA, cpei npOeRo, nepepeB, yTeuKn, cTpaHHbI 3aIax, aHOMaJIbHbI Wym, I3MeHHe NOpMbI INI UCBeta .
9) Npeed kaxdbim nCnoB3OBAHnem y6eDntecb B 6e30nacHOt n3dEInna , npOBepNB npaBnIbHocTb pa6oTbI BCEX OCHOB HbIX fYHKUIN , TAKNX KAK TOPMo3a , dPocceNb U YckOpEnHe . Y6eDntecb , UTO BCE coeDnHeHHu IN KpeENXHbIE 3neMeHTb I aDeJHX 3aTAYbI uIN 3aΦnKcnpoBaHbI . Y6eDntecb B OTCyTCTBn H3aKpEnHeHbIX , pa36oNTaHHbIX DeTaJIe INI INpyrN X OTKNoHEHn B IN3dEInn . Bcerda npOBepRte TopMo3a Npeed nCnoB3OBAHnem .
10) UTo6bI cHn3ntb pUcK, CByaHHbI c NOnOMKO u3JeLna, o6CnyXuBaIte n peMOHTpyTe erO no Mepe Heo6xoDmocT.
11) Ecn y Bac Bo3nKnn KaKne - n6o BOpocbI OTHocTeBHO n/ nn 6eOnaChOCTn, HemeJeHHo ppeKpaTnt e nCnoB3OBAHnE n3deJn o6paTNTecb 3a npoeeccnHaBHO nOMouHIO nn ycnyramn nn CBxNTEcB c KOMNaHne Segway.
COXPAHNTE 3TN INHCTPYKUN
漢
* 火災或觸電風險的相關指示
重要安全指示
EN Please maintain your E-Bike properly so as to prolong its serving life and achieve stable and safe riding. Segway suggests you do pre-riding and post-riding check regularly and read the Recommended Maintenance Schedule.
Warning: failure to follow the foregoing recommendation increase risk of injury and incident.
| Tasks Tools Operations | ||
| Check Tire Pressure | Tire Pressure Gauge | Check whether tire pressure is within the range specified by the manufacturer. The tire pressure range is marked on the sidewall of tire. You shall inflate or deflate tire when necessary. |
| Check Braking System | N/A | Squeeze the left brake lever when pushing E-bike forward and the E-bike has to be stopped immediately. Do the same operations to the right brake lever. |
| Check Handlebar N/A | Squeeze the left brake lever then push E-bike forward or backward. Thr screws connecting the handlebar to the fork shall be tightened. Please tighten the screws there and test by the method mentioned above when necessary. | |
| Clean and Lubricate Chain | Chain Lubricant and Clean Cloth | It is suggested to clean the dirt on the chain with a brush first. Then grasp the chain between cassette and chainwheel & crankset with a clean cloth and rotate the pedal counterclockwise for several rounds to clean dirt. You'd better lubricate the chain with high-quality E-bike lubricant. |
| Check Wheel N/A | Check whether every screw on the wheels is tightened and both wheels shall not be shaken. | |
| Check Battery Level | N/A | Power on E-bike and make sure its battery level is sufficient enough for your trip. |
EN Wear helmet and protected gear, fold kickstand and press and hold power button to power on.
EN Get on the E-bike saddle and squeeze any brake lever once (or pedal E-bike forward until the speed exceeds 3.7 mph (6 km/h)) to exit Park Mode.
EN Grasp the handlebar and pedal (under pedal assistance model) or lightly press throttle (under throttle assistance model) to go forward.
EN Pay attention to surrounding vehicles and slowly swing handlebar to turn left or right.
EN Release throttle / stop pedaling (as applicable) and squeeze brake(s) to decelerate and/or stop.
EN Pay attention to surrounding vehicles and keep balance. Temperature limits for E-bike use and storage: -4-122°F (-20-50°C)
EN Do not do hard braking at a fast speed in case of overturning.
EN When riding, press "+" and "-" button to adjust assisting power. The assisting mode can be set via Segway Mobility App.
EN *The higher the level of the assisting power is, the more assisting power the motor will output under the same riding conditions.
EN *If you shift the E-shifter to an appropriate riding gear, the higher the level of the assisting power is, the easier the E-bike is to ride.
EN *When riding or starting up, you shall not ride with a relatively lower gear of the E-shifter (for example, the E-shifter is at gear 1 or 2) and a relatively higher level of the assisting power together, or it is easy for you to encounter pedal slip, which may cause safety risk; If you ride with a relatively higher gear of the E-shifter (for example, the E-shifter is at gear 7 or 8) and a relatively higher level of the assisting power together, you E-bike will come to a fast speed in a short time. When the E-bike's speed reaches the max. speed limited by local law (20 mph for Class 20, and 28 mph for Class 3), the assisting power of the E-bike will cut off, and then you will feel a noticeable deceleration. Please control your E-bike carefully.
EN When riding the E-bike, press the E-shifter button up (+) or down (-) to shift the gears. Press up to shift to a more strenuous gear and down to an easier one (a total of 9 gears available).
EN *It is suggested that you operate the E-shifter only when you are pedaling forward. The E-shifter can only shift up or down for one gear if the speed of the E-bike is slower than 3.7 mph (6 km/h). It is not recommended to operate the E-shifter if the battery level is low (lower than 5%). You shall shift to an appropriate gear (gear 4, 5 or 6) at once if you've got a notification of low battery level, because you will not be able to shift gear via the E-shifter when the E-bike's battery level runs out.
EN When utilizing power assist, engaging a higher gear will cause pedaling to become more strenuous, whereas a lower gear reduces pedaling effort. Gears should be selected appropriately in accordance with prevailing road conditions.
EN At a complete stop, press and hold for 1 second to enter Push Assist mode (the default function of the accessory button is to enter Push Assist Mode). Press the button again to exit Push Assist mode, or you cannot ride the E-bike as normal.
EN When riding forward, once the millimeter-wave radar detects that a vehicle has entered the blind spot behind the left or right side of the E-bike, the E-bike will issue audible and visual alerts.
EN You can enable Rear Collision Warning (RCW) manually in the Radar Function in the Segway Mobility App. After enabling it, when riding forward, once the millimeter-wave radar detects that a vehicle is approaching fast from behind, the E-bike will issue audible and visual alerts, and the dashboard will prompt a notification with the warning "Watch out for fast-approaching vehicles from behind".
EN The Radar function will assist your riding and reduce risk of accident. However, due to environment complexity, weather conditions (such as fog, snow etc), and limitations on this function (such as its impaired / inability to detect certain wave-absorbing materials or non-metallic objects), it cannot eliminate all risks and it may not alert you all risks. Please always pay attention to your surroundings while riding and check your blind sport before merging onto another lane.
EN *After parking your E-bike, please push vehicle forward or backward until it cannot be pushed any more to ensure the hub lock is locked. Hub lock is enabled by default and can be disabled via Segway Mobility App.
EN Please maintain your E-Bike properly so as to prolong its serving life and achieve stable and safe riding. Segway suggests you do pre-riding and post-riding check regularly and read the Recommended Maintenance Schedule.
| Tasks Tools Operations | ||
| Check Tires and Wheels | Tire Pressure Gauge | Check for any debris, damage or crack. |
| Check Shifter and Cassette | N/A | Lift the rear wheel up, rotate the pedal by hand and use the shifter to change gear at the same time. E-bike shall change the gear quickly. Check the shifter for any debris that may have leaked out. |
| Clean Frame and Front Suspension | Clean and Wet Cloth | Clean the E-bike's frame and front suspensionby a clean cloth and check for any damage or crack at the same time. |
| Clean Chain Clean Cloth | It is suggested to clean the dirt on the chain with a brush first. Then grasp the chain between cassette and chainwheel & crankset with a clean cloth and rotate the pedal counterclockwise for several rounds to clean dirt. You'd better lubricate the chain with high-quality E-bike lubricant. | |
| Check Pedals N/A Pedal E-Bike once and ch | check for crack. | |
| Wheel Flatness | N/A | Rotate the wheels one by one and check for any shake at the same time. |
| Charge Battery Charger | Charge the E-bike in time and make sure its battery level is sufficient enough for your trip. | |
EN After switching to Music Play Center page, user can play/pause and select previous/next song by pressing the multi-media button.
EN Incoming Call Notification is enabled by default, the number of the incoming call will be displayed on the display, with a incoming bell sent out by horn.
EN User can mute or hang up the call in accordance with the instructions displayed on the display.
EN Enable Quiet Mode in the Control Center, then the E-bike will power off in 5 seconds and enter Quiet Mode. Sentry Mode, AirLock and Gesture Detection will also be unavailable in this mode.
EN You can exit Quiet Mode by pressing and holding the power button after lighting up the dashboard.
EN *It is recommended to enter Quiet Mode when repairing or shipping the E-bike.
EN Enable the AirLock function through Segway Mobility App. Keep phone's Bluetooth on and bring it close to the vehicle. The Bluetooth icon on the dashboard will light up automatically, and you can then power on the vehicle and ride away.
EN You can also enable Gesture Detection. With it enabled, when you keep phone's Bluetooth on and bring it close to the vehicle, the vehicle will be unlocked automatically after you right the vehicle.
EN Set a unlock password via Segway Mobility App. Then power on the vehicle, and press the multi-media button upward and downward to enter password and confirm each password entered by pressing the mid button. Vehicle will power on automatically after entering correct password.
EN After binding your E-bike successfully to Segway Mobility App, you can unlock the vehicle remotely by operating "Slide to Unlock" on the homepage of Segway Mobility App, then power on the vehicle in 15 seconds.
EN More intelligent functions are under development, please stay tuned.
EN Launch Find My app on an iPhone or iPad, Tap + then tap Add Other Item ^+ . Power on the vehicle, and pair vehicle (unlocked) with Apple Find My by squeezing the brake lever three times, pressing the power button once, then choosing the vehicle in the Find My app and following the on-screen instructions to pair it with Find My.
EN Connect vehicle with Segway Mobility App, and disable Find My via at homepage > More Functions > Ninebot Laboratory > Locating vehicle (Beta version) > Disable, then manually remove your vehicle from Find My app.
EN After powering on the vehicle, owner can complete RESET by squeezing brake lever by 5 times and pressing power button once in unlocked status, then manually remove your vehicle from Find My app. After these steps, the owner can not use Find My to find this vehicle.
EN A E-bike can be connected to a maximum of 3 iOS devices (with same account).
EN Owner can enable & disable Find My Beacon by squeezing brake lever by 9 times and pressing power button once in unlocked status (position information).
EN Any iOS user can connect to the vehicle by Apple Find My app, and then check vehicle's S/N by squeezing brake lever for 8 times and pressing power button once. The S/N will display on the Apple Find My app.
Nearby Status and Separated Status / Statut Nearby et statut Separated / Estado Nearby y estado Separated / * CtaTycb1 Nearby u Separated / Nearby 矛態與 Separated 畸態

EN If the vehicle has been paired with Find My, when the owner leaves away from the vehicle or turns off the Bluetooth of his or her mobile device after a riding, the vehicle will automatically enter Nearby status after a short period of time. After a long period of time, the vehicle will enter Separated status. When owner gets close to the vehicle with the mobile device, the Bluetooth of the device will automatically connect with the vehicle and the vehicle will enter Connected status. If the vehicle is in Separated status, non-owner can connect to this vehicle via Find My app, and use the method mentioned above to check the SN. Owners can still use Find My to find the vehicle.
- Only users of Apple devices need to read this Apple Find My app instruction.
Use of the Works with Apple badge means that a product has been designed to work specifically with the technology identified in the badge and has been certified by the product manufacturer to meet Apple Find My network product specifications and requirements. Apple is not responsible for the operation of this device or use of this product or its compliance with safety and regulatory standards.
App Store, Apple Logo, Apple, Apple Find My, Apple Watch, Find My, iPhone, iPad, iPadOS, Mac, macOS and watchOS are trademarks of Apple Inc. IOS is a trademark of Cisco and is used under license.
FR
EN Take extra precautions when riding in the dark.
dONHHTeHbIe MepblpeIOCTOpOXHOCTN.
漢在黑暗中騎乘時,請多加注意。
!
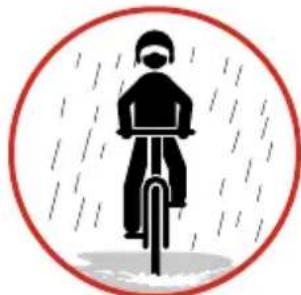
EN Slow down and be mindful in wet weather.
RU He TporaTe TopMo3Hoi DnCK NnMOTop-KoJIeCo nocJe Noe3dkn.
漢騎乘後,切勿碰觸碟煞或輪毂電機。
!
EN Vigilance is crucial, especially on rough roads.
EN Do not turn sharply.
EN Only use genuine charger which model is NBW54D601D3D01 and parts from Segway-Ninebot in case of safety risks.
EN You HAVE TO disable Hub Lock in app and power E-bike off before turning it upside down. Check E-bike's battery level, tire pressure, main parts and functions regularly.
EN Tampering with the system is strictly prohibited. Do not modify or attempt to repair the E-bike system except as indicated in the instructions for use and care.
EN Please use additional accessory lights and reflectors (as reasonably necessary) to ensure you are visible to others and vehicles.
EN DO NOT carry passengers on this E-bike.
| Item Parameters | ||
| Product Info | Name Segway E-bike Ninebot | Myon |
| Model 210301U | ||
| Product Type E-Bike (Class 2 | Standard) | |
| L × W × H | Approx. 74 × 26.8 × 45.7 in (1880 × 680 × 1160 mm) | |
| Net Weight Approx. 72.8 lbs (3 | 3 kg) | |
| Riding Requirements | Max. Rider Weight Approx. 265 | lbs (120 kg) |
| Recommended Age 18-60 y | years old | |
| Required Height 5'3" - 6'4" (16 | 0-195 cm) | |
| Vehicle Performance | Max. Speed [1] | Close to, but less than 20 mph (32 km/h) (Class 2 Standard) |
| Range at Max. Speed [2] | Approx. 44 miles (71 km) | |
| Range at 12.4 mph (20 km/h) [3] | Approx. 64 miles (103 km) | |
| Ranges with Power-assisting [4] | Approx. 79 miles (127 km) (20% Power Assisting) Approx. 73 miles (117.5 km) (50% Power Assisting) Approx. 71 miles (114 km) (100% Power Assisting) | |
| Traversable Terrain Park, con | mmunity, most flat roads or normal asphalt and tarmac roads | |
| Max. Slope | 21% | |
| Operating Temperature | 32-104 °F (0-40°C) | |
| Ambient Temperature For Storage | -4-122 °F (-20-50°C) | |
| IP Rating | IPX5 | |
| Charging Duration | Approx. 5h | |
| Rear Carrier Max. Payload | Approx. 55.1 lbs (25 kg) | |
| Vehicle Max. Payload | Approx. 135 kg (300 lbs) | |
| Battery Pack | Battery Type Lithium Battery | |
| Nominal Voltage 46.8 V | ||
| Nominal Energy 722 Wh | ||
| Nominal Capacity 15.42 Ah | ||
| Charging Ambient Temperature | 32-104 °F (0-40°C) | |
| Motor | Motor Type Hub Motor | |
| Nominal Power 500 W | ||
| Charger | Input Voltage 100-240 V~50 | -60 Hz |
| Max. Output Voltage 54.6 V | ||
| Nominal Output 53.6 V | = 1.3 A | |
| Rated Output Power 70 W | ||
| Tire | Tire Type | 27.5 × 2.0-inch Pneumatic Tires × 2 / 27.5 × 1.95-inch Pneumatic Tires × 2 |
| Others | Display Type Fully-laminated Glass TFT Display | |
| Frame Material Aluminum Alloy | ||
| Fender Material Plastic | ||
| Brake System | Hydraulic Disc Brakes | |
[1] Class 2 Standard: The Class 2 E-Bike is equipped with a throttle which provides a boost without pedaling, and stops assisting at 20mph (32 km/h).
[2] Range at Max. Speed: Calculated in accordance with the power consumption per ten kilometers without power assisting, with a full battery, 165 ± 11 lbs ( 75 ± 5 kg) load, 77 ± 9^ F ( 25 ± 5^ C), at the max. speed on average on pavement.
[3] Range at 12.4 mph (20 km/h): Calculated in accordance with the power consumption per ten kilometers without power assisting, with a full battery, 165 ± 11 lbs (75 ± 5 kg) load, 77 ± 9^ F (25 ± 5°C), at the speed of 12.4 mph (20 km/h) on average on pavement.
[4] Ranges with Power-assisting: Calculated in accordance with the power consumption per ten kilometers with power assisting 20% , 50% and 100% respectively, with a full battery, 165 ± 11 lbs ( 75 ± 5 kg) load, 77 ± 9^ F ( 25 ± 5^ C), at the speed of 12.4 mph ( 20 km/h).
FR
Please visit https://service segway.com/us-en/ for more information about services, maintenance, self-repair, safety & warnings, and other important product-related information. (How to find information for your product: visit the website, select the icon for your product's model series, and then choose your specific product model. This will open a dedicated page where you can access product and safety-related information applicable to your product.). Information online may be updated/revised from time to time. Please always check the latest information for your safety and enjoyment of the product. If you have any questions about your product and/or safety, or you cannot find any document/information available online, please contact our customer service team.
Items Operations
Braking System
Maintenance Instructions
Oil-hydraulic Disc Brakes are equipped in E-bike, and it is recommended to check the position of brake caliper and the tension of braking lever monthly.
If you hear abnormal noises caused by disc rubbing, you can loosen the two screws of caliper with 5 mm Allen wrench and adjust the space between braking discs and calipers until there is no abnormal noise.
If you find weak braking lever tension, you need to loosen the screws in oil filling hole of braking lever with 2.5mm plum wrench, and add braking oil with a set of oil transfer tools (purchase it seperately) by yourself. You have to add mineral braking oil. Please squeeze the braking lever and flick the brake line when adding the braking oil, and you also need to check for any bubble in the progress. Add oil until there is no bubble any more. (Watch tutorial video on https://service segway.com/us-en/)
It is important to check for any leakage of braking oil. If so, please contact after-sales service.
Suggestions on Braking Pad Replacement
As the motor of E-bike, which provides E-bike with a much stronger power for fast speed, is heavy, the braking pads of E-bike are worn out faster than conventional bicycle. If you hear abnormal noises when braking, especially sharp noises from metal rubbing, or find that the thickness of braking pad is less than 1 mm, you have to replace the braking pads. You can complete the replacement after dismantling the braking caliper.
Tools required: 5 mm Allen wrench, needle nose pliers
| Items Operations | |
| Wheels | Maintenance Instructions Spoke is an important part which connects the wheel hub with the rim. The strength and tightness of spoke directly influence the stability and security of an E-bike. Please adjust spokes by professional tools in the official serving point in case of the following situations: 1. Wheel swings left and right or moves up and down. 2. Spoke nipple is loose. (Shaking spoke to check whether it is loose.) |
| Wheels | You can replace tires by yourself after purchasing tires from official online shop. Tools required: 2.5/3/6 mm Allen wrench, adjustable wrench and pry bar. How to Evaluate Tire Wear Degree and Danger Statement The replacing frequency of E-bike's tires determined by personal riding habits, road conditions as well as the using time, tire wear and using frequency of tires. Here are some general suggestions: Tire Wear: It is suggested to replace a tire when the tire tread is smoothed. Age: A tire shall be replaced every 2 to 3 years although its tire tread is not worn apparently, as the tire will be aging with its surface becoming hardened after a long period of use or storage, which may cause danger. A tire can be used for about 6 years, but if you find any aging phenomenon, such as cracks, you have to replace it immediately even if its serving period is shorter than 6 years. Wear and Tear: If you riding E-bike at a high frequency, especially in bad road conditions, the tire will be worn faster, so you shall check and replace tires more frequently. Other Damages: You shall consider to replace tire if you find tire bulge caused by a damage on the tire surface or sidewall, or abnormal wearing phenomena, including one-side tire wear and wavy tire wear. In conclusion, It is suggested to check the tire wear monthly, and replace the tire in case of serious tire ware, thinning of tire thickness or cracks. At meantime, to extend the serving life of a tire, please clean and maintain it regularly |
| Tires | Cleaning and checking tire pressure regularly are basic maintenance methods. Suggested tire pressure (e.g. 40 psi) is printed on the tire sidewall. If you only find a suggested tire pressure range on the tire sidewall, as the best tire pressure is determined by your E-bike model, payload and road conditions, you shall do some tests to get the best tire pressure. |
| Lubrication Method | It is suggested to lubricate the transmission system (chain, cassette, chainwheel & crankset and rear derailleur) by good E-bike mineral lubricant monthly. Clean transmission system with brush or other professional tools before lubricating to prevent from lubricant accumulation. |
| Adjustment to Reflectors | See the "User Manual" for details. |
| Adjustment to a Skewed and Loose Handlebar | You need to adjust the handlebar and front fork after loosening three screws there, when you find that the wheels are not perpendicular to the handlebars, or the front fork is shaking when you squeeze brake levers and push E-bike forward and backward. Before adjustment, please dismantle the handlebar holder panel. Tools required: 2.5/4/5 mm Allen wrench, cross driver When there is abnormal sound in handlebar part after long-term riding, you shall use the Allen wrench to tighten the double-ended screw in handlebar (max. torque is 18.5 N·m). Tools required: 5 mm Allen wrench |
| Handlebar | You can adjust the angle of E-bike's handlebar after loosening the screw on headset. Tools required: 5 mm Allen wrench |
| Saddle | The basic maintenance is saving your E-bike appropriately. It is suggested not to park E-bike outside on a rainy day or in a wet environment. When you encounter a rain outside, It is suggested to cover the saddle by a waterproof cloth, which is a temporary solution, and you shall remove the cloth and use it to wipe the moisture on the E-bike later, and move the E-bike to a dry place and let it to be dried naturally. Although this E-bike is waterproof at some extent, it may be damaged by water, moisture or liquid if you expose it to liquid or water. (Note: Product damage caused by liquid or water is not covered by warranty. Any damage to E-bike main parts, including PCB, controlling board, wires, electronic system, battery, etc., may lead to greater and more serious risk or danger.) Meanwhile, you need to prevent E-bike from prolonged exposure to the sunshine, and shall park it under a shelter. E-bike's battery has a charging/discharging overheat protection function which may stop the charging/discharging when battery's temperature is too high. You'd better prevent battery from charging/ discharging in a high-temperature environment, because that may influence the battery's performance. You need to prevent saddle from corrosive substances. |
| Recommended Cleaning Method | It is suggested to use wet cloth and non-corrosive degradable detergent to clean E-bike and wipe with a dry cloth. We recommend you to lubricate and clean the chain with high-quality lubricant. Warning: Do not clean the E-bike by high-pressure spray water gun, which may cause the short circuit of electronic control system or accelerate the corrosion of mechanical parts. Do not clean with corrosive or volatile detergent. Please check for dirt accumulation on charging port. You shall use a soft brush or low-pressure air to clean the inner part of E-bike. Take the battery out before cleaning. Power off the E-bike before cleaning. Unplug the charger close the charging port cover before cleaning. Make sure all contacts and ports are dry and clean before connecting to charger |
| Other Conditions | If you need help from maintenance engineer, please contact to official after-sales to know the nearest service center.Prolonged Exposure to UV Rays, Rain and the Elements May Damage the Enclosure Materials, Store Indoors When Not in Use. |
FR
To ensure safe riding, day-to-day care and regular maintenance are essential. You, the owner, have control and knowledge of how often you use your scooter, how hard you use it, and where you use it. It is the owner's responsibility to perform regular checks and bring your scooter to an authorized service center for inspection and service. Please refer to the maintenance schedule below.
Maintenance Schedule
| Item Type | Pre-riding Check | Maintenance Frequency | ||||
| Every 500 km or every 3 months | Every 1,000 km or every 6 months | Every 2,000 km or every 12 months | Every 20,000 km or every 3 years | |||
| Tire | Ensure tire pressure and tire appearance are normal | Check tire pressure with a tire pressure gauge | Consider to replace tires based on the degree of tear | Recommended to replace tires | ||
| Rear Wheel | Check the wheel motor for any swing or appearance damage | |||||
| Front Wheel | Check wheel hub for any swing and the motor wire for any damage | |||||
| Brake | Ensure the brake system works normally | Inspect brake system and adjust it if necessary | ||||
| Shock Absorber | Check front fork, rear fork, front shock absorber and shock absorber surface for any oil leakage | |||||
| Light | Ensure the light system works normally | Check the headlight and turn signal for any looseness | ||||
| Crankarm | Ensure the crankarm structure and appearance are normal | Check the crankarm for any abnormal gap or swing | ||||
| Padel | Ensure the padel structure and appearance are normal | Check whether the padel can rotate smoothly, and whether non-slip mats are excessively worn | ||||
| Transmission System | Conduct basic appearance check and basic clean | Check the structure of the transmission system and conduct maintenance and adjustment | Conduct further check and maintenance in official store | |||
| E-shifter | Check appearance and structure | Check whether the e-shifter can normally shift gear and conduct basic maintenance | Reset e-shifter and do maintenance | |||
| Item Type | Pre-riding | |||||||||||||
| Every 500 Km | ||||||||||||||
| Monthly | ||||||||||||||
| Battery | ||||||||||||||
| Charging | ||||||||||||||
| Port | ||||||||||||||
| Battery | ||||||||||||||
| Base | ||||||||||||||
| Handbar | ||||||||||||||
| Handlebar | ||||||||||||||
| Check the handlebar for any looseness or swing | ||||||||||||||
| Check the handlebar and the relevant parts for any swing or looseness | ||||||||||||||
| Ensure the steering is smooth | ||||||||||||||
| Ensure the steering is smooth | ||||||||||||||
| Ensure the steering is smooth | ||||||||||||||
| Ensure the steering is smooth | ||||||||||||||
| Ensure the steering is smooth | ||||||||||||||
| Ensure the steering is smooth | ||||||||||||||
| Ensure the steering is smooth | ||||||||||||||
| Ensure the steering is smooth | ||||||||||||||
| Ensure the steering is smooth | ||||||||||||||
| Ensure the steering is smooth | ||||||||||||||
| Ensure the steering is smooth | ||||||||||||||
| Ensure the steering is smooth | ||||||||||||||
| Ensure the steering is smooth | ||||||||||||||
| Ensure the steering is smooth | ||||||||||||||
| Ensure the steering is smooth | ||||||||||||||
| Item Type | Pre-riding Check | Maintenance Frequency | ||||
| Every 500 km or every 3 months | Every 1,000 km or every 6 months | Every 2,000 km or every 12 months | Every 20,000 km or every 3 years | |||
| Cargo Rack | Check the handlebar for any looseness or appearance damage | |||||
| Saddle | Ensure that the saddle is fixed stably in an appropriate angle | |||||
| Kickstand | Check the handlebar for any looseness or appearance damage | |||||
| Chain Cover | Check the chain cover for any looseness or appearance damage | |||||

Users can perform self-maintenance using general-purpose tools by referring to the official maintenance guides or instructional videos provided.

Users must possess both the required professional tools and mechanical competencies. Otherwise, maintenance should be performed exclusively by an authorized service center.

Conduct the maintenance in an authorized service center.
Note:
-
To keep your vehicle working securely and normally, and to prolong its lifespan, conducting regular checks, maintenance, and repairs is necessary. The usage habits, riding patterns, and storage conditions of vehicles may vary among consumers, and factors such as wear and tear may differ accordingly. Therefore, the maintenance plans we provide are general guidelines based on typical vehicle usage conditions and are intended for reference only, without any form of commitment or warranty. Consumers should independently assess the actual condition and usage needs of their vehicles to determine specific maintenance and repair requirements, and carry out timely checks, maintenance, or repairs as necessary.
-
Never underrate any tiny problem or abnormality of your vehicle, because they may, as time goes by, cause more serious problems without a timely solution.
- We strongly recommend that you conduct a check and a repair to your vehicle in an authorized service center after any falling over, even if there is no damage that can be found visually, so as to reduce the safety risk.
- We recommend that you conduct a check and necessary repair in an authorized service store after riding for every 2,000 km or 12 months, no matter there is apparent damage or not.
- If you find obvious attenuation of the battery performance, we strongly recommend that you dispose of the battery harmlessly following local laws and regulations, then buy and install a new battery, so as to avoid the safety risk caused by the battery error.
- If you find cracks or corrosion on the connection part or the vehicle frame, you shall stop using the vehicle immediately and contact an authorized service center for a check and repair, so as to avoid a safety risk.
- All maintenance operations shall be conducted in a safe environment legally, and the vehicle shall be powered off during the whole process.
- Before conducting any maintenance, please carefully read the maintenance guidelines. If you encounter any issues that cannot be resolved, please contact after-sales support or an authorized service center for assistance. If you lack the expertise to check, repair, or maintain the vehicle by yourself, we strongly recommend having the vehicle serviced or repaired by a qualified service provider. During use, if you have any questions about the product, please promptly contact our official customer service team for support. Additionally, we offer both in-warranty and out-of-warranty (paid) repair and inspection services.
Scan the following QR Code for detailed maintenance guidelines:

FR
Segway, Rider Design are trademarks of Segway Inc. Ninebot is the trademark of Ninebot (Beijing) Technology Co., Ltd. Apple, Apple Find My, Find My, iPhone, iPad, iPadOS, Mac, macOS and watchOS are trademarks of Apple Inc in USA and in other countries. Android is trademark of Google LLC. IOS is trademark or registered trademark of Cisco. The Bluetooth® word mark and logos are registered trademarks owned by Bluetooth SIG, Inc. and any use of such marks by Segway-Ninebot is under license. Other trademarks and trade names are those of their respective owners.
We have attempted to include descriptions and instructions for all the functions of the E-bikes at the time of printing. However, due to constant improvement of product features and changes of design, your E-bike may differ slightly from the one shown in this document. Scan the QR code or visit the Apple App Store (iOS) or the Google Play Store (Android) to download and install the App.
Please note that there are multiple models with different functions, and some of the functions mentioned herein may not be applicable to your E-bike. The manufacturer reserves the right to change the design and functionality of the E-bikes and documentation without prior notice.
© 2025 Segway-Ninebot. All rights reserved.
Certifications
This product complies with 16 CFR PART 1512.
This product complies with ANSI/CAN/UL 2849.
The battery complies with UN/DOT 38.3.
The battery complies with ANSI/CAN/UL 2271.
Federal Communications Commission (FCC) Compliance Statement for USA
This device complies with part 15 of the FCC rules. Operation is subject to the following two conditions: (1) This device may not cause harmful interference, and (2) this device must accept any interference received, including interference that may cause undesired operation. CAN ICES (B) /NMB (B)
Any Changes or modifications not expressly approved by the party responsible for compliance could void the user's authority to operate the equipment:
NOTE: This equipment has been tested and found to comply with the limits for a Class B digital device, pursuant to part 15 of the FCC Rules. These limits are designed to provide reasonable protection against harmful interference in a residential installation.
This equipment generates, uses and can radiate radio frequency energy and, if not installed and used in accordance
with the instructions, may cause harmful interference to radio communications. However, there is no guarantee that interference will not occur in a particular installation.
If this equipment does cause harmful interference to radio or television reception, which can be determined by turning the equipment off and on, the user is encouraged to try to correct the interference by one or more of the following measures: Reorient or relocate the receiving antenna.
—Increase the separation between the equipment and receiver.
Connect the equipment into an outlet on a circuit different from that to which the receiver is connected.
—Consult the dealer or an experienced radio/TV technician for help.
Industry Canada (IC) Compliance Statement for Canada
This device contains licence-exempt transmitter(s)/receiver(s) that comply with Innovation, Science and Economic Development Canada's licence-exempt RSS(s).
Operation is subject to the following two conditions: (1) This device may not cause interference. (2) This device must accept any interference, including interference that may cause undesired operation of the device.
This equipment complies with Industry Canada radiation exposure limits set forth for an uncontrolled environment.
AkkymyTop COOTBETCTByeT CTaHapTy UN/DOT 38.3.
Batapera COOTBetCTByet CTaHdpTy ANSI/CAN/UL-2271.
3aBHeHne FedepaBbHOKOMnCCnNo CBa3n (FCC) ocooTBcTbNn IJIaCLUA
3To yctpoiCTBO COOTBEcTByeT qactn 15 npabun FCC. 3Kcnnyataun Bo3MOxHa npu co6nOJeHH nCneDyUxH xBvX ycNoBn: (1) 3To yctpoiCTBO He doJnxHo co3daBaTb BpeIhBe Iomexn, n (2) 3To yctpoiCTBO doJnxHO octaBaTbcra pa6oTOcNOco6HbIM npu HAIuHH JIO6bIX NOMEX, BKJIouaYIOMExN, KOtOpbIe MOryt pInBeCTn K HeNPabUNbHOJ pa6Ote. CANICES (B)/NMB (B)
IIO6bIe N3MeHHeN IIN MoIINoKauNn, RaBHO He OIO6peHHbIe CTOpOH, OTBeTCTBeHHOa 3a COOTBeTCTBne, MOryT IINuHTb NOJIb3OBaTeIa npaba Ha 3KcPnyatauio 06OpyDoBaHn.
PIMMEUHNE.3to 60opuydoBaHne 6bIIO npoTeCTnpoBaHO n npu3HaHO COOTBeTCTBYUOUM orpaHueHnM dIaIuΦpoBbIX yctpOCTB KnaCca B B COOTBeTCTBn C uactbIO 15 npaBnFCC.3TN orpaHueHnPa3pa6oTaHbI dIaIobecneueHn pa3ymHO 3auNTbI OT BpeDhX NOMex pnpy UcTAHOBE B XnJIbIX NOMEeHnx.
3To 60bpyoBaHne rHeepnpyet, nCnoIb3yET mOxKET n3JyuaTb paNIOuacTOTHU 3HeprNIO, ecn OHO yCTaHOBJeHO nCNoIb3yETcR He B COOTBeTcTBn CnHCTpyKcunMn, MoXET co3daBaTb BpeDhble nomexn Ira paNIOCBzH. OHaKO HET rapaHTm, YTO NOMEXn HE BO3HkHyT npi KOHKpTeHoi yCTaHOBKe.
Ecnn 3TO o6OpdyOBaHne IeNCTBnTeNbHO CO3daET HeOnyucMbIe NomExn IJI npMe paAnIO nII TeNeBuDeHna, YTO MoKHO ONpeJeNTb PyTeM BkLIOUeHn IN BblKIOUeHn O6OpdyOBaHn, NOIb3ObaTeIIO peKOMeHnyetcN ONbITaTbcra YcTpAHb T NOMEXn ODNHM INI HecKoBkIMN IN3 CLeNyOuNX cnOCo6OB:
-Измениь opиентацию Или мecтоноожене ппимонаHTehнbl.
- YBeJIuHTb paCCToHHe mKJy o6OpUoBaHnem nIpnEHHKOM.
- PtoKJIOHTb o6OpYIOBAAHne K po3eTke B cIeIN, OTNIuHoi OT Toi, K KOtOPOI POJIKJIIOUeH IpNiEMHnK.
-06paTntbCra 3a NOMOuK npoAubuynOnbTHOMy CneuaNcTy no paNIO/TeIeBnIeHIO.
3aBHeHcO COOTBeTCTBn Tpe6oBaHmM HnHCTepCTBa npombIeHHocTu KaHaDbI (IC) nraKaHaDbI
3To yctpoicTBo coepknt nepe,atauukn/npneMHNKU,OCBO60XdeHHbIe OT IueH3nn, KOtOpBie COOTBeTCTBYIOT RSS n3JeN,OCBO60XdeHHbIX OT IueH3nn MmHnCTepCTBa INHOBaun, HayKn 3KOHOUMueCKOrO pa3BNTra KaHaBl.
3KcnpaataaBo3MOxHa npC6JIIODeHn CNEyIOUX DByx yCNOBn: (1) 3To yCTpoiCTBO He DOJXHO BblBaTb NOMex. (2) 3To yCTpoiCTBO DoJXHO OCTaBA Tcpa6Otocnoc6HbIM npn HAIuHN IIO6bIX NOMEX, BKIOUay NOMEXN, KOTopbIE MOrTy pInBeCTn K HenpabunbHo pa6Ote yCTpoiCTBa.
3To 60bpyoobAHne COOTBcTByET npeJeIam paDnauOnHoro 6nyeHna Ira HeKoHTpOJIpyeMoI cpebl, yCTaHOBHeHHbIM MInHCtepCTBOM npomblJeHHocTn KaHaDbI.