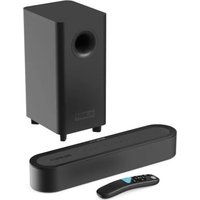
Bowfell Axis Atmos - Soundbar Majority - Free user manual and instructions
Find the device manual for free Bowfell Axis Atmos Majority in PDF.


| Product type | 2.1 soundbar with wireless subwoofer, Dolby Atmos |
| Soundbar dimensions (W x H x D) | 40.5 x 6.2 x 9 cm |
| Subwoofer dimensions (W x H x D) | 18.5 x 32 x 15 cm |
| Total net weight | 2.95 kg |
| Power supply | 110V-240V ~ 50Hz/60Hz |
| Frequency response | 55 Hz - 20 kHz |
| Bluetooth version | 5.0 |
| Bluetooth range | Up to 8 m |
| Supported USB audio formats | MP3, WAV, FLAC |
| Maximum USB capacity | 32 GB |
| Main features | Dolby Atmos, ARC/eARC, optical input, AUX, Bluetooth, USB playback |
| Remote control | Included (AAA batteries provided) |
| Wall mounting | Possible, kit included |
| Warranty | 12 months standard, free extension to 3 years upon registration |
| Care and cleaning | Unplug before cleaning, use a dry cloth |
| Safety | Follow the instructions in the manual, do not expose to water or excessive heat |
| Spare parts and repairability | Contact technical support for any repairs |
Frequently Asked Questions - Bowfell Axis Atmos Majority
User questions about Bowfell Axis Atmos Majority
0 question about this device. Answer the ones you know or ask your own.
Ask a new question about this device
Download the instructions for your Soundbar in PDF format for free! Find your manual Bowfell Axis Atmos - Majority and take your electronic device back in hand. On this page are published all the documents necessary for the use of your device. Bowfell Axis Atmos by Majority.
USER MANUAL Bowfell Axis Atmos Majority
What's in the Box? 3
Controls and functions.... 4
Product Setup.... 8
Mounting the soundbar to the wall....9
Connecting to Mains Socket.... 10
Pairing the Soundbar with its Wireless Subwoofer.... 11
Selecting the Input Source 12
Dolby Atmos.... 13
ARC/eARC Input.... 14
Optical Input.... 15
Audio Input (AUX) 16
Bluetooth.... 17
USB Playback 19
Troubleshooting.... 20
Support.... 21
Product Specification.... 22
Warranty.... 22
Warning and Safety Information.... 23
EU Declaration of Conformity.... 26
3 year Warranty
Register your product online for a FREE 3 year extended warranty at: www.majority.co.uk
What is in the box?
A. Majority Axis Atmos soundbar with subwoofer
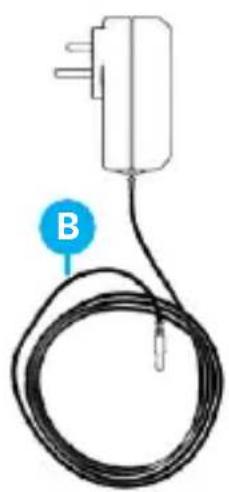
B. Power adaptor (soundbar)
C. Power cord (subwoofer)
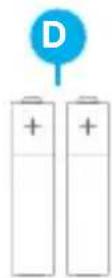
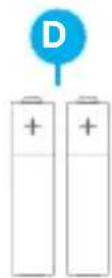
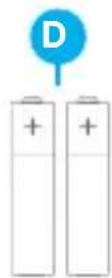
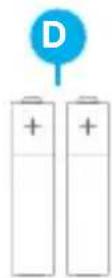
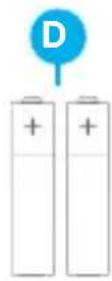
D. Remote control with batteries (2 x AAA)
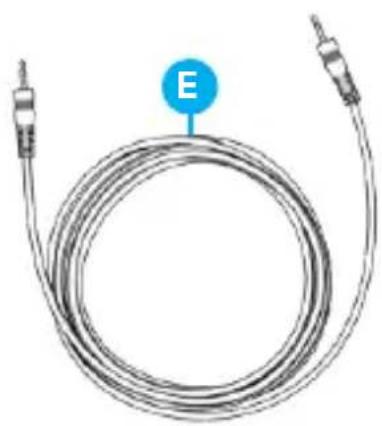
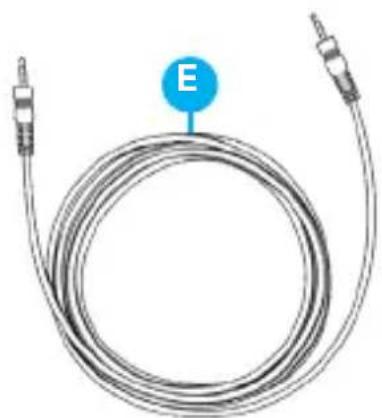
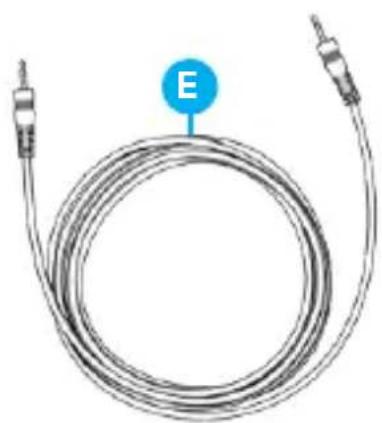
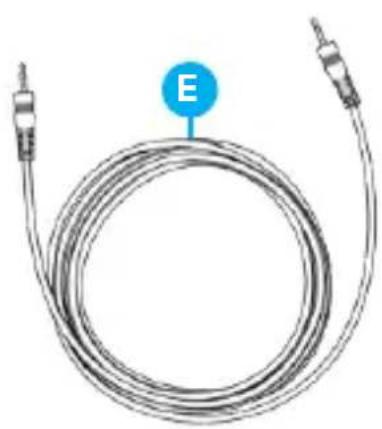
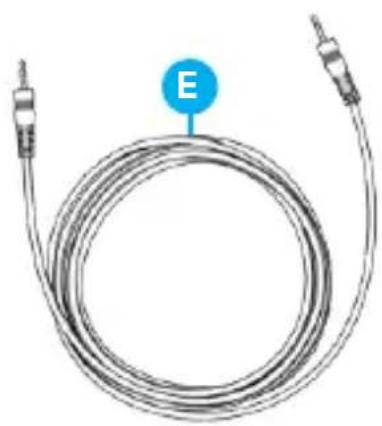
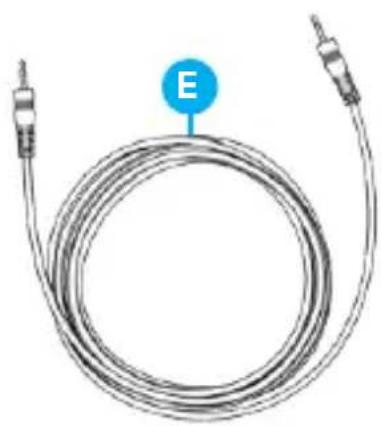
E. AUX to AUX cable
F. Wall mounting kit
G. User manual
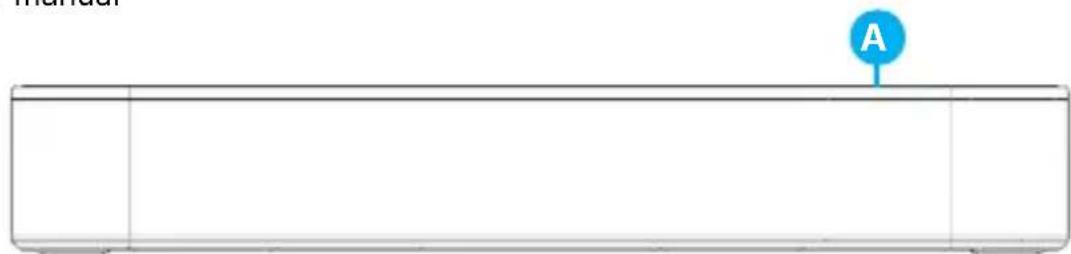
natural_image
Simple line drawing of a cable with a plug and a labeled connection point B (no text or symbols beyond label)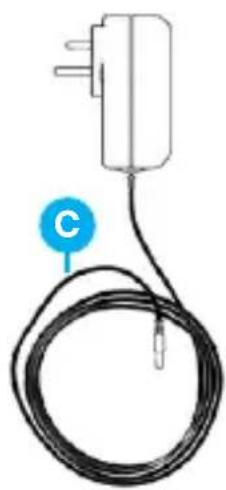
natural_image
Simple line drawing of a cable with a plug and a labeled component (no text or symbols)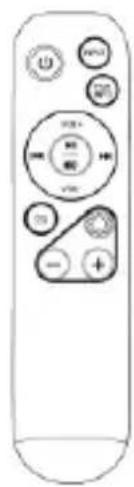
natural_image
Coiled electrical cable with two connectors and a labeled point E (no text or symbols on the cable itself)
natural_image
Diagram showing two vertical bars with a blue circle labeled 'F' above them, and two separate screw-like figures below (no text or symbols)
natural_image
Simple line drawing of a blank book with a blue circular icon labeled 'G' on top (no text or symbols on the book itself)Front, top and rear views of the soundbar
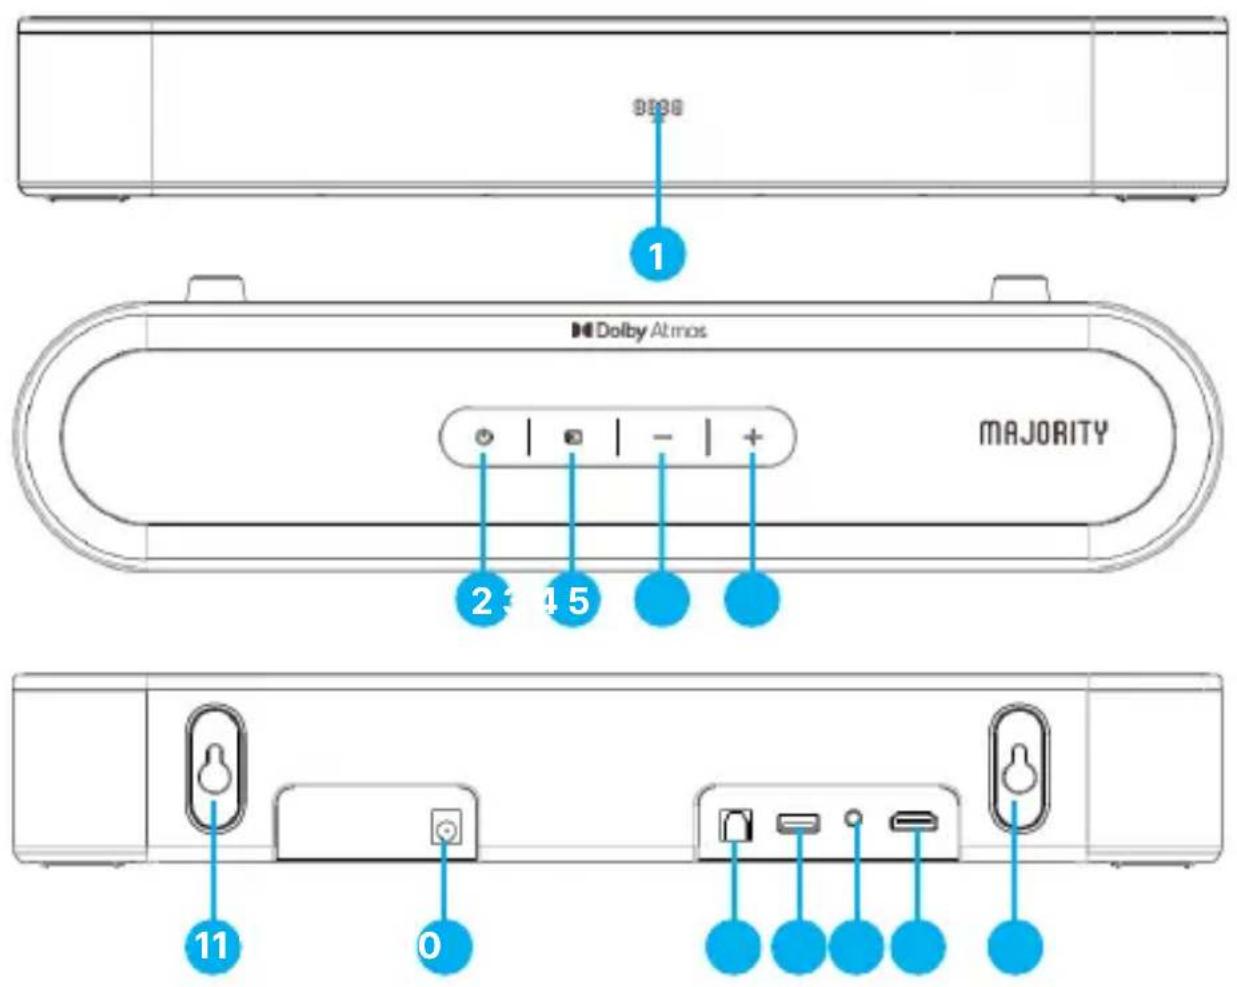
- Display panel
- Power ON/OFF, Standby
- Input
- Volume -
- Volume +
- DC IN power adaptor port (20V/1.5A)
- Optical Input
- USB Playback port
- AUX Input (Line IN)
- ARC/ eARC port for TV
- Wall Mounting bracket
Front and rear views of the subwoofer
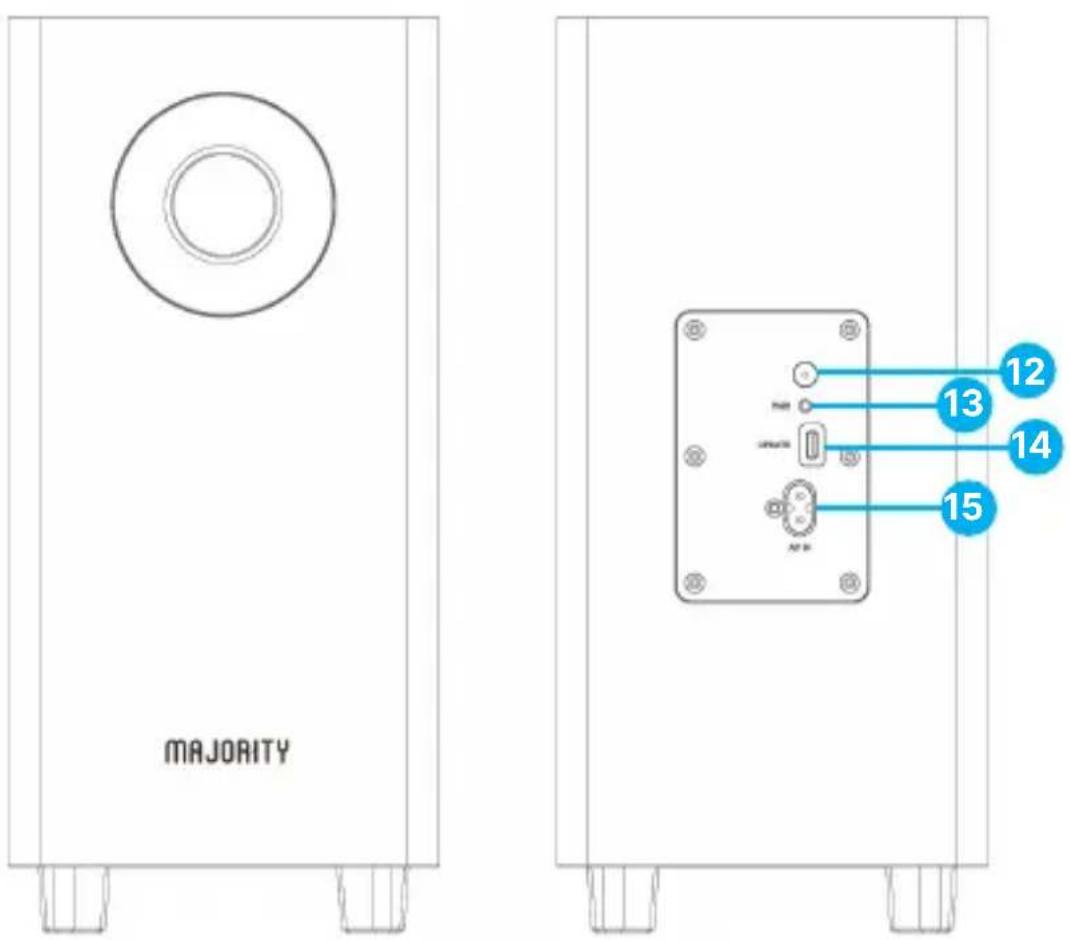
- LED indicator
- PAIR button
- Press once to light up the LED indicator
- Press and hold for two- three seconds to reconnect to the soundbar
- Subwoofer USB port for software upgrade only
- AC IN port for subwoofer power cable (figure 8)
Important: The Majority Axis Atmos Soundbar will automatically pair with the subwoofer when both items are powered on. The LED indicator on the rear of the subwoofer will flash blue while searching for the soundbar and remain solid blue once successfully connected.
To reconnect the subwoofer to the soundbar please follow the instructions on page 11.
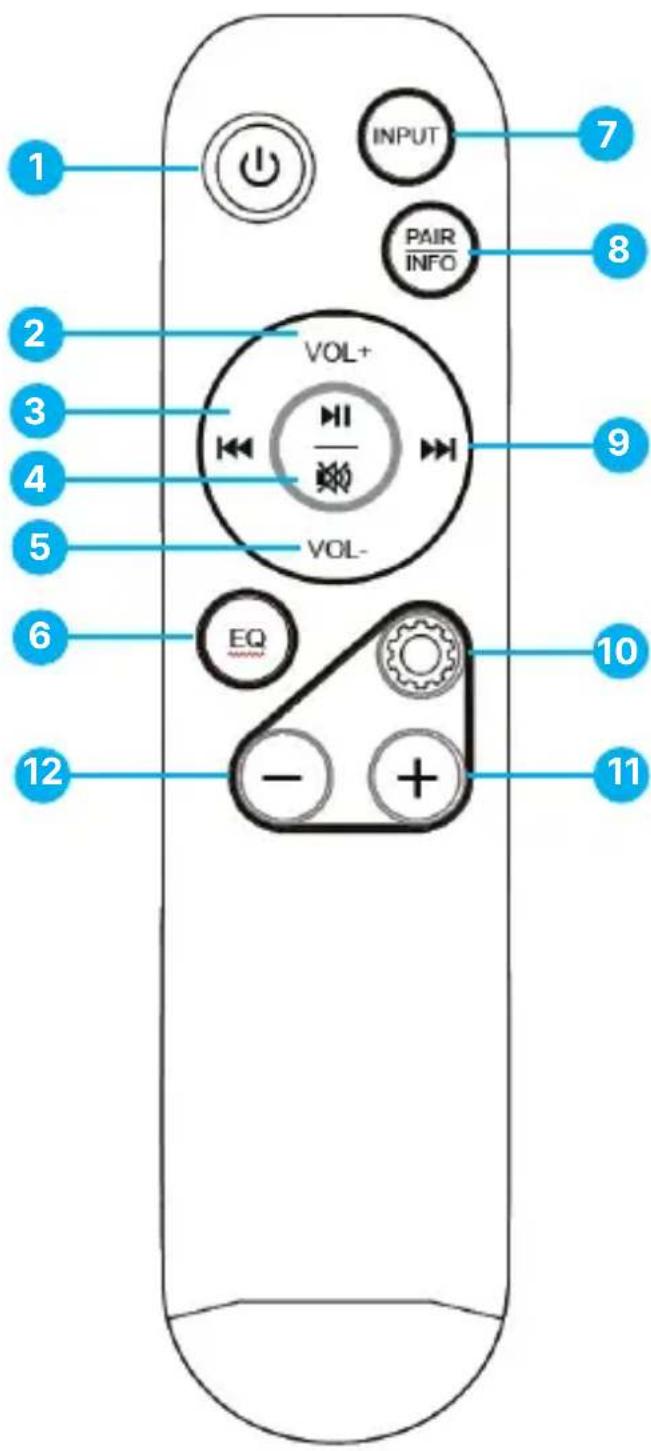
Remote Control
-
POWER / STANDBY – Switch the soundbar on or off to Standby mode.
-
VOLUME +
-
PREVIOUS – Press to skip to the previous track (works in USB and Bluetooth modes only).
-
PLAY/PAUSE/MUTE
In USB or Bluetooth mode: press to play or pause music. In other modes: press to mute or unmute the sound.
-
VOLUME -
-
EQ (Equaliser) – Press to choose a sound setting: EQ1 for Music, EQ2 for Movie, EQ3 for News or EQ4 for Sport
-
INPUT – Press repeatedly to change the soundbar mode to AUX, USB, TV (eARC), Optical, or Bluetooth.
-
PAIR /INFO
In AUX mode: Press and hold for 2 seconds to pair the wireless subwoofer with the soundbar.
In Bluetooth mode: hold for 2 seconds to connect a new Bluetooth device or reconnect the last one.
In ARC/eARC mode or optical press to see what audio signal is playing such as Dolby Atmos, Dolby Surround or PCM.
-
NEXT – Press to skip to the next track (works in USB and Bluetooth modes only).
-
Sound Settings -Short press to enter setup mode to adjust bass and treble levels (range: -5 to +5, default = 0).
-
'+' When in setup mode, press to increase bass or treble levels.
-
'-' When in Setup, use this to decrease bass or treble.
Example: Press the 'Sound Settings' button once. The text 'b-00' (bass) will appear on the soundbar display. Use '-' to decrease the value or '+' to increase it. Press the 'Sound Settings' button again and follow these same steps to change treble.
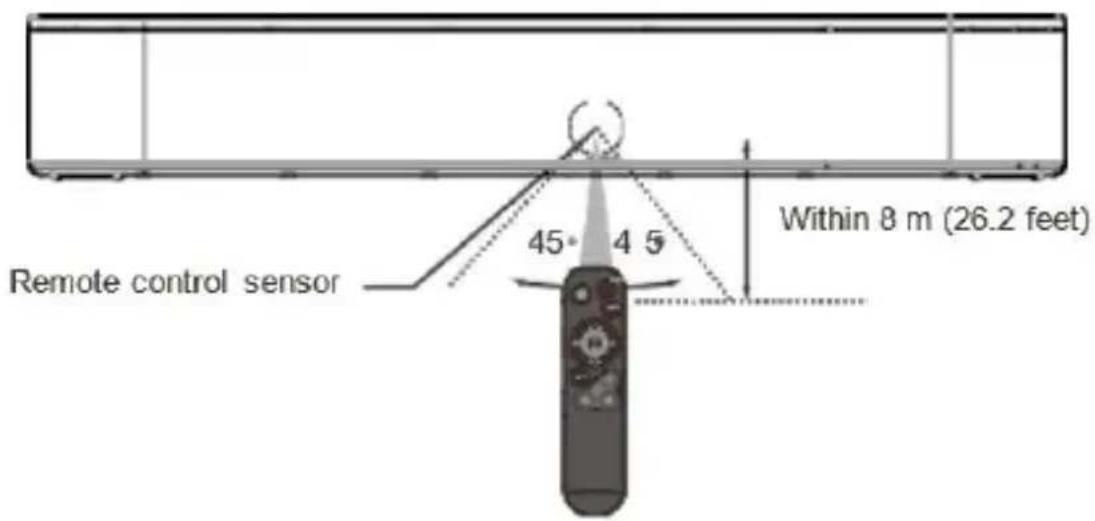
Remote Control Range
- When the unit is mounted on a wall, aim the remote control at the sensor on the front panel. The supplied remote control allows the unit to be operated from a distance.
• Even within the effective range of up to 8 metres (26.2 feet), operation may not be possible if there are obstacles between the remote control and the unit. - If the remote control is used near other products that emit infrared signals, or if another infrared remote control is operated nearby, the unit may not work correctly. Conversely, the other products may also respond incorrectly.
PLEASE NOTE: The instructions within this user manual will refer to the button number on the soundbar and subwoofer (Ref 'number'), or buttons on remote control e.g. (Rem. 'number'), in accordance with the diagrams from pages 4 - 7.
Getting Started
Remove all packaging materials. Prepare the soundbar and subwoofer for use.
Remove any labels or stickers from the front or top of the cabinet. Do not remove labels from the back or bottom.
Place the soundbar and the subwoofer near a mains outlet, away from heat, dust, moisture, and vibration.
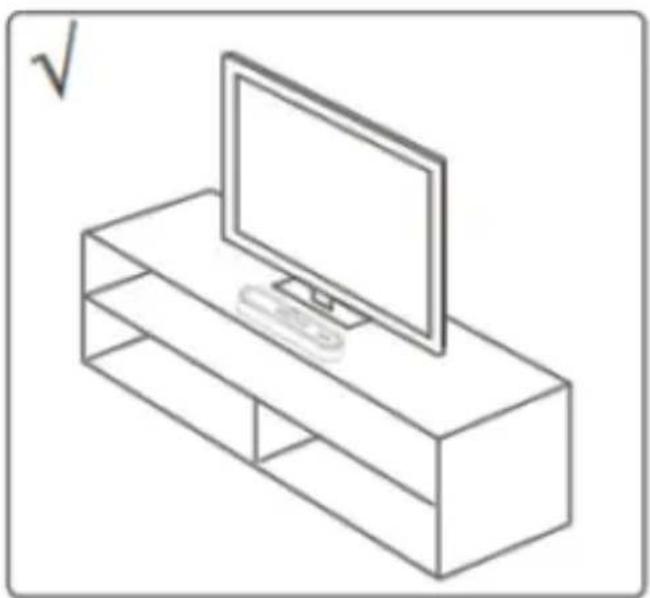
The Majority Axis Atmos soundbar can be placed on a flat surface or wall-mounted using the brackets and screws provided.
If positioning it on a flat surface such as a TV stand, ensure the surface is stable and align the soundbar centrally with the TV screen.
Leave some space between the soundbar and the wall.
Do not place it inside a cabinet or on a walled shelf. Following this guidance will ensure the best sound output and proper airflow around the soundbar.
natural_image
Line drawing of a flat-screen TV set with a monitor and keyboard (no text or symbols)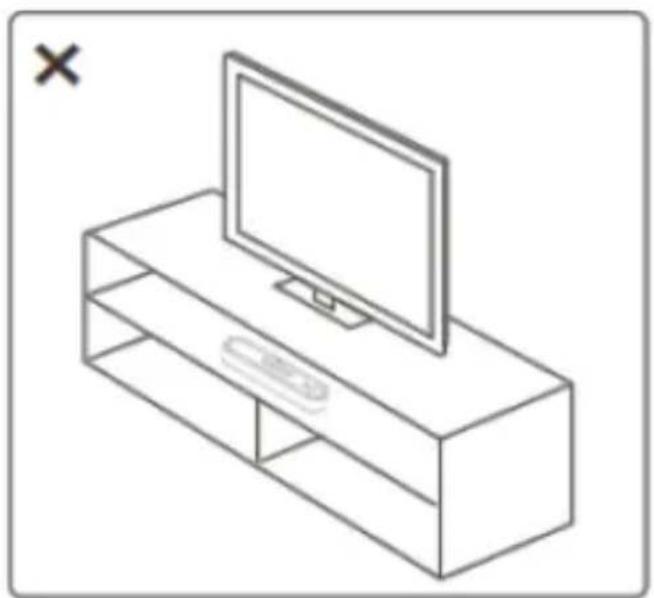
natural_image
Line drawing of a flat-screen TV set with a monitor and cable rack (no text or symbols)Preparing to wall-mount the soundbar

Warning: If you are not confident in securely wall-mounting the soundbar, please seek assistance from an experienced person or a professional.
• Install the soundbar on a vertical, solid, reinforced section of wall.
- For plasterboard walls, it is recommended to screw directly into wall studs for added security.
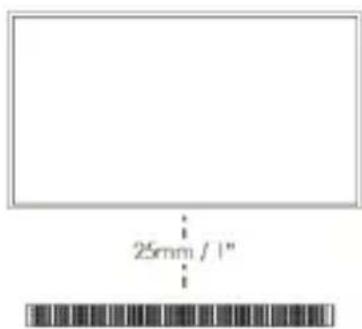
- For optimum performance, allow at least 25 mm (1") of space between the soundbar and the TV.
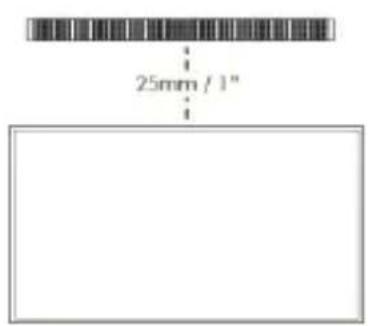
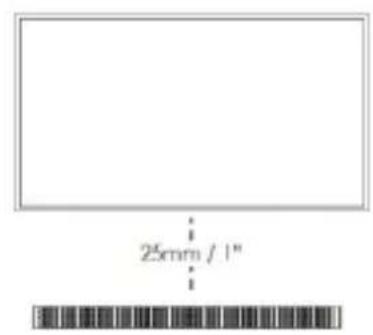
Wall-Mounting Instructions
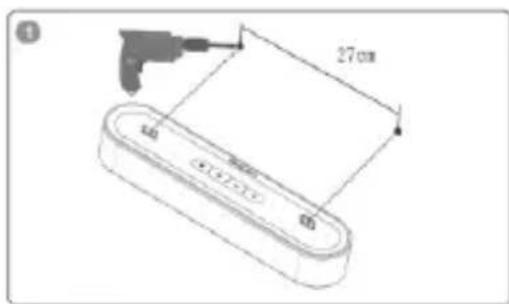
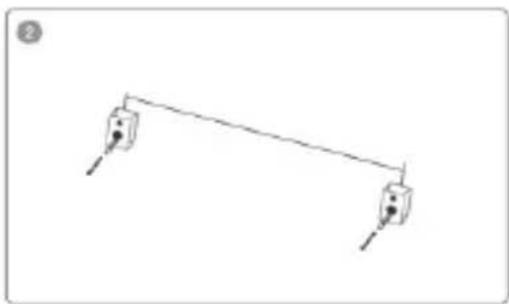
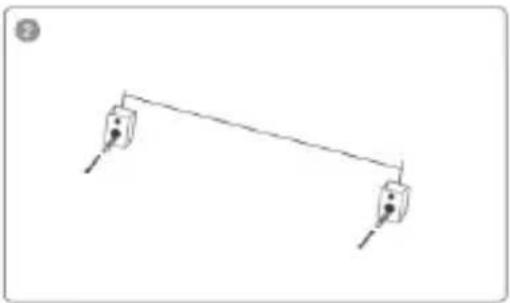
- Mark and drill two holes in the wall at the same distance as the brackets on the back of the soundbar.
- Insert the plastic anchors into the holes, then partially fasten the screws into the anchors. Leave a small gap so the soundbar can be hung securely.
- Attach the two EVA pads to the wall-mount bracket. This ensures a minimum clearance of 15 mm between the wall and the soundbar outlet.
- Once the screws are securely fastened, hang the soundbar by aligning the brackets and inserting the screws into the slots.
natural_image
Simple line drawing of a lever mechanism with two weights and a fulcrum (no text or symbols)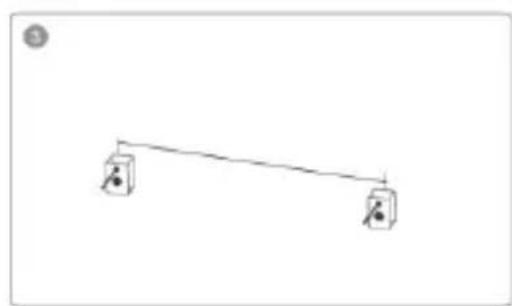
natural_image
Simple line drawing of a lever with two hanging weights (no text or symbols)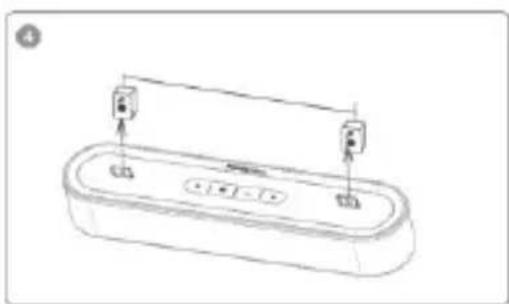
natural_image
Line drawing of a rectangular electronic device with two ports and a connecting rod (no text or symbols)Connecting to the Mains Socket
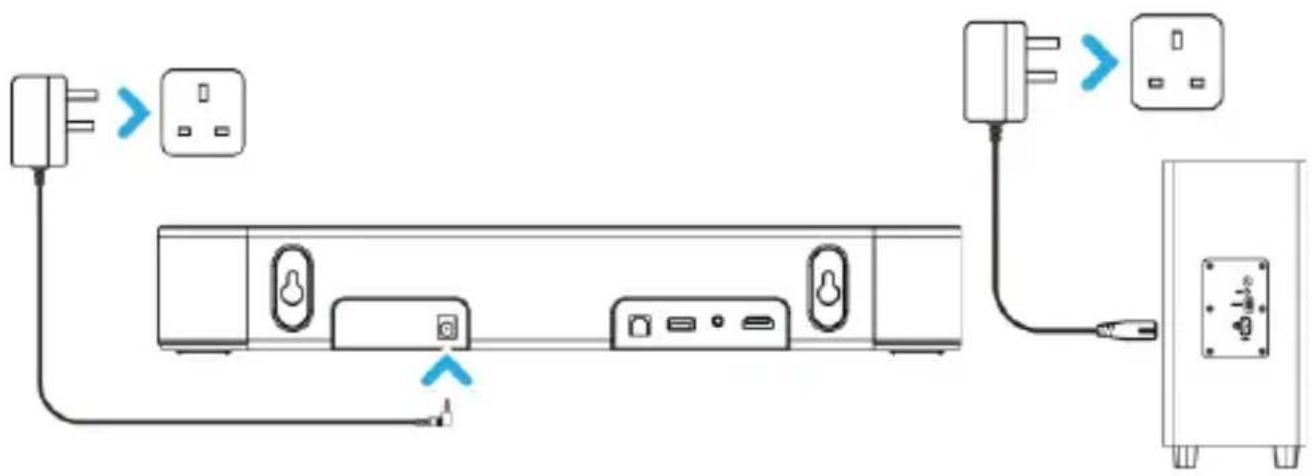
Ensure that the power supply voltage is within the range of 110V\~240V. Any other voltage may cause damage to the unit.
• Fully unwind the mains power cables for both the soundbar and subwoofer.
- Insert the soundbar's power adaptor (20V 1.5A) into its port (Ref.6), then plug into mains socket.
- Next, insert the subwoofer's power cord (figure 8) into its port at the back of the subwoofer (Ref.4) then plug to main socket
Ensure that both the soundbar and subwoofer plugs are fully and securely inserted into the wall sockets before powering on.
flowchart
graph LR
    A["Power"] --> B["Switch"]
    B --> C["Device 1"]
    C --> D["Device 2"]
    D --> E["Device 3"]
    E --> F["Device 4"]
    F --> G["Device 5"]
    G --> H["Switch"]
    H --> I["Device 6"]
    I --> J["Switch"]
    J --> K["Device 7"]
    K --> L["Switch"]
    L --> M["Device 8"]
    M --> N["Switch"]
    N --> O["Device 9"]
    O --> P["Switch"]
    P --> Q["Device 10"]
Ensure all audio cable connections of the units are properly inserted before connecting the soundbar and the subwoofer to the mains power socket. Unplug the power cord from the outlet when the unit is not in use for an extended period of time.
The Majority Axis Atmos soundbar will automatically connect to its wireless subwoofer.
• Plug both the soundbar and subwoofer into main sockets (page 10).
- Press the POWER/STANDBY button on the remote control (Rem.1) or on the soundbar (Ref.2) to switch on.
- The wireless subwoofer will automatically attempt to pair with the soundbar. The LED indicator on the back of the subwoofer (Ref.12) will flash while searching and remain steady once paired.
Please do not press the PAIR button on the subwoofer while these are trying to connect, as this action will disrupt the automatic pairing process. If the soundbar and subwoofer becomes unpaired, please follow the manual pairing instructions to reconnect.
Manual Pairing
If the soundbar and subwoofer do not pair automatically, they can be reconnected at any time by following these steps:
- Connect the Majority Axis Atmos and the subwoofer to the power supply. The system will start in standby mode: “- -” will be displayed on the soundbar, and the blue LED indicator on the rear of the subwoofer will flash slowly, indicating that pairing has not yet occurred.
- Press the POWER/STANDBY button on the soundbar (Ref.2) or on the remote control (Rem.1) to power on. Then press the INPUT button on remote control (Rem.7) or on the soundbar (Ref.3) to select AUX mode.
- While in AUX mode press and hold the PAIR button on the remote control( Rem.8) until "PAIR" text appears on the soundbar display. At the same time, press and hold the PAIR button on the rear of the subwoofer (Ref.2) until the LED indicator flashes quickly. Both units are now in pairing mode.
• After approximately 20–30 seconds, the LED indicator on the subwoofer (Ref.12) will stop flashing and remain solid blue, confirming a successful connection. - Once paired, the soundbar and subwoofer will automatically reconnect after being switched off and on again.
Note: To ensure successful pairing, make sure the soundbar and subwoofer are both switched on, and within range, and that any other wireless devices are either turned off or in standby mode.
Selecting the Input Source
| Source Input | Use | Remote Control Button | Display |
| OPTICAL | Connecting the soundbar with Optical Cable (not included), to the Optical port of a TV, PC or similar device. | 'Input' | OPTI |
| TV ARC /eARC | Connecting the soundbar with HDMI(ARC) Cable (not included), to the TV HDMI(ARC/eARC) port . When the soundbar is in ARC mode will display the text ARC, and when is in eARC will display EARC text. | 'Input' | ARCEARC |
| Bluetooth | Pairing the soundbar via Bluetooth with a TV, phone, or other similar device to play audio from via Majority Axis Atmos . | 'Input' or 'Pair' | BT |
| USB | USB Playback port- to be used to play audio from a USB stick (not included). | 'Input' | USB |
| AUX | Connecting the soundbar with 3.5mm audio cable ( not included), with a TV, PC, or other similar devices | 'Input' | RUX |
| STANDBY | Majority Axis Atmos has an automatic standby function, which activates after 20 minutes of no sound signal being received from the connected device. Press the power button to take the soundbar out of standby mode and resume playback. | Power ON/ Standby | -- |
Dolby Atmos
Majority Axis Atmos soundbar with wireless subwoofer is manufactured under license from Dolby Laboratories. Dolby, Dolby Audio, Dolby Vision, Dolby Atmos and the double -D symbol are trademarks of Dolby Laboratories.
What is Dolby Atmos®?
Dolby Atmos® is an advanced audio technology that delivers immersive, three-dimensional sound for a more cinematic experience.
Using Dolby Atmos®
Dolby Atmos® is only available in TV (eARC) mode. For details on how to connect, please refer to the "HDMI ARC/eARC Connection".
- To use Dolby Atmos® in TV (eARC) mode, your TV must support Dolby Atmos®.
- Ensure that "No Encoding" is selected for bitstream in the digital audio output settings of the connected external device (e.g. Blu-ray player, TV, etc).
- When entering Dolby Atmos® / Dolby Digital Plus format, the soundbar will display DOLBY ATMOS or DOLBY SURROUND.
• If available, set the audio output sampling rate to 192 kHz.
• This soundbar supports 4K, Passthrough and Dolby Vision. When playing a disc that supports 4K video signals, the signal can be delivered directly to your TV.
Important Note:
- The soundbar will still operate when connected using other methods (such as a Digital Optical cable). However, these connections cannot support all Dolby features.
- For full Dolby Atmos® experience, we strongly recommend connecting via HDMI ARC/eARC.
Using the ARC/eARC Input
- Ensure that the TV's ARC/eARC port supports both video and audio and is HDMI-CEC compliant.
- Some 4K HDR TVs require the ARC input or picture settings to be adjusted for HDR content reception. For detailed setup instructions regarding HDR display, please refer to your TV's instruction manual.
Supported audio formats: Dolby Atmos, Dolby Digital, Dolby Digital Plus, Dolby TrueHD, and Dolby Surround.
When using the TV (ARC/eARC) input source:
- If the soundbar is not connected to your TV, or is in standby mode, “--” will appear on the display panel. Press the POWER/STANDBY button (Rem.1) to switch it on.
- If the soundbar is connected to your TV's HDMI ARC port, "ARC" will appear on the display.
- If the soundbar is connected to your TV's HDMI eARC port, "EARC" will appear on the display.
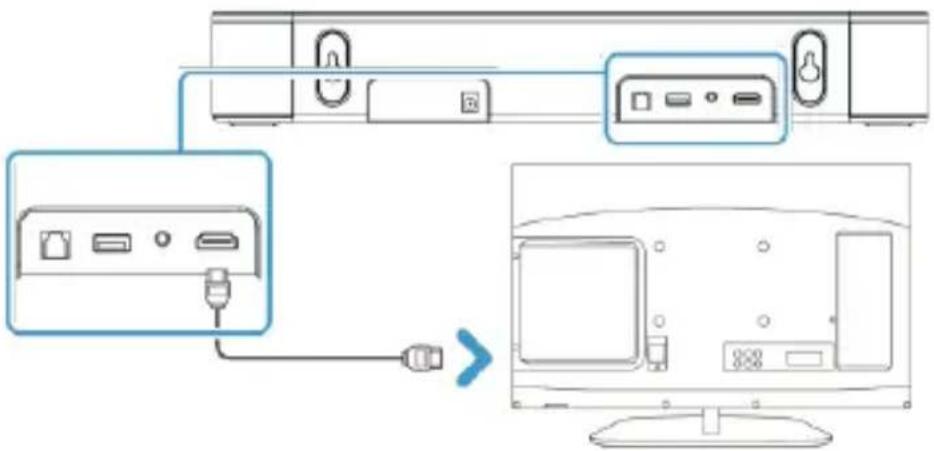
Connect the soundbar to a TV:
- Using a high-speed HDMI cable connect Majority Axis Atmos to your TV. Insert one end of the cable into the soundbar's ARC port (Ref.10), and the other end into your TV HDMI ARC/eARC port.
Change the soundbar mode into ARC:
- Press the 'INPUT' button repeatedly on the Soundbar (Ref.3) or on the remote control (Rem.7) until ARC Mode is selected. The soundbar LED display will show either 'ARC' or 'EARC' text.
Adjust the TV audio settings:
- Ensure the TV audio settings are set to HDMI ARC/ eARC sound output, and the audio format is set to AUTO or Dolby. Enable HDMI –CEC in your TV settings.
- Use the soundbar remote control to select and apply a predefined Equaliser (Rem.6) or to set the Sound Settings (Rem.10, 11, 12), according to your playback preferences.
Using the Optical Input
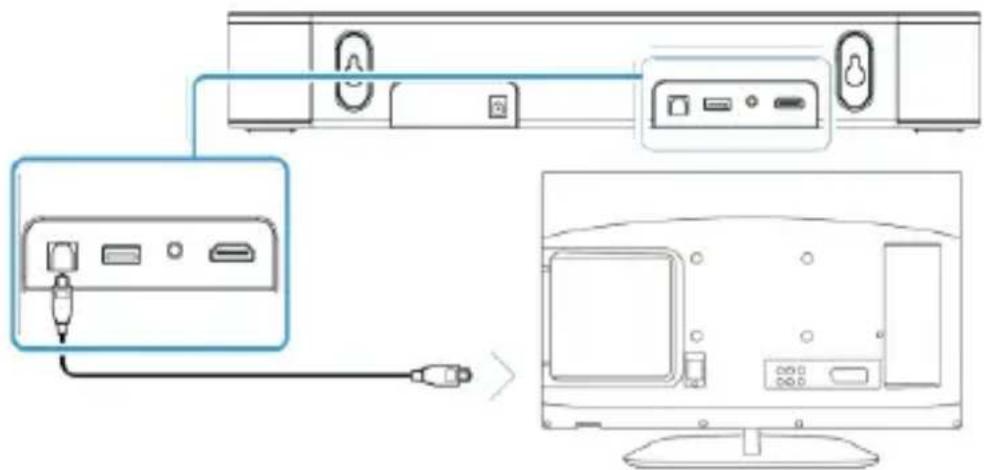
Connect the Majority Axis Atmos with an audio source/ such as a TV/PC/Freeview box with an Optical Audio Output using a Digital Optical Audio cable (not included).
Connect the soundbar to TV, PC, audio source:
- Insert one end of the Digital Optical Audio cable to the optical output on the TV or the audio source and the other end to the Optical Input port on the Soundbar (Ref.7).
- Press the 'POWER/STANDBY' button on the top of the soundbar (Ref.2) or on the remote control (Rem.1) to switch the soundbar on.
Change the soundbar mode into Optical:
- Press the 'INPUT' button on the remote control repeatedly (Rem.7) to switch to Optical Mode or press the 'INPUT' button (Ref.3) repeatedly on the soundbar to select 'Optical Mode'. The soundbar LED display must show 'OPTI'.
Adjust the audio settings on TV, PC audio source:
- Using the native controls on your TV or connected device, make sure the TV audio settings are set to Digital Optical Audio and the digital audio format to PCM.
- When connecting the soundbar using optical with other device than the TV such as a DVD player, set the audio settings on your device to AUTO or Dolby.
• Use the soundbar remote control to apply on sound a predefined Equaliser (Rem.6) or set the Sound Settings (Rem.10, 11, 12) according to your playback preferences. Control the volume levels using the soundbar remote.
Using the AUX Input
Majority Axis Atmos can be connected to a PC, tablet, smartphone, TV's headphone jack by using the AUX input on the soundbar.
In this mode the audio playback can only be controlled from connected device.
Connecting to external devices using a 3.5 mm to 3.5 mm audio cable (included):
- Insert one end of the 3.5mm audio cable into the AUX input socket on the rear panel of the Soundbar (Ref.9) and the other end into the audio output/headphone output on external devices, e.g. MP3 player, phone or other audio sources etc.
Connecting to the TV or a DVD Blu-ray player using the 3.5 mm to RCA cable (not included)
- Insert the 3.5mm cable end into the AUX Input port on the rear panel of the Soundbar (Ref.9) and insert the other two RCA colored ends into TV's RCA audio output port or to the DVD player AUDIO RCA Output.
Once the cables are connected, press the 'POWER/STANDBY' button on the panel of the soundbar (Ref.2) or remote control (Rem.1) to switch the soundbar on.
Change the soundbar mode into AUX
- Press the 'INPUT' button repeatedly on the soundbar (Ref.3) or on the remote control (Rem.7) repeatedly until AUX In Mode is selected. The LED screen must display 'RUX'.
Adjust the audio settings on your device. For example, if you connect Majority Axis Atmos with a TV, the digital audio format must be set to PCM.

PLEASE NOTE: If you connect the Majority Axis Atmos to a TV using any of these cables and experience no sound from the soundbar, please check the TV's audio/sound settings and set them to PCM. Also, ensure that the RCA port on your TV is an RCA Audio Output port — if it is an RCA Audio Input port, no sound will be produced. Alternatively, try a different type of connection, such as an optical cable, ARC/eARC, or Bluetooth.
Bluetooth Mode
The Majority Axis Atmos can be paired via Bluetooth with any Bluetooth-enabled device, such as a Smart TV, PC, phone, tablet, or similar device you would like to play audio from through the soundbar.
Switching On
Press the POWER button on the soundbar (Ref.2) or on the remote control (Rem.1) to turn the unit on.
Activating Bluetooth Mode
- Press the INPUT button repeatedly on the remote control (Rem.7) or on the soundbar (Ref.3) until Bluetooth Mode is selected. The display will show "BT". A short beep will sound to confirm the mode. While searching for a device, "BT" will flash on the soundbar display.
Pairing with a Bluetooth Device
- Enable Bluetooth on your device and search for new devices.
- Select "Majority Axis Atmos" from the list when prompted.
Successful Connection
- When successfully paired, a double beep will sound, and "BT" text will stop flashing. After the initial pairing, the soundbar will automatically reconnect unless manually unpaired or reset.
Reconnecting or Unpairing a Device
- If your device should become unpaired or you find it is unable to connect, repeat the above steps.
- To unpair the soundbar from a paired device press and hold the 'PAIR' button on remote control (Rem.8) for 2-3 seconds to disconnect.
Start playing form your device and the sound will be heard via Majority Axis Atmos.
Playback Controls in Bluetooth Mode
- Play/Pause button: Start, pause, or resume playback.
- PREV/NEXT buttons: Skip to the previous or next track.
• EQ (remote control only): Select a predefined equaliser setting.
• Sound Settings (remote control only): Adjust bass and treble to your preference.
PLEASE NOTE:
• The Majority AXIS Atmos is not compatible with Bluetooth earbuds.
- If you are experiencing connection problems, remove "Majority Axis Atmos" from your device's Bluetooth history, ensure the soundbar is within 10 metres range of your device, and try pairing again.
- For the best sound quality, ensure a clear line of sight between your device and the soundbar.
- If the paired device is switched off or disconnected, the soundbar will automatically enter pairing mode.
- Bluetooth streaming may be interrupted by obstacles such as walls, metal casings, or nearby devices operating on the same frequency.
• To connect to another Bluetooth device, press and hold PAIR on the remote control to disconnect the current device, then follow the pairing steps to connect with a new device.
Using the USB Playback Port on the soundbar
The Majority Axis Atmos soundbar includes a USB port for playing music directly from a USB stick (up to 32GB) with supported audio formats: MP3, FLAC, and WAV.
- Press the POWER button on the soundbar (Ref.2) or the remote control (Rem.1) to switch the unit on.
- Insert the USB stick into the USB port on the back of the soundbar (Ref.8).
- The soundbar will automatically switch to USB mode, shown on the LED display as "USB".
- If the USB stick contains supported files, playback will start automatically. The display will show "00:00", then the elapsed play time once music begins.
Playback controls in USB mode:
• VOL +/−: Adjust the volume.
• PLAY/PAUSE: Play or pause playback.
- PREV/NEXT: Skip to the previous or next track.
• EQ (remote control only): Select a predefined equaliser setting.
• Sound Settings (remote control only): Adjust bass and treble to your preference.

natural_image
Diagram of a USB port with ports and an arrow indicating data transfer (no text or symbols)Please note:
- The USB port on the soundbar is for playback only – it cannot connect or charge other devices.
• The USB ports on the subwoofer is not for music playback.
Observation Potential Cause / Solution
| No Power/ No Function | Check that the power is switched on at the wall socket.Ensure the power adaptor of the soundbar and the power cable of the subwoofer are properly connected to the mains outlet.Unplug the soundbar and subwoofer and disconnect them from your devices. Leave everything switched off for 10 minutes, then reconnect the soundbar and subwoofer to the mains and power on.f a particular mode causes issues, try an alternative connection (e.g. Optical or Bluetooth) |
| No sound | Check whether the unit or your device is set to MUTE.Ensure the soundbar is powered on and not in standby mode (display shows “--”). Press the POWER button on the remote or the soundbar, then select the mode that matches your connection type.Ensure the soundbar is in the correct mode and all cables are securely connected.Increase the volume on both the soundbar and your device.Check your device's audio settings to ensure they are properly configured. |
| Hissing Sound or No Sound heardwhen connected to TV (ARC/eARC / Optical / AUX) | Check the TV's audio or sound settings and adjust, as necessary. Hissing sound can be heard if if the cable used is a faulty one, poor quality, or if Tv audio settings are not adjusted as per connection used.Ensure the TV is set to use external speakers . The TV set should be compliant with HDMI ARC/ eARC connection for this connection type. Ensure CEC is enabled when using TV eARC.For TV eARC, use a 19-core HDMI cable (high speed).Check the TV's audio/sound settings and ensure the digital audio format is set to PCM.Check cable connections, replace the cable if necessary, or try an alternative connection. |
| No Sound in Bluetooth Mode | Check that your Bluetooth device is paired and the soundbar is set to BT mode.If the soundbar is paired with another device, unpair and try again.Ensure your device is within Bluetooth range with no obstacles in between, such as furniture or walls in between.Increase the volume on both the soundbar and your device.If issues persist:-Unplug the soundbar and leave it switched off for a few minutes.-Remove the soundbar from your device's Bluetooth list.-After 5 minutes, reconnect the soundbar to the mains, allow it to pair with its subwoofer, set it to BT mode, and try pairing again. |
Troubleshooting
| No sound In USB playback mode | Ensure the audio files uploaded on the USB stick are in supported formats: MP3, Flac or WAV.Ensure the soundbar mode is st to 'USB'. This text must be displayed on soundbar LED panel. Use a different USB stick. |
| Remote control function issues | Check whether the battery needs to be replaced, try new ones.Check whether there are obstacles blocking the remote sensor. |
| Sound quality is not as expected | Use the soundbar remote control to select a predefined and apply Equaliser (Rem.6) or the Sound Settings (Rem.10, 11, 12) and set them according to your playback preferences. |
Do you still need help with your Majority Bowfell Axis Atmos? Contact Tech Support
If you require further assistance with your Majority product, please contact our team on the Majority website: www.majority.co.uk/support or email us @techsupport@majority.co.uk
Product Specification
| Power supply 110V -240V ~ 50Hz/60Hz | |
| Sound Frequency Response 55Hz-20KHz | |
| Bluetooth version 5.0 | |
| Bluetooth range Up to 8 metres | |
| USB playback audio format supported MP3, WAV, FLAC | |
| Soundbar Dimension (LxHxW) Subwoofer Dimension (LxHxW) | 40.5 (L) x 9(W) x 6.2 (H) cm18.5 (L)x 15 (W)x 32 (H) cm |
| Net Product Weight (soundbar with subwoofer) | 2.95 KG |
Warranty
All products come with a standard 12-month warranty. To extend your warranty to a total of three years, you must register your product within 30 days of purchase at www.majority.co.uk. Simply navigate to the menu and select 'Register Your Product' and complete the registration form. This service is completely free of charge.
Bowfell
Axis Atmos
natural_image
Simple line drawing of a cable with a plug and a labeled connection point B (no text or symbols beyond label)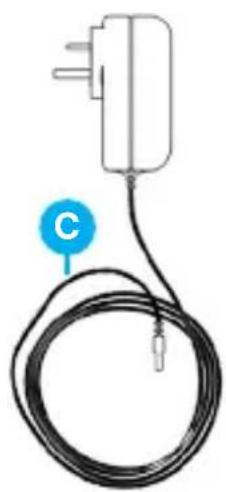
natural_image
Simple line drawing of a cable with a plug and a labeled point 'C' (no text or symbols on the cable itself)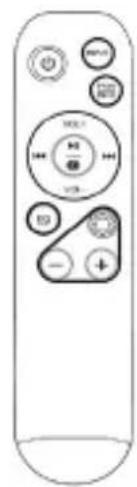
natural_image
Line drawing of a remote control with buttons and dials (no text or symbols)
natural_image
Coiled electrical cable with two connectors and a labeled point E (no text or symbols on the cable itself)
natural_image
Diagram showing two cylindrical objects with a blue circular label containing the letter F, and two separate screw-like structures below (no text or symbols)
natural_image
Illustration of a blank book with a blue circular marker labeled 'G' on top (no text or symbols on the cover)natural_image
Line drawing of a simple TV set with a monitor on top and a keyboard, no text or symbols present.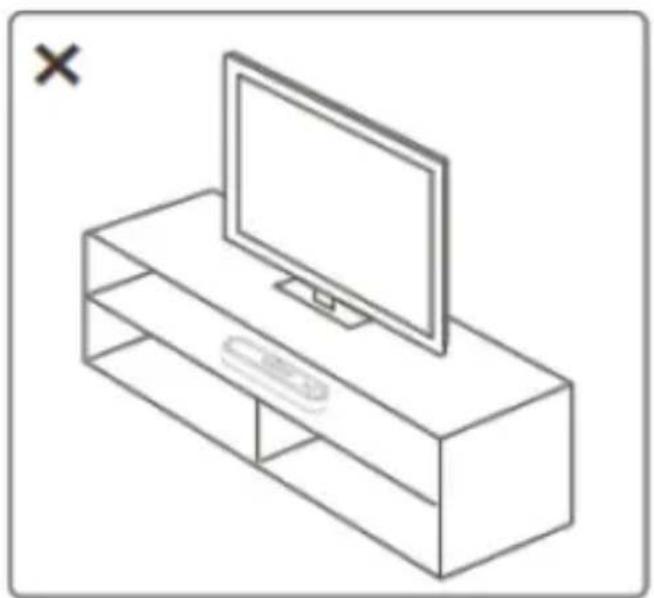
natural_image
Line drawing of a flat-screen TV set with a monitor and cable rack (no text or symbols)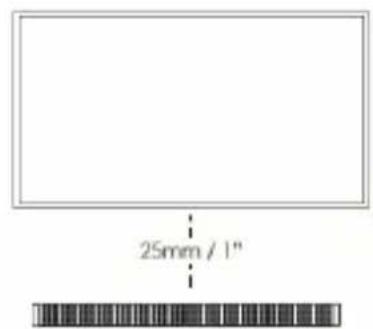
natural_image
Simple line drawing of two connected devices with wires, no text or symbols present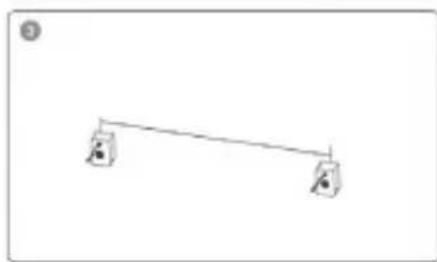
natural_image
Simple line drawing of a lever with two weights (no text or symbols)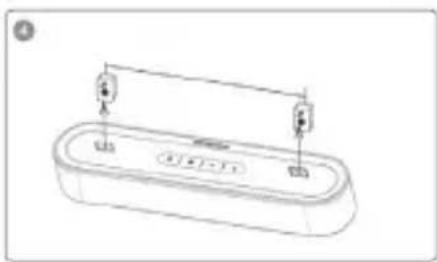
natural_image
Line drawing of a rectangular sink with two hanging fixtures and a central control panel (no text or symbols)natural_image
Diagram of a USB port with ports and an arrow indicating data transfer (no text or symbols)Bitte beachten:
natural_image
Simple line drawing of a cable with a plug and labeled point B (no text or symbols beyond label)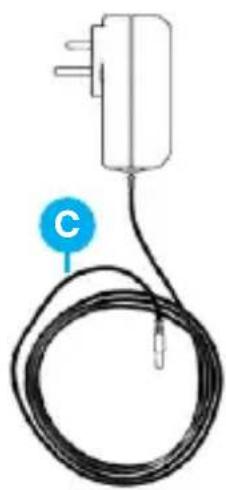
natural_image
Simple line drawing of a cable with a plug and a labeled component (no text or symbols)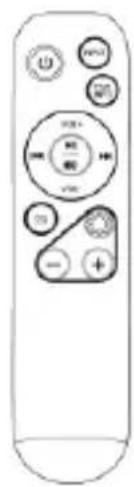
natural_image
Coiled electrical cable with two connectors and a labeled point E (no text or symbols on the cable itself)
natural_image
Diagram showing two vertical bars with a blue circular label containing the letter 'F' above them, and two separate screw-like figures below (no text or symbols present)
natural_image
Simple line drawing of a blank book with a blue circular icon labeled 'G' on top (no text or symbols on the book itself)natural_image
Line drawing of a TV set with a monitor on top (no text or symbols)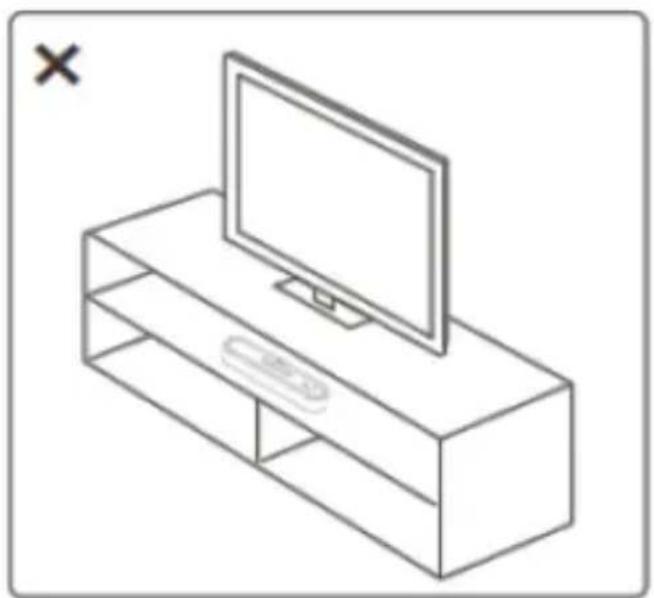
natural_image
Line drawing of a flat-screen TV set with a monitor and cable rack (no text or symbols)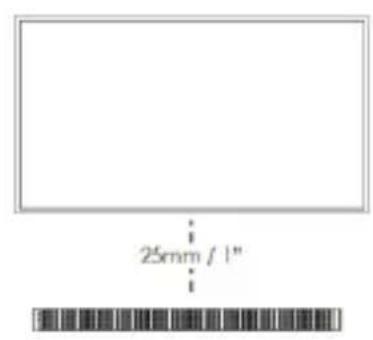
natural_image
Simple line drawing of a mechanical linkage or lever system (no text or symbols)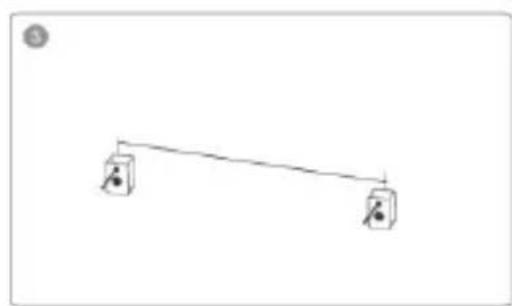
natural_image
Simple line diagram of a lever with two hanging weights (no text or symbols)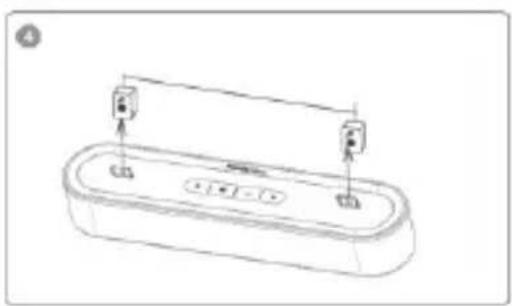
natural_image
Line drawing of a rectangular electronic device with two ports and a connecting rod (no text or symbols)natural_image
Diagram of a USB drive with port and connector ports (no text or symbols)Veuillez noter :
natural_image
Simple line drawing of a cable with a plug and a labeled connection point B (no text or symbols beyond label)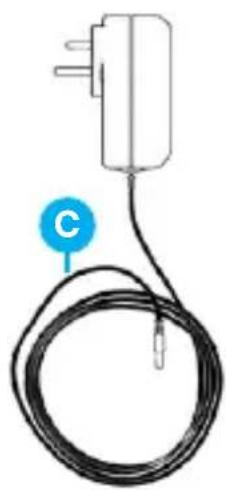
natural_image
Simple line drawing of a cable with a plug and a labeled component (no text or symbols)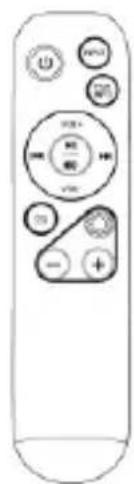
natural_image
Coiled audio amplifier cable with two leads and a labeled point E (no text or symbols on the cable itself)
natural_image
Diagram showing two cylindrical objects with a blue circular label containing the letter F, and two separate screw-like figures below (no text or symbols present)
natural_image
Simple line drawing of a closed book with a blue circular icon labeled 'G' on top (no text or symbols on the book itself)natural_image
Line drawing of a flat-screen TV set with a monitor and keyboard (no text or symbols)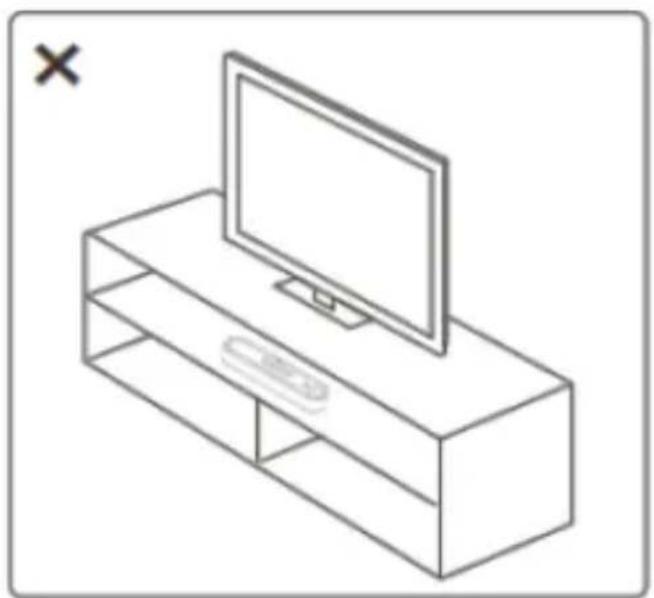
natural_image
Line drawing of a flat-screen TV set with a monitor and cable rack (no text or symbols)Mounting the Soundbar to the Wall
natural_image
Simple line drawing of a horizontal beam with two vertical supports at both ends (no text or symbols)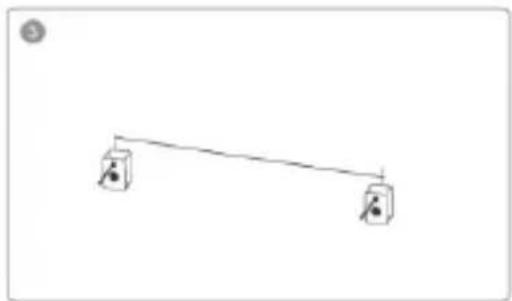
natural_image
Simple line diagram of a lever with two hanging weights (no text or symbols)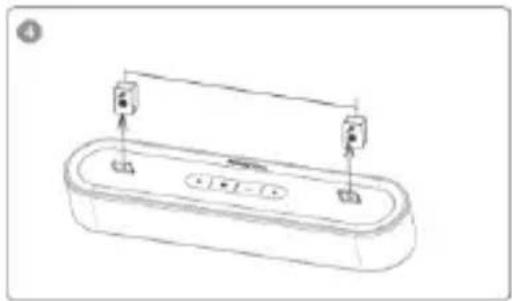
natural_image
Line drawing of a rectangular electronic device with two ports and a connecting rod (no text or symbols)natural_image
Diagram of a USB port with ports and an arrow indicating data transfer (no text or symbols)Nota:
natural_image
Simple line drawing of a cable with a plug and labeled point B (no text or symbols on the cable itself)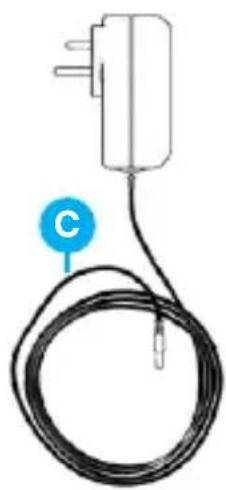
natural_image
Simple line drawing of a cable with a plug and a labeled component (no text or symbols)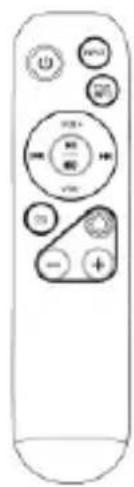
natural_image
Coiled electrical cable with two connectors and a labeled point E (no text or symbols on the cable itself)
natural_image
Diagram showing two cylindrical objects with a blue circular label labeled 'F' above them, and two separate screw-like figures below (no text or symbols)
natural_image
Simple line drawing of a blank book with a blue circular icon labeled 'G' on top (no text or symbols on the book itself)natural_image
Line drawing of a flat-screen TV set with a monitor and keyboard (no text or symbols)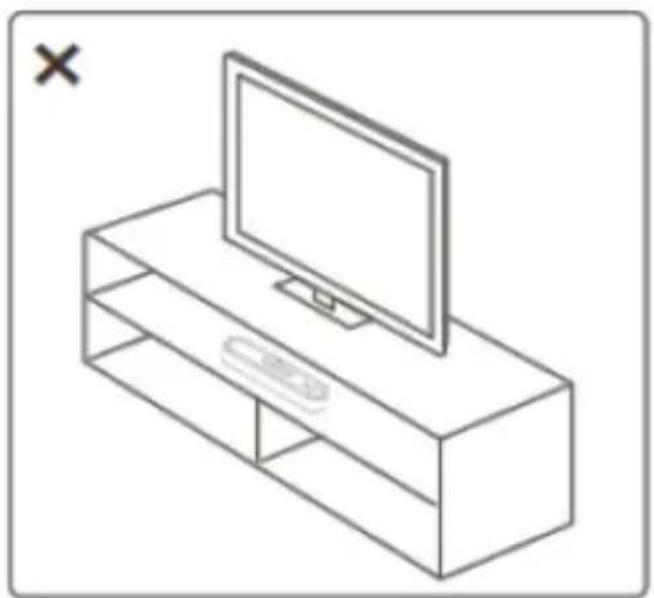
natural_image
Line drawing of a flat-screen TV set with a monitor and cable rack (no text or symbols)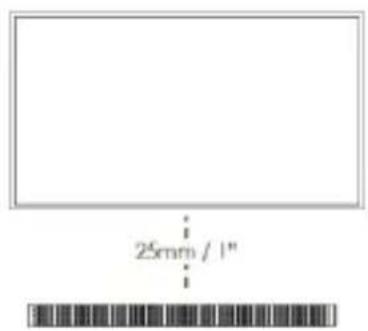
natural_image
Simple line drawing of a lever system with two weights and a fulcrum (no text or symbols)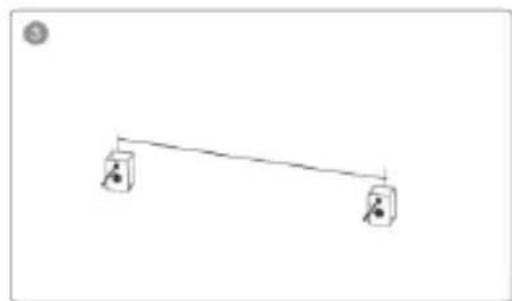
natural_image
Simple line diagram of a lever with two hanging weights (no text or symbols)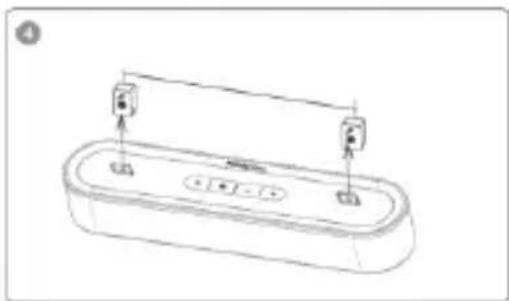
natural_image
Line drawing of a rectangular electronic device with two ports and a horizontal line above it (no text or symbols)natural_image
Diagram of a USB drive with port and ports, showing a blue USB icon pointing to a device (no text or symbols present)Tenga en cuenta:
natural_image
Simple line drawing of a cable with a plug and a labeled component (B), no text or symbols present.
natural_image
Simple line drawing of a cable with a plug and a labeled component (no text or symbols)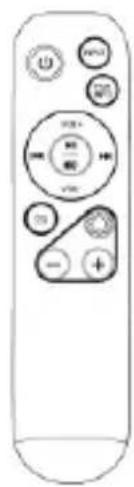
natural_image
Coiled electrical cable with two connectors and a labeled point E (no text or symbols on the cable itself)
natural_image
Diagram showing two vertical cylindrical objects with a blue circular label containing the letter F, and two separate screw-like structures below (no text or symbols present)
natural_image
Simple line drawing of a blank book with a blue circular icon labeled 'G' on top (no text or symbols on the book itself)natural_image
Line drawing of a computer monitor mounted on a rectangular TV base (no text or symbols)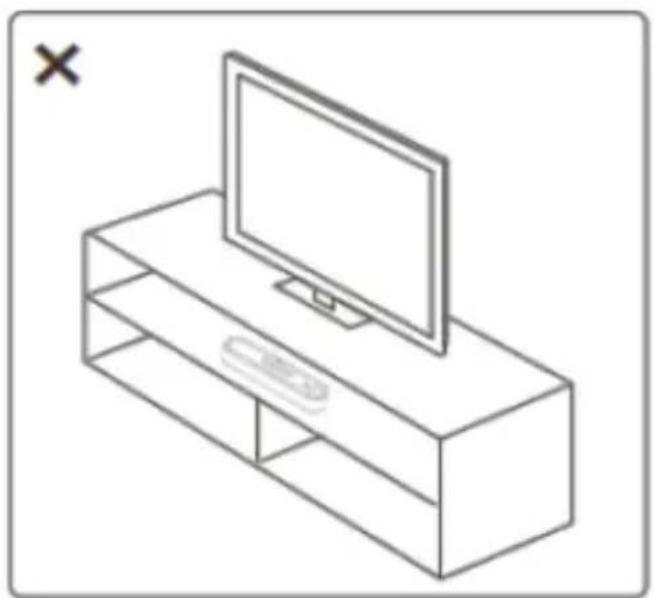
natural_image
Line drawing of a flat-screen TV set with a monitor and cable rack (no text or symbols)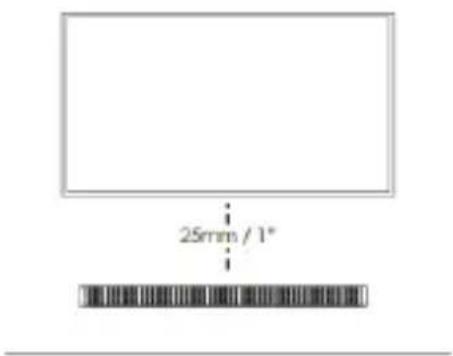
natural_image
Simple line drawing of a mechanical linkage or lever system (no text or symbols)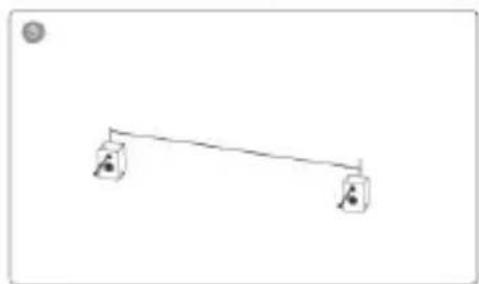
natural_image
Simple line drawing of a lever with two weights (no text or symbols)
natural_image
Line drawing of a rectangular electronic device with two vertical connectors and a central control panel (no text or symbols)natural_image
Diagram of a USB port with ports and an arrow indicating data transfer (no text or symbols)Huomio:
EN Safety and Usage Guidelines (All where applicable)
General Safety Information - Read and Retain: Review all safety and operating instructions before use; keep them for future reference. Follow Instructions: Adhere strictly to all safety and operational guidelines. Water Exposure: Keep the device away from water; avoid placing liquids near it. Ventilation: Ensure ventilation openings are unobstructed to prevent overheating. Heat Sources: Keep the device away from heat-emitting appliances. Wall Mounting - Installation Safety: Follow the manufacturer's instructions and use approved mounting kits only. Avoid drilling into areas with cables, gas, or water lines. Use proper tools and safety apparatus. Regular Maintenance: Inspect regularly for wear or damage, especially if wall-mounted. Relocation: Detach from the wall mount before moving. Child Safety: Keep out of children's reach and ensure heavy items are securely mounted. Seismic Precautions: Use specialized mounts in earthquake-prone areas. Electrical Safety - Power Source: Use the specified power source; consult an electrician if unsure. Cable Management: Protect the power cord from damage. Power Disconnection: Keep the main plug accessible; unplug during storms or long periods of non-use. Battery Safety - Charging: Use the manufacturer's charger; avoid extreme conditions. Heat Exposure: Keep batteries away from heat to prevent explosion or leakage. Battery Condition: Discontinue use if the battery is damaged; dispose of it properly. Replacement: Only use recommended batteries; incorrect types can cause hazards. External Batteries: Use only specified types, observing correct polarity. Battery Removal: Remove batteries if not used for an extended period. Disposal: Follow local regulations for battery disposal; do not incinerate. Connectivity Safety - Cable Connections: Power off devices before connecting or disconnecting cables. Bluetooth Pairing: Ensure a secure connection; avoid interference from other devices. Volume Control: Keep volume moderate to prevent hearing damage. Connectivity and Data Security - Wireless Security: Review privacy policies and secure your network. Software Updates: Keep software updated for security and performance. Children's Safety Warnings - Product Use: Intended for adults; keep away from children. Battery Warning: Keep batteries and items containing batteries out of children's reach. Volume Control: Maintain a safe volume level to protect children's hearing. Fire Hazard - Flammable Materials: Do not place open flames near the product. Overheating: Avoid covering the product to prevent overheating and fire risks. Disposal and Recycling - Product Disposal: Dispose of at a recycling centre according to local laws. Environmental Compliance: Follow regulations for battery and electronic waste disposal. User Maintenance - Cleaning: Unplug before cleaning; use a dry cloth only. Servicing: Only qualified personnel should perform repairs. Data Protection: Reset to factory settings before returning or disposing of the product. Disclaimer: Failure to follow these instructions may result in injury, death, or property damage. The manufacturer is not liable for damage caused by improper use.
Declaration of Conformity:
We, Izilla Ltd, Newton House, 2 Pioneer Court, Histon, Cambridge, CB24 9PT declare under our sole responsibility that the product:
Product Name: Majority Bowfell Axis 2.1 Atmos Model: 1000003084
Brand Name: Majority
To which this declaration referred is in conformity to the following harmonized standards or normative documents (CE & Rohs 2.0);
EN 55035:2017, EN 55032:2015, EN61000-3-2:2014, EN61000-3-3:2013, EEN62368-1:2004+A11:2017, ETSI EN 301 489-1 V2.2.3(2019-11), ETSI EN 301 489-17, V3.2.2(2019-12), ETSI EN 300 328 V2.2.2 (2019-07), EN 62479: 2010, IEC 62321-3-1:2013, IEC 62321-4:2013, IEC 62321-5:2013, IEC 62321-6:2015, IEC 62321-7-1:2015, IEC 62321-7-2:2017, IEC 62321-8:2017, (EC)NO 1275/2008,EN50564:2011, (EC)NO 801/2013.
Complying with the requirements or provisions of Council Directives which relate to:
EMC Directive 2014/30/EU, RED Directive 2014/53/EU, LVD Directive 2014/35/EU, Directive (2011/65/EU) and its amendment directives 2015/863/EU (RoHS 2.0) of the, European parliament, ERP Directive 2009/125/EC.
All essential test suites have been carried out.
Point of Contact: Eddie Latham | Founder
Signed: E.Latham
Date of Issue: January 2024
Place of Issue: Cambridge, UK
Importer's Addresses:
UK: iZilla Ltd, Newton House, 2 Pioneer Court, Histon, Cambridge, CB249PT
Email: techsupport@majority.co.uk
EU RP: AR Experts, Po Box 5047, 3620 AA Breukelen, The Netherlands
Email: info@ar-experts.eu
US: iZilla Ltd C/O A.N.Deringer Inc, 19520 Wilmington Ave, Rancho
Dominguez, CA, 90220
Email: techsupport@majority.co.uk

ATTENTION
RISK OF ELECTRIC SHOCK DO NOT OPEN


CAUTION
RISQUE D'ELECTROCUTION NE PAS OUVRIR


IMPORTANT: Please read all instructions carefully before use and keep for future reference
MAJORITY
www.majority.co.uk




- What is in the box?
- Front, top and rear views of the soundbar
- Front and rear views of the subwoofer
- Remote Control
- Remote Control Range
- Getting Started
- Preparing to wall-mount the soundbar
- Wall-Mounting Instructions
- Connecting to the Mains Socket
- The Majority Axis Atmos soundbar will automatically connect to its wireless subwoofer.
- Manual Pairing
- Selecting the Input Source
- Dolby Atmos
- What is Dolby Atmos®?
- Using Dolby Atmos®
- Important Note:
- Using the ARC/eARC Input
- When using the TV (ARC/eARC) input source:
- Connect the soundbar to a TV:
- Change the soundbar mode into ARC:
- Adjust the TV audio settings:
- Using the Optical Input
- Connect the soundbar to TV, PC, audio source:
- Change the soundbar mode into Optical:
- Adjust the audio settings on TV, PC audio source:
- Using the AUX Input
- Connecting to external devices using a 3.5 mm to 3.5 mm audio cable (included):
- Connecting to the TV or a DVD Blu-ray player using the 3.5 mm to RCA cable (not included)
- Change the soundbar mode into AUX
- Bluetooth Mode
- Switching On
- Activating Bluetooth Mode
- Pairing with a Bluetooth Device
- Successful Connection
- Reconnecting or Unpairing a Device
- Playback Controls in Bluetooth Mode
- PLEASE NOTE:
- Using the USB Playback Port on the soundbar
- Playback controls in USB mode:
- Troubleshooting
- Do you still need help with your Majority Bowfell Axis Atmos? Contact Tech Support
- Warranty
- Bowfell
- Axis Atmos
- Bitte beachten:
- Veuillez noter :
- Mounting the Soundbar to the Wall
- Nota:
- Tenga en cuenta:
- EN Safety and Usage Guidelines (All where applicable)
- Declaration of Conformity:
- To which this declaration referred is in conformity to the following harmonized standards or normative documents (CE & Rohs 2.0);
- Complying with the requirements or provisions of Council Directives which relate to:
- Importer's Addresses:
- MAJORITY
Brand : Majority
Model : Bowfell Axis Atmos
Category : Soundbar