
BabyBlend+ 6-in-1 - Baby products Luvion - Free user manual and instructions
Find the device manual for free BabyBlend+ 6-in-1 Luvion in PDF.


| Appliance type | 6-in-1 baby food steamer blender |
| Brand | Luvion |
| Model | BabyBlend+ 6-in-1 |
| Main functions | Steaming, blending, reheating, sterilizing, keep warm, descaling |
| Heating power | 700 W |
| Blending power | 120 W |
| Voltage | 220-240 V ~ 50 Hz |
| Water tank capacity | 280 ml |
| Blender container capacity | 900 ml |
| Maximum blending capacity | 500 ml (food + liquid) |
| Dimensions (L x W x H) | 288 x 132 x 212 mm |
| Weight | 2.1 kg |
| Materials | Plastic, stainless steel (blade), possible glass (bottle not included) |
| Spare parts | Blender container, steaming basket, strainer, lids, seal, blade, measuring cup, spatula, tongs |
| Cleaning | All parts except the body are dishwasher safe. Clean after each use. |
| Safety | Unplug before cleaning, very sharp blades, watch out for hot steam, do not immerse motor |
| Included accessories | Steaming basket, strainer, measuring cup, anti-splash lid, spatula, tongs, insulating lid |
| Warranty | Not specified in the manual |
Frequently Asked Questions - BabyBlend+ 6-in-1 Luvion
User questions about BabyBlend+ 6-in-1 Luvion
0 question about this device. Answer the ones you know or ask your own.
Ask a new question about this device
Download the instructions for your Baby products in PDF format for free! Find your manual BabyBlend+ 6-in-1 - Luvion and take your electronic device back in hand. On this page are published all the documents necessary for the use of your device. BabyBlend+ 6-in-1 by Luvion.
USER MANUAL BabyBlend+ 6-in-1 Luvion
NL Handleiding & Veiligheidsinstructies 2
EN Manual & Safety Instructions 14
FR Manuel d'utilisation & Consignes de sécurité 26
DE Bedienungsanleitung & Sicherheitshinweise 38
WELKOM / WELCOME / BIENVENUE / WILLKOMMEN
EN Thank you for purchasing the LUVION® BabyBlend+ 6-in-1. With this instruction manual you have all the information to quickly start using your LUVION® product. Please preserve this guide for further reference.
TOUCH-BEDIENINGSPANEEEL
Figuur 7
HET MES INSTALLEREN EN VERWIJDEREN
Figuur 10 Figuur 11
Figuur 18
Figuur 19 Figuur 20
Figuur 24
VERWARMING

Figuur 25 Figuur 26
Figuur 27
Figuur 28 Figuur 29

TAFELS VOOR VERWARMING
Figuur 30
REINIGING EN VERZORGING

Figuur 32
Figuur 33

Figuur 31
REINIGING VAN DE STOOMUITLAAT
- The following precautions must be taken each time an electrical appliance is used and particularly when children are present.
- Be careful if hot liquid is poured into the food processor or blender as it can be ejected out of the appliance due to sudden steaming.
• Always disconnect the appliance from the power supply if unattended and before assembling, disassembling or cleaning. - Children should be supervised to ensure that they do not play with the appliance. Keep the appliance and the cord out of reach from children.
- This appliance is not intended to be used by persons (including children) with reduced physical, sensory or mental capabilities, lack of experience and knowledge unless they are under supervision during the whole operation on.
- If the power cord is damaged, it must be replaced by the manufacturer, service agent or other qualified person in order to avoid accidents to occur.
- Never use the appliance if the plug, cord, casing or if the appliance itself is damaged. Handle the blades with great care, particularly when you empty or clean the jar.
- If the blades get blocked, always unplug the appliance before removing the cause of the blockage.
• The appliance gets very hot during steam cooking and may cause burning in the event of contact. - Beware of the hot steam that rises from the bowl and water tank during cooking and when you remove the lid.
- Never leave the appliance on without supervision.
- This appliance is intended to be used in a domestic household environment. Always use the handle to lift the bowl.
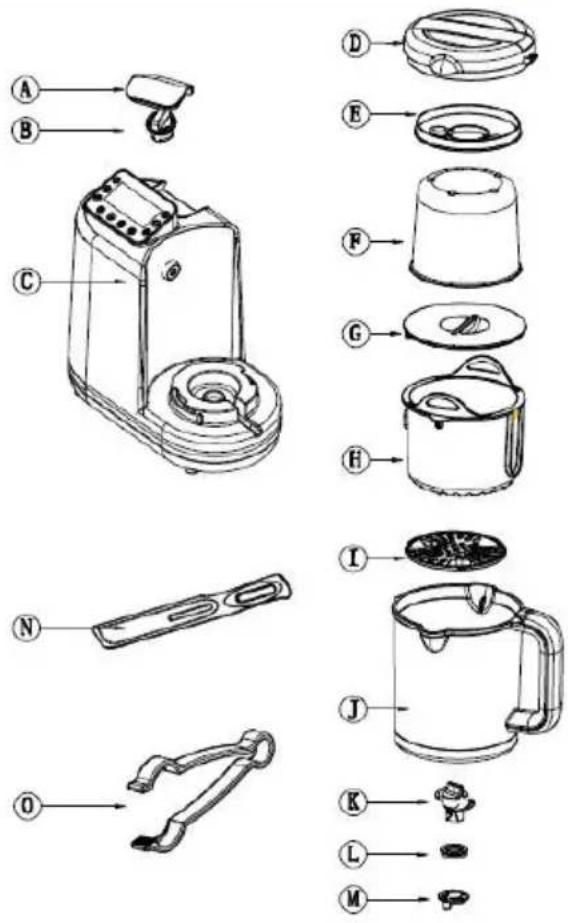
PARTS DESCRIPTION
A. Water tank lid
B. Water tank cap
C. Casing and digital control panel
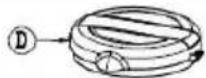
D. Jar lid
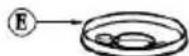
E. Heat insulation cover
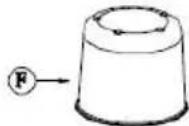
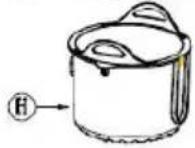
F. Measuring cup
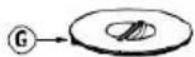
G. Splash Lid
H. Steaming basket
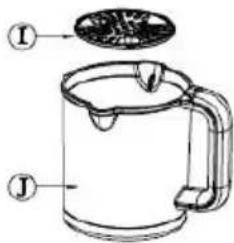
I. Strainer
J. Blender jug
K. Blade
L. Blade sealing gasket
M. Blade base
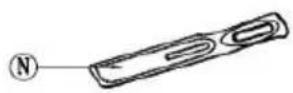
N. Spatula
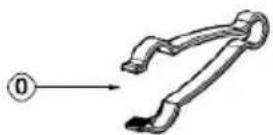
O. Pinchers
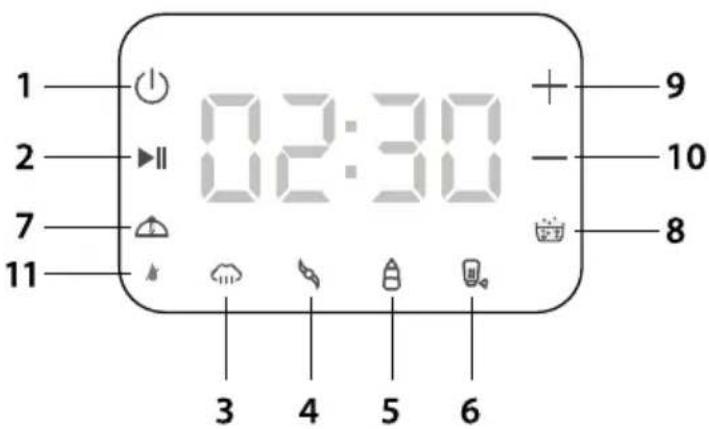
TOUCH CONTROL PANEL
- ON/OFF
- Start/Pause
- Steaming function
- Blending function
- Heater Function
- Sterilizer Function
- Keep warm
- Descaling
- Increase time
- Decrease time
- Empty water tank indicator
WATER LEVEL WINDOW
The left side of water tank shows water level (ml).
The right side shows an estimate of how many minutes of steam cooking the water level allows

Figure 3
Before first usage carefully clean the jar, the blades, the cooking baskets, the lids, The strainer, the spatula and the clamp with a sponge in soapy water or in the dishwasher.
FILLING THE WATER TANK (Figure 4 - Figure 6)
- Remove the water tank lid (A) by pulling it up as shown below.
- Open the water tank by turning the cap (B) anticlockwise.
- Fill the tank with water using the Measuring Cup (F)
- Close the water tank by turning the cap (B) clockwise.
- Put the lid (A) on to the tank nozzle and carefully press the lid down.
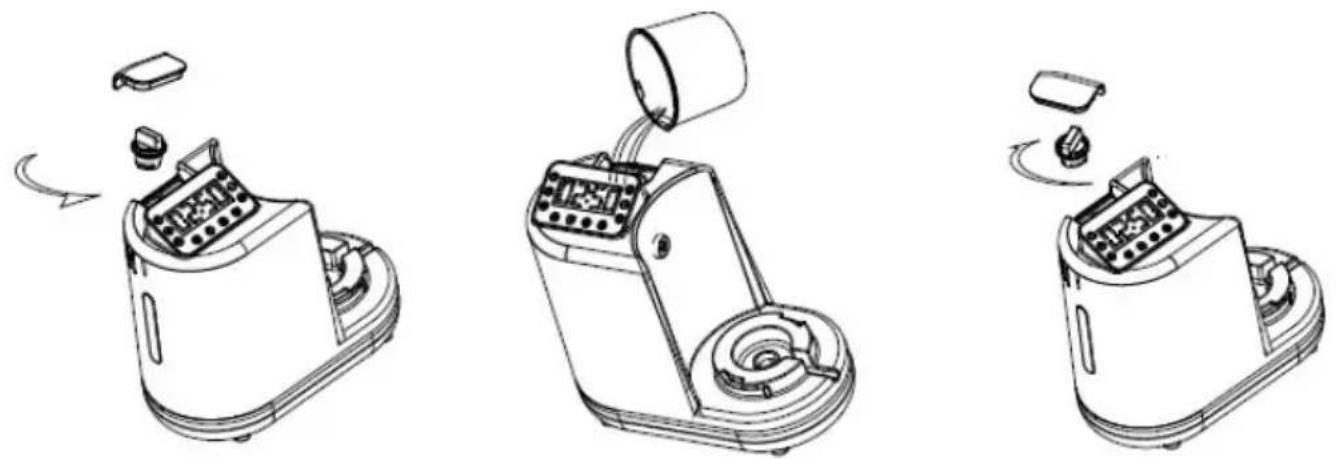
Figure 4 Figure 5 Figure 6
BLENDER JAR PLACEMENT
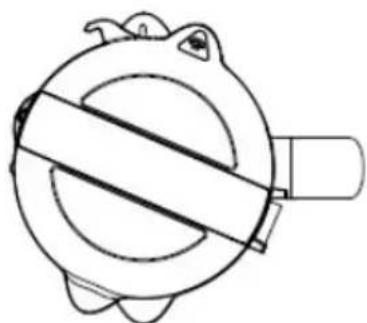
- Before use, make sure the blender jar fits correctly.
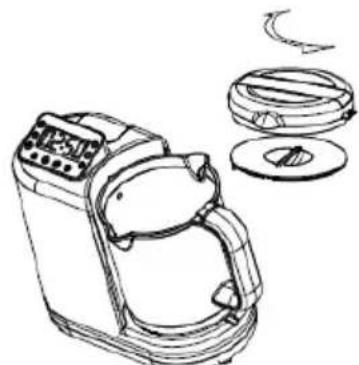
- If you want to use the jug lid, just fit the jug lid on the blender jar and turn anticlockwise, make sure the hook of the lid is fully inserted in the hold on the housing.
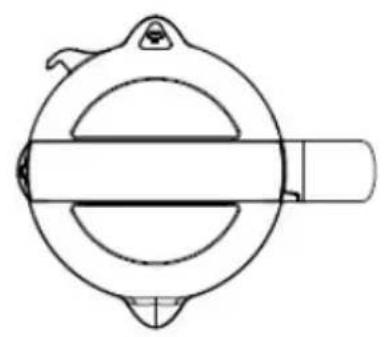
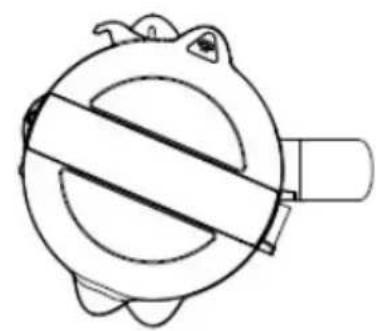
Figure 7
INSTALLING AND REMOVING THE BLADE
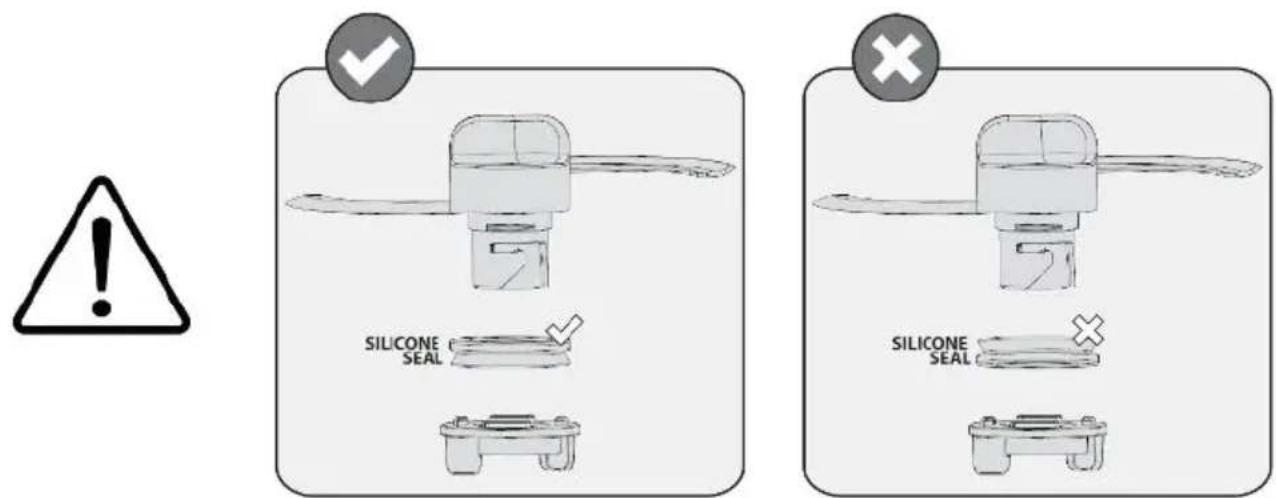
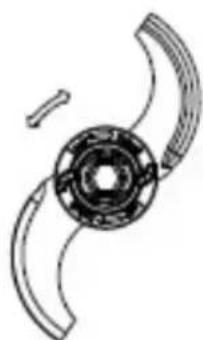
- Hold the blade (K) upside-down (as shown) and position the seal (L) with the suction pad facing upwards.
- Push the seal (L) onto the blade spindle.
- Hold the blender jar (J) upside-down and insert the blade's spindle into the hole inside the blender jar. Place the locking ring (M) on to the blade's spindle, while holding the blade in position inside the blender jug (J).
- Twist the locking ring (M) a quarter turn anticlockwise to secure that the blade is in place.
Important! Pull the locking ring (M) to ensure that the blade is properly attached before operation!
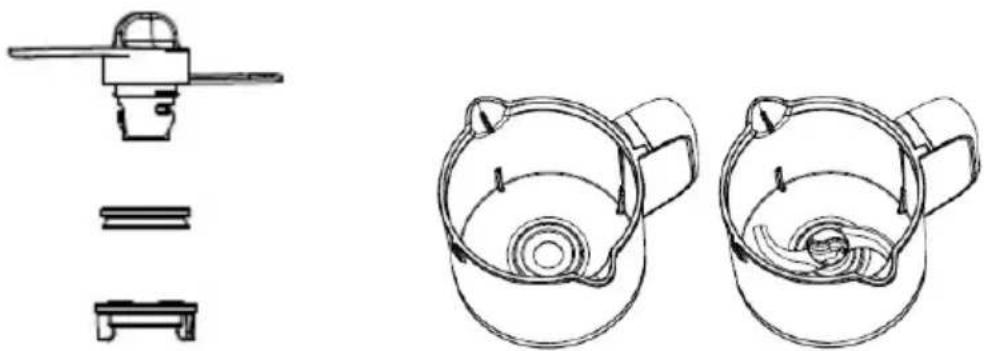
Figure 8 Figure 9
ANTI-DRY PROTECTION
Once the water tank is empty during steaming/heating/sterilizing, the empty water tank indicator on the control panel will flash and a buzzer will sound for 10 minutes.
As soon as fresh water is added into the tank the indicator and buzzer will stop and the appliance can be restarted and operation resumed.
STEAMING

- Fill the water tank
- Place the food into the steam basket (H).
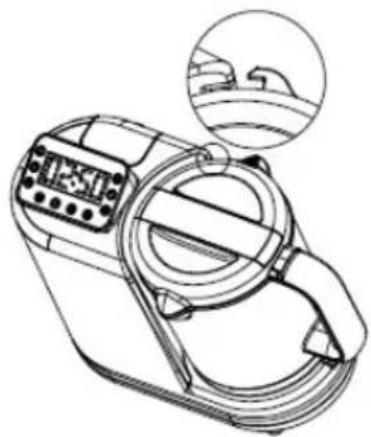
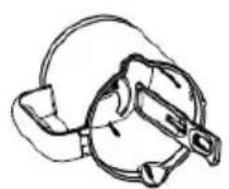
- If you want to steam only one food at a time, just put the food into the steaming basket and place the basket into the blender jar, put the jug lid at place and turn it anticlockwise into the handle (Figure 10). Before starting to steam, turn the buckle on the jug lid into the housing (Figure 11).
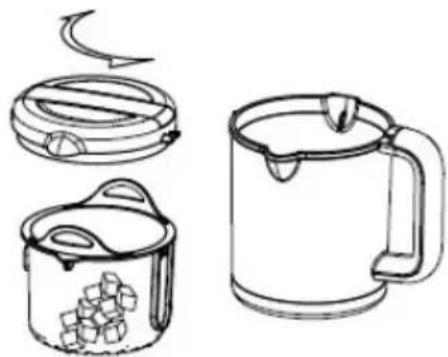
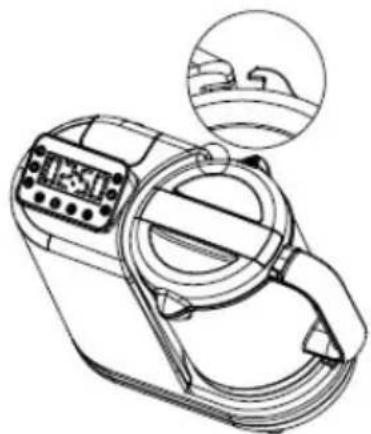
Figure 10 Figure 11
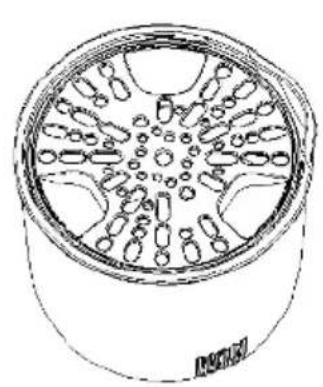
- If you want to steam two different foods at one time, put the first food into the steaming basket and insert the basket into the blender jug. Put the second food into the measuring cup and put the strainer in place as shown below. Place the measuring cup over the steaming basket. (Figure 12 - Figure 14)
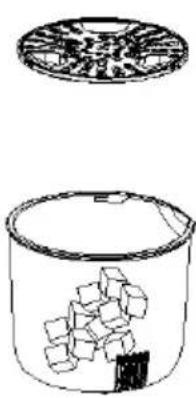
Figure 12 Figure 13 Figure 14
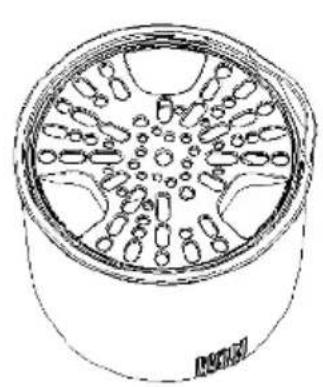
- Press the steam button on the display.
5.1 The default setting is 20 minutes steaming, you can press ⭕ on the display to increase or decrease the steaming time (between 1 minute and 30 minutes). Once the cooking time is set, press start ▶ to start the cooking process. If you want to pause the machine during cooking, press ▶ When you wish to resume the steaming press ▶
-
When cooking is completed, the appliance beeps and a light will flash. The light will turn off after 5 minutes if there is no any further operation.
-
Open the jar lid and pull out the steam basket by using the spatula(N).
-
The food is ready to eat or to blend
Notes:
- All food must be cut in small pieces, no bigger than 2-3cm.
- The amount of water required to fill the tank in order to achieve a certain steaming time may vary according to the room temperature and/or the hardness and temperature of the water. The maximum level in the tank is suitable for steaming for 30 minutes.
If you require longer steaming sessions, follow below steps when the water in the tank is emptied: pause the operation and wait for 5 minutes
open the water tank
- fill with enough water to finish the steaming
- Press the button (2) to resume the steaming process.
| Food Type Food Cooking time | ||
| Fruit | Apple 5 min. | |
| Orange 10 min. | ||
| Peach 10 min. | ||
| Pear 5 min. | ||
| Pineapple 15 min. | ||
| Plum 10 min. | ||
| Vegetables | Asparagus 10 min. | |
| Broccoli 20 min. | ||
| Carrot 15 min. | ||
| Cauliflower 15 min. | ||
| Celery 15 min. | ||
| Courgette 15 min. | ||
| Fennel 15 min. | ||
| Haricots verts 20 min. | ||
| Leek 15 min. | ||
| Onion 15 min. | ||
| Peas | 20 min. | |
| Pepper | 15 min. | |
| Potato | 20 min. | |
| Pumpkin | 15 min. | |
| Spinach 15 min. | ||
| Swedes | 15 min. | |
| Sweet potato | 15 min. | |
| Tomato | 15 min. | |
| Meat | Chicken, beef, lamb, pork etc. | 20 min. |
| Fish | Salmon, sole, cod, trout etc. | 15 min. |
BLENDING FUNCTION

-
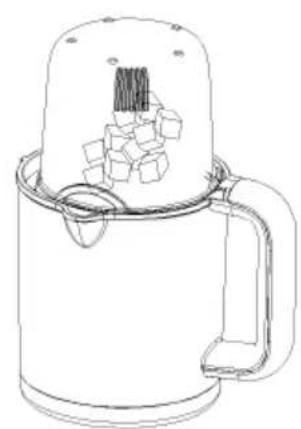
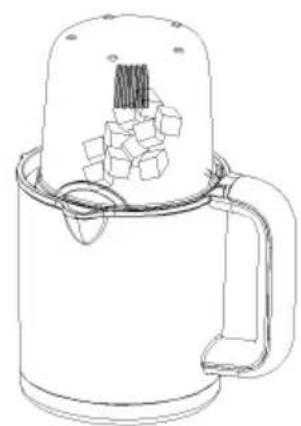
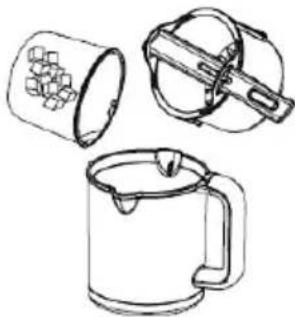
Place the cooked or fresh food from the basket directly into the blender jar.(Figure 15- Figure 17)
-
Put the splash lid (G) on and close the jar lid (D).
-
Place the bowl on the base and lock into place.
-
Plug in and turn on the appliance (C).
Default setting is 5 cycles. If you want to pause the operation you may press this button again. Each cycle is 13 seconds blending and 2 seconds off for each session.
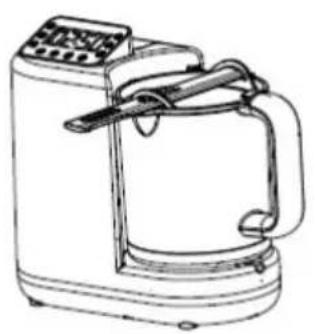
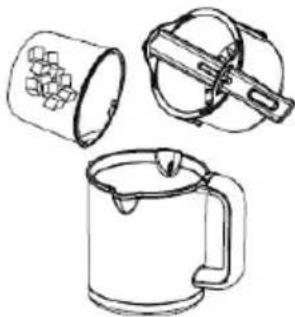
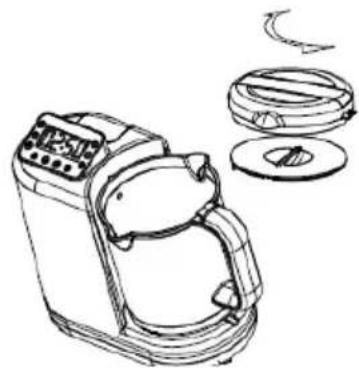
Figure 15 Figure 16 Figure 17
Add the ingredients (such as water, milk, sugar, oil, etc) based on your need, and turn the jug lid anticlockwise. All foods and ingredients inside the blender jug should not exceed 500mL.
Guides and recommendation for blending:
| Food Maximum Quantity | Operating time (one | cycle) | Maximum number of cycles |
| e.g. Carrots & water 300g | carrots & 200mL water | 13s on & 2s off 5 |
Attention:
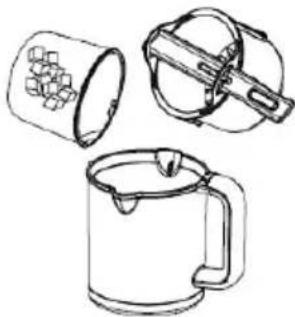
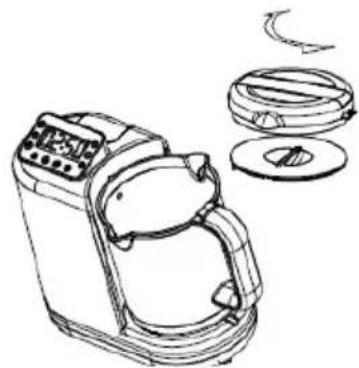
-When using the blending function, you need to put the food into the blender jug, place the splash cover over the blender jug, and follow the next step (Figure 18).
- Avoid blending when the jug is empty.
- Before using the blending function, make sure the blender jug fits correct ly. (The inlet hole on the side of the blender jug must line-up exactly with the steam outlet on the food processor). Fit the jar
lid on the blender jug and turn anticlockwise, make sure the hook of the lid is fully inserted in the hold on the housing.
-
Press the blend button (4). Press the start button (2) to start the operation.
-
If you want to pause the machine during blending, press ▶. To resume blending, press ▶ again after one cycle is finished, you may press start button again for an extra 12 seconds of blending.
-
When blending is completed, a buzzer will sound and a light will flash. All lights will turn off after 5 minutes if there is no further operation.
-
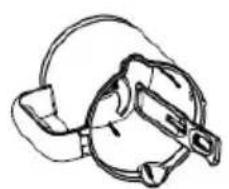
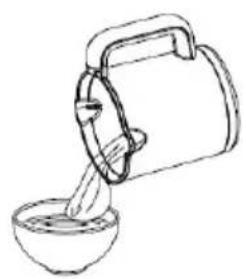
Scrape the foods out from blender jar by the spatula. (Figure 18 - Figure 20)
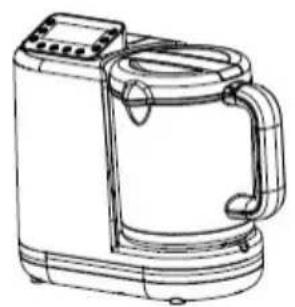
Figure 18
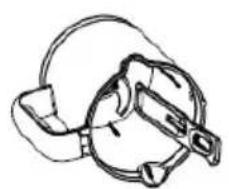
Figure19 Figure20
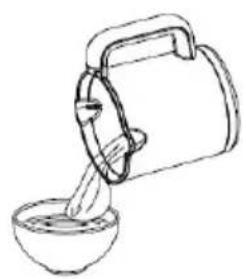
- Unplug the appliance
- Clean the blender jug after the blending is done.
STERILIZER

- Fill the tank with water.
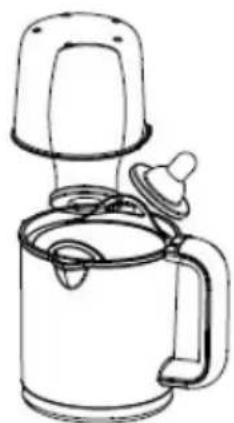
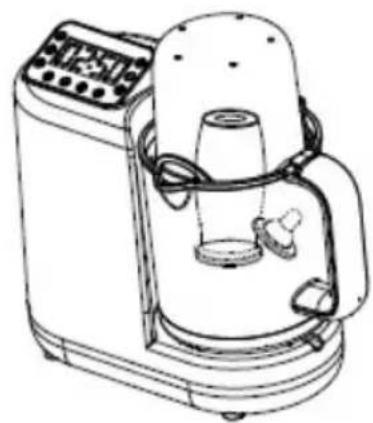
- Place the blender jug onto the housing, twist it and then insert the steaming basket into the blender jar. (Figure 21)
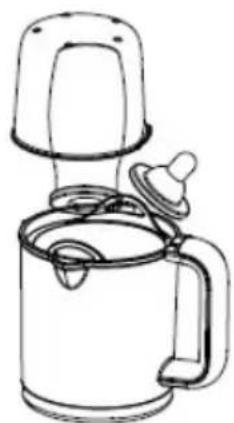
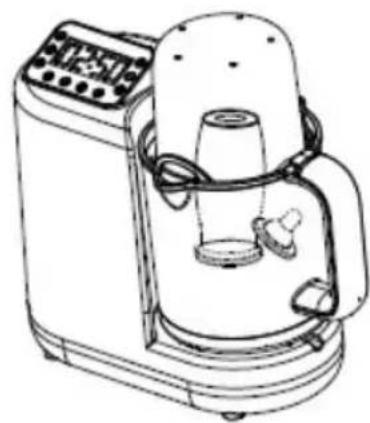
- Put the bottle upside down into the steaming basket, then cover it with the measuring cup. (Figure 22 - Figure 23)
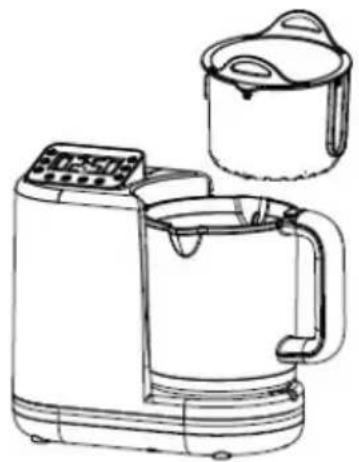
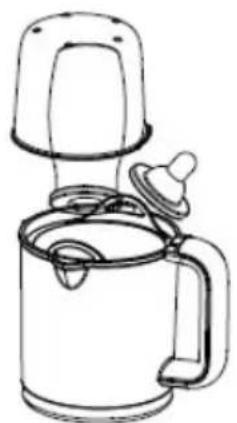
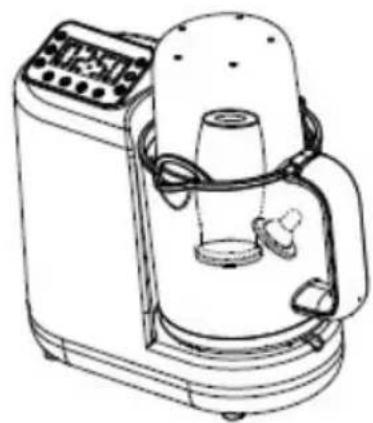
Figure 21 Figure 22 Figure 23
- Sterilizer button
Press the sterilizer button. Default working time is 8 minutes. You may press the ⭕ to increase or decrease the sterilizer time between 1 minute and 30 minutes. After selecting the desired setting, press the start button to start the sterilizing. If you want to pause the machine during the operation, press the ▶ button again.
To continue the operation press the start button
- Once the sterilizing is completed, a buzzer will sound 6 times and a light will flash. All lights will turn off after 5 minutes if there is no any further operation.
- Open the jug lid and take out the bottle by using the tong or gloves. (Figure 24)
- Unplug the appliance
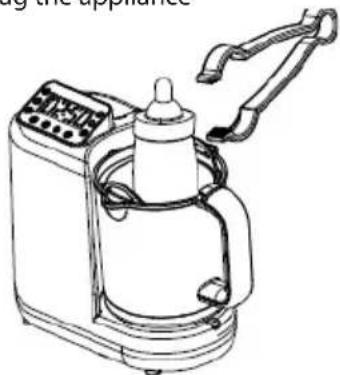
Figure 24
HEATING

- Fill the water tank with approx. 50ml water.
- Place the blender jug on the housing, twist it on and then insert the steaming basket into blender jug.(Figure 25)
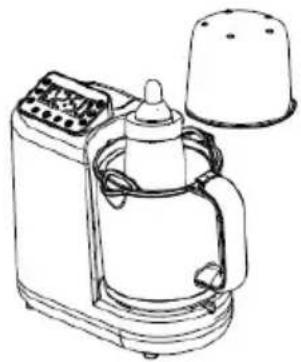
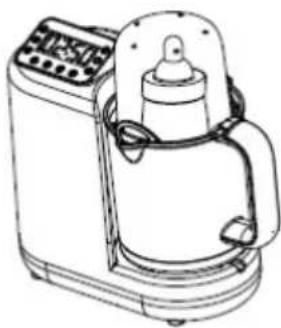
- Put the bottle into the steam basket, and cover it with the measuring cup. (Figure 26 - Figure 27)
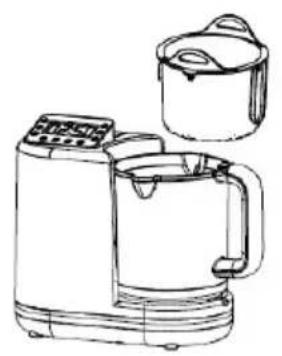
Figure 25 Figure 26
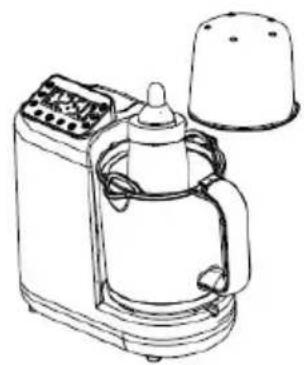
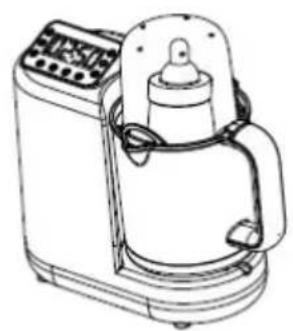
Figure 27
Food you may heat include baby milk, soup, juice, water and pre made baby food
4. Heater button
Press the heater button, default cycle time is 3 minutes. You may press ⬕ to increase or decrease the heating time between 1 minute and 20 minutes. After selecting the desired setting, press the start button ▶ to start the operation. If you want to pause the machine during operation, press the button ▶ again. After pause, press to resume the operation.
- Once heating is completed, a buzzer will sound 6 times, and a light will flash. All lights will turn off after 5 minutes if there is no any further operation.
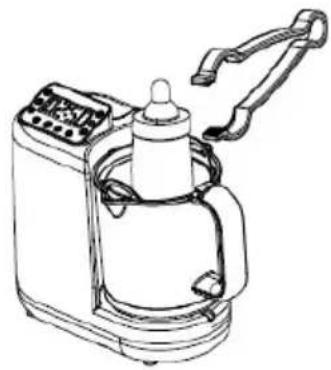
- Open the jug lid and take out the bottle by using the tong or gloves. (Figure 28-Figure 29)
- Unplug the appliance
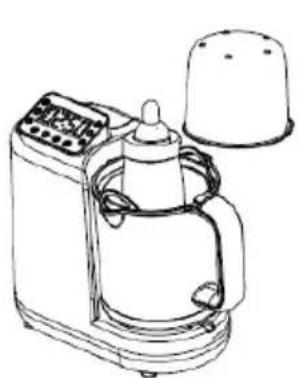
Figure 28 Figure 29
NOTE: The final temperature of the contents may vary due to differences in the room temperatures, bottle size and/or shapes. If the temperature of the contents is too low, you may increase the heating time. If it is too hot, you may reduce the heating time.
TABLES FOR HEATING
| 100 ml in the water tank (25°C) | |||
| Reheating time (min) Defrosting time (min) | |||
| Ambient Temperature (22°C) Fridge | Temperature (10°C) | ||
| PP bottle 30ml 5 | 6 | ||
| 60ml 5 6 | |||
| 90ml 6 6 | |||
| 120ml 6 7 | |||
| 150ml 7 7 | |||
| 180ml 7 8 | |||
| 210ml 7 8 | |||
| 260ml 7 8 | |||
| 270ml 7 8 | |||
| 330ml 8 9 | |||
| Glass bottle 100ml 5 5 | |||
| 130ml 5 6 | |||
| 200ml 6 6 | |||
| 260ml 6 7 | |||
KEEP WARM

- When you finish steaming and blending the food you can keep the food in the steam basket or blender jug to keep it warm. Cover the jug with the lid.
- Fill the tank with 150ml water
- Start the keep warm function. The default working time is 60 minutes, you may adjust the keep warm time between 1 hour and 8 hours.
- When your selected setting is chased, the appliance will start after 5 seconds if there is no further operation.
- Clean the blender jar.
DESCALING

A lime deposit may build up on the bottom of the water tank during use. The water tank must be regularly cleaned to ensure the steaming function works normal. Descaling every 1-4 week(s) is suggested
- Always unplug the appliance before cleaning.
- Add 15g citric acid and 150ml water into the tank, or 100ml white vinegar and 50ml water.
- Cover and twist the water tank cap into place.
-
Place the blender jug on the appliance.
-
Start the descaling water tank function. Descaling time can adjusted between 4 and 8 hours, unplug the appliance after the cleaning time has ended.
-
Pour out all acetic acid (Vinegar) and water from the tank.
-
Clean the tank and the blender jug with water several times.
-
Pour out all the water in the tank
-
Before using the appliance to cook food, fill 100-200ml water into the tank then steam with no food inside the blender jug for 20 minutes to remove any residual odours.
-
Let the water tank dry.
POWER CORD STORAGE
The power cord can be stored at the bottom of appliance as shown
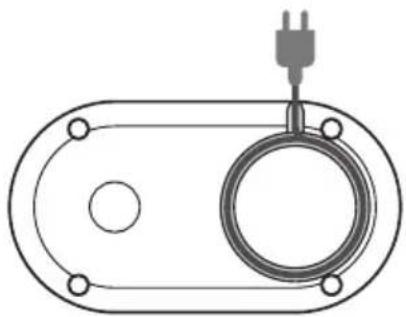
Figure 30
CLEANING AND CARE
Clean the appliance after each use.
Never immerse the motor into water. Do not use abrasive products when cleaning. Never pour bleach or other chemical sterilizing solutions/tablets into the appliance.
- Always unplug the appliance and remove the blender jug from the main machine when not in use.
- Remove the jug lid from blender jug.
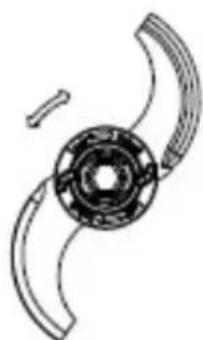
- Remove the parts of the blade and disassembly as below.
- After each use, wash the blade immediately with water.
- After each use, clean all parts that have been in contact with food.
Attention: All parts except the main body can be cleaned in dishwasher.
- Use a dry cloth to clean the main body if necessary.
- Check the water tank and clean it if there is any food inside.
- Check the steam outlet and clean it if there is any foods inside. (see section "steam outlet cleaning").
- Always keep water the tank dry.
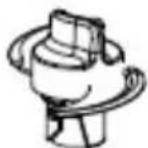

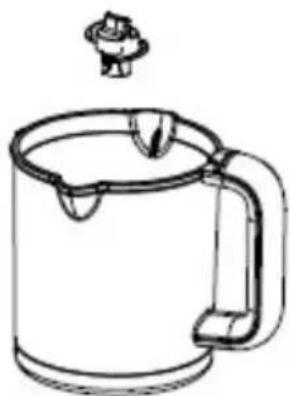

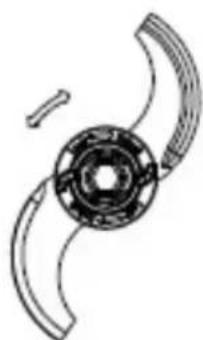
Figure 32
Figure 33
STEAM OUTLET CLEANING
The steam outlet should be cleaned if the nozzle are blocked Cleaning instructions shown as below.
- Always unplug the appliance
- Add citric acid (vinegar) and water into the tank.
- Cover and turn the water tank cap.
- Tilt the appliance so the steam outlet is upside down, pour the citric acid (vinegar) and water out from the outlet.
- Empty the water tank and keep it dry
TECHNICAL SPECIFICATIONS
Heating power: 700W
Blending power : 120W
Voltage: 220-240V \~ 50Hz
Water tank capacity: 280 mL
Blending jug capacity: 900 mL
Weight: 2.1kg
Unit size: 288x132x212mm
CONSIGNES DE SÉCURITÉ ET AVERTISSEMENTS


PANNEAU DE COMMANDE TACTILE
Figure 4 Figure 5 Figure 6
PLACEZ LE BOL DU MIXEUR
Figure 7
INSTALLATION ET RETRAIT DE LA LAME
Figure 8 Figure 9
PROTECTION ANTI-MANQUE D'EAU
Figure 10 Figure 11
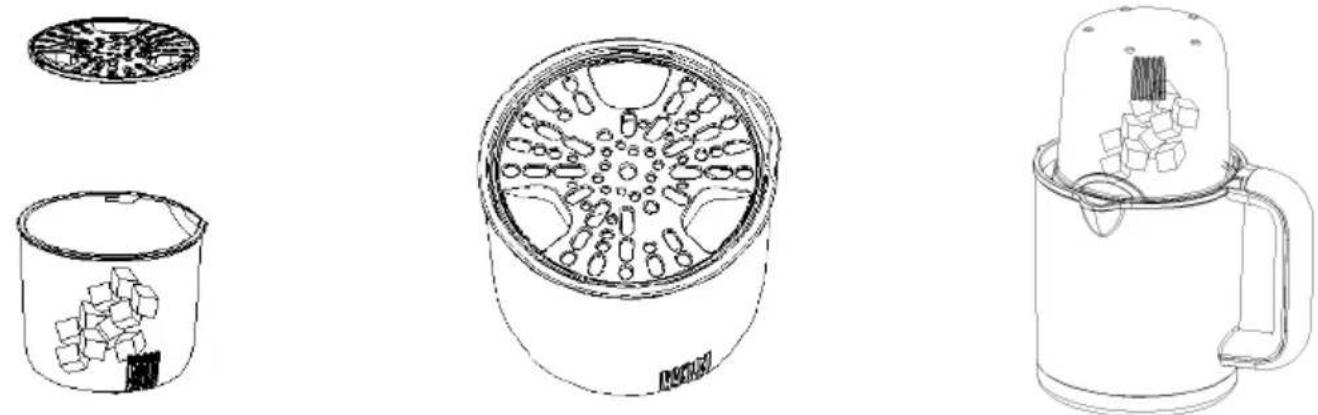
Figure 12 Figure 13 Figure 14
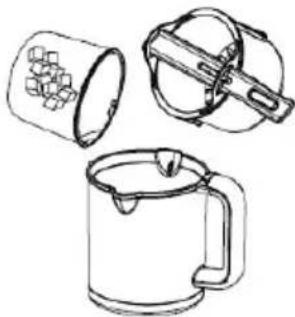

Figure 15 Figure 16 Figure 17
Figure 18
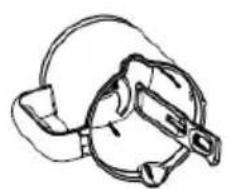
Figure19 Figure20
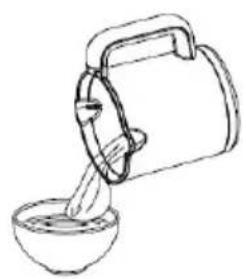
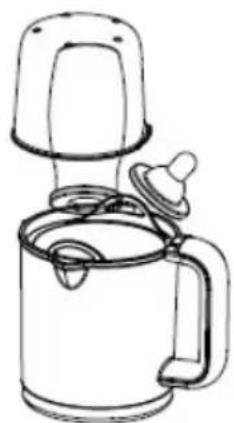
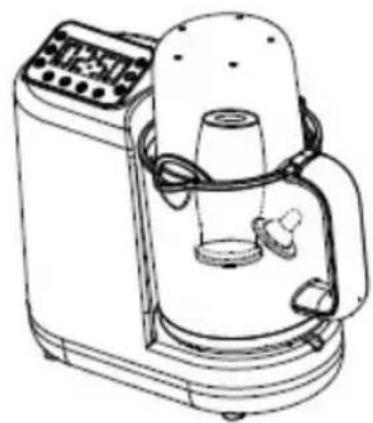
Figure 21 Figure 22 Figure 23
Figure 24
RECHAUFFEUR

Figure 25 Figure 26
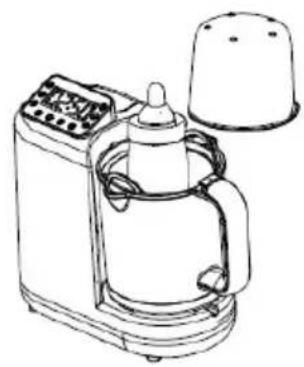
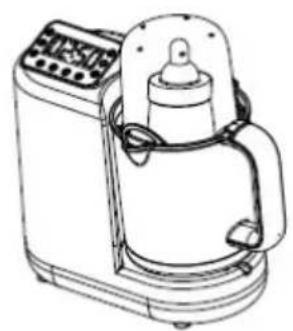
Figure 27
Figure 28 Figure 29
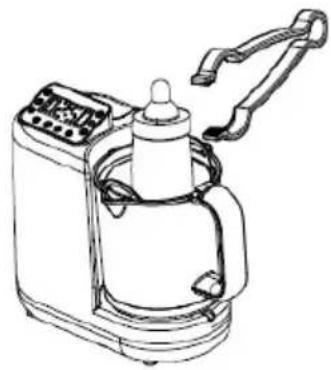
Figure 30
NETTOYAGE ET ENTRETIEN
Figure 32
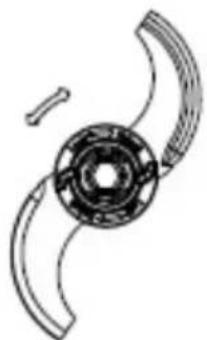
Figure 33
NETTOYAGE DE LA SORTIE DE VAPEUR
TOUCH-BEDIENFELD
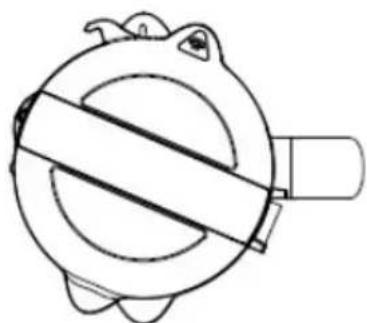
Abbildung 7
MONTAGE UND ENTFERNEN DER KLINGE
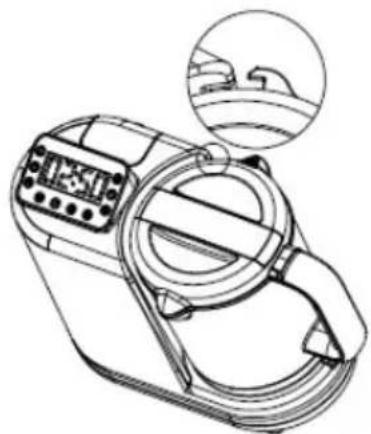
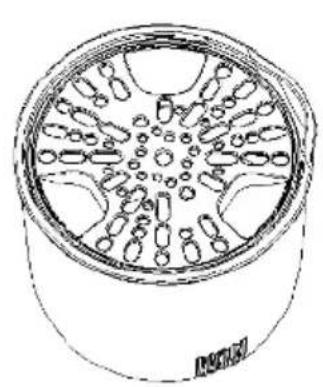
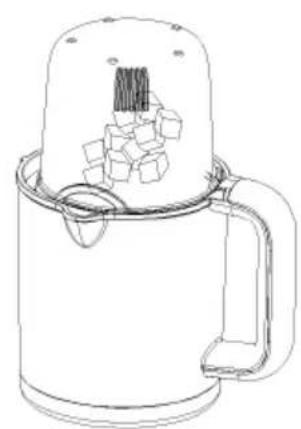
Figure 12 Figure 13 Figure 14
| Food Maximum Quantity | Operating time (one | cycle) | Maximum number of cycles |
| e.g. Carrots & water 300g | carrots & 200mL water | 13s on & 2s off 5 |
Achtung:-
Abbildung 18
HEIZUNG

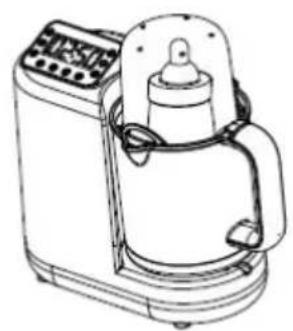
Abbildung 27
Abbildung 30
Delft, The Netherlands
Visit us on www.Luvion.com




- WELKOM / WELCOME / BIENVENUE / WILLKOMMEN
- TOUCH-BEDIENINGSPANEEEL
- HET MES INSTALLEREN EN VERWIJDEREN
- VERWARMING
- TAFELS VOOR VERWARMING
- REINIGING EN VERZORGING
- REINIGING VAN DE STOOMUITLAAT
- PARTS DESCRIPTION
- TOUCH CONTROL PANEL
- WATER LEVEL WINDOW
- FILLING THE WATER TANK (FIGURE 4 - FIGURE 6)
- BLENDER JAR PLACEMENT
- INSTALLING AND REMOVING THE BLADE
- ANTI-DRY PROTECTION
- STEAMING
- NOTES
- BLENDING FUNCTION
- ATTENTION
- STERILIZER
- HEATING
- HEATER BUTTON
- KEEP WARM
- DESCALING
- POWER CORD STORAGE
- CLEANING AND CARE
- STEAM OUTLET CLEANING
- TECHNICAL SPECIFICATIONS
- CONSIGNES DE SÉCURITÉ ET AVERTISSEMENTS
- PANNEAU DE COMMANDE TACTILE
- PLACEZ LE BOL DU MIXEUR
- INSTALLATION ET RETRAIT DE LA LAME
- PROTECTION ANTI-MANQUE D'EAU
- RECHAUFFEUR
- NETTOYAGE ET ENTRETIEN
- NETTOYAGE DE LA SORTIE DE VAPEUR
- TOUCH-BEDIENFELD
- MONTAGE UND ENTFERNEN DER KLINGE
- ACHTUNG
- HEIZUNG
Brand : Luvion
Model : BabyBlend+ 6-in-1
Category : Baby products