
STKS 800 B1 - Toaster SILVERCREST - Free user manual and instructions
Find the device manual for free STKS 800 B1 SILVERCREST in PDF.

| Product type | 2-slice toaster |
| Brand | SilverCrest |
| Model | STKS 800 B1 |
| Power supply | 220-240 V~, 50/60 Hz |
| Power consumption | 730-870 W |
| Standby power consumption | 0.0 W |
| Browning control | 6 continuous levels (1 light to 6 dark) |
| Functions | Toasting, reheating, defrosting, manual stop |
| Pastry rack | Yes, foldable |
| Crumb tray | Yes, removable |
| Cord winder | Yes, under the appliance |
| Housing material | Heat-resistant plastic |
| Dimensions (approx.) | 30 x 20 x 20 cm |
| Weight (approx.) | 1.5 kg |
| Intended use | Toasting bread, pastries and bakery products |
| Usage | Domestic, dry indoor only |
| Warranty | 3 years |
| Customer service | 0800 919270 (France) |
| Safety standards | CE, automatic shutoff, overheat protection |
| Maintenance | Clean exterior with damp cloth, empty crumb tray regularly |
| Country of origin | Germany (manufacturer TARGA GmbH) |
Frequently Asked Questions - STKS 800 B1 SILVERCREST
User questions about STKS 800 B1 SILVERCREST
0 question about this device. Answer the ones you know or ask your own.
Ask a new question about this device
Download the instructions for your Toaster in PDF format for free! Find your manual STKS 800 B1 - SILVERCREST and take your electronic device back in hand. On this page are published all the documents necessary for the use of your device. STKS 800 B1 by SILVERCREST.
USER MANUAL STKS 800 B1 SILVERCREST
natural_image
White flat-screen toaster with ribbed grille and side buttons (no text or symbols visible)TOASTER STKS 800 B1 DOPPELSCHLITZ-TOASTER STKS 800 B1 GRILLE-PAIN DOUBLE STKS 800 B1
TAIGAGMIN
Coesternog 45
GERMANY
GENERAL
Operating Instructions and Safety Instructions
NL OE
TOASTER MET DUBBELE SLEUF
Hendelsing en welichektszuwizingen
C
TOPINKOVAČ
natural_image
Simple icon of a light bulb inside a circle with a curved line above it (no text or symbols)natural_image
Top-down schematic of a device housing with internal circuit layout and mounting points (no text or symbols)10. Fehlerbehebung
- Intended use....18
- Package contents....18
- Technical specifications....19
- Safety instructions....19
- Copyright....22
- Before you start 22
- Getting started 22
7.1 Initial operation....23
7.2 Toasting 23
7.3 Using the roll holder 24 - Maintenance/cleaning 24
8.1 Maintenance....24
8.2 Cleaning 24 - Storage when not in use....25
- Troubleshooting....25
- Environmental regulations and disposal information 26
- Food-grade use.... 27
- Conformity notes 27
- Warranty and Service Information....28
Congratulations!
By purchasing the SilverCrest STKS 800 B1 toaster, hereinafter referred to as the toaster, you have opted for a quality product.
Before first using it, familiarise yourself with the way the toaster works and read these operating instructions through carefully. Be careful to follow the safety instructions and only use the toaster as described in the operating instructions and for the applications given.
Keep these operating instructions in a safe place. If you pass the toaster on to someone else, make sure to give them all the relevant documents with it.
1. Intended use
This toaster is designed exclusively for toasting slices of bread, rolls and other bread items. The toaster has not been designed for corporate or commercial applications. Use the toaster for private purposes only. Any use other than that mentioned above does not correspond to the intended use. The toaster may also not be used outdoors or in tropical climates. This toaster fulfils all relevant norms and standards associated with CE Conformity. In the event of any modification to the toaster that was not approved by the manufacturer, compliance with these standards is no longer guaranteed. The manufacturer accepts no liability for any damage or malfunctions resulting from this.
Observe the regulations and laws in the respective country of use.
2. Package contents
- Toaster
• These operating instructions
These operating instructions have a fold-out cover. On the inside of the cover, the toaster is shown with figures indicated. The meanings of the numbers are as follows:
| 1 | Toast | slots |
| 2 | Roll | holder |
| 3 | Start | lever |
| 4 | Warm | button |
| 5 | Defrost | button |
| 6 | Stop | button |
| 7 | Control | dial |
| 8 Roll holder lever | ||
| 9 Cable winder (underneath) | ||
| 10 | Crumb | tray |
| 11 | Power | cable |
3. Technical specifications
| Model STKS 800 B1 | |
| Power supply 220-240 V | -, 50/60 Hz |
| Power consumption 730-870 W | |
| Power consumption in off or standby mode 0.0 W | |
The technical data and design may be changed without prior notice.
4. Safety instructions
Before you use this toaster for the first time, please read the following notes and heed all warnings, even if you are familiar with handling electronic devices. Keep these operating instructions in a safe place for future reference. If you sell the toaster or give it away, pass on the operating instructions at the same time. The operating instructions are an integral part of the product.

DANGER! This symbol and the word "Danger"
denote a potentially dangerous situation. Ignoring it can lead to severe injury or even death.

WARNING! This symbol and the word "Warning"
denote important information required for the safe operation of the product and for the safety of its users.
DANGER! Warning, hot surfaces! This symbol
denotes the risk of injuries or burns from hot surfaces on the toaster.

natural_image
Simple icon of a lightbulb with rays above a factory chimney, no text or symbols present.AC voltage
This symbol denotes further information on the topic.
Manufacturer's address
DANGER OF ELECTRIC SHOCK!
DO NOT OPEN THE DEVICE!
Operating environment
This toaster is only suitable for use in dry inside spaces.
The toaster is not for use in rooms with a high temperature or humidity (e.g. bathrooms), and must be kept free of excessive dust.
DANGER! The toaster is not designed to be operated with an external timer or a separate remote control system. Do not leave the toaster unattended when it is switched on. This constitutes a fire hazard!
DANGER! This toaster may be used by children of 8 years or over or by persons with physical, sensory or mental impairments or those with no knowledge or experience providing they are supervised or they have been given instructions on the proper use of the device and they understand the associated risks. Children must not play with the toaster. Cleaning and user maintenance must not be carried out by children unless they are older than 8 years old and supervised. Keep the packaging materials out of the reach of children. There is a risk of suffocation. Keep children younger than 8 years away from the toaster and its power cable.
DANGER! If you notice any smoke, unusual noises or strange smells, switch off the toaster immediately and remove the mains plug from the mains socket. If this occurs, the toaster should not be used before it has been inspected by authorised service personnel. Never inhale smoke from a possible device fire. If you do inadvertently inhale smoke, seek medical attention. Smoke inhalation can be damaging to your health.
DANGER! Never touch the power cable or the toaster with wet hands, there is a risk of electric shock!
DANGER! Only plug the mains plug into an easily accessible mains socket. Operate the toaster only at the voltage indicated on the
rating plate! The rating plate is located on the underside of the toaster. No action is required by the user to set the product to 50 or 60 Hz. The product automatically adjusts to 50 and 60 Hz.
DANGER! Risk of electric shock! Do not poke fingers or metallic objects (e.g. forks, knives, etc.) into the toast slots as the heating elements are live.
⚠️ DANGER! Do not cover the toaster while it is in use. This constitutes a fire hazard!
DANGER! Always place the toaster on an even, heat-resistant surface away from heat sources and combustible materials, liquids or gases. Leave a clearance of at least 15 cm to walls to prevent fire hazards!
⚠️ DANGER! The toaster must not be damaged in order to avoid any further risks.
DANGER! Make sure that no fire hazards (e.g. burning candles) are placed on or near the toaster. This constitutes a fire hazard!
DANGER! Do not leave the toaster unattended. When not using the toaster, turn it off and disconnect the mains cable from the mains socket. Do not put the toaster away before it has completely cooled down. This constitutes a fire hazard!
DANGER! Caution: Risk of fire! Bread can burn. Therefore, do not use the toaster near or underneath flammable materials such as curtains. Maintain a clearance of at least 50 cm around the device to flammable and combustible materials.
DANGER! There is a risk of burning if standard sliced bread is not used. Because of the smaller size or the shape, there is a risk of touching hot parts when removing the toast.
WARNING! Do not expose the toaster to any direct heat sources (e.g. heaters), direct sunlight or strong artificial light. The product must not be exposed to spray or dripping water or abrasive liquids. Do not use the toaster near water. The toaster must especially never be immersed (do not place any containers containing liquids such as drinks, vases, etc. on the toaster). Make sure that the toaster is not subject to excessive shocks or
vibrations. Do not introduce any foreign bodies into the device. otherwise the toaster could get damaged.
Power cable
DANGER! Always hold the power cable by the mains plug and never pull on the cable itself.
DANGER! Make sure that the power cable does not touch any hot surfaces of the toaster.
DANGER! Never use adapter plugs or extension cables that do not comply with the safety regulations applicable in your country, and do not modify the power cable yourself! If the power cable is damaged, it must be replaced by the manufacturer, its customer service or a similarly qualified person, in order to avoid any possible danger.
WARNING! Never place the toaster, furniture or other heavy objects on the power cable and make sure it does not get kinked.
WARNING! Never tie knots in the mains cable and do not tie it to other cables. The mains cable should be installed so that nobody can trip over it or be obstructed by it.
5. Copyright
All the contents of this user manual are protected by copyright and provided to the reader for information only. Copying data and information without the prior explicit written consent of the author is strictly forbidden. This also applies to any commercial use of the contents and information. All texts and diagrams are up-to-date as of the date of printing. Subject to change without notice.
6. Before you start
Remove the toaster from the packaging. Remove all packaging material and check that all parts are complete and undamaged. If you find anything missing or damaged, please contact the manufacturer.
7. Getting started
⚠️ DANGER! Place the toaster on a level and heat-resistant surface. Place a heat-resistant board in between the surface and the toaster if the surface itself is critical.
DANGER! Risk of getting burnt! When switched on, the exposed surfaces can get very hot. Only touch the controls of the toaster.
DANGER! There is a risk of burning if standard sliced bread is not used. Because of the smaller size or the shape, there is a risk of touching hot parts when removing the toast.
7.1 Initial operation
- Plug the mains plug into an easily accessible mains socket.
- Adjust the control dial [7] to "6" (the highest setting).
- Operate the toaster three times without any bread. Push the start lever [3]. The indicator on the stop button [6] lights up while it is in use. When you use it for the first time, smells or slight smoke may develop. This is normal and perfectly safe. Open a window to ensure sufficient ventilation.
7.2 Toasting
Please note that different kinds of bread and the thickness and moisture of the slice can affect the level of browning. It is best to store bread in its packaging. Normal sliced bread can burn if the browning level is set too high. First, select a lower level of browning if possible.
Dry, light bread browns quicker than fresh or dark bread.
Do not use slices of bread which are too thick or too large. If a slice of bread gets stuck, remove the mains plug from the mains socket and wait for the toaster to cool. If necessary, push the start lever [3] up and remove the bread.
Set the control dial [7] a little lower if you are only using one toast slot [1].
- Plug the mains plug into an easily accessible mains socket.
- Set the level of browning you want on the control dial [7]. You can set the browning level steplessly from 1 [light] to 6 [dark].
- Place the bread in the toast slots [1].
- Push the start lever (3) down. The indicator on the stop button (6) lights up while it is in use.
- The bread is then toasted. The toaster switches off automatically as soon as the set level of browning is reached. The toast pops up.
- Remove the toast from the toast slots [1].
- Clean the toaster as described in the "Cleaning" chapter.
When the toaster is in use, you can press the stop button [6] early to stop toasting. The toast then pops up.
After pressing the start lever [3], press the Warm button [4] to warm the bread. The indicator on the warm button [4] lights up. This just warms the bread, instead of toasting it.
After pressing the start lever [3], press the Defrost button [5] to defrost and toast frozen bread. The indicator on the defrost button [5] lights up. Please note that the level of browning can be slightly different to non-frozen bread.
7.3 Using the roll holder

DANGER! Risk of getting burnt! Do not attempt to toast bread in the toast slots (1) while the roll holder (2) is in use. Otherwise, the bread can get stuck, causing burns or property damage.
Always use the roll holder (2) for rolls or other larger bread items. Never place any rolls or other larger bread items directly on the toaster.
- Press the roll holder lever [8] downwards to unfold the roll holder [2].
- Plug the mains plug into an easily accessible mains socket.
- Set the level of browning you want on the control dial [7]. You can set the browning level steplessly from 1 (light) to 6 (dark). We recommend using level of browning 2.
- Place the rolls or bread items on the roll holder [2].
- Push the start lever (3) down. The indicator on the stop button (6) lights up while it is in use.
- The rolls or bread items are now toasted. The toaster switches off automatically as soon as the set level of browning is reached.
- Remove the rolls or bread items from the roll holder [2].
• Pull the roll holder lever (8) upwards to retract the roll holder (2).
- Clean the toaster as described in the "Cleaning" chapter.

When the toaster is in use, you can press the stop button [6] early to stop toasting.
Toast the rolls or bread items from both sides to ensure even browning.
8. Maintenance/cleaning
8.1 Maintenance

DANGER! Maintenance is required if the toaster has been damaged in any way, for example, if liquid has entered the product, if the toaster has been exposed to rain or moisture, if the toaster is not working properly or if it has been dropped. If you notice any smoke, unusual noises or strange smells, switch off the toaster immediately and remove the mains plug from the mains socket. If this occurs, the toaster should not be used before it has been inspected by authorised service personnel. All servicing work must be carried out by qualified specialist personnel. Never open the housing on the toaster.
8.2 Cleaning

DANGER! Unplug the mains plug from the mains socket before you start to clean, there is the risk of electric shock!

DANGER! Wait until the toaster has cooled down. Otherwise there is risk of burn injury!

DANGER! Never immerse the toaster itself in water, there is a risk of electric shock!

Do not clean the toaster in the dishwasher, as this may cause irreparable damage.
To clean the casing, use a slightly damp cloth. Never use any solvents or cleaners that may damage the plastic. For stubborn dirt, add a little detergent to the damp cloth.
Remove and empty the crumb tray (10). Clean the crumb tray (10) with a slightly moistened cloth if necessary. For stubborn dirt, add a little detergent to the damp cloth. Push the crumb tray (10) back in until you hear it slot into place.
9. Storage when not in use
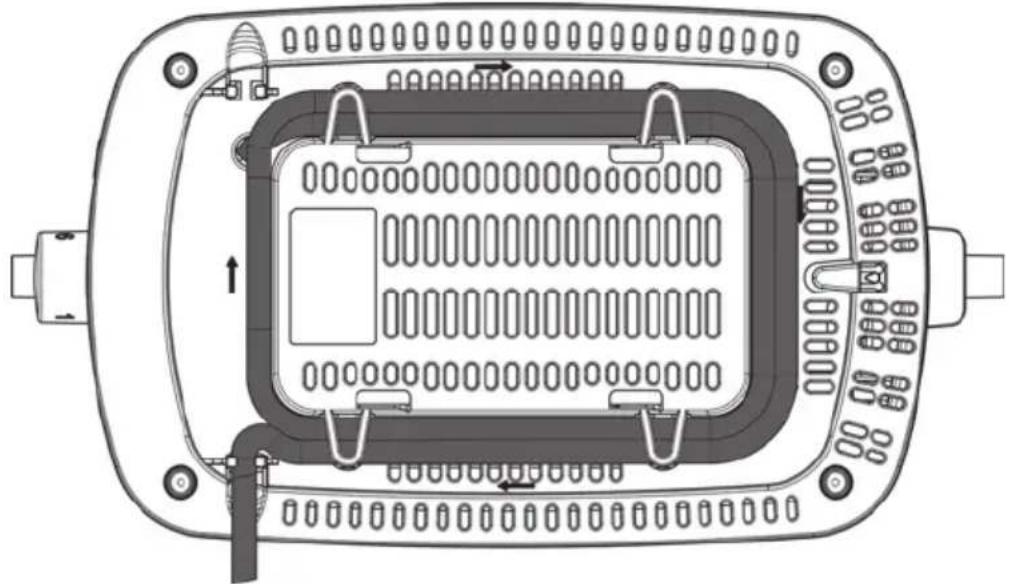
When you do not wish to use the toaster, disconnect the mains plug from the mains socket. Wind the power cable [11] in the direction shown around the cable winder [9] underneath the toaster. Store the toaster a clean, dry place out of direct sunlight.
natural_image
Top-down schematic of a device housing with internal grid layout and mounting points (no text or symbols)10. Troubleshooting
The toaster does not work or the start lever [3] will not engage.
- Check that the mains plug is correctly inserted into the mains socket.
The toast is too light.
- Check the setting of the control dial [7] and increase the level of browning as necessary.
The toast is too dark.
- Check the setting of the control dial [7] and decrease the level of browning as necessary.
The toast is not ejected or gets stuck.
• The bread you are using is too thick. Do not use slices which are too thick.
- If the bread still gets stuck in the toast slot (1), try gently pushing the start lever (3) upwards to push the bread out of the toast slot (1).
- If it is still not possible to remove the bread, proceed as follows:
First unplug the mains plug from the mains socket! There is a risk of electric shock!
Wait until the toaster has cooled down. There is a risk of getting burnt!
Now you can poke your fingers into the toast slot [1] to loosen and remove the stuck bread.
11. Environmental regulations and disposal information
 | Devices marked with this symbol are subject to the European Union Directive 2012/19/EU. Electrical and electronic devices may not be put in the household waste, but must be disposed of via designated public disposal centres. By properly disposing of the old device, you can avoid environmental damage and hazards to health. Further information regarding proper disposal of the old device can be obtained from your local authority or the shop where you purchased the device. |
 | Dispose of all packaging in an environmentally friendly manner. Cardboard packaging can be taken to paper recycling centres or public collection points for recycling. Any film or plastic contained in the packaging should be taken to your public collection points for disposal. |
 | |
| ES/PT |
Only relevant for France:
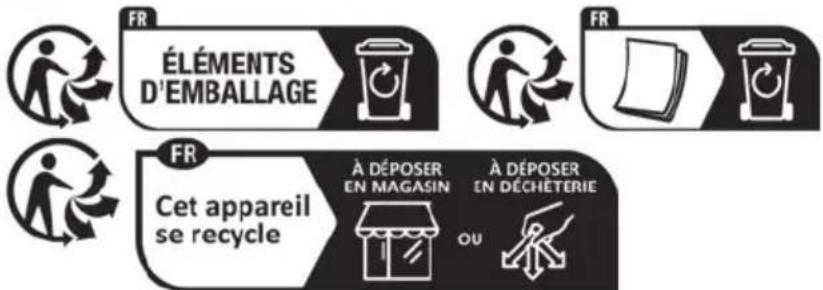
flowchart
graph LR
    A["FR ÉLÉMENTS D'EMBALLAGE"] --> B["FR"]
    B --> C["FR"]
    C --> D["FR"]
    D --> E["Cet appareil se recycle"]
    E --> F["À DÉPOSER EN MAGASIN"]
    E --> G["À DÉPOSER EN DÉCHÉTERIE"]
The product, the accessories, the printed material and the packaging are recyclable. They are subject to enhanced manufacturer responsibility and are sorted and collected separately.
 | Please note the markings on the packaging material when disposing of it, it is labelled with abbreviations (a) and numbers (b), the meanings of which are as follows:1-7: plastic / 20–22: paper and cardboard / 80-98: composite materials. | ||||
 | |||||
| Only relevant for Spain and Portugal:Please separate the packaging material and dispose of it in the relevant collection containers in accordance with the symbols on the packaging: |  |  |  | ||
| Symbol Material Contained in the following packagingelements for this product | |||||
| LD-PE | Low density polyethylene | Plastic bag in the packaging | |||
| 20PAP | Corrugated cardboard Sales packaging | ||||
| 21PAP | Other cardboard Inside box | ||||
12. Food-grade use

This symbol designates products whose physical and chemical composition has been tested and found to be non-hazardous to health when used in contact with food in accordance with the requirements of Regulation EU 1935/2004.
13. Conformity notes

The product complies with the requirements of the applicable European and national directives. Evidence of conformity has been provided. The manufacturer has the relevant declarations and documentation.
The product complies with the requirements of the applicable national directives of the Republic of Serbia.
The complete EU Declaration of Conformity and any other conformity declaration (where applicable) are available for download from this link:
https://www.targa.gmbh/downloads/conformity/496700_2504.pdf
Contact address in accordance with 2023/988 Product Safety Regulation: ce@targa.de
14. Warranty and Service Information
Warranty of TARGA GmbH
Dear Customer,
This device is sold with three years warranty from the date of purchase. In the event of product defects, you have legal rights towards the seller. These statutory rights are not restricted by our warranty as described below.
Warranty conditions
The warranty period commences upon the date of purchase. Please keep the original receipt in a safe place as it is required as proof of purchase. If any material or manufacturing faults occur within three years of purchase of this product, we will repair or replace the product free of charge as we deem appropriate.
Warranty period and legal warranty rights
The warranty period is not extended in the event of a warranty claim. This also applies to replaced and repaired parts. Any damage or defects discovered upon purchase must be reported immediately when the product has been unpacked. Any repairs required after the warranty period will be subject to charge.
Scope of warranty
The device was carefully manufactured in compliance with stringent quality guidelines and subjected to thorough testing before it left the works. The warranty applies to material and manufacturing faults. This warranty does not cover product components which are subject to normal wear and which can therefore be regarded as wearing parts, or damage to fragile components such as switches, rechargeable batteries or components made of glass. This warranty is void if the product is damaged, incorrectly used or serviced. To ensure correct use of the product, always comply fully with all instructions contained in the user manual. The warnings and recommendations in the user manual regarding correct and incorrect use and handling of the product must always be observed and complied with. The product is solely designed for private use and is not suitable for commercial applications. The warranty is rendered void in the event of incorrect handling and misuse, if it is subjected to force, and also if any person other than our authorised service technicians interfere with the device. No new warranty period commences if the product is repaired or replaced.
Submitting warranty claims
To ensure speedy handling of your complaint, please note the following:
Before using your product for the first time, please read the enclosed documentation carefully. Should any problems arise which cannot be solved in this way, please call our hotline.
- Always have your receipt, the product article number as well as the serial number (if available) to hand as proof of purchase.
- If it is not possible to solve the problem on the phone, our hotline support staff will initiate further servicing procedures depending on the fault.
You can find this and many more manuals, product videos and installation software available for download at www.lidl-service.com. This QR code takes you directly to the LIDL service page (www.lidl-service.com). There, you can enter the item number (IAN) to access your operating manual.

Service

Phone: 0800 404 7657
E-Mail: targa@lidl.co.uk

Phone: 1800 101010 E-Mail: targa@lidl.ie

Phone: 800 62230 E-Mail: targa@lidl.com.mt

Phone: 8009 4241 E-Mail: targa@lidl.com.cy
IAN: 496700_2504

Manufacturer
Please note that the following address is not a service address. First contact the service point stated above.
TARGA GmbH
Coesterweg 45
59494 Soest
GERMANY
Table des matières
natural_image
Top-down schematic of a device housing with internal circuit layout and mounting points (no text or symbols)https://www.targa.gmbh/downloads/conformity/496700_2504.pdf
Cher client, chère cliente,
Cher client, chère cliente,
natural_image
Simple icon of a lightbulb inside a circle with radiating lines, no text or symbols present.Wisselspanning
OPEN HET APPARAAT NIET!
Gebruiksomgeving
natural_image
Top-down schematic of a device housing with internal compartments and mounting points (no text or symbols)10. Problemen oplossen
De toast is te donker.
- Controleer de instelling van de bedieningsknop [7] en verlaag de bruiningsstand indien nodig.
https://www.targa.gmbh/downloads/conformity/496700_2504.pdf
Contactadres ce@targa.de
overeenkomstig
Verordening
2023/988
inzake
productveiligheid:
natural_image
Icon showing a lightbulb above a factory silhouette (no text or symbols)natural_image
Top-down schematic of a device housing with internal grid layout and mounting points (no text or symbols)https://www.targa.gmbh/downloads/conformity/496700_2504.pdf
natural_image
Simple icon of a lightbulb with a factory silhouette below, no text or symbols present.Střídavé napětí
natural_image
Top-down schematic of a device housing with internal compartments and mounting points (no text or symbols)https://www.targa.gmbh/downloads/conformity/496700_2504.pdf
natural_image
Simple icon of a lightbulb inside a circle with radiating lines, no text or symbols present.natural_image
Top-down schematic of a device housing with internal compartments and mounting points (no text or symbols)10. Odstraňovanie problémov
https://www.targa.gmbh/downloads/conformity/496700_2504.pdf
natural_image
Symbolic icon of a light bulb with a factory silhouette below, representing an idea or innovation (no text present)natural_image
Top-down schematic of a device interior with internal circuitry and mounting points (no text or symbols)https://www.targa.gmbh/downloads/conformity/496700_2504.pdf
natural_image
Simple icon of a light bulb inside a circle with a curved line above it (no text or symbols)
RISIKO FOR ELEKTRISK ST∅D!
ÅBN IKKE KABINETTET!
Betjeningsforhold
natural_image
Top-down schematic of a device housing with internal circuit layout and mounting points (no text or symbols)10. Fejlfinding
natural_image
Simple icon showing a lightbulb above an industrial plant with smokestacks, no text or symbols present.Tensione CA
natural_image
Top-down schematic of a device housing with internal grid layout and mounting points (no text or symbols)https://www.targa.gmbh/downloads/conformity/496700_2504.pdf
natural_image
Symbolic icon of a light bulb with a factory chimney below, representing an idea or innovation (no text present)natural_image
Top-down schematic of a device interior with internal compartments and ventilation slots (no text or labels)10. Hibaelhárítás
https://www.targa.gmbh/downloads/conformity/496700_2504.pdf

- TOASTER STKS 800 B1 DOPPELSCHLITZ-TOASTER STKS 800 B1 GRILLE-PAIN DOUBLE STKS 800 B1
- Fehlerbehebung
- Congratulations!
- Intended use
- Package contents
- Technical specifications
- Safety instructions
- DANGER OF ELECTRIC SHOCK!
- DO NOT OPEN THE DEVICE!
- Operating environment
- Power cable
- Copyright
- Before you start
- Getting started
- Initial operation
- Toasting
- Using the roll holder
- Maintenance/cleaning
- Maintenance
- Cleaning
- Storage when not in use
- Troubleshooting
- Environmental regulations and disposal information
- Only relevant for France:
- Food-grade use
- Conformity notes
- Warranty and Service Information
- Warranty of TARGA GmbH
- Warranty conditions
- Warranty period and legal warranty rights
- Scope of warranty
- Submitting warranty claims
- Table des matières
- Gebruiksomgeving
- Problemen oplossen
- Odstraňovanie problémov
- RISIKO FOR ELEKTRISK ST∅D!
- ÅBN IKKE KABINETTET!
- Betjeningsforhold
- Fejlfinding
- Hibaelhárítás
Brand : SILVERCREST
Model : STKS 800 B1
Category : Toaster