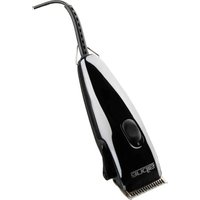
TR1500 - Electric mower Trixie - Free user manual and instructions
Find the device manual for free TR1500 Trixie in PDF.


| Product type | Electric pet clipper |
| Brand | Trixie |
| Model | TR1500 |
| Power supply | Mains, 230 V / 50 Hz, 15 W |
| Adjustable cutting length (without comb) | 0.8 mm (against the grain) to 3.2 mm (with the grain) |
| Included cutting combs | 4 combs: 3 mm, 6 mm, 13 mm, 19 mm |
| Cutting lengths with combs | From 3.2 mm (3 mm comb, against the grain) to 28.6 mm (19 mm comb, with the grain) |
| Blade material | Stainless steel |
| Switch | On/Off (I/O positions) |
| Power cord | Yes, with mains plug |
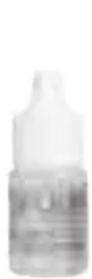
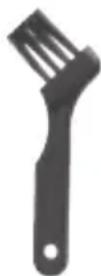
| Included accessories | Cutting head oil, cleaning brush, 4 cutting combs |
| Maintenance | Oil before, during and after each use; clean with brush |
| Blade replacement | Possible, removable cutting head set |
| Safety | Unplug before cleaning; do not use near water; do not leave plugged in unattended |
| Warranty | 2 years (excluding wear parts: blades, combs) |
| Intended use | Pet grooming (dogs, cats) |
| Approximate dimensions | 18 x 5 x 4 cm |
| Approximate weight | 350 g |
| Repairability | Spare parts available from Trixie or authorized dealers |
| Noise level | Not specified |
Frequently Asked Questions - TR1500 Trixie
User questions about TR1500 Trixie
0 question about this device. Answer the ones you know or ask your own.
Ask a new question about this device
Download the instructions for your Electric mower in PDF format for free! Find your manual TR1500 - Trixie and take your electronic device back in hand. On this page are published all the documents necessary for the use of your device. TR1500 by Trixie.
USER MANUAL TR1500 Trixie
D Schermaschinen-Set TR1500 Gebrauchsanweisung
GB Clipper Set TR1500 Operating instructions
F Set de tonte type TR1500 Mode d'emploi
① Set per la tosatura TR1500
Istruzioni d'uso
NL Tondeuse-Set TR1500
Gebruiksaanwijzing
⑤ Klippmaskinsset TR1500 Bruksanvisning
EFG
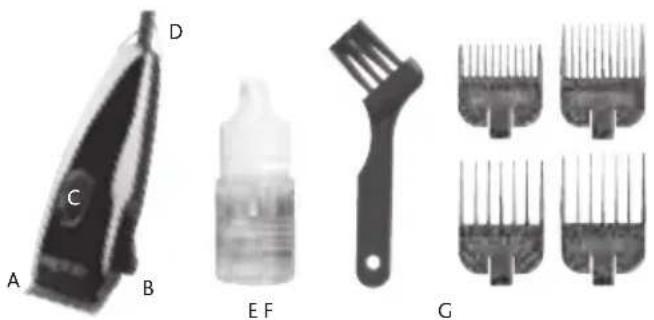
Description of parts
A High quality clipper blades made of stainless steel with precision edge
B Cutting length adjustment lever (0.8–3.2 mm)
C On/Off Switch
D Mains cable
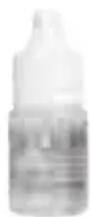
E Lubricating oil
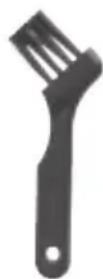
FCleaningbrush
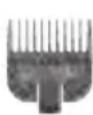
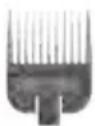
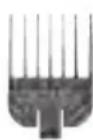
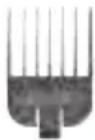
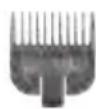
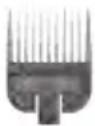
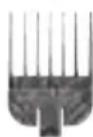
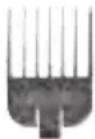
G 4 attachment combs for cutting lengths of 3, 6, 13 and 19 mm
Important safeguards
Please read the following instructions before using your new clipper TR1500.
When using an electrical appliance, basic precautions should always be followed, including the following:
- Do not reach for an appliance that has fallen into water. Unplug immediately. Never use clipper near water.
- Do not use while bathing or in a shower.
- Do not place or store appliance where it can fall or be pulled into a tub or sink. Do not place in or drop into water or other liquid.
• Always unplug this appliance from the electrical outlet immediately after using. Unplug by holding and pulling on plug, not cord.
- Unplug this appliance before cleaning, removing, or assembling parts.
- An appliance should never be left unattended when plugged in.
- This appliance can be used by children aged from 8 years and above and persons with reduced physical, sensory or mental capabilities or lack of experience and knowledge if they have been given supervision or instruction concerning use of the appliance in a safe way and understand the hazards involved.
• Children shall not play with the appliance.
- Use this appliance only for its intended use as described in this manual. Do not use attachments not recommended by TRIXIE Heimtierbedarf GmbH & Co. KG.
- Never operate this appliance if it has a damaged cord or plug, if it is not working properly, if it has been dropped or damaged, or dropped into water. Return the appliance to TRIXIE Heimtierbedarf GmbH & Co. KG for examination or repair.
- Keep the cord away from heated surfaces.
- Never drop or insert any object into any opening.
- Do not use outdoors or operate where aerosol (spray) products are being used or where oxygen is being administered.
- Do not use this appliance with a damaged or broken blade or comb, as injury to the skin may occur.
- To disconnect turn control to "0" then remove plug from outlet.
- Warning: During use, do not place or leave appliance where it may be damaged by an animal or exposed to the weather.
- Before using as well as after each use the blades has to be oiled. Blades may become hot during use. Check often to prevent burning animal.
- Keep the appliance dry.
Save these instructions!

Using for the first time
Plug the cord into an electrical outlet, operate at 230–240 volt, 50 cycle AC electrical current or as noted on the unit. To start the clipper move the switch button to the "ON" ("I") position. To stop, move the switch button back to the original position. After using your clipper TR1500, rewrap the cord and store in a safe place.
Clipper blade adjustment
The clipper blade set is easy to adjust. From coarse to fine cuts, all that's needed is a flick of the adjustment lever with your thumb. In the upright position, blades are set for the finest, or shortest cuts (Figure A).
Using the attachment combs
Some models do not have combs and sizes will vary by kit. You can set the blades for a longer cut by using any of the attachment combs made for your clipper TR1500. The combs mount easily; simply slip the cutter blade teeth into comb and snap the comb down. To remove, simply snap off (Figures B & C). These attachment combs guide hair into the blades and give you precise control of hair lengths. The length of trim is indicated on the attachment comb. Use the chart to find the approximate lengths of cut. Different blade angles in relation to the skin, thickness and texture of the hair will vary the cutting length.
CLIPPING GUIDE
| Description Clipping Direction Fine Coarse | Approx. Length of Cut | ||
| Standard Blade TR1500 | With hair grainAgainst hair grain | 1/16" (1.6 mm)1/32" (0.8 mm) | 3/16" (4.8 mm)1/8" (3.2 mm) |
| Attachment Comb 1/8" (3 mm) | With hair grainAgainst hair grain | 1/4" (6.4 mm)1/8" (3.2 mm) | 3/8 (9.5 mm)1/4" (6.4 mm) |
| Attachment Comb 1/4" (6 mm) | With hair grainAgainst hair grain | 3/8" (9.5 mm)1/4" (6.4 mm) | 1/2" (12.7 mm)3/8" (9.5 mm) |
| Attachment Comb 1/2" (13 mm) | With hair grainAgainst hair grain | 5/8" (15.9 mm)1/2" (12.7 mm) | 7/8" (22.2 mm)5/8" (15.9 mm) |
| Attachment Comb 3/4" (19 mm) | With hair grainAgainst hair grain | 7/8" (22.2 mm)3/4" (19.0 mm) | 1-1/8" (28.6 mm)1" (25.4 mm) |
Servicing of the clipper
Cleaning and user maintenance shall not be made by children without supervision. The internal mechanism of your clipper has been permanently lubricated at the factory. Other than the recommended maintenance described in this manual, no other maintenance should be performed, except by TRIXIE Heimtierbedarf GmbH & Co. KG. If the supply cord is damaged it must be replaced by the manufacturer, its service agent or similarly qualified persons in order to avoid a hazard.
Checking the blades
Due to the high speed nature of the clipper TR1500, please check for blade heat often, especially on close cutting blades. If you have a detachable blade unit, you can change your blade in order to maintain a comfortable temperature; using multiple blades of the same size is popular among groomers.
Care and servicing of the clipper blades
Blades should be oiled before, during, and after each use. If your clipper blades leave streaks or slow down, it's a sure sign blades need oil. The clipper should be held in the position shown in Figure D to prevent oil from getting into the motor. Place a few drops of the clipper oil on the front and side of the cutter blades (Figure C). Wipe excess oil off blades with a soft dry cloth. Spray lubricants contain insufficient oil for good lubrication, but are an excellent clipper blade coolant. Always replace broken or nicked blades to prevent injury. You can clean the excess hair from your blades by using a small brush or worn out toothbrush. To clean the blades we suggest to immerse the blades only into a shallow pan of the clipper oil, while the clipper is running. Any excess hair and dirt that has accumulated between the blades should come out. After cleaning, turn your clipper off and dry blades with a dry cloth and start clipping again.
Replacement/Removal of the blade set
To remove the blades, first unplug the clipper from the electrical outlet. Turn the clipper upside down so that the blade teeth are pointing down. You may want to place the clipper on a flat surface to do this. Unscrew the screws on the blades. Remove the blades. To replace the blades, put the smaller, upper blade back into position (Figure F). Line up the screw holes in the bottom blade with the two holes in the clipper housing, and replace the screws. Do not tighten down the screws completely. Turn the clipper over and align the lower blade so the teeth on both blades are parallel, but with the lower blade's teeth slightly above the upper blade's teeth. Failure to do this may result in nipping the skin when cutting the hair.
Blade and Clipper/Trimmer Repair Service
When the blades of the clipper/trimmer TR1500 become dull after repeated use, it is advised to purchase a new set of blades available through your supplier. Some blade sets can be resharpened - contact your supplier or the TRIXIE Heimtierbedarf GmbH & Co. KG for information on resharpening. If you wish your clipper/trimmer to be serviced as well, contact your supplier.
Disposal in EU Countries
Follow the appropriate laws and regulations for the disposal of the device. Information for the disposal of electric and electronic devices in the European Union: In the European Union the disposal of electric devices
is regulated nationally, based on the EU-guideline 2012/19/EU for Waste Electrical or Electronic Equipment (WEEE). Accordingly, this device may not be disposed of through the community or domestic waste collection services. This device will be accepted at community collection points or recycling yards free of charge. The product packaging consists of recyclable materials. Dispose of these properly to protect the environment and ensure it can be reused or recycled.
Disposal in non-EU Countries
Please dispose of the device at the end of its service life in an environmentally friendly way and according to the legal requirements.
CAUTION: Never handle your clipper TR1500 while you are operating a water faucet and never hold your clip-
per under a water faucet or in water. There is danger of electrical shock and damage to your clipper. The TRIXIE Heimtierbedarf GmbH & Co. KG will not be responsible in case of injury due to this carelessness.
230 V/50 Hz 15 W
CE
Basic Instructions for Fur Care
Best Conditions for Clipping
- Prepare a stable and non-slip work area on a table.
-
Get your pet/your dog acquainted to the clipper:
-
Step 1: Switch the device on while feeding or playing for several days before the clipping. That way, you pet can get used to the sound first and connects it to something positive.
- Step 2: Get your pet used to the vibration. For this, hold the device gently to your pet's head with the blades pointing away from your pet. If your pet wants to sniff the device, allow this.
Information: Play with your pet/dog and speak to it. The clipping should be fun for you both. Should your pet be nervous or afraid, postpone the clipping to another day.
- Bathe your pet/dog. Please only use dog shampoo from pet specialist shops (e.g. item 29195). Dry your pet's coat completely, if necessary with a hair dryer (always in the direction of the hair growth).
- Comb the coat and remove severe mats and tangles. Thorough brushing is extremely important. It helps your pet/dog to relax and removes the last tangles from the coat. Start by using a wide-tooth comb (e.g. item 23766) and continue with a finer soft brush (e.g. item 24132).
- Oil the blade set before & after clipping. Otherwise your right to claim under guarantee becomes invalid!
Clipping
Each pet/dog is cared for individually according to coat type and breed:
- Shortening a long coat: Use a blade set/attachment comb of your choice and always clip in the direction of the hair growth.
- Short clipping/clipping close to the skin: Use a blade set up to 0.5/0.8 mm (depending on how the blade head of your clipper can be adjusted) and always clip against the direction of the hair growth.
- Comb the coat thoroughly after clipping and remove all shorn-off hair.
Warranty Statement
- The rights arising from this warranty constitute an addition to the statutory and/or contractual claims for defects that the customer is entitled to assert against their seller. The latter rights are not restricted by the warranty.
- TRIXIE GmbH & Co. KG grants a warranty of two years for the clipper TR1500, warranting that these devices are free of production defects. This warranty does not include parts that are subject to wear, e.g. shaving foils, drive components, blade sets, snap-on brushes (parts subject to wear).
The warranty does not come into effect if
- the device was misused or handled without due care,
- the device was damaged by excessive use, incorrect handling or external impact,
- the defect resulted from the instructions for use being ignored,
-
repairs or attempts at repairs were carried out by others than the staff of TRIXIE GmbH & Co. KG or an authorized point of sales.
-
The warranty period is subject to the length of the statutory period of limitation for material defects of the national law of the country in which the device has been purchased; however, the maximum warranty period is 2 years. This period begins when the device is handed over to the customer by the seller.
The place of purchase and the time of the handover are to be proved by presenting a proof of purchase such as a sales receipt, invoice, delivery note or similar.
- Defects that occur during the warranty period and of which we are notified in writing together with the device within three weeks of their occurrence will be remedied by TRIXIE GmbH & Co. KG free of charge under this warranty. The repairs will be carried out by TRIXIE GmbH & Co. KG or an authorized agency. TRIXIE GmbH & Co. KG reserves the right to remedy the defect by providing the customer with an equivalent device. No further claims arise from this warranty for the customer, in particular no reimbursement of expenses, reduction, compensation nor the right to withdraw an order. Statutory or other contractual claims for defects remain unaffected. The provision of warranty services does not extend the warranty period.
- The parts exchanged under warranty repairs or the original device that has been replaced become the property of TRIXIE GmbH & Co. KG.
- In case of unjustified claims towards customer service, TRIXIE GmbH & Co. KG is entitled to invoice the costs incurred to the customer.
- If defects occur, please consult the distributor of the device or the service address for your country.
EFG
EFG
E
F
G
Důležité upozornění

- DESCRIPTION OF PARTS
- IMPORTANT SAFEGUARDS
- USING FOR THE FIRST TIME
- CLIPPER BLADE ADJUSTMENT
- USING THE ATTACHMENT COMBS
- SERVICING OF THE CLIPPER
- CHECKING THE BLADES
- CARE AND SERVICING OF THE CLIPPER BLADES
- REPLACEMENT/REMOVAL OF THE BLADE SET
- BLADE AND CLIPPER/TRIMMER REPAIR SERVICE
- DISPOSAL IN EU COUNTRIES
- DISPOSAL IN NON-EU COUNTRIES
- BASIC INSTRUCTIONS FOR FUR CARE
- BEST CONDITIONS FOR CLIPPING
- CLIPPING
- WARRANTY STATEMENT
- DŮLEŽITÉ UPOZORNĚNÍ
Brand : Trixie
Model : TR1500
Category : Electric mower