K-8549 - Faucet KOHLER - Free user manual and instructions
Find the device manual for free K-8549 KOHLER in PDF.

| Product Type | Shower/bath diverter |
| Brand | Kohler |
| Model | K-8549 |
| Category | Bathtub/shower faucet |
| Main Material | Brass body, plastic internal components |
| Hole Diameter | 1-1/4" (3.2 cm) for countertop mounting |
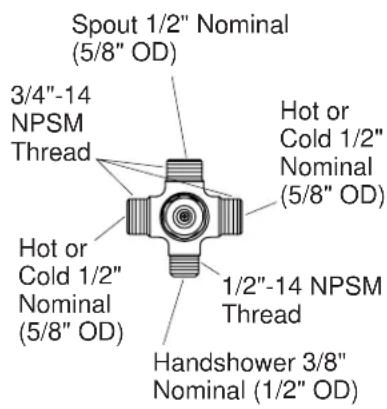
| Supply Connections | Hot and cold water 1/2" nominal (5/8" OD) with 1/2"-14 NPSM threads |
| Spout Outlet Connection | Hot spout 1/2" nominal (5/8" OD) with 3/4"-14 NPSM threads |
| Handshower Connection | 3/8" (1/2" OD) port for handshower |
| Recommended Water Pressure | Follow local plumbing codes (not specified in the manual) |
| Use | 2-way diverter for bathtub with handshower or optional spout |
| Functions | Switching between bathtub spout and handshower; default flow to spout |
| Installation | Countertop, ledge, or wall mounting; requires soldering of connections (except supplies) |
| Care and Cleaning | Clean with soft cloth and soapy water; avoid abrasive products |
| Safety | Do not use as shut-off valve (risk of scalding); avoid excessive heat during soldering |
| Spare Parts and Repairability | Removable internal cartridge for replacement; protected O-rings |
| Box Contents | Diverter, cartridge assembly, handle, escutcheon, mounting nut, washers, hoses (depending on version) |
| Warranty | Kohler limited warranty (see terms) |
| General Information | Follow plumbing codes; provide access panel |
Frequently Asked Questions - K-8549 KOHLER
User questions about K-8549 KOHLER
0 question about this device. Answer the ones you know or ask your own.
Ask a new question about this device
Download the instructions for your Faucet in PDF format for free! Find your manual K-8549 - KOHLER and take your electronic device back in hand. On this page are published all the documents necessary for the use of your device. K-8549 by KOHLER.
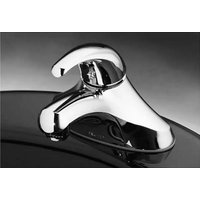
USER MANUAL K-8549 KOHLER
with Three-Way Handshower
K-8549
M product numbers are for Mexico (i.e. K-12345M)
Thank You For Choosing Kohler Company
We appreciate your commitment to Kohler quality. Please take a few minutes to review this manual before you start installation. If you encounter any installation or performance problems please don't hesitate to contact us. Our phone numbers and website are listed on the back cover. Thanks again for choosing Kohler Company.
Tools and Materials

Drill and Hole Bit
Adjustable Wrench

3/32" Hex Wrench

Tape Measure
Propane Torch

Solder
Plus:
• Supply piping, connectors, and caps
Before You Begin

WARNING: Risk of personal injury. This product is a diverter valve only and should never be used as a shut-off valve. Use as a shut-off valve will allow cross flow between the hot and cold water supplies and will create a serious scalding hazard.
□ Observe all local plumbing and building codes.
□ Shut off the main water supply.
☐ Provide an access panel for all installations.
□ Carefully read this entire instruction manual before beginning the installation; the illustrations do not show all possible configurations.
□ Carefully inspect waste and supply tubing for any sign of damage.
□ Replace waste or supply tubing if necessary.
Before You Begin (cont.)
☐ You can extend the distance between the between the water source and the braided hose connection with 1/2" copper piping below the rim of the bath/whirlpool, but it may not be safe or practical. A long run of piping will mean a long run of room-temperature standing water when the handshower is first activated for use.

CAUTION: Risk of product damage. Excessive heat will damage the internal plastic components. Follow these steps to avoid product damage.
IMPORTANT! Do not apply excessive heat while soldering. Direct the torch flame away from the brass body.
IMPORTANT! Only apply direct heat to the connectors and extensions.
☐ Do not install spouts with flow restrictors or handheld shower units on the large (5/8" O.D.) bath outlet.
☐ The Kohler two-way diverter is designed for use with Kohler non-diverting bath spouts.
☐ Remove all internal components of the diverter valve before soldering. Kohler Co. recommends soldering supply and optional outlet connections to avoid potential leakage.
☐ Kohler Co. reserves the right to make revisions in the design of products without notice, as specified in the Price Book.
1. Diverter Configuration
☐ The small port is for the supplied handshower hose.
☐ The port directly opposite of the handshower port is for an optional bath spout. Default flow is through this port. If not utilized, this port will need to be capped.
☐ The remaining two ports are for the hot and cold water. These connections are interchangeable.
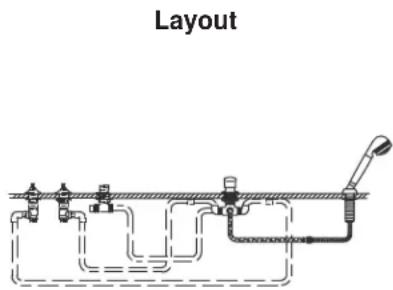
2. Component Layout
□ Verify the location of the components, and the orientation of all ports.
☐ Decide in advance on the location and orientation of the diverter. The location of the shower, and the handshower, as well as the direction in which the inlets/outlets point, will affect the piping and connectors needed.
☐ Allow clearance for valve outlets, handles, and handshower hoses. For use with an optional spout, also allow clearance for the spout connection.
☐ You can extend the distance between the between the diverter and the braided hose connection with 1/2" copper piping below the rim of the bath/whirlpool, but it may not be safe or practical. A long run of piping will mean a long run of room-temperature standing water when the handshower is first activated for use.
Component Layout (cont.)
☐ Secure long runs of piping to the underside of the deck or rim. If the piping cannot be secured at a point near the diverter, secure from underneath with lumber of other suitable support.
3. Preparation
□ Provide an access panel for all installations.
□ Allow for access to the connection between the shower high-pressure hose and the shower interlock hose.
☐ For easiest installation, do not install the bath unit until all soldering (except supplies) is complete. Then install the bath and connect the supplies.
☐ If used, install the bath spout shank at this time according to the spout installation instructions. If possible, do not install the finished trim until all other installations and construction are completed.
☐ If possible, do not install the finished portion of the spout until all other installation and construction is complete.
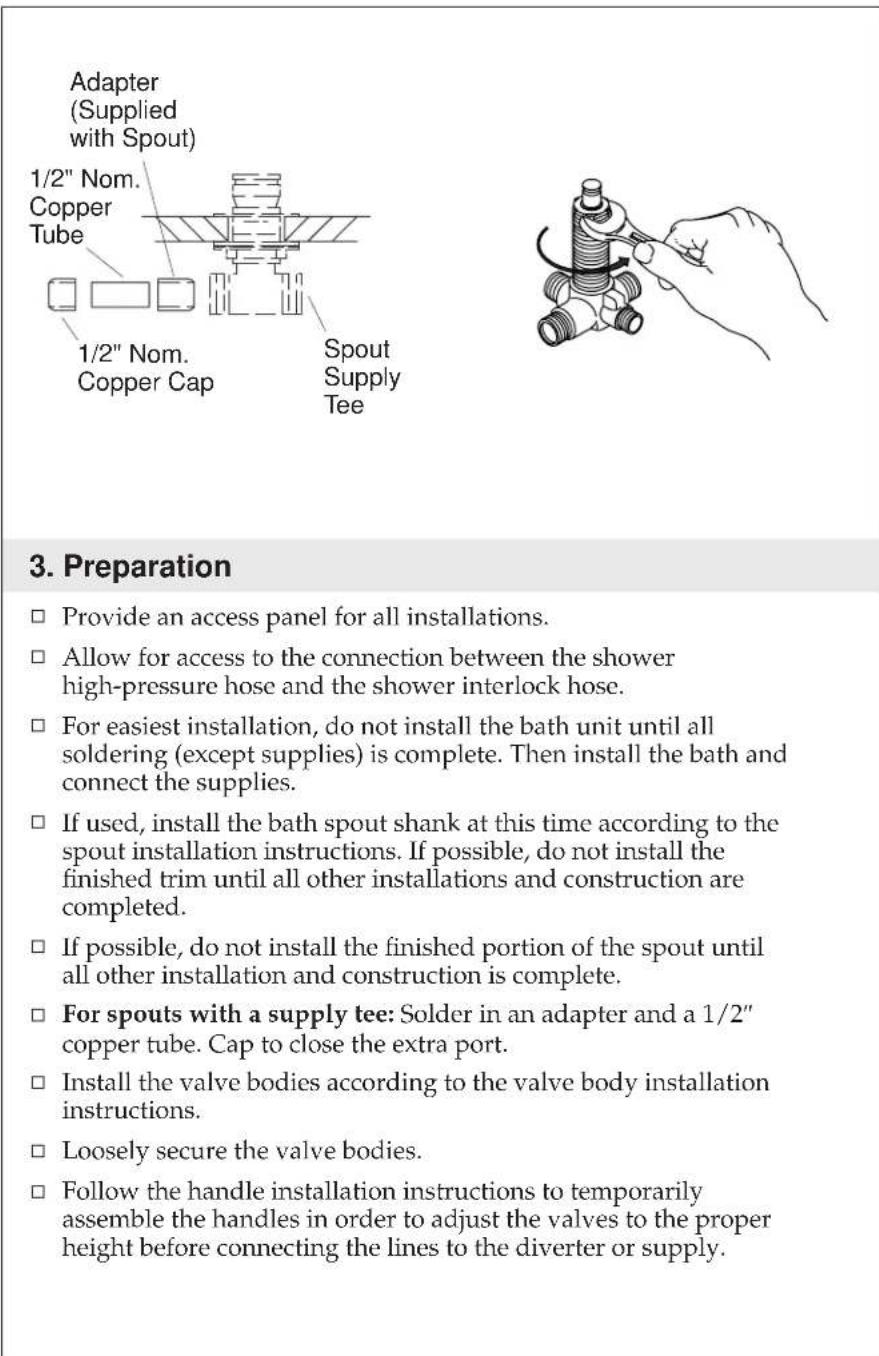
☐ For spouts with a supply tee: Solder in an adapter and a 1/2" copper tube. Cap to close the extra port.
□ Install the valve bodies according to the valve body installation instructions.
□ Loosely secure the valve bodies.
☐ Follow the handle installation instructions to temporarily assemble the handles in order to adjust the valves to the proper height before connecting the lines to the diverter or supply.
Preparation (cont.)
NOTE: The cartridge assembly is easier to remove before the diverter is installed. You can remove the assembly now or after the diverter installation.
☐ Use a wrench to loosen the cartridge assembly from the diverter body. Continue to unthread the assembly to remove.
☐ Set the assembly aside. Protect the seals and O-rings from becoming dirty, damaged, or misaligned.
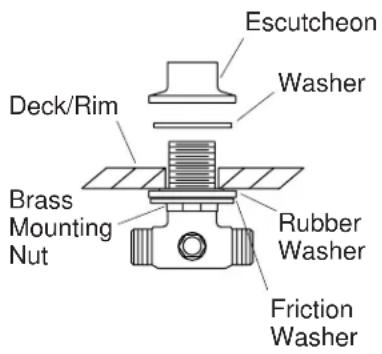
4. Install the Diverter
NOTE: You may need assistance to align and secure the diverter.
☐ Thread the mounting nut all the way down onto the diverter body.
☐ Slide the friction washer followed by the rubber washer over the diverter body and down to the mounting nut.
☐ Insert the diverter body through the deck/rim/wall.
□ Slide the washer onto the diverter body.
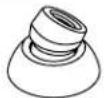
☐ Thread the escutcheon onto the diverter body until the top of the escutcheon is flush with the top of the diverter body. This will allow ample clearance for proper handle function.
□ Align the inlets and outlets.
□ Hand tighten the mounting nut.
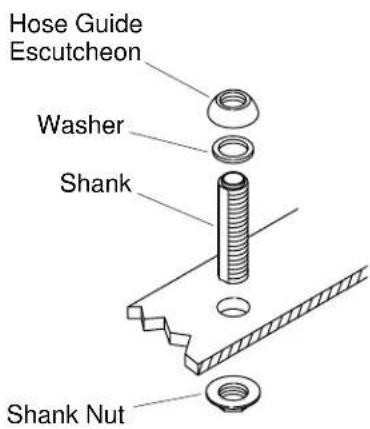
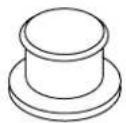
5. Install the Hose Guide
Deck-Mount Installations
☐ From the top of the finished deck drill a 1-1/4" (3.2 cm) mounting hole.
For All Installations
□ Slide one washer and thread the escutcheon down the shank.
□ From the top of the bath or finished deck, insert the shank into the mounting hole.
□ From the underside of the bath, thread the shank nut up onto the shank and securely tighten. Do not overtighten.
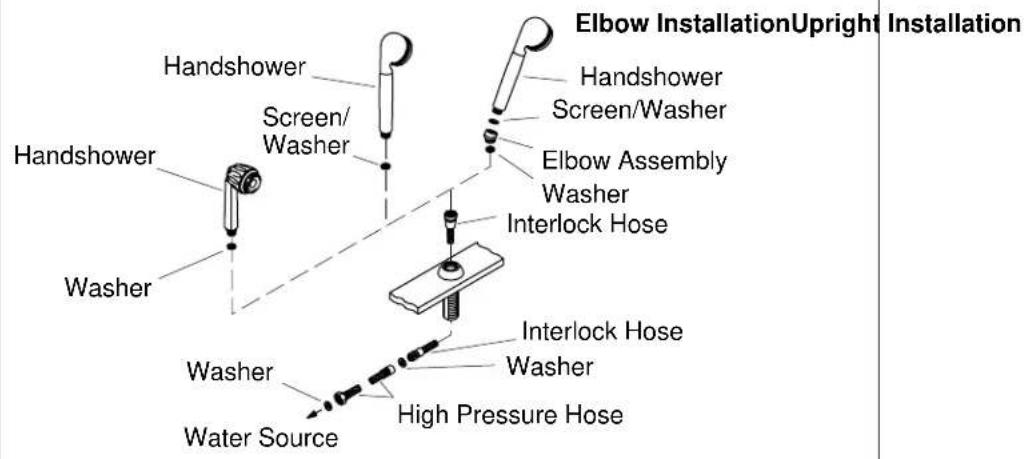
6. Install the Handshower
☐ From the top of the bath or finished deck, insert the smaller end of the interlock hose down into the hose guide and through the mounting hole.
☐ From the underside of the bath or finished deck, insert one washer into the flexible hose. Thread the flexible hose into the high pressure hose.
☐ Insert one washer into the other end of the high pressure hose. Connect the high pressure hose onto a vacuum breaker (if installed), or onto the appropriate water source.
□ Run cold and hot water through the handshower hose to flush out dirt and debris. Check for leaks.
□ Turn the cold and hot water supply off.
☐ For an elbow installation: Insert one washer into the bottom of the elbow assembly. Thread the bottom of the elbow assembly onto the interlock hose. Insert a screen washer into the top of the elbow assembly. Thread the handshower onto the elbow assembly.
☐ For an upright installation: Insert one screen washer into the end of the handshower. Thread the handshower onto the handshower hose.
☐ To avoid kinking, be sure to remove any twist loops in the hose.
Note: Provide Diverter Support
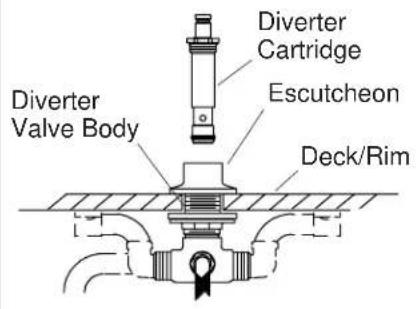
7. Complete the Diverter Installation

CAUTION: Risk of product damage. Verify that the diverter body is secure before removing the cartridge. If not secured, the process of removing the cartridge may damage the pipe and connections.

CAUTION: Risk of product damage. Excessive heat will damage the internal plastic components. Follow these steps to avoid product damage.
IMPORTANT! If there is limited access to the solder connections, or if any other risk of excessive heat being applied to the brass body exists, remove the cartridge prior to soldering. If you remove the cartridge, protect the seals and O-rings from becoming dirty, damaged, or misaligned.
IMPORTANT! Do not apply excessive heat while soldering. Direct the torch flame away from the brass body.
IMPORTANT! Only apply direct heat to the connectors and extensions.
☐ If not already removed, remove the diverter cartridge assembly.
□ Dry fit all piping and connectors.
□ Solder piping for the optional spout or wall shower.
□ Connect the hot and cold lines from the valves to the diverter.
□ While supporting from below, carefully install and wrench tighten the cartridge assembly into the diverter body.
Complete the Diverter Installation (cont.)
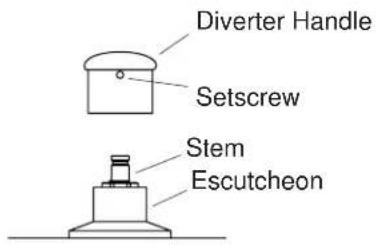
☐ Install the diverter handle. Use a hex wrench to tighten the setscrew.
8. Installation Checkout
☐ Complete the installation of the valve, valve trim and any other components according to the instructions packed with the product.
□ Ensure that all connections are tight.
□ Open the drain.
☐ Turn on the main water supply and check for leaks. Repair as needed.
☐ Open both hot and cold valves and run water through the spout (if installed) to remove debris. Check for leaks.
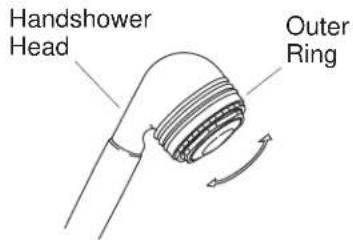
☐ Check the handshower for smooth operation.
□ Confirm proper diverter operation.
☐ Turn the cold and hot handles off and then on. Verify that the water flow is diverted back to the spout and that the handshower is off.
□ Turn the valves off.