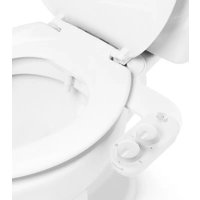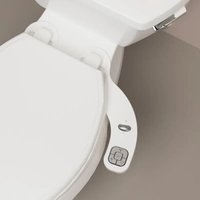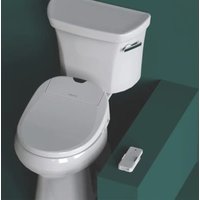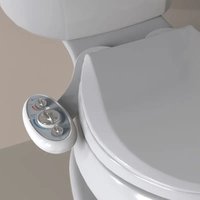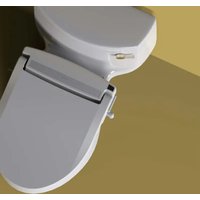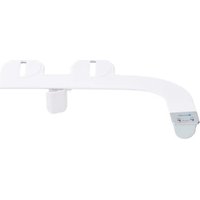
SimpleSpa Thinline SS-250 - Toilet Brondell - Free user manual and instructions
Find the device manual for free SimpleSpa Thinline SS-250 Brondell in PDF.


User questions about SimpleSpa Thinline SS-250 Brondell
0 question about this device. Answer the ones you know or ask your own.
Ask a new question about this device
Download the instructions for your Toilet in PDF format for free! Find your manual SimpleSpa Thinline SS-250 - Brondell and take your electronic device back in hand. On this page are published all the documents necessary for the use of your device. SimpleSpa Thinline SS-250 by Brondell.
USER MANUAL SimpleSpa Thinline SS-250 Brondell
natural_image
Technical line drawing of a mechanical component with curved and rectangular features (no text or symbols)ATTACH PROOF OF PURCHASE TO THIS PAGE
Read this Owner's Manual for correct installation, use and maintenance of this product. After reading and completing installation, keep this manual in a place that is easily accessible.
PRODUCT INFORMATION
2 Product Features
3 Product Components
4 Product Dimensions
PRODUCT INSTALLATION
5 Before Installation
5 Installing the Bidet Attachment
PRODUCT OPERATION
9 Using the SimpleSpa
MAINTENANCE
9 Cleaning the SimpleSpa
9 Short Term Non-Use
TECHNICAL INFORMATION
10 Warranty
11 Contact
TRANSLATIONS
12 Spanish
23 French
PRODUCT INFORMATION
Product Features
- Separate Front (feminine) and Rear wash nozzles
• Hygienic retractable nozzles
• High-quality ABS material with full body panel
• Ambient temperature bidet wash - Adjustable water pressure
• Ceramic-core internal valve
• High-quality metal 78 " T-valve
• Durable braided metal cold water hose
• No electricity or batteries required - Easy installation and adjustable toilet fit
- All accessories included for standard installation
• One-year warranty
PRODUCT INFORMATION
Product Components
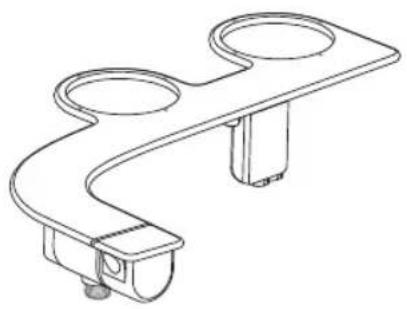
natural_image
Line drawing of a mechanical device with two circular ports and a curved handle (no text or symbols)Bidet attachment with ergonomic control
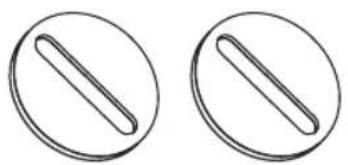
natural_image
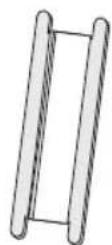
Two identical circular diagrams with parallel lines inside, no text or symbols present.Adjustable mounting brackets (2)
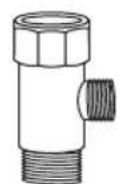
T-Valve connector with included rubber cone washer
$$ (7 / 8" \times 7 / 8" \times 3 / 8") $$
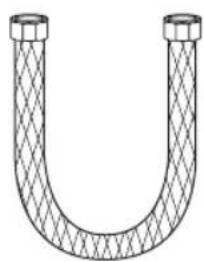
natural_image
Line drawing of a U-shaped pipe with mesh pattern (no text or symbols)27½" braided metal bidet hose
Teflon Tape
PRODUCT INFORMATION
Product Dimensions
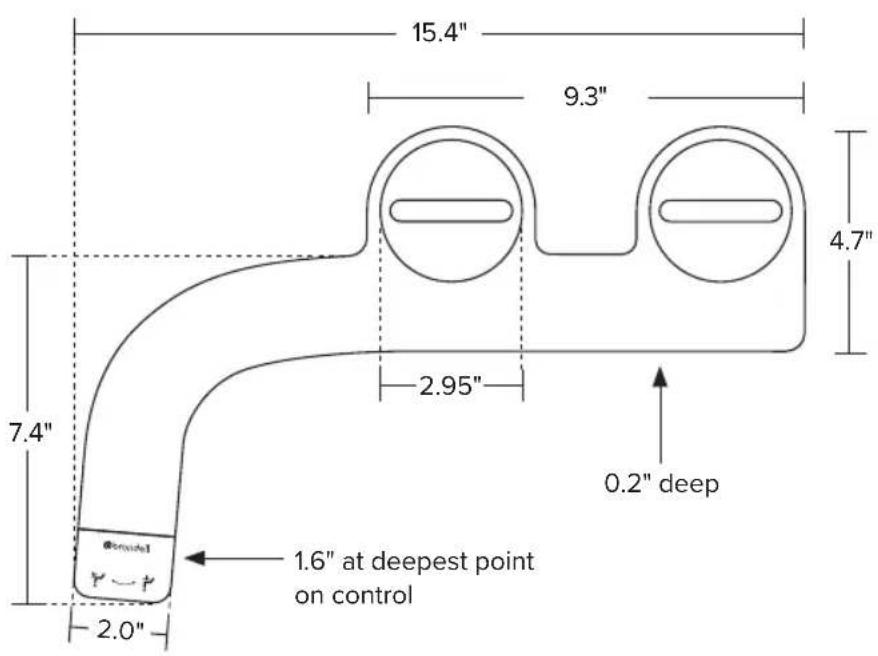
text_image
15.4" 9.3" 4.7" 7.4" 2.95" 0.2" deep 1.6" at deepest point on control 2.0"PRODUCT INSTALLATION
Before Installation
IMPORTANT
Please be advised that the provided T-Valve should be installed at the Fill Valve under the toilet tank, and NOT at the cold water supply coming from the wall.
If you do not have access to the Fill Valve under the toilet tank, contact Brondell Customer Service at 888.542.3355. We may be able to provide alternative options.
Check Water Supply Line
Check the water supply line that connects the toilet tank fill valve to the water shut-off valve at the wall. If it is a rigid pipe, you will need to purchase a flexible water supply hose to replace it before installing the SimpleSpa. The length of the hose you purchase may vary, but the top connection size should be 78 " Ballcock (to connect to the T-valve that you will install under the toilet tank), and the bottom connection will be 38 " or 12 " female compression (to connect at the shut-off valve at the wall).
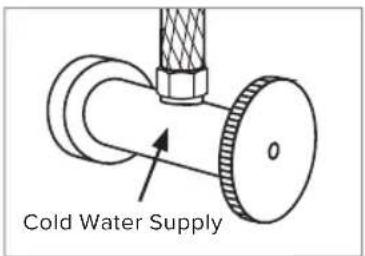
text_image
Cold Water SupplyINCORRECT
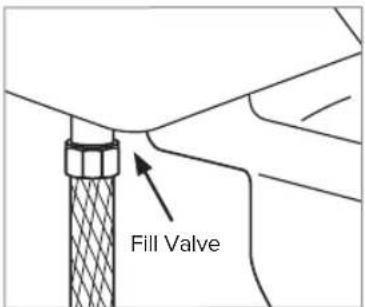
text_image
Fill ValveCORRECT
PRODUCT INSTALLATION
Installing the Bidet Attachment
- Remove the existing toilet seat.
a. Lift hinge covers and use flathead or Phillips head screwdriver to remove the mounting bolts. Alternatively, you may need to loosen mounting bolts underneath the seat.
b. Remove the toilet seat and set the seat, mounting bolts, and hardware aside.
- Turn off water supply valve and flush toilet.
a. Turn off water supply at the wall to stop flow of water.
b. Flush toilet and hold down handle to completely empty toilet tank.
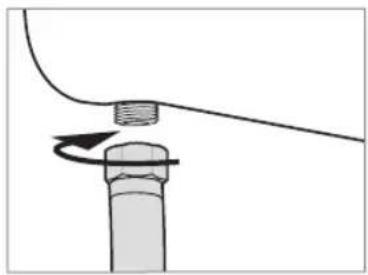
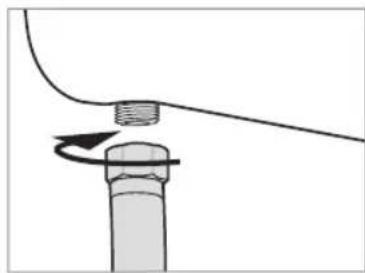
c. Disconnect water supply hose from the fill valve under the toilet tank.
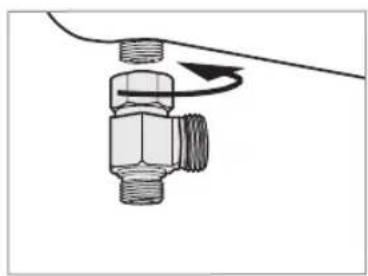
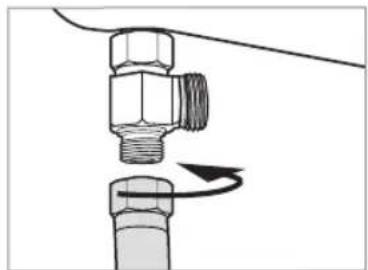
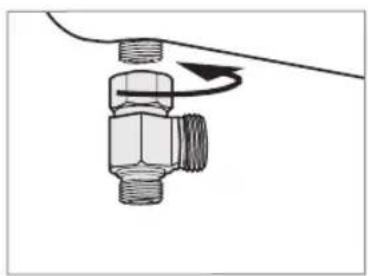
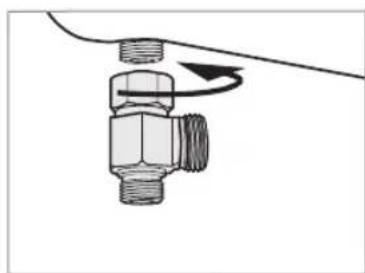
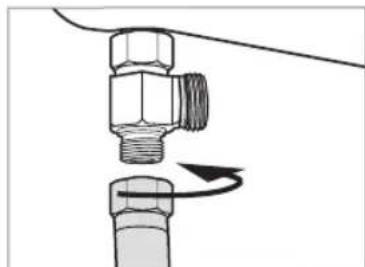
- Connect 78 " T-Valve to Water Supply Line and Fill Valve under Toilet Tank.
a. Install the 78 ” T-valve with included rubber washer to the incoming water connection on the bottom of your toilet tank. Ensure the rubber washer is properly seated, tapered side up.
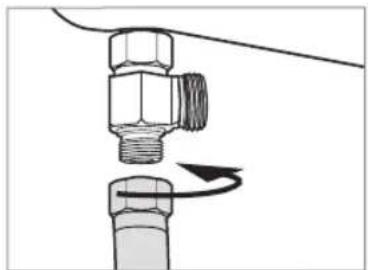
b. Connect the cold water supply line coming from the wall to the bottom of the T-valve.
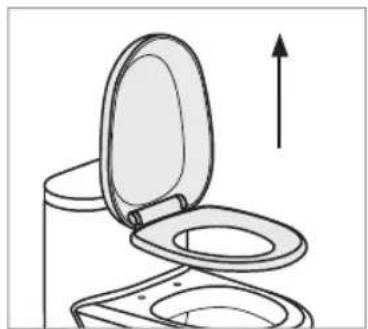
natural_image
Line drawing of a toilet with an open lid and upward arrow indicating direction (no text or symbols)Step 1b
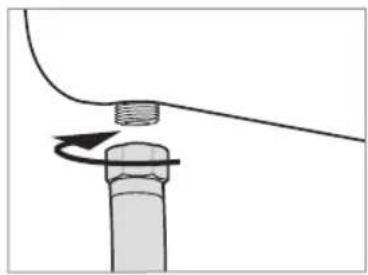
natural_image
Diagram of a pipe fitting with a rotating valve, showing no text or symbolsStep 2c
natural_image
Diagram of a mechanical valve assembly with a curved line and directional arrow indicating rotation (no text or labels)Step 3a
natural_image
Diagram of a mechanical valve assembly with a rotating arrow indicating rotation (no text or symbols)Step 3b
PRODUCT INSTALLATION
Installing the Bidet Attachment
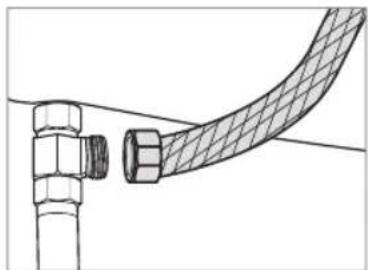
- Connect the Bidet Hose to the T-Valve.
a. The ends of the bidet hose are two different sizes. Determine which is the smaller of the two ends.
b. Connect the smaller end of the braided metal bidet hose to the remaining open side of the installed T-valve.
- Install Adjustable Mounting Brackets into the Bidet Attachment
a. Line up the dots of one of the adjustable mounting brackets with the dots around one of the open mounting bracket holders.
b. Push the bracket into the bracket holder until it snaps into place.
c. Repeat Steps 1 and 2 to install the other adjustable mounting bracket.
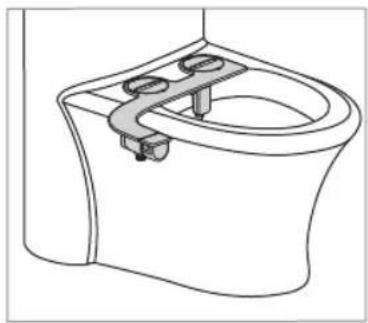
- Install Bidet Attachment on Toilet.
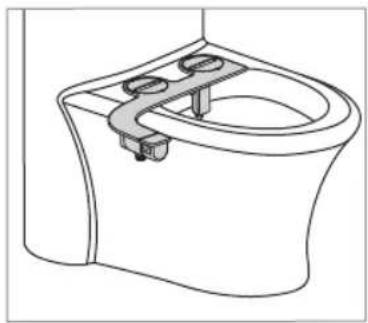
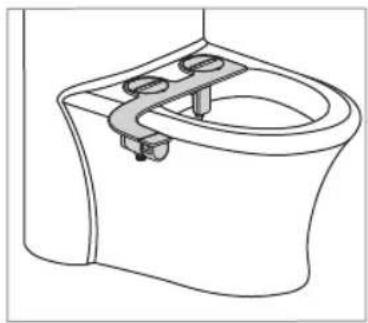
a. Place bidet attachment on the toilet with the nozzles close to the back of the toilet, leaving a slight gap between the toilet and the nozzles. This will vary by toilet.
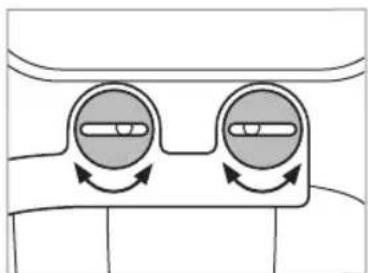
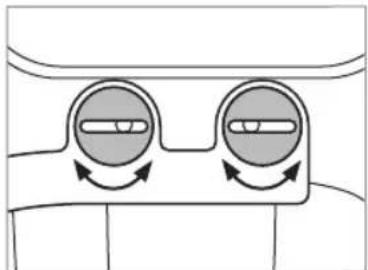
b. Make sure the adjustable brackets line up with the holes in the toilet fixture. You may need to rotate the adjustable brackets accordingly to line up properly.
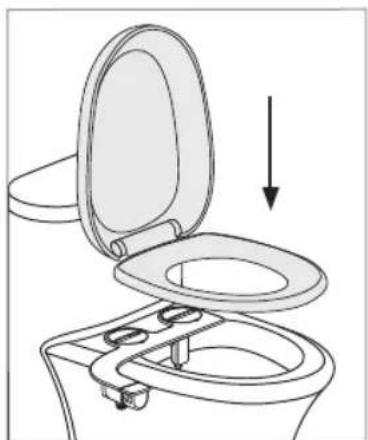
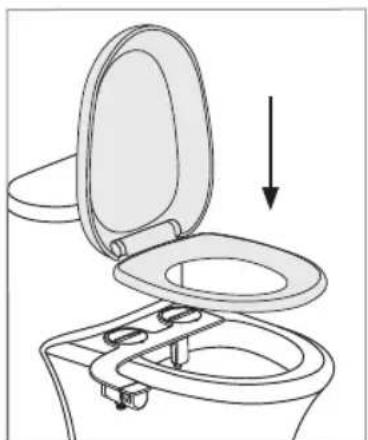
c. Replace the toilet seat on top of bidet attachment and secure using original toilet seat hardware. Make sure to tighten so that the bidet attachment and seat do not move.
d. Ensure the control knob is lying flat and isn't turned to one of the operating positions to prevent water from accidentally spraying out of the toilet bowl.
natural_image
Diagram of a pipe fitting with a meshed cable, no text or symbols presentStep 4b
natural_image
Line drawing of a toilet with a clamp bracket (no text or symbols)Step 6a
natural_image
Diagram of two circular objects with directional arrows indicating rotation or movement (no text or symbols)Step 6b
natural_image
Line drawing of a toilet with an open lid and seat, showing a downward arrow indicating a drop (no text or symbols present)Step 6c
PRODUCT INSTALLATION
Installing the Bidet Attachment
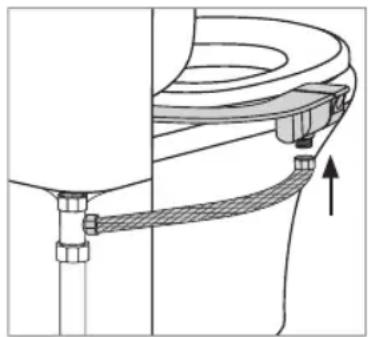
- Connect the Bidet Hose to the Bidet Attachment Connect open end of bidet hose to the connection underneath the bidet attachment.
- Turn on the Water Supply and check for leaks.
a. Open the main water supply valve slowly and check for leaks.
b. Wait 5-10 minutes, check again and if there are no leaks, continue.
natural_image
Technical diagram of a mechanical assembly with no visible text or symbolsStep 7
NOTE: If there is any leaking, check all rubber washers and make sure all water connections are tight and secure. If necessary, you can use the provided Teflon Tape (Plumber's Tape) for any leaking connections.
PRODUCT OPERATION
Use and Maintenance
Using the SimpleSpa
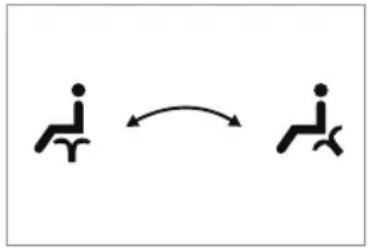
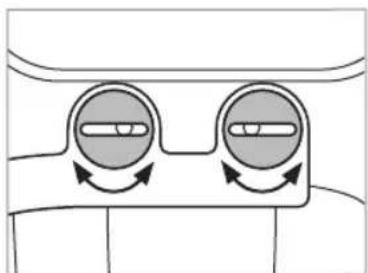
To activate a wash function, turn the control knob to the left for a Front (feminine) wash, or to the right for a Rear wash.
- The further the knob is turned, the higher the water pressure will be.
- To lower the water pressure, turn the knob back towards the center.
- To stop the flow of water, rotate the knob to center so it sits flat.
flowchart
graph LR
    A["Figure 1"] <--> B["Figure 2"]
Cleaning the SimpleSpa
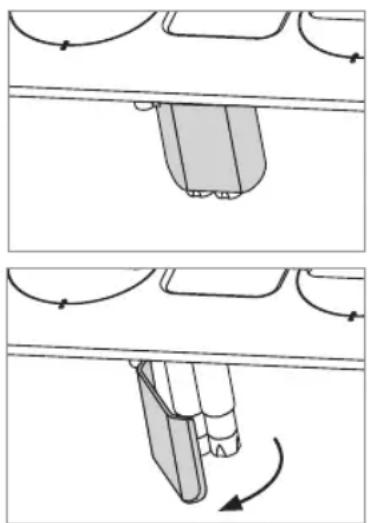
To clean the nozzles, open the Nozzle Guard door by pulling it gently open on the right side. With the nozzle revealed, pull down on the nozzle cap, and clean the spray holes and nozzle using a toothbrush or soft cloth and mild detergent (such as dish soap). When cleaning, be careful not to drop or flush the nozzle cap. Periodically tighten the cap so it doesn't become loose with use and cleaning.
To clean the SimpleSpa, use a mild cleaner such as Simple Green or Windex spray. Do not scrub or use harsh, abrasive products to clean the SimpleSpa, as they may scratch the product.
natural_image
Diagram showing a mechanical component under two different motion scenarios, with no visible text or symbols.Short Term Non-Use
If the product will not be used for more than a few weeks, you may consider shutting the water supply off at the wall for extra precaution.
TECHNICAL INFORMATION
Warranty
Brondell products are backed by some of the most comprehensive warranties in the industry. Brondell warrants that all products (excluding consumable items) shall be free from defects in material and workmanship under normal use and service.
SimpleSpa SS-250 Residential One-Year Limited Warranty
100% Coverage of all parts and labor for the entire product for the first year from original date of purchase.
SimpleSpa SS-250 Commercial Warranty
Warranty period 1 year from original purchase date for all Brondell products. Warranties may not apply to products that are used for heavy commercial, hospital, or other high use non-residential applications.
Exclusions and Limitations
- BRONDELL warrants its products to be free from manufacturing defects under normal use and service. This warranty is extended only to the ORIGINAL PURCHASER.
- BRONDELL's obligations under this warranty are limited to repairs or replacement, at BRONDELL's option, of products or parts found to be defective, provided that such products were properly installed and used in accordance with instructions. BRONDELL reserves the right to make such inspections as may be necessary in order to determine the cause of the defect. BRONDELL will not charge for labor or parts in connection with warranty repairs for the first full year from date of purchase on all products except those that may be subject to commercial use limitations.
-
BRONDELL is not responsible for the cost of removal, return (shipping) and/or re-installation of products. This warranty does NOT apply to:
-
Damage or loss which occurs during shipment.
- Damage or loss sustained through any natural or man-made causes beyond the control of BRONDELL, including but not limited to fire, earthquake, floods, etc.
- Damage or loss resulting from sediments or foreign matter contained in a water system.
- Damage or loss resulting from negligent or improper installation including installation of a unit in a harsh or hazardous environment.
-
Damage or loss resulting from removal, improper repair, modification of the product, or improper maintenance including damage caused by chlorine or chlorine related products
-
This warranty gives you specific legal rights. You may have other rights which vary from state to state.
THIS WRITTEN WARRANTY IS THE ONLY WARRANTY MADE BY BRONDELL. REPAIR OR REPLACEMENT AS PROVIDED UNDER THIS WARRANTY SHALL BE THE EXCLUSIVE REMEDY AVAILABLE TO THE PURCHASER. BRONDELL SHALL NOT BE RESPONSIBLE FOR LOSS OF USE OF THE PRODUCT OR FOR OTHER INCIDENTAL, SPECIAL, FOR CONSEQUENTIAL DAMAGES OR EXPENSES INCURRED BY THE PURCHASER OR FOR LABOR OR OTHER COSTS DUE TO INSTALLATION OR REMOVAL OR COSTS OF REPAIRS BY OTHERS, OR FOR ANY OTHER EXPENSE NOT SPECIFICALLY STATED ABOVE. EXCEPT TO THE EXTENT PROHIBITED BY APPLICABLE LAW, ANY IMPLIED WARRANTIES, INCLUDING THAT OF MERCHANTABILITY, ARE EXPRESSLY LIMITED TO THE DURATION OF THIS WARRANTY. SOME STATES DO NOT ALLOW LIMITATIONS, SO THE ABOVE LIMITATION AND EXCLUSION MAY NOT APPLY TO YOU.
How to Obtain Service
To obtain repair service under this warranty, you must contact an authorized BRONDELL Service Center to obtain an RMA (Return Merchandise Authorization) number. Proof of purchase in the form of a copy of the original receipt must accompany the returned unit for the warranty to be valid. Take or ship the unit pre-paid to the closest Brondell authorized service center along with the RMA number and proof of purchase.
To obtain the RMA number and locate the BRONDELL Service Center location nearest you, please call 1-888-542-3355.
brondell®
a healthy home experience
Contact:
Brondell, Inc.
PO Box 470085
San Francisco, CA 94147-0085
Phone: 1-888-542-3355
Email: support@brondell.com
Web: www.brondell.com
For questions, contact Brondell
Customer Service: 1-888-542-3355
Manufactured by:
Brondell, Inc.
PO Box 470085
San Francisco, CA 94147-0085
Please retain receipt records for any warranty claims.
MANUAL DEL PROPIETARIO DE SIMPLESPA SS-250
Contenido
natural_image
Line drawing of a mechanical bracket or support structure with two circular cutouts and a base mount (no text or symbols)natural_image
Two identical circular diagrams with parallel diagonal lines, no text or symbols presentAjustable Soportes de montaje ajustables (2)
natural_image
U-shaped pipe diagram with mesh pattern, no text or symbols presentnatural_image
Line drawing of a toilet with an open lid and upward arrow indicating direction (no text or symbols)Paso 1b
natural_image
Diagram of a pipe fitting with a rotating valve, showing no text or symbolsPaso 2c
natural_image
Diagram of a mechanical valve assembly with a curved line and directional arrow (no text or labels)Paso 3a
natural_image
Diagram of a mechanical valve assembly with a rotating arrow indicating rotation (no text or symbols)Paso 3b
natural_image
Technical diagram of a pipe fitting with a meshed cable, showing no text or symbolsPaso 4b
natural_image
Line drawing of a toilet with a clamp bracket (no text or symbols)Paso 6a
natural_image
Diagram of two circular components with directional arrows indicating rotation or movement (no text or symbols)Paso 6b
natural_image
Line drawing of a toilet with an open lid and seat, showing a downward arrow indicating a component (no text or symbols present)Paso 6c
natural_image
Technical diagram of a mechanical assembly with no visible text or symbolsPaso 7
natural_image
Diagram showing a mechanical component under two different motion scenarios, with no visible text or symbols.a healthy home experience
Contacto:
Brondell, Inc.
PO Box 470085
San Francisco, CA 94147-0085
1-888-542-3355
support@brondell.com
www.brondell.com
CARACTÉRISTIQUES DU PRODUIT
INSTALLATION DU PRODUIT
CARACTÉRISTIQUES DU PRODUIT
CARACTÉRISTIQUES DU PRODUIT
natural_image
Line drawing of a mechanical bracket or support structure with two circular cutouts (no text or symbols)natural_image
Two identical circular diagrams with parallel diagonal lines inside, no text or symbols present.natural_image
Line drawing of a U-shaped pipe with mesh pattern (no text or symbols)INSTALLATION DU PRODUIT
INSTALLATION DU PRODUIT
Installation du bidet adaptable
natural_image
Line drawing of a toilet with an open lid and upward arrow indicating airflow or movement (no text or symbols)Étape 1b
natural_image
Diagram of a pipe fitting with a rotating valve, showing no text or symbolsÉtape 2c
natural_image
Diagram of a mechanical valve assembly with a curved arrow indicating rotation (no text or symbols)Étape 3a
natural_image
Diagram of a pipe fitting with a valve and rotating arrow indicating motion (no text or symbols)Étape 3b
INSTALLATION DU PRODUIT
Installation du bidet adaptable
natural_image
Diagram of a pipe fitting with a mesh cable, showing no text or symbolsÉtape 4b
natural_image
Line drawing of a toilet with a clamp bracket (no text or symbols)Étape 6a
natural_image
Diagram of two circular objects with directional arrows indicating rotation or movement (no text or symbols)Étape 6b

natural_image
Line drawing of a toilet with an open lid and seat, showing a downward arrow indicating a drop (no text or symbols present)Étape 6c
INSTALLATION DU PRODUIT
Installation du bidet adaptable
natural_image
Technical diagram of a mechanical assembly with no visible text or symbolsÉtape 7
natural_image
Diagram showing two mechanical or fluid dynamics scenarios with curved arrows indicating motion, no text or symbols present.Exclusions and Limitations
a healthy home experience
Coordonnées :
Brondell, Inc.
PO Box 470085
San Francisco, CA 94147-0085,
États-Unis
1-888-542-3355
support@brondell.com
www.brondell.com
a healthy home experience
brondell.com