Glenguard K-5295 - Water dispenser KOHLER - Free user manual and instructions
Find the device manual for free Glenguard K-5295 KOHLER in PDF.

| Product Type | Water Dispenser (Drinking Fountain and Cuspidor) |
| Brand | Kohler |
| Model | Glenguard K-5295 |
| Material | Vitreous China |
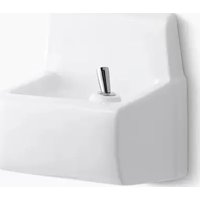
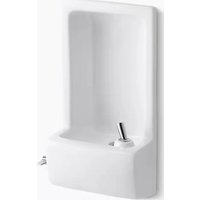
| Rough-in Opening Dimensions (W x H) | 13 in x 23 in (330 mm x 584 mm) |
| Estimated Exterior Dimensions (W x H x D) | 14.25 in x 20 in x 9 in (362 mm x 508 mm x 229 mm) |
| Installation Type | Wall-mounted, Recessed |
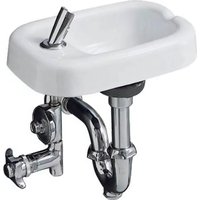
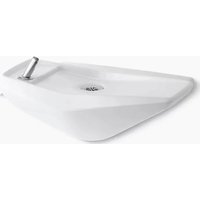
| Water Supply | Cold water, 3/8 in IPS connection |
| Main Functions | Drinking fountain and cuspidor with flow regulator |
| Included Accessories | Cups, gaskets, spacers, drains, strainers |
| Maintenance | Regular cleaning with non-abrasive products, check gaskets |
| Safety | Handle with care to avoid chipping the china |
| Repairability | Spare parts available (strainers, gaskets, regulators) |
| Estimated Weight | Approximately 10 kg |
| Standards | Complies with local plumbing codes |
Frequently Asked Questions - Glenguard K-5295 KOHLER
User questions about Glenguard K-5295 KOHLER
0 question about this device. Answer the ones you know or ask your own.
Ask a new question about this device
Download the instructions for your Water dispenser in PDF format for free! Find your manual Glenguard K-5295 - KOHLER and take your electronic device back in hand. On this page are published all the documents necessary for the use of your device. Glenguard K-5295 by KOHLER.
USER MANUAL Glenguard K-5295 KOHLER
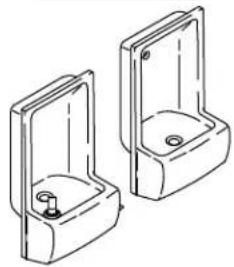
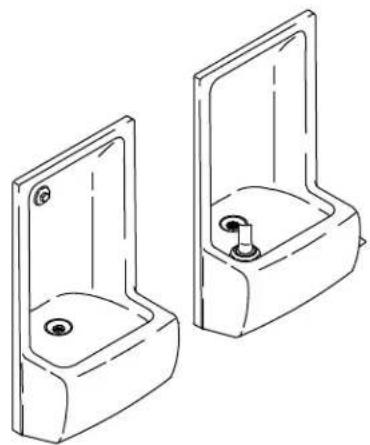
Drinking Fountain and Cuspidor
K-5293, K-5295
natural_image
Technical line drawing of two bracket-shaped metal fixtures with mounting holes (no text or symbols)Mproduct numbers are for Mexico (i.e. K-12345M)
• Various Carpentry Tools
BeforeYouBegin

CAUTION: Riskofpersonalinjury. Handle with care. Vitreous china can break or chip if the product is handled carelessly.
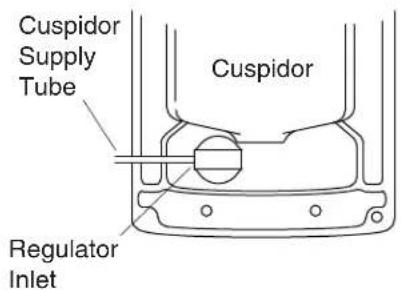
NOTE: The water supply to the cuspidor is controlled from the drinking fountain.
□ Observe all local plumbing and building codes.
Kohler Co. 3 105126-2-AC
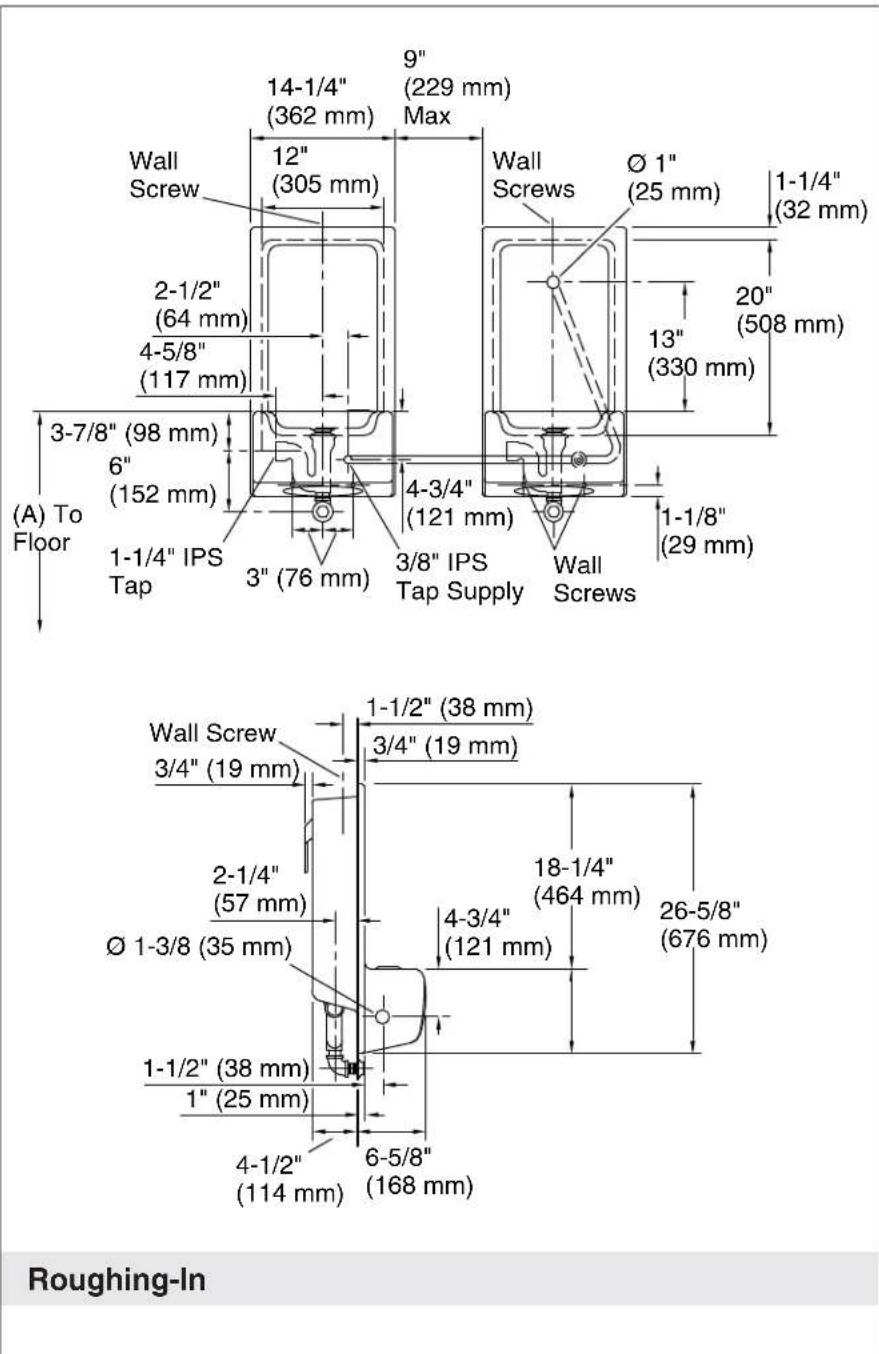
Roughing-In(cont.)
- The distance between the rim and the floor (dimension A) is 30" (762 mm) for grade schools and 36" (914 mm) to 44" (1118 mm) for other buildings.
105126-2-AC 4 Kohler Co.
1. PreparetheRecess
NOTE: Be sure to provide adequate backing for the fasteners.
☐ Determine the desired "A" dimension, as shown in the roughing-in. Add 17" (432 mm) to the "A" dimension chosen. The overall inside height dimension produced from this calculation is needed in the next step.
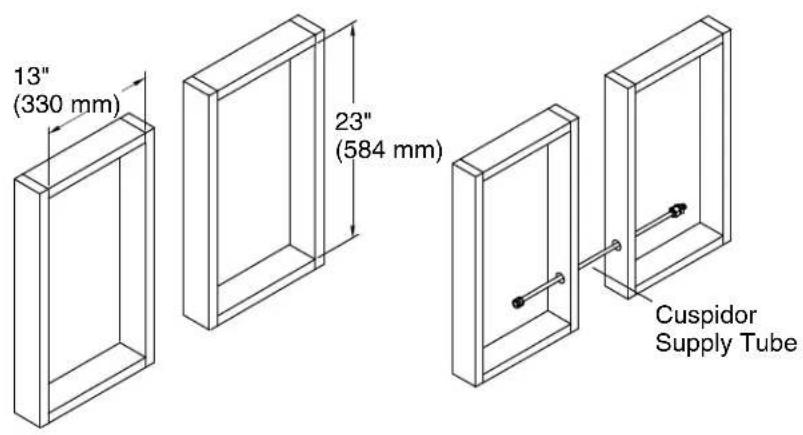
☐ Prepare a stud framing box at the chosen installation site. The inside dimensions of the framed box must be 13" (330 mm) wide by 23" (584 mm) high. The distance between the top inside of the box and the floor must be the dimension previously calculated.
☐ Rough-in the supply and drain piping according to the roughing-in.
□ Provide adequate backing for the fasteners.
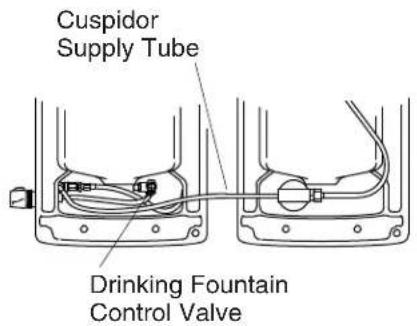
□ Prepare and drill the stud framing for the cuspidor supply tube.
☐ Route the cuspidor supply tube through the stud framing so that the ground-joint fitting is on the drinking fountain side.
□ Position the cuspidor supply tube so that it protrudes evenly from both ends of the stud framing.
2. InstalltheDrinkingFountain
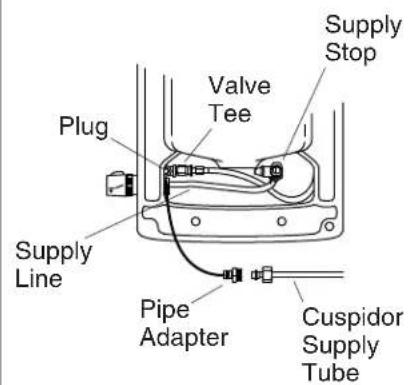
☐ Attach the supply stop to the drinking fountain supply line so that the supply stop adjustment screw will be accessible after installation.
□ Remove the plug from the drinking fountain valve tee.
□ Remove the pipe adapter from the cuspidor supply tube.
□ Apply thread sealant to the pipe adapter, and thread it into the valve tee. Tighten securely.
□ Apply thread sealant to the cuspidor end of the cuspidor supply tube, and thread the regulator inlet to the cuspidor supply tube.
☐ Tighten securely so that the regulator adjustment screw will be accessible after installation.
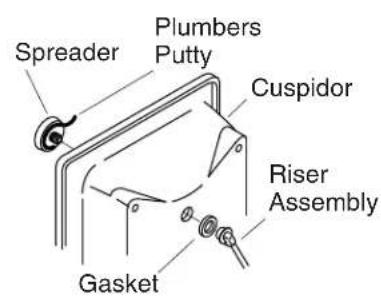

3.InstalltheSpreader
□ Apply a bead of plumbers putty around the spreader according to the manufacturer's instructions.
□ Install the spreader through the cuspidor to the gasket and riser assembly.
□ Securely tighten so the riser is positioned at an angle, as shown.
□ Position the spreader so the holes face the bottom of the cuspidor.
□ Remove the reducer from the riser assembly, and apply thread sealant to the reducer.
☐ Thread the reducer into the regulator outlet, and tighten securely.
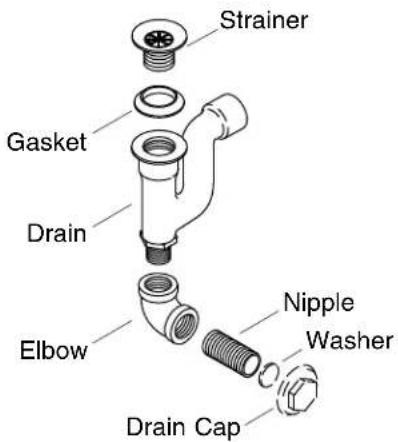
4. InstalltheDrain
□ Remove the strainers and gaskets from the drains.
□ Install the drains to the rough drain connections according to the roughing-in.
□ Apply thread sealant to the elbows, and thread them to the drains so they face outward. Securely tighten.
□ Apply thread sealant to the nipples, and thread them to the elbows.
☐ Do not install the washers and plated drain caps until the wall is finished.
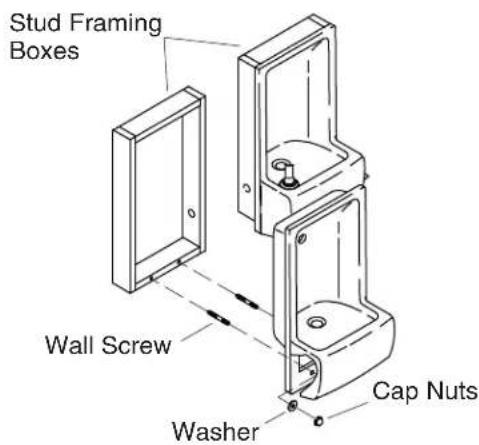
5. InstalltheFixtures
☐ Install two wall screws into the bottom of the stud framing boxes, according to the roughing-in.
☐ Install the fixtures into their respective stud framing boxes, and hold them in place by hand tightening the cap nuts and washers to the wall screws. Donotwrenchtightenatthistime.
☐ Check the fit of the fixtures and all plumbing connections. Remove the fixtures as needed, and make adjustments.
☐ Reinstall the fixtures when adjustments are completed.
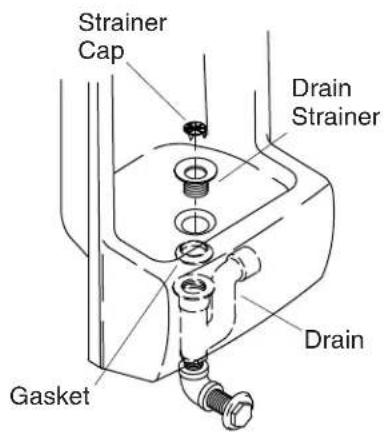
6. InstalltheStrainer
□ Carefully remove the strainer cap from the drain strainer.
☐ Position the gasket on the cuspidor drain with the tapered side up.
□ Apply a bead of plumbers putty around the bottom of the strainer according to the manufacturer's instructions.
☐ Thread the strainer to the drain. Tighten securely, and remove any excess plumbers putty.
□ Snap the strainer cap onto the strainer.
□ Repeat for the drinking fountain.
105126-2-AC 10 Kohler Co.
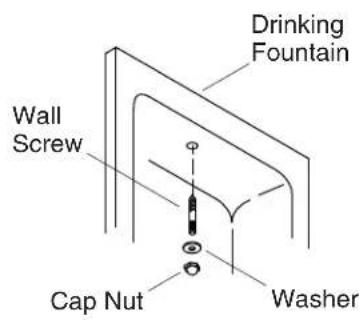
7. SecuretheFixture
CAUTION: Riskofpersonalinjury. Overtightening can cause vitreous china to break or chip.
☐ Thread the remaining cap nut to the wall screw.
☐ Add the washer, and use the wall screw to secure the top of the drinking fountain. Securely tighten.
□ Securely tighten the bottom cap nuts.
□ Repeat for the cuspidor.
□ Carefully bend the cuspidor supply tube to fit the distance between the drinking fountain and cuspidor.
□ Connect the cuspidor supply tube to the drinking fountain and cuspidor. Securely tighten.
- Connect the supply tube to the drinking fountain control valve. Securely tighten.
natural_image
Line drawing of two bathroom sink compartments with no text or symbols8. Complethethel Installation
□ Complete the finished wall.
□ Install the plated drain caps and washers to the nipples. Securely tighten.
□ Turn on the water supply.
□ Open the drinking fountain supply stop.
□ Open the drinking fountain control valve. Water should flow from the drinking fountain and cuspidor.
□ Inspect both fixtures for leaks or incorrect operation. Adjust as needed.
□ Adjust the cuspidor regulator so water flows from the spreader as desired.
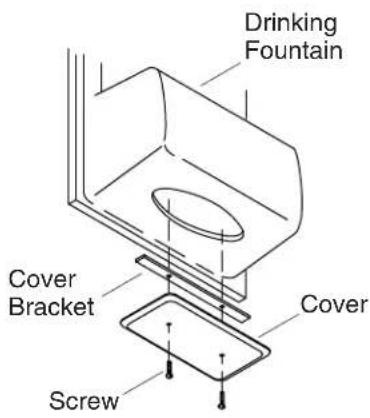
9. InstalltheCoverBracket
☐ Loosely assemble the drinking fountain cover bracket to the cover with two screws.
☐ Fit the cover to the bottom access hole, and evenly tighten the screws until the cover is securely fitted.
□ Repeat for the cuspidor.